The visual preview lets you check how automated webinar events appear in the room—for example, when a video starts, chat messages appear, or the room’s status changes. You can review the event sequence, jump to a specific point, and edit event settings right away.
Select a section below to jump to it:
How to Open the Event Preview and Editor
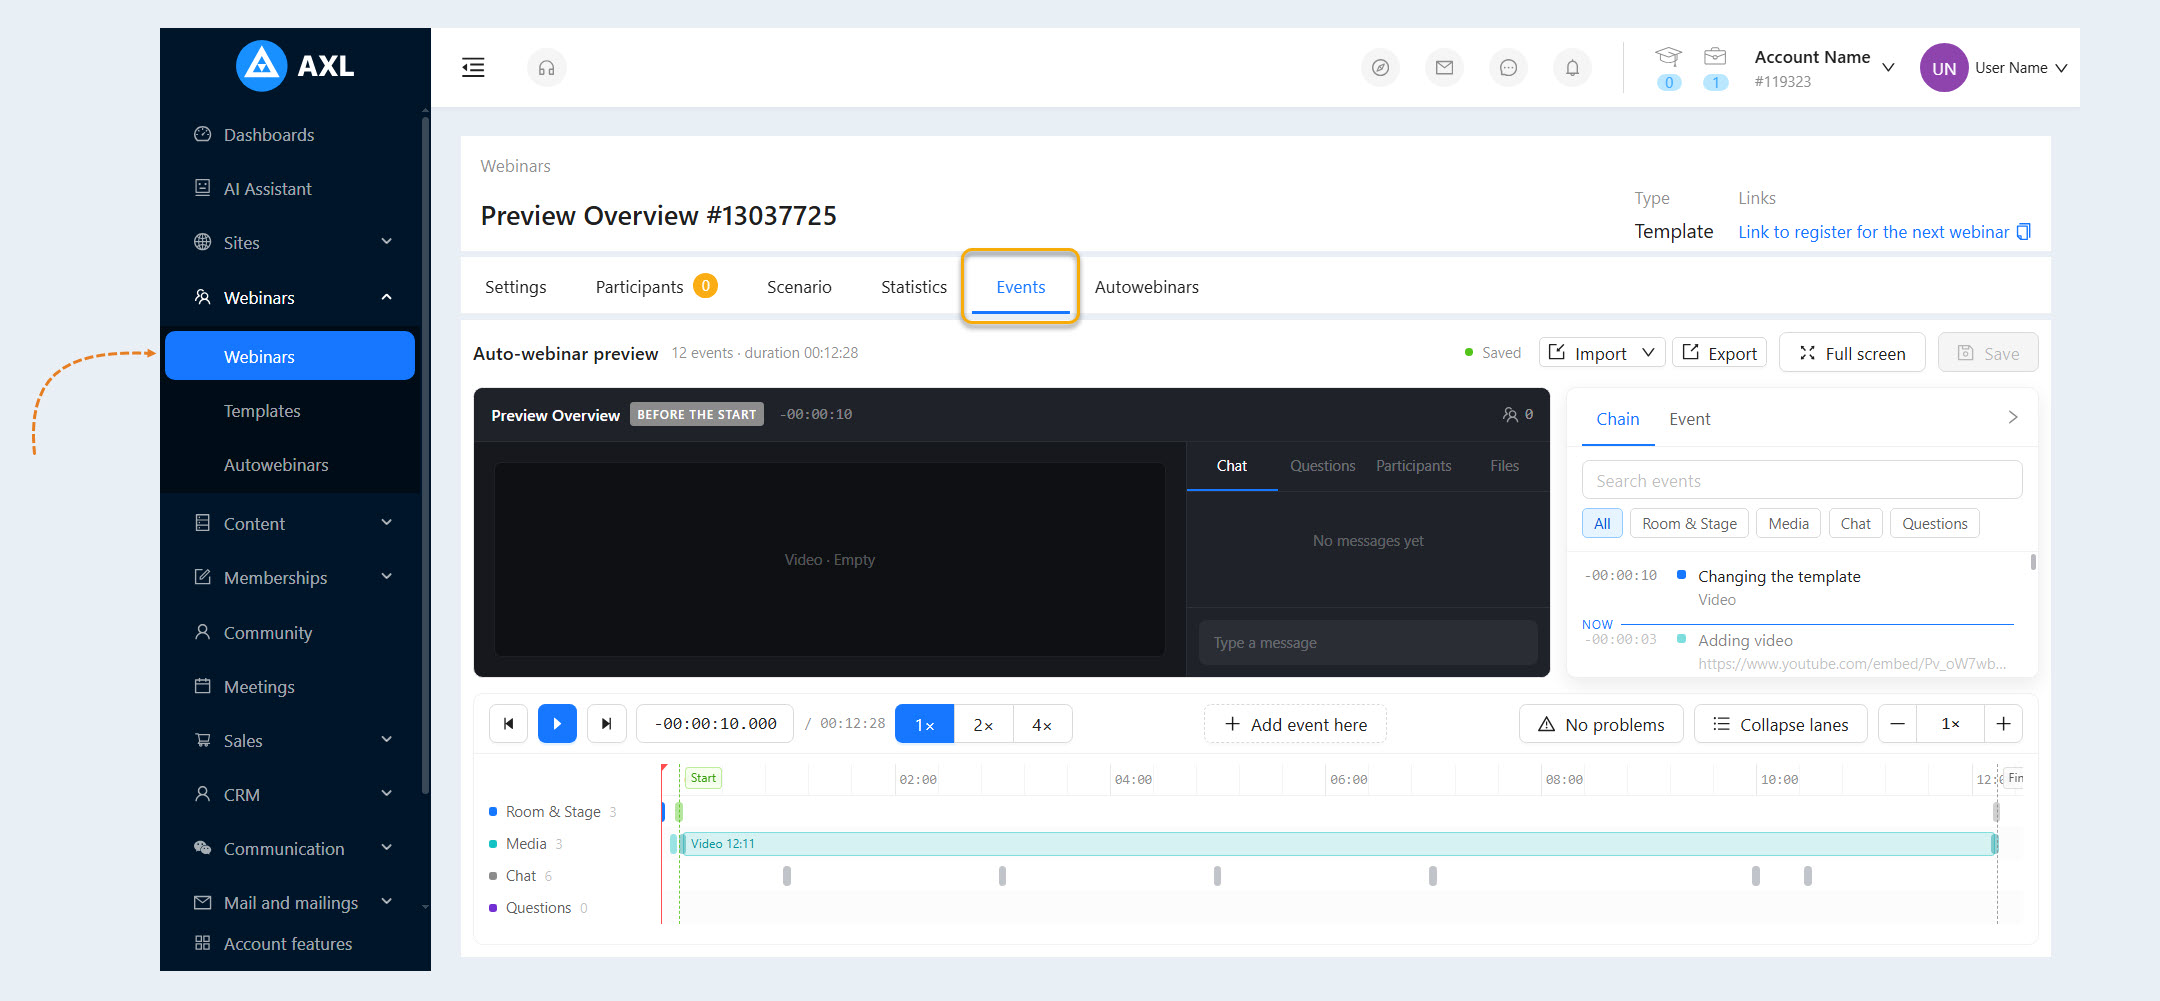
Go to Webinars → Templates.
Select an automated webinar template and open the Events tab.
Find the Automated Webinar Preview section.
For a better view, click Expand to Full Screen. To return to the standard view, click Exit Full Screen.
Event Preview and Editor Overview
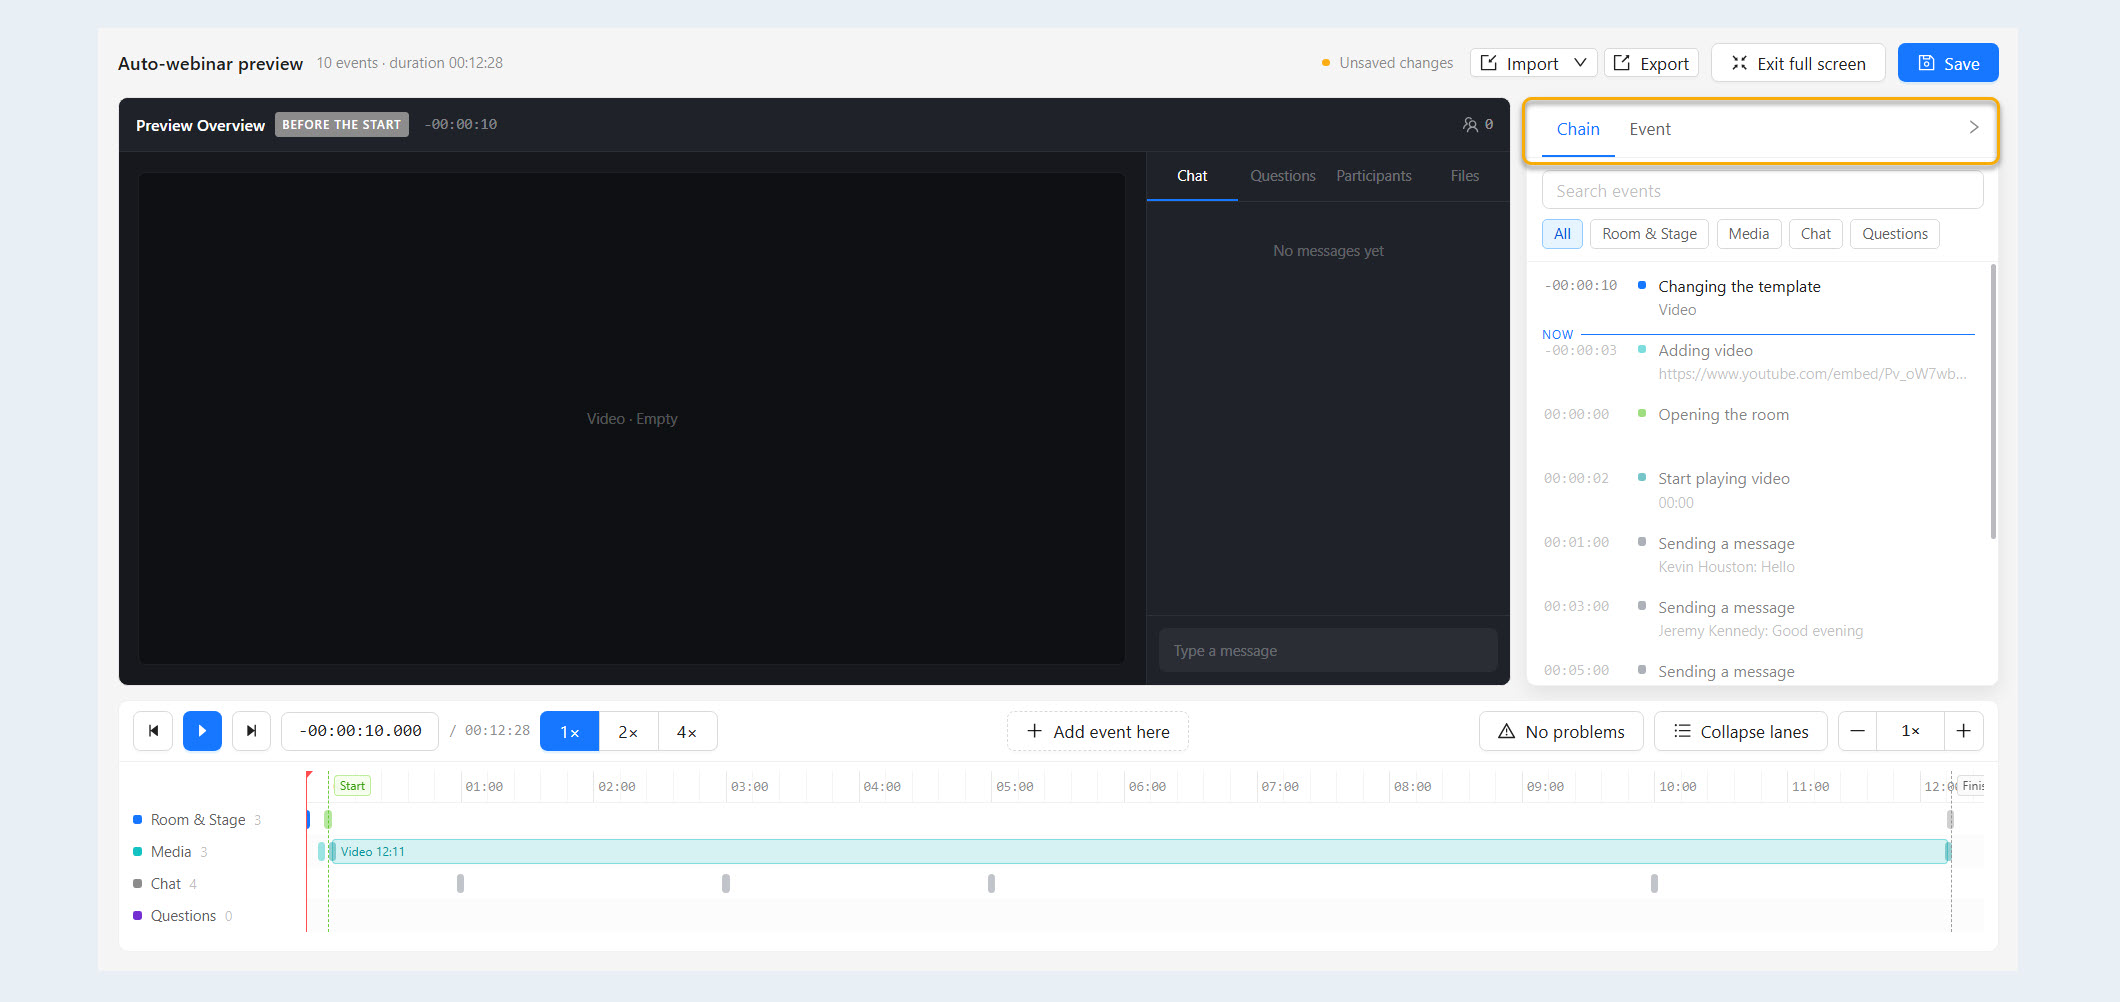
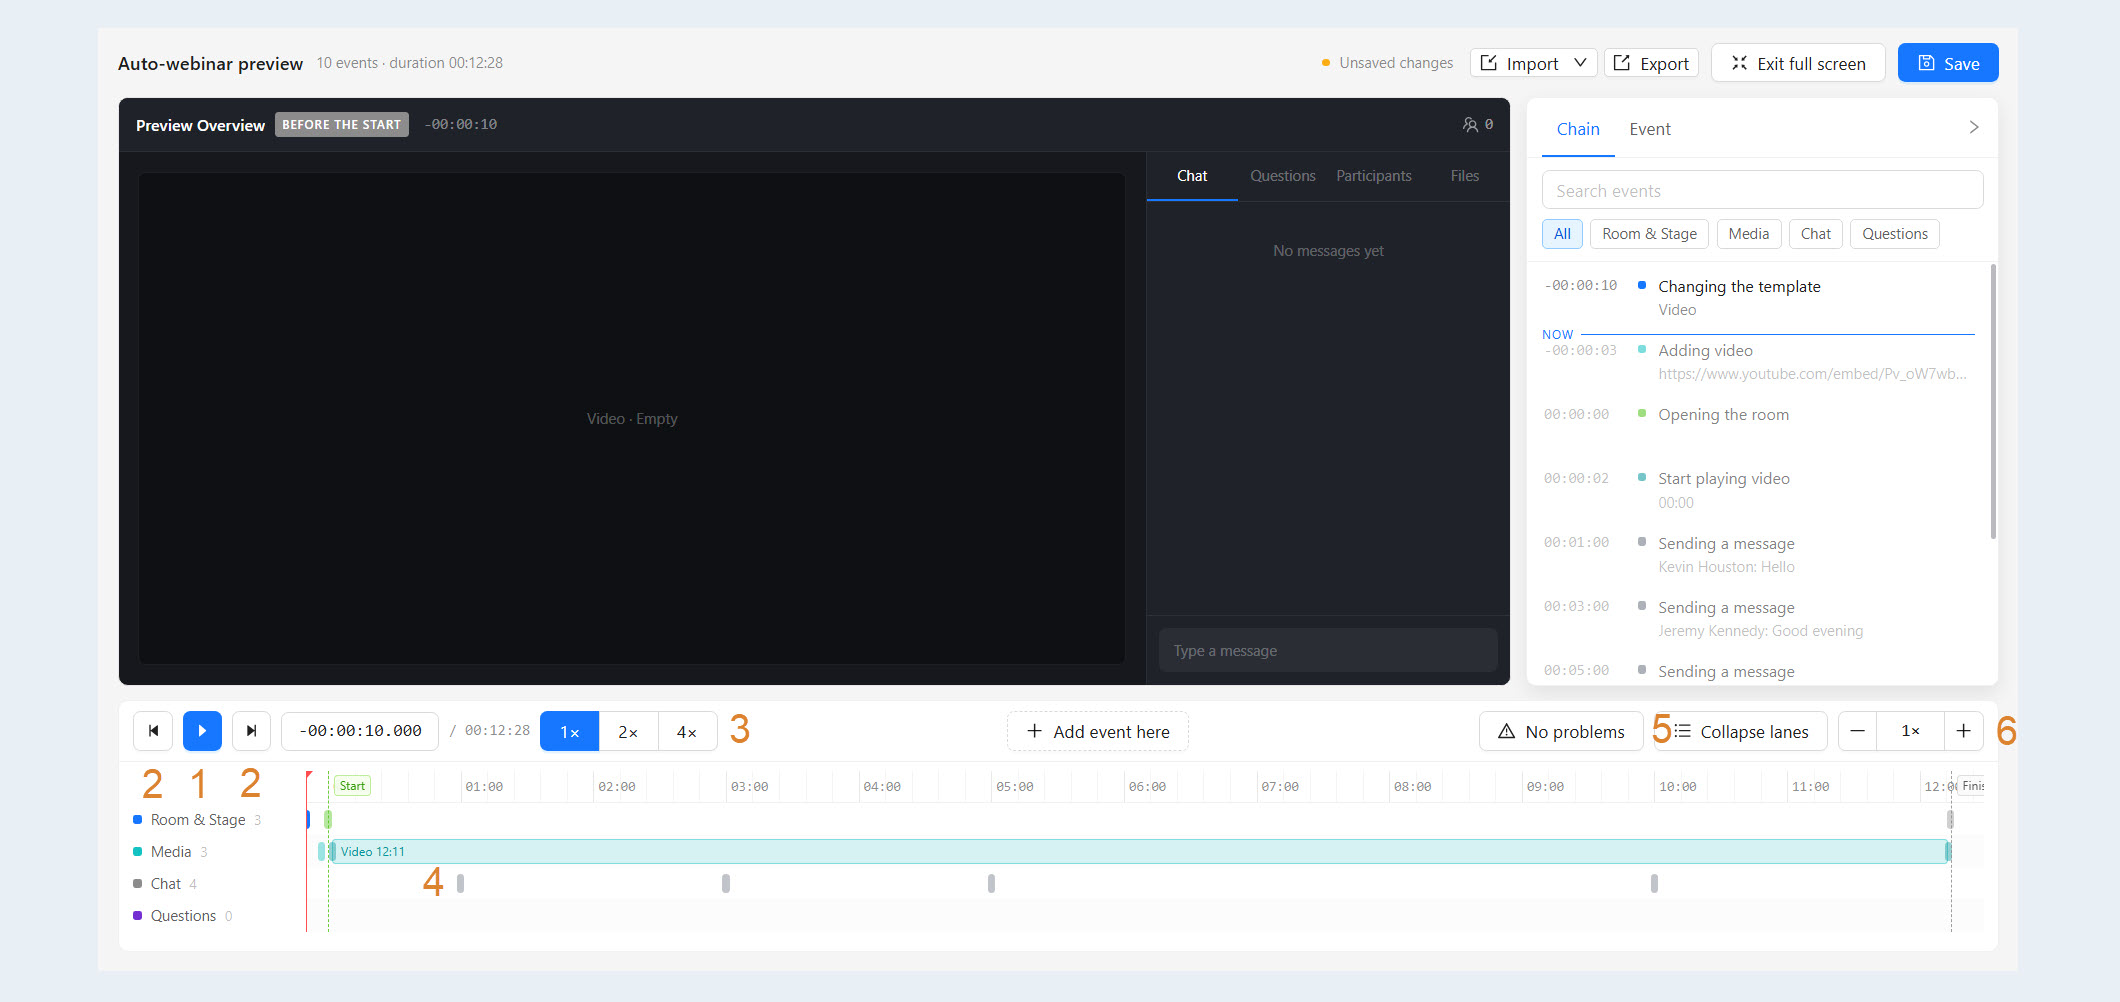
The webinar room, including the video and chat, appears in the center. As you preview the webinar, the room’s content changes according to the configured events.
The panel on the right has two tabs:
Sequence — Displays a list of events and their scheduled times. You can search for an event or filter the list by category: Room and Stage, Media, Chat, or Questions. Select All to display the complete list.
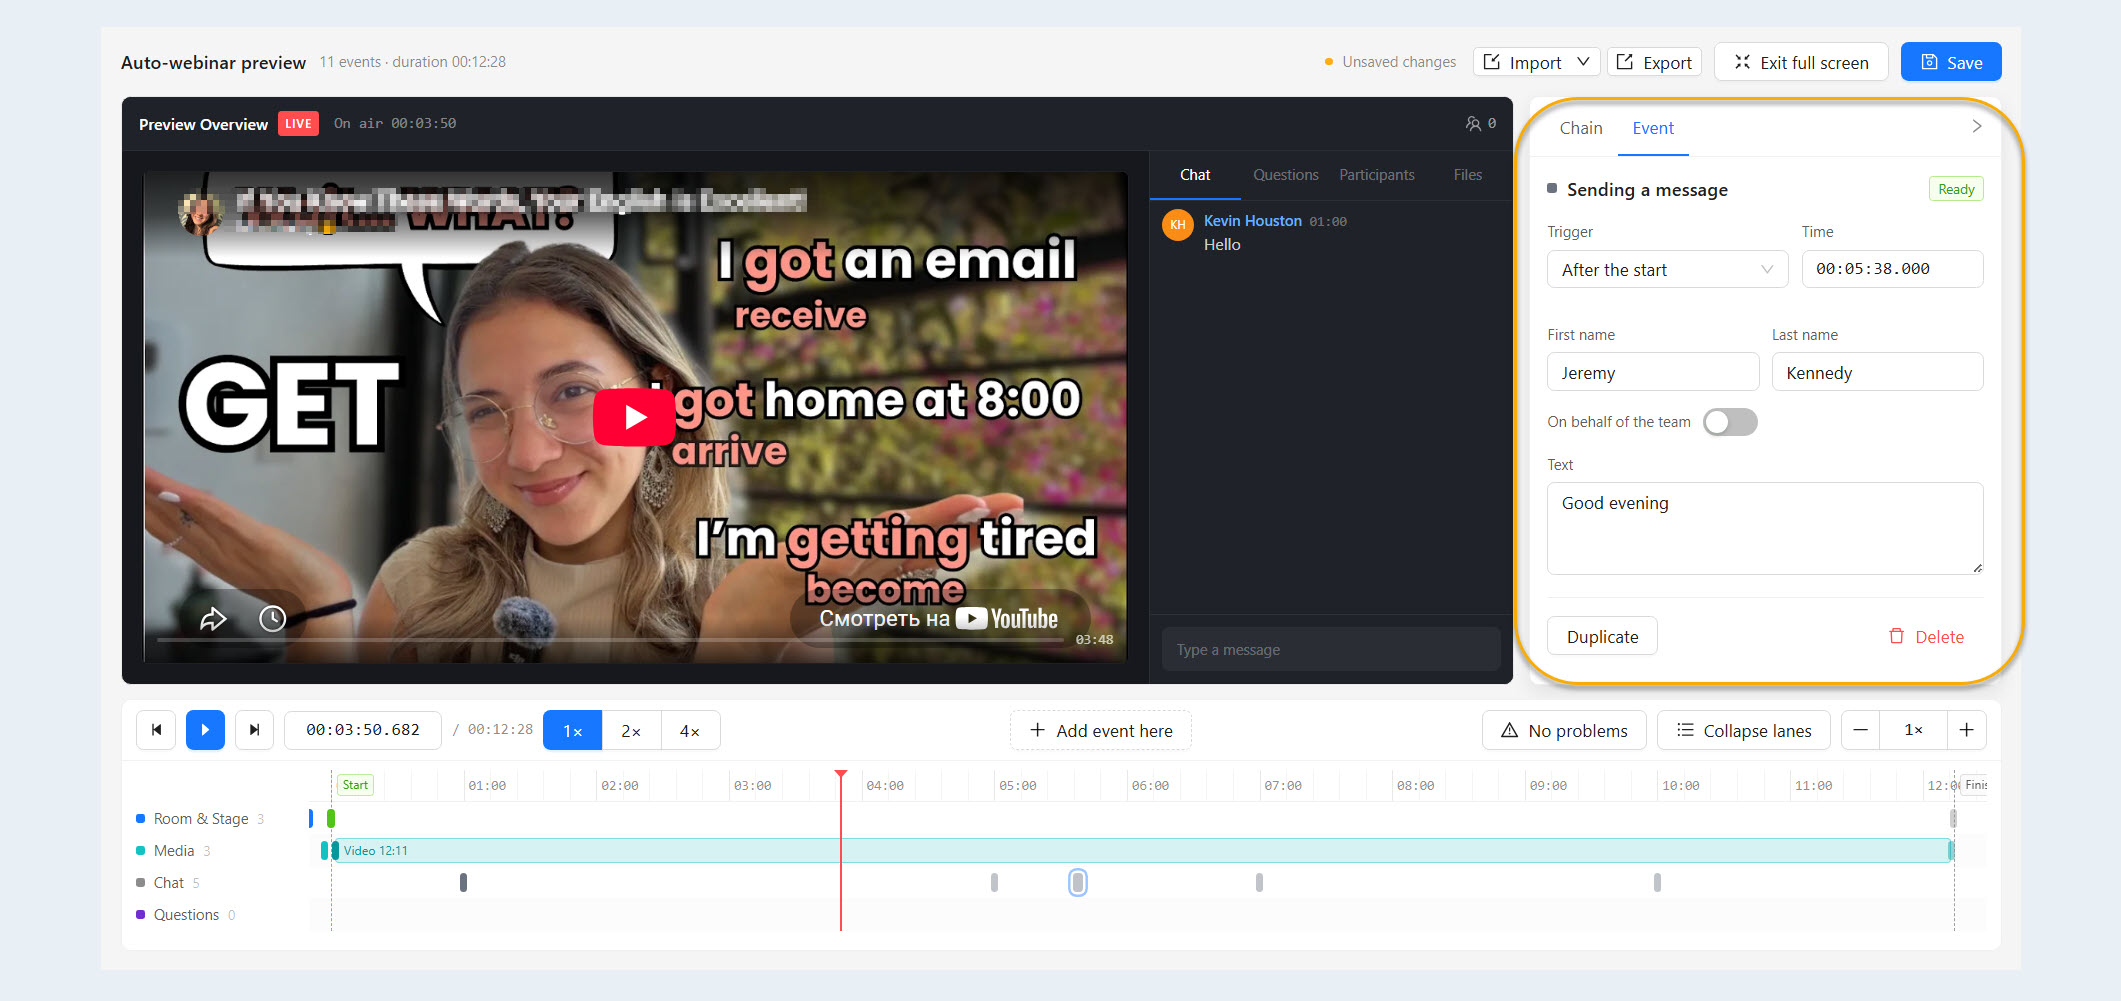
Event — Displays the settings for the selected event. The available fields depend on the event type.
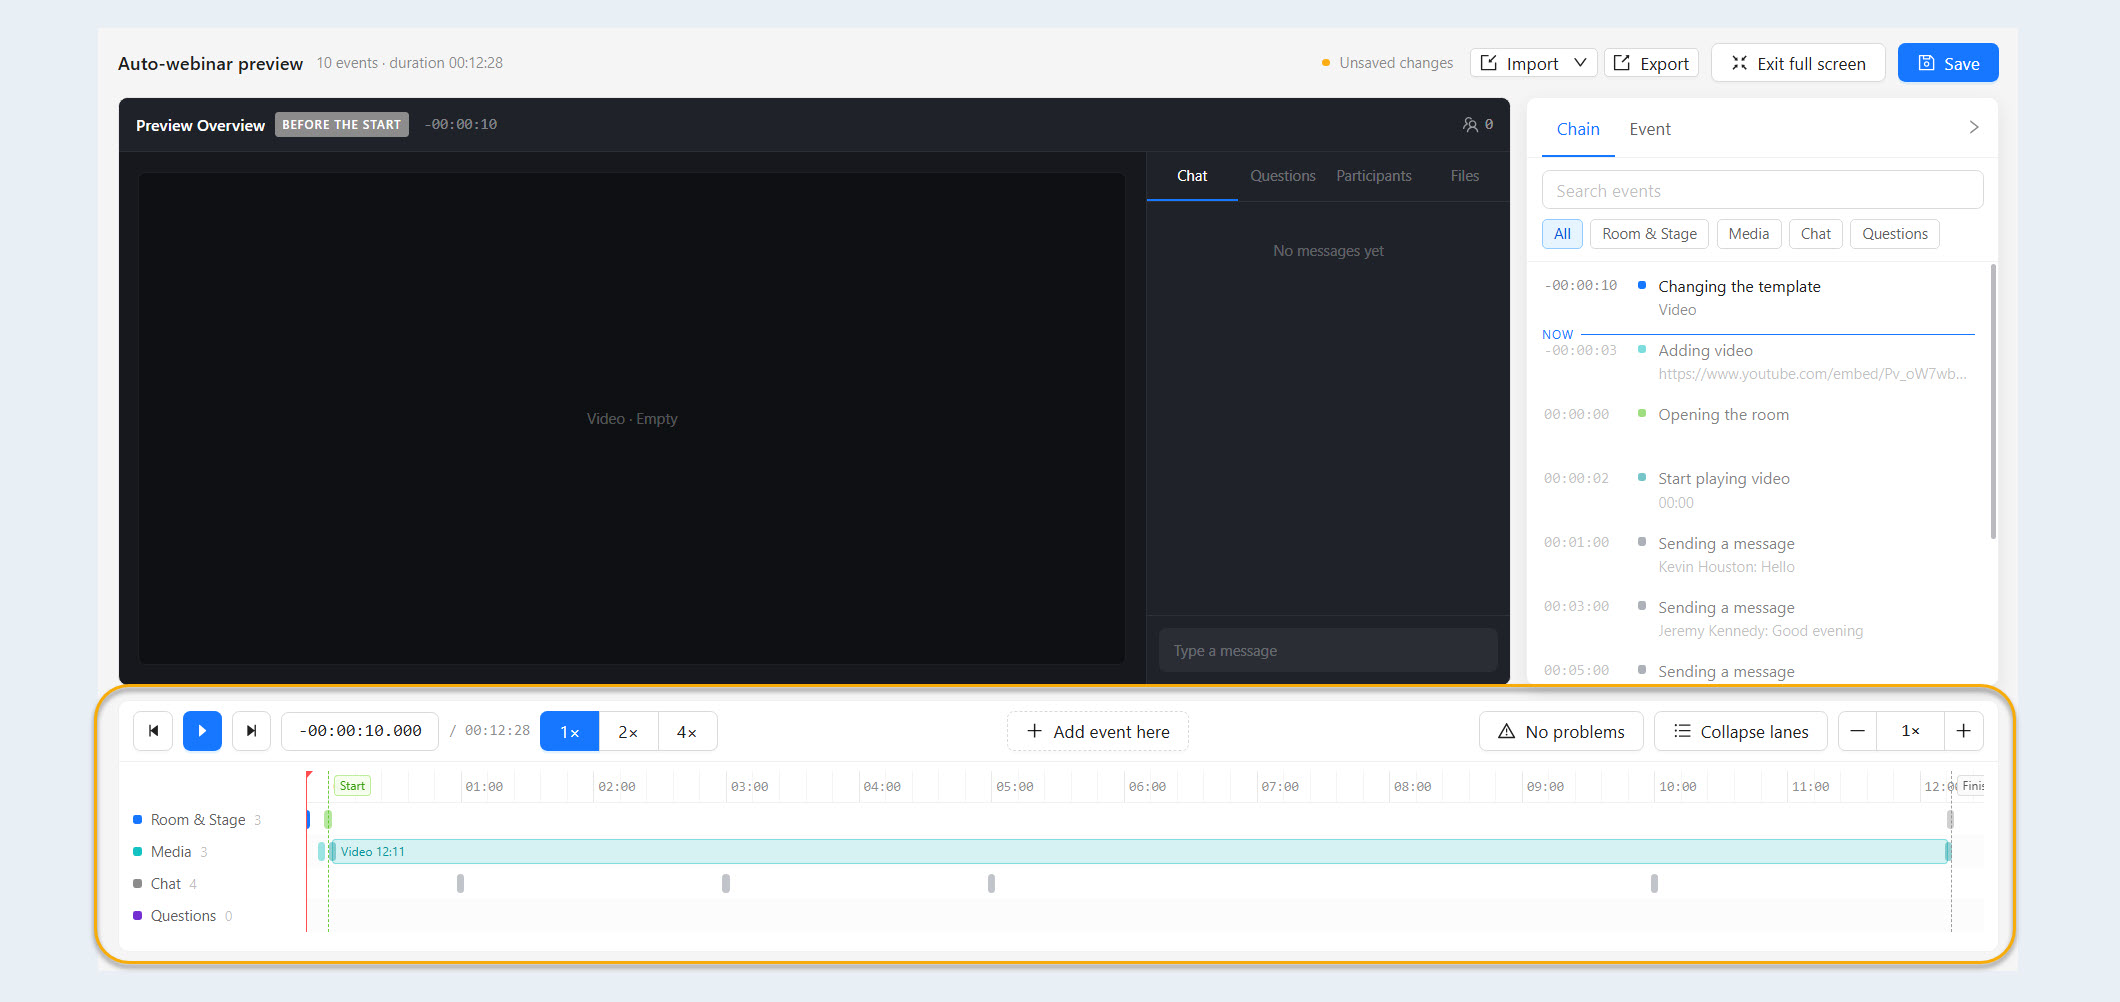
The timeline appears at the bottom. Events are arranged on tracks that correspond to the same categories, while the red playhead indicates the current preview position. Above the timeline are the playback controls, the time field, and event management tools.
How to Preview an Automated Webinar
- Click the Play button below the webinar room. Watch the video, chat messages, and events in the sequence. Pause the preview if necessary.
- Use the Back and Forward buttons to move between events.
Select 2× or 4× to preview the webinar faster. Select 1× to return to normal speed.
To check a specific segment, select the corresponding position on the timeline. The current time appears in the field next to the playback controls.
Click Collapse Tracks to make the timeline more compact.
Use the − and + buttons on the right to adjust the timeline zoom. This makes it easier to inspect events scheduled close together.
For example, if a message is scheduled for the five-minute mark, jump to that point and confirm that it appears in the chat.
Timeline
Click anywhere on the timeline to jump to that point in the automated webinar and check what is displayed in the room.
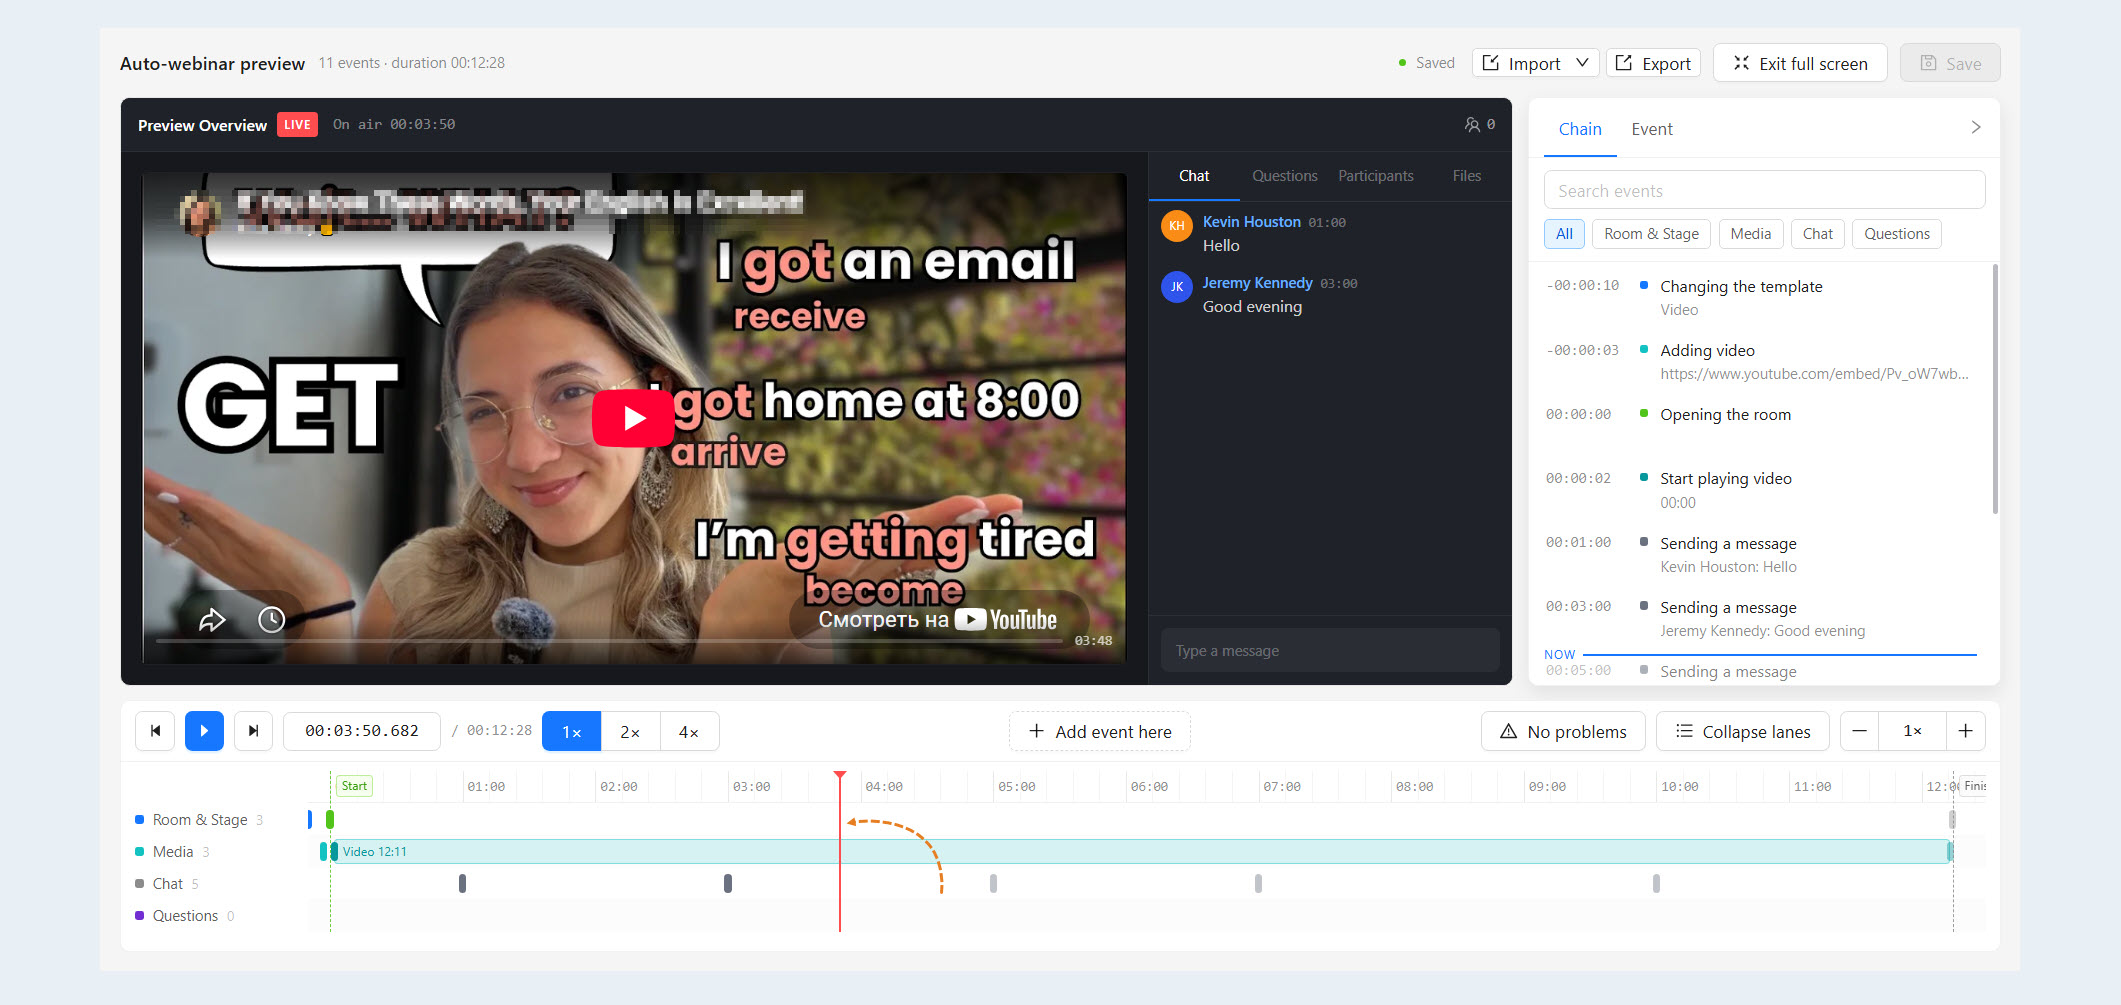
You can also change when an event occurs directly on the timeline. For a short event, click the event itself. For a longer event, click the handle at its starting point. Hold down the mouse button and drag it left or right: drag left to make the event occur earlier or right to make it occur later.
After making your changes, click Save.
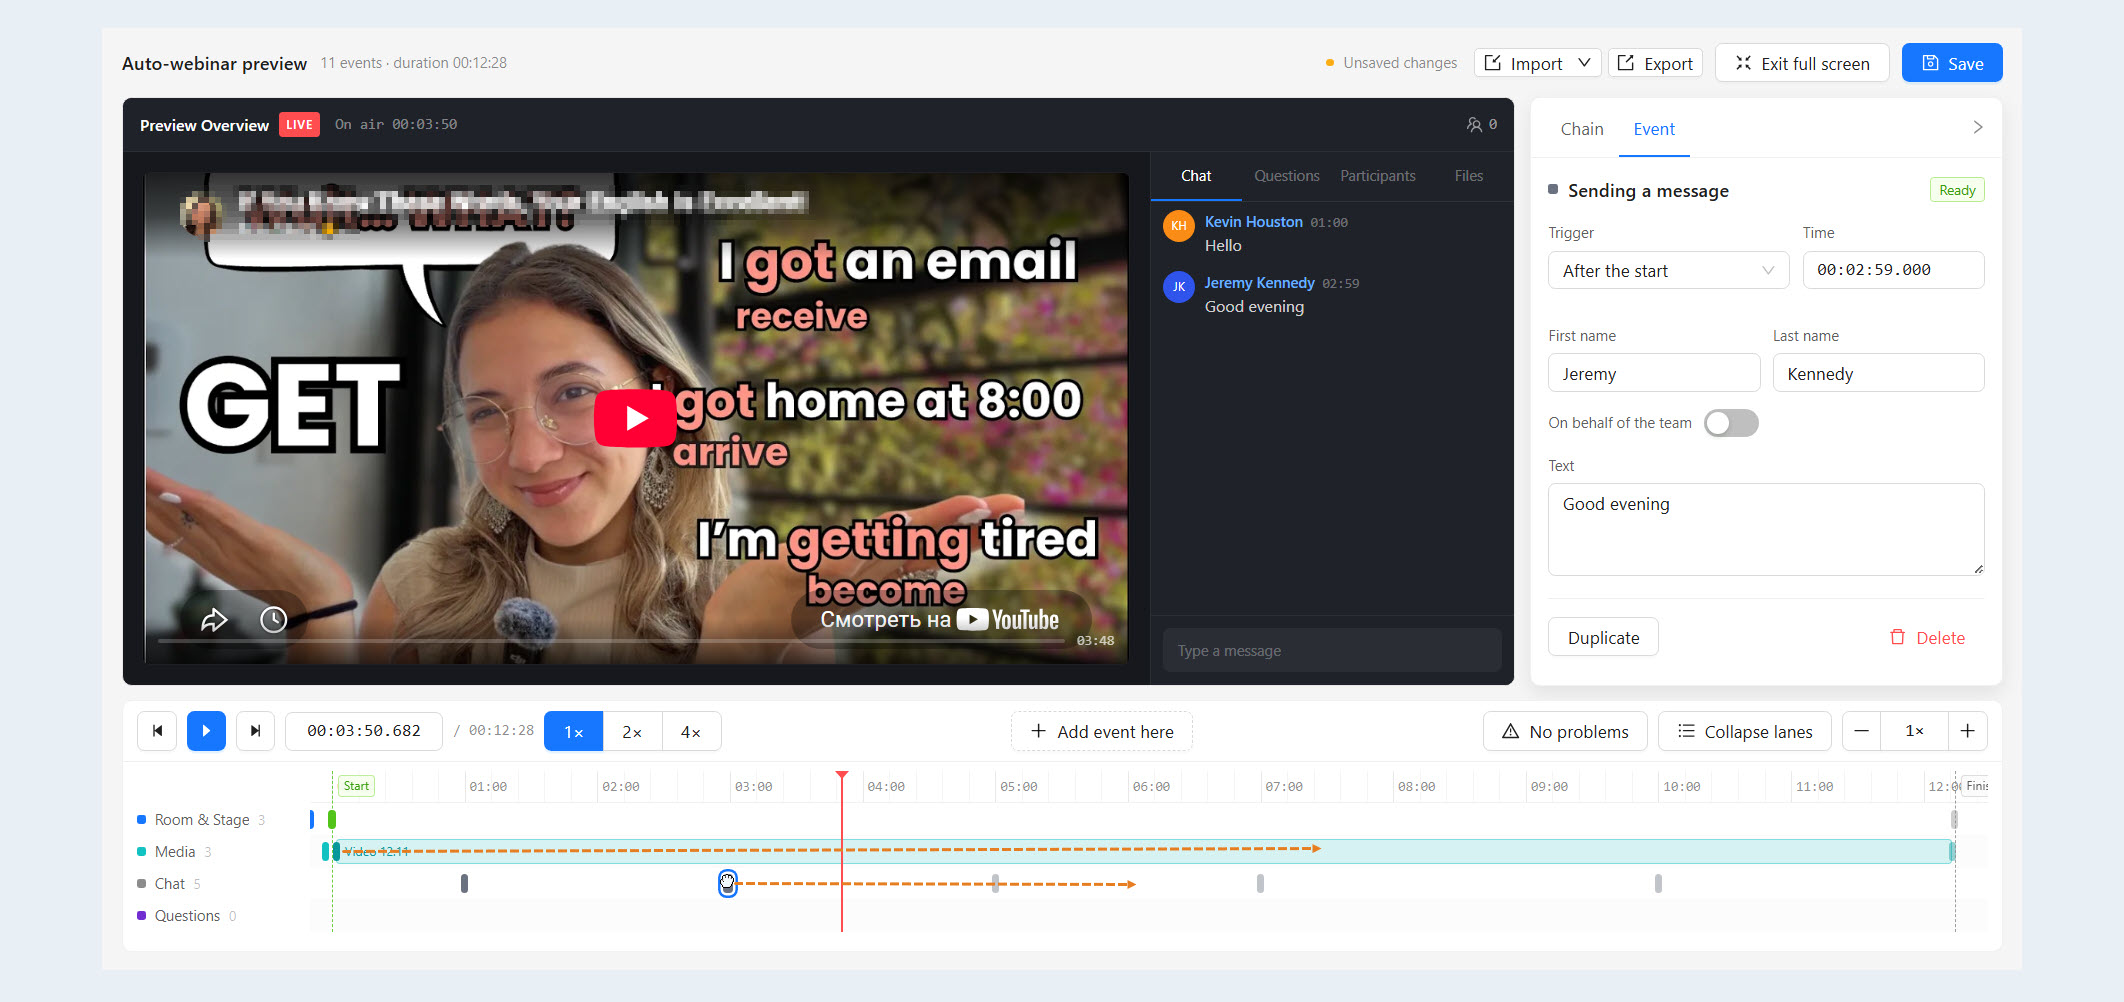
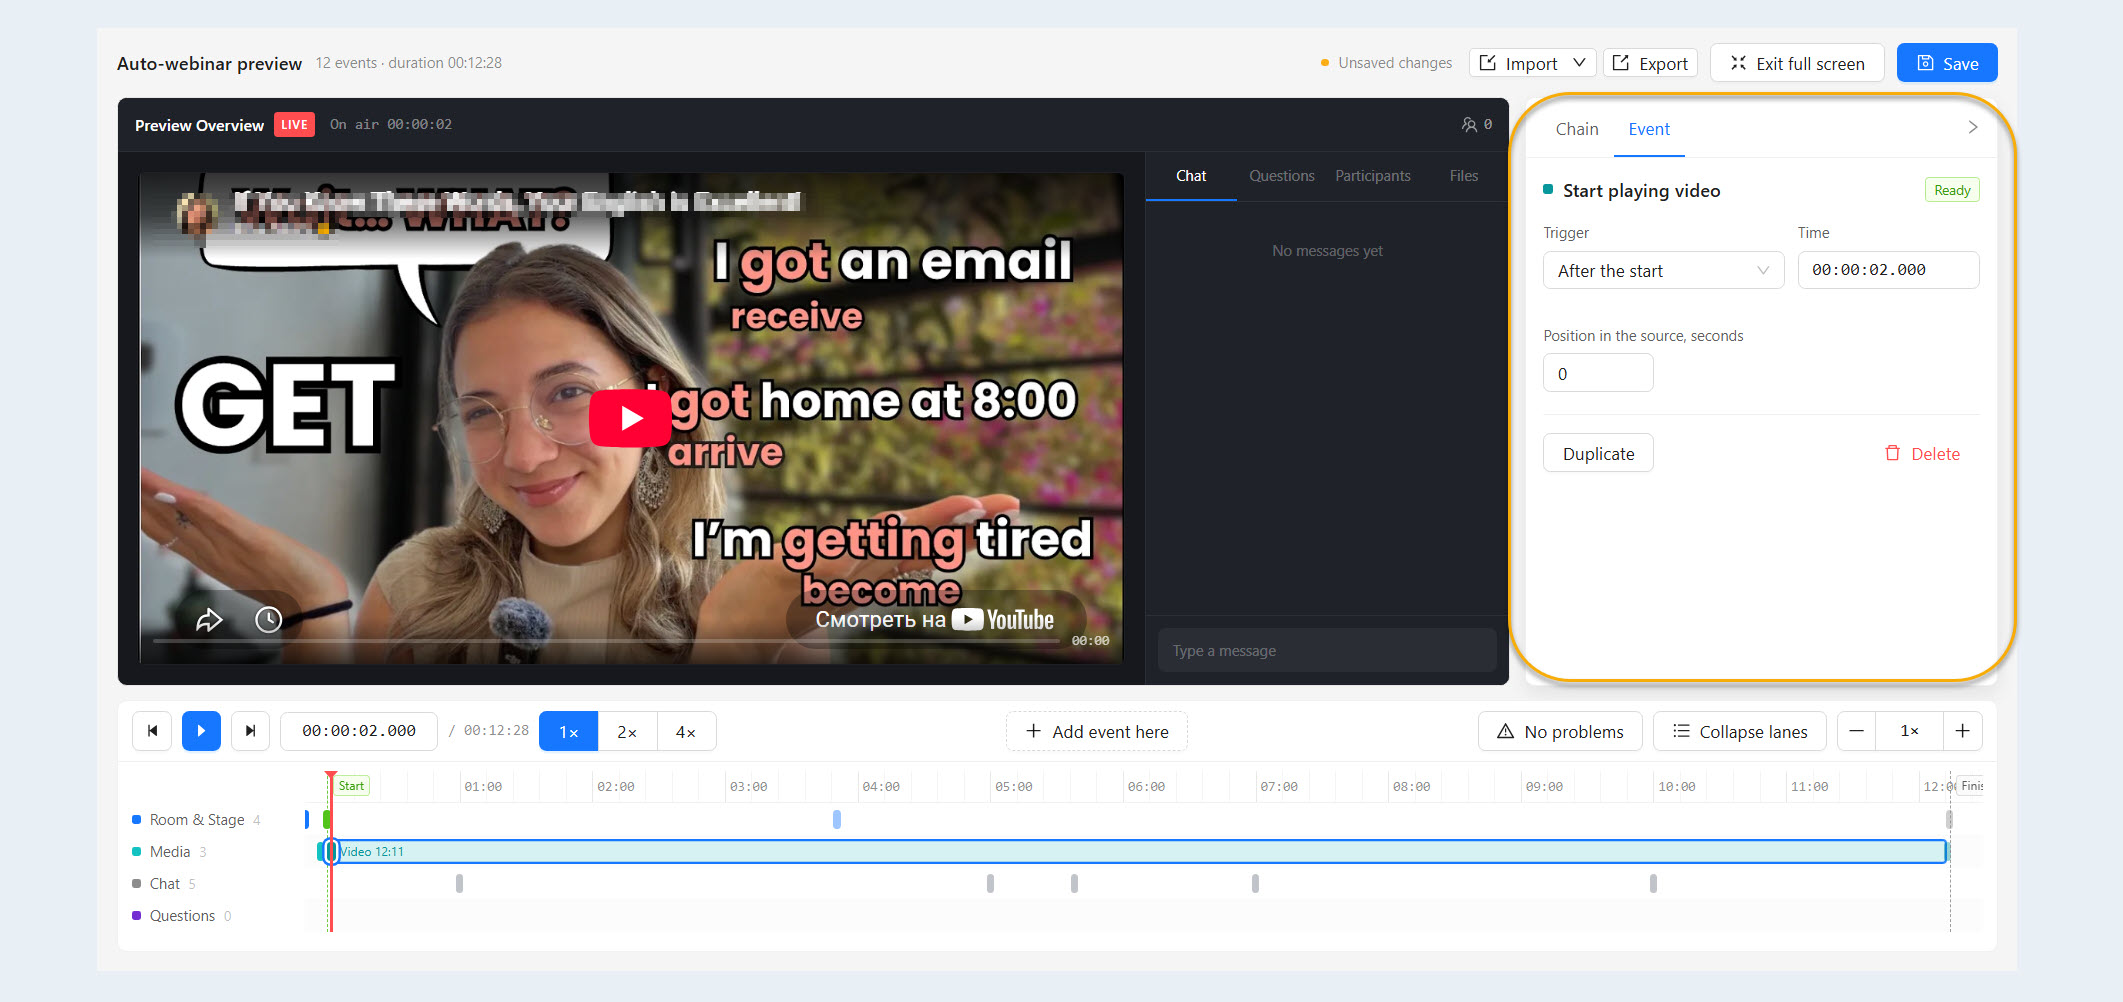
You can also edit an event’s time in the panel on the right. In addition to changing its time, you can edit any of its other settings there.
How to Add an Event
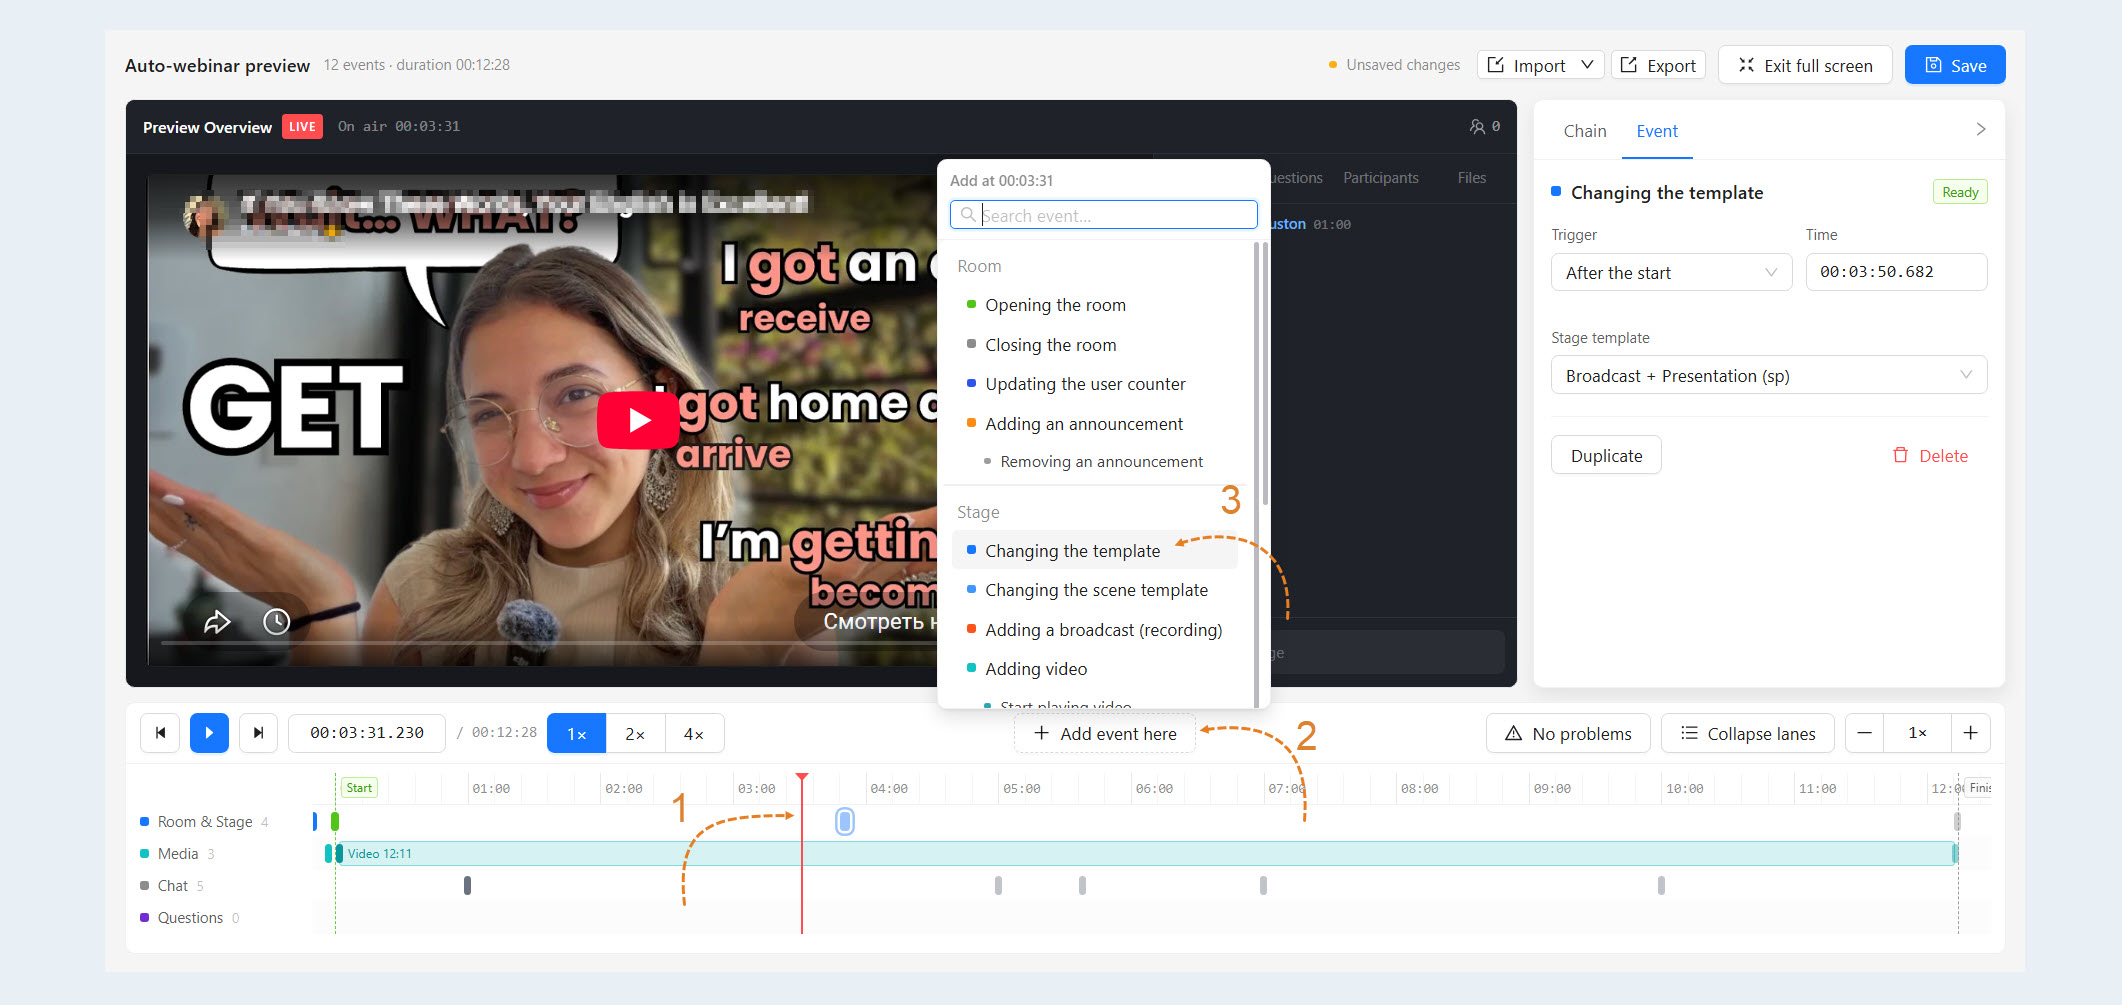
Move the playback cursor to the approximate time, and then refine it using the panel on the right.
Click + Event Here above the timeline.
Select an event type from the list. To find one quickly, start typing its name.
Complete the settings on the Event tab on the right and verify the event time.
Check the result in the preview.
For example, for a Start Video Playback event, you can configure its start time and the playback position in the source video, in seconds. For a Send Message event, you can specify the sender’s first and last name, choose whether to send the message on behalf of the team, and enter the message text.
The Duplicate and Delete buttons are available at the bottom of the panel.
How to Edit an Event
Select the event in the sequence or on the timeline.
Open the Event tab in the panel on the right.
Change the event time or any other settings.
Check the result in the preview window.
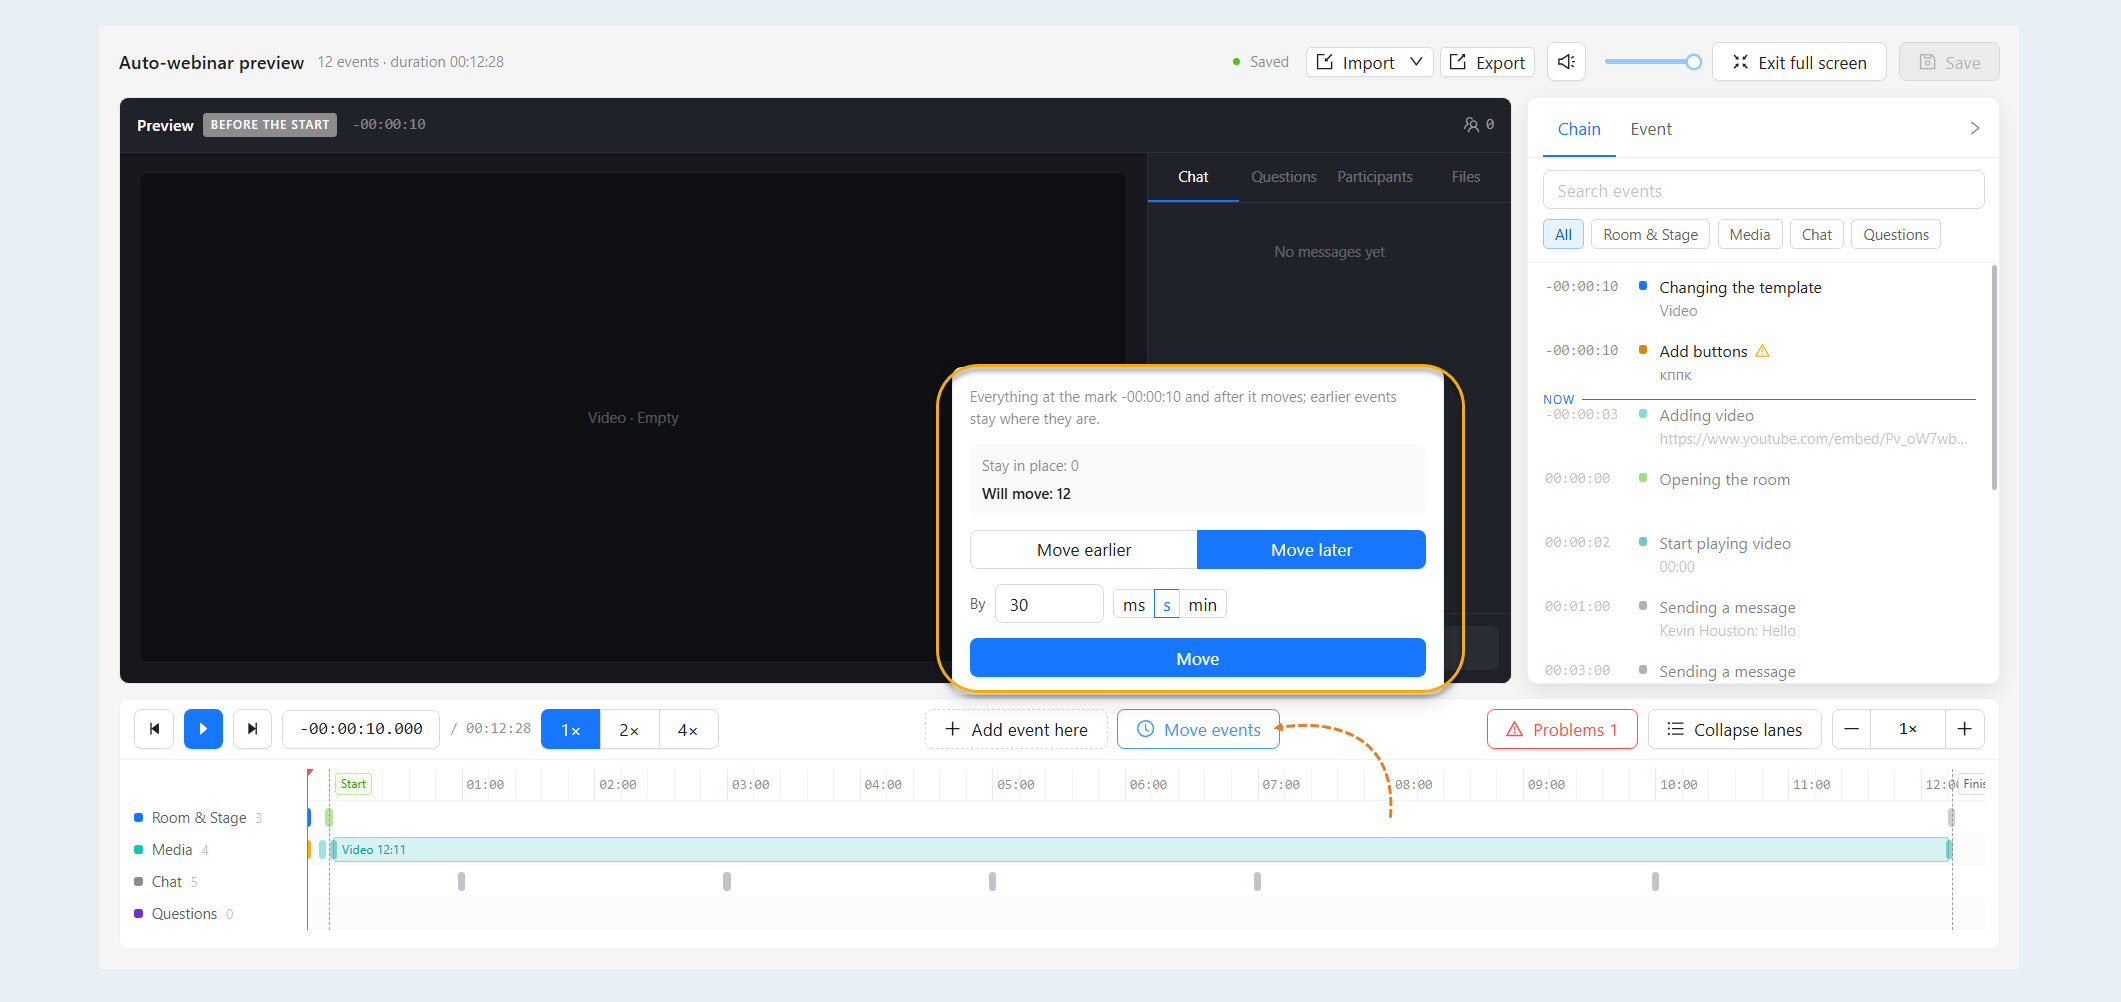
You can also move events that come after the red marker by clicking the “Move Events” button. You can move events forward or backward by the amount of time you need.
How to Check for Issues and Save Changes
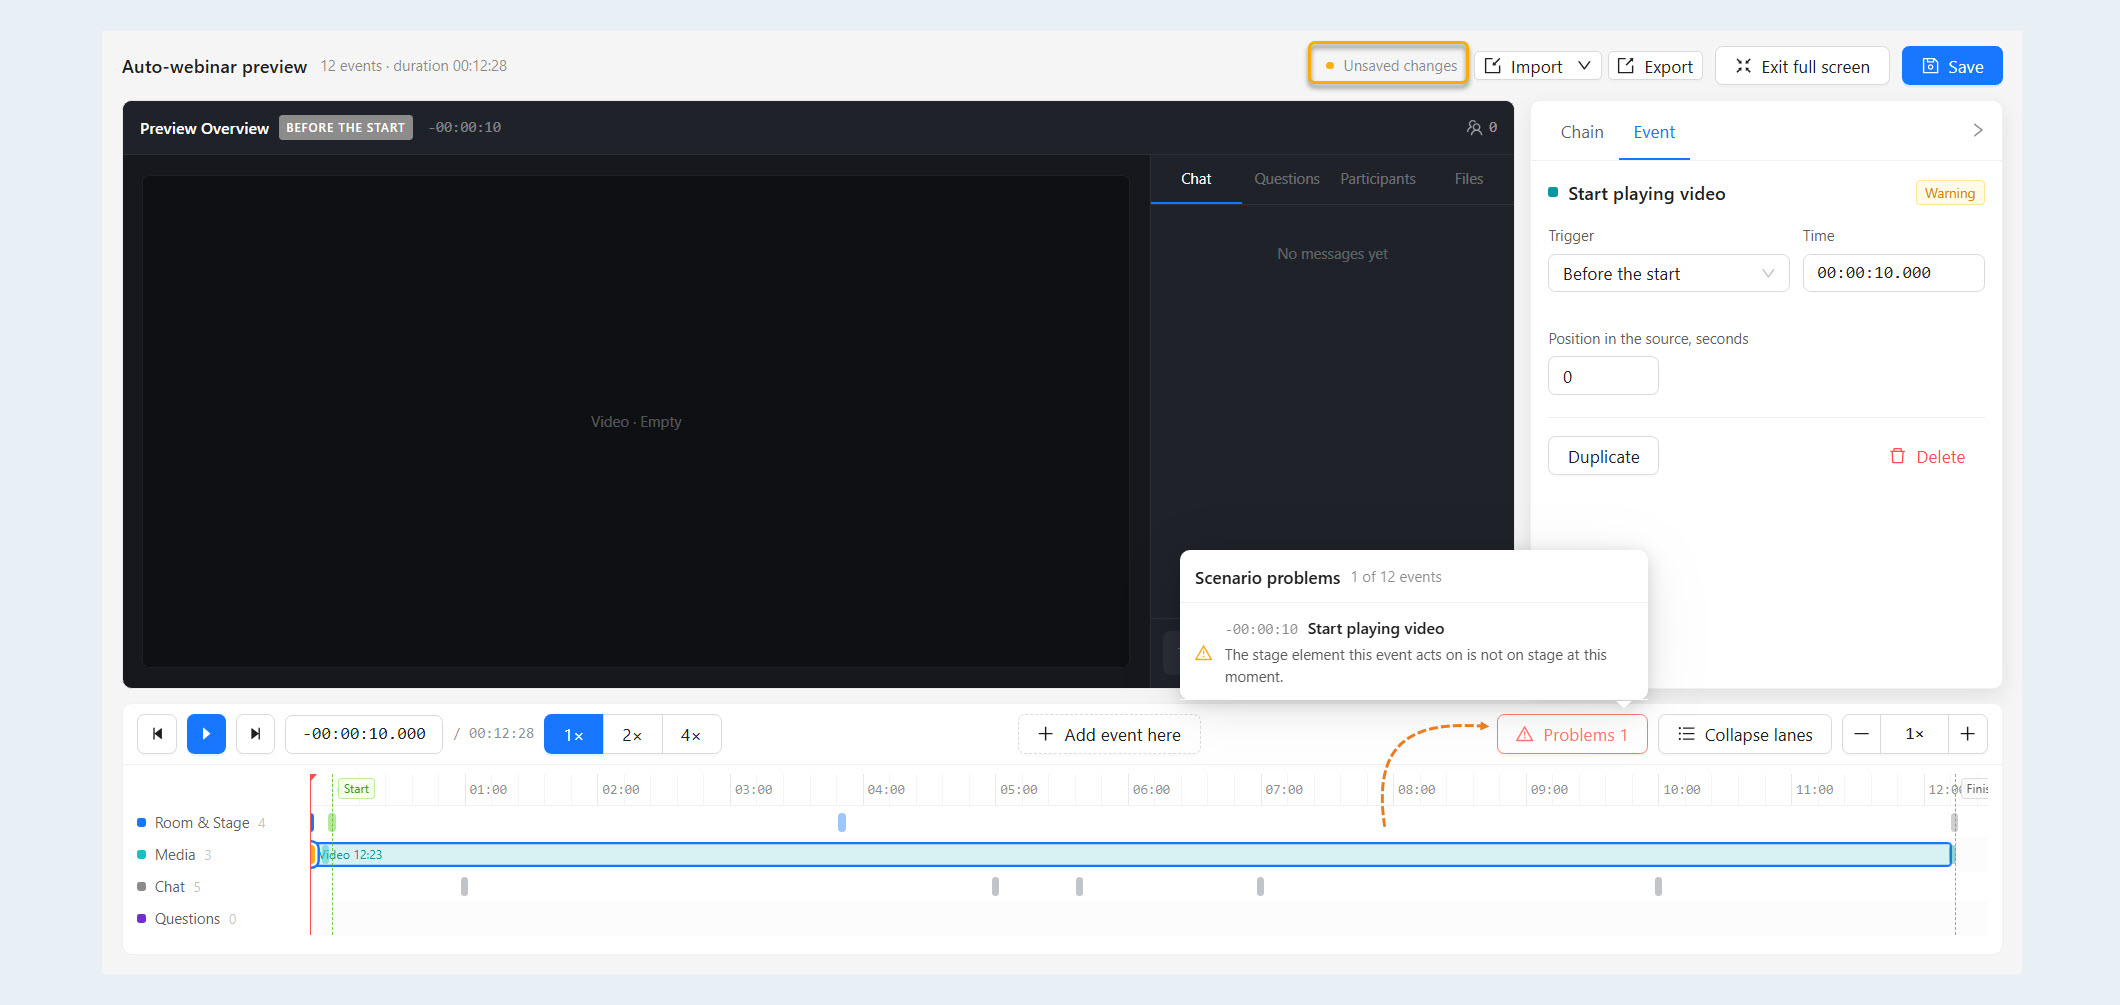
A validation indicator appears above the timeline. It displays either No Issues or Issues, along with the number of issues found. An event with incorrectly configured settings may have an Error status.
For example, adding a message without entering any text causes an issue to appear in the preview. After you enter the message text, the event status changes to Ready, and the indicator is updated.
Before saving:
Fix all events with an Error status.
Make sure the indicator displays No Issues.
Check the key moments: changing the webinar template, opening the room, adding a video, starting video playback, ending video playback, and closing the room.
Click Save in the upper-right corner.
Make sure the Saved status appears.
Note: If the Unsaved Changes status appears, click Save before leaving. Seeing your changes in the preview does not mean they have been saved.