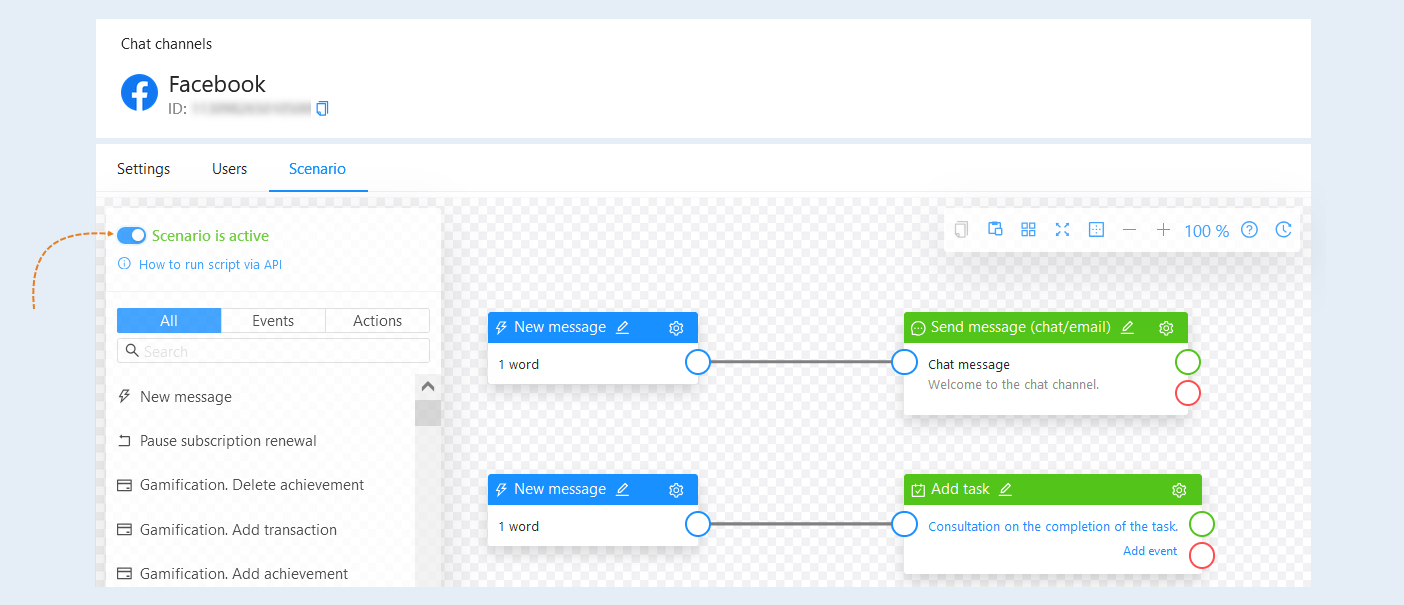
The scenario of the chat channel is a sequence of events and actions within the chat channel that are automatically executed when certain events occur in the chat.
The scenario responds to user manipulations within the chat channel and performs corresponding actions.
When creating a scenario, first set the event as "New message". This event will be triggered when a user sends a message or key phrase in the chat channel. This event will trigger the scenario (sequence of responsive actions).
Next, you need to set the responsive actions: send a message, request data, etc. Connect events and actions together. This way, you define the sequence of actions in the scenario.
Creating a chat channel scenario
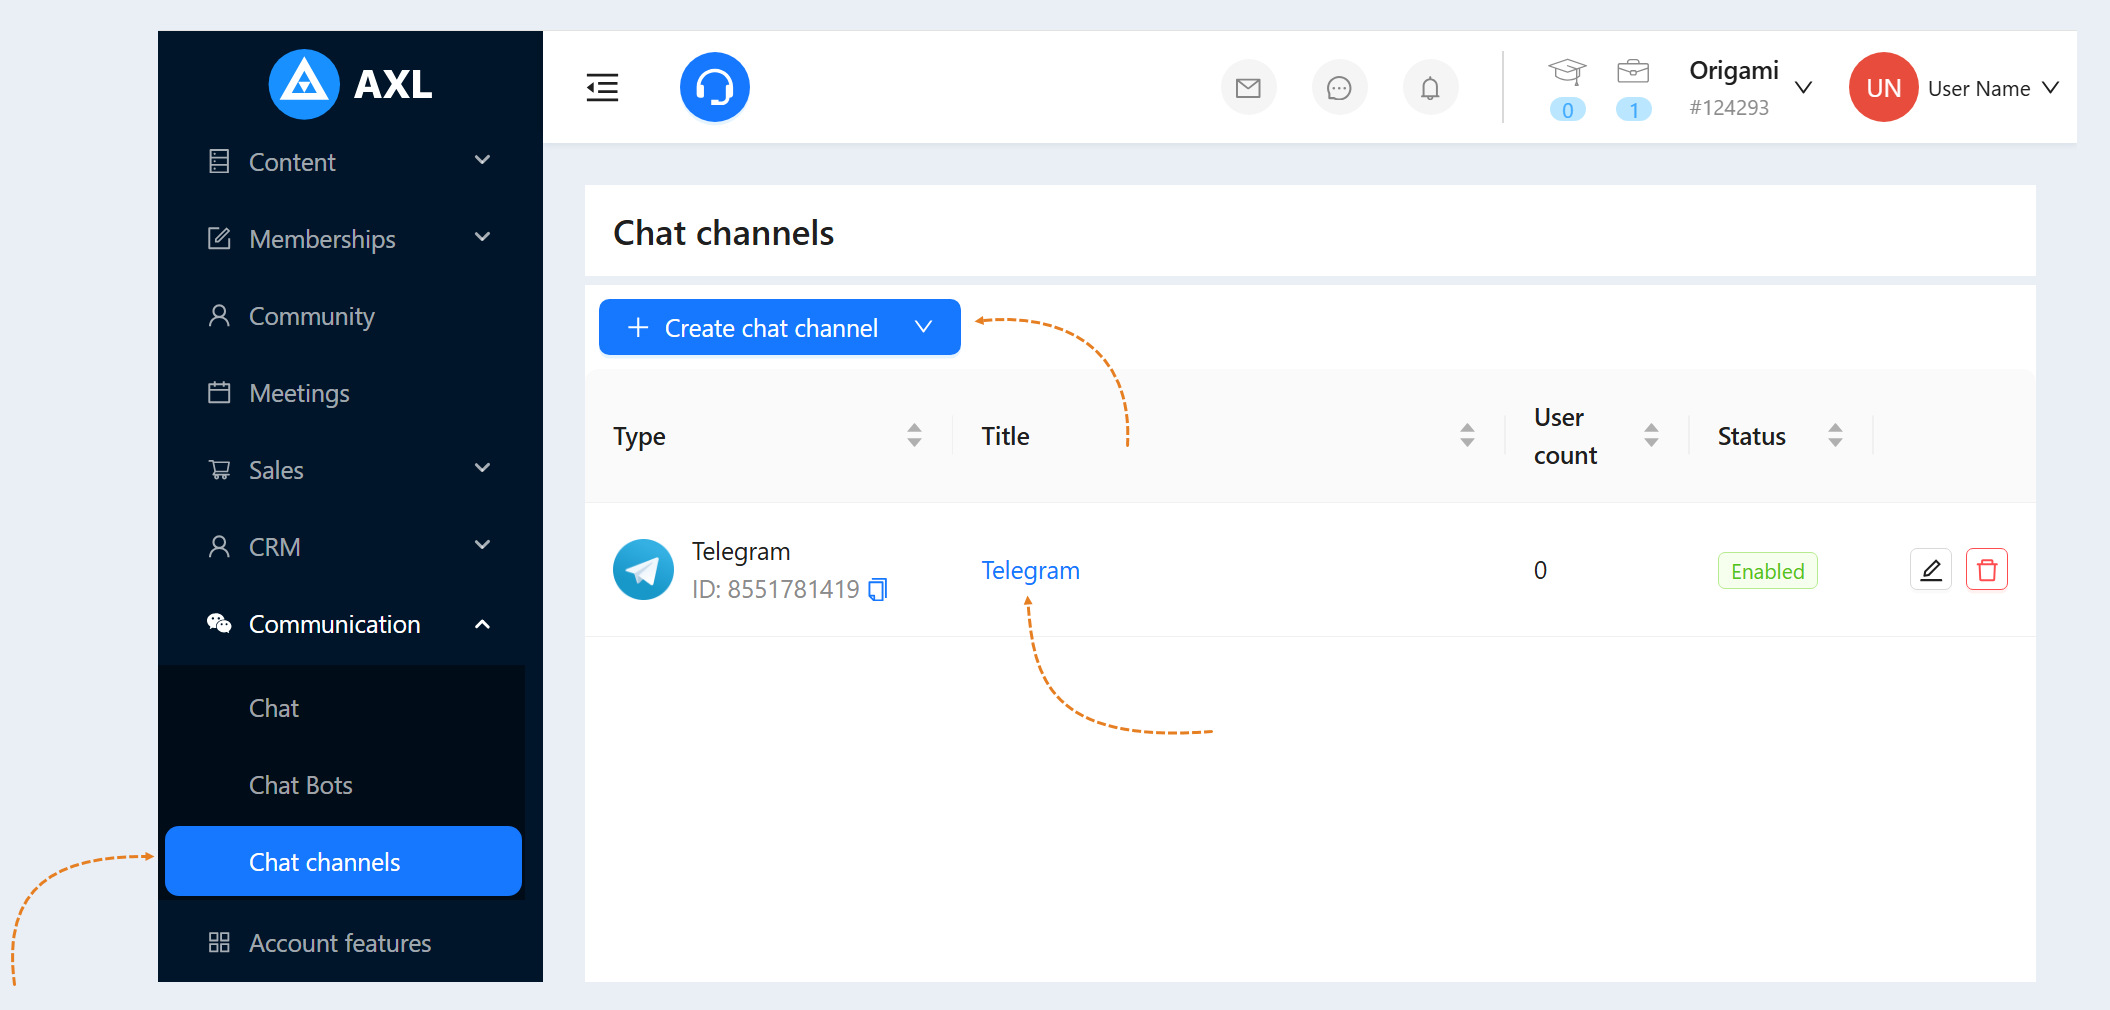
Go to the "Communication" section, then the "Chat Channels" tab. Create a new chat channel or select an existing one. For more information on creating chat channels, see the "Chat Channels" article.
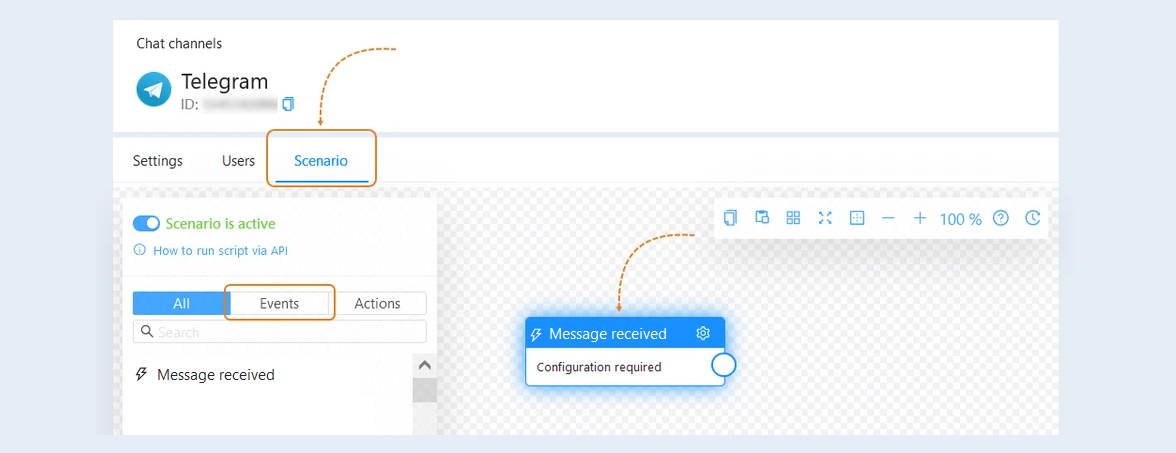
Go to the "Scenario" section. Choose the event that triggers the scenario, "Message received". This event is triggered when a user sends a message in the chat channel, for example, a user sends a message like "start" or "watch recording".
Next, configure the event settings. Click on the "Settings" button in the top right corner, then open the node settings. In the node settings, you can choose specific words in the message that will trigger the scenario.
The "Message received" event allows for the triggering of various scenarios depending on keywords contained in the user's message. Configuring specific words allows for more personalized automatic responses and helps users quickly receive the information they need.
You can choose one or several keywords in the event, or create multiple events containing different words to set up multiple branches of the scenario.
For example, the word: "help". A user sends a message in the chat channel: "I need help with completing the task". Then, a message with instructions is sent to the user, or a task appears for the responsible administrator to contact the user for personal consultation.
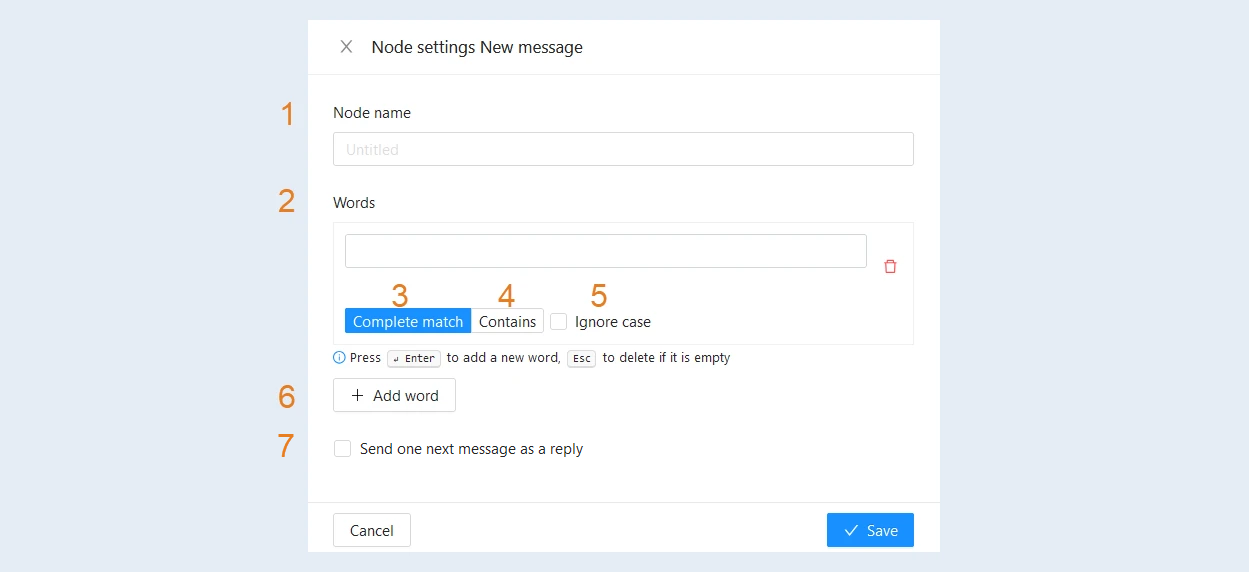
In the node settings window that appears, fill in the fields:
- Node name. Specify the node name, you can name nodes in the scenario as you see fit.
Words. Enter the words in the text field that will launch the scenario.
Complete match means that the event node will be activated only if the message contains an exact match with the specified word or phrase. For example, if the word "hello" is specified, then the event node will be activated only when writing this word, without taking into account other spellings or phrases.
Contains means that the event node will be activated if the specified word or phrase is present in the message, regardless of the location or combinations with other words. For example, if the word "task" is specified, then the event node will be activated with any message containing this word, for example, "there is a task", "homework", "next week's task" and so on.
Ignoring case means that the event node will be activated regardless of how the specified word or phrase is written - in uppercase, lowercase, or mixed. For example, if the word "Hello" is specified, then the event node will be activated when writing as "Hello", "Hello", "HELLO", etc. This is convenient to provide flexibility and ease of use for users, so as not to limit their spelling options.
Add word. Click the "Add Word" button or press the "Enter" key to add a new word. Click the "Trash" icon or the "Esc" key to delete a word if it is empty.
Send one next message as a reply. Check the box so that the next message is sent as a response to the user's message.
After configuring the event settings, click the "Save" button.
Next, add the scenario action. Choose an action from the list and drag it into the scenario field. For detailed information on each action, read the article "Types of Actions in a scenario and their Configuration".
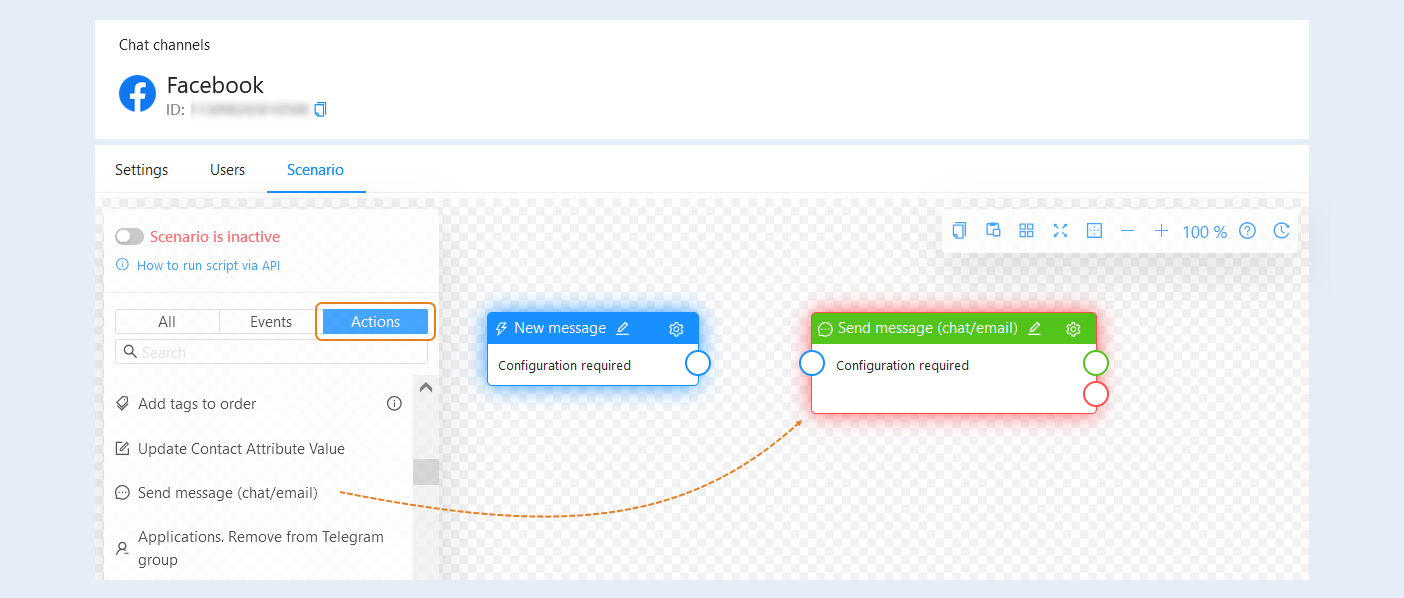
For each action, configuration is required. Click on the "Settings" button in the top right corner of the action, then open the node settings.
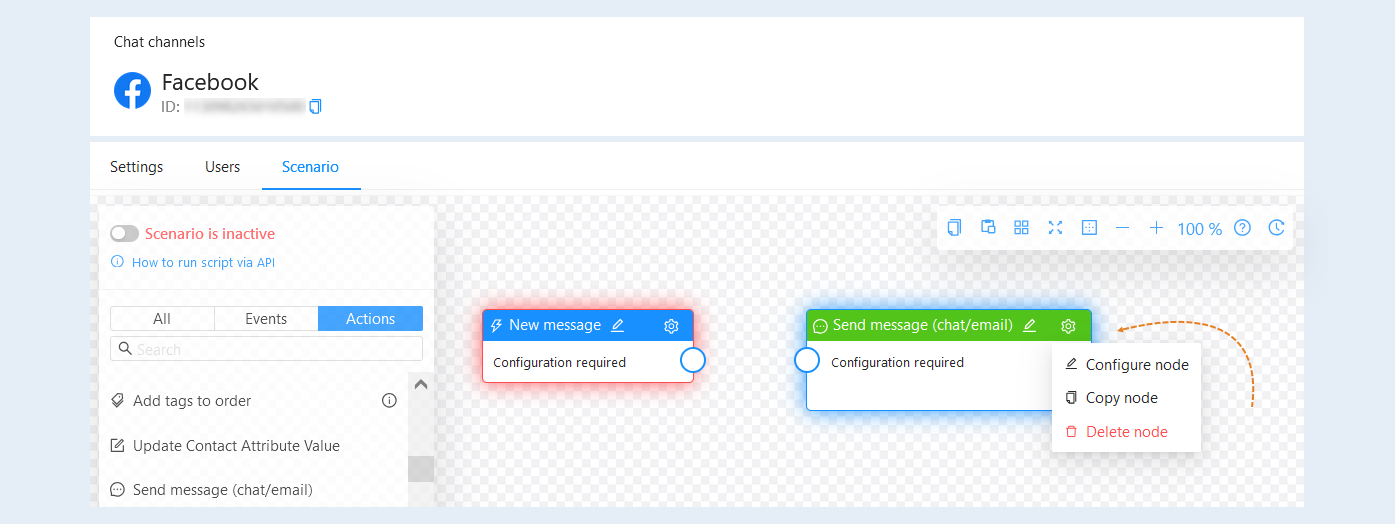
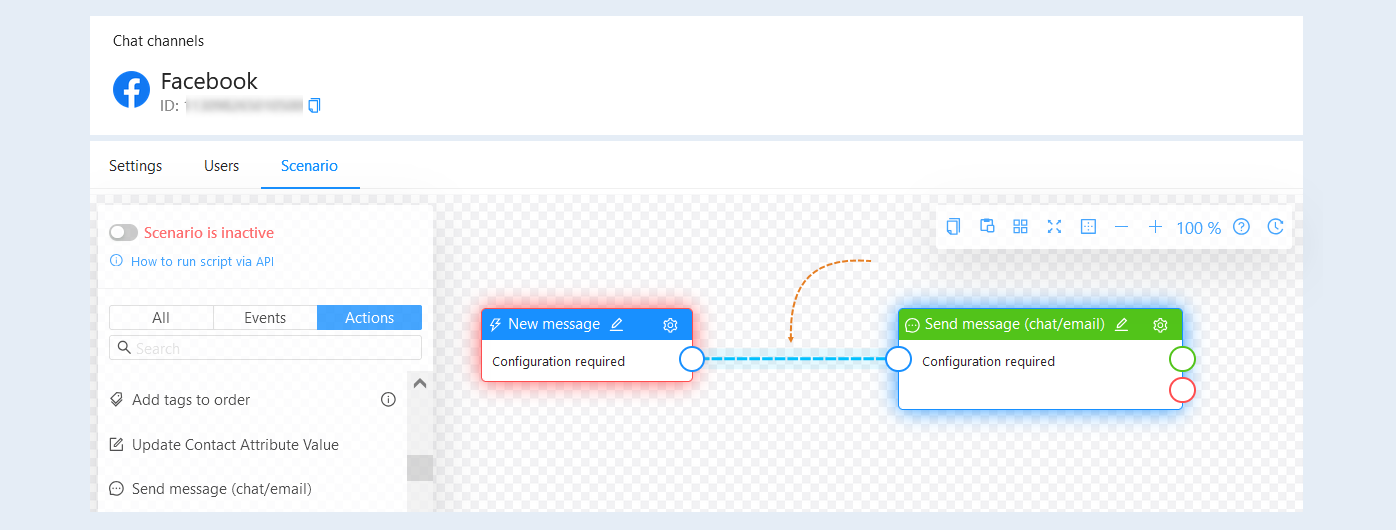
Next, connect the event and action. You can create one or multiple links between events and actions. To delete a link between scenario elements, double-click on the link.
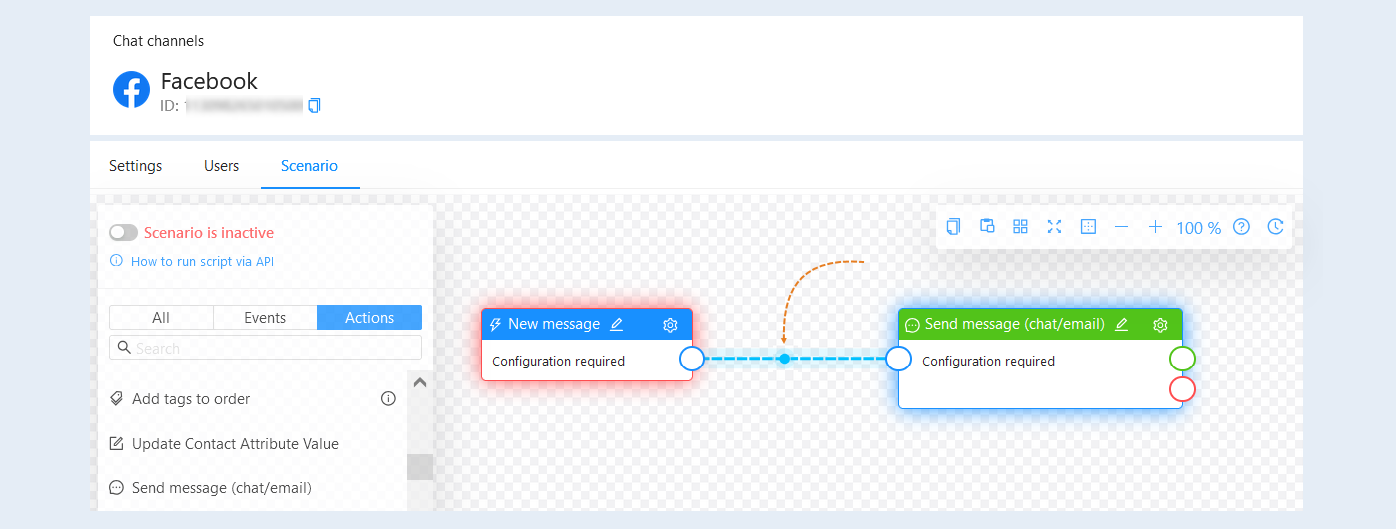
You can use the function of adding connection points to create chains. To add a connection point, select the location on the link where you want to add the point. Left-click on the selected location while simultaneously pressing the Ctrl key on the keyboard. Then you can grab the connection point and move it within the scenario field.
To remove a connection point, double-click on the point. Double-clicking on the line will remove the line and all connection points on it.
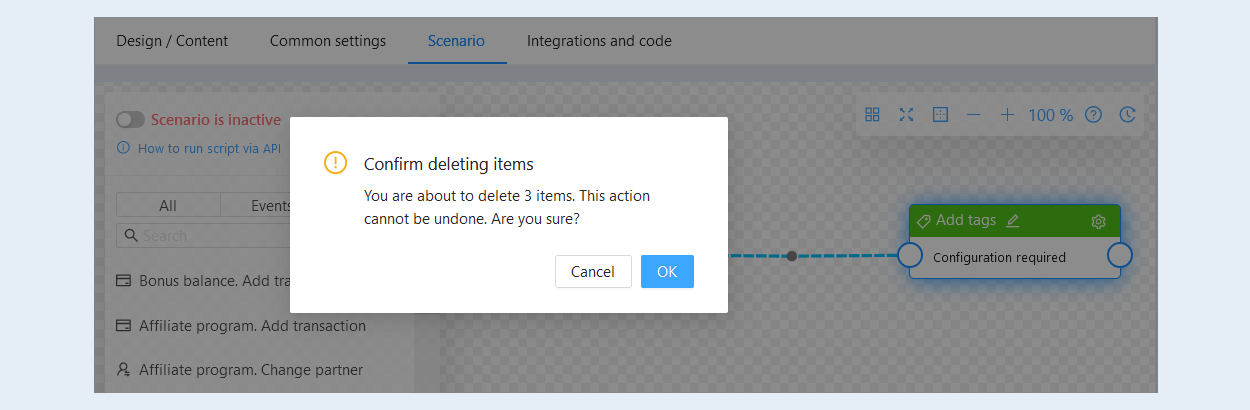
To massively delete script steps, hold down the "Shift" key and select the desired events and actions by clicking on them with the mouse. Next, press the "Delete" or "Backspace" key and confirm the deletion of the selected script steps.
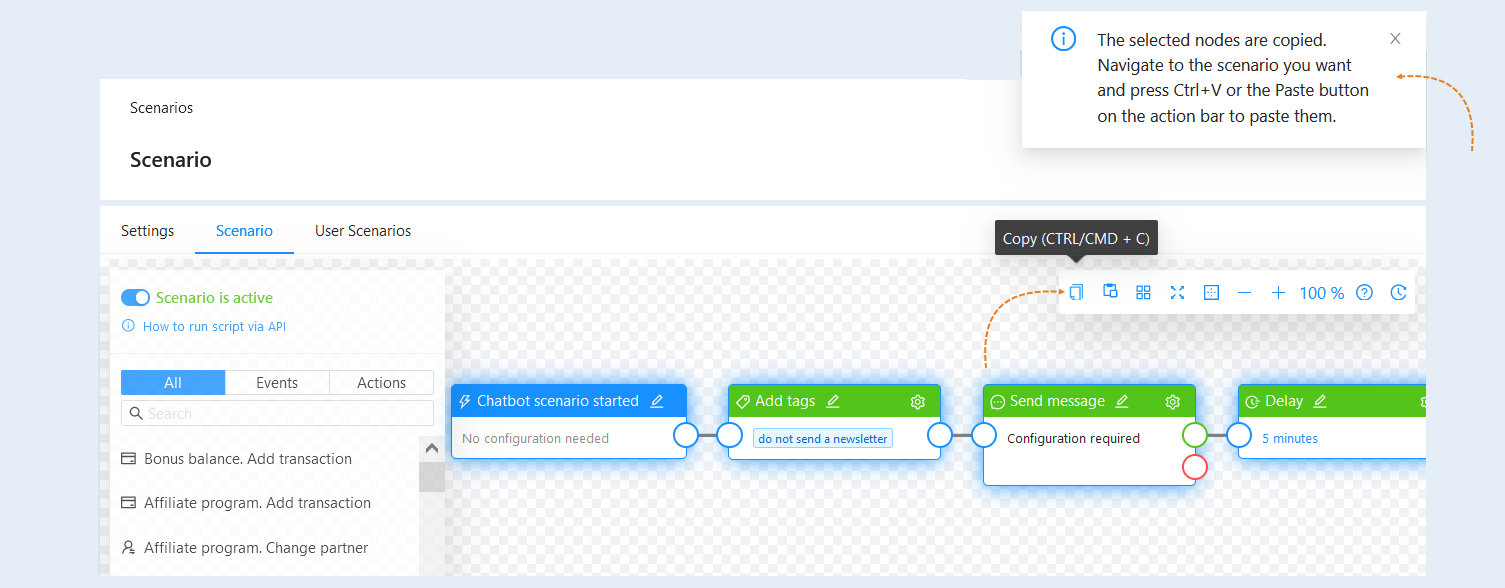
You can copy steps and connections between scenarios within one account. Press Shift and select the desired steps by clicking on them with the mouse. The selected scenario steps will be highlighted with a blue frame. Then copy the selected steps by clicking the "Copy" button or "Ctrl + C" on the keyboard. A message will appear in the top right corner stating that the scenario steps have been copied.
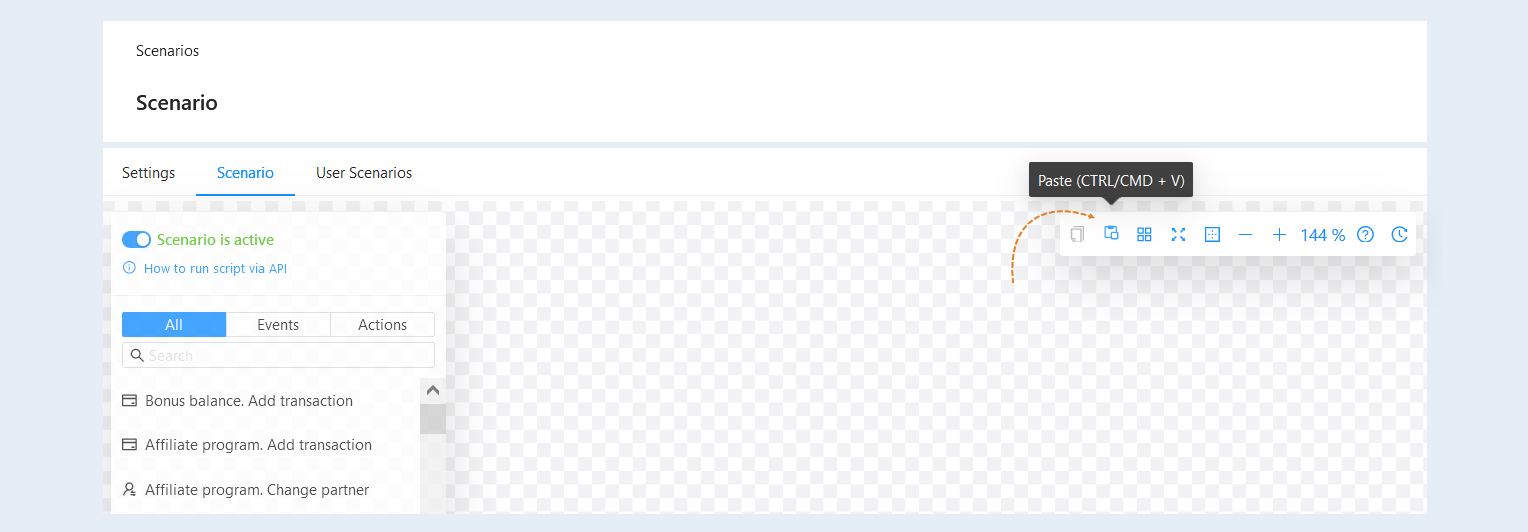
Open another scenario in your online account. Note that transferring scenario nodes only works within the same account. Click the "Paste" button or "Ctrl + V" on the keyboard. The scenario steps will be copied to the new scenario.
Add the necessary number of events and actions to your scenario. Now your scenario is ready. To activate the scenario, move the slider to the active position.