The Telegram groups/channels application allows you to manage user access to a closed Telegram groups/channels. Using this application, you can automatically approve applications to join a group or block group users in Telegram.
Click on the desired section of the article to go to its description:
1
Telegram groups/channels Application
Go to the “Applications" section. In the "All Applications" tab, a list of all possible applications for connecting to your account will be available.
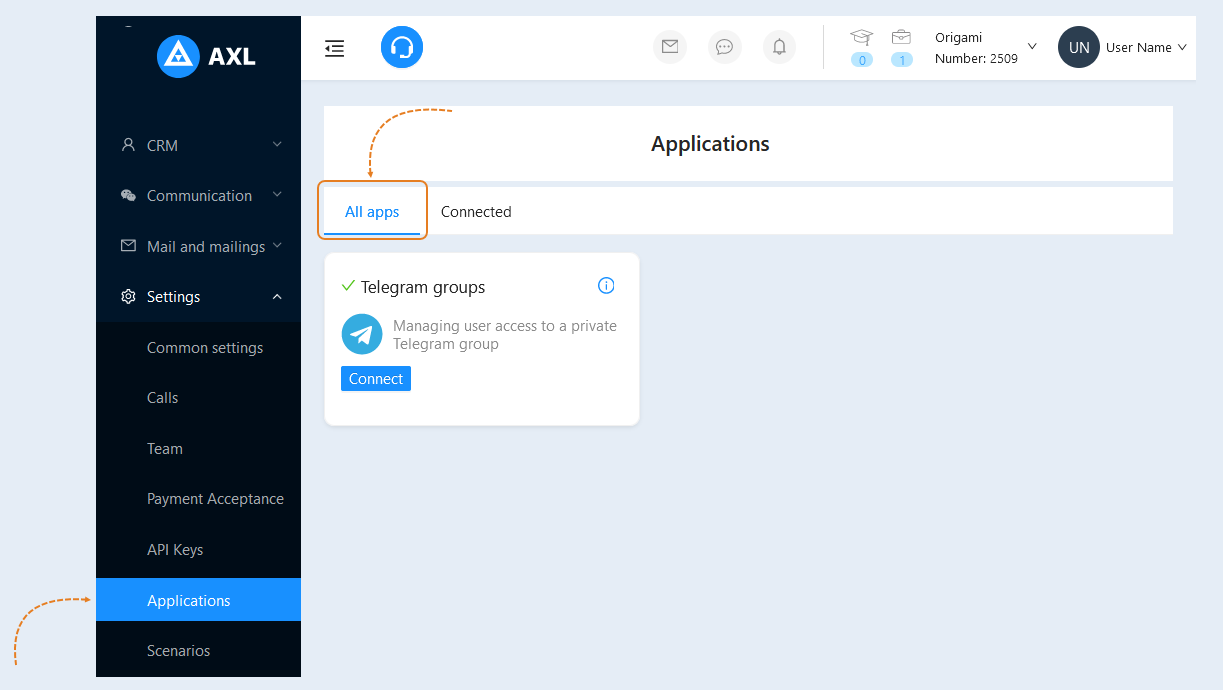
To connect the Telegram groups/channels application, you first need to create a new bot. If you want to use an existing bot, its early settings will no longer work. Therefore, we recommend creating a new bot.
2
Creating a Telegram bot
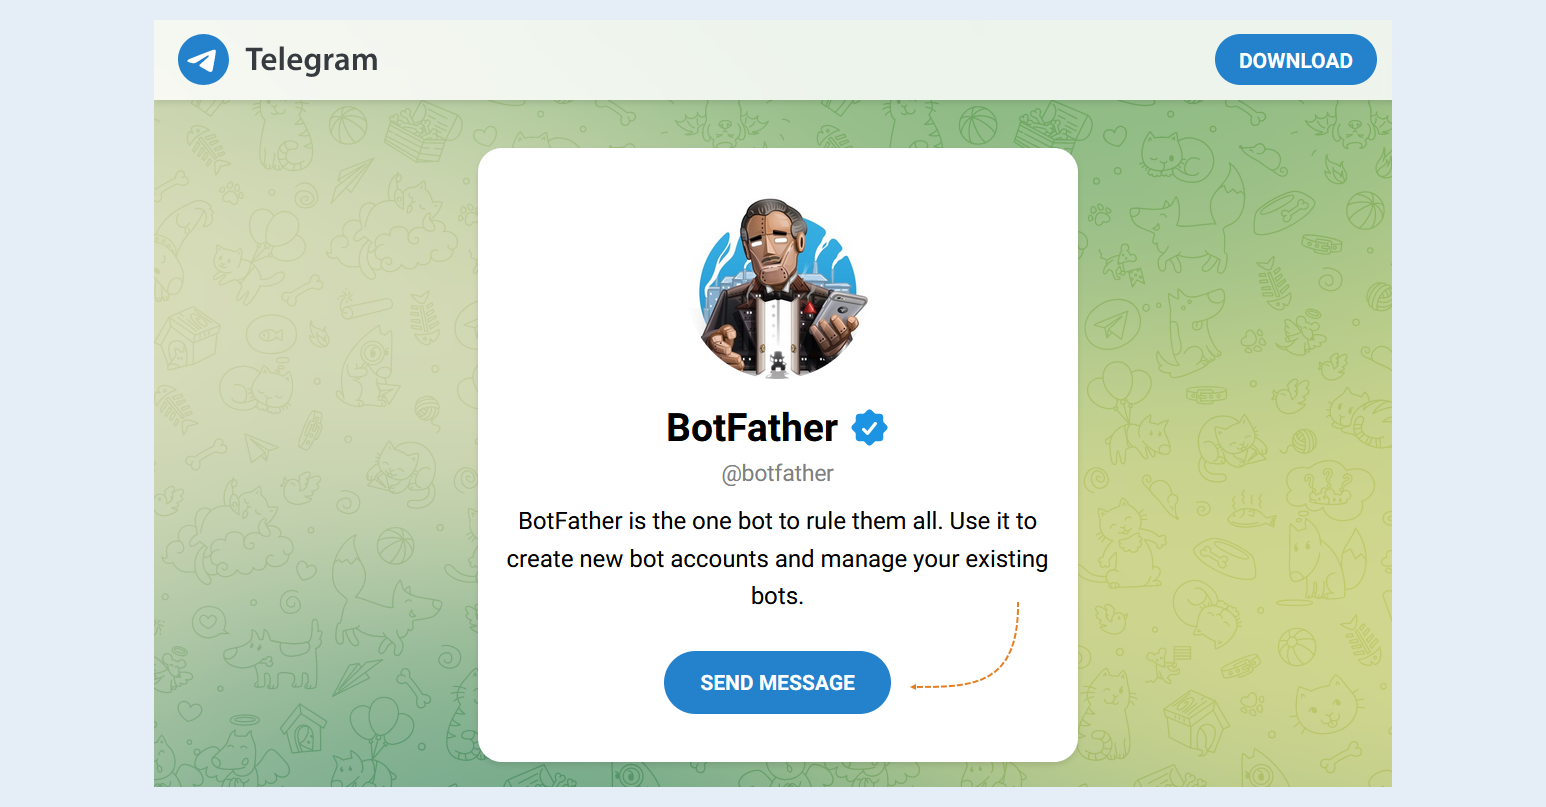
A new bot in Telegram is created using another bot called BotFather. Follow the link. Click the "Send Message" button and open the app in Telegram Desktop.
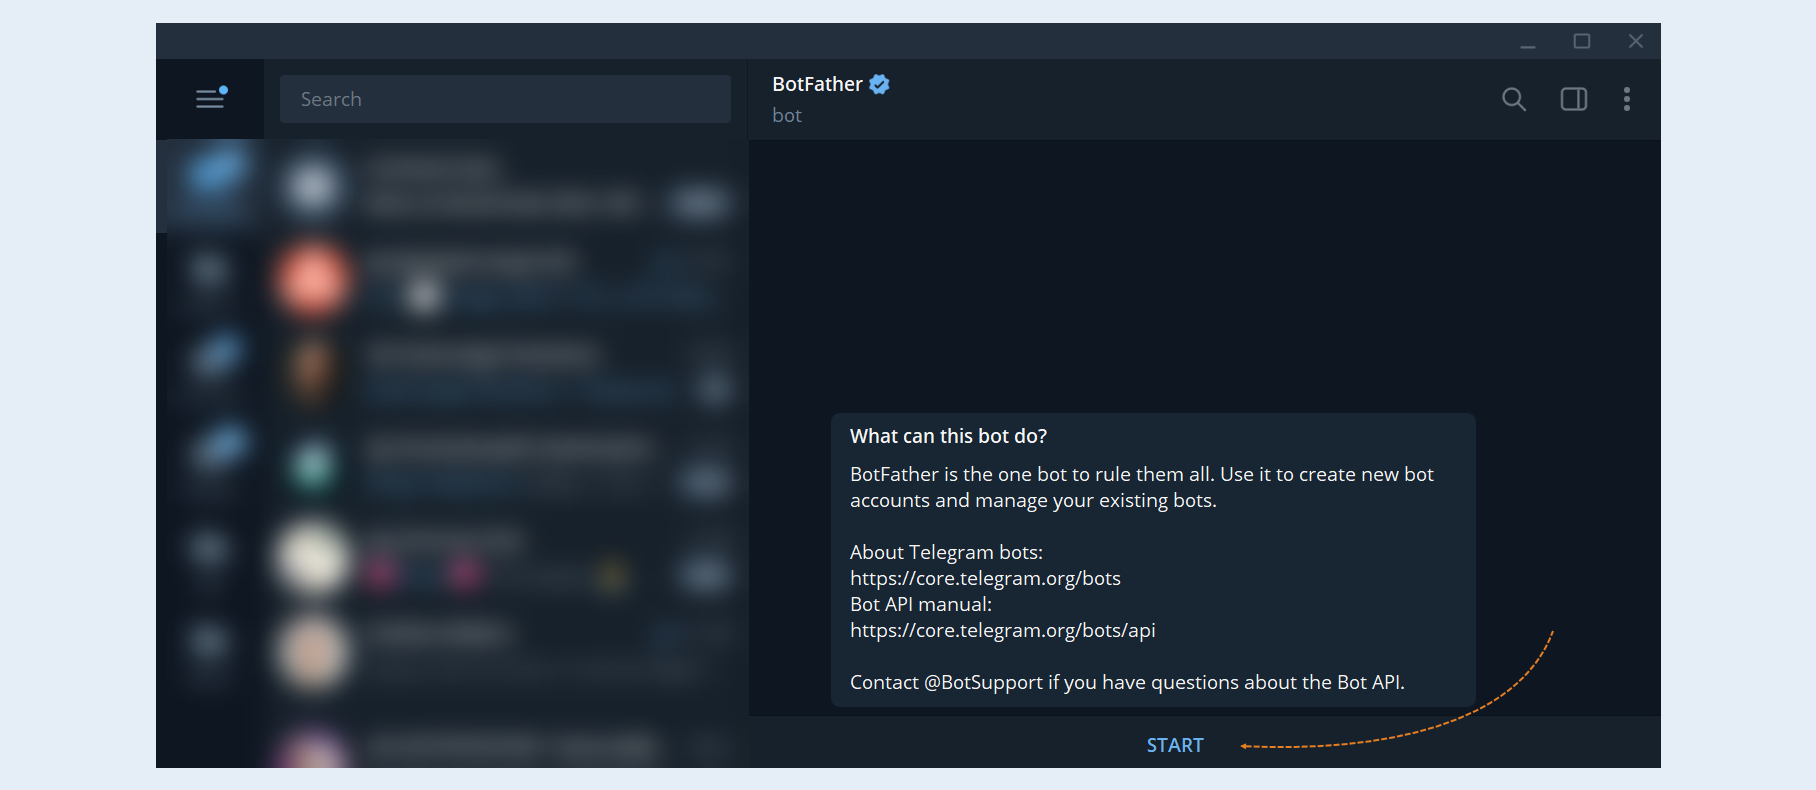
Go to telegram and start the bot by pressing /start.
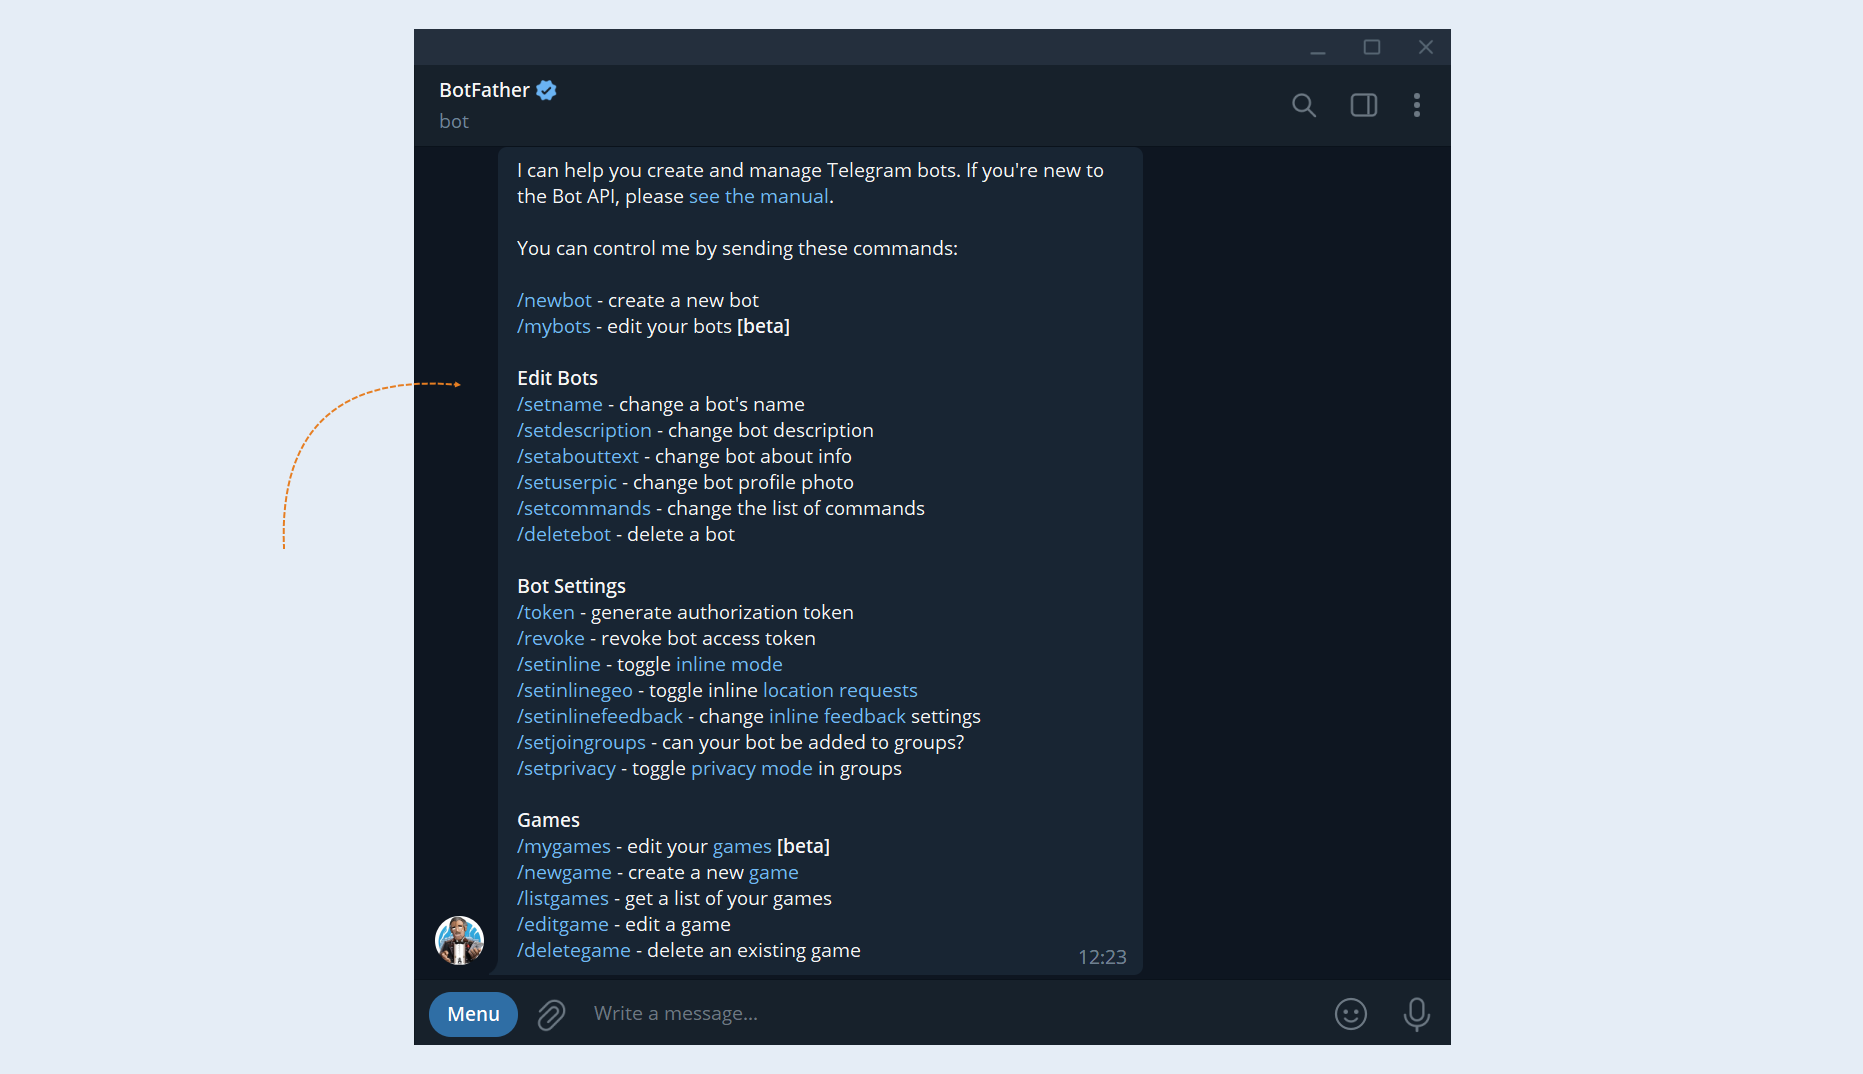
This will open the bot menu. All possible commands for the bot are listed here. You need to select the /newbot command.
After that, you are prompted to enter a name for your
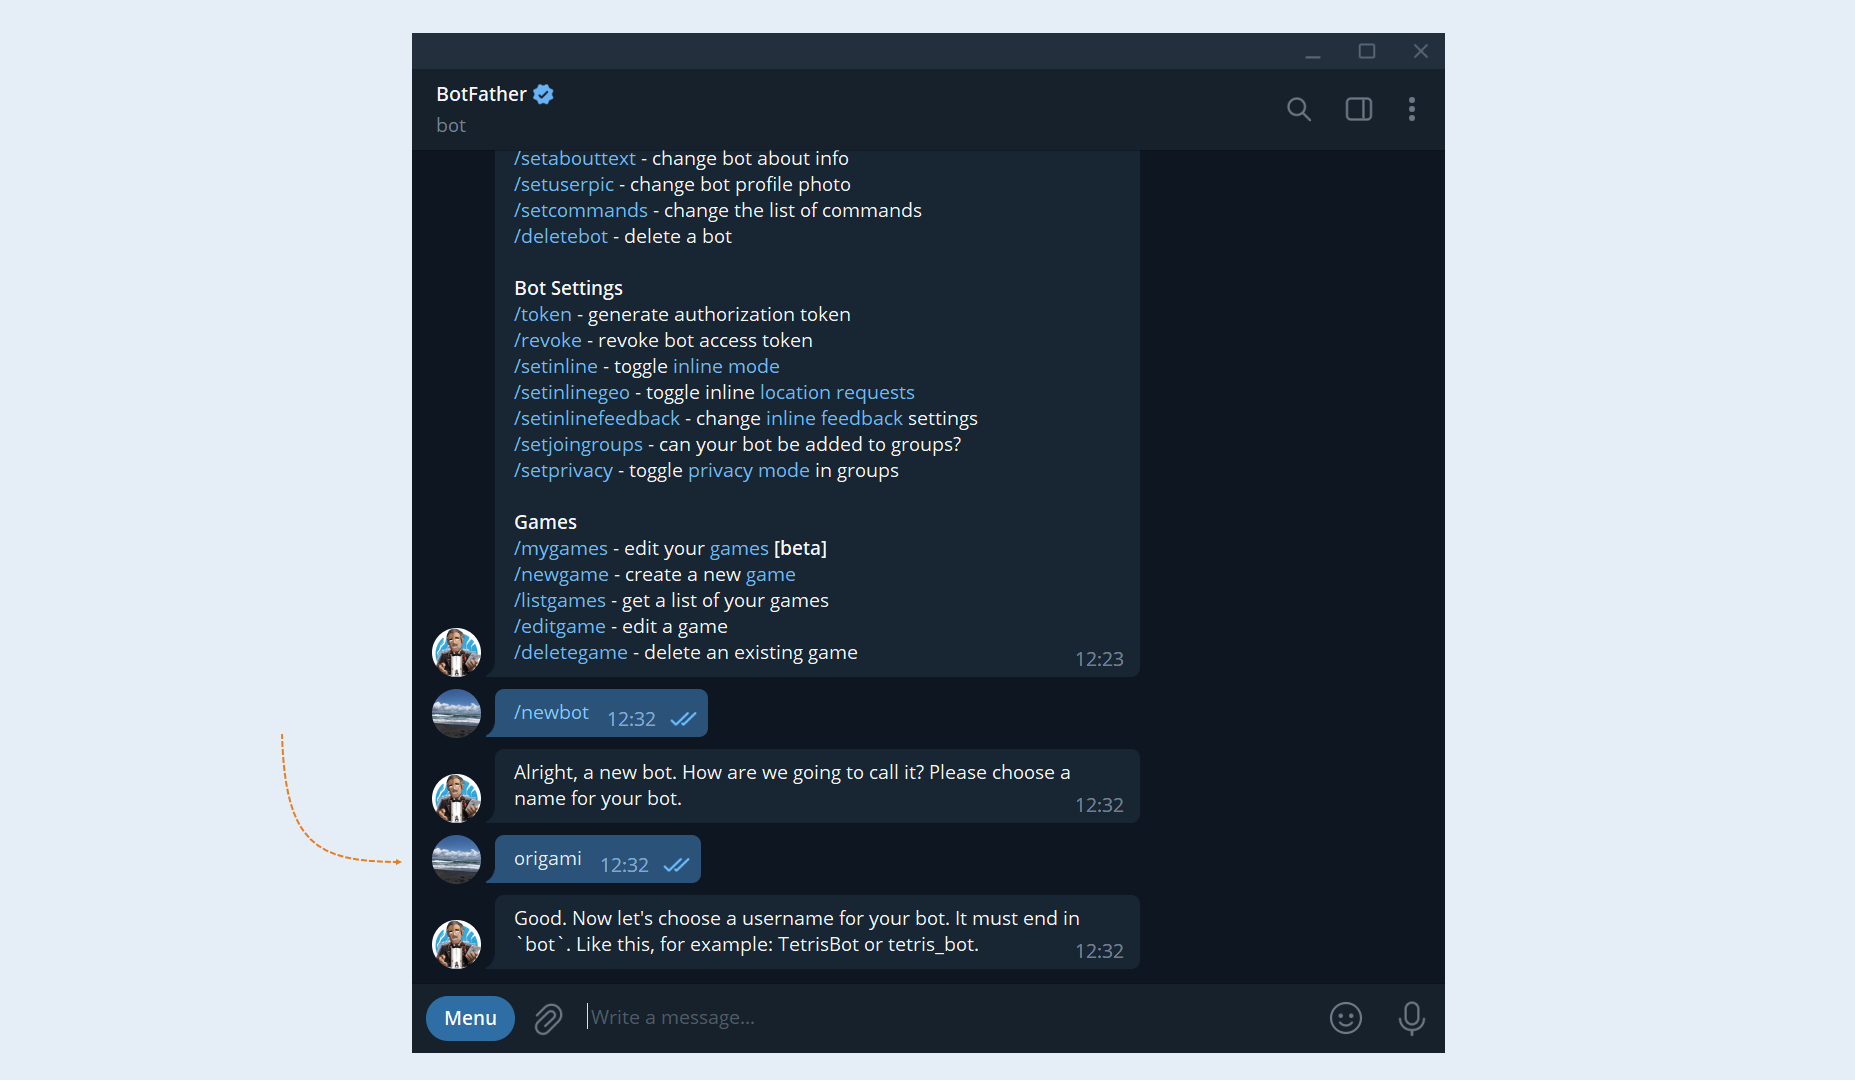
If the name is approved by the bot, then you need to enter the login for your bot. Login must be unique and end with the word "bot". If the login you have chosen is already taken, then try changing the wording.
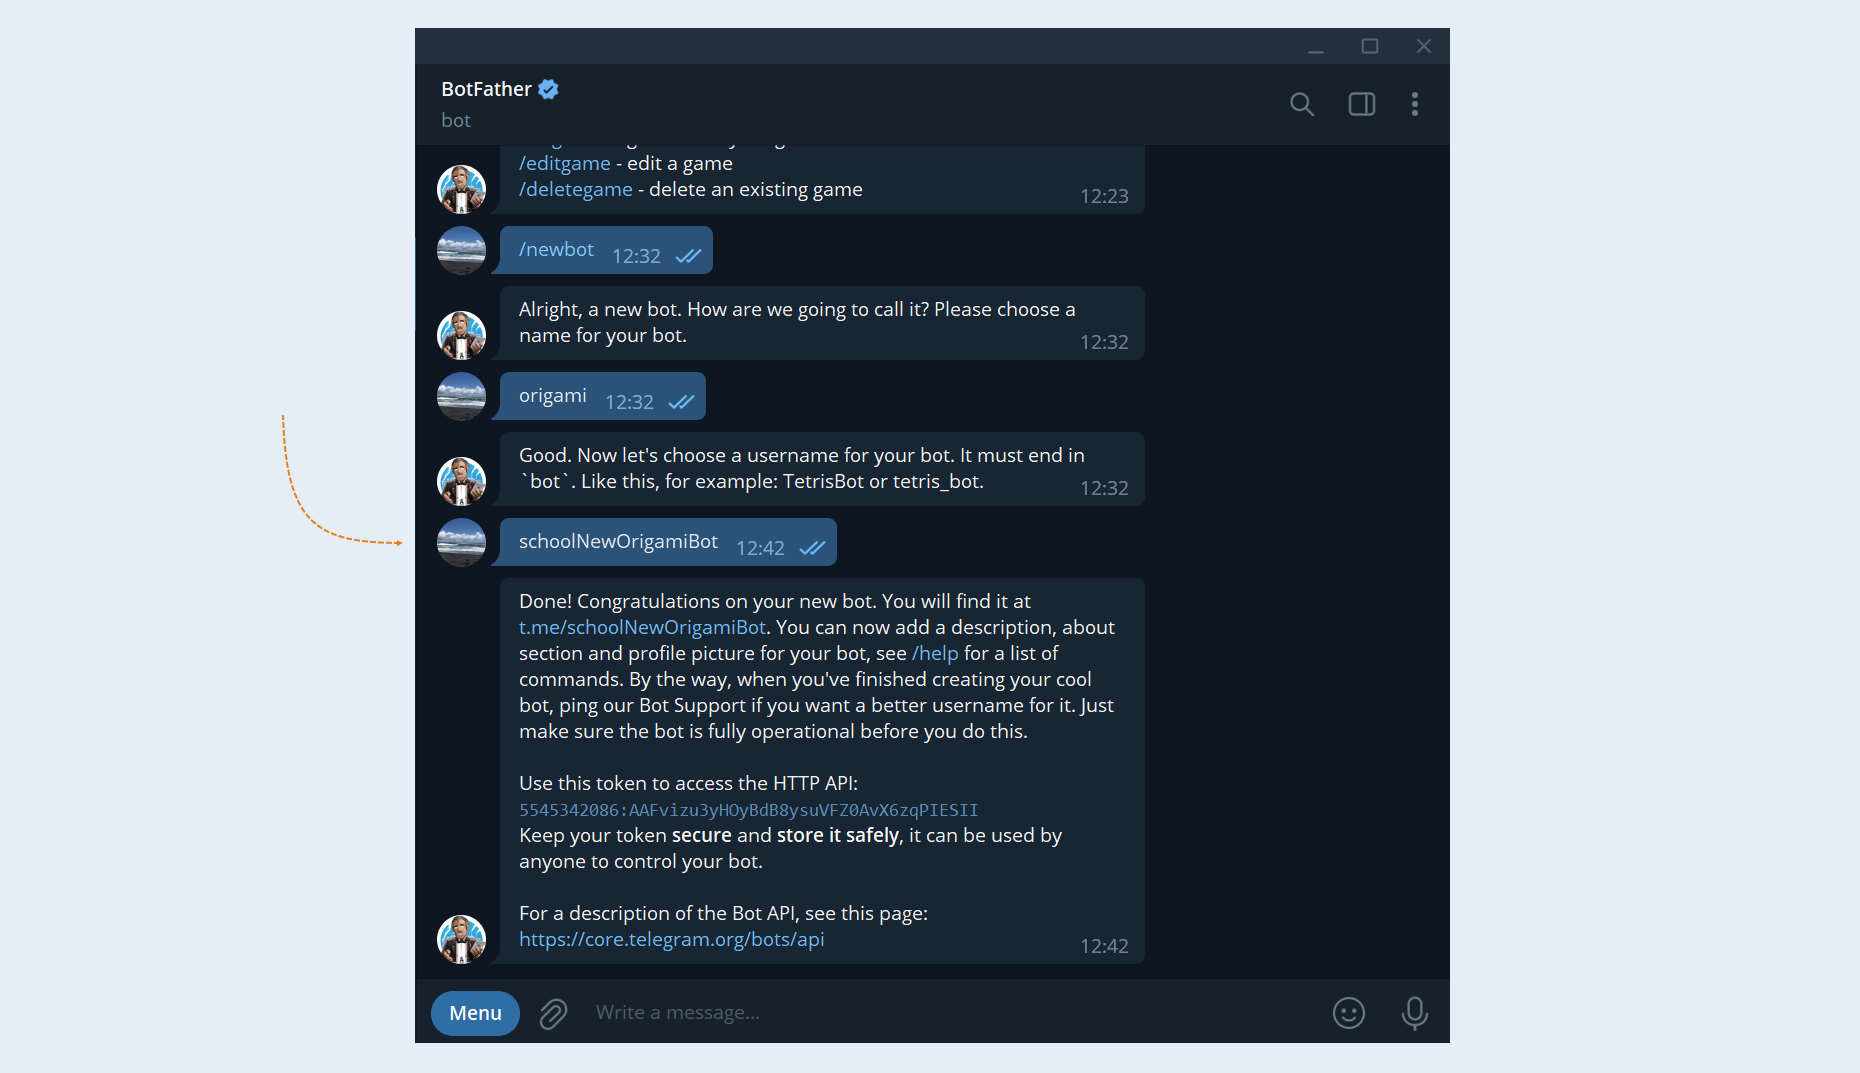
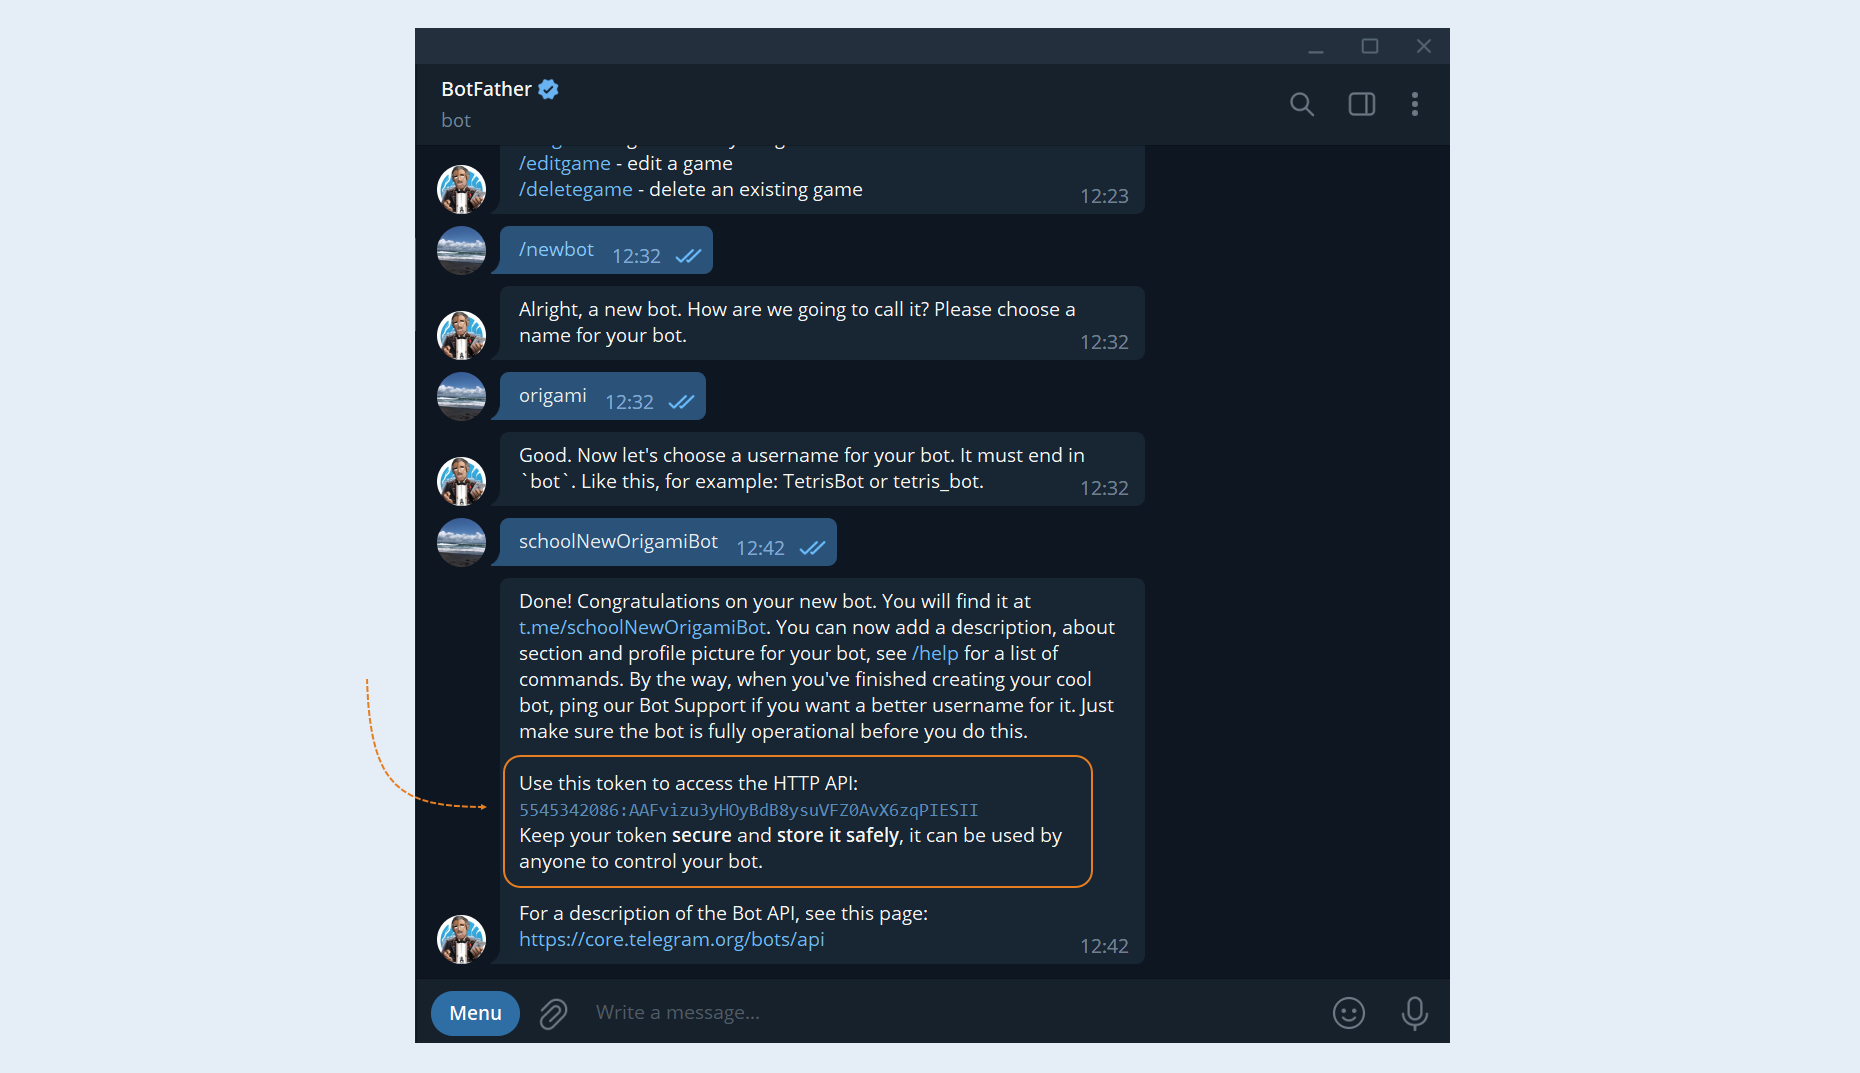
After the bot approves the login, you will see a message. The message will contain a link to your bot, as well as a token that must be attached when connecting the application in step № 3 of this article. Copy this token.
3
Connecting Telegram to AXL
Then return to the AXL platform. Go to the "Settings" section, the "All Applications" tab. In the Telegram groups/channels application window, click the "Connect" button.
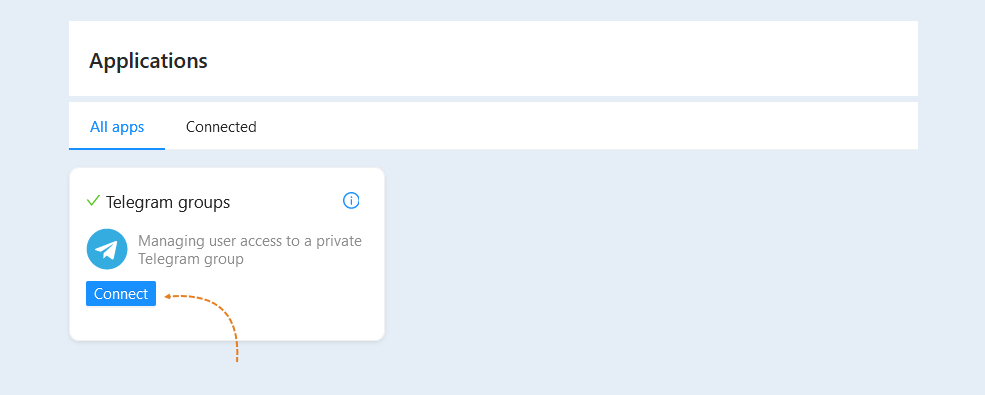
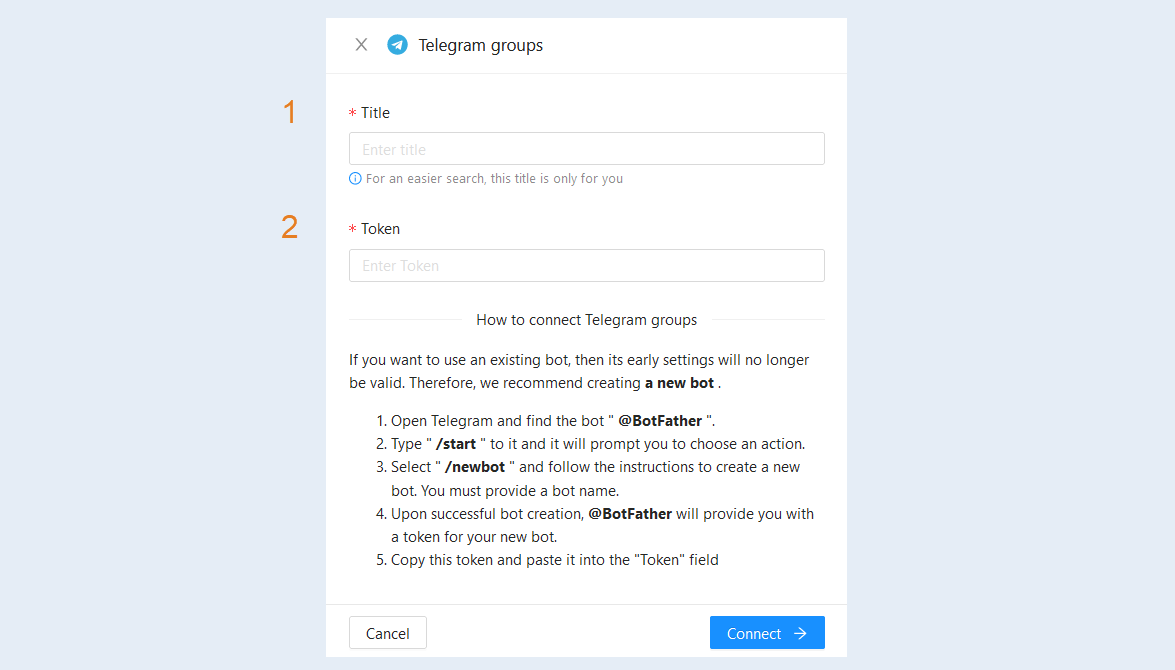
In the window that opens, fill in the fields:
- Title. Enter the name of your bot.
Token. Insert the token value from BotFather, copied in step №2 of this article, into this line.
Click the "Connect" button.
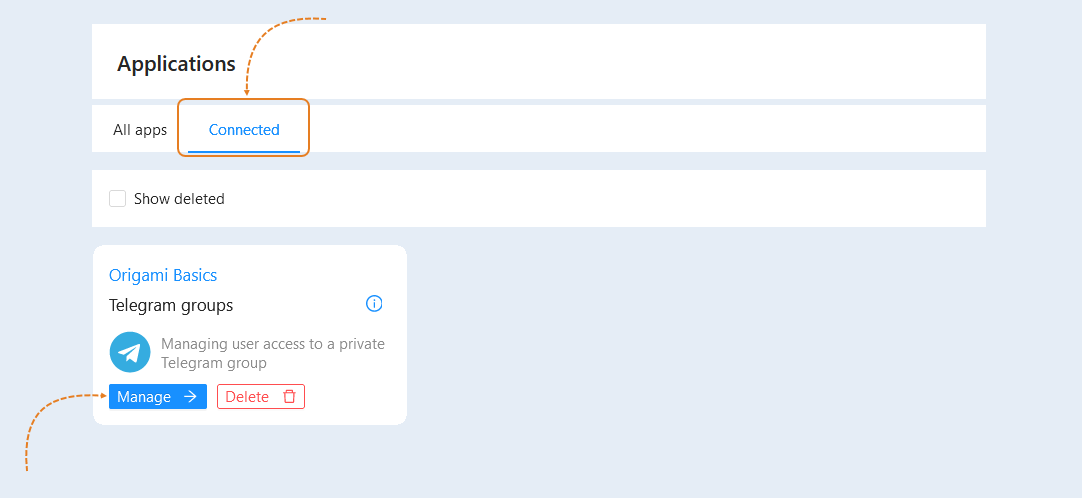
The "Connected" tab will display the connected Telegram groups/channels application. To continue the settings, click the "Manage" button.
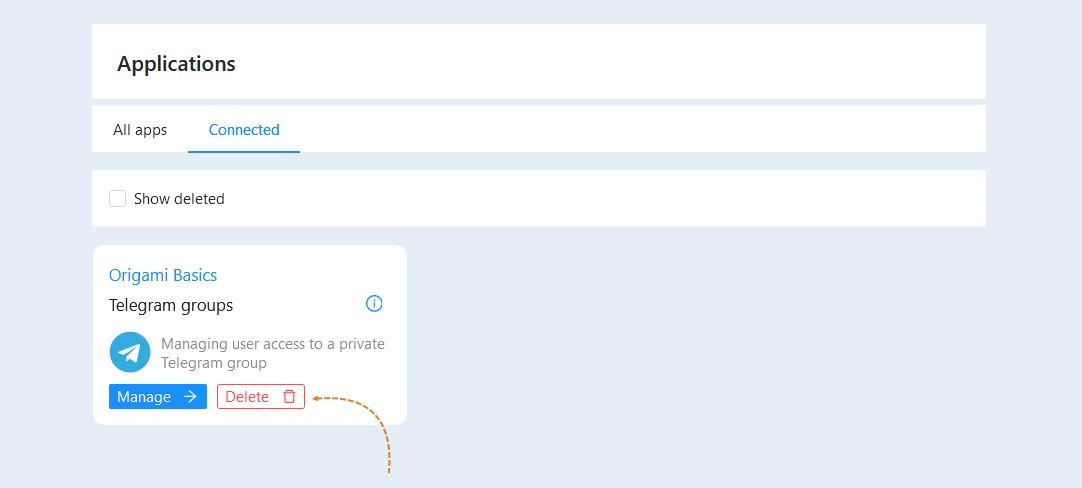
Click the "Delete" button in the card to delete the application.
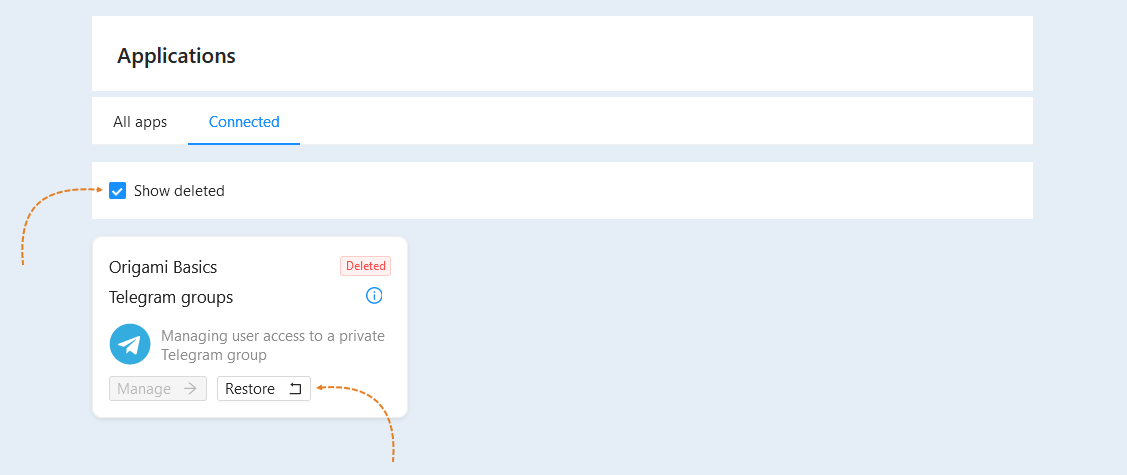
Check the "Show deleted" box to see the list of deleted applications. You can restore a previously deleted application.
4
Creating a Telegram group
The bot can manage several groups and channels. You can create the required number of groups. To do this, click the "Add group/channel" button.
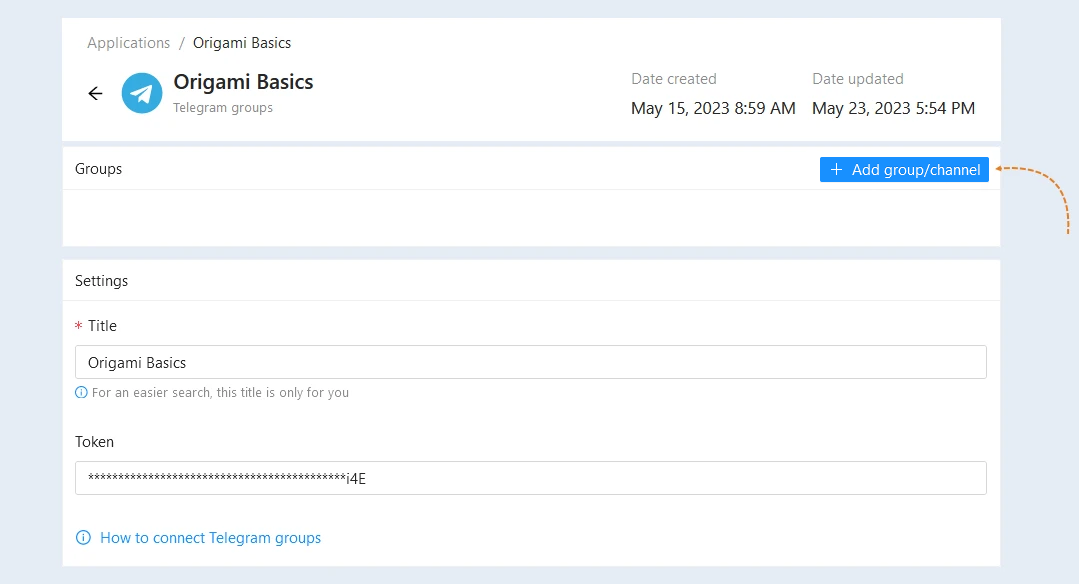
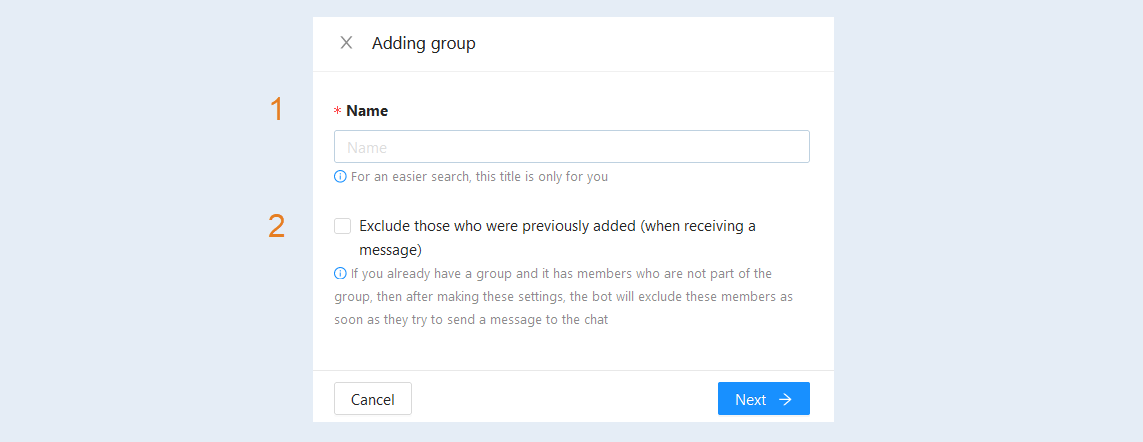
In the window that opens, fill in the fields:
- Name. Specify the name of the group.
Exclude those who were previously added (when receiving a message). If you already have a group/channel and there are members who are not part of the group/channel on the site, then after making these settings the bot will exclude these members as soon as they try to send a message to the chat.
Click "Next" and follow the instructions.
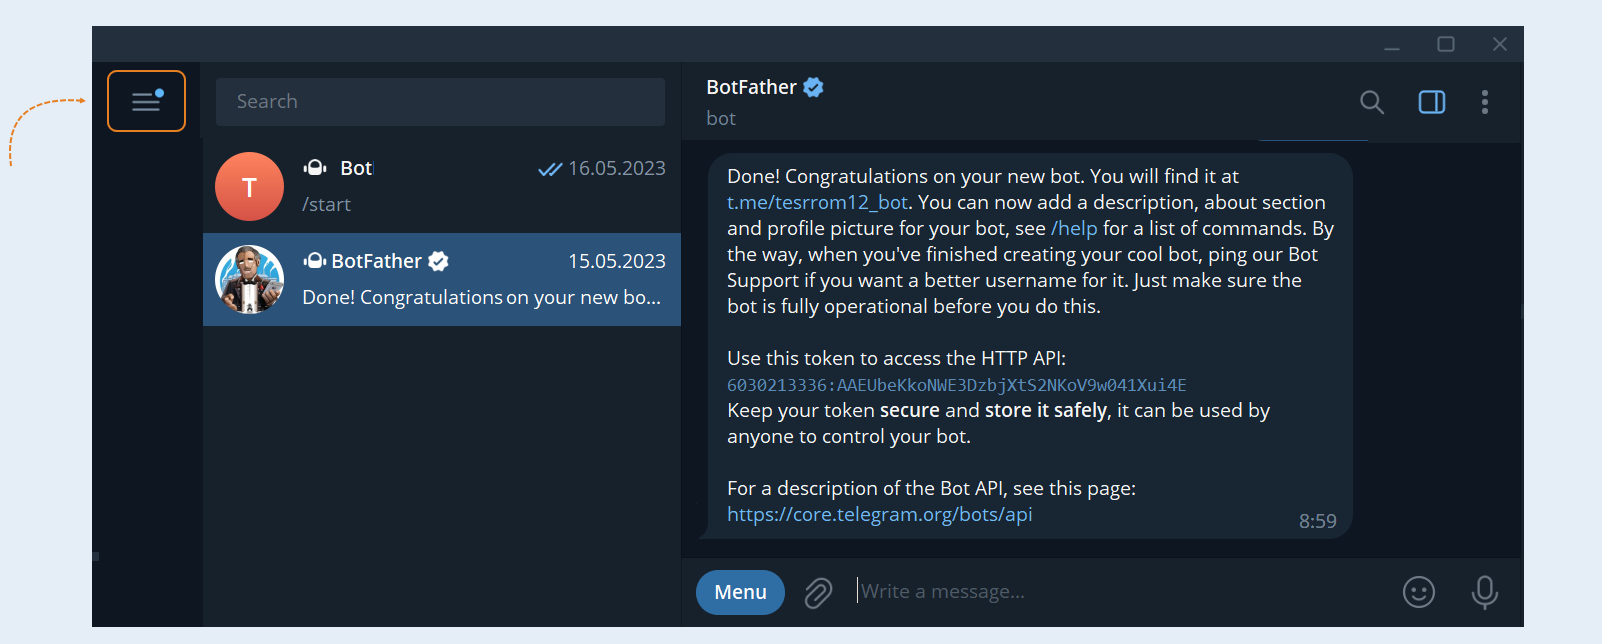
Open the Telegram app. Create a Telegram group for control, control is possible only for the group, not the channel. Click the Menu button.
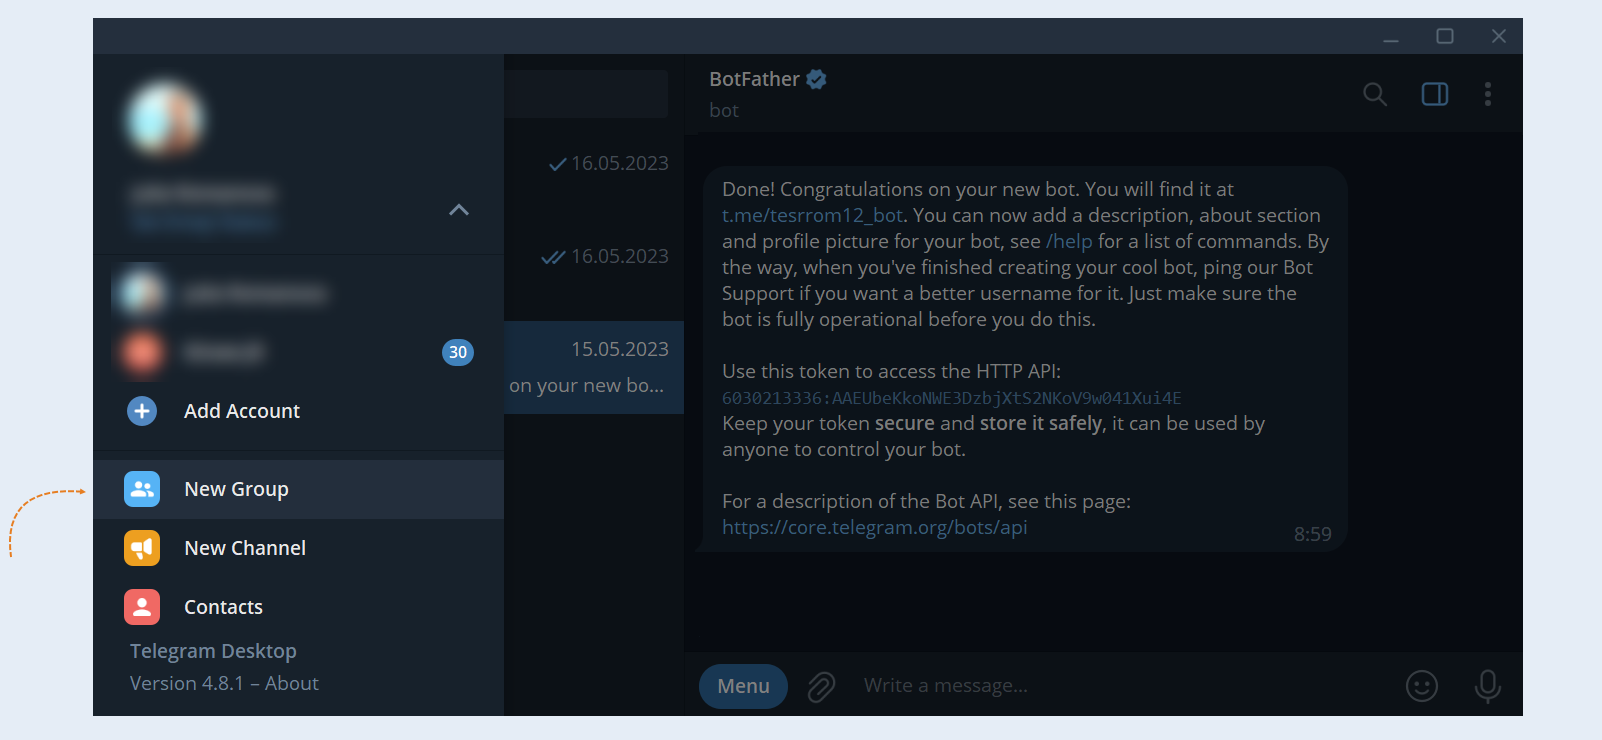
In the menu that opens, select the "Create Group" command. Next, specify the name of the group, add members to the group and click "Create".
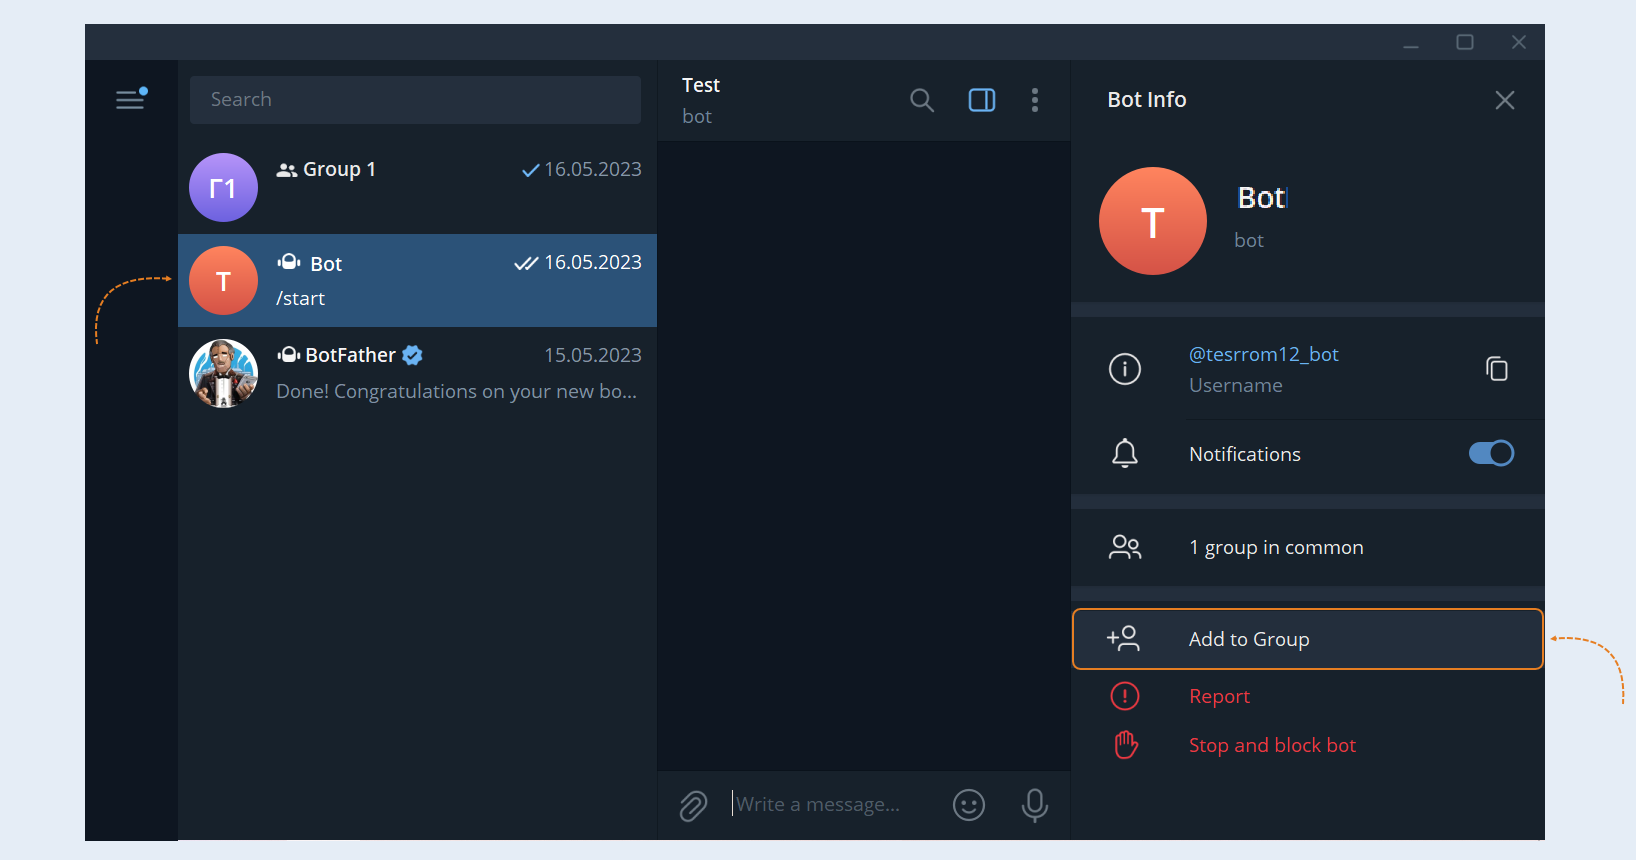
Next, add the bot to the created group. Open the bot, click the "Add Group" button and select the created group from the list.
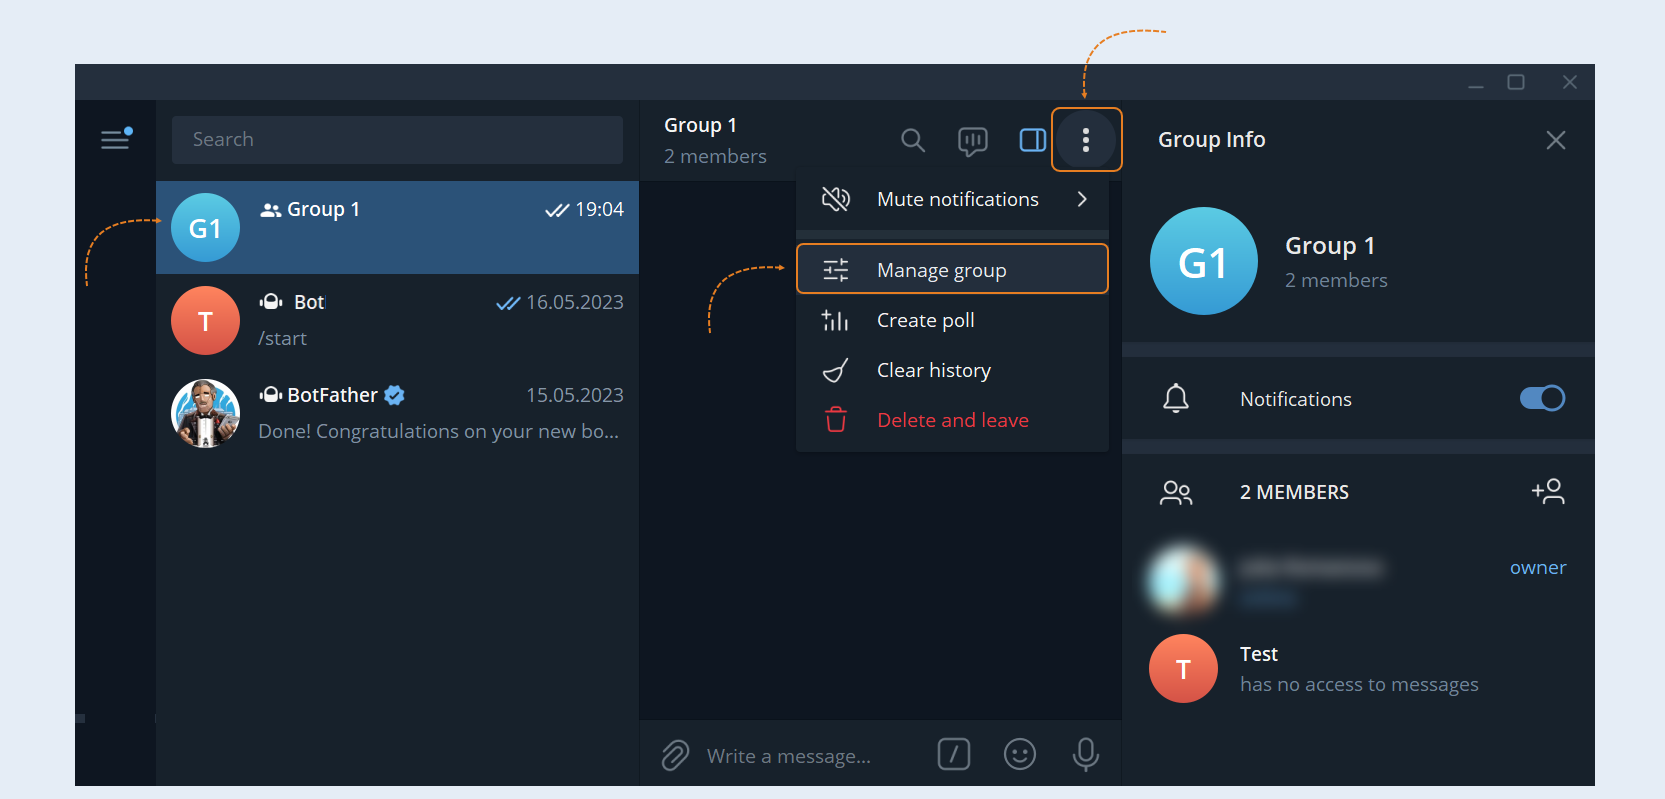
Open the created group. In the group settings, select the "Manage Group" command.
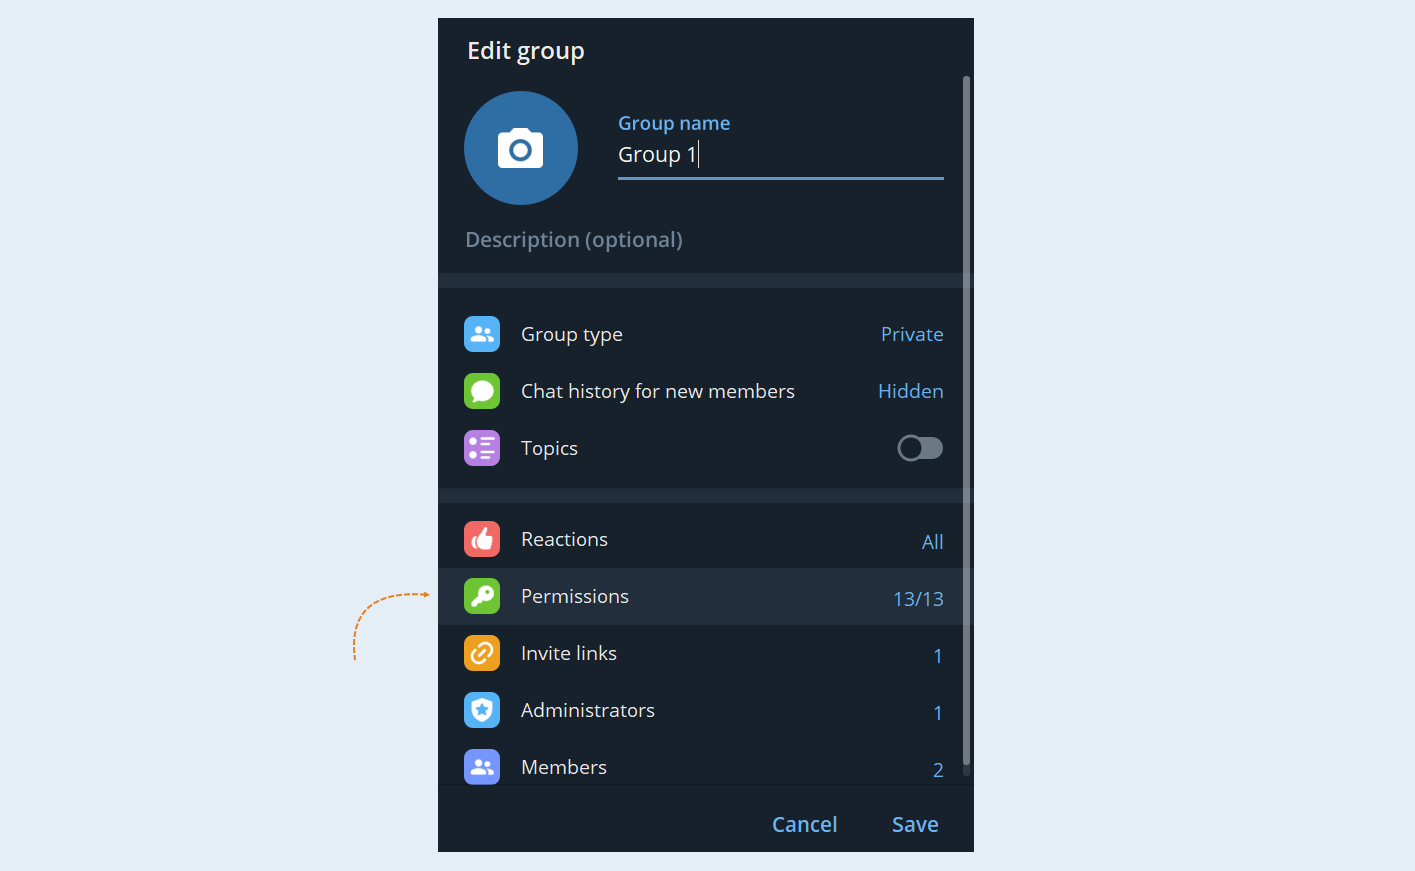
Be sure to change the group settings. In the "Permissions" section, disable the ability for group members to add others to the group and edit it.
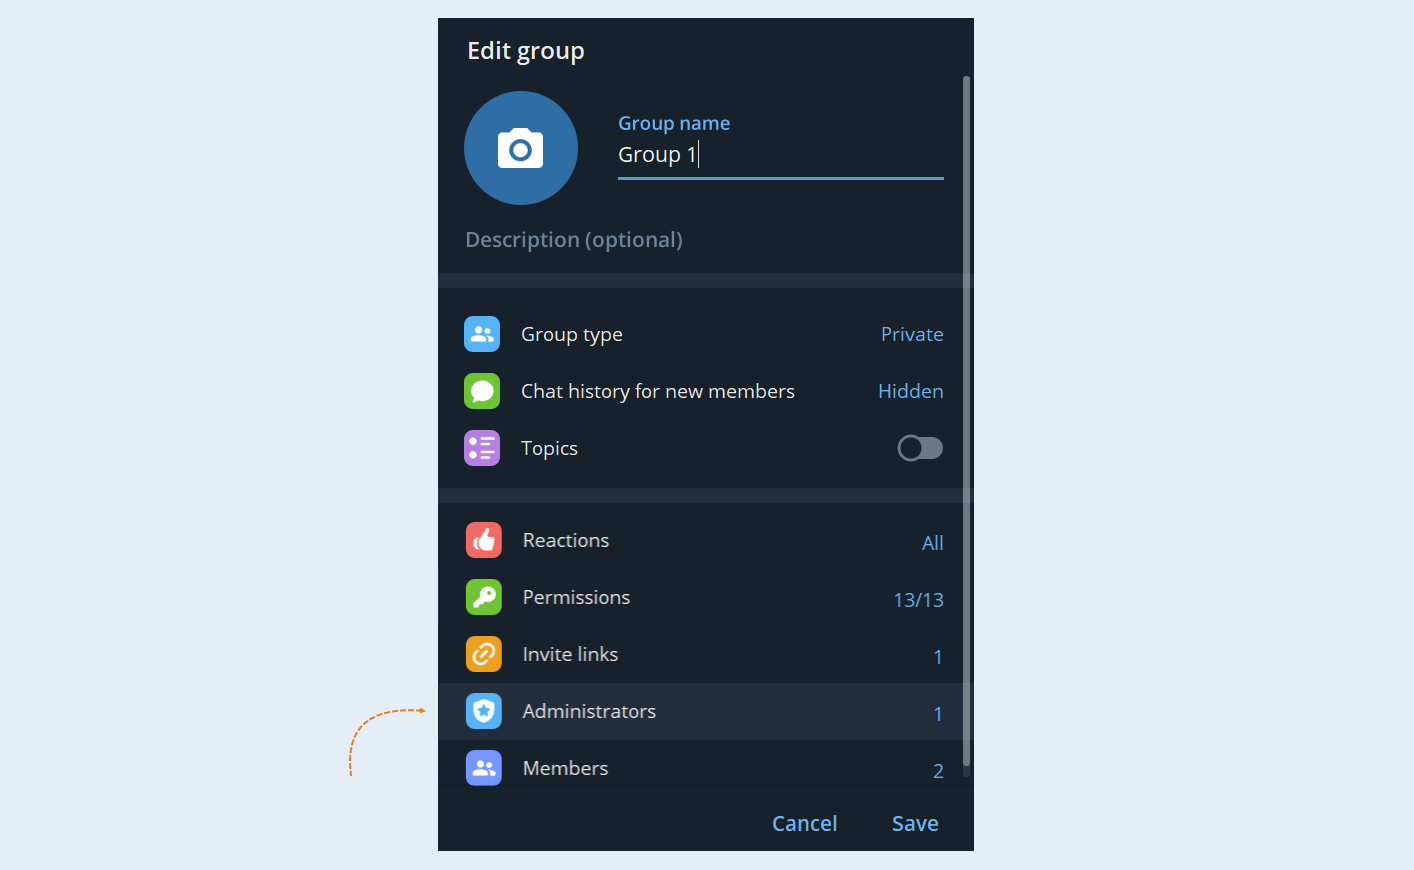
Go to the “Administrators" section and make the bot an administrator, with the rights “Stay anonymous“ (after connecting, you can remove this).
After completing the settings, go back to the AXL platform and copy the code from the "Adding Group" window. Send a message from yourself with the code to the Telegram group.
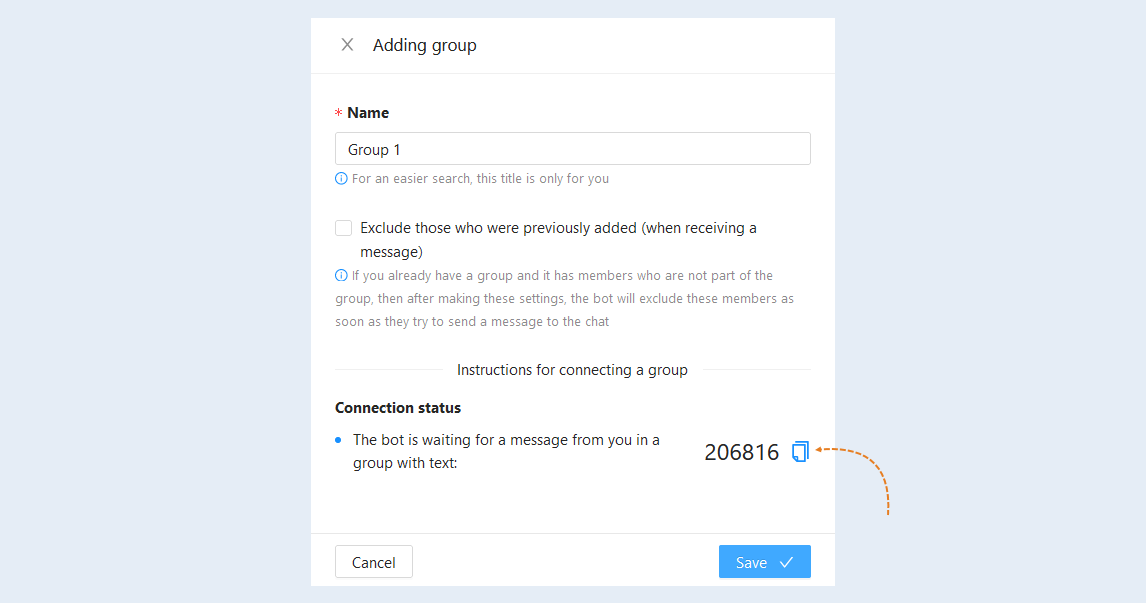
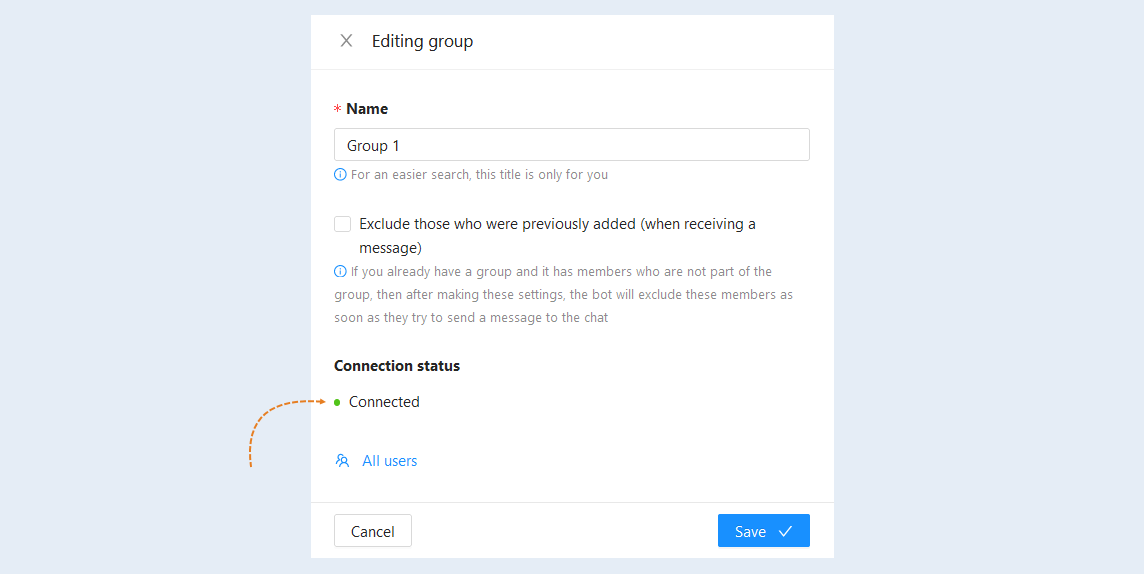
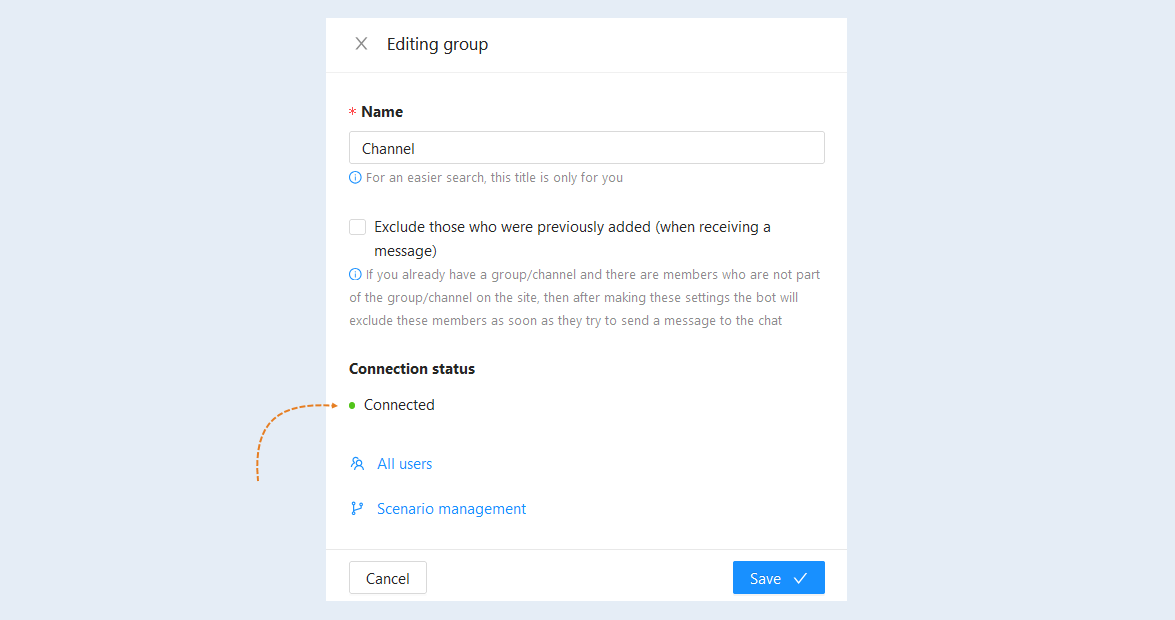
After the group is connected, its status will change to "Connected". Click the "Save" button.
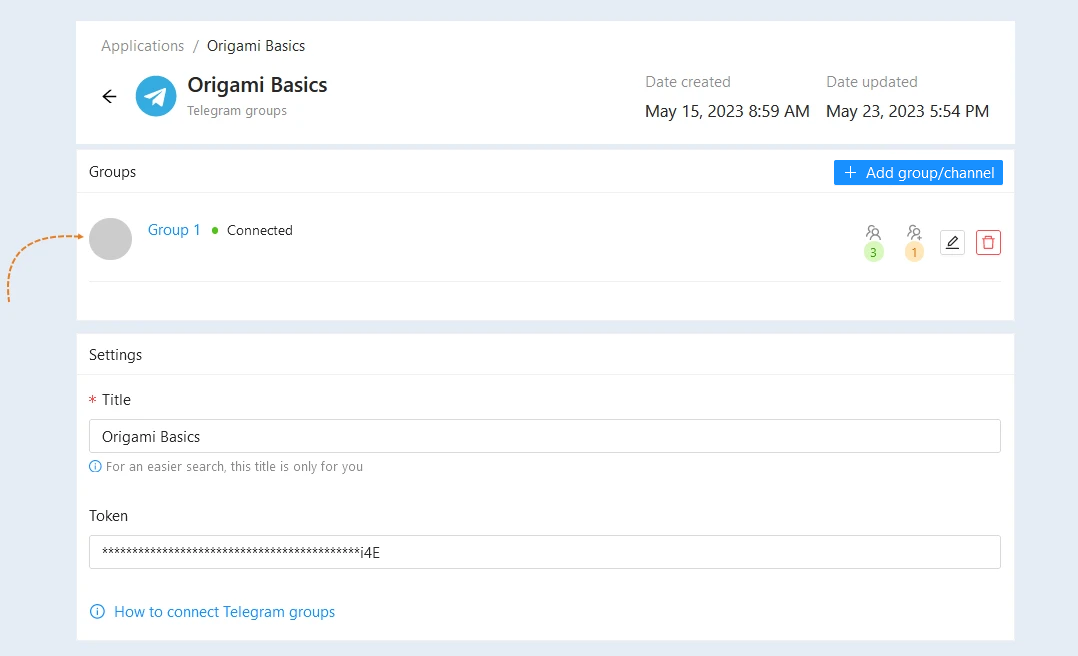
The group will appear in the list of groups/channels of the application.
5
Creating a Telegram channel
The bot can manage multiple channels. You can create any number of Telegram channels. To do this, click the "Add Group/Channel" button.
In the window that opens, fill in the fields:
- Name. Specify the name of the channel.
Exclude those who were previously added (when receiving a message). This option allows you to configure the bot's behavior when interacting with participants in the group or channel. If you already have a group/channel and there are members who are not part of the group/channel on the site, then after making these settings the bot will exclude these members as soon as they try to send a message to the chat.
Click the "Next" button and follow the instructions.
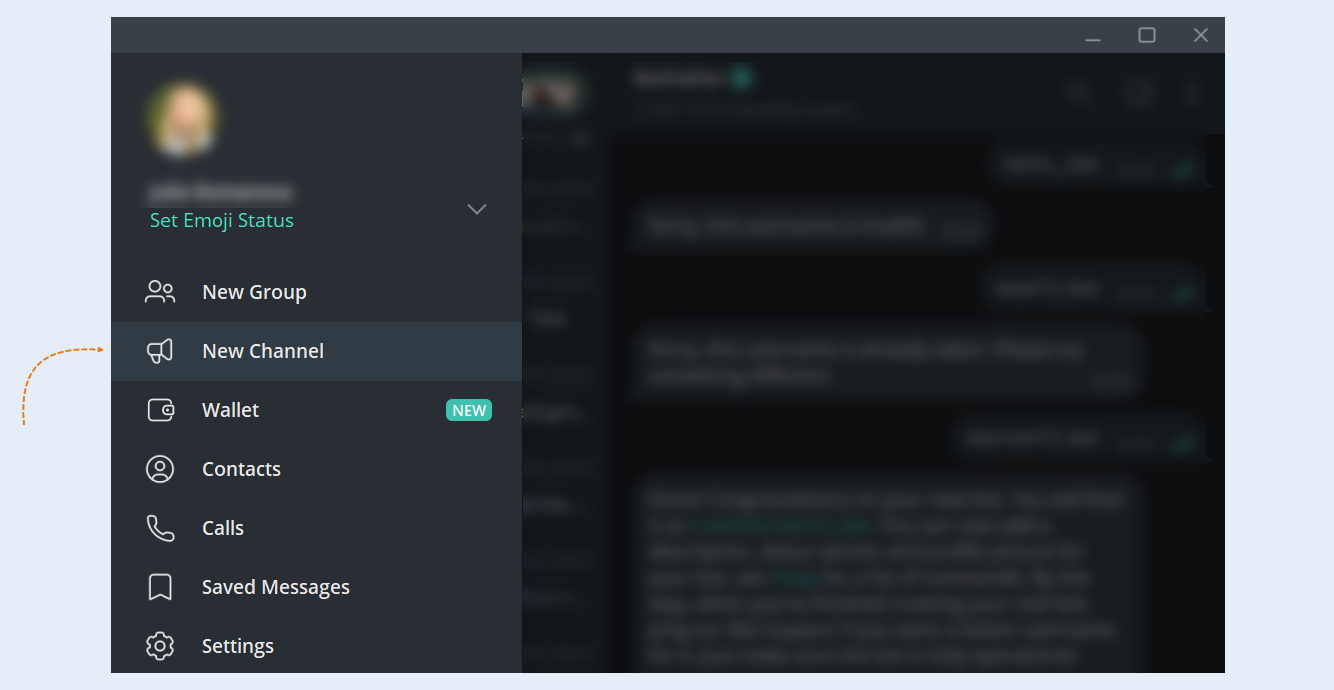
Open the Telegram app. To create a Telegram channel, click the "Menu" button.
In the menu that opens, select the "New Channel" command. Then specify the channel name, choose the channel type (public or private), add participants, and click the "Create" button.
Next, add the bot to the created channel. In the channel settings, select the "Manage Channel" command.
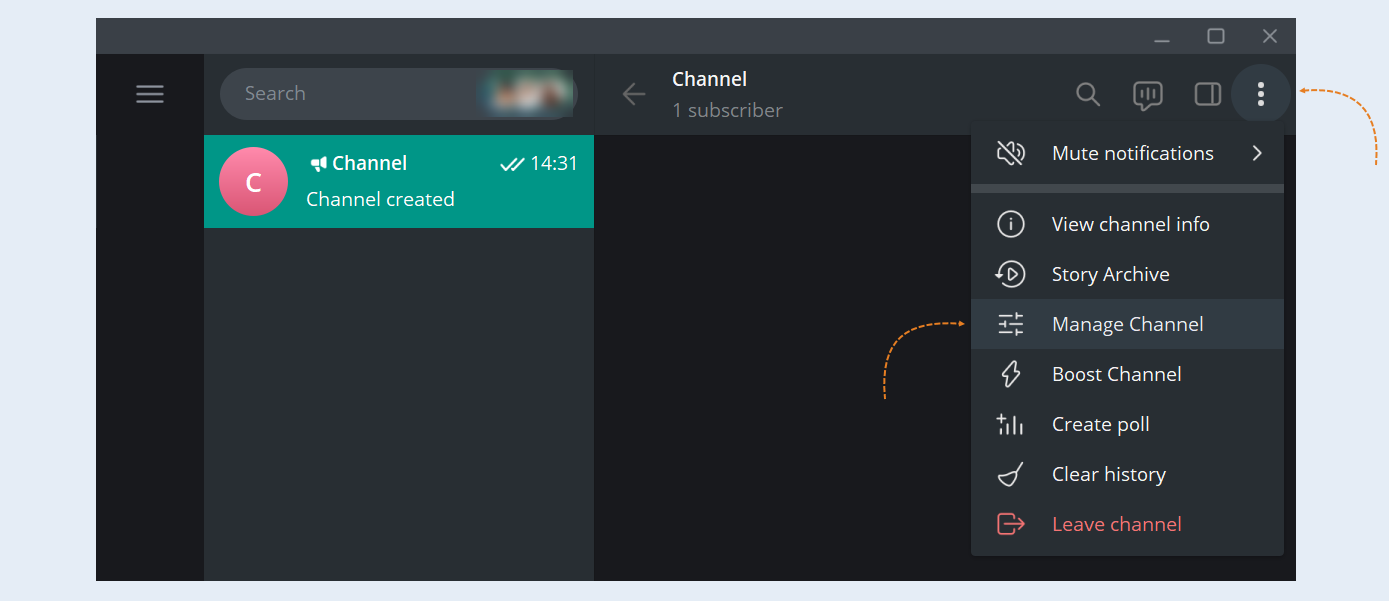
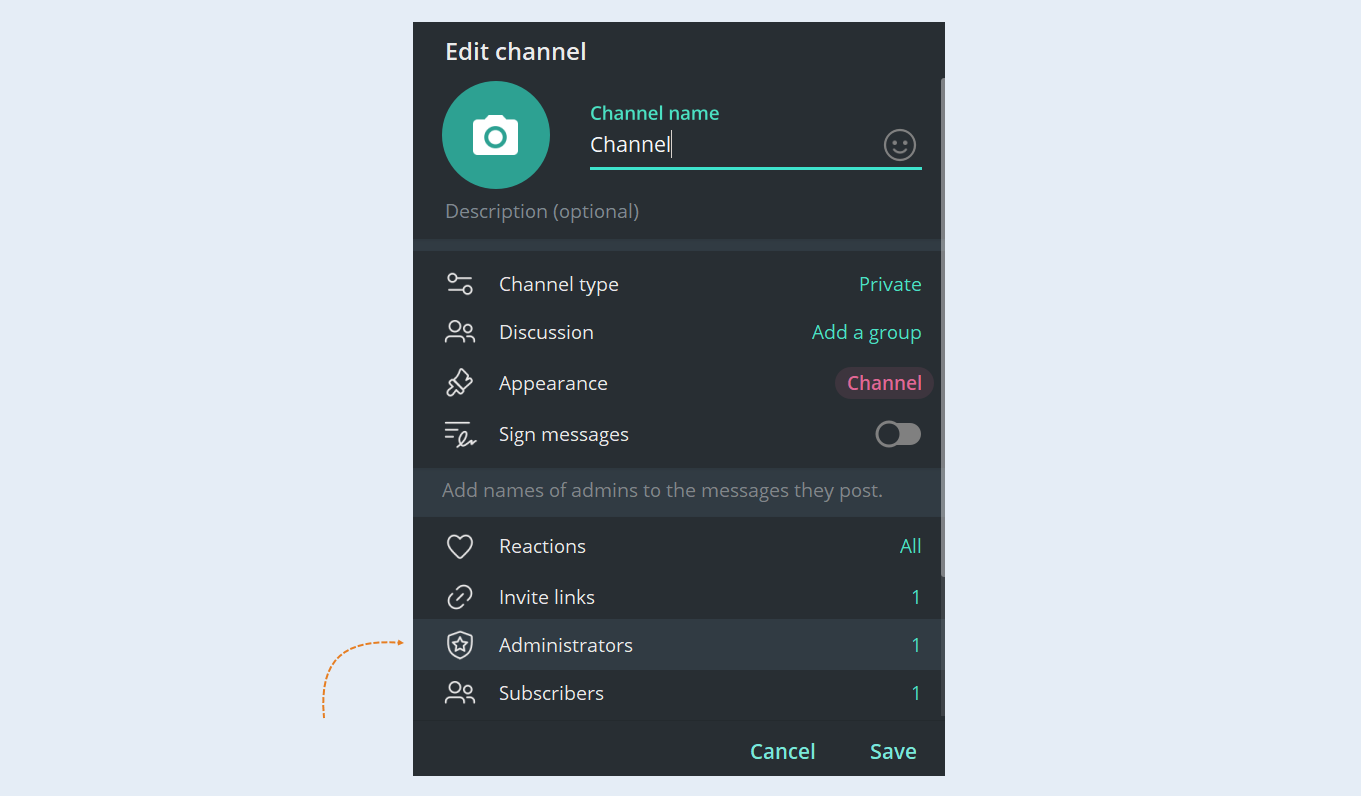
Go to the "Administrators" section and make the bot an administrator.
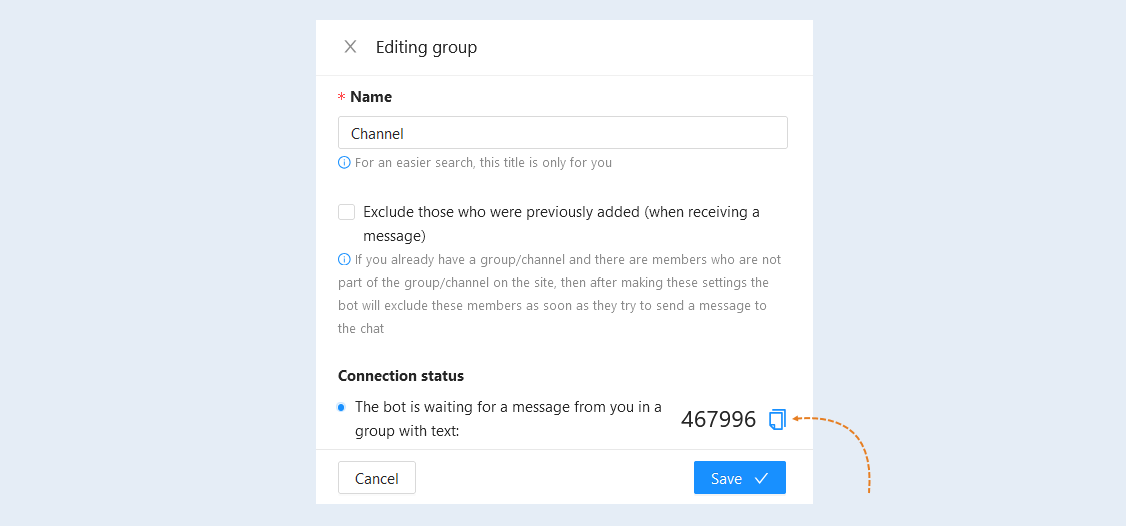
After completing the settings, return to the AXL platform and copy the code from the "Add Group/Channel" window.
Send a message with the code to the Telegram channel.
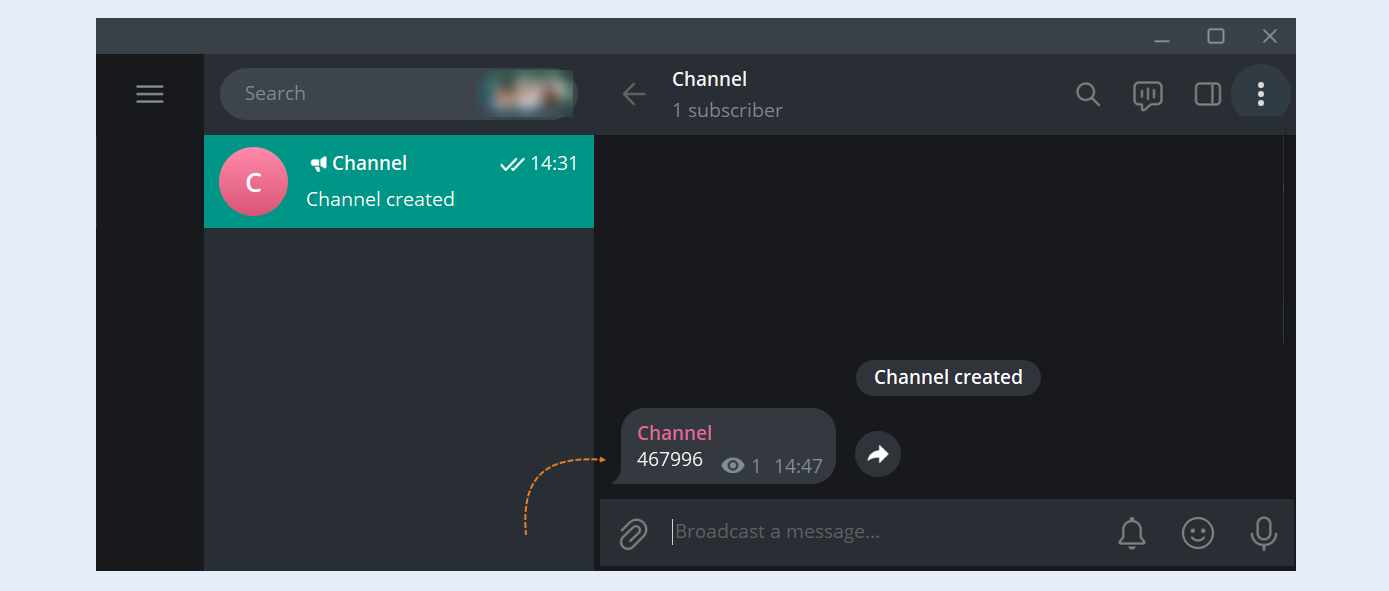
After this, the status of the channel will change to "Connected." Click the "Save" button.
The channel will appear in the list of groups/channels in the app.
6
Creating an invitation link to a group/channel
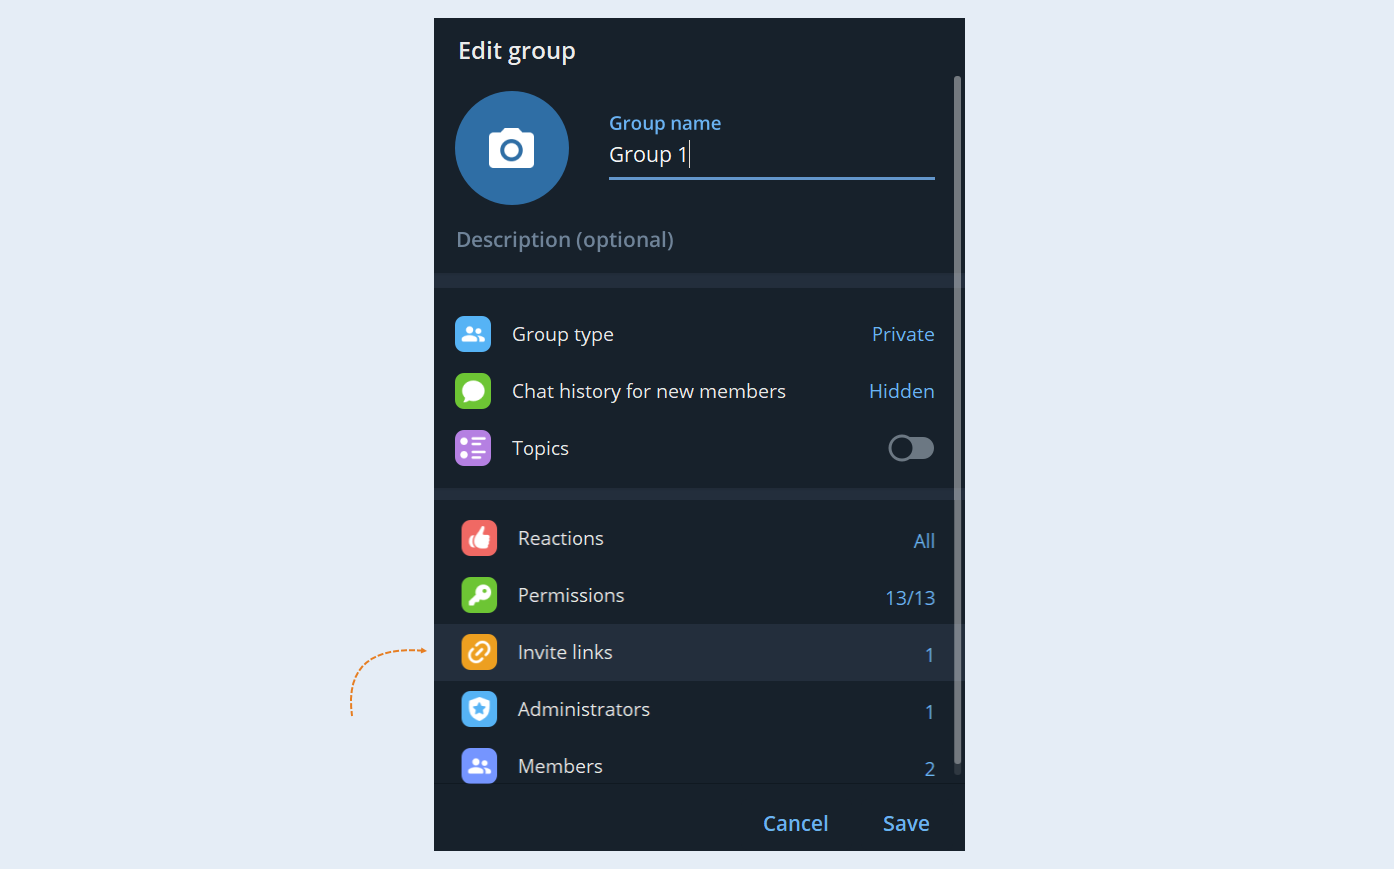
Open the Telegram app. Open the created group/channel, click "Manage group/channel" in the group settings.
Select the "Invite Links" section.
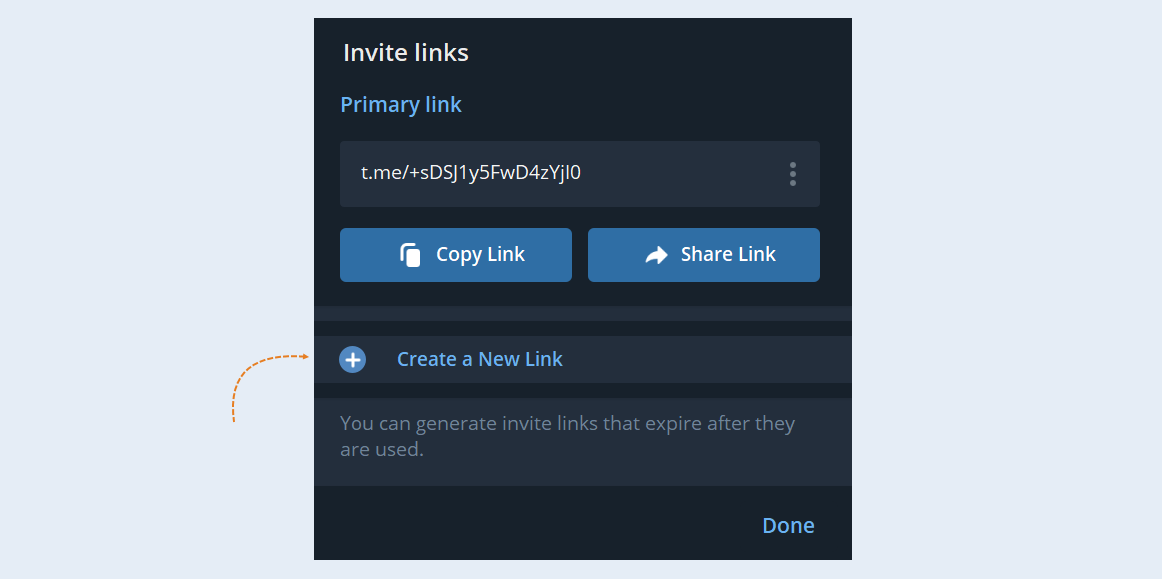
Click the "Create a new Link" button.
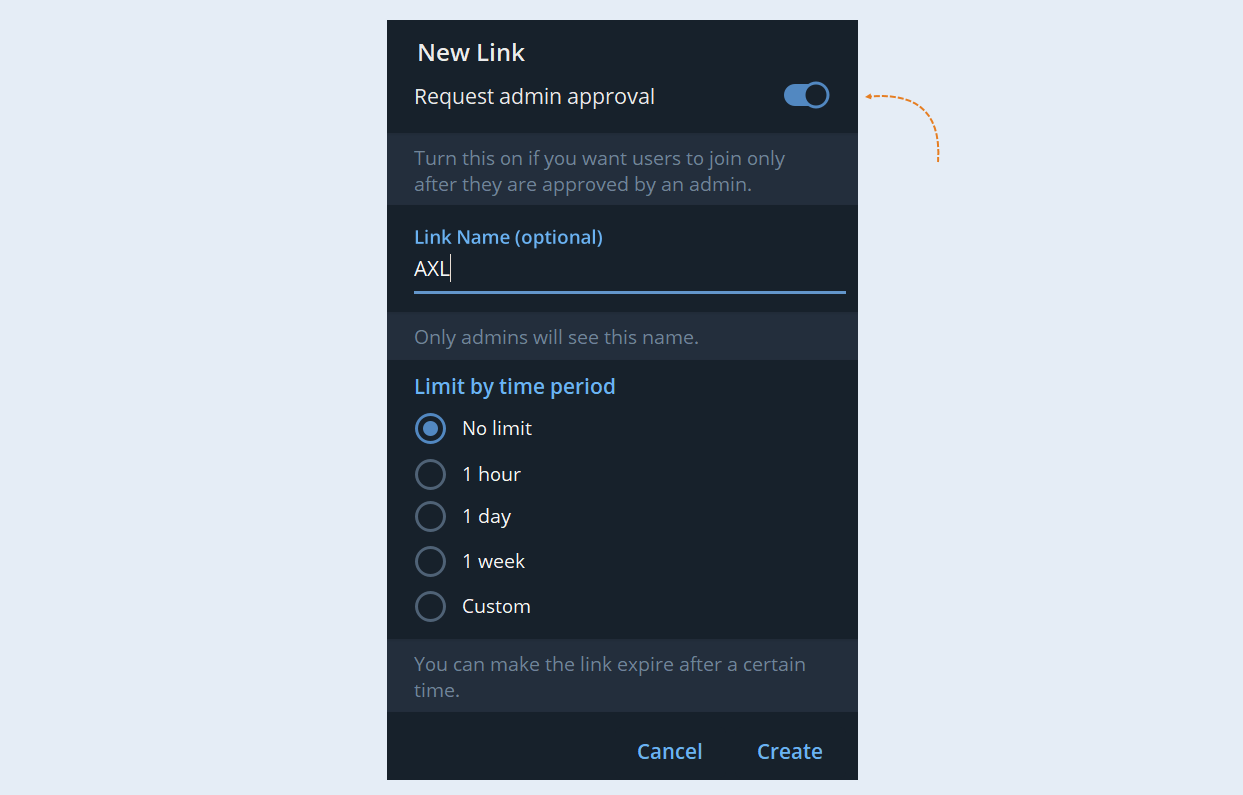
To create an invitation link that requires approval, move the "Request admin approval" slider to the active position. Specify the name of the new link. Click the "Create" button.
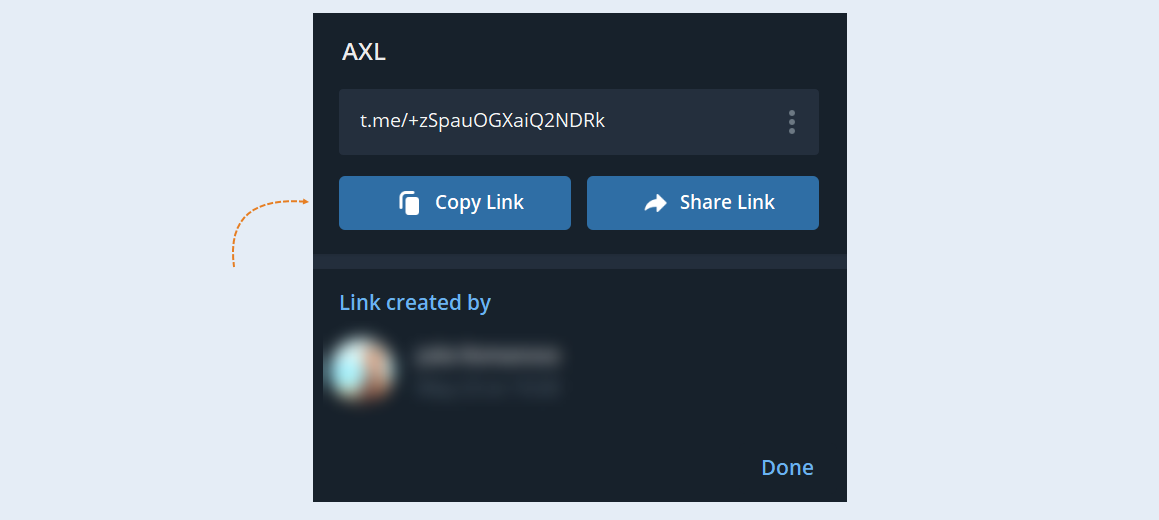
Copy the link and send it to the users you want to invite to the group/channel. You can send the link manually or using any script, via a regular message or by mail.
7
Managing users of a group/channel
The following actions are available to you in front of each group or channel:
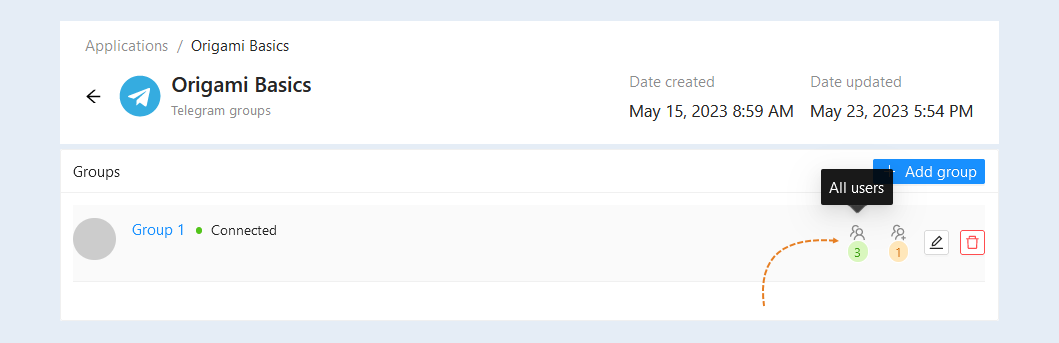
- All users. Click to open a list of all the users in the group/channel.
Pending users. Click to open the list of users who are waiting to be added to the group/channel.
Scenario management. Click to open and configure the group/channel Scenario. A Scenario is a predefined sequence of actions that are performed automatically in response to certain events, such as sending messages to a group or channel. These actions may include interacting with users, providing information, surveys, notifications, as well as sending training materials and performing other tasks. For more information about the scenario settings, read the article "Scenario".
Manage Group. Click to open the group/channel settings.
Remove. Click to delete the group/channel.
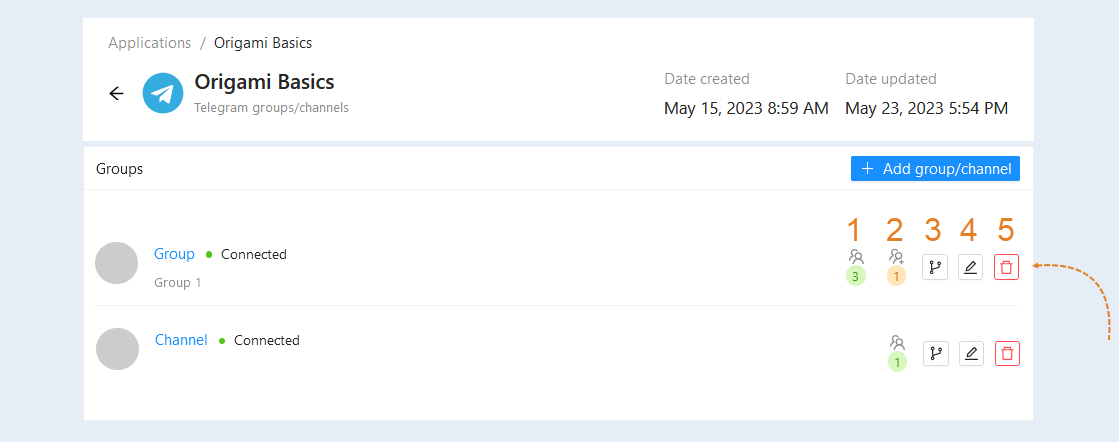
Click the "All Users" button. You will see the "Manage Users" window with a complete list of all users in the group. Here you can add users who have followed the invitation link and are waiting to be added to the group.
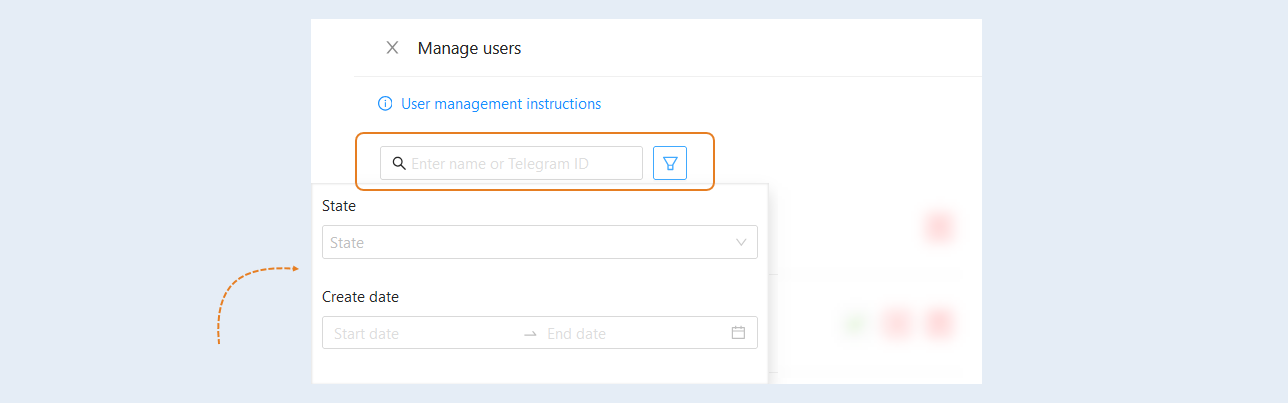
A search bar and a filter are available at the top of the User Management section. Use them to quickly find the right contact.
Click the "Add Filter" button and select a filter condition from the list:
State. This condition highlights contacts that are currently in a certain status (approved, blocked, pending, deleted, etc.). Select the contact status from the suggested list.
Create date. This condition highlights contacts that were created on certain dates. Select the date range.
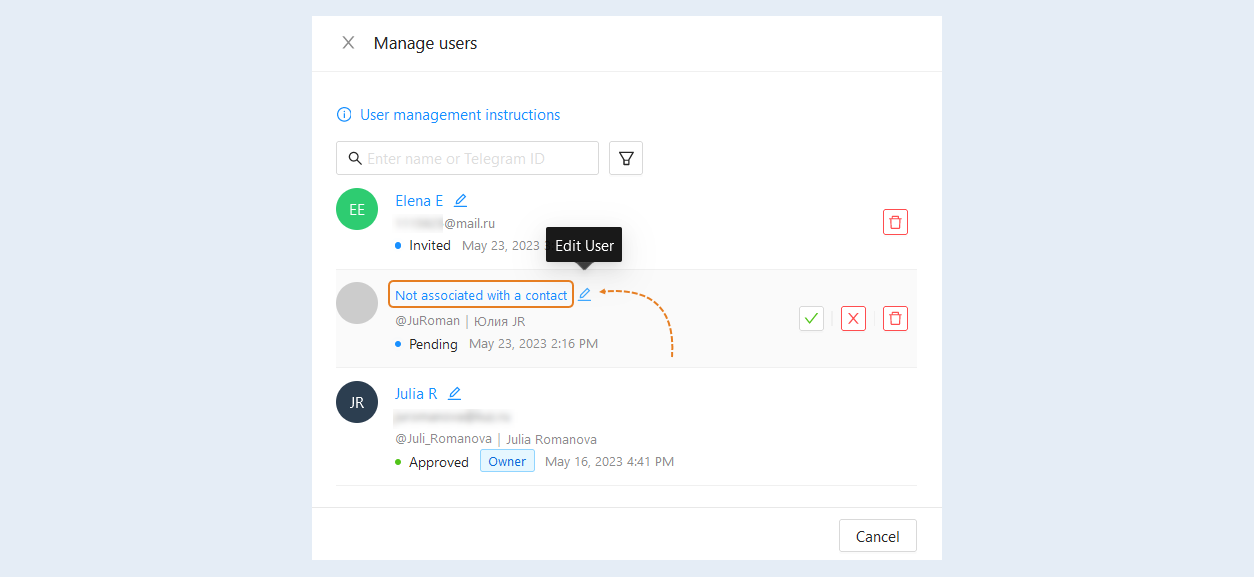
If an anonymous participant (not associated with a CRM contact) has applied to join the group, he will appear in the list of users of the group marked "Not associated with a contact". This way you can manually associate a user with a CRM contact and add him to a group or reject his application. Click the "Edit User" button.
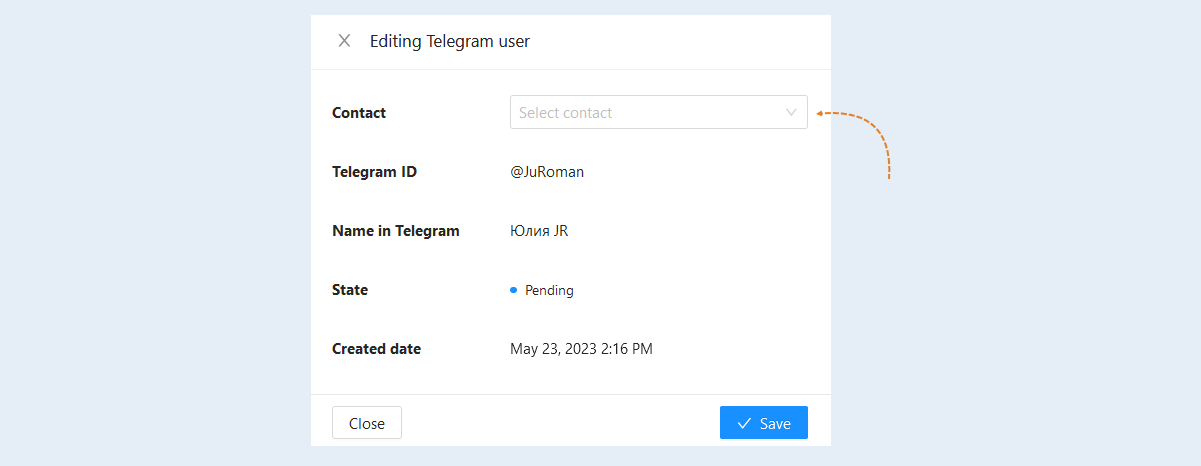
In the window that opens, select a contact from the CRM list and click "Save". Thus, the Telegram account will be linked to the CRM contact.
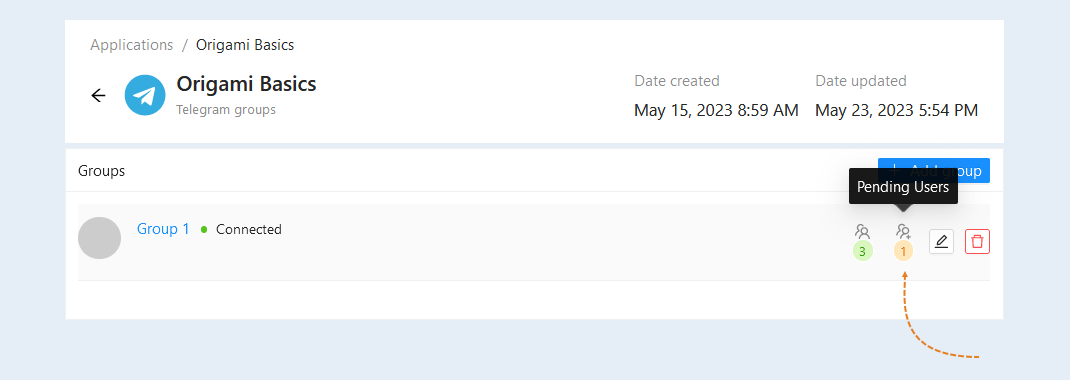
Users who have applied to join the group, but have not yet been approved by the administrator, are in the "Pending Users" list. And also, if a Telegram is not found for a user, or he is not recognized by the system, he will appear in the list of "Pending users" and will be waiting for approval, so do not forget to check this list.
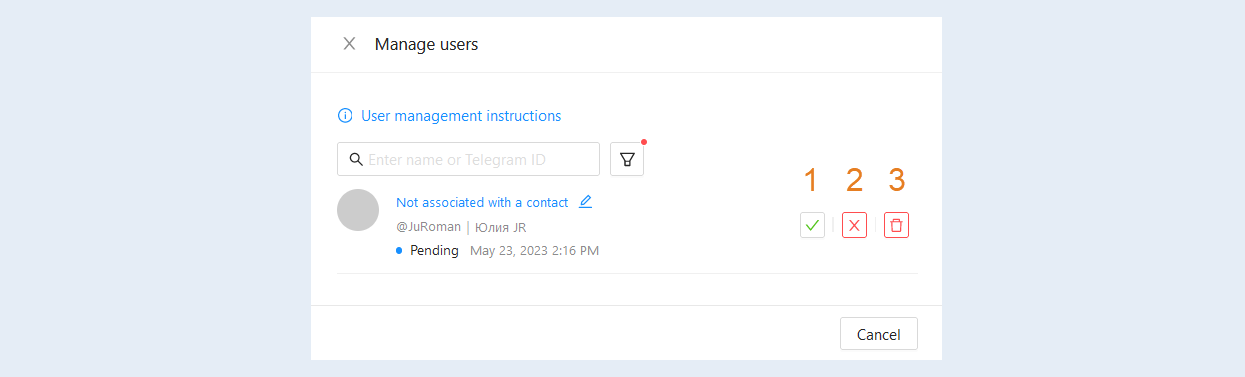
Click the "Waiting Users" button and the User Management window will open. You can do the following:
- Accept user. Click to add a user to the group.
Decline user. Click to reject the application to join the group.
Remove. Click to delete the user's request.
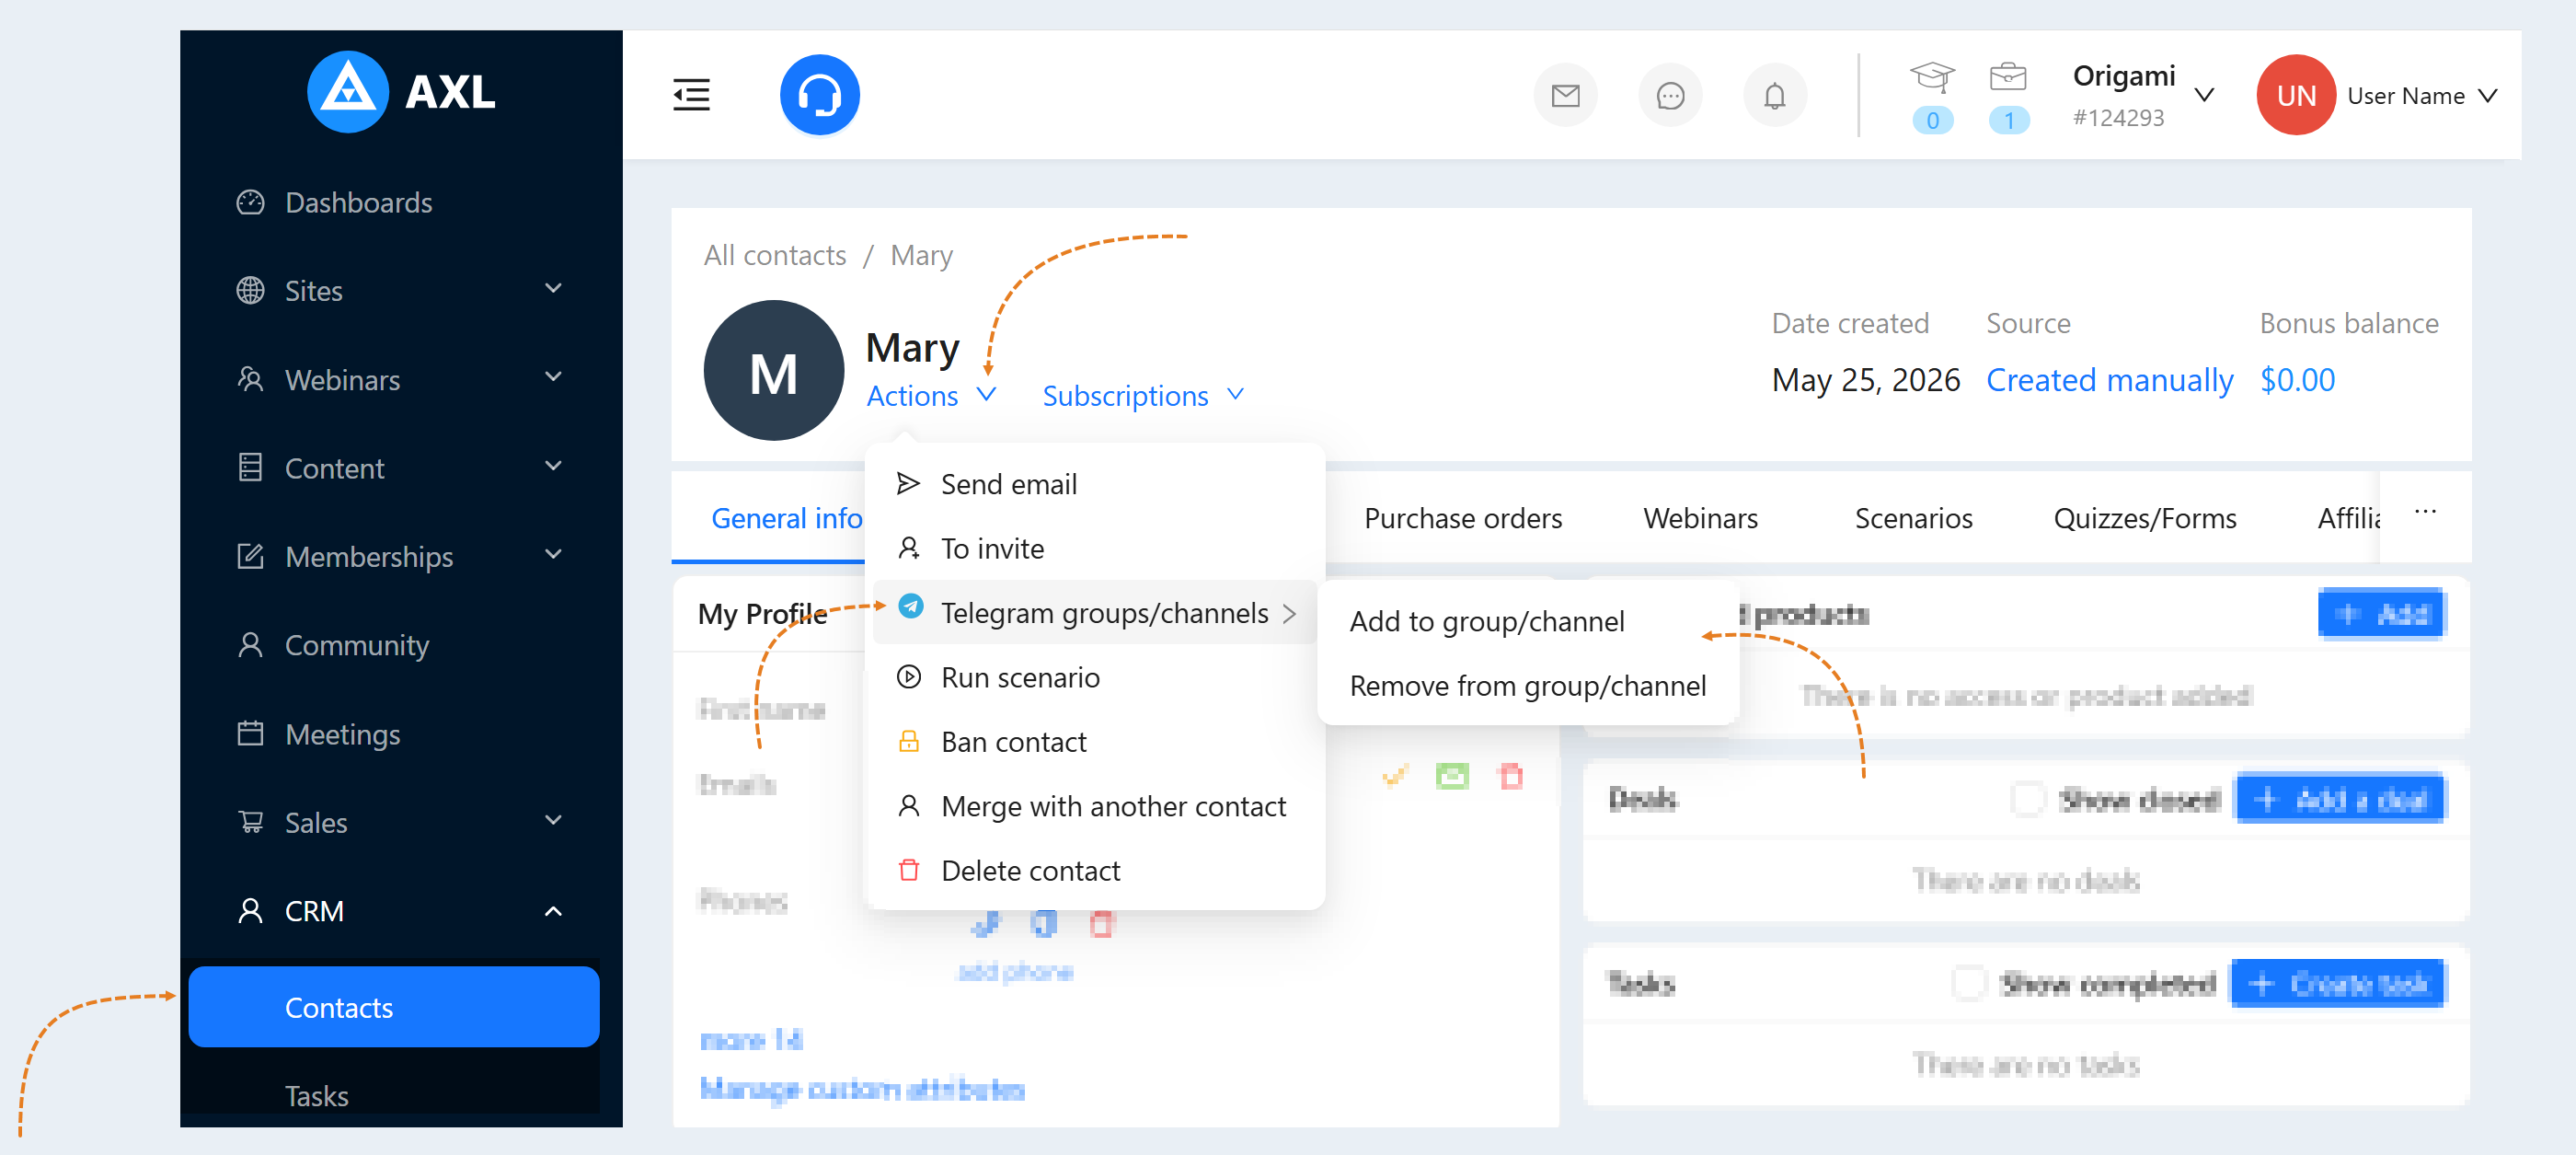
You can also add a user in his CRM contact card using the “Actions“ menu under his name, on top. Open the "Contacts" section, select the desired contact and open his card. Click the "Actions" button, then select "Telegram groups" and add the user to the group/channel or remove from the group/channel.
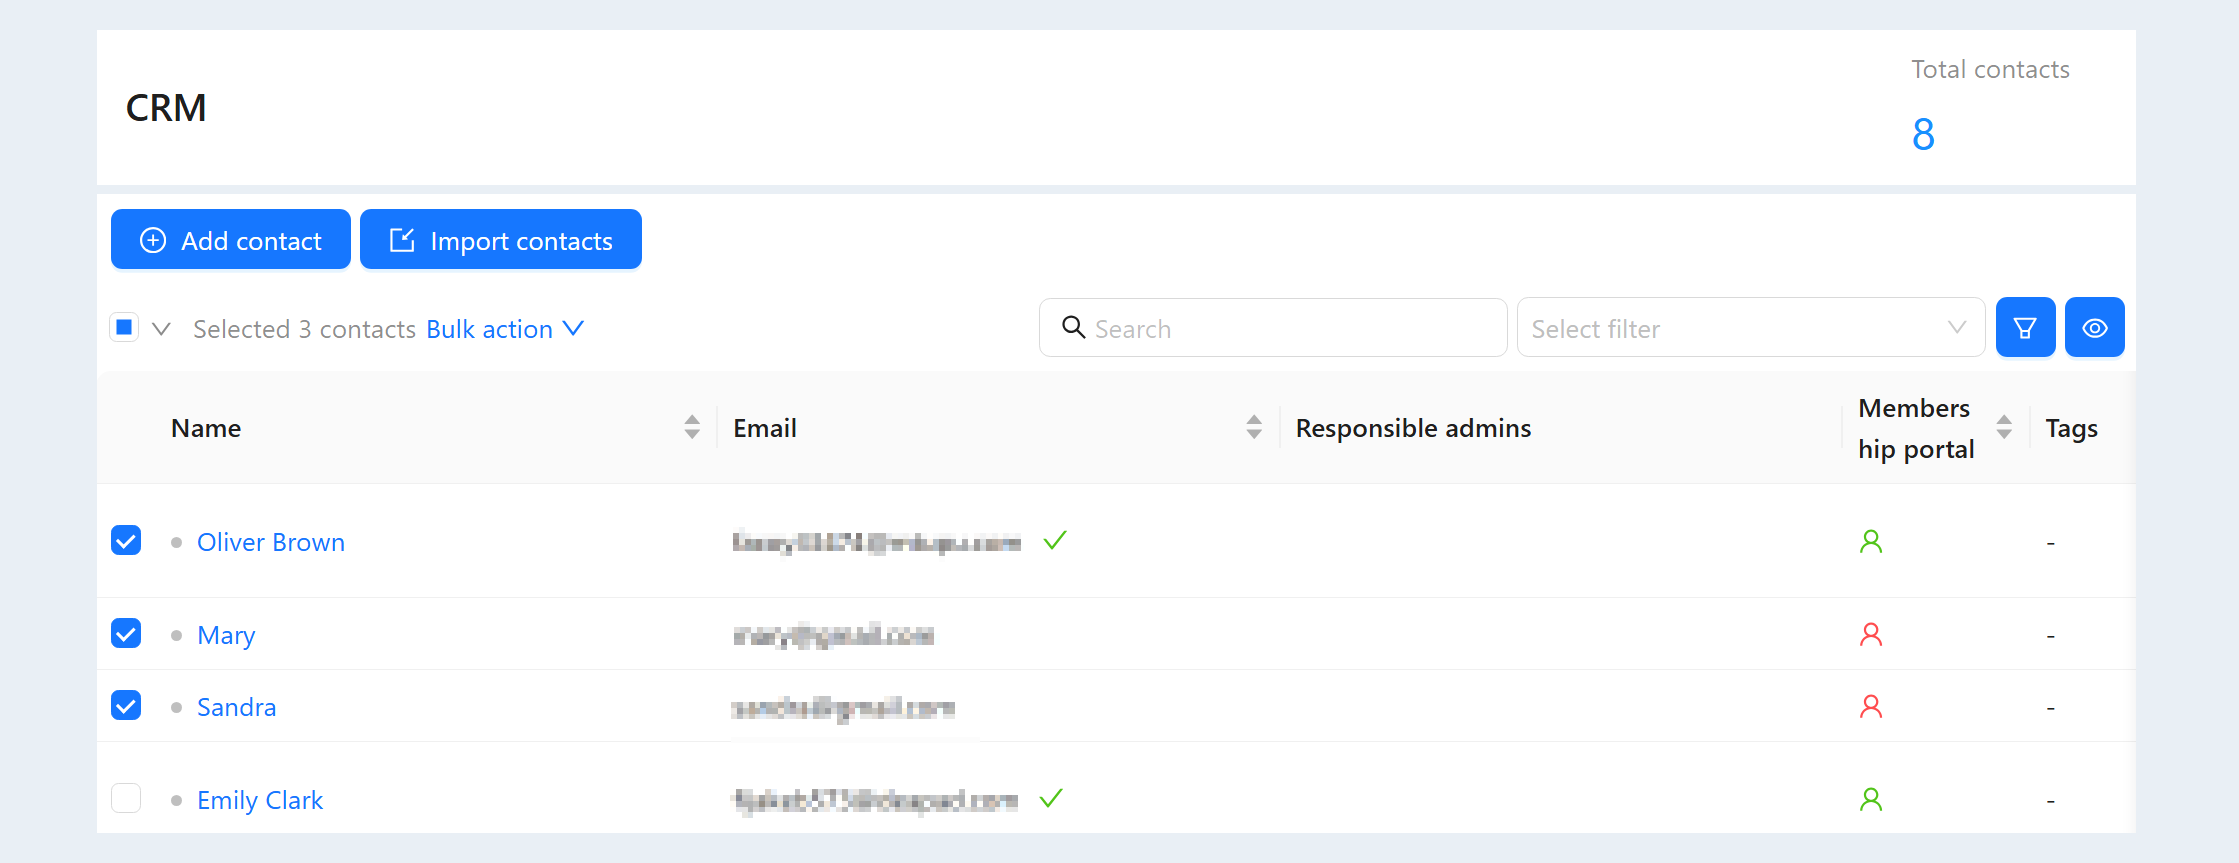
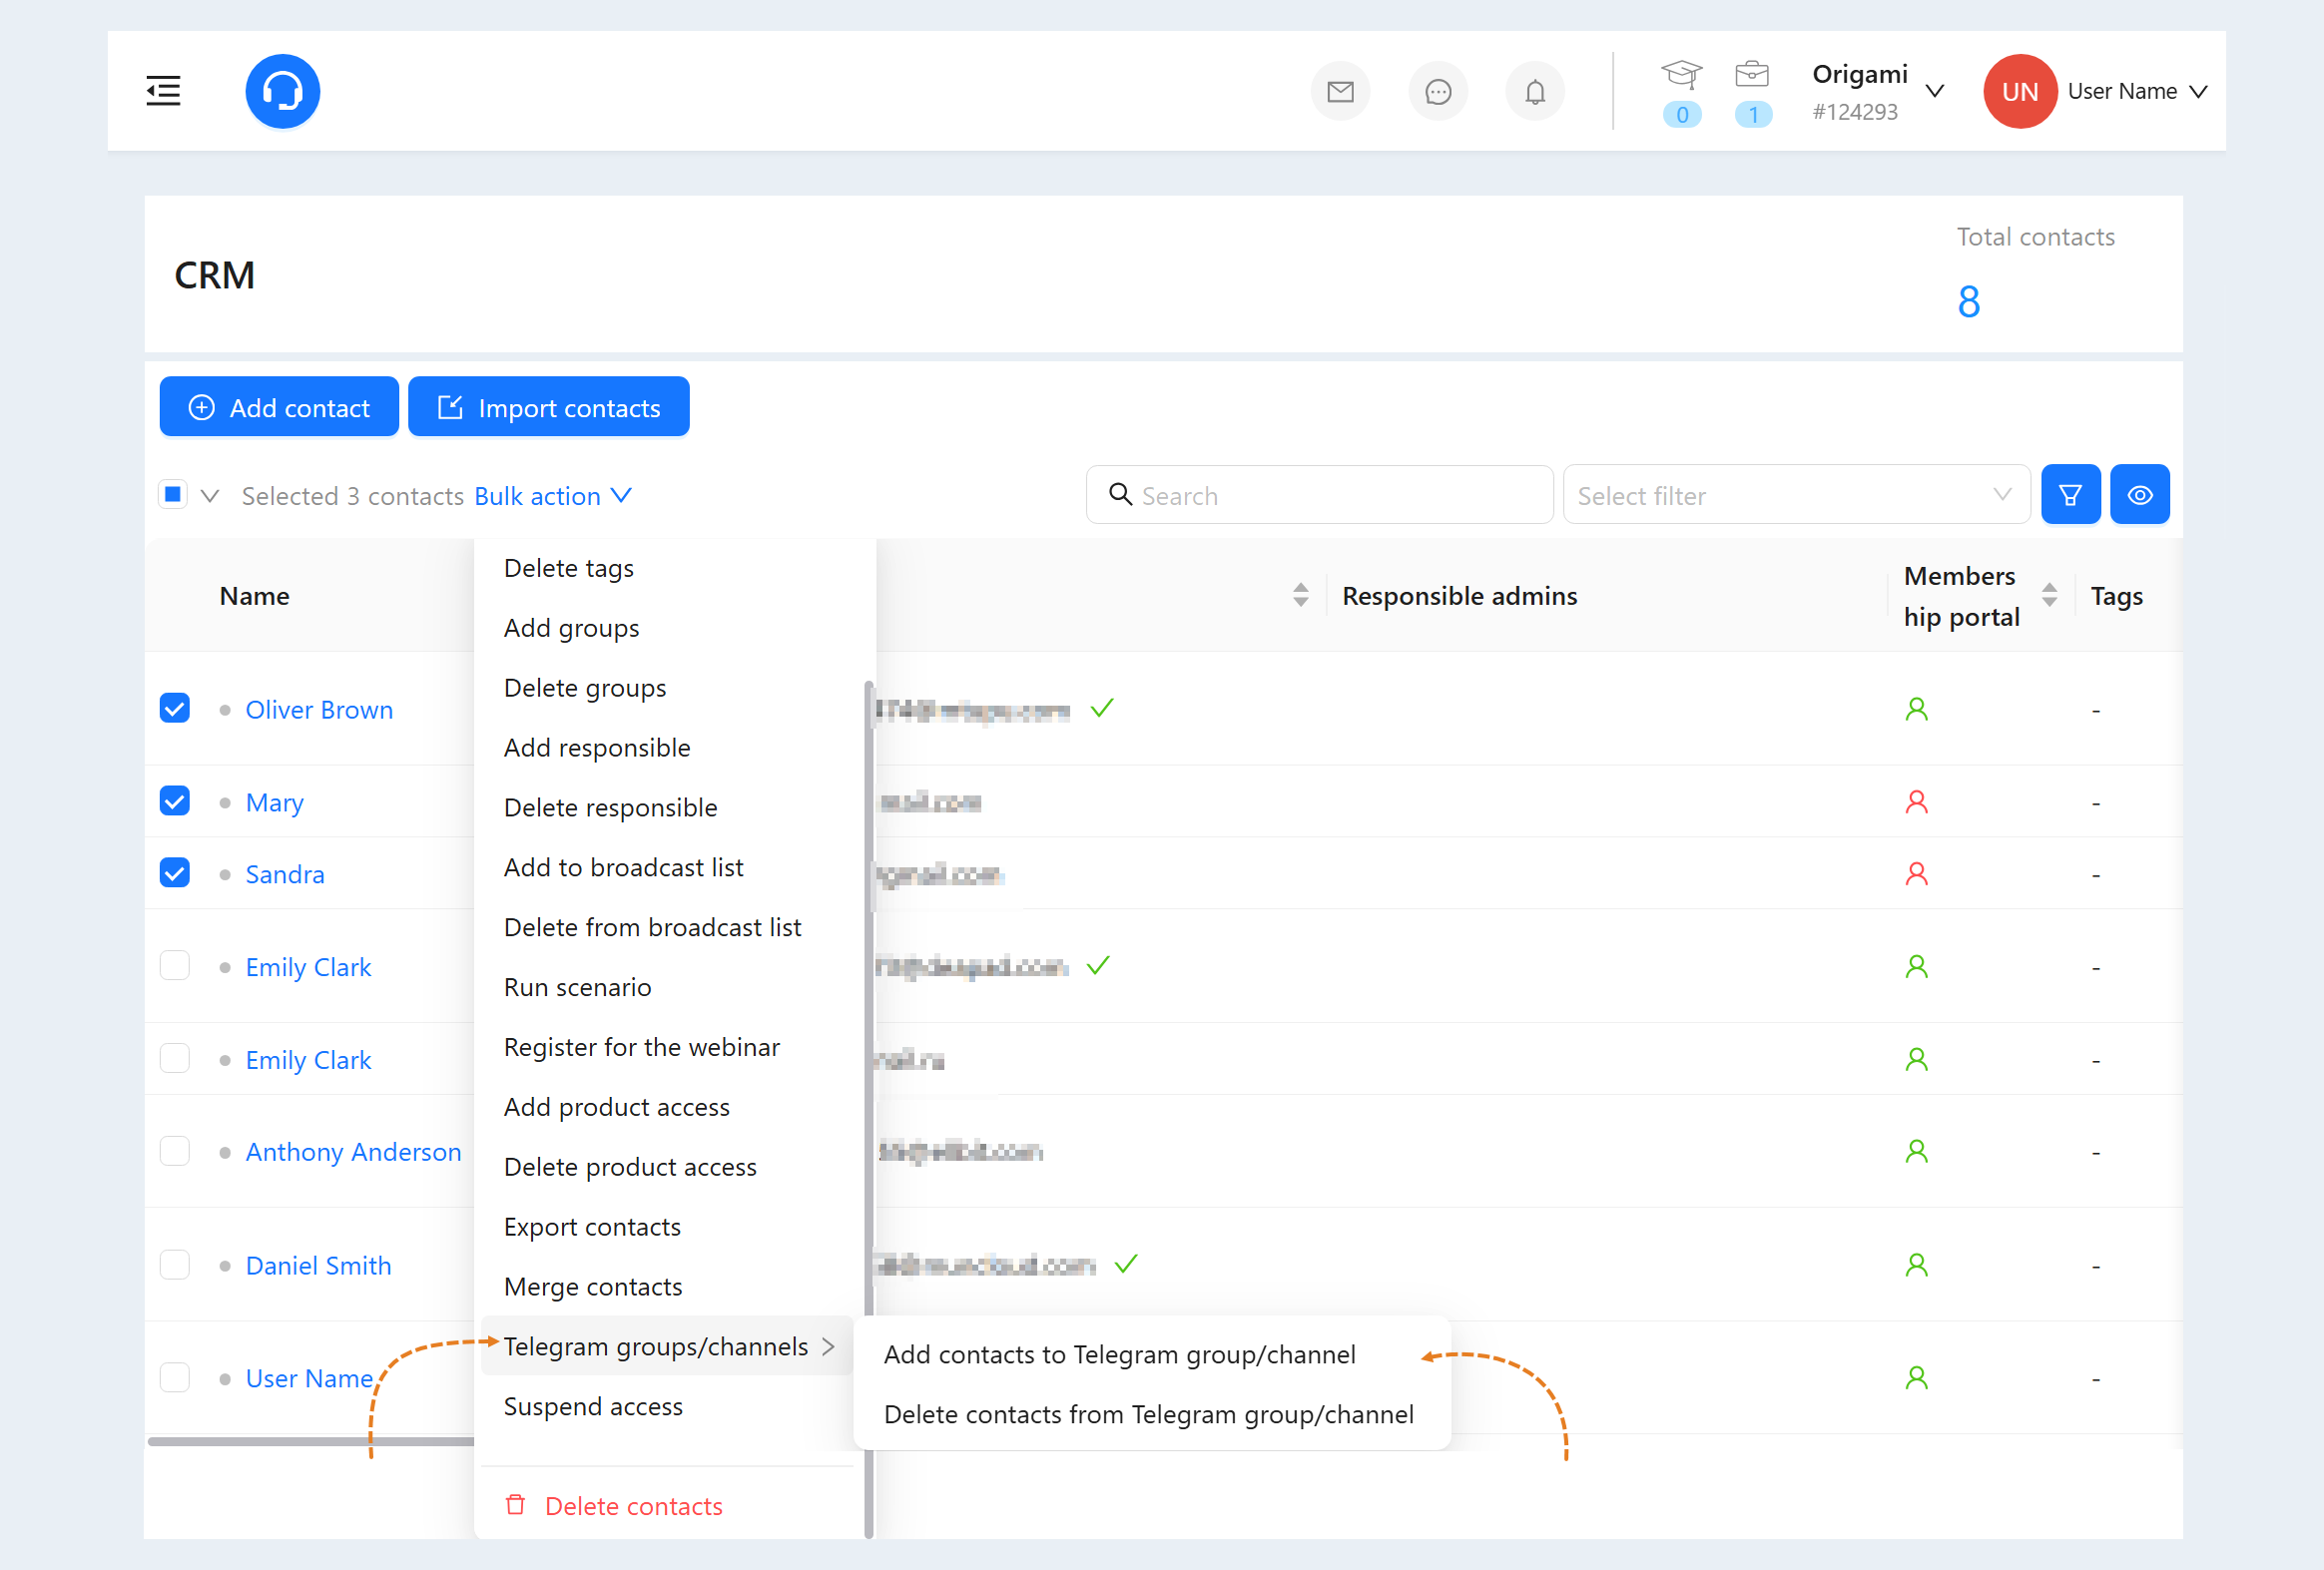
If you want to massively add or block users, then you need to go to the contact list page in CRM. Select contacts using the necessary filters, and then click on the "Bulk Action" menu.
In the list of bulk actions, select the "Telegram groups" section and add users to the group or remove them from the group/channel.
To learn how to automate the process of adding users to a group, read the article "How to automate the work of a Telegram group".