A mailing list is a targeted list for your mailings based on conditions.
In the "Mailing lists" tab, you can create and manage mailing lists, that is, define the conditions for sending a specific letter. Thus, you filter existing contacts and send them different letters.
For example, you can create a newsletter for customers who have completed a specific course at your membership portal.. Or you can filter out those customers who have not entered your membership portal for a long time and remind them about training. There are a lot of options for conditions for mailing. You can read about each condition of filtering and searching in more detail in the article "Conditions for mailing".
Conditions for mailing help to create any options for filtering contacts. You can not only add certain customers to the mailing list, but also exclude customers by certain parameters.
For example, you can exclude customers whose last activity date is more than 1 year. To do this, select the "Date of last activity" condition. Specify "Less than" in the settings and set the date. Click the "Ok" button and you will see a list of contacts that match the conditions you specified. Click the View button to view the details of these users.
Click on the desired section of the article to go to its description:
How to create a mailing list
Go to the "Mail" section, the "Mailing Lists" tab.
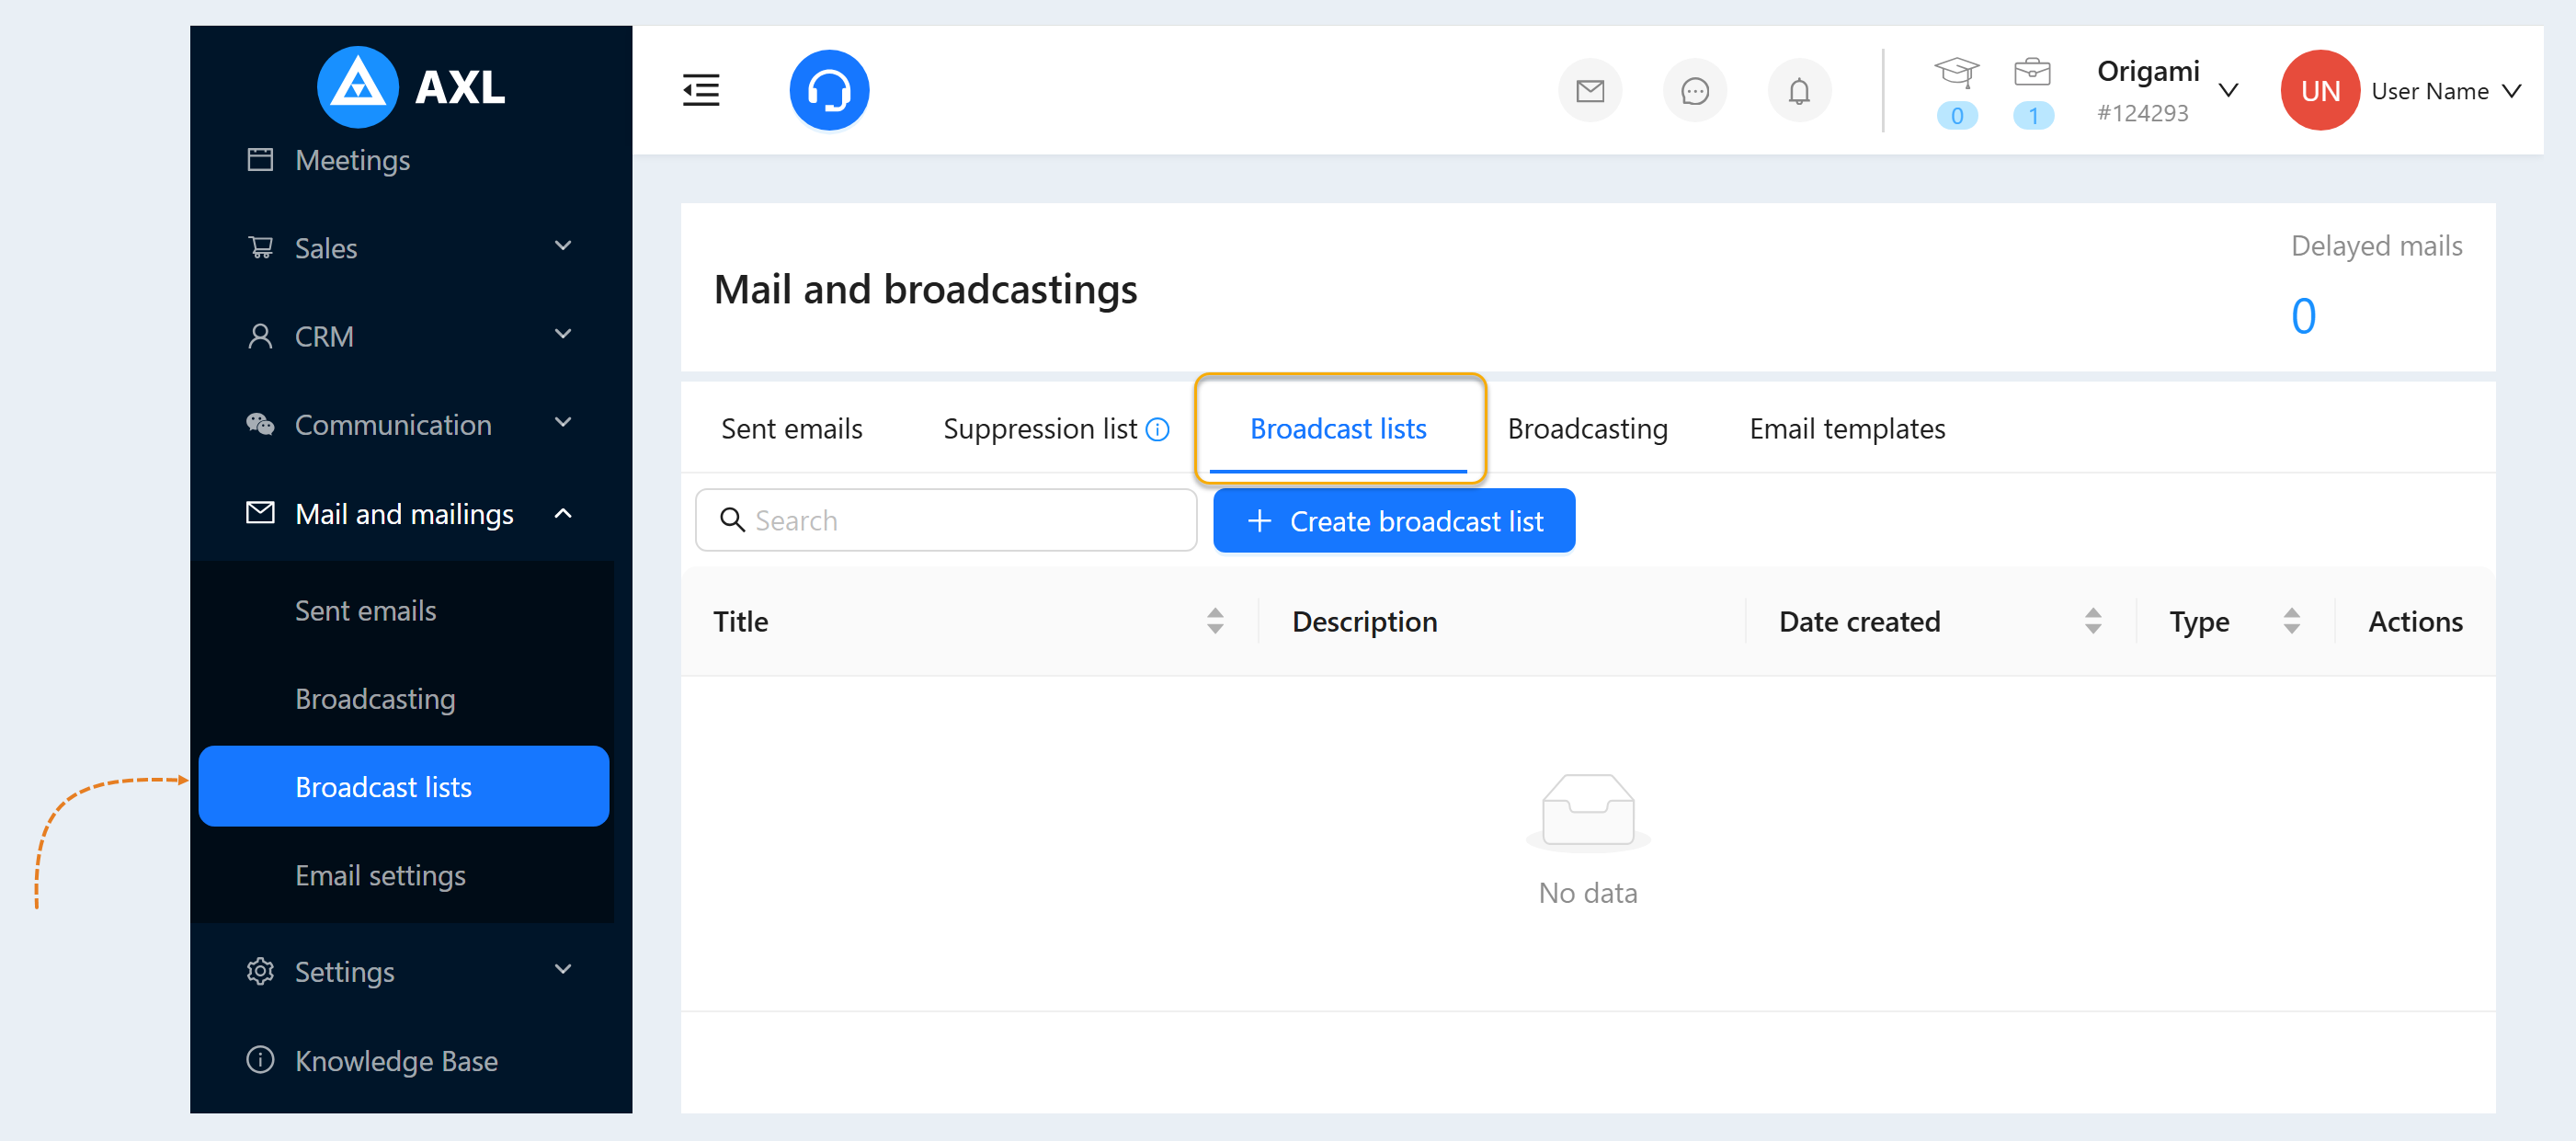
Click the "Create Mailing List" button and fill out the form:
- Mailing type: static or dynamic.
- The static type is manually adding contacts to the mailing list. You will be redirected to the CRM section. And you will need to manually select contacts from the list. And then add these contacts by clicking the "Add to mailing list" button.
Dynamic type is adding contacts to the mailing list automatically, according to specified conditions.
- The static type is manually adding contacts to the mailing list. You will be redirected to the CRM section. And you will need to manually select contacts from the list. And then add these contacts by clicking the "Add to mailing list" button.
- The name of the mailing list. Write a name for this mailing list.
- Description. Add a description for this mailing list.
- Conditions. Select conditions for mailing from the list provided. After you have selected a condition from the list, add settings for this condition. Read more about each condition in the article "Conditions for mailing".
Viewing. Click the "View" button to see the list of sorted users in an additional window.
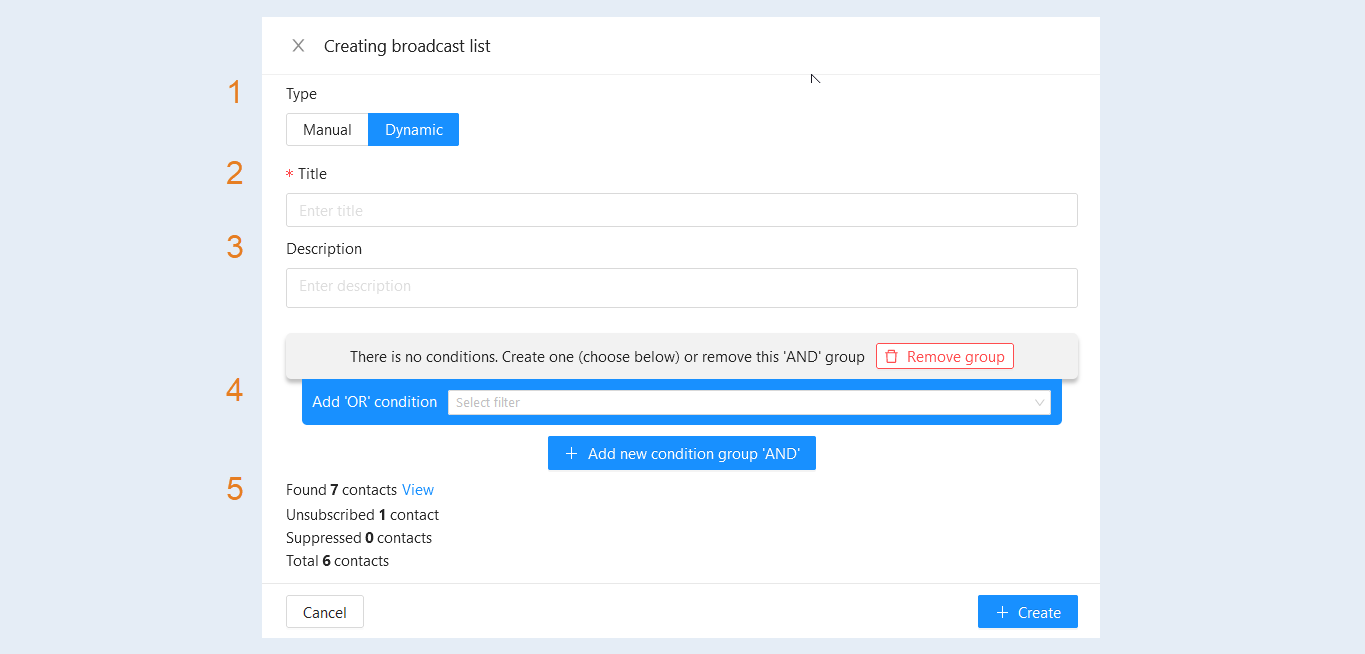
After you enter your terms, the list will be filtered and the search results will be shown to you. Click "Save".
You have created a mailing list. This mailing list will be applied automatically to all users who in the future will meet the conditions you choose.
Mailing list management
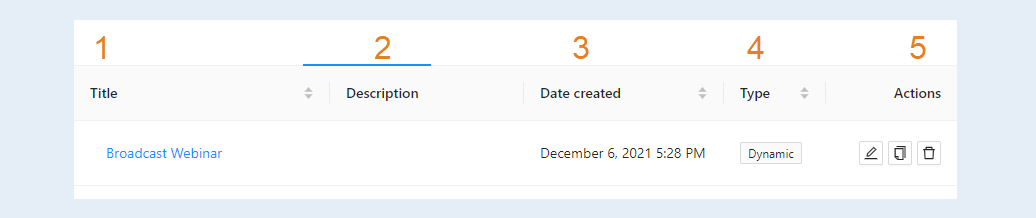
In the "Mailing List" tab, you will see the lists you have created and will be able to manage them.
- Title. For example, "Origami Basics Online Webinar."
- Description. Add a description for the mailing. For example: "An invitation to an online webinar where we will share basic knowledge for beginners."
- Date created. The exact date and time that this mailing list was created.
- List type: dynamic (that is, automatic selection of contacts from CRM based on conditions) or static (manually added contacts).
- Actions:
- Edit button. Click to edit this mailing list. You can change the title, description and conditions for the newsletter.
Copy button. You can create a copy of this mailing list.
Delete button. Click to remove this mailing list.