Comments are feedback from course users. Reasoning, explanations, criticism of lessons, assignments, videos, tests in your membership portal.
In this section, you can see user comments about the course or the step of the course. You can also manage and reply to comments.
Click on the desired section of the article to go to its description:
How to allow comments
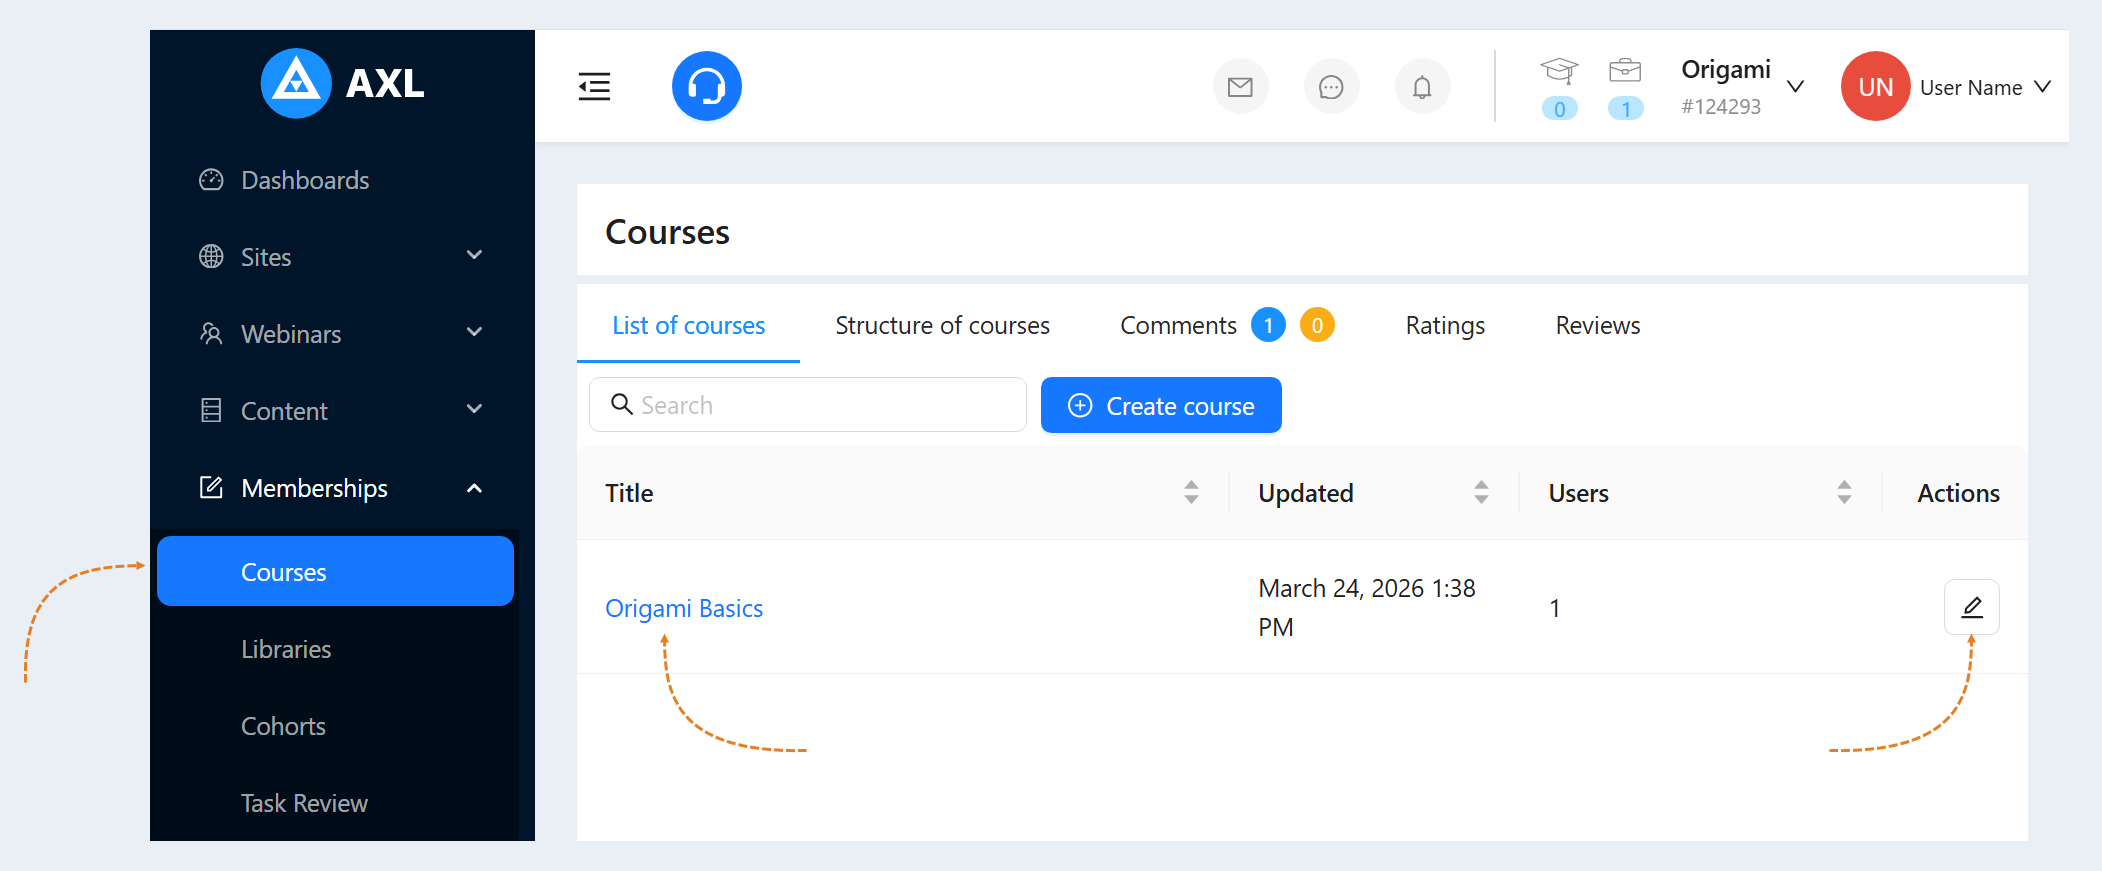
Go to the "Courses" section. Click on the course name or the "Actions" button. A window will open for you to edit the course.
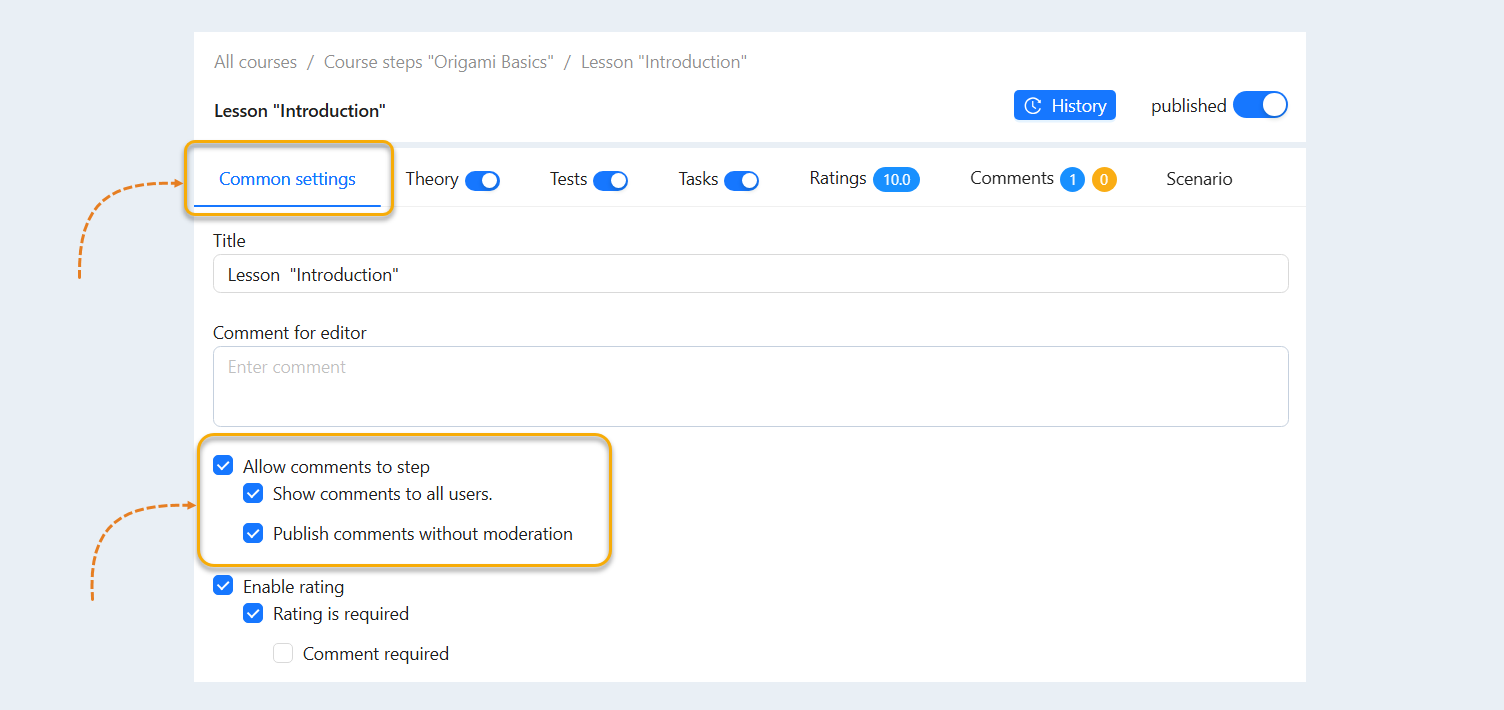
Go to the “Course Steps" tab. Select a step and click Edit. You will see the “General Settings” page of the step.
To allow users to leave comments, check the boxes in the lines:
- Allow comments to step. This option allows users to leave comments on a specific step or lesson. If this setting is enabled, users can ask questions, share opinions, or give feedback on the material. This facilitates interaction between users and the teacher and improves the learning process through the exchange of opinions and questions.
Show comments to all users. When this option is enabled, all users will be able to see comments left by other users. If this option is disabled, only the author of the comment and the teacher can see them. This setting allows you to create an open discussion and exchange of information between users. Users can see what their colleagues are thinking, which can help them solve their own questions and improve their understanding of the material.
Publish comments without moderation. Enabling this feature allows users to leave comments without prior approval from the teacher or moderator. The comments will be immediately visible to everyone. This simplifies the communication process and reduces the delay time in receiving responses. However, it requires a certain level of trust in users, as incorrect or inappropriate comments may appear without moderation.
Go back to the "Course Steps" to allow comments for other steps.
General list of comments
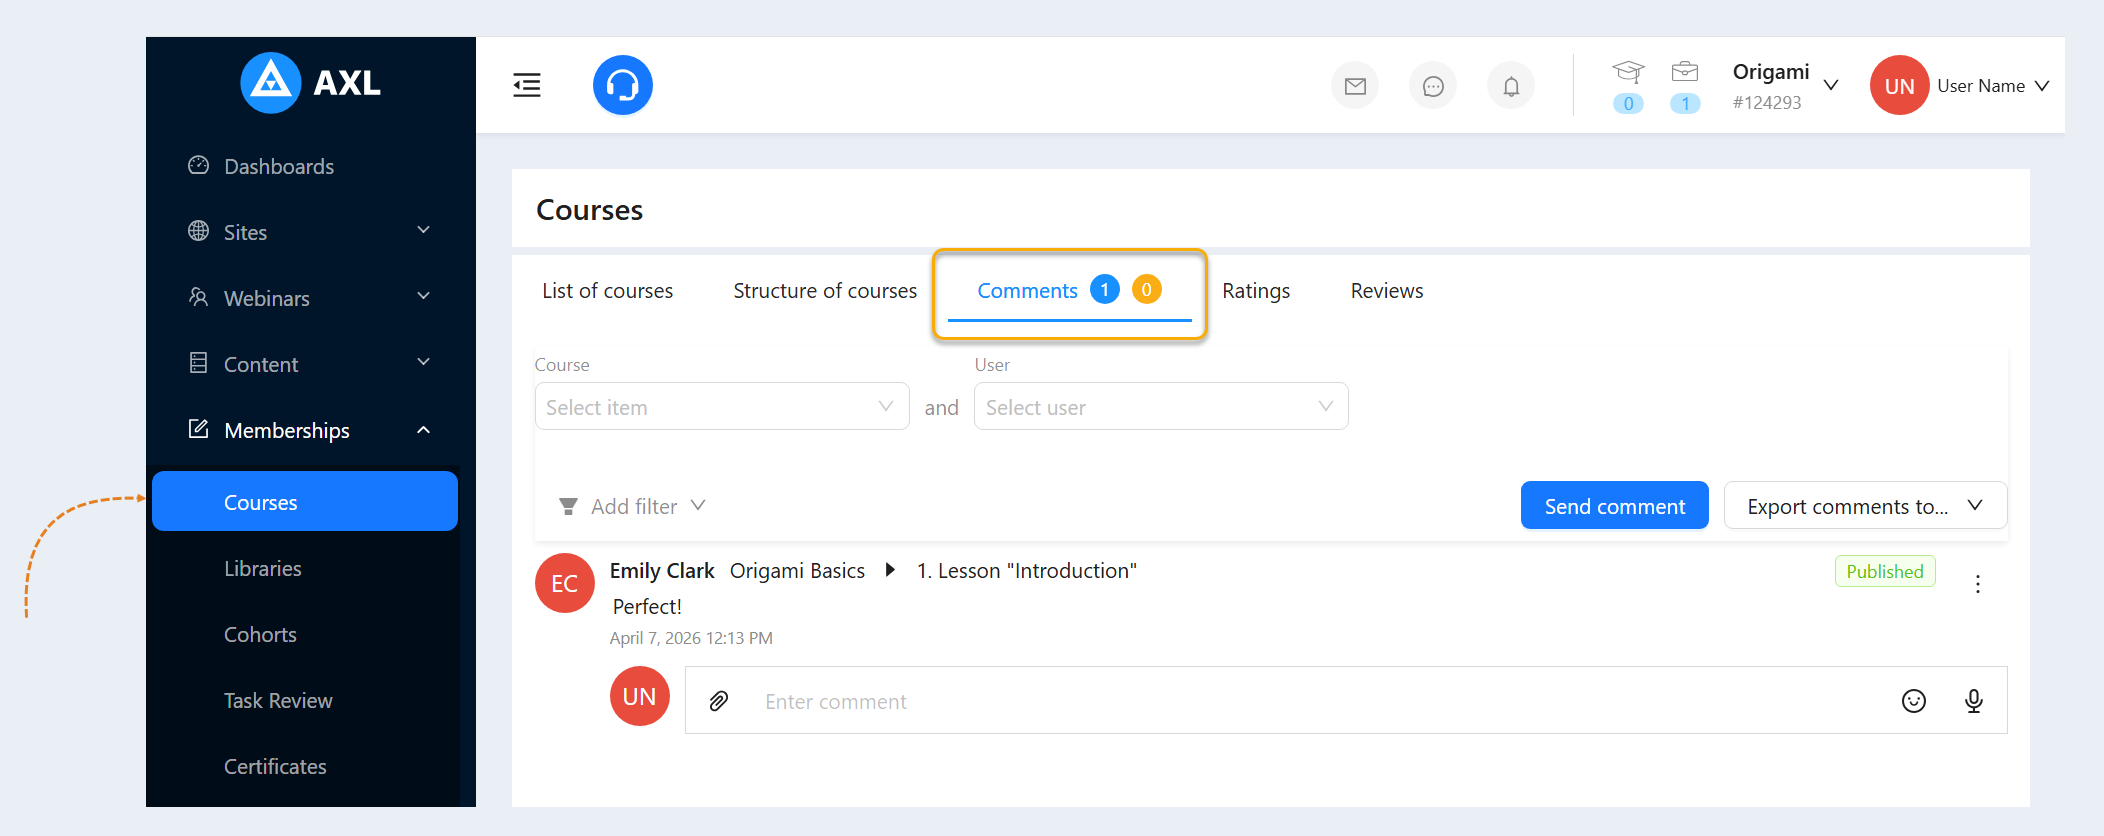
To open the general list of comments, go to the "Courses" section, open the "Comments" tab. This tab displays all user comments about all membership portal courses.
A list of comments for an individual course
To open a list of comments on an individual course, go to the "Courses" section. Open the previously created course. In the course, open the "Comment"s tab. Users' comments on this course are displayed here.
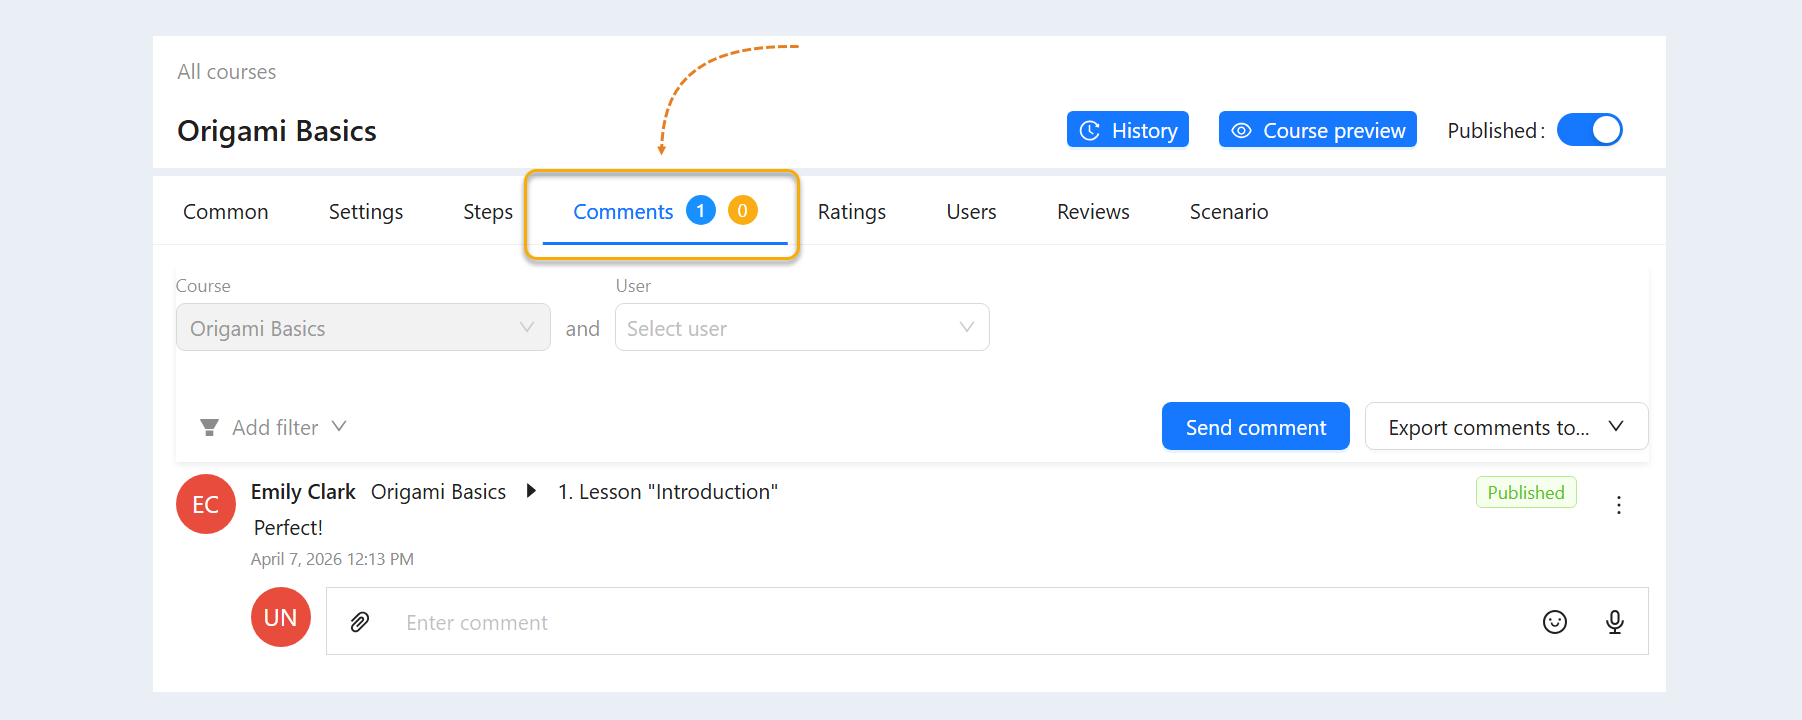
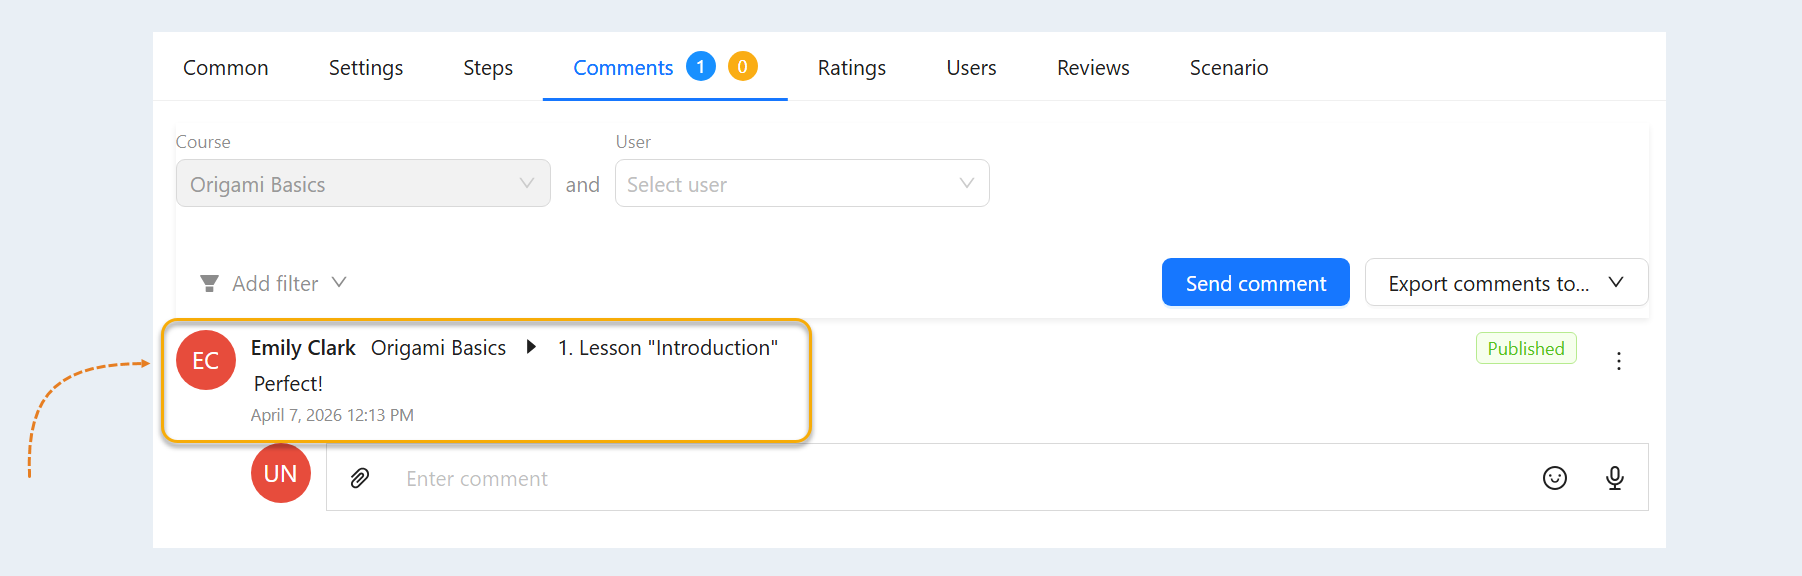
In the list of comments, you can see the following information:
- User avatar. If a user has uploaded their photo, you will see an avatar in a round window.
- The name of the user. You see the user's name.
Course. The name of the course is indicated. Click on the course name to go to its settings.
- Lesson (course step). Here you can see the step of the course where the user left a comment. Click on the lesson name to go to its settings.
- Comment text. Here you can see the comment left by the user.
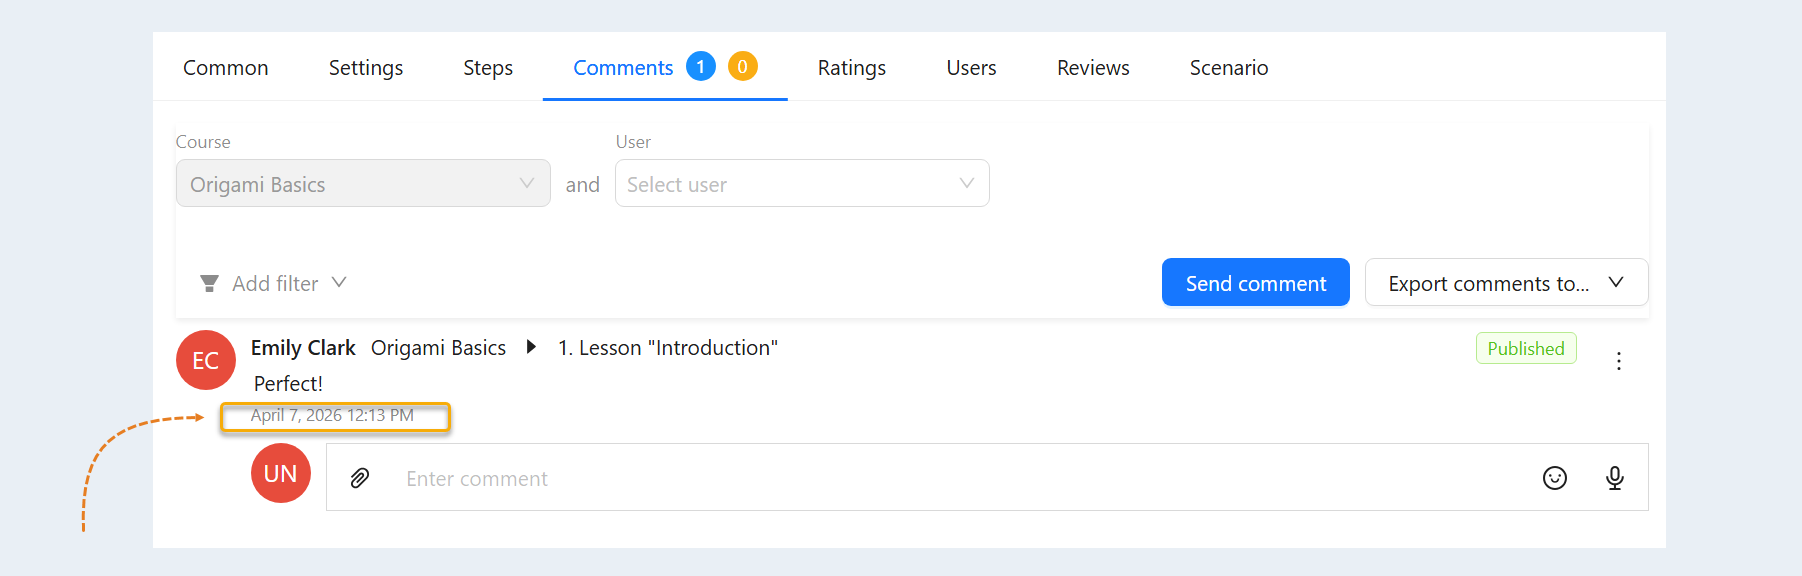
Next, you see:
- Departure date. The date and time the comment was posted.
- Update date. If the user made changes to the comment, you will see the date of the change.
- Delete button. Click to delete this comment.
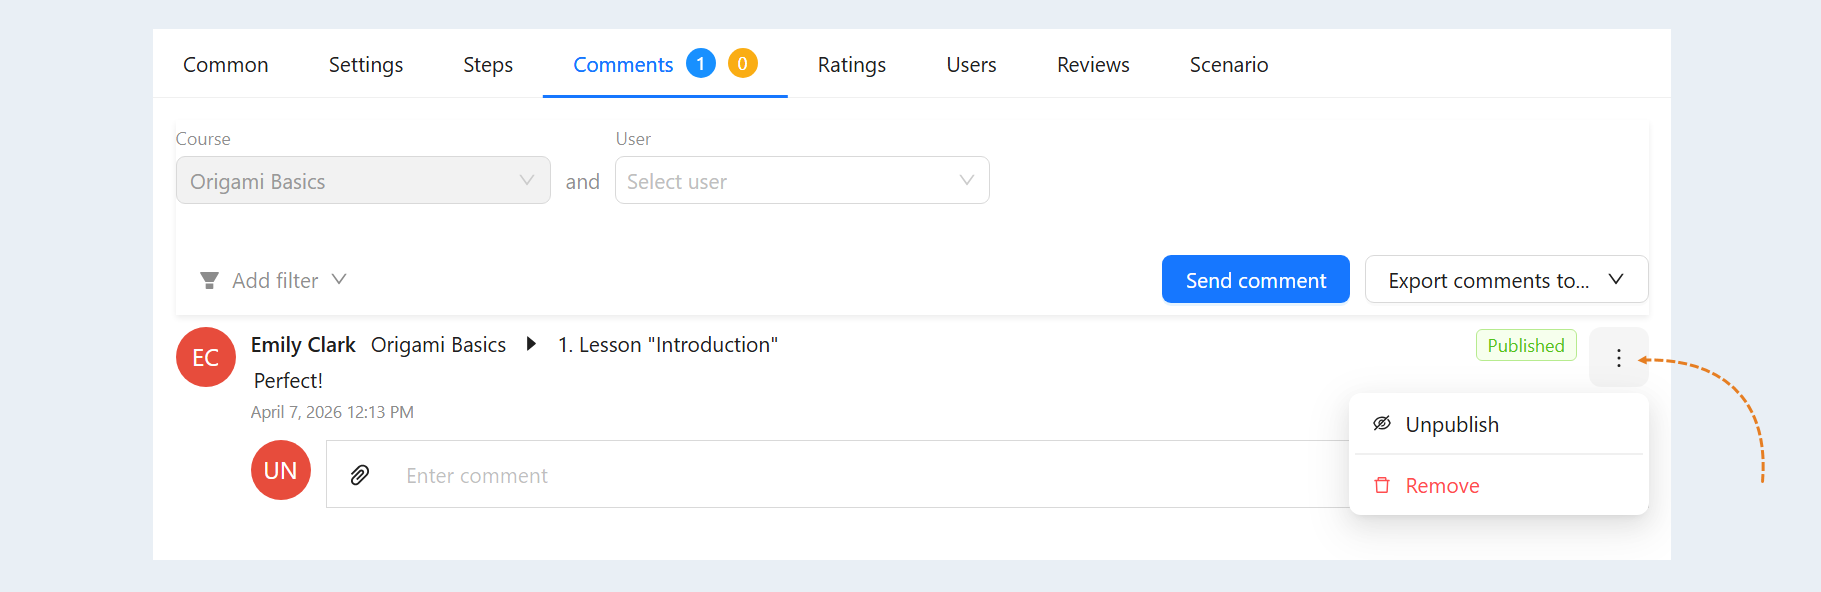
- Comment status. On the right you can see the status of the comment - "Published" or "Not published".
- Published Comment button. Click to change the status of a comment: post a comment in the course or unpublish.
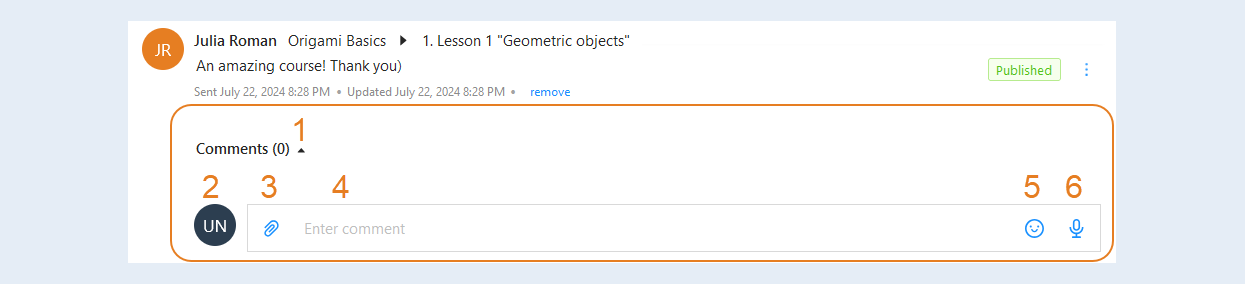
Below is the response to the comment:
- The "Collapse/Expand" button. Click to expand the list of all responses to the comment.
Avatar. If a photo is added to the contact, you will see the avatar in a round window.
The “Files” button. Click on the button to attach the files to your answer.
Answer. Write a response to this comment in the text field and click the "Send" icon on the right.
Add emojis. Click to add an emoji to the response.
Record a voice message. Tap to record and send a voice message.
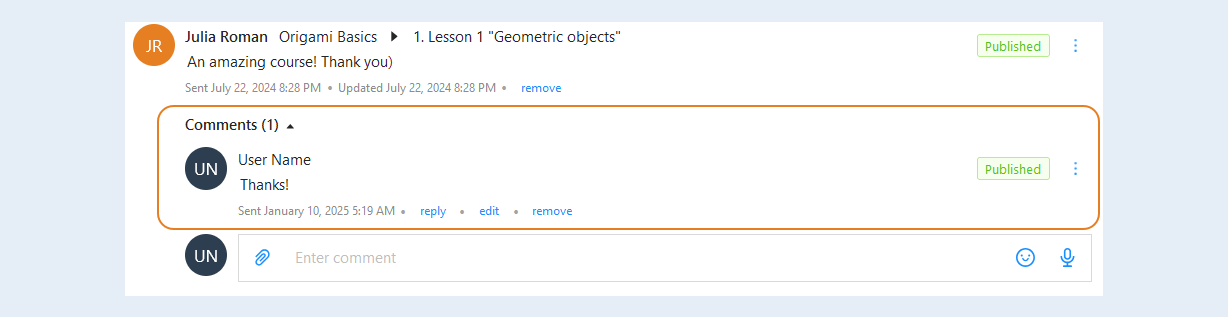
- Reply to comment. Your answer will be posted under the user's comment. You can write a reply, edit your comment, delete it or unpublish it.
Comment management
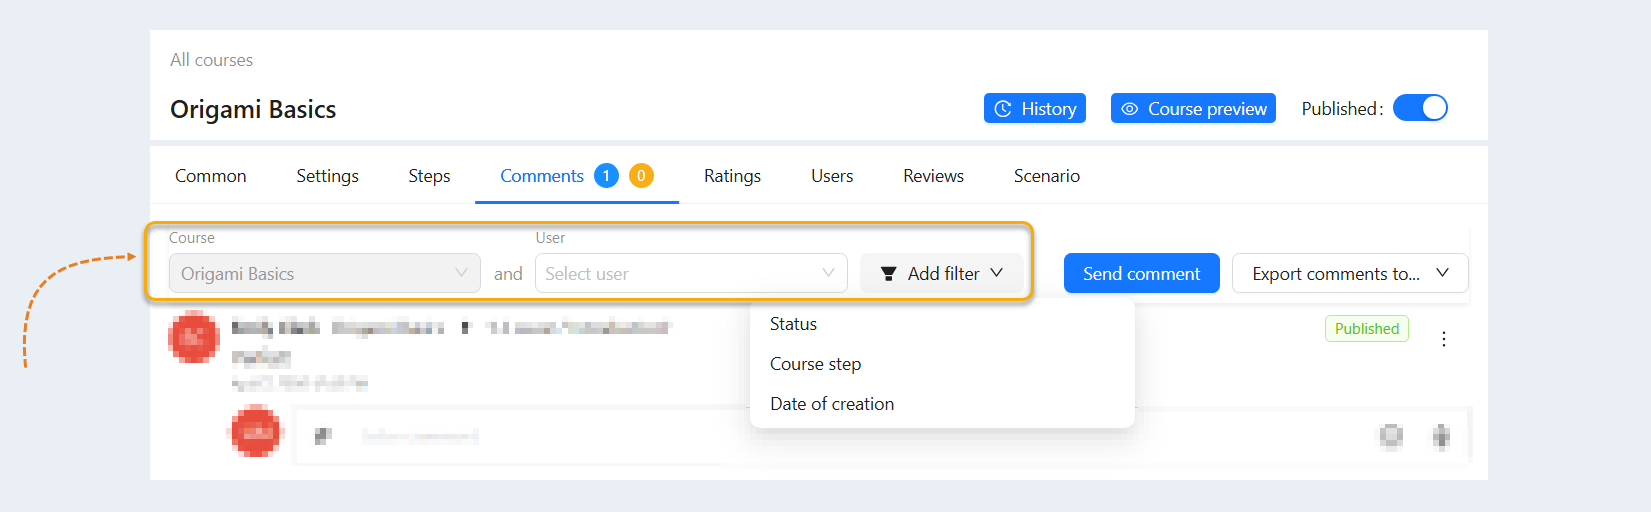
The "Comments" section contains search strings for managing comments. You can select comments by the following parameters:
Course. By default, the course in which you opened the comments section is already selected.
User. Select a user's name to read only their comments.
- Status. This condition highlights comments that are currently in a certain status. Select a status from the suggested list: published, under review, not published.
- Course step. This condition highlights the comments left for a certain step (lesson). Select a course step from the suggested list.
Date of creation. This condition highlights comments that were created on certain dates. Select the date when the comment was created.
The "Export comments" option is located in the upper-right corner of the page. Exporting allows you to save and analyze data off-platform in XLSX or CSV format.
This option is needed to analyze user feedback, identify frequently asked questions, problematic topics, or technical difficulties. This helps to improve the course content and respond promptly to user requests.
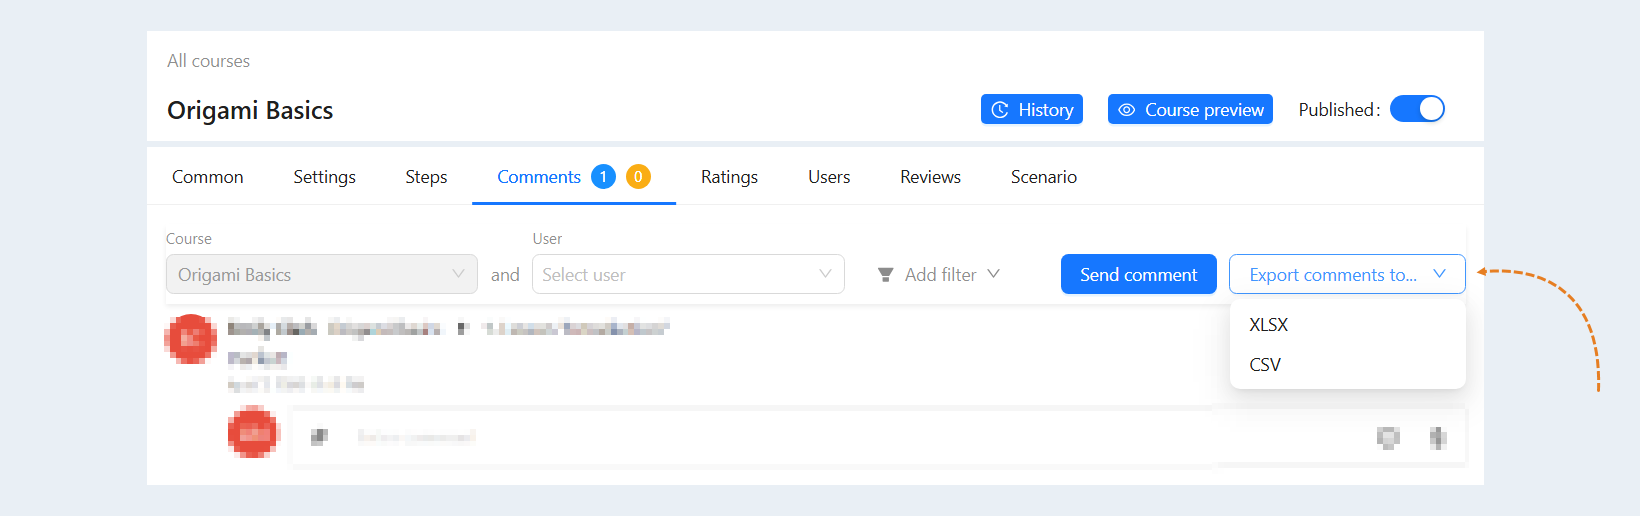
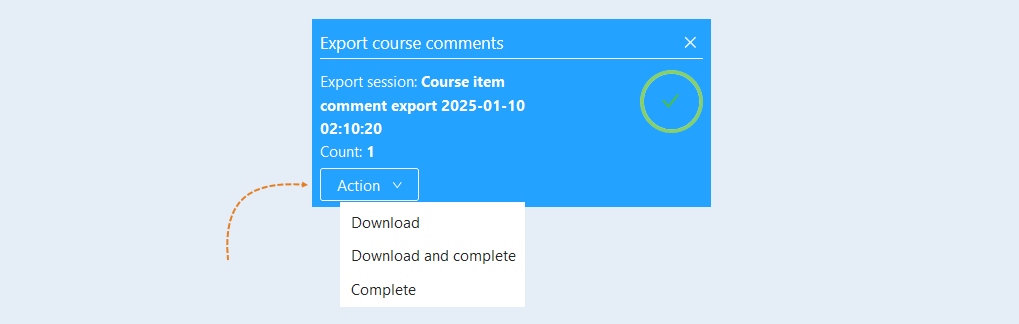
Click the "Export Comments to" button and select the desired file format (XLSX or CSV). Next, you can download the created file by clicking the "Action" button and selecting the "Download" action.