ECPay - the first fintech service company in Taiwan integrated payment platform with the most value-added services. Open an online store without hassles and solve problems with payment services, logistic services, and E-invoices all at once. ECPay has been committed to solving various challenges with online and offline payment services since its establishment in 1996. ECPay has already successively completed connecting with major banks and payment services with the four major convenience store chains in Taiwan.
Click on the desired section of the article to go to its description:
1
Registration in ECPay
To get started, create an ECPay account. Register on the official ECPay website using this link. Click the "Register" button.
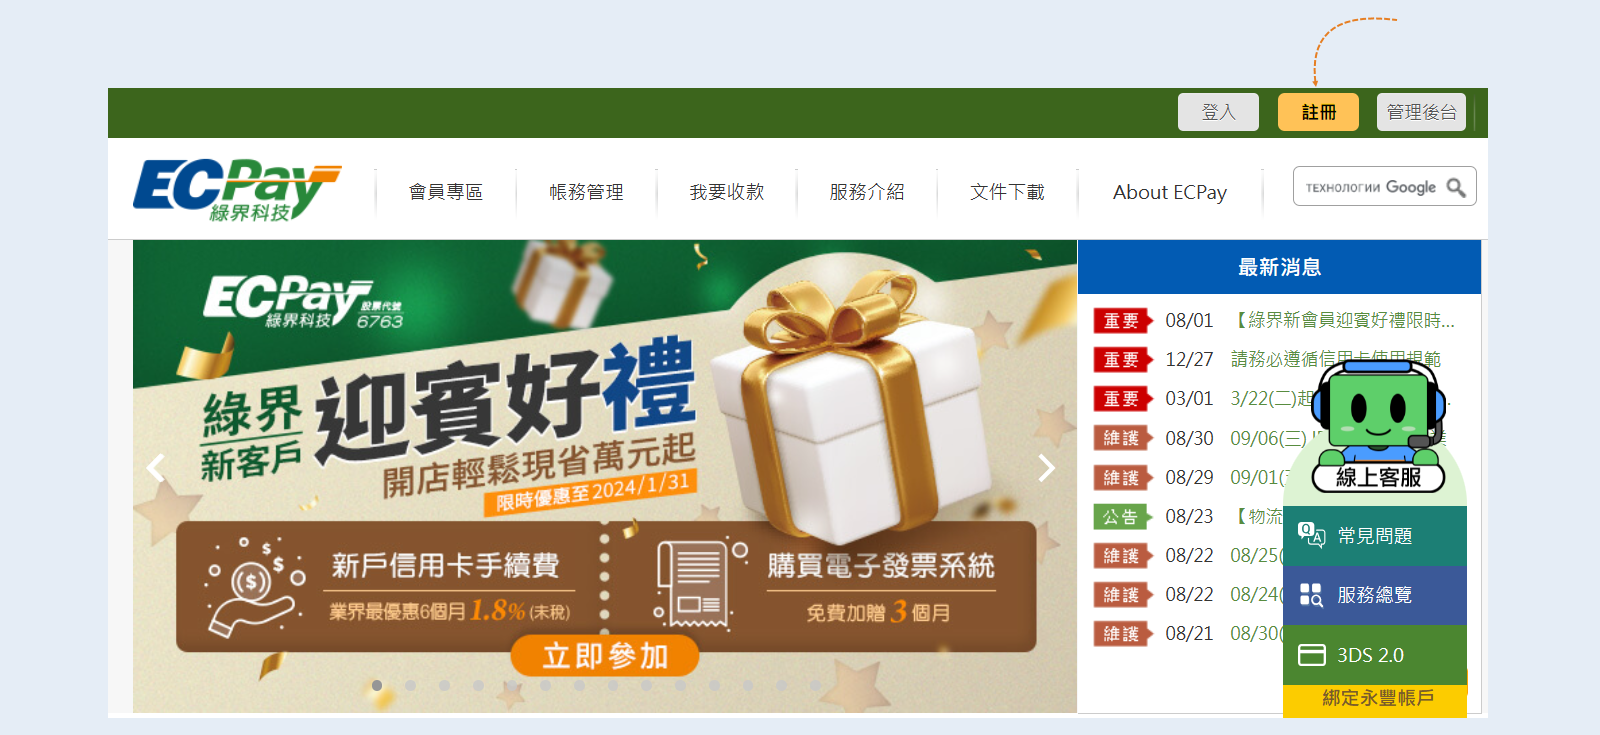
Complete the registration following the instructions of the website.
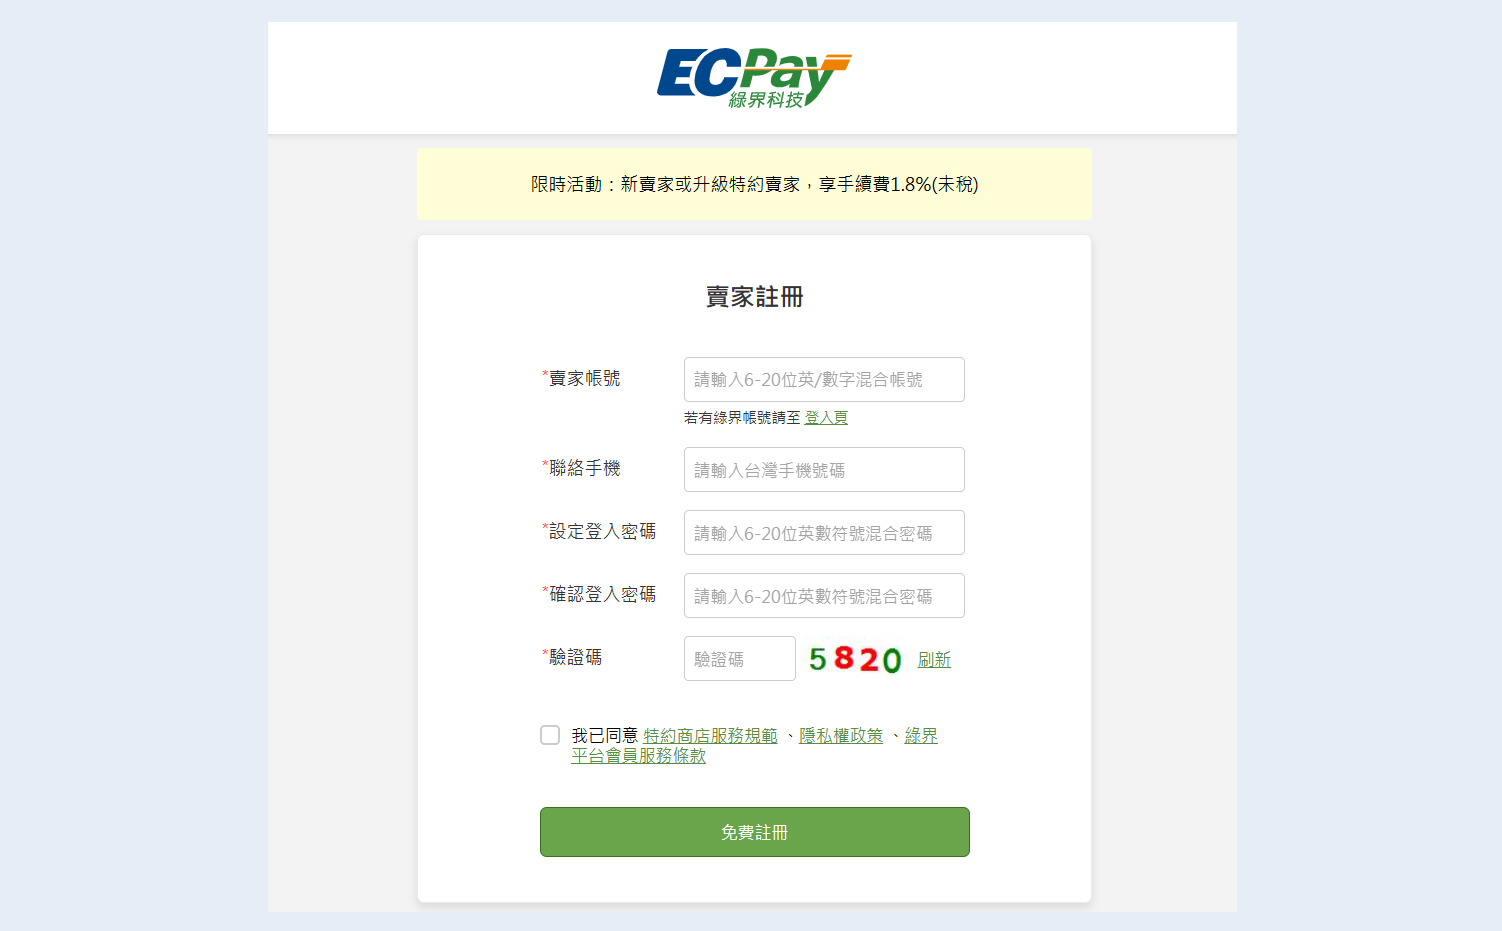
Copy the MerchantID, HashKey and HashIV, you will need these data at the next stage of creating a payment integration.
Get HashKey HashIV MerchantID Here - https://vendor.ecpay.com.tw/Frame/Index.
2
Integration with AXL
Next, you need to integrate the payment instrument into AXL. In order for your customers to be able to pay for the services of your account, it is necessary to embed payment forms in your account.
Go to the AXL website. Select the "Settings" section and the "Payment Settings" tab. Click the "Create Payment Integration" button.
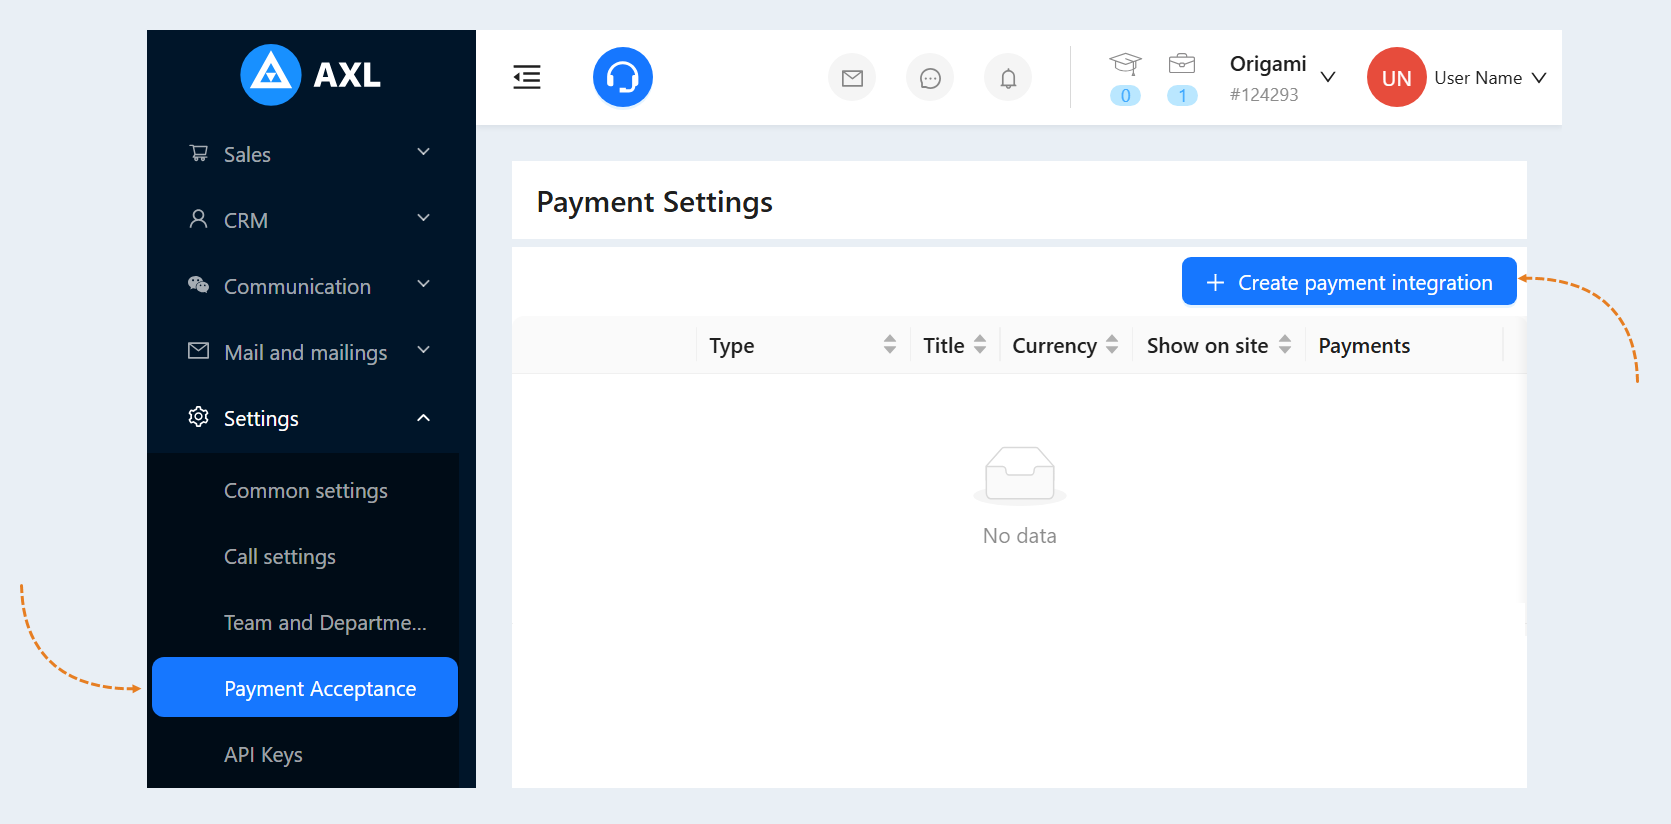
Select "ECPay" from the list. In the window that opens, fill in the fields:
- Title. Write the name of the payment instrument.
Description. Add a description of this payment instrument. Customers will see this description on the website.
Payment Button Text. Write the text that will be displayed on the payment button on your website.
Is Primary Payment Method. Check the box if this payment method will be the main one in your account.
Show on site. Check this box to make this payment method available on your website.
Currency. Select the currency in which you plan to accept payments. If you work in different markets in different countries, you can choose the currency for accepting payments in each payment system. For example, by selling courses in dollars through one payment system, you can accept rubles through another payment system. Automatic currency conversion takes place at the international exchange rate.
Merchant ID. Enter the Merchant ID that you copied on the ECPay website.
HashKey. Enter the HashKey that you copied on the ECPay website.
HashIV. Enter the HashIV that you copied on the ECPay website.
Test mode. Check the box to make a test payment (without money).
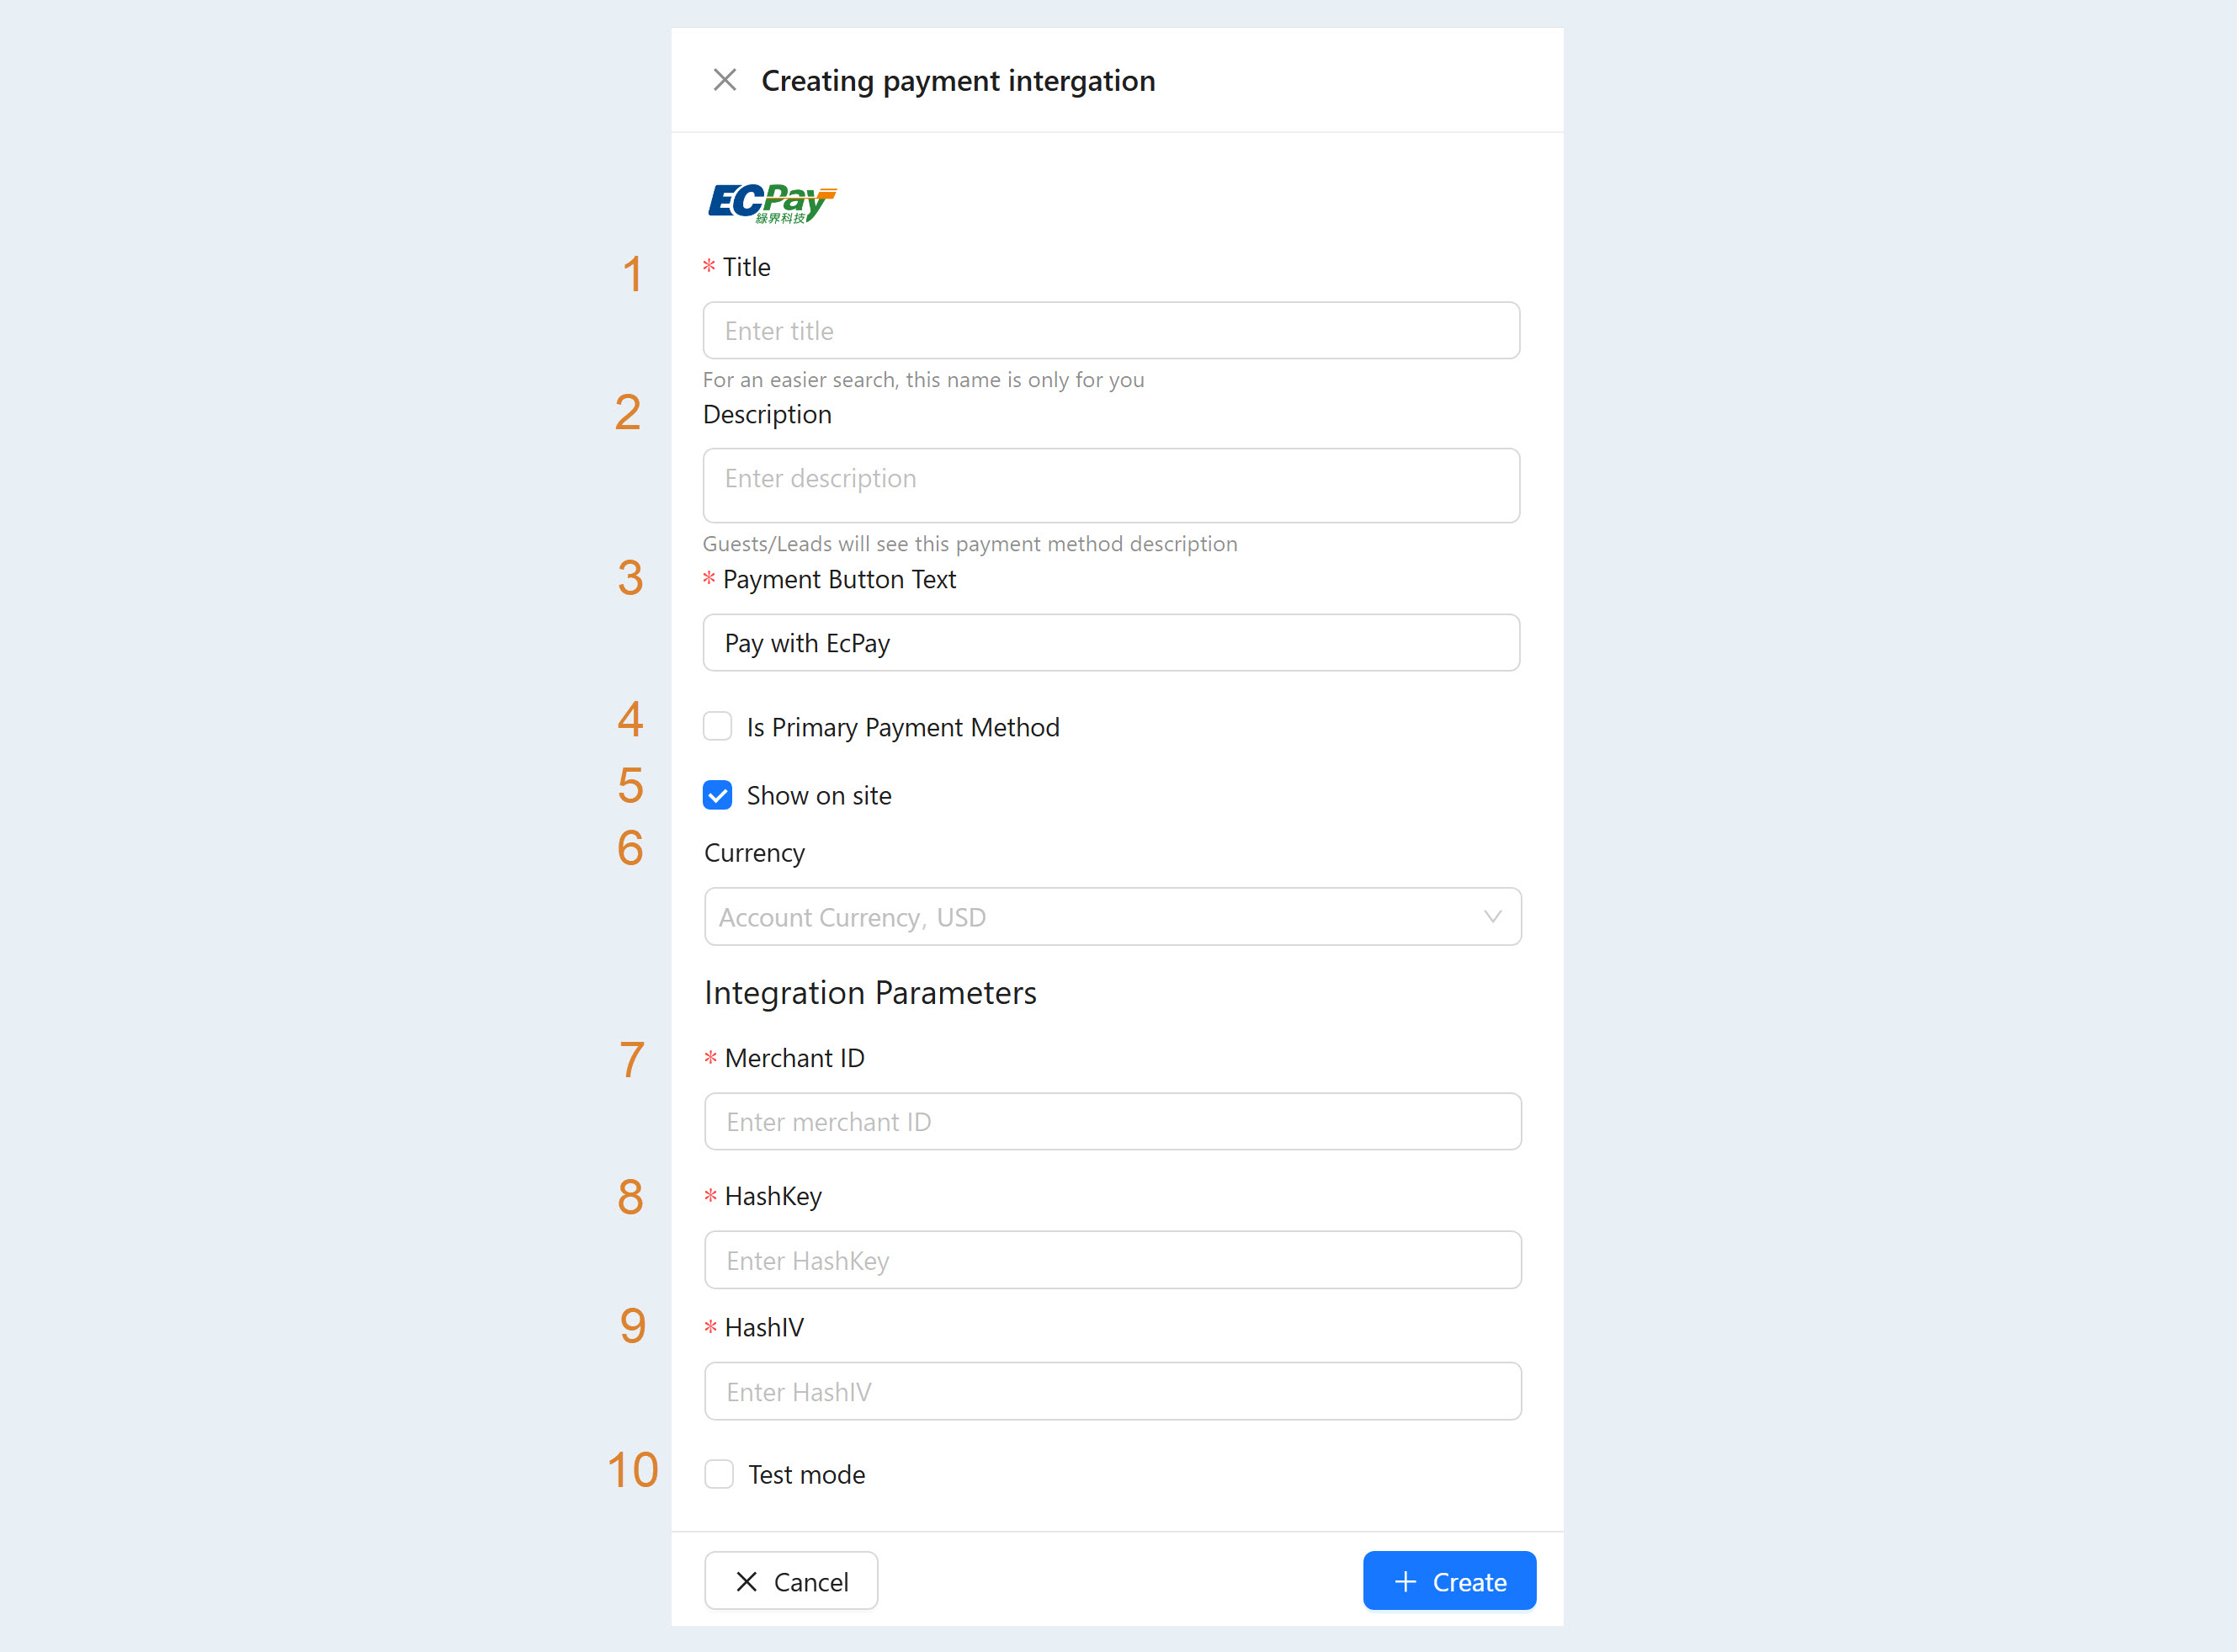
After filling out the form, click "Create". Now you have the "ECPay" tool in the list of payment instruments.