In the first tab "General Information" you see many sections with detailed contact information. Consider the "Profile" section.
In the "Profile" section you see personal contact data. You can add more information about the client or make changes.
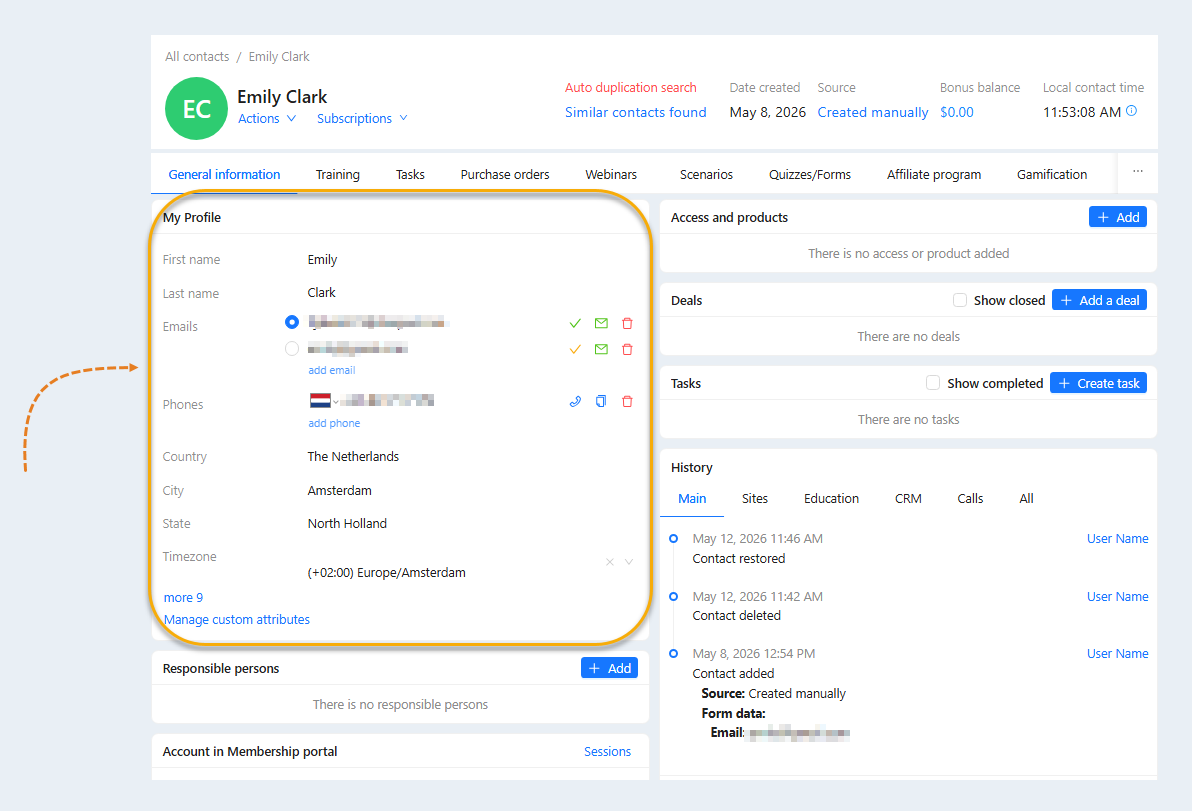
Click on the word "more", you will see a complete list of data:
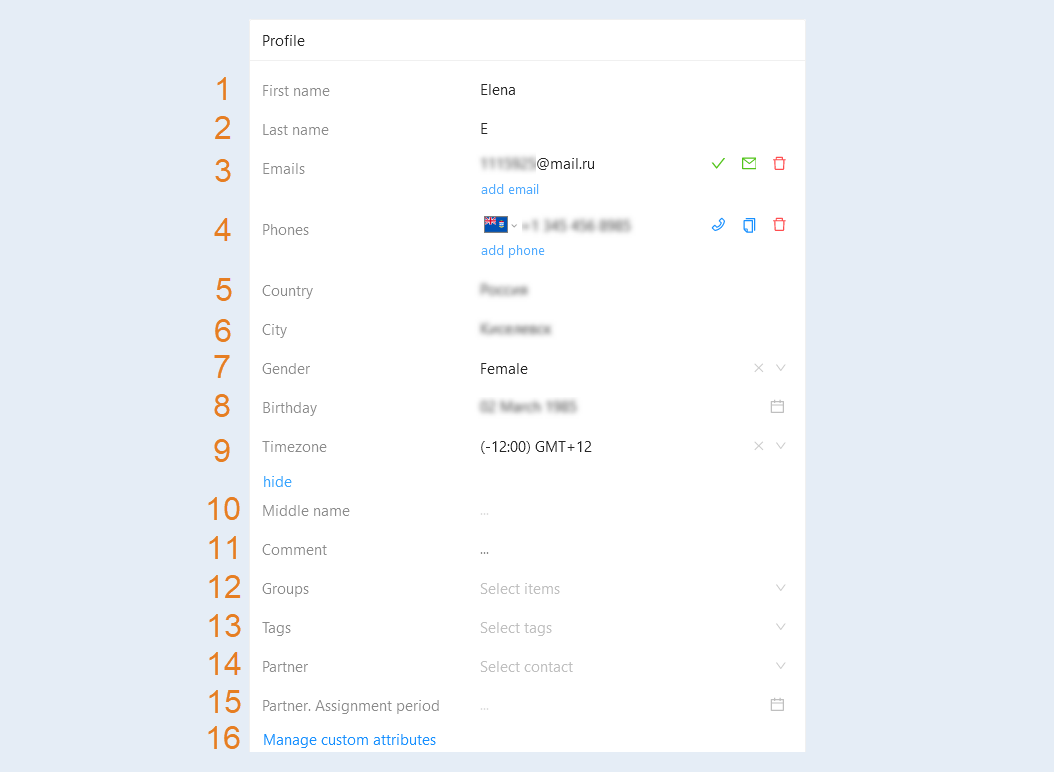
- First name. Here you see the customer's name.
- Last name.
Emails.
Phones.
Сountry. Click on this line and write the country in which the client is located.
City. Click on a row and add a city.
- Gender.
Birthday. Select a date from the calendar.
- Timezone. Select the time zone in which the client resides from the list.
- Middle name.
- Сomment. Here you can add any comments to this contact. This comment will be visible to you and all account administrators.
- Groups. You can add a contact to a group. Click All Items. Here is the "Manage Groups" button. Click the Manage Groups button. An additional window will open. Click on the "Add group" button and write the name of the group. Then click "Close". Now add a group to the contact.
- Tags. Add tags to this contact. Come up with a new tag or choose from a list of tags already added.
Partner. The partner assigned to the contact is shown. Pinning a partner to a contact ensures that the partner receives a commission for all transactions that are carried out with the pinned contact. For more information about the affiliate program, read the article "Affiliate Program".
Partner. Assignment period. The duration of the partner's attachment to the contact is shown.
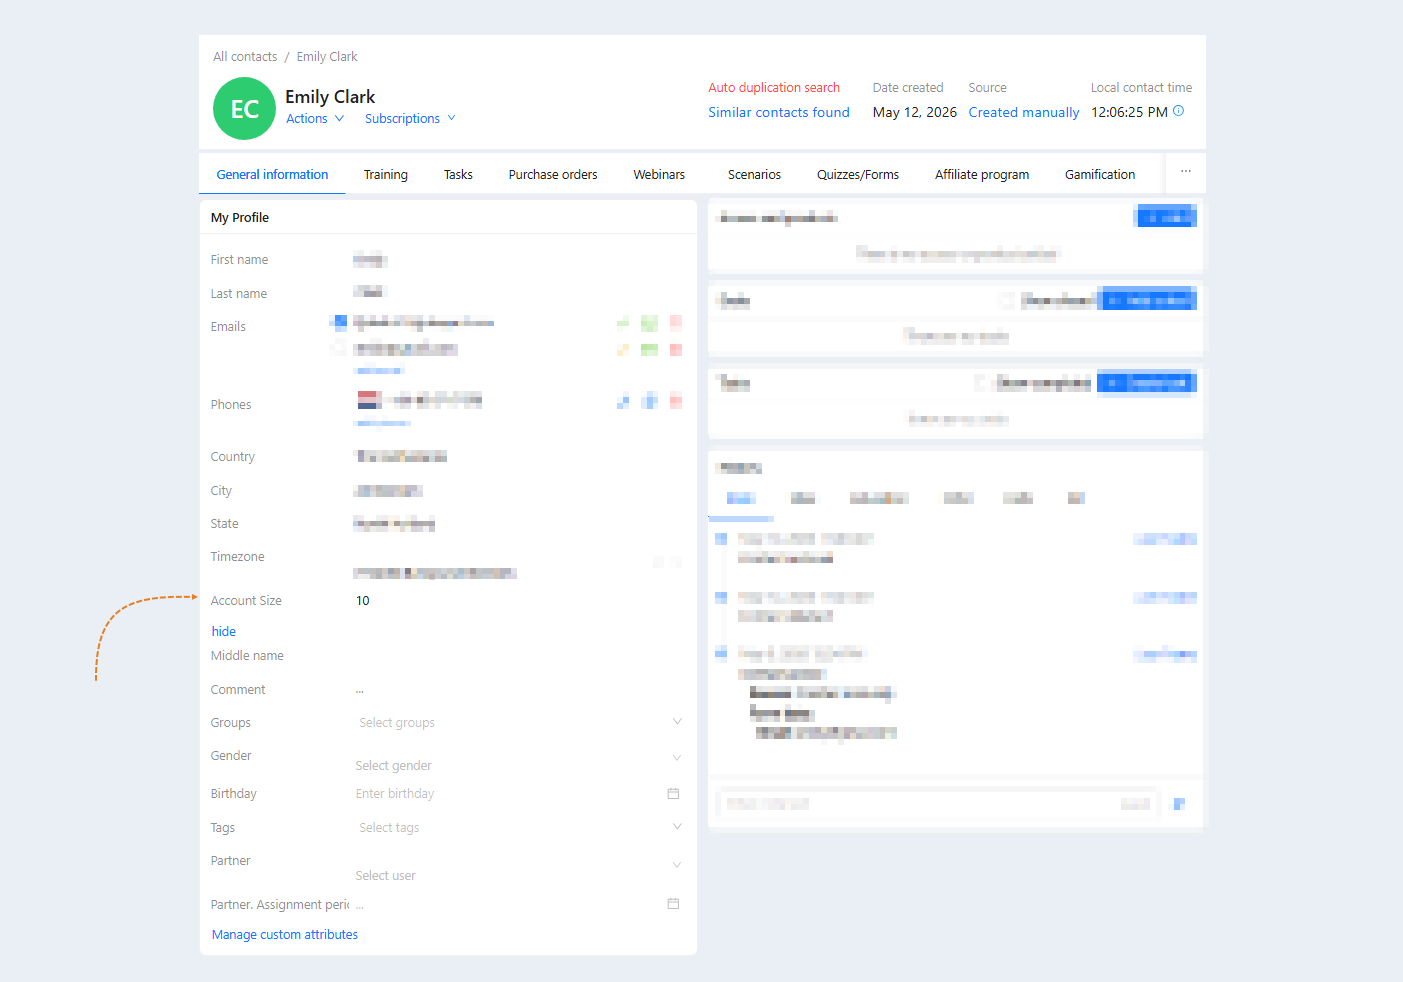
- Manage custom attributes. You can add your own contact attributes. Click on the button and create an attribute.
The contact attribute represents a specific characteristic or information about each user that can be displayed in a list. Contact attributes are necessary to provide additional information about users. They allow for quick access to the required information and sorting or filtering the list of users according to specified parameters.
After clicking on the "Manage User Attributes" button, a window for creating user attributes will open.
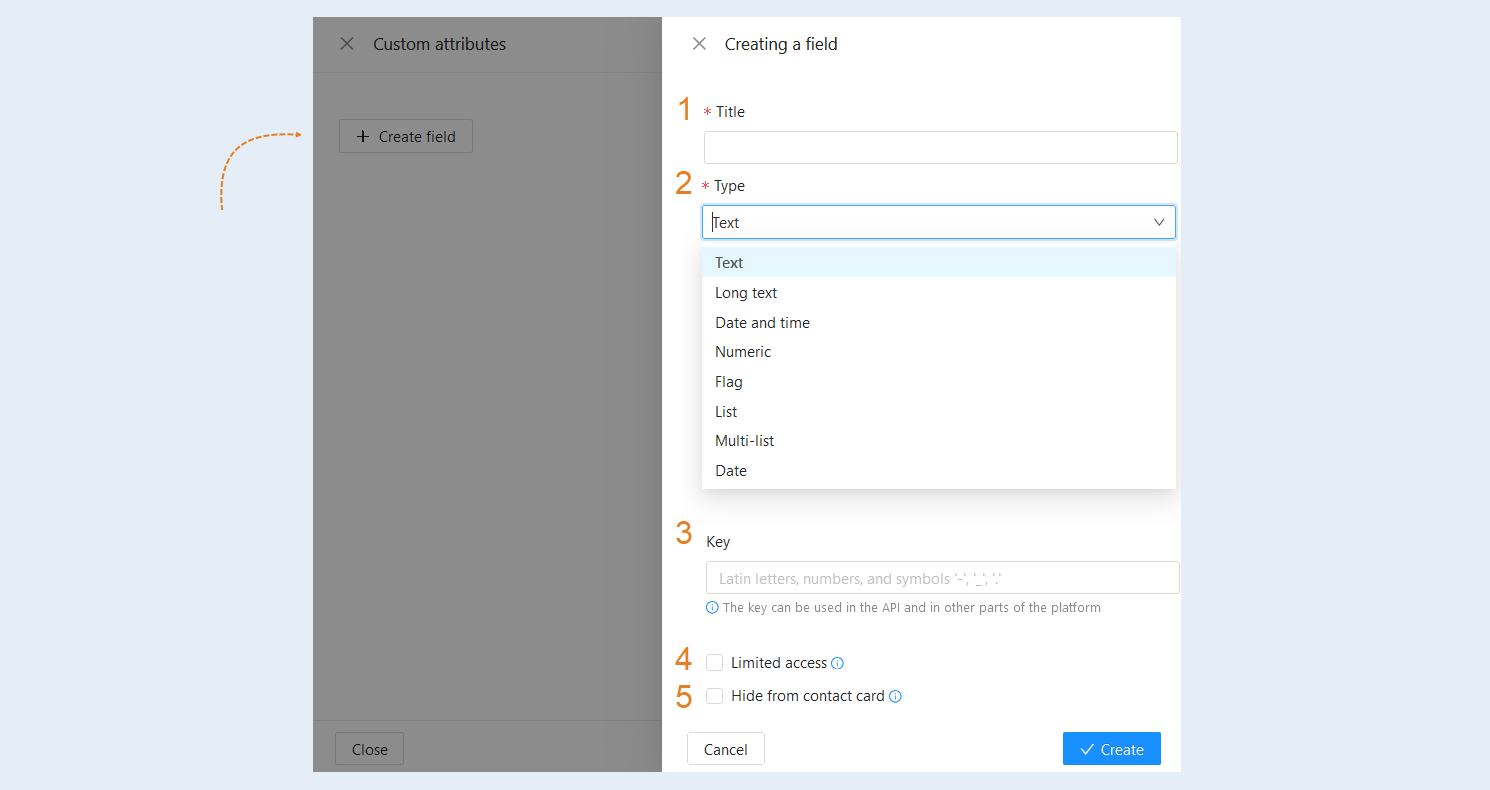
To create a new attribute, click on the "Create Field" button. In the opened window, fill in the following fields:
- Name. Specify the name of the attribute.
Type. Select the type of contact attribute.
- Text. This is a simple text attribute that can contain short words or phrases. For example, a user's name or nickname.
Long text. This attribute allows for entering longer texts or paragraphs. It can be used for writing a user's biography or describing their interests.
Date and time. This attribute is used to specify a specific date and time. For example, the date and time of a user's last login or registration date.
Numeric. The number attribute allows for entering numerical values, such as a user's age or the number of completed tasks.
Flag. The flag attribute is a logical value that can be either "yes" or "no". It can be used to indicate different user statuses, such as presence or absence, subscription or unsubscribe.
List. The list attribute allows for selecting one value from a predefined set of options. For example, education level or study group.
Multi-list. This attribute allows for selecting multiple values from a predefined set. It can be used to specify languages that a user can communicate in.
Date. This attribute is used to specify only the date without considering time. For example, a user's date of birth or course start date.
Key. This is a unique identifier used to identify each attribute in the system. Add the key using Latin letters, numbers, and symbols. The key can be used in the API and other parts of the platform.
Limited access. This option allows you to restrict access to this contact field. Only administrators with rights to restricted fields will be able to view and edit this field. For example, if the field contains confidential information (for example, passport number, financial data), it can be made available only to administrators with the appropriate rights.
Hide from the contact card. This option allows you to hide the field from the profile of the contact card. The field will not be displayed in the standard interface, but you can see it if you expand the full list of fields by clicking the "More" button.
After completing the settings, click on the "Create" button.
After creating the new attribute, it will appear in the list of user attributes. Here you can see the following information:
- Hold down the "Move" icon and move the attribute higher or lower in the list.
The name of the attribute.
Field type.
The field key.
The icon "The field is not displayed even if filled in".
The "Edit" button.
The "Delete" button.
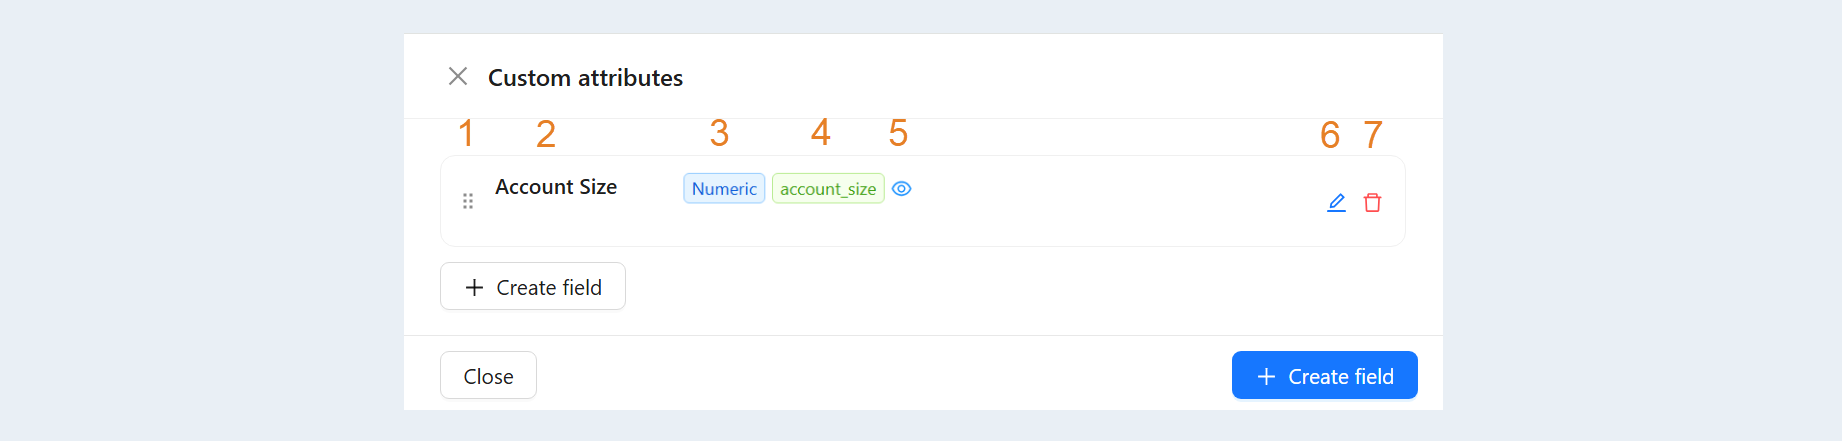
Additionally, the new attribute will appear in the user contact card profile.
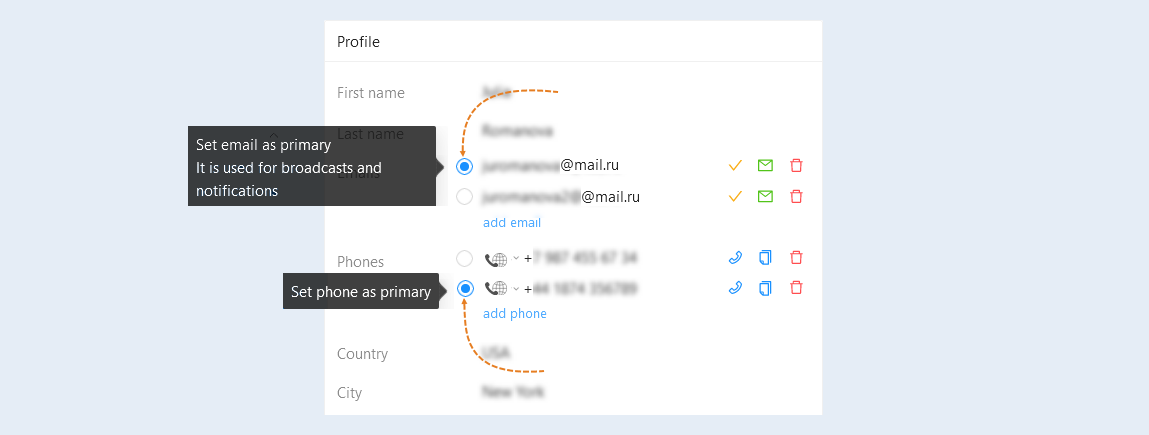
In the contact profile, you can add several email addresses and several phone numbers. Click the "Add email" or "Add phone" button, enter an additional email and phone number in the new line.
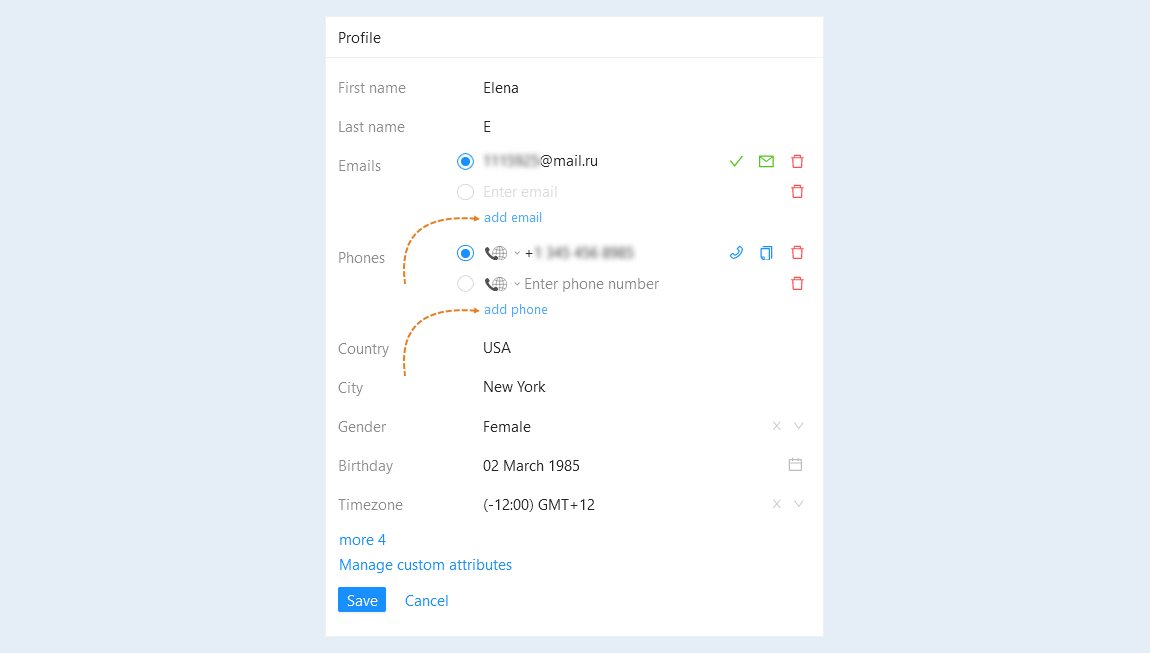
One of them will be chosen as the main one. Check the box next to the desired email and phone number to set it as the main one.
Mailings and notifications will be sent to the main email address. The main phone will be considered the primary one.