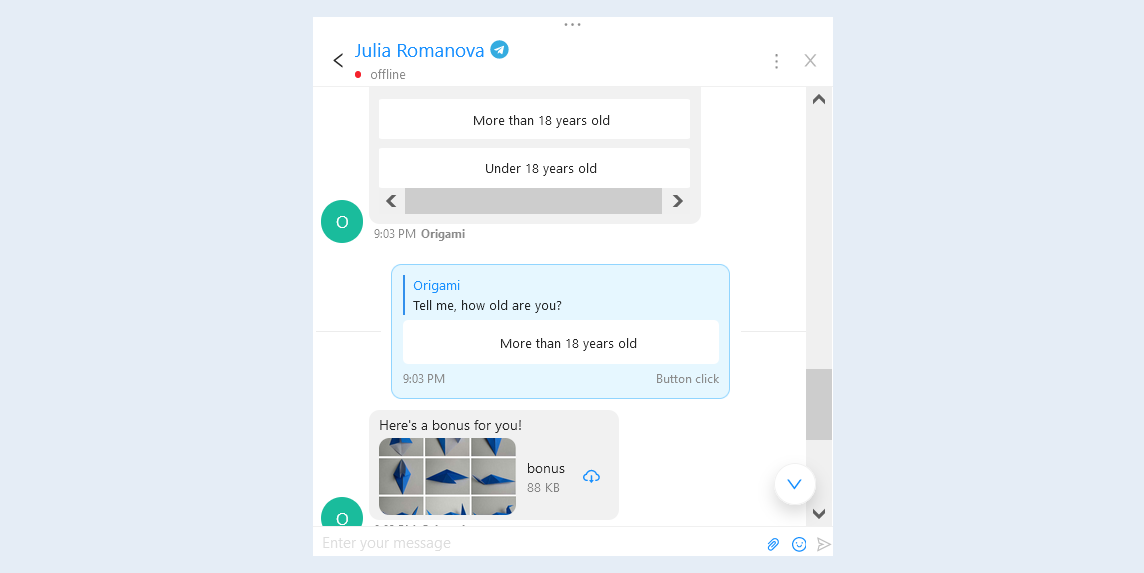
In chatbots, regular scripts and newsletters, you can add buttons to messages sent via various chat channels. This system works universally for each chat channel. You set up just one step of the chatbot, and it will function similarly in Telegram, Viber, Facebook and other messengers.
In scripts, you can configure the execution of a certain action when a button is clicked, whether it is an action button or a link to a website in the form of a button. All clicks are recorded, and you can view the history of clicks.
In this article, we will consider in detail how to configure and automate the operation of buttons in a chatbot. Click on the desired section of the article to go to its description:
1
Creating a chatbot
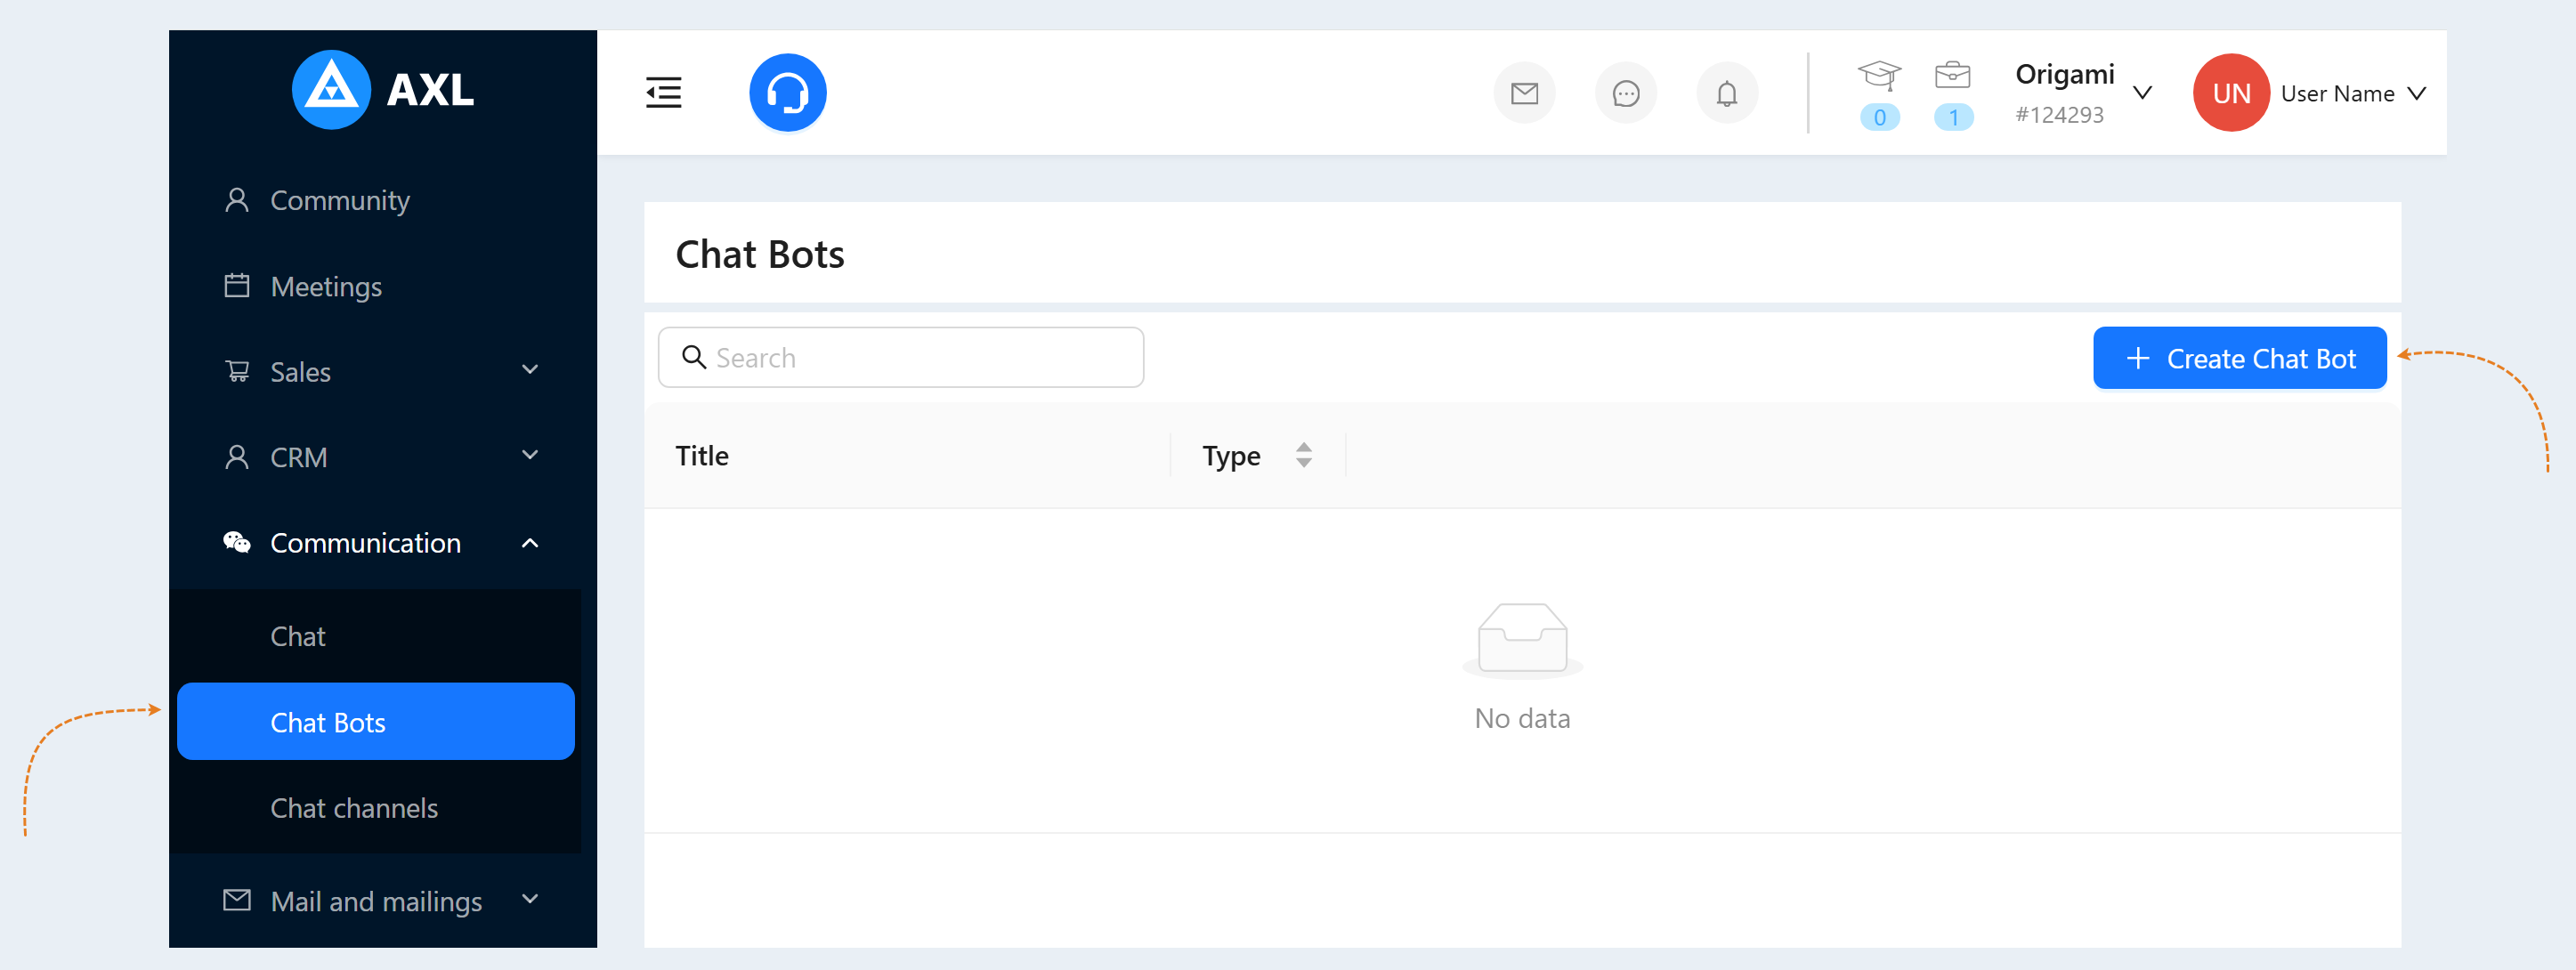
Go to the "Communication" section, the "Chatbots" tab. Click the "Create a chatbot" button.
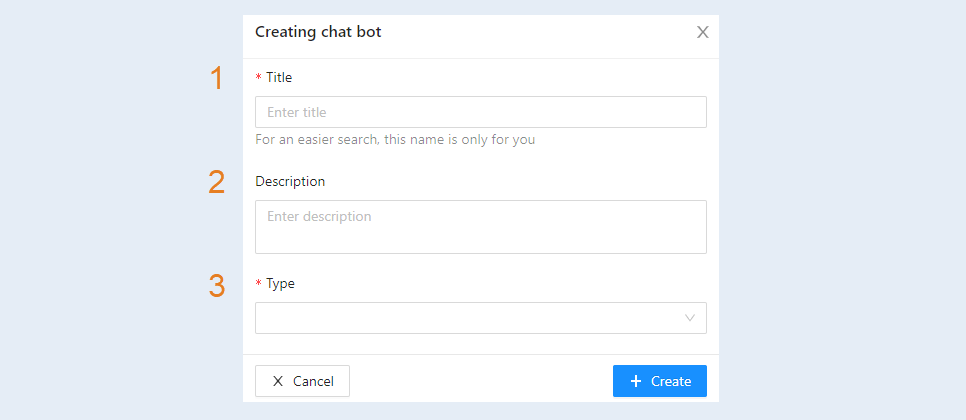
An additional window will open for you. Fill in the fields:
- Title. Write a name for your chatbot.
Description. Add a description for the chatbot.
Type. Select the type of chatbot from the list: simple, webinar.
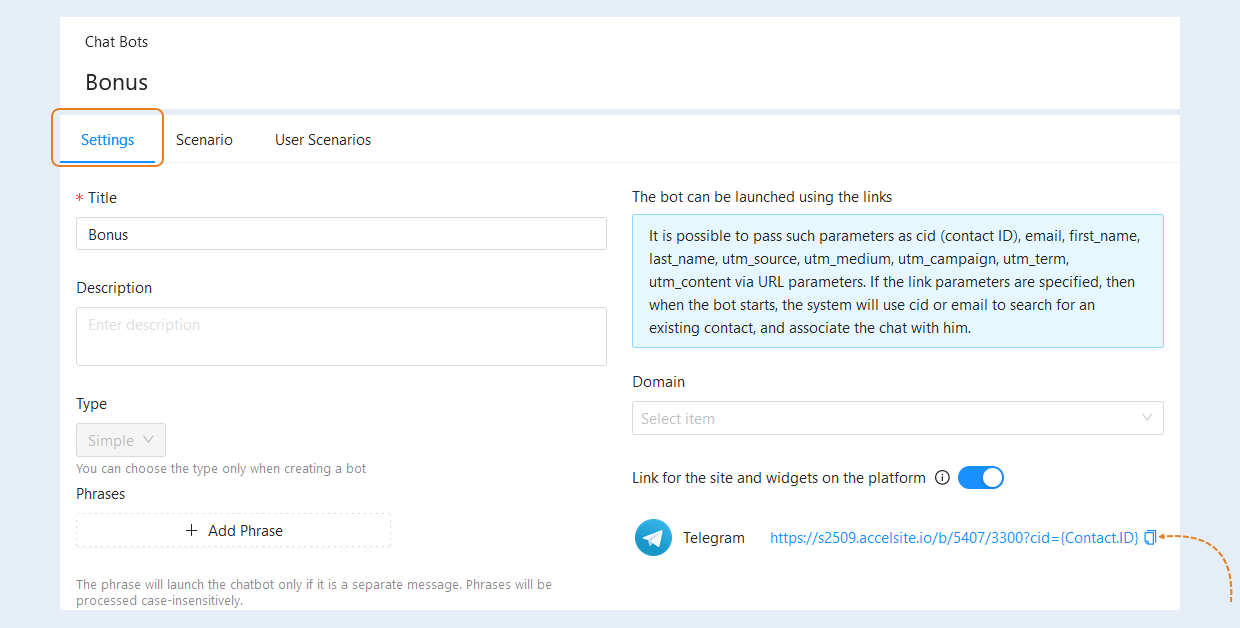
Click the "Create" button. The chatbot settings will open for you. Copy the link to the chatbot. You will need this link at step №3 of this article.
2
Chatbot scenario
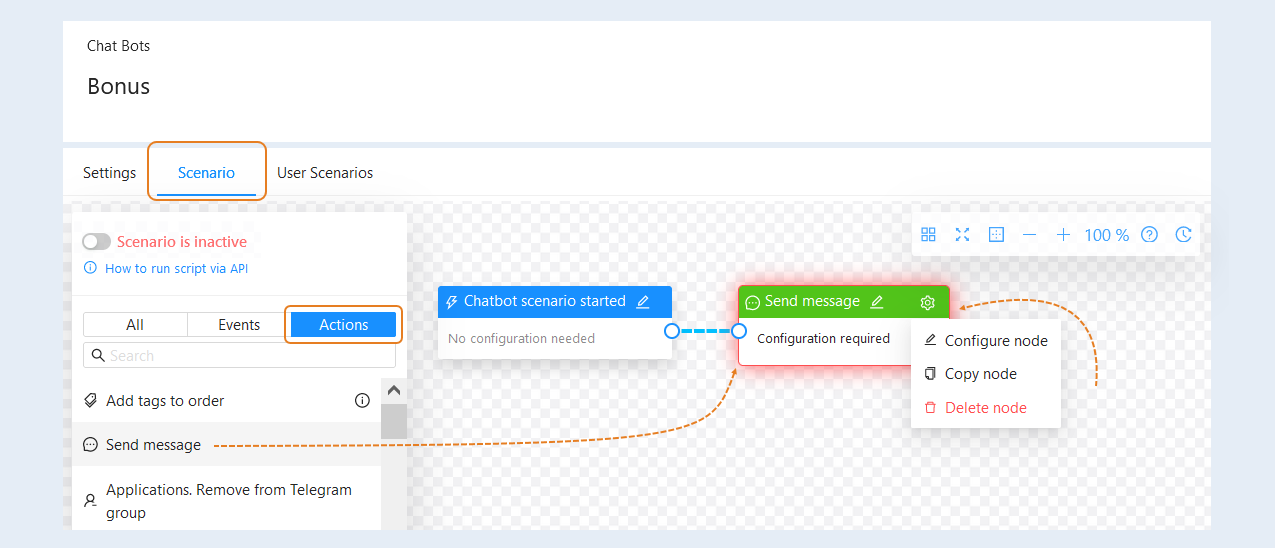
Go to the "Scenario" tab of the chatbot. Here, by default, the event triggering the chatbot "Chatbot scenario started" is already set. It is automatically created when you create a chatbot.
Next, select the "Send Message" action and drag it into the scenario field. For the action, you need to perform settings - configuration. Click the "Settings" button and then the "Configure Node" button.
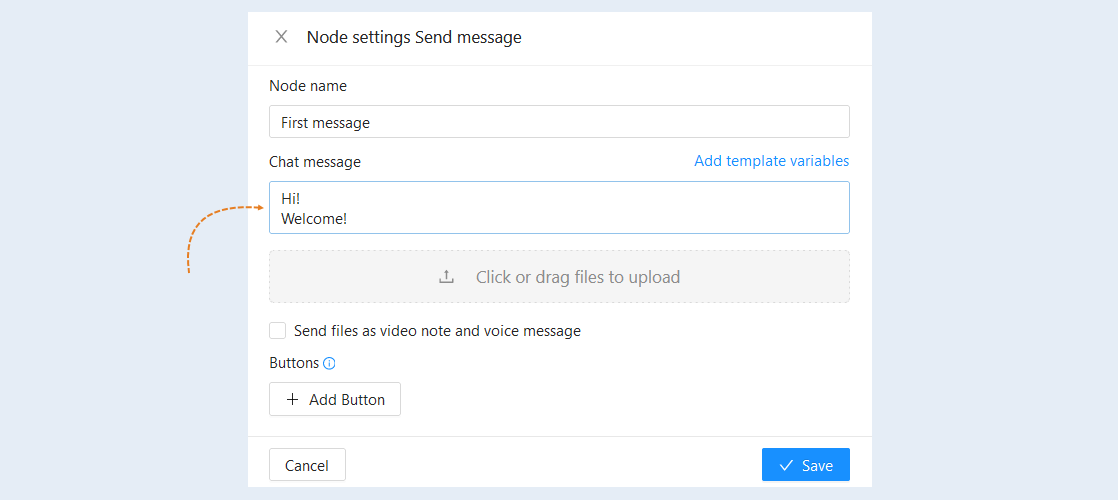
In the "Send Message Node Settings" field, add the message text.
Thus, after launching the chatbot, a welcome message will be sent to the user.
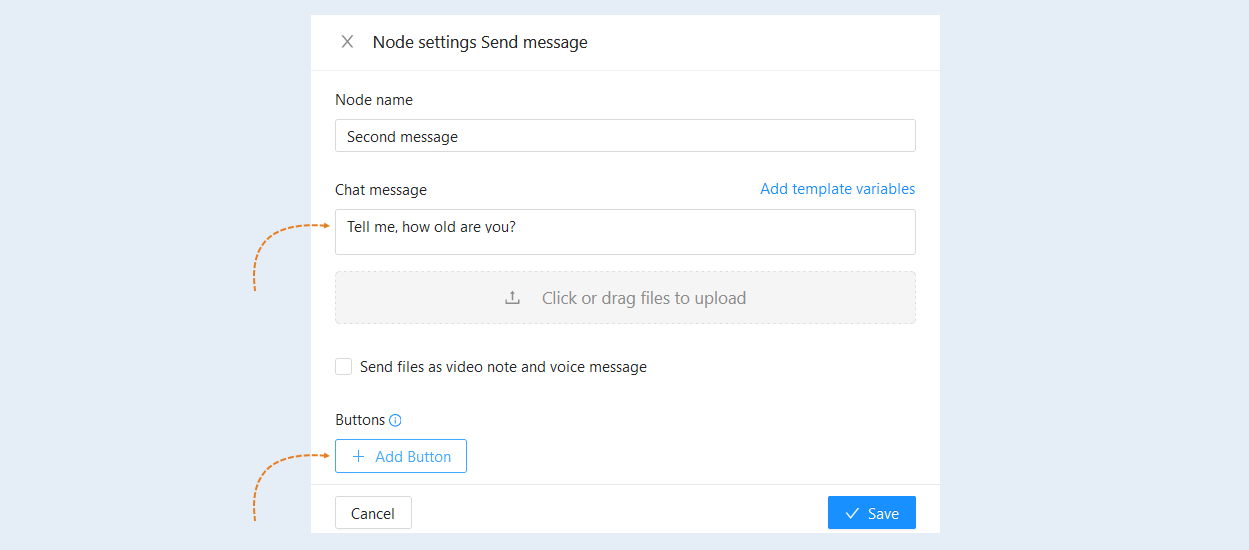
Next, add another action "Send a message" and perform the settings - configuration.
In the settings of the second message, add the text and click "Add button".
The buttons in the chatbot will stop working 6 months after sending the message. The maximum number of buttons for Viber is 7 in one message (buttons cannot be divided into several messages, since when sending a second message with buttons, the first buttons disappear). There are no restrictions on the number of buttons for other messengers. Buttons are not supported in Wazzup24 chat channels (only WhatsApp channel is supported).
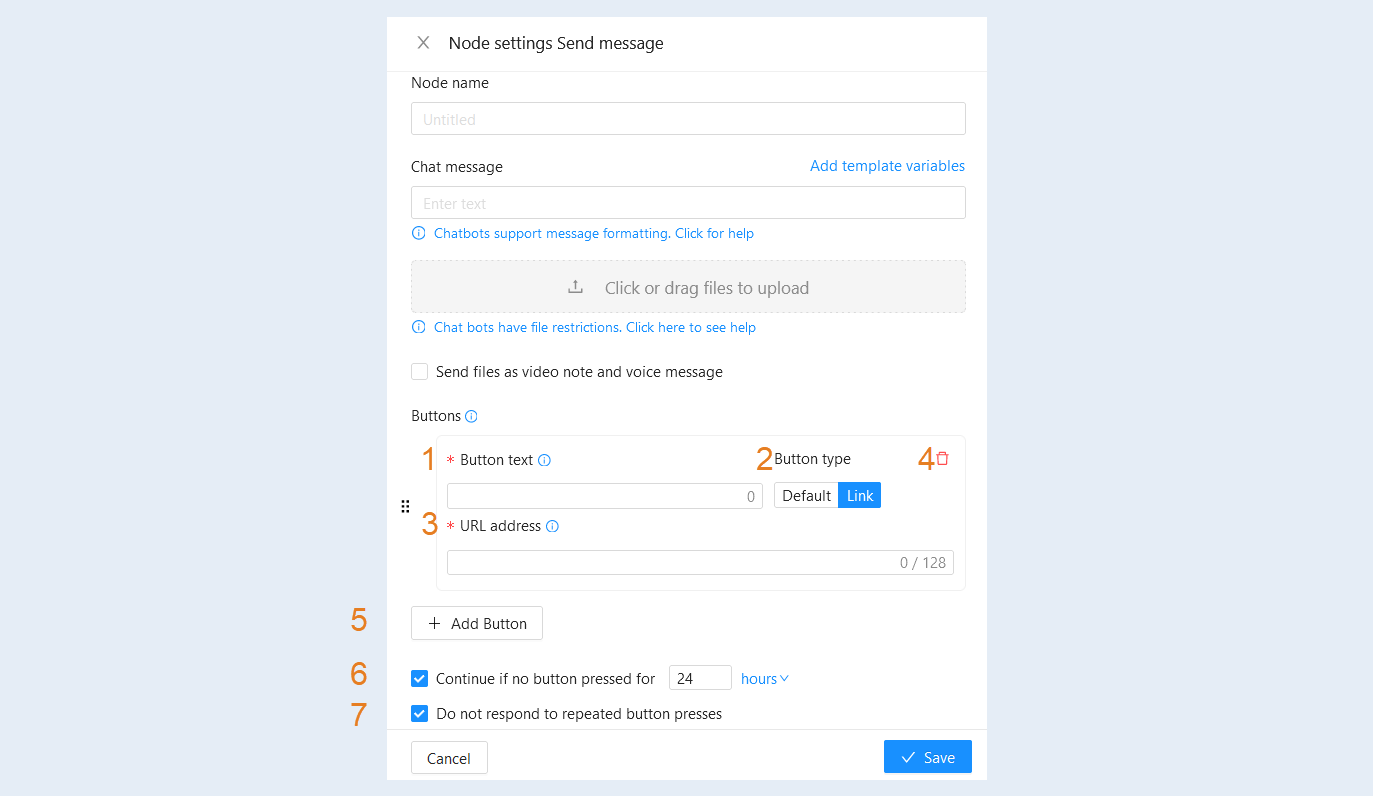
After adding a button, it will appear in the list of buttons. Here you can see the following information:
Button text. Specify the button text that users will see. The maximum length of the button text for different channels: Telegram - 4096 characters, Viber - 7000 characters, Vkontakte - 4000 characters, Facebook - 2000 characters, WhatsApp - 4096 characters, Instagram - 1000 characters, Line: 5000 characters. If the text turns out to be longer than allowed, it will be cut off.
Button type. Select the button type:
- Default.
Link.
Link. This field will be available if the link button type is selected. The maximum link length is 128 characters. Links support variables, as in the message text.
Restrictions for WhatsApp - navigation by direct links is not supported, the link to go will be sent in the next message when you click on the button.The "Delete" button. Click to delete the button.
Click "Add Button" to add another button.
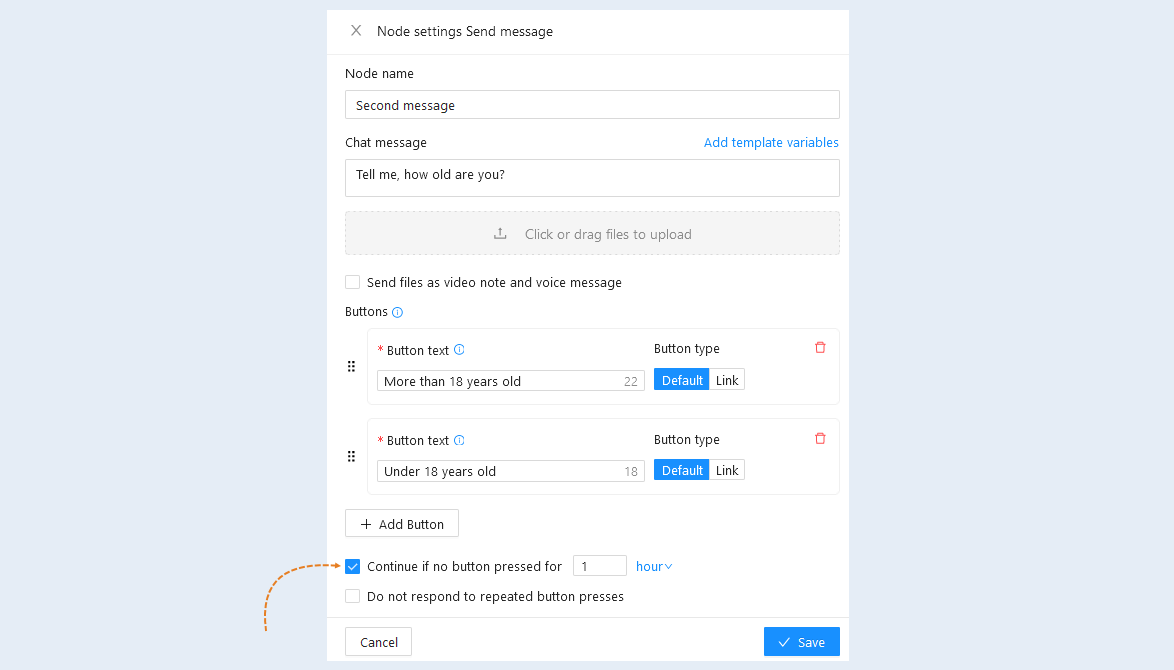
Continue if no button pressed for. If the user does not press any of the buttons, then after the specified time, the script will continue and the next action in the chatbot script will work. Check the box and set the time interval. The time interval can be selected in days, hours or minutes.
Do not respond to repeated button presses. Check the box so that the user can click on the button only once.
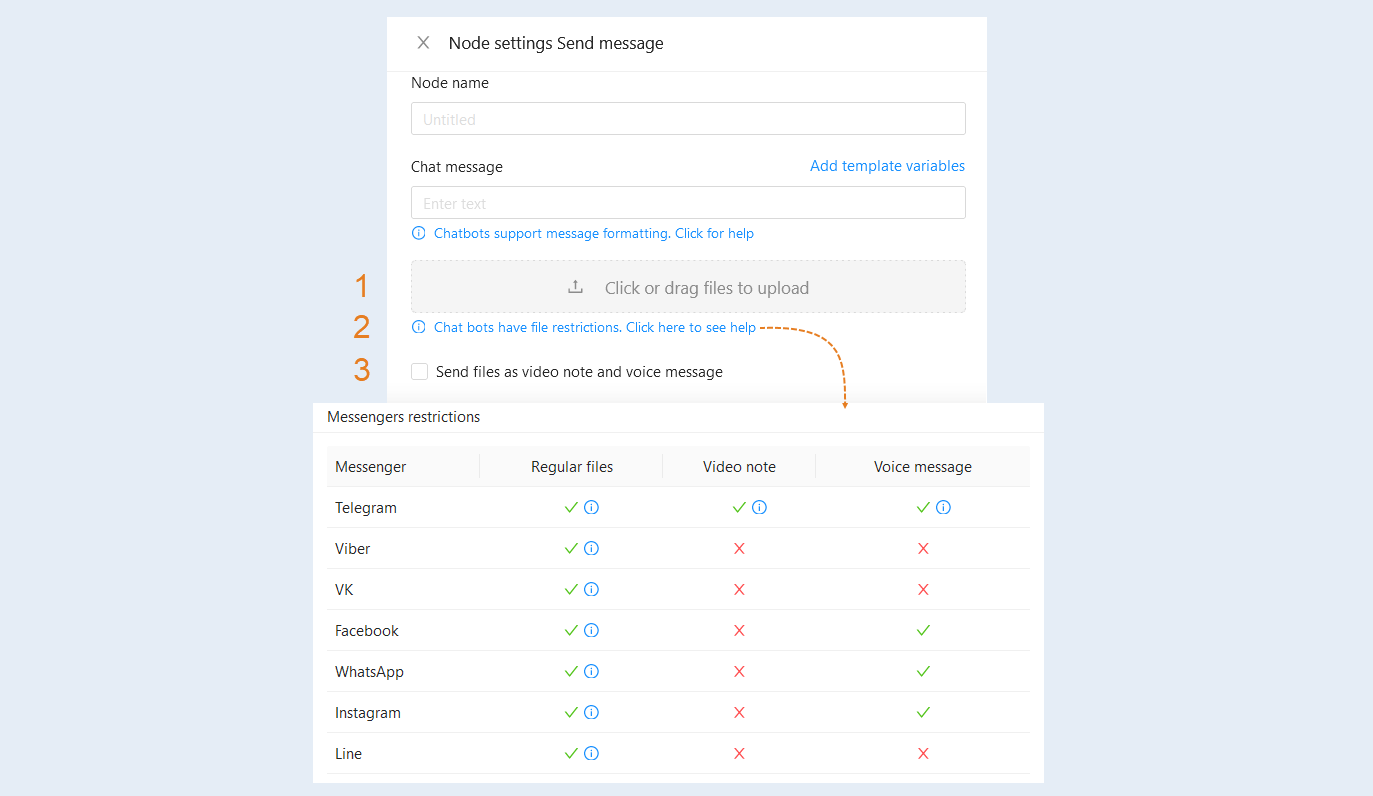
You can set up sending files in the form of a video circle and a voice message.
- Click or drag files to upload. Attach video or audio files.
Messenger restrictions. Click to open the table of parameters and restrictions for various messengers. Sending a message in the form of a video circle is available for Telegram. Instagram Facebook, WhatsApp, and Telegram voice messages can be sent.
Check the box "Send files as video note and voice". The video must be of equal width and height (square) up to 639px, an mp4 file and no longer than 1 minute in length for it to become a video circle. For a voice message, the file must be in ogg format, up to 50 MB.
Please note that if you record a voice message on the microphone and attach this file in the “Send Message node Settings”, then in some cases Telegram may not recognize the file as a video circle and a voice message.
If you want a message in the form of a video circle and a voice message to always be sent correctly, then you should first talk and send a video circle or a voice message to yourself (or a friend) in Telegram. Then save the video circle from Telegram to your computer and only after that attach this file in the “Send Message node Settings".
The file recorded and saved from Telegram will always be sent correctly and in the right format.
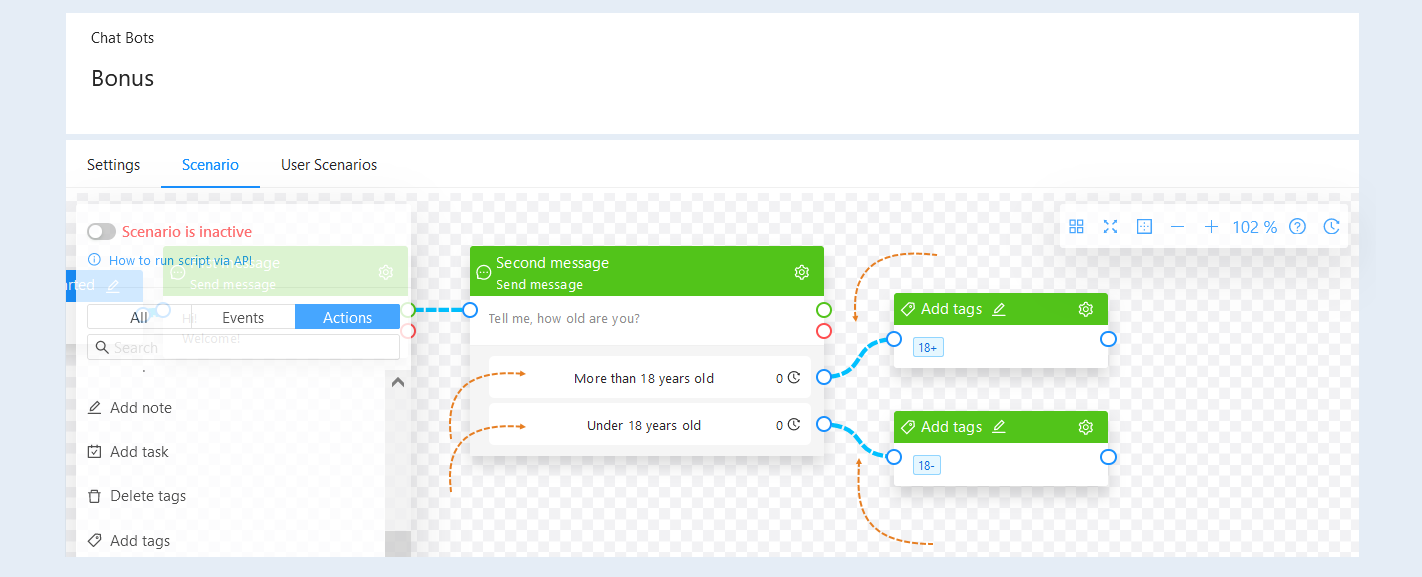
Click the "Save" button. After adding the buttons, they will be displayed in the script in the "Send message" action field. Next, you can bind a specific action in the script to each button. Thus, when the user clicks on the selected button, it will be sent according to a separate scenario.
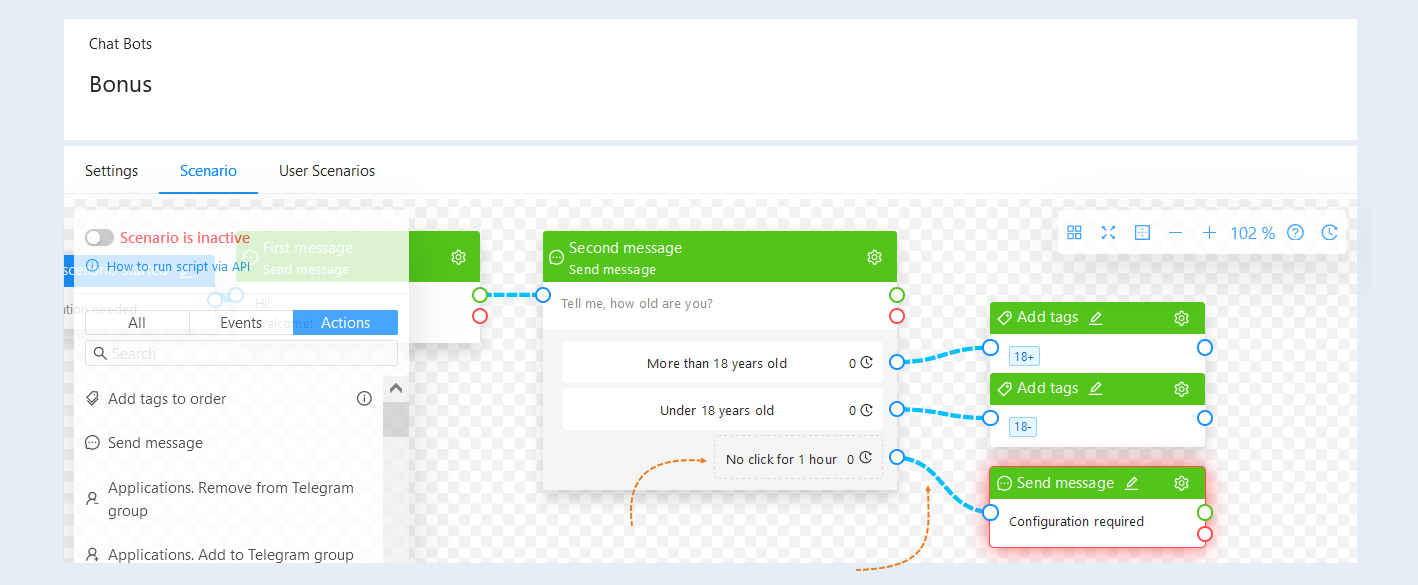
If you ticked "Continue if no button is pressed" in the settings of the "Send message" node and set the time, then after the specified time, if the user does not press any of the buttons, the next action in the script will be launched.
In the "Send Message" action, another line will appear for which you can configure your script chain.
Thus, for each user action option at this stage of the scenario, you can configure a different sequence of further actions.
If you want to send another message, regardless of the user's action, then you can create a new script chain at the top of the action. For example, send a link to purchase a course the next day, after sending the second message.
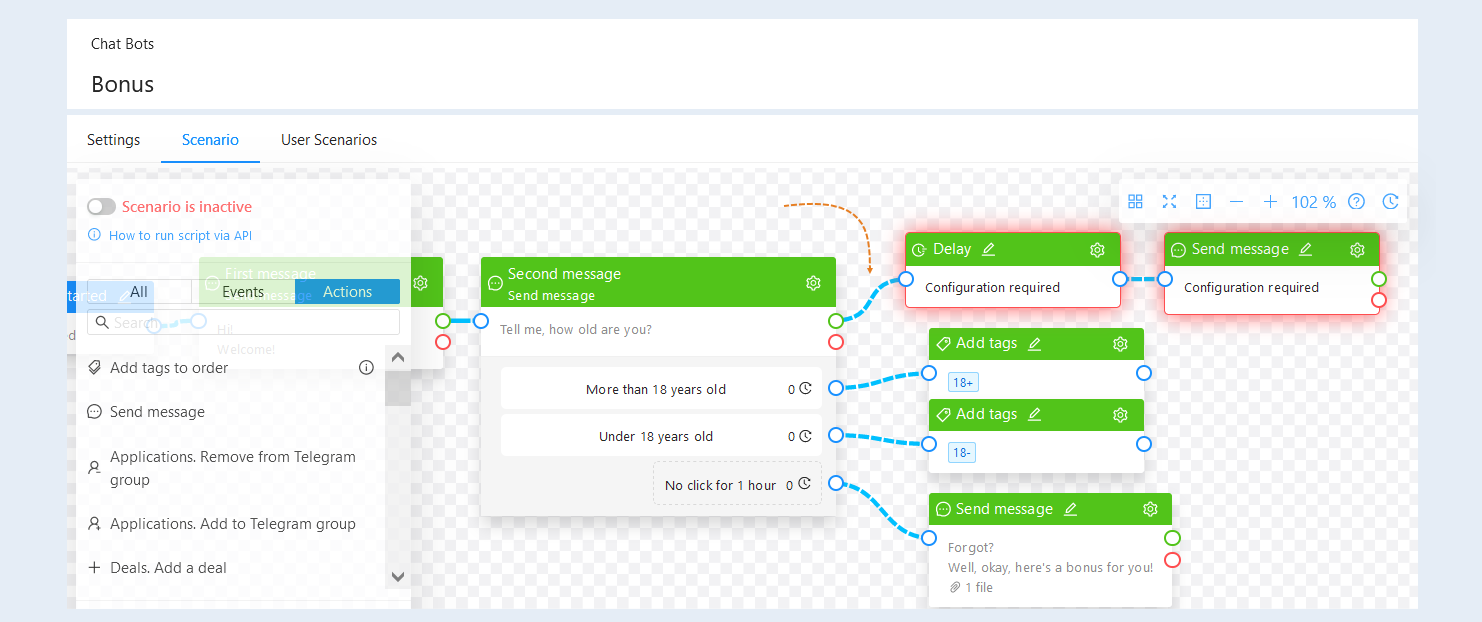
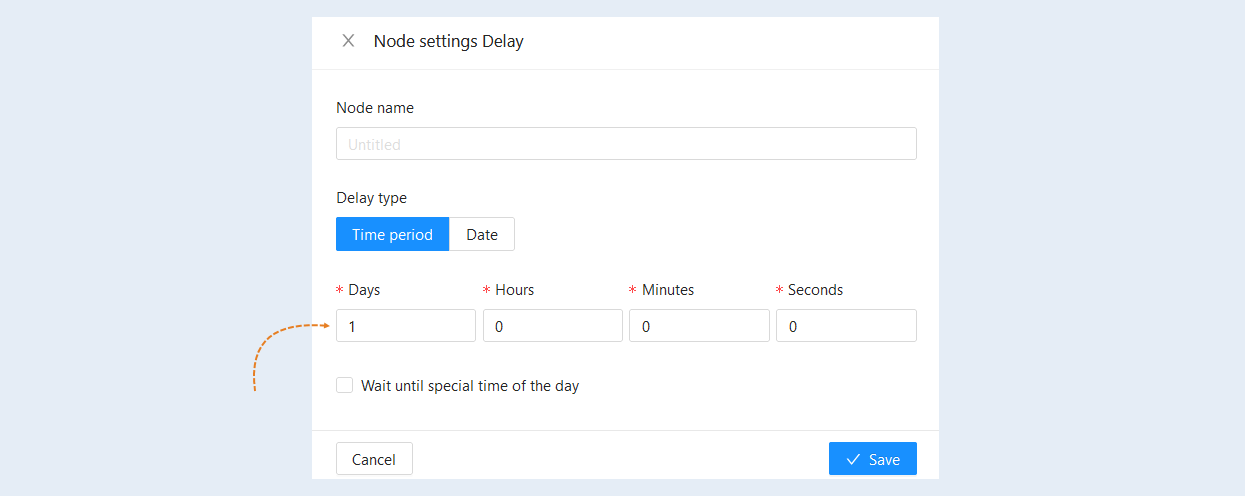
Select the "Waiting" action and drag it to the script field. In the "Waiting" node settings, set the delay to 1 day.
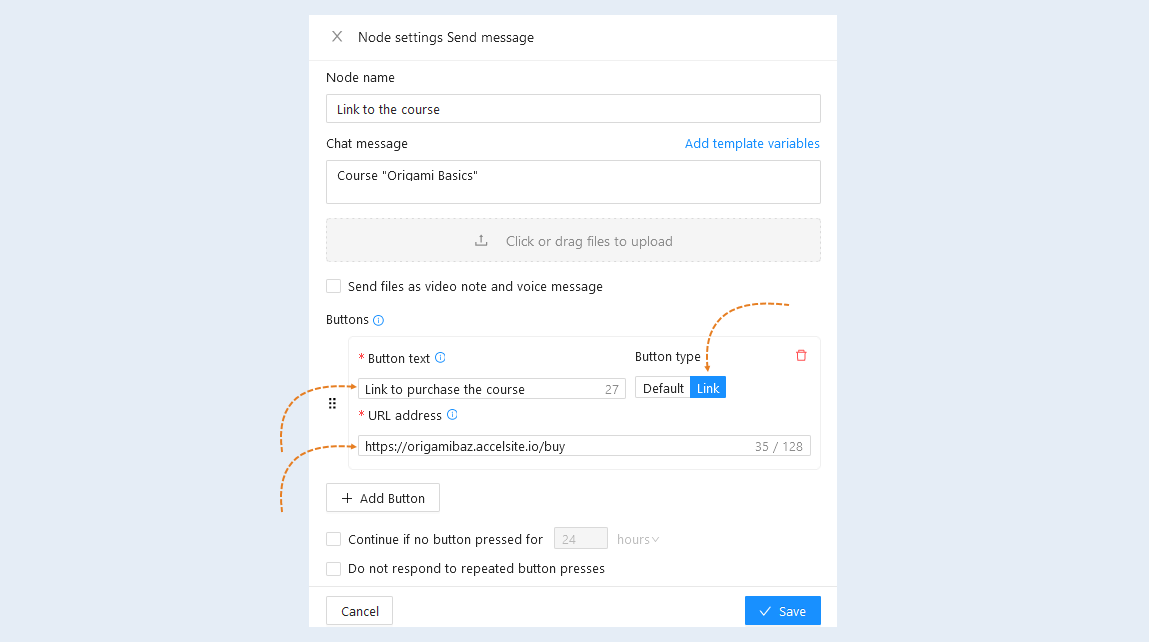
Next, select the "Send Message" action and drag it into the script field. In the settings of the "Send message" node, add a button and set the button type - link. In the URL field, insert a link to purchase the course. For more information on how to create a link to purchase a course, read the article "How to sell a course in 5 minutes".
All button clicks in the form of links to the site are recorded and you can view the history of clicks. The advantage of sending a link in a chatbot in the form of a button is that it is more difficult to forward a button than a simple message with a link. Therefore, open links that can be used several times will not scatter over the Internet, as it could be with ordinary messages.
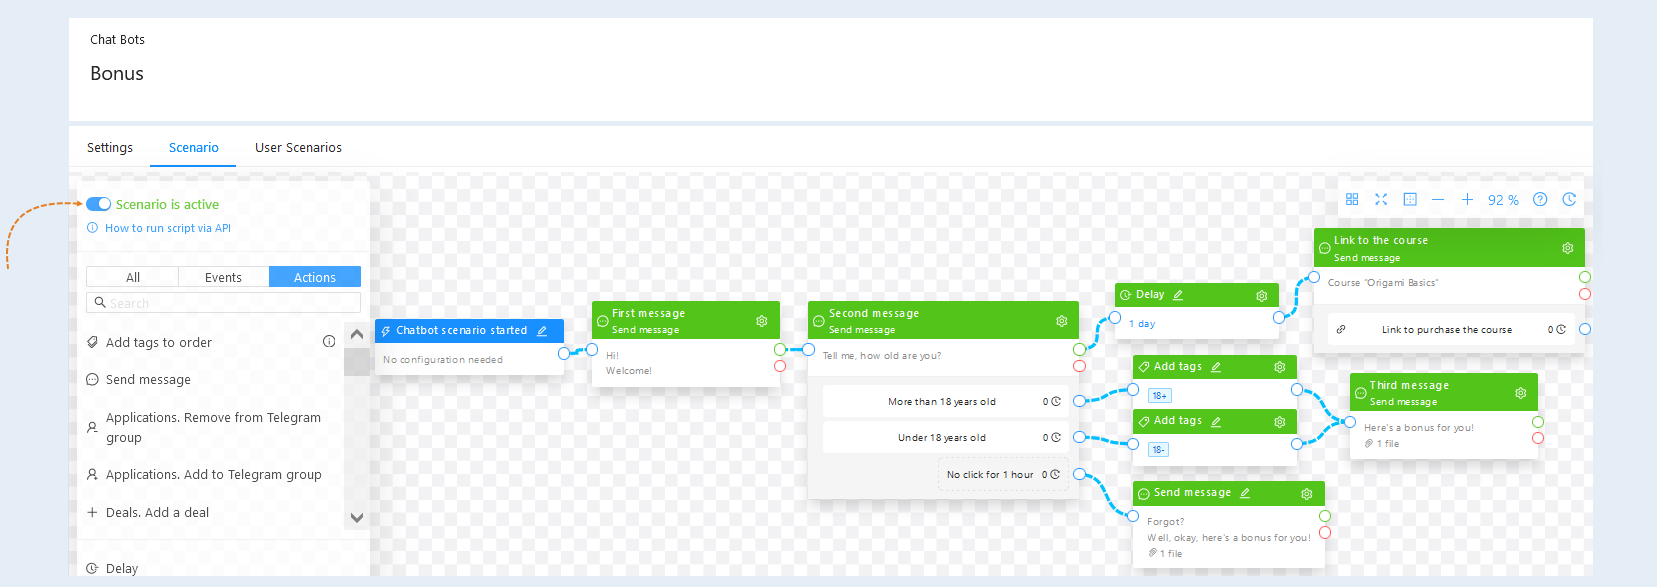
After completing the script settings, move the "Scenario is active" slider to the active position.
3
Connecting a chatbot to a website
In order to create a chatbot launch button on the site page, configure the site on the AXL platform.
Go to the "Sites" section. Open a previously created site or create a new one. Read more about how to create a website in the article "How to create a website".
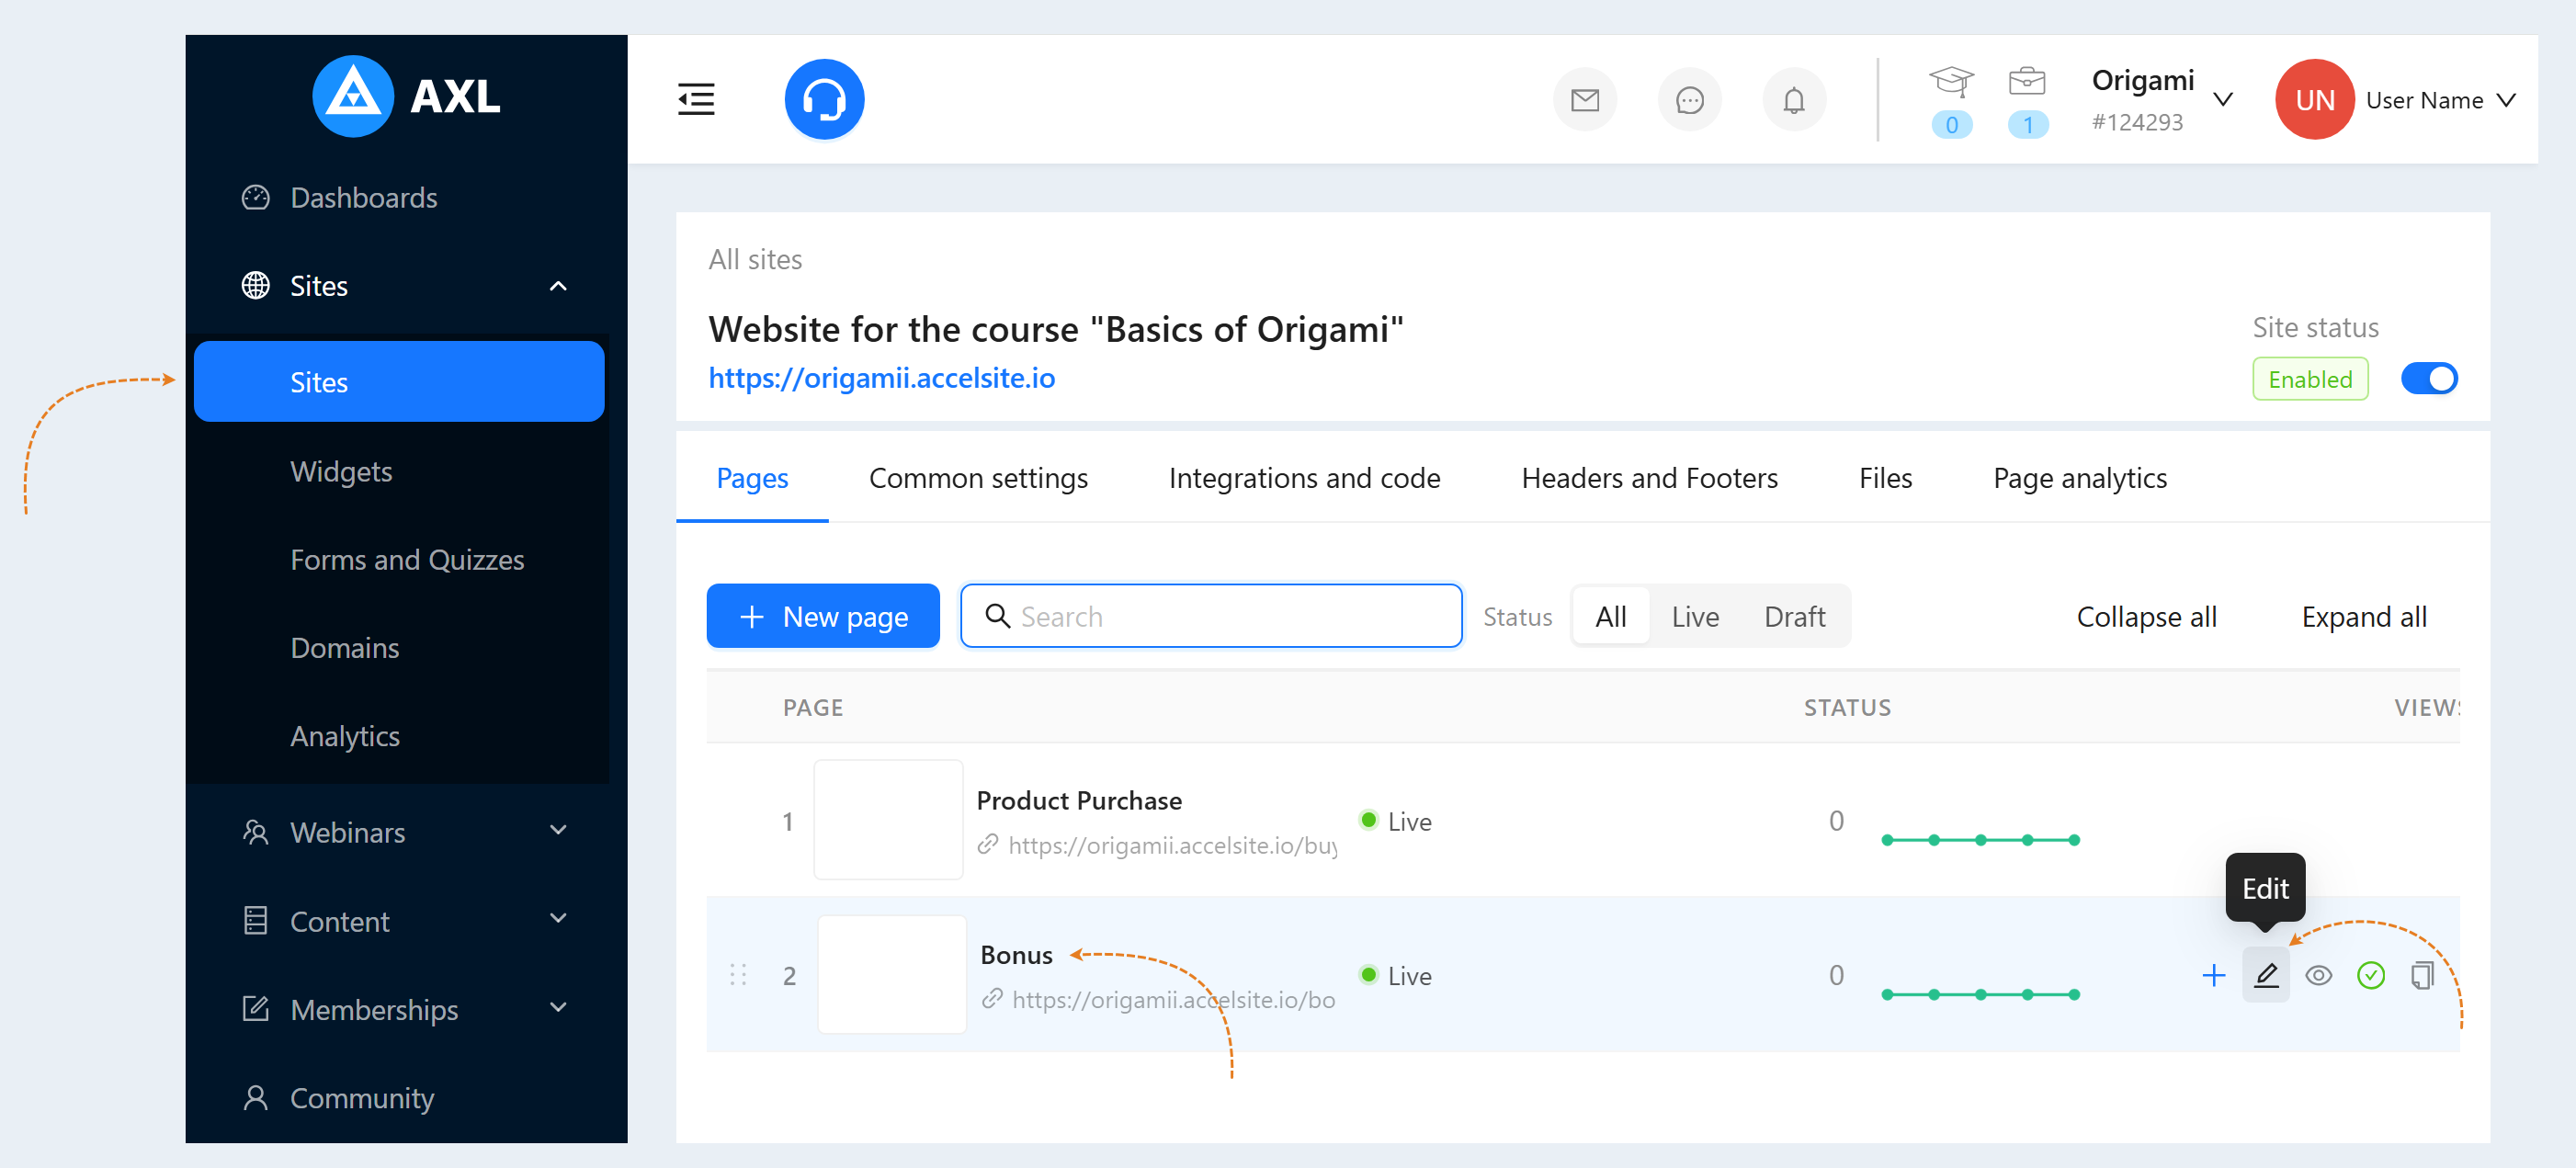
Next, in the "Pages" tab, select one of the created pages and click on the page name or the "Edit" button to open it.
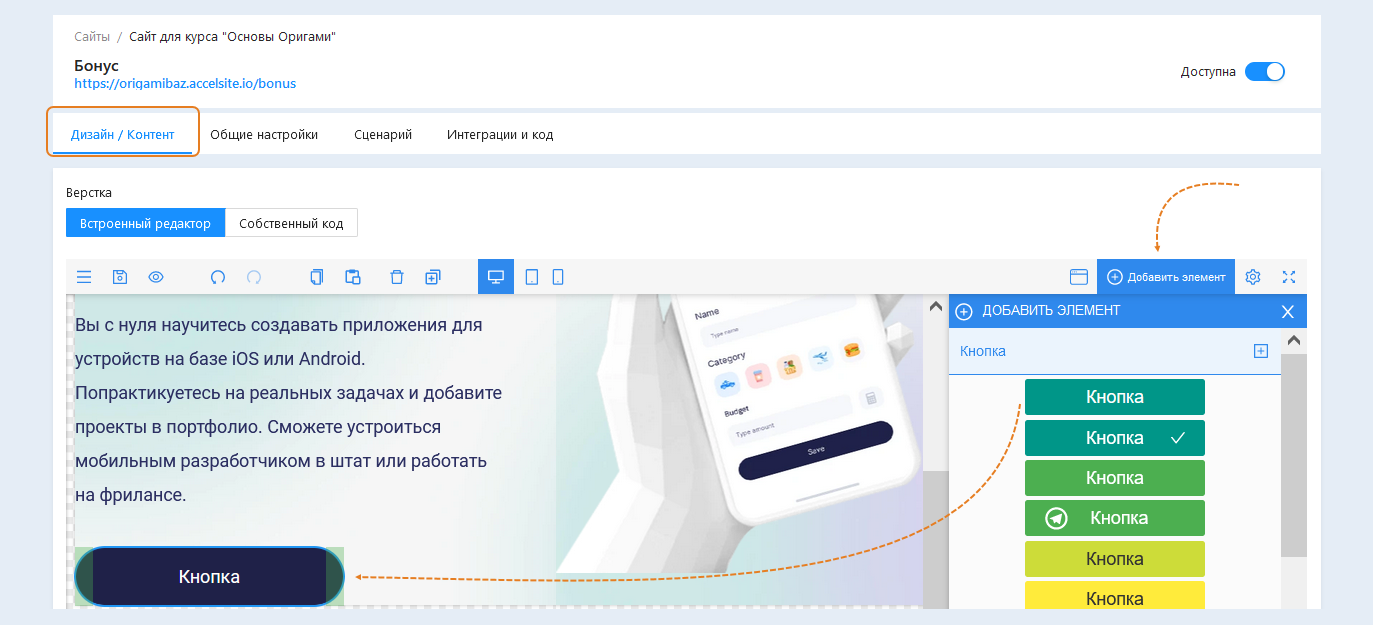
In the editor window of the site page, click the "Add element" button. Select the "Button" element and drag it to the page field.
Select the entire button to open the settings for this item. The Settings toolbar opens on the right.
In the button settings, open the "Interaction" tab and add an action by clicking "Go to link". In the "Link" field, insert the link to the chatbot copied in step №1 of this article.
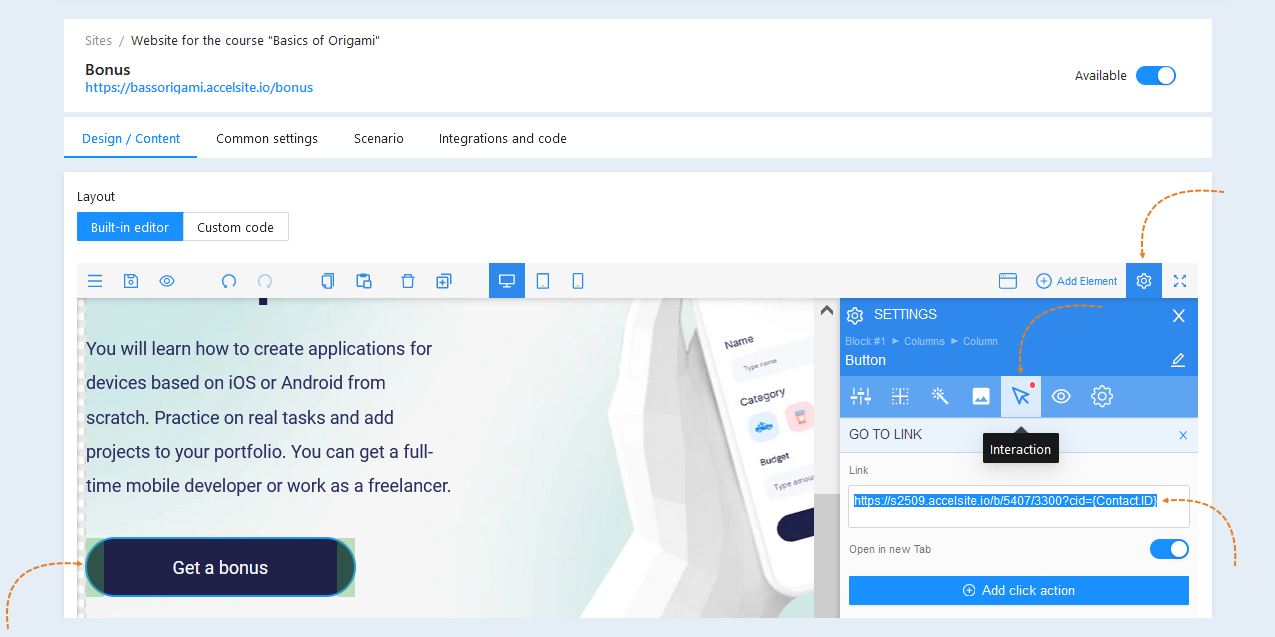
Thus, after the user clicks the "Get bonus" button on the site page, he will launch a chatbot and start the script created in step №2 of this article.
4
Chatbot Execution history
To view the history of chatbot launches, go back to the chatbot script. In the upper right corner of each event and action there is information about the number of its launches. The numbers indicate the number of messages sent.
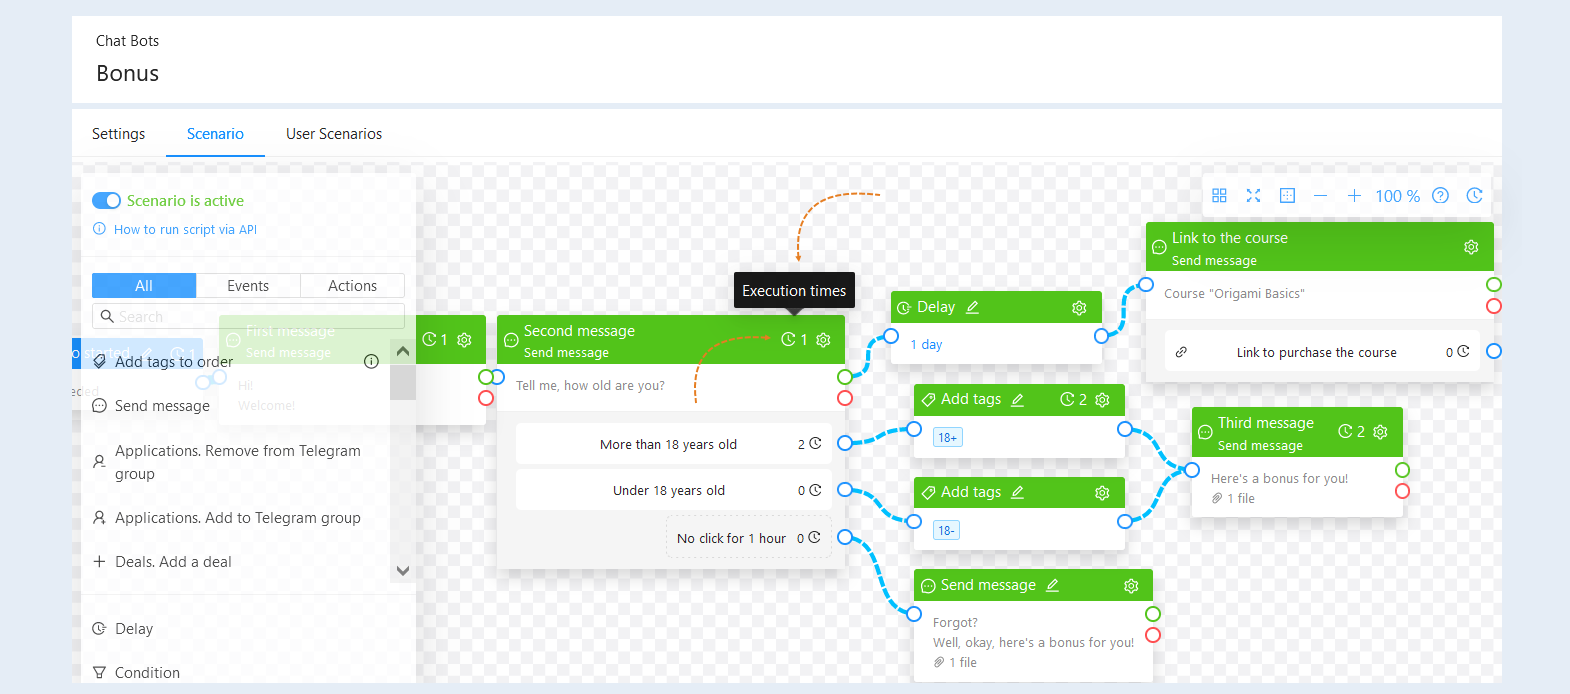
Click the "Execution times" icon and the "Node History" window will open. Here you can see detailed information about the date and time the message was sent and the recipients of the message. Click on the username to open the CRM contact card.

In the upper right corner of each button there is also information about the number of clicks on it.
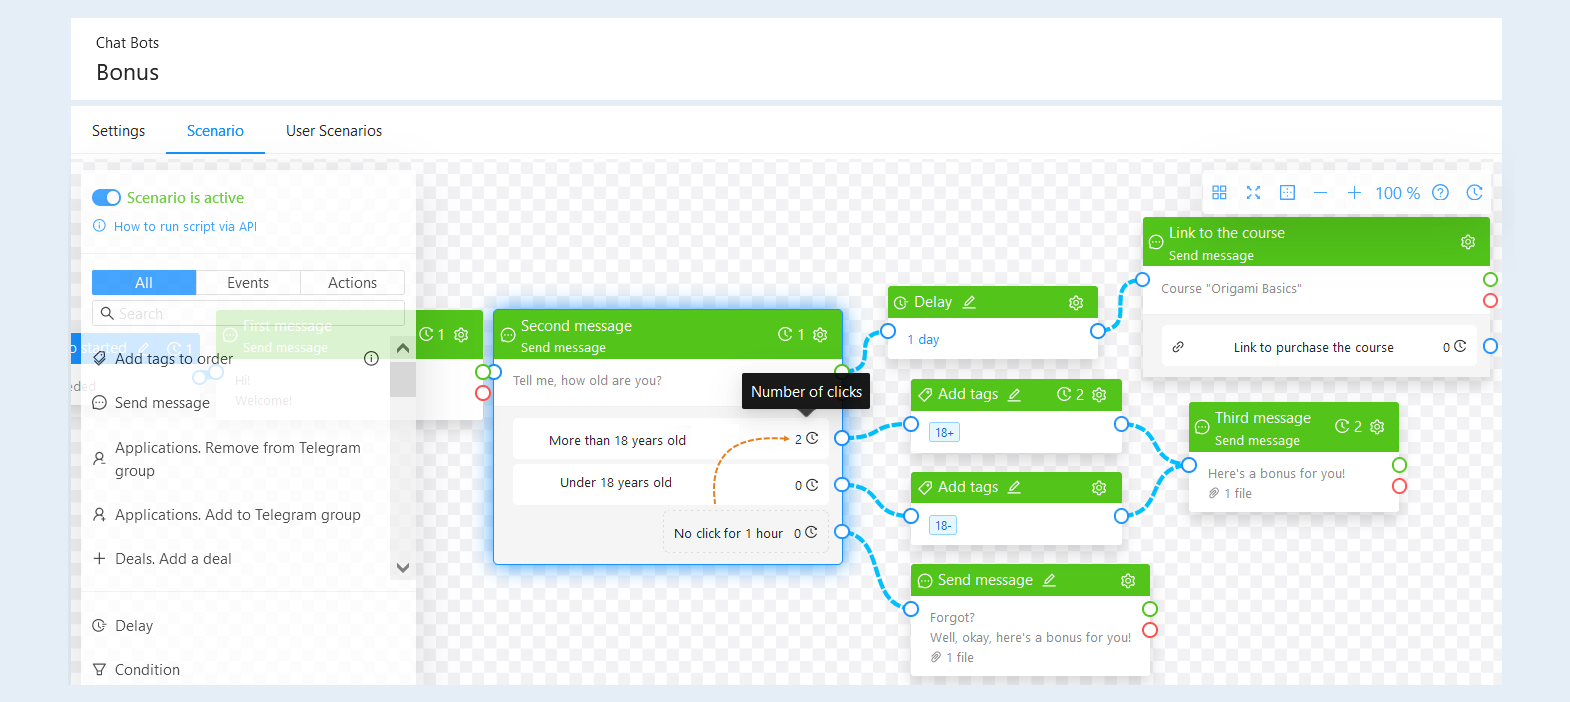
Click the "Number of clicks" icon and the "Port History" window will open. Here you can see detailed information about the date and time of the click and the users who clicked the button. Click on the username to open the CRM contact card.

5
Chatbot Dialogs
At the top of the toolbar of your account, click the Dialogs button.
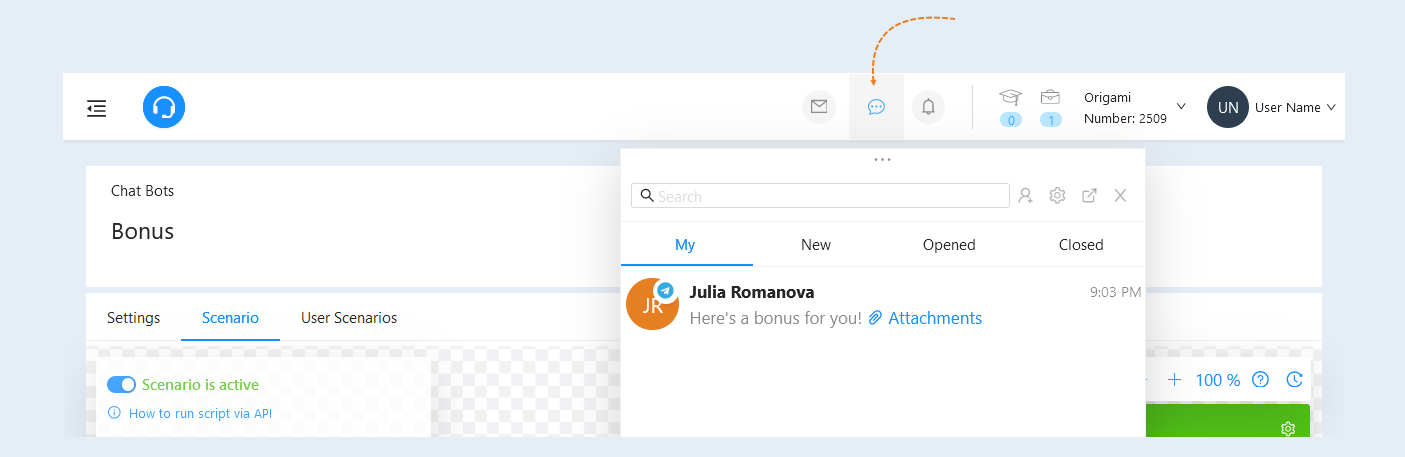
Here you can see all the correspondence from the chatbot script with each user.