In this article, we will consider in detail the section "Deal Details". Click on the desired section to go to its description:
Deal Details
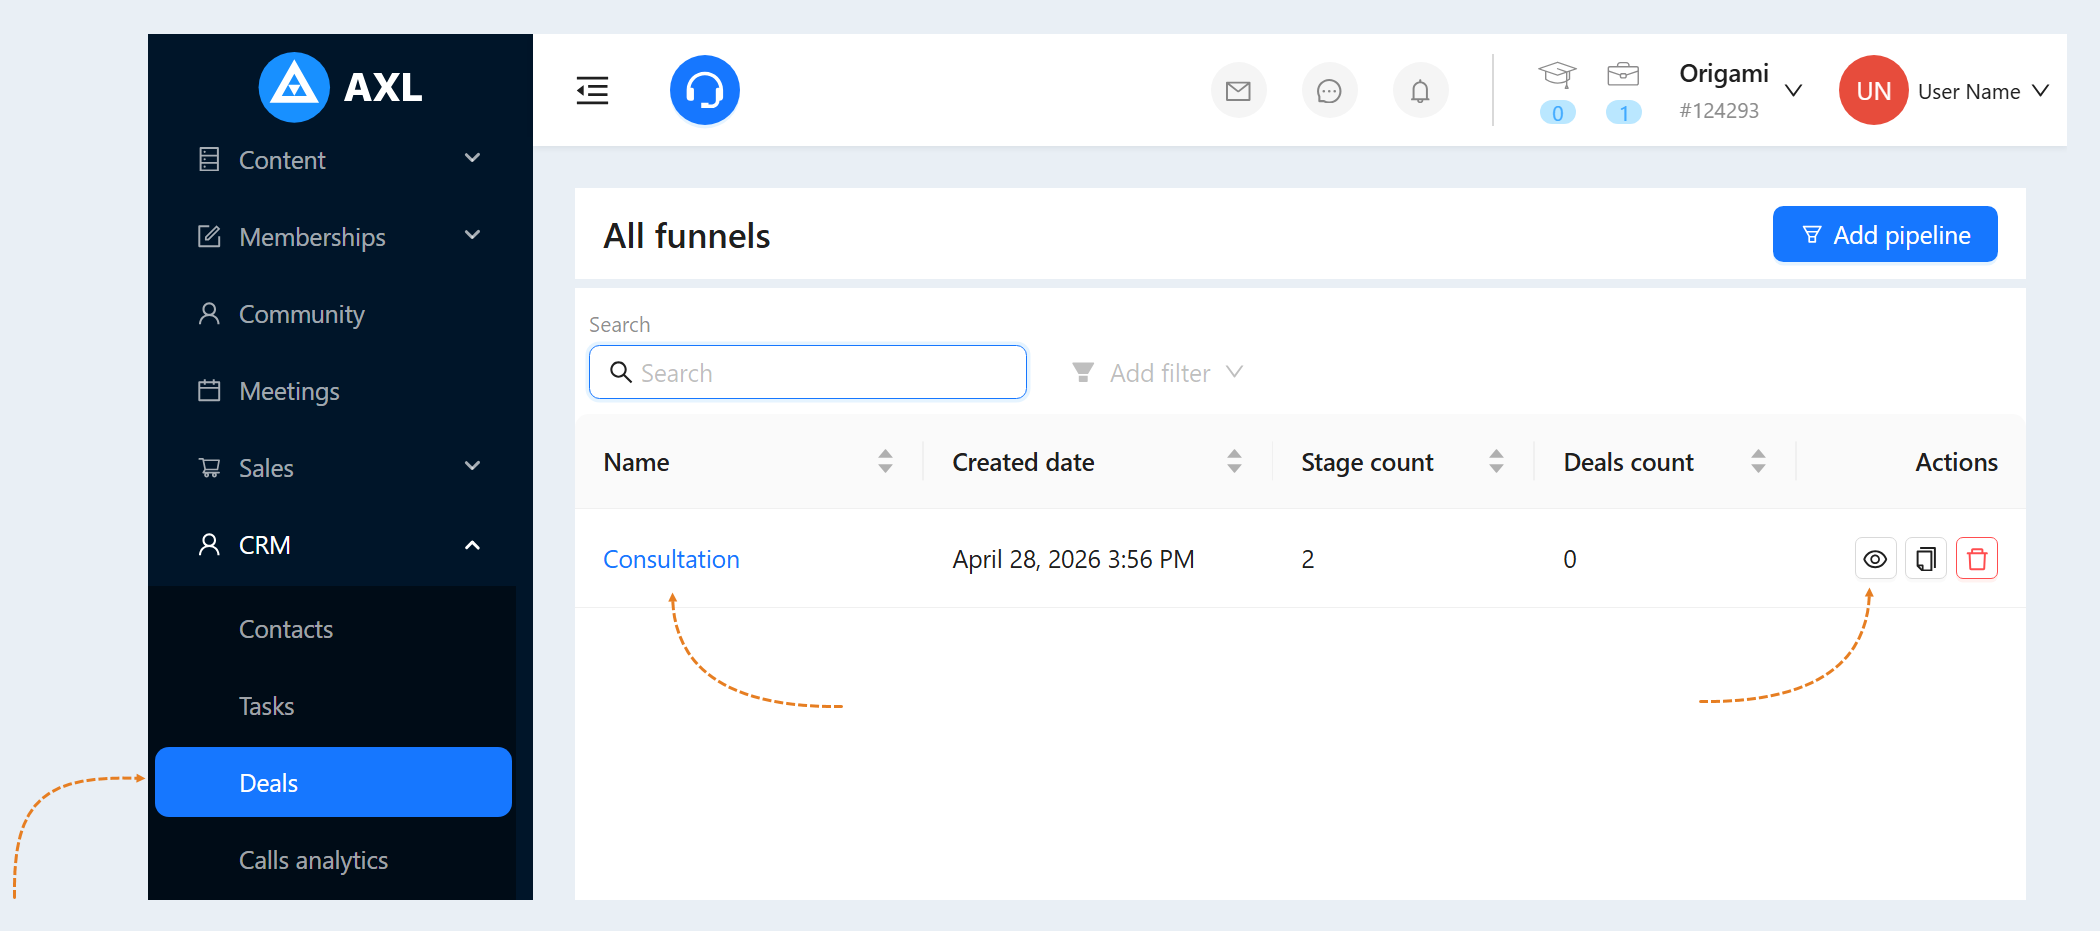
Go to the "CRM" section, the "Deal" tab. Create a new funnel or select an existing one. Read more about how to create a funnel in the article "Deals".
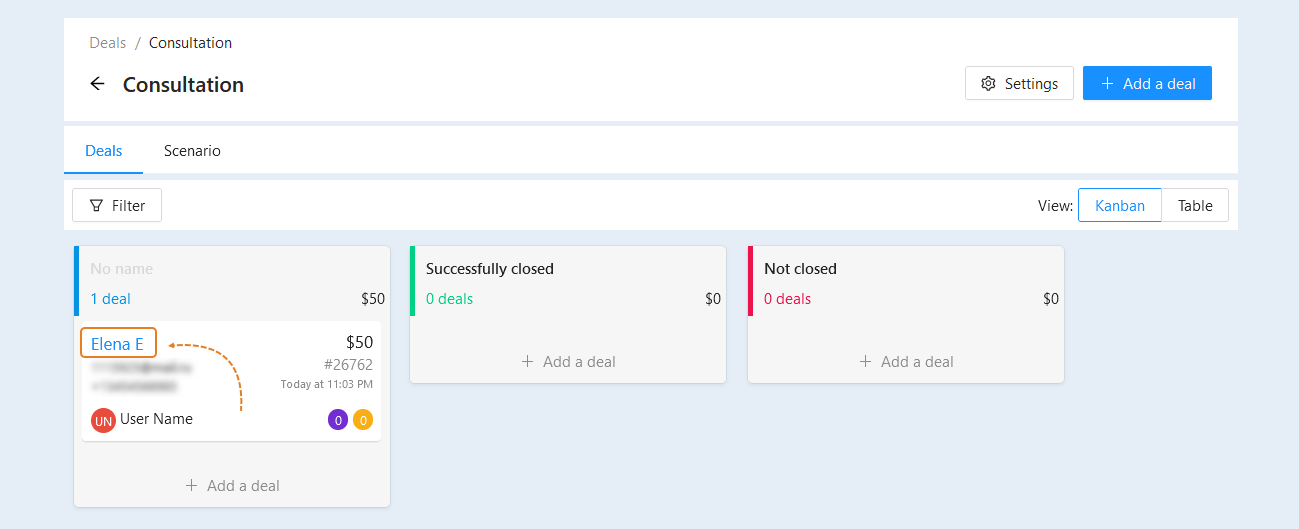
To open the details of the deal, click on the name of the contact inside the deal.
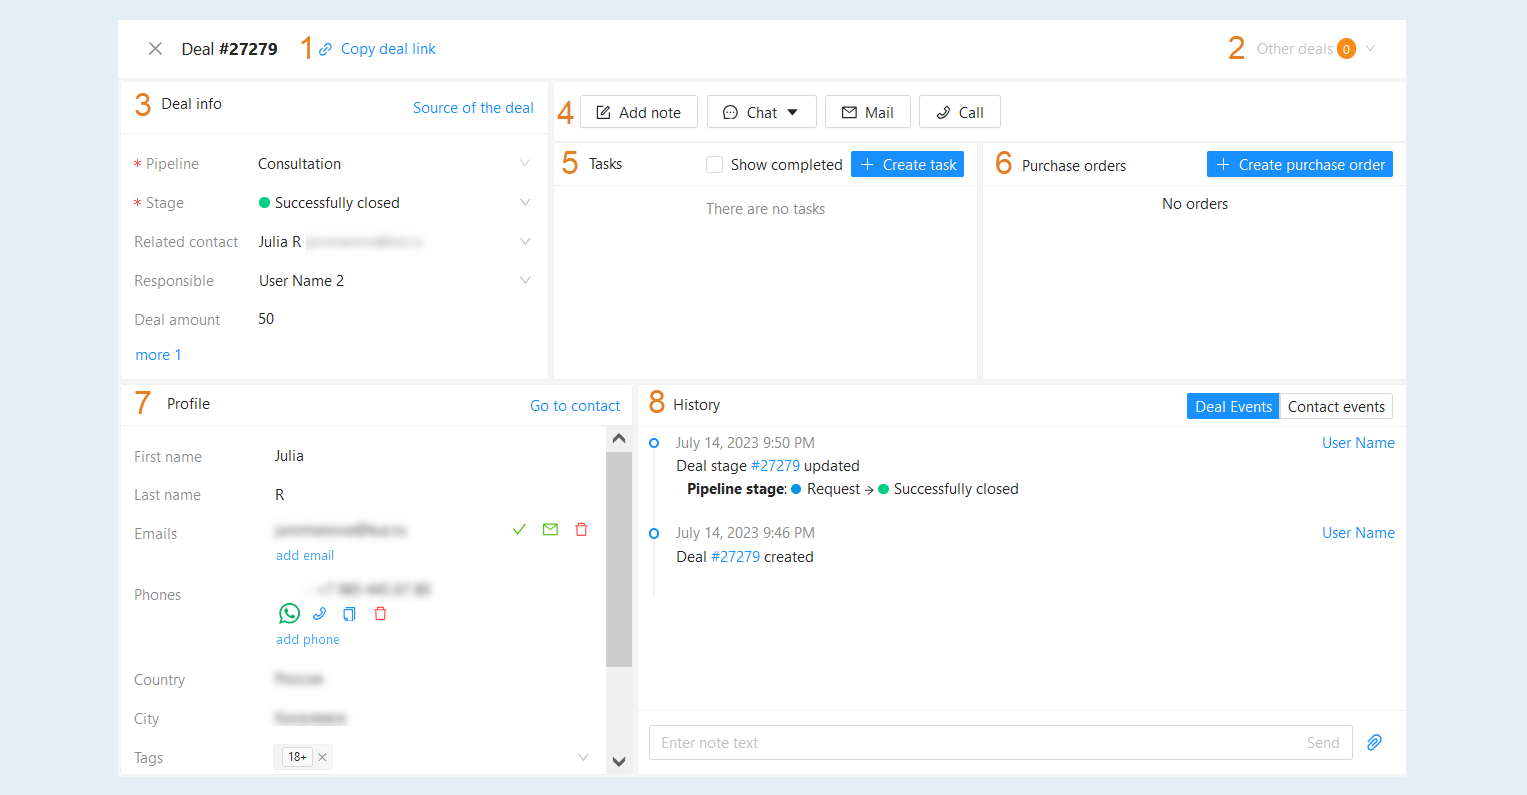
In the window that opens, you see several sections in which you can perform the necessary actions and change the deal settings:
- Copy deal link. Click to copy the link to this deal.
Other deals. Click to see the rest of the user's transactions.
Deal info.
Actions.
Tasks.
Purchase orders.
Profile.
History.
These sections are described in detail below.
Deal Info
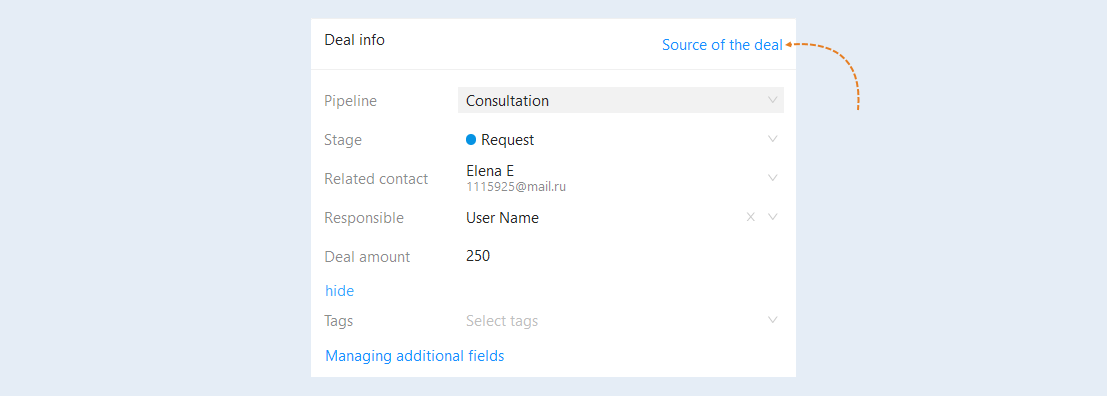
In the "Deal Info" section, you can see detailed information: the funnel and the funnel stage in which the deal is located, the person responsible for executing the deal, the amount of the deal and its tags. Click the "Source of the deal" button to see how the deal was created.
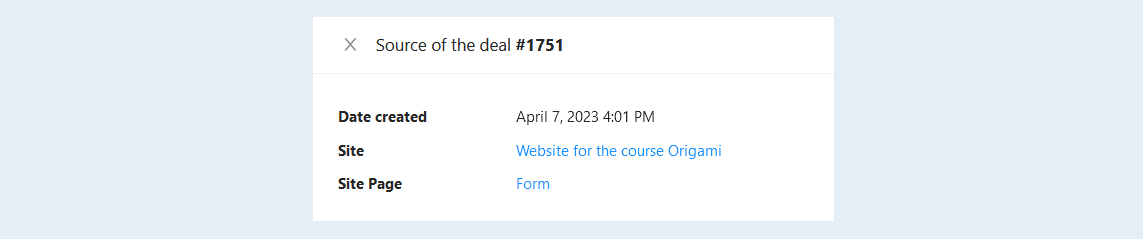
In the window that opens, you see information about the source of the deal creation (date and time of creation, the site from which the transition was made, the site page with the form, etc.). Click on the name of the site or form to go to their settings.
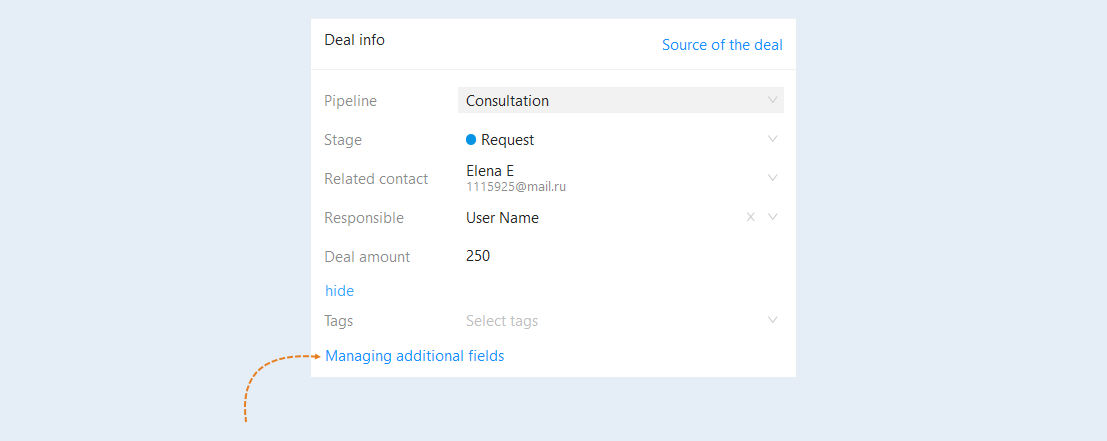
Click on the "Manage additional Fields" button to add additional fields to the deal.
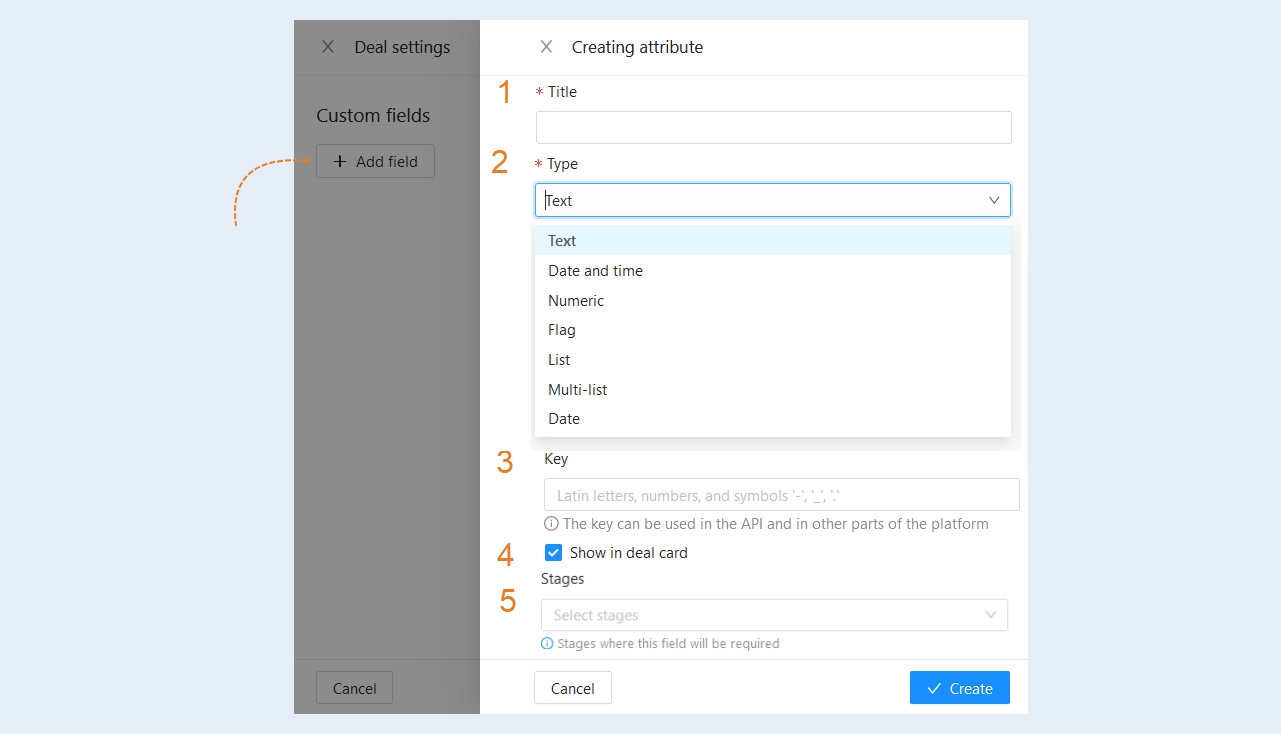
In the window that opens, click the "Add Field" button. Then fill in the fields:
- Title. Specify the name of the additional field.
Type. Select the type of additional field from the suggested list: text, date and time, number, flag, list, multi-list, date.
Key. Add a key. The key can be used in the API and in other parts of the platform.
Show in the deal card. Check the box so that the field is displayed in the deal card.
Stages. Select from the list the stages of the transaction at which this field will be required.
After adding additional fields, they will appear in the window for creating a new deal. As well as additional fields will be displayed in the deal card.
Actions
In this section, you can add a note, open a chat with the user, send an email or call the user.

Tasks
In the "Tasks" section you can see a list of tasks for this deal. To see all previously created and completed tasks, check the "Show completed" box. In the section you can also create a new task by clicking the "Create Task" button.

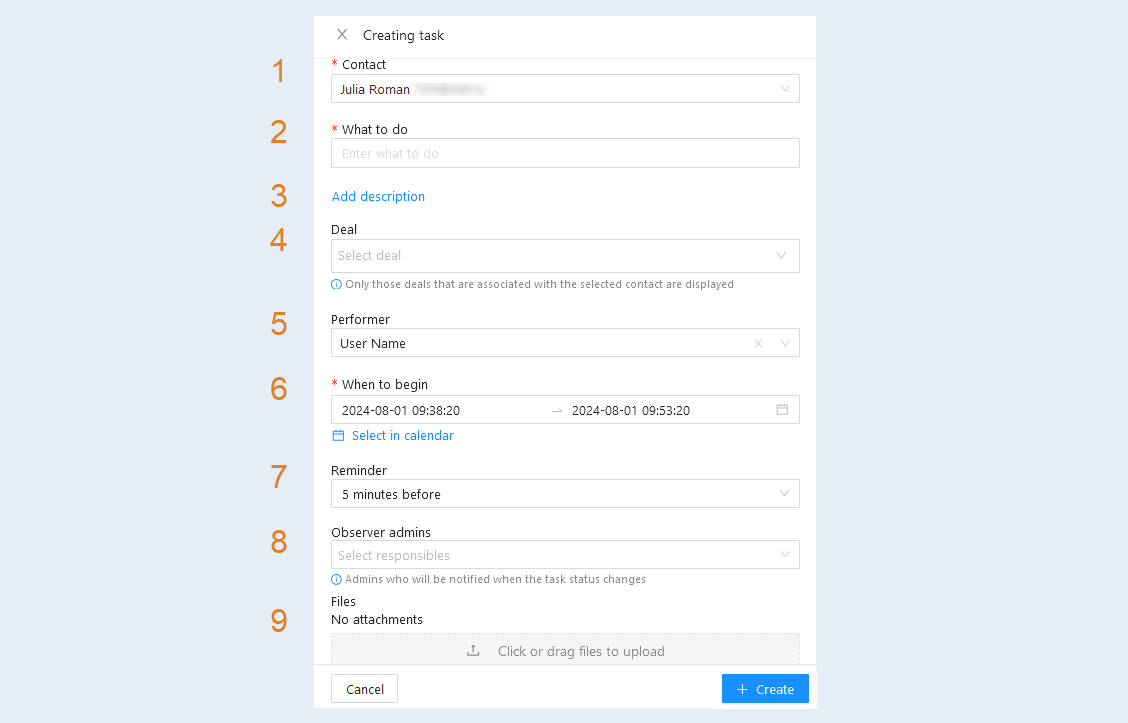
In the window that opens, fill in the fields:
- Contact. Select a client from the list.
What to do. Write the action that will need to be performed with the client.
Add description. Click to add a description to the task.
Deal. You can change the deal to which the task will be added. In the deal selection field, only those deals that are associated with this contact are displayed.
Performer. Assign a responsible employee to perform this task.
When to begin. Set the time interval for the task. Click "Select in calendar" and use your mouse to select a period of time on the calendar, and then click Apply.
Reminder. Set a reminder period for the task: 5 minutes, 30 minutes, 1 hour before the start or do not remind.
Observer admins. Assign an administrator to monitor the execution of this task.
Files. Attach files as needed.
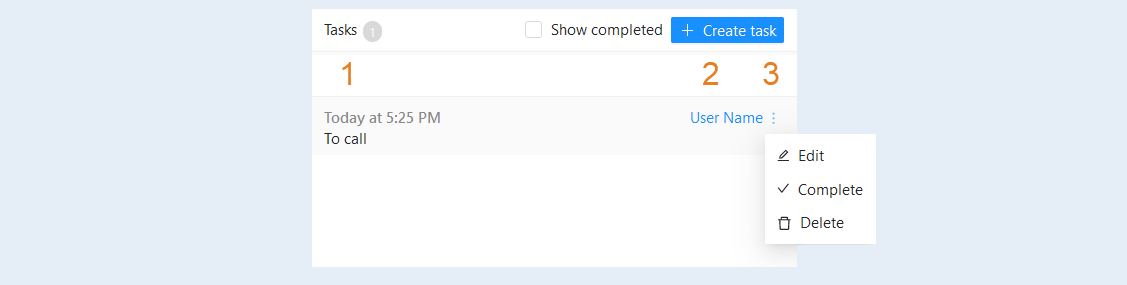
After creating a task, it will appear in the list of tasks in the section. In the task list you see:
- Title. The name and date of the task creation are displayed.
Responsible. The responsible employee for the task is specified. Click on the name to open the employee card in the "Team" section, in this section you can change the access rights for the employee.
Additionally:
The "Edit" button. Click to open and edit the task.
The "Complete" button. Click to complete the task.
The "Delete" button. Click to delete the task.
Purchase orders
In the "Purchase Orders" section you can see a list of orders for this deal. You can also create a new order by clicking the "Create Purchase Order" button.

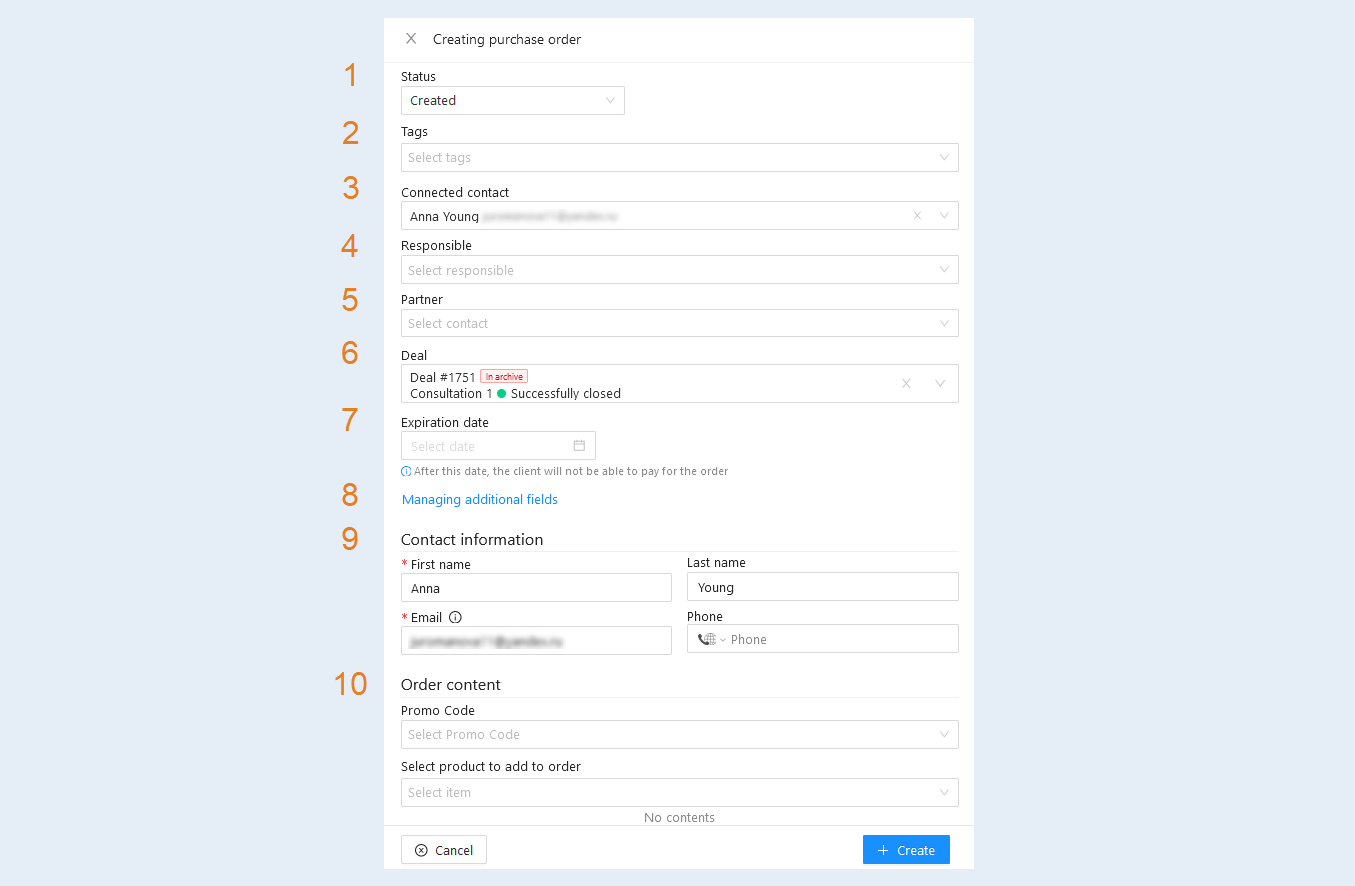
In the window that opens, fill in the fields:
- Status. Select the order status from the list.
Tags. Select the tags for the order from the list.
Connected contact. Select the client's name from the list.
Responsible. Select the responsible employee for completing the order.
Partner. The partner whose invitation link will be used to create the order is specified.
Deal. You can change the deal in which the order will be created. In the deal selection field, only those deals that are associated with this contact are displayed.
Expiration date. After this date, the client will not be able to pay for the order.
Managing additional fields. Click to create additional fields for the order.
Contact information. Enter the client's contact information: first name, last name, email and phone number.
Order content. Select a product from the list to add to the order. You can add multiple products. Select a promo code for the order.
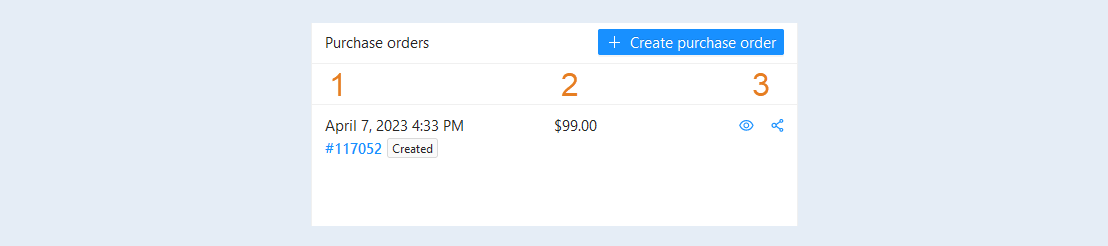
After you have added an order, it will appear in the list of orders in the section. In the list you see:
- Order number, status and date of its creation. Click on the order number to open the order details page.
Order amount. The amount and currency of the order are specified.
The "View" button. Click the button to open the order.
The "Share" button. Click the button to share the order payment link.
Profile
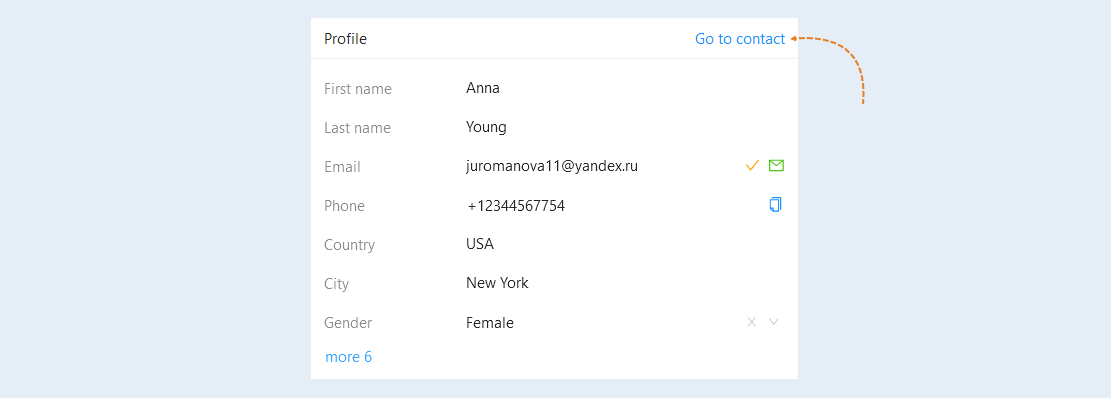
In the "Profile" section, you see the contact's personal data. You can add more detailed information about the client or make changes. Click the "Go to Contact" button to open the contact card and make changes.
History
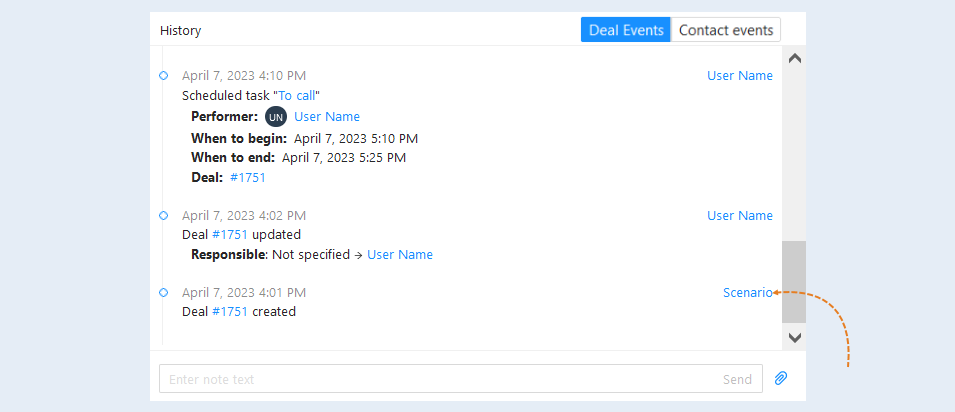
In the "History" section, you can see interactions with the transaction: creating a deal, moving through the stages of the funnel, creating and completing orders, changing contact information, making calls, and so on. A detailed history of all interactions is shown here, indicating the dates and time of the action, as well as the names of responsible employees and links to sites (order, task, website, course, and more).
The transaction history has clickable content. In the history, you can go to the script, task, site, order, and other things that caused a certain action. To do this, click on the name, and the selected section will open in a separate window.
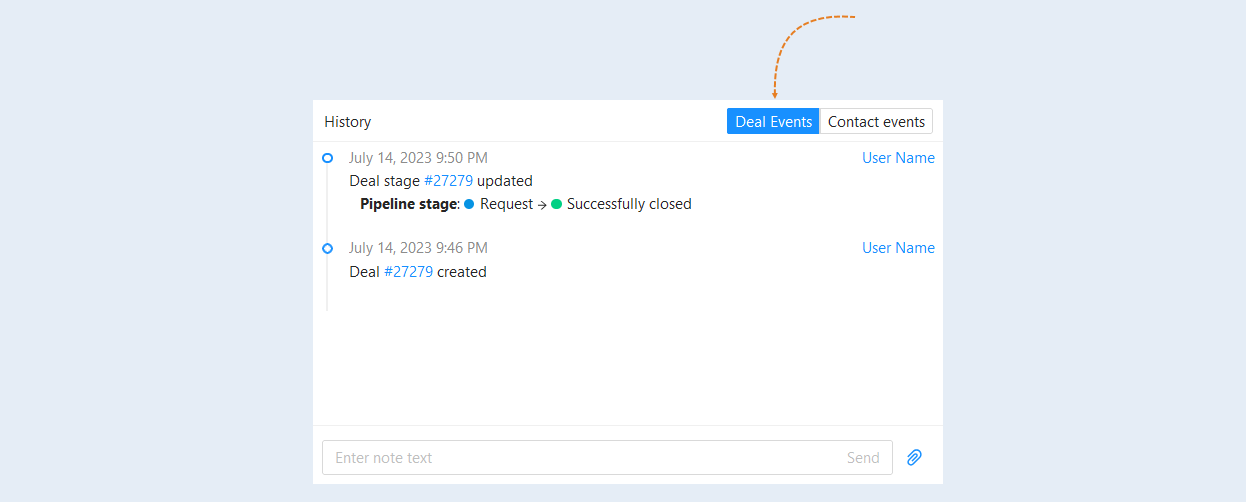
In the upper right section, there are filter rows labeled "Deal Events" and "Contact Events." These filters are designed to track and analyze interactions with users. They assist in managing customer relationships, understanding their behavior, and evaluating the effectiveness of marketing and educational activities.
Select "Deal Events" to see all events related to the deal. This section focuses on the deal itself and helps track its status and progress.
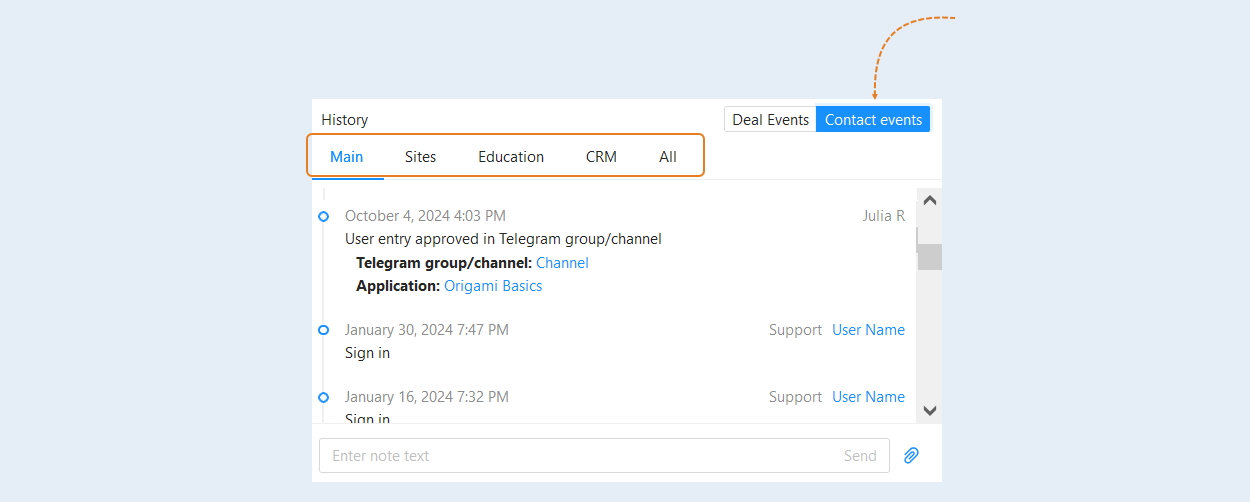
Select "Contact Events" to see all events related to the contact. This section allows for a detailed analysis of the interactions with a specific contact.
In this section, the following filters are available to you:
- Main. This tab presents all key events that provide information about how the contact interacts with the platform and what actions they take. The list includes events such as:
- Form submission.
Quiz submission.
Webinar registration.
Participation in a webinar.
Chatbot initiated.
Website visit (when a session was created).
Order payment.
Course started.
Course completed.
Call.
Note.
Deal created.
Task completed.
Task scheduled.
Deal realized or not realized.
Email sent.
Order fulfilled.
Sites. This subsection displays information about the website visits recorded for a specific contact. This can help determine the user's interests and improve targeted offerings.
Education. This section lists events concerning the educational process, including the start and completion of courses, as well as assignment completion status. This section helps analyze how dedicated the contact is to learning and which materials generate the most interest.
CRM. This subsection provides information about interactions with the CRM system, including tasks, note-taking, and other actions that assist in managing user relationships.
All. This subsection provides a summary of all moments of interaction that the contact has had with the platform, including both deals and events related to learning and other activities.
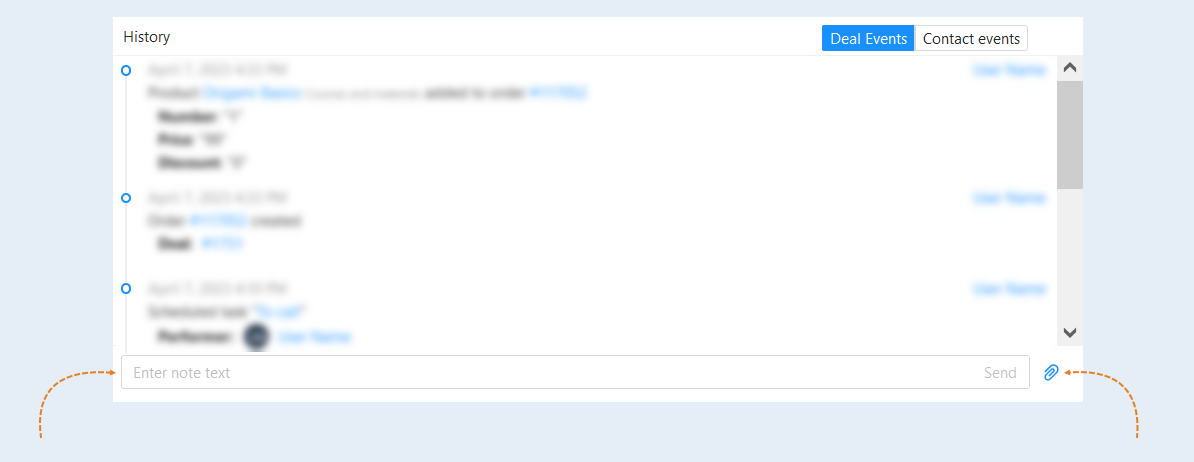
You can add comments to the deal history by entering text in the field for notes and attach the necessary files.
Restoring the transaction
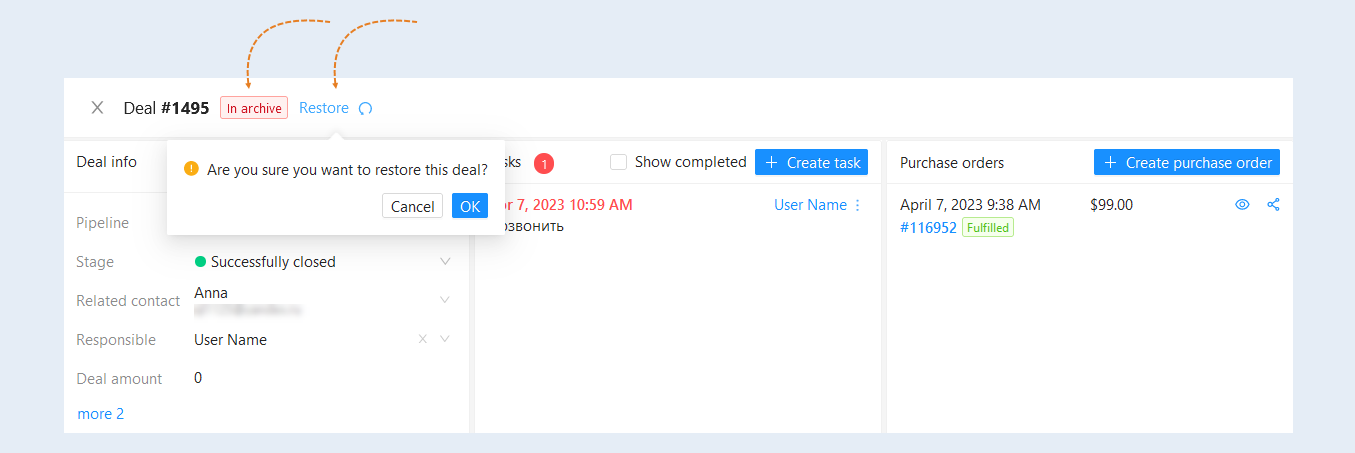
If the transaction is deleted, the "In archive" icon will appear in the transaction card. You can restore a deleted transaction by clicking the "Restore" button at the top of the transaction card.
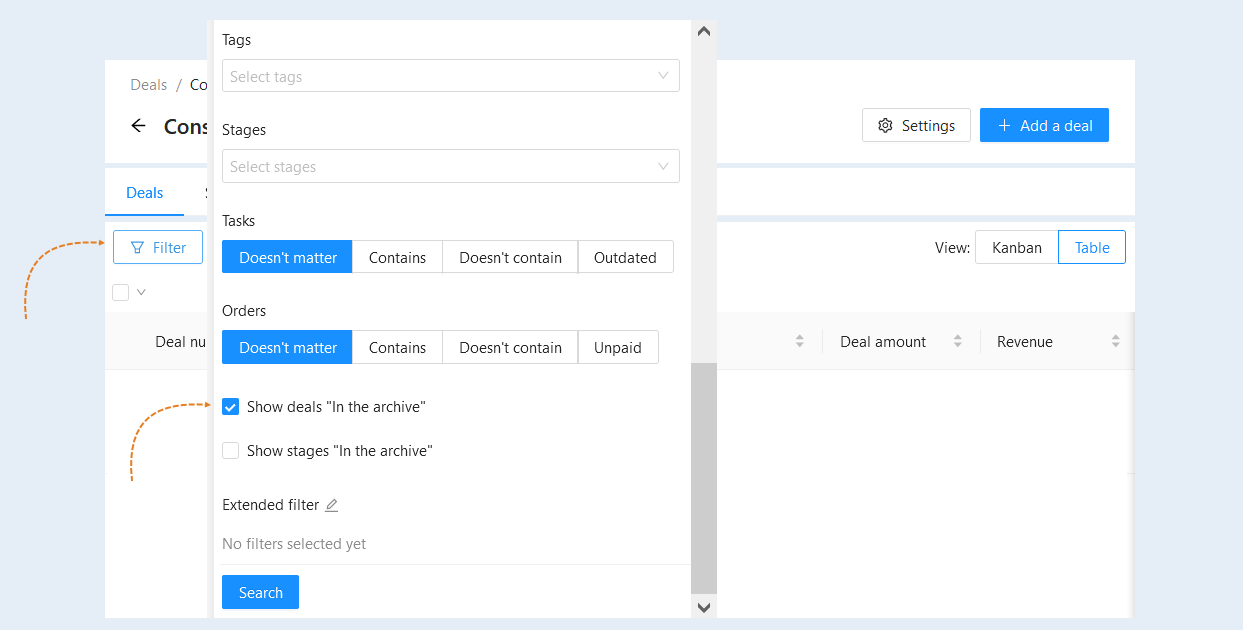
To see all deleted transactions, open the "Filter" and move the "Archived" slider to the active position. Deleted transactions will appear in the list.