In this article, we will consider in detail how to accept payments using a cashless payment.
Click on the desired section of the article to go to its description:
1
Creating a website page
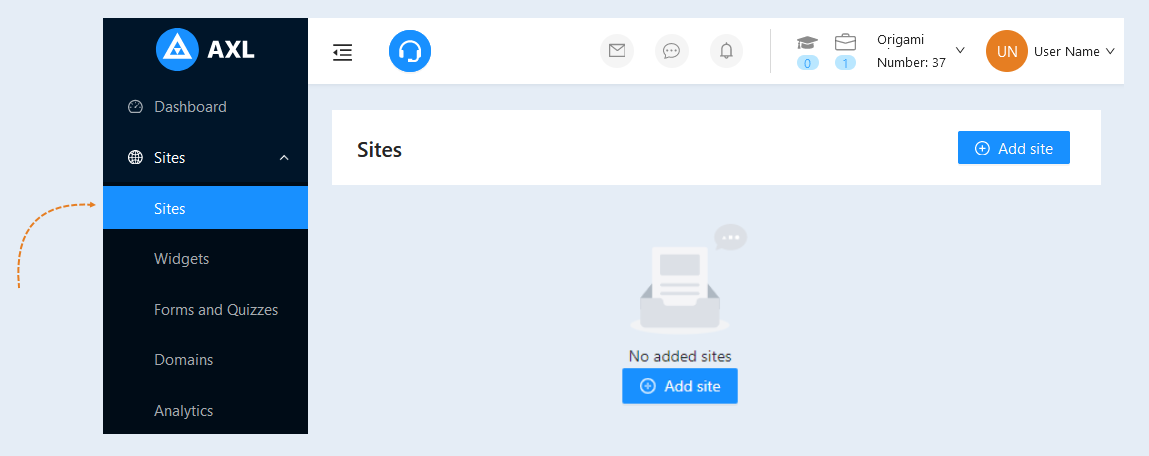
Go to the "Sites" tab and open the site. Read more about how to create a website in the article “How to create a website".
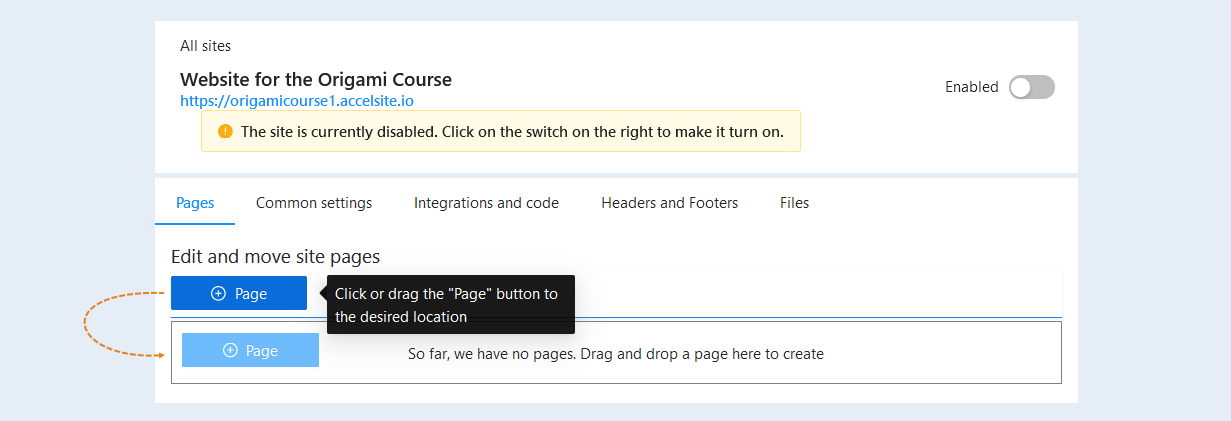
To create a new site page, drag the “Pages” button into the field.
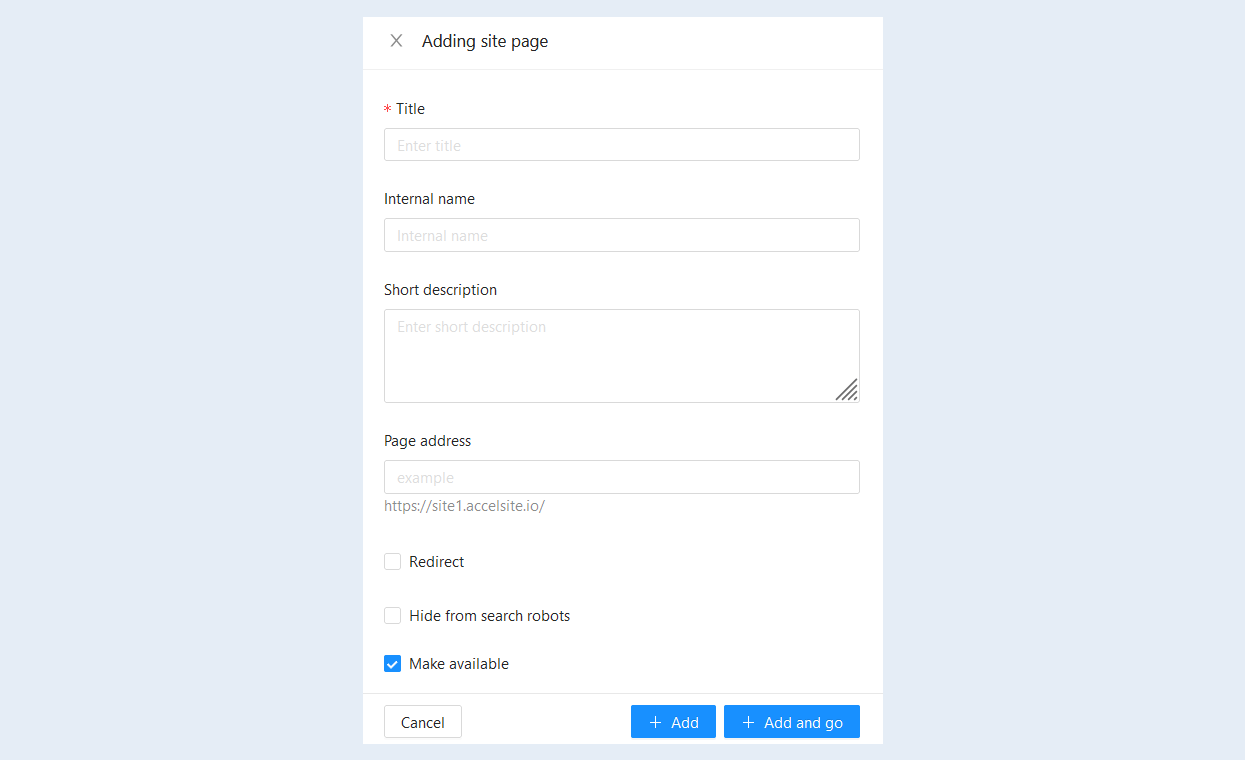
In the window that opens for adding a site page, specify the page name and page address. Then click the "Add and Go" button. You will open the site page editor.
2
Creating a form
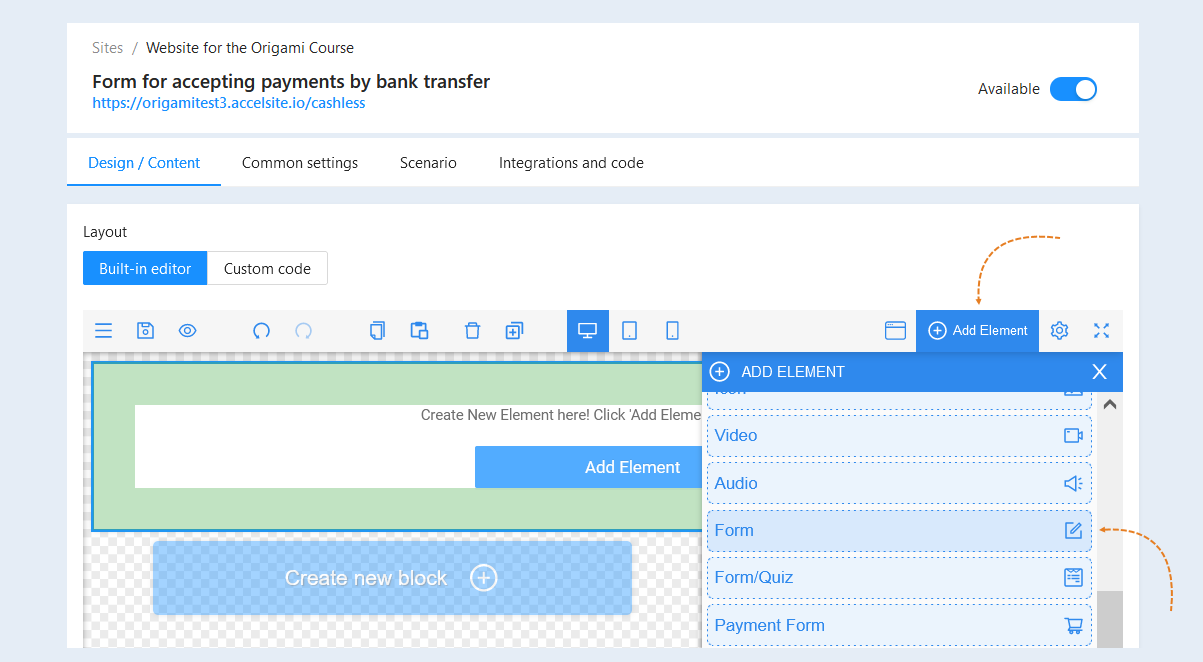
In the editor window of the site page, select "Empty block" and click "Add element". Select the "Form" element by transferring it to the element.
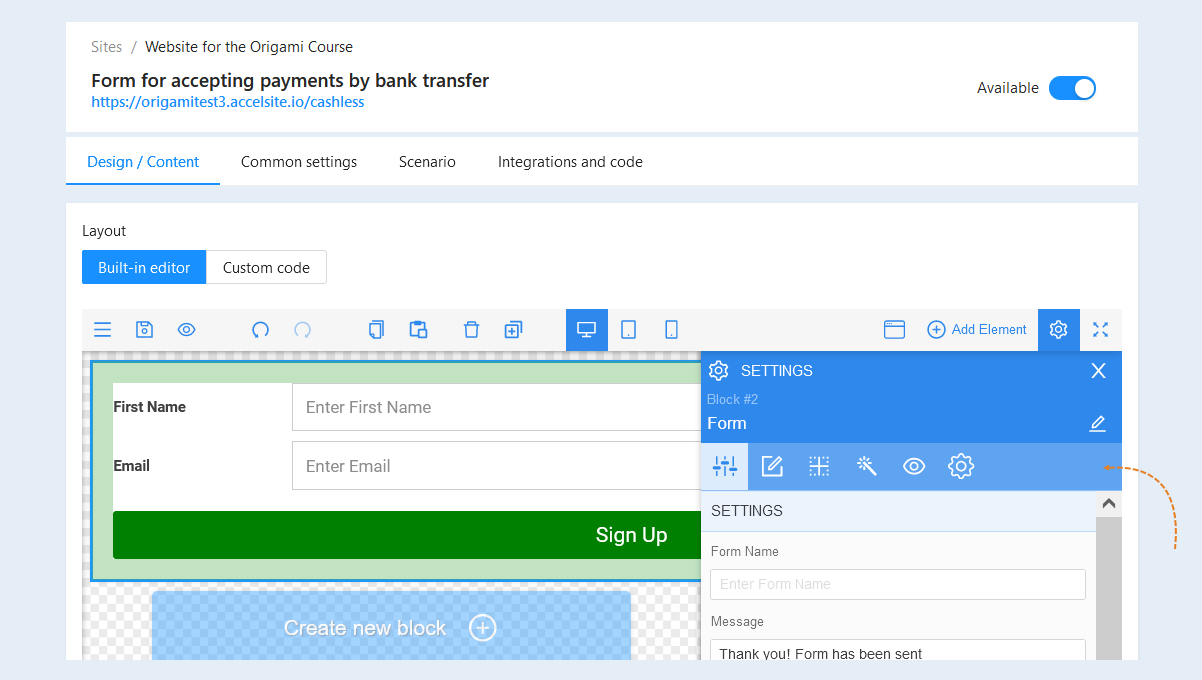
Select the entire form to open the settings for this element. The Settings toolbar opened on the right.
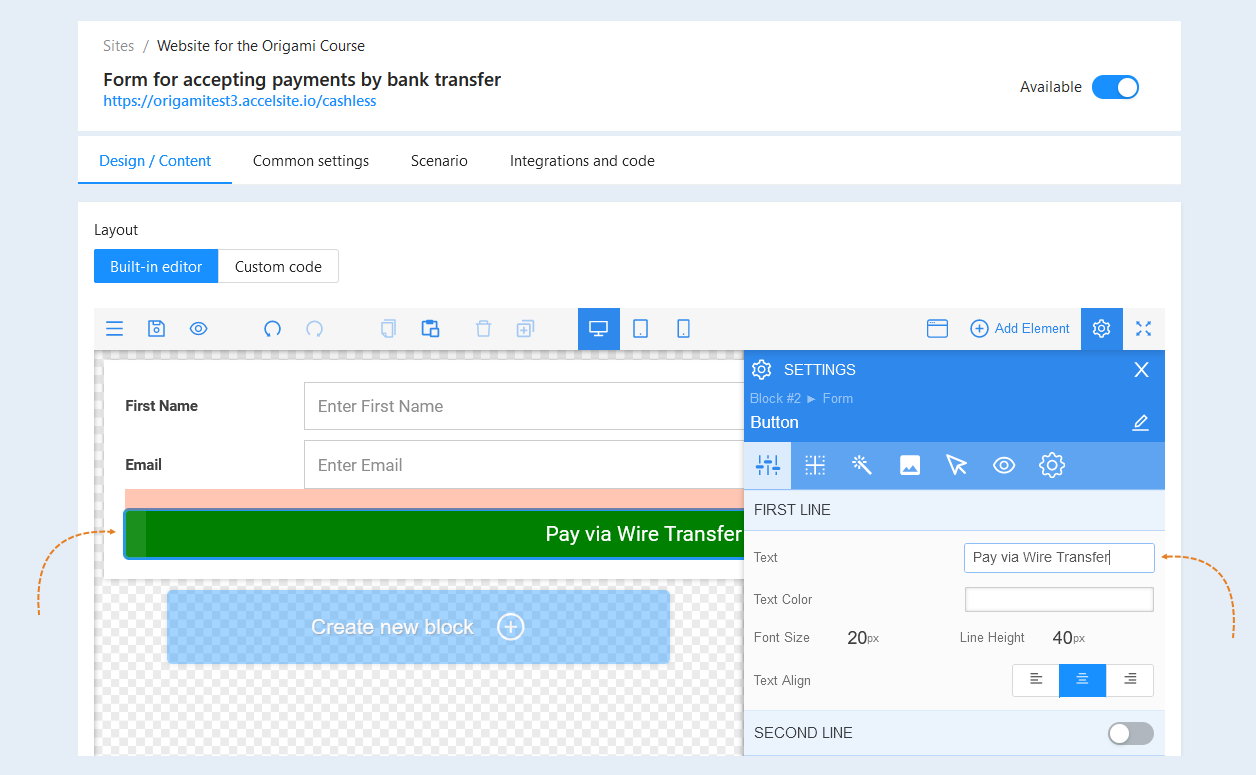
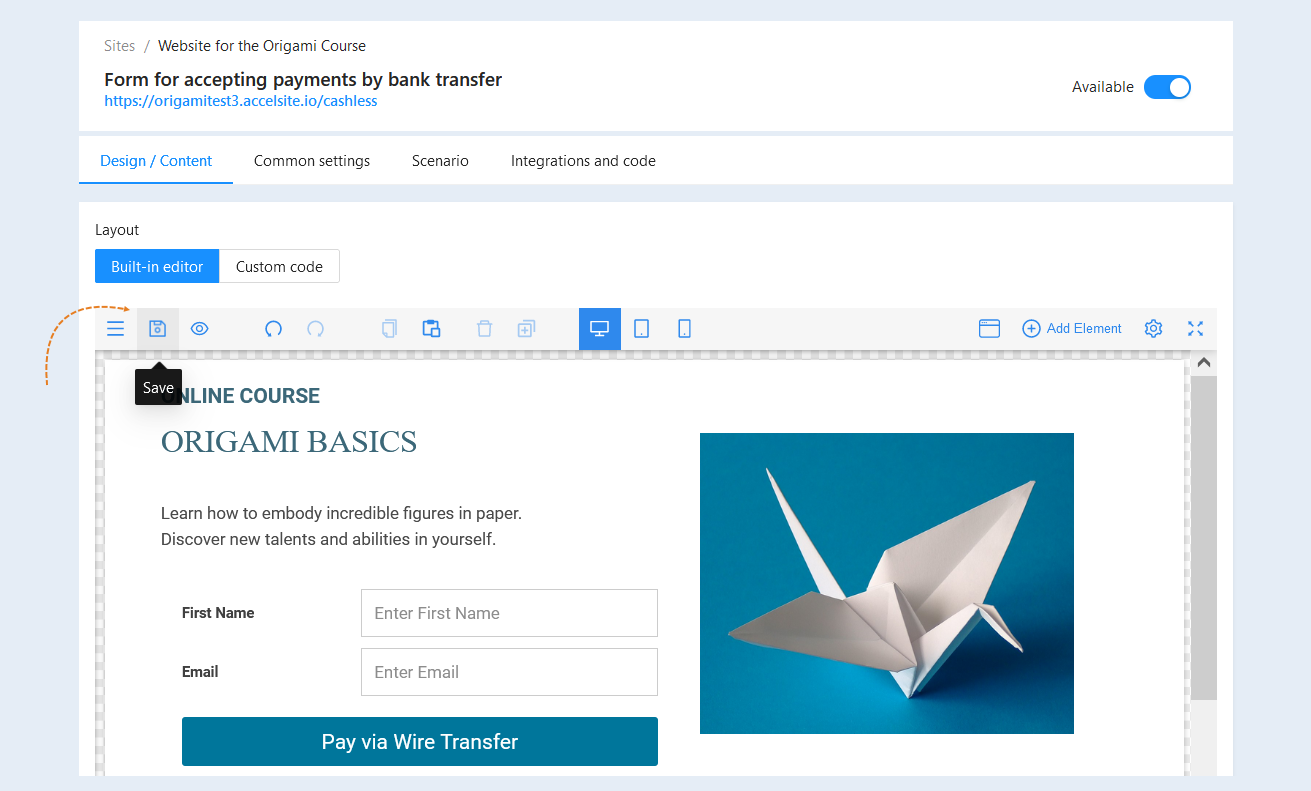
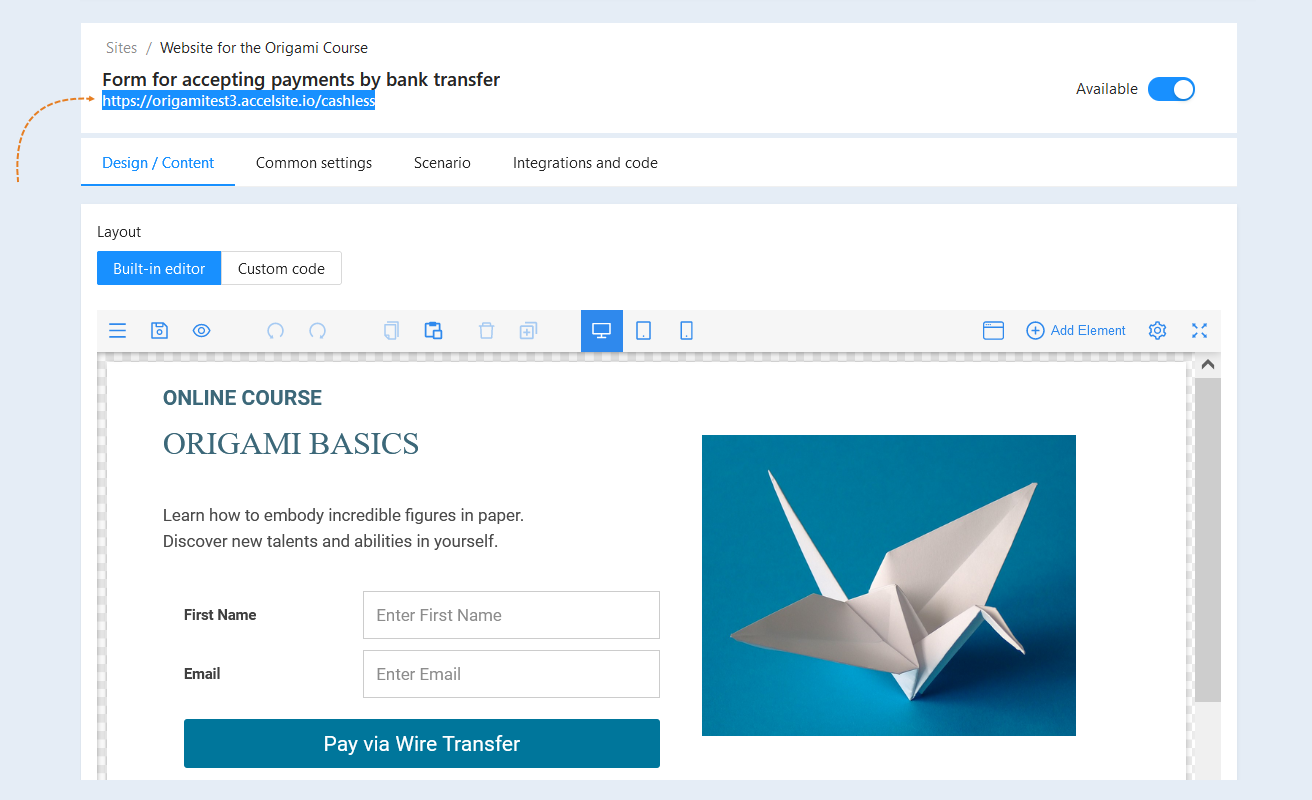
Highlight the "Sing Up" button to open a window with advanced button settings. Change the text of the button to the text "Pay via Wire Transfer" or write your own text.
Next, add the necessary elements to the form: course name, course description text, image, etc. Read more about how to add site elements in the article "Elements".
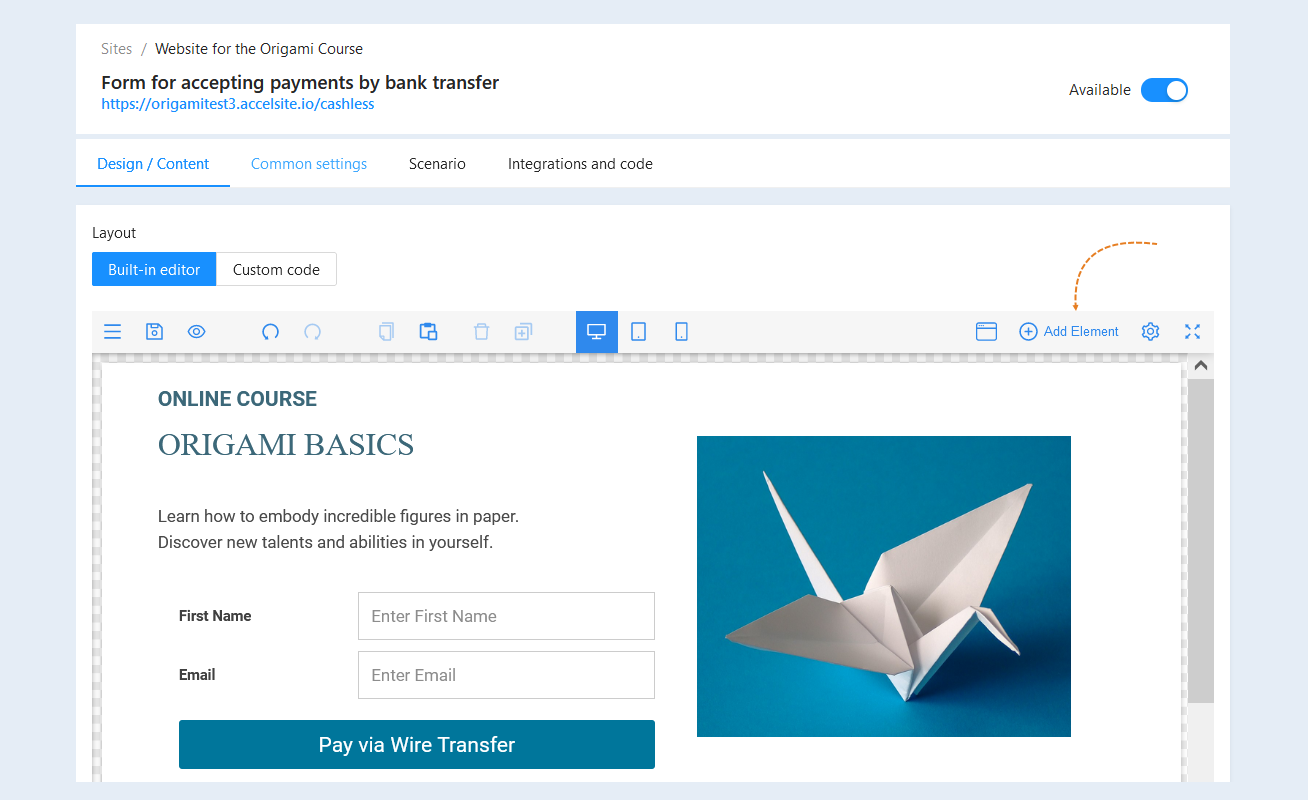
After completing the form settings, click the "Save" button.
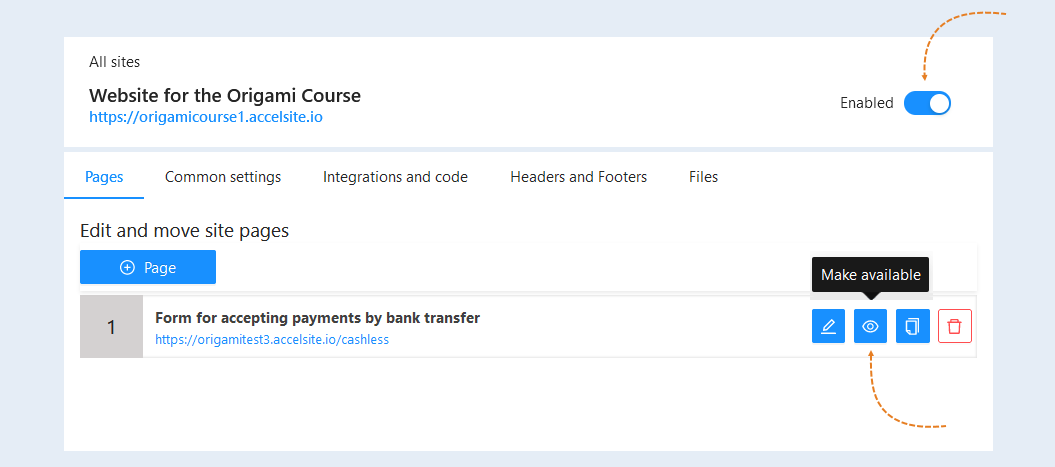
Go back to the "Sites" section. Open the previously created site. In the upper right corner, move the "Enabled" slider to the active position to make the site page accessible to users.
3
Creating a scenario
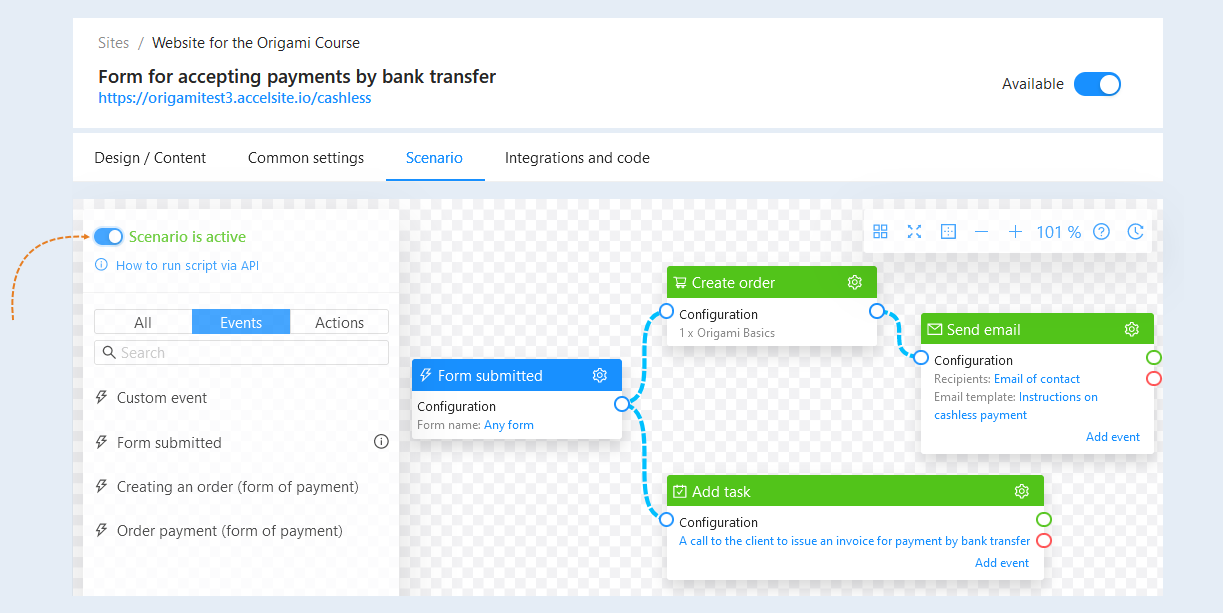
In order to send a letter with payment instructions to the user after clicking the "Payment by bank transfer" button and create a task for the employee to call the client to issue an invoice for payment, you need to configure the scenario of the site form.
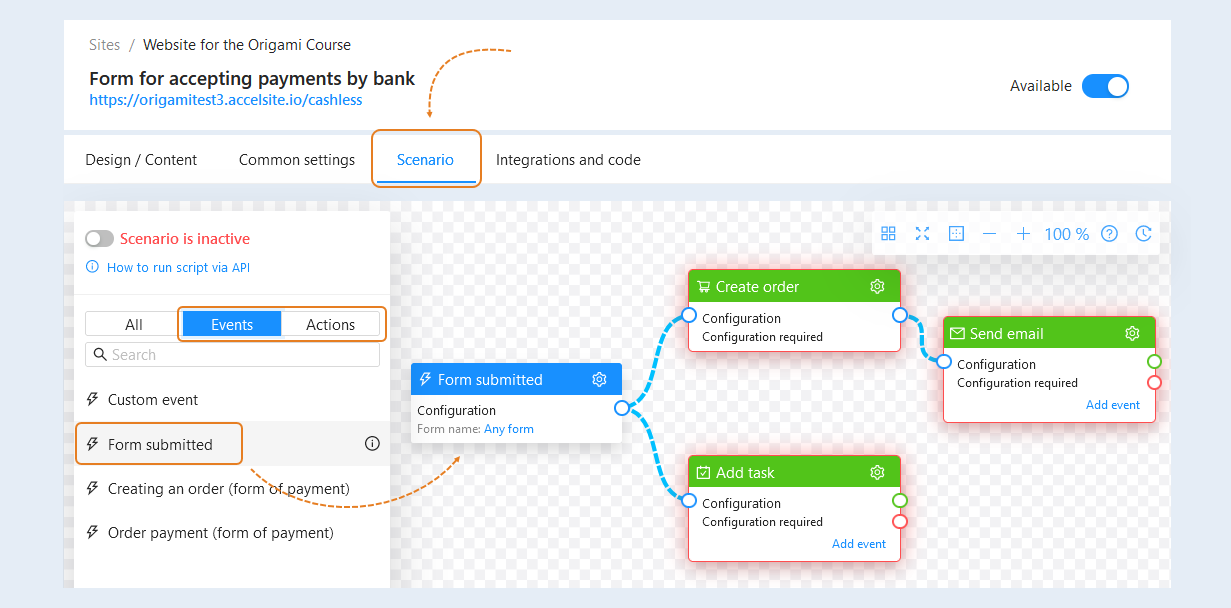
Open the Scenario tab. Open the "Events" tab, select "Form submitted" and drag the event to the scenario field. Next, open the "Actions" tab, drag "Add Task", "Create order" and "Send Email" into the scenario field. Next, you need to connect the event and the action together.
For more information on how to create a website script, read the article "Site Scenario".
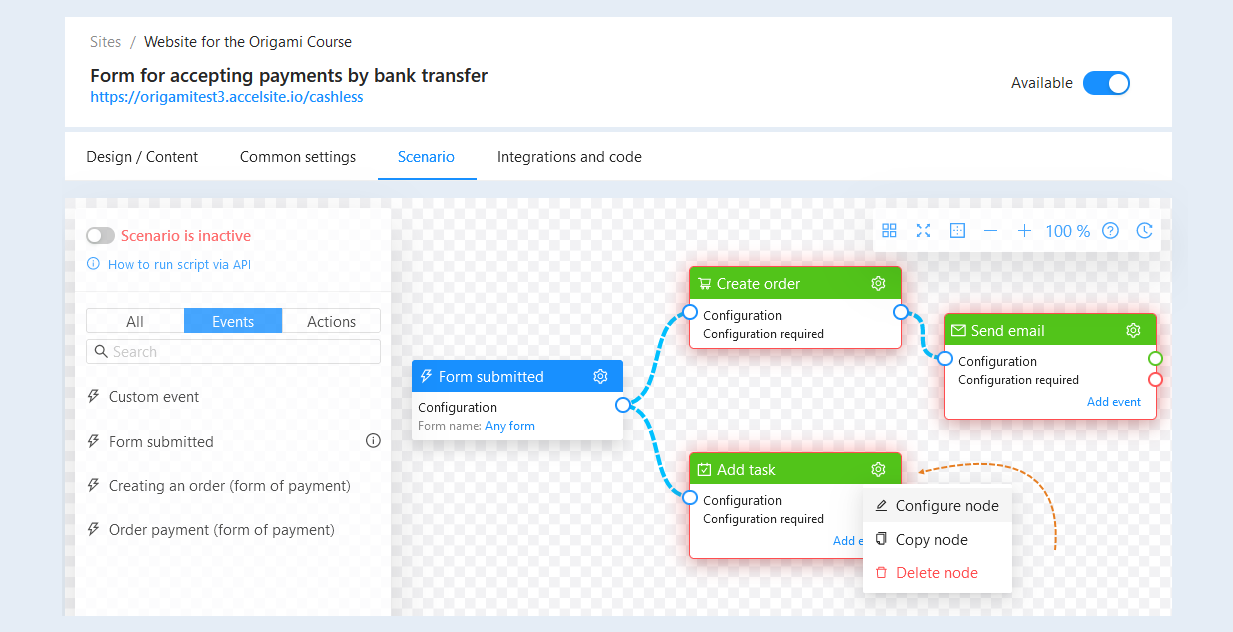
For the actions "Add a task", "Create order" and "Send an email", it is necessary to perform the configuration settings. Click on the "Settings" button and then the "Configure Node" button.
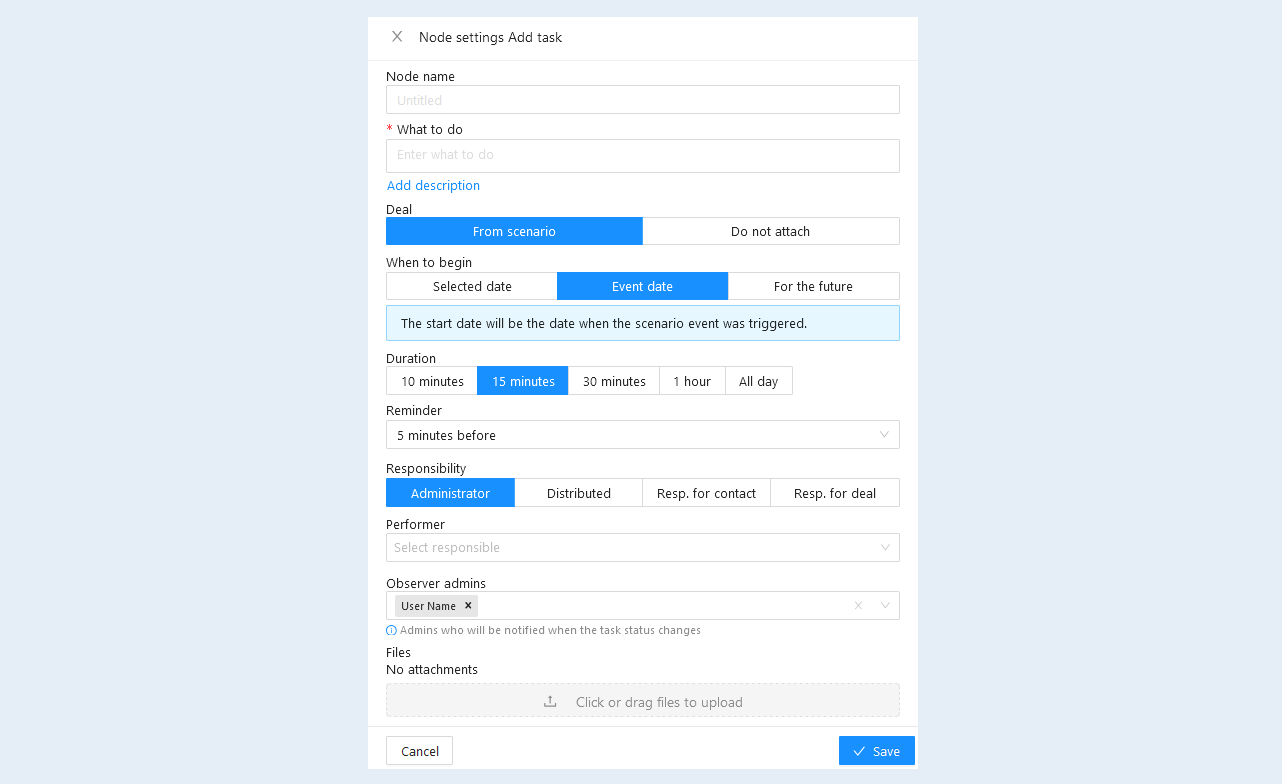
You will see the "Add Task" node settings window. In the "What to do" field, add a task for an employee to call a customer to issue an invoice for payment. Next, specify the date of the event and select the task performer. Click the "Save" button.
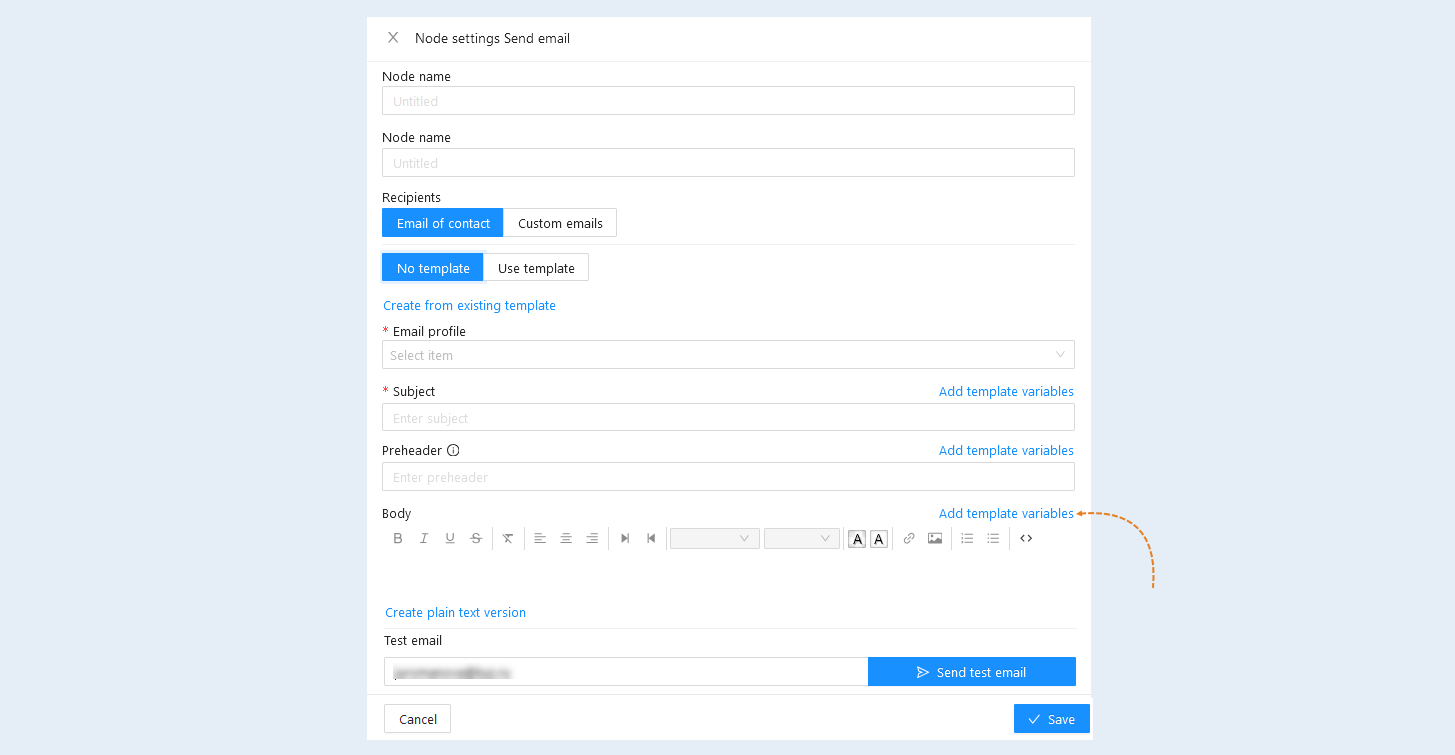
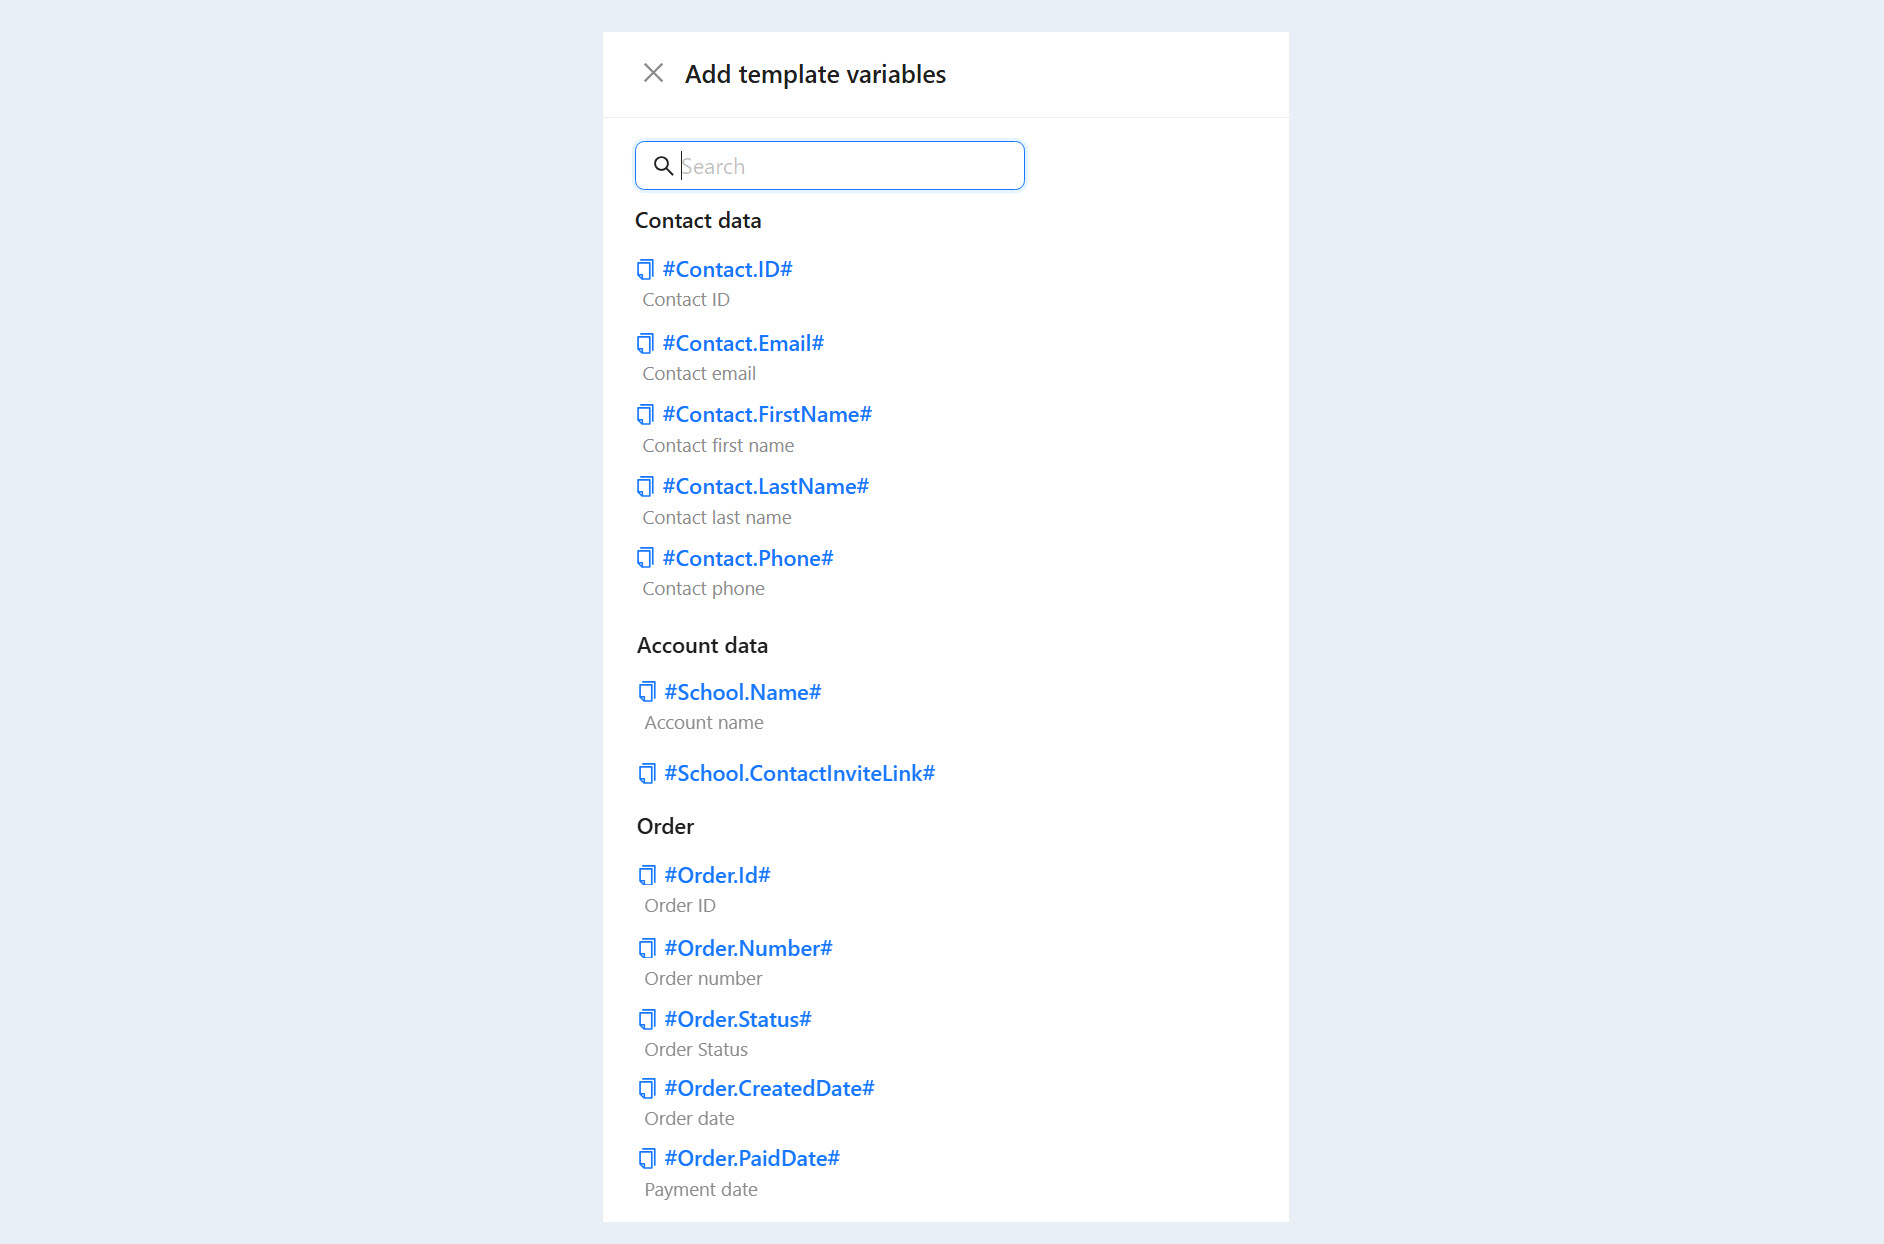
Click on the "Settings" button and then the "Configure Node" button in the "Send email" action. You will see the "Send Email" node settings window. Select the sending profile from the list, add the subject, the header and the text of the letter. In the text of the letter, write instructions for the client about the procedure of non-cash payment. In the configuration settings, you can add variables. A variable is a value to be automatically replaced with the data you selected. This can be the contact's name, e-mail, account name, order number, etc. Variables will automatically replace the data in the email. Specify the variable “Contact Name” and when sending an email, this variable is replaced with the recipient's name. Click the "Add template variables" button.
Next, select the desired variables from the list.
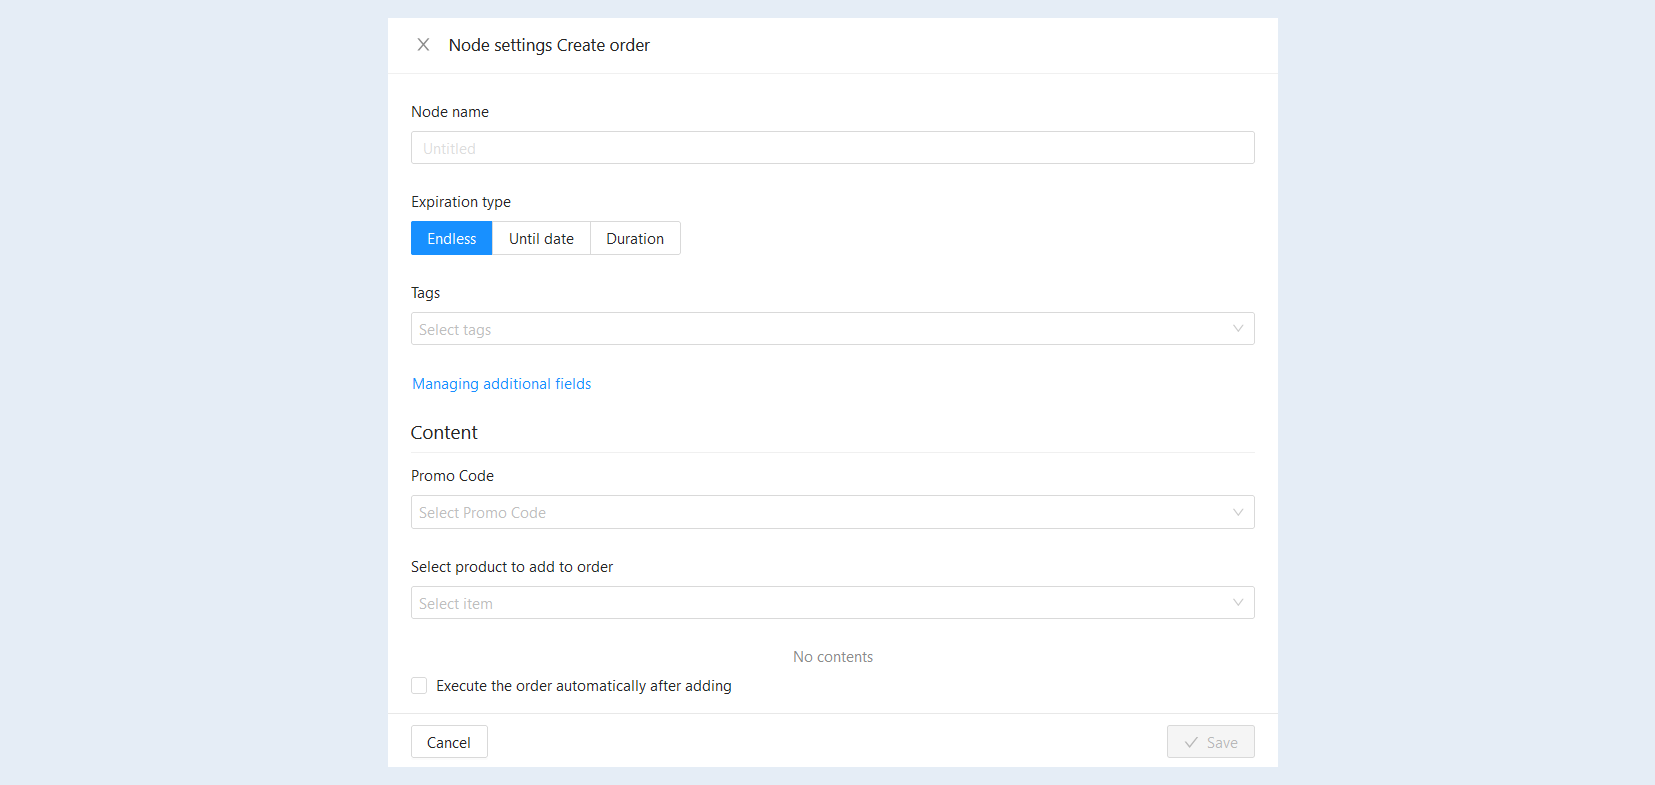
Click on the "Settings" button and then the "Configure Node" button in the "Create Order" action. You will see the "Create Order" node settings window. Select the product to add to the order. Click the "Save" button.
After completing the script settings, move the "Scenario is active" slider to the active position.
4
Link for accepting payments by bank transfer
Open the site page. Copy the link to the page for accepting cashless payments in the upper left corner. You can use this link to the form for selling the course in newsletters to users.
5
Order status changes
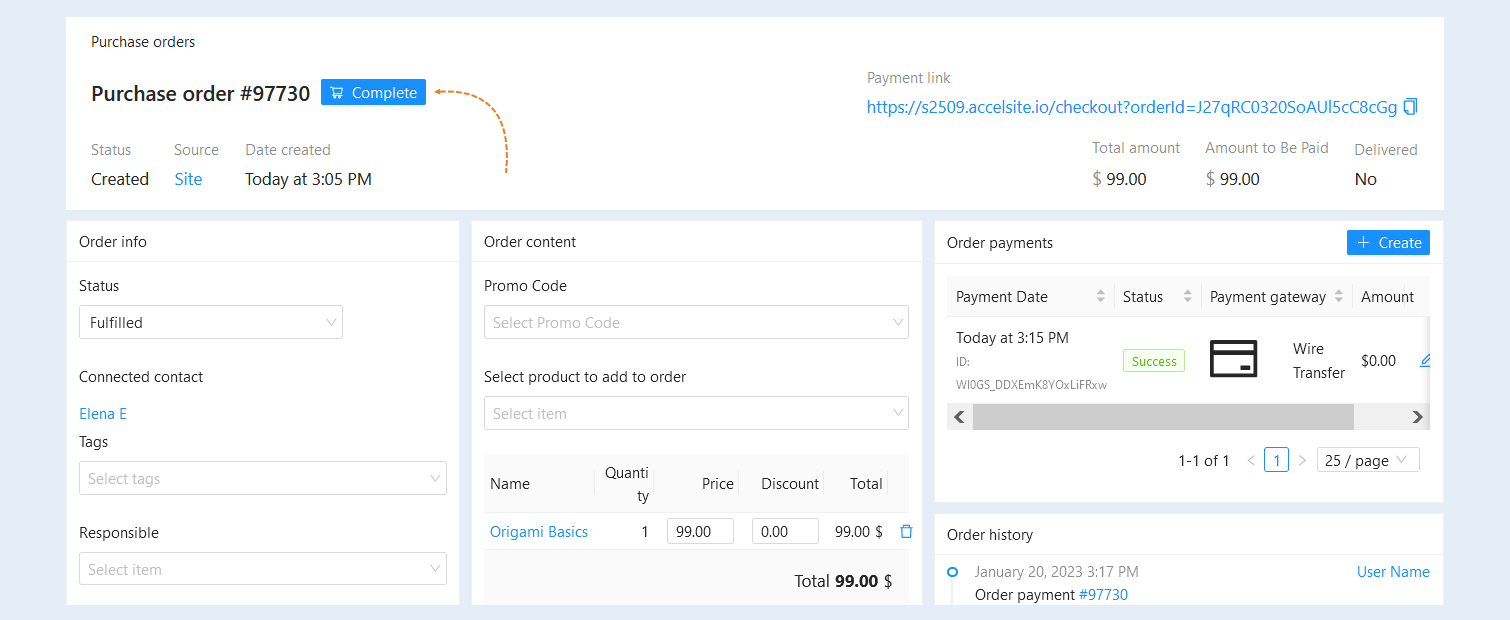
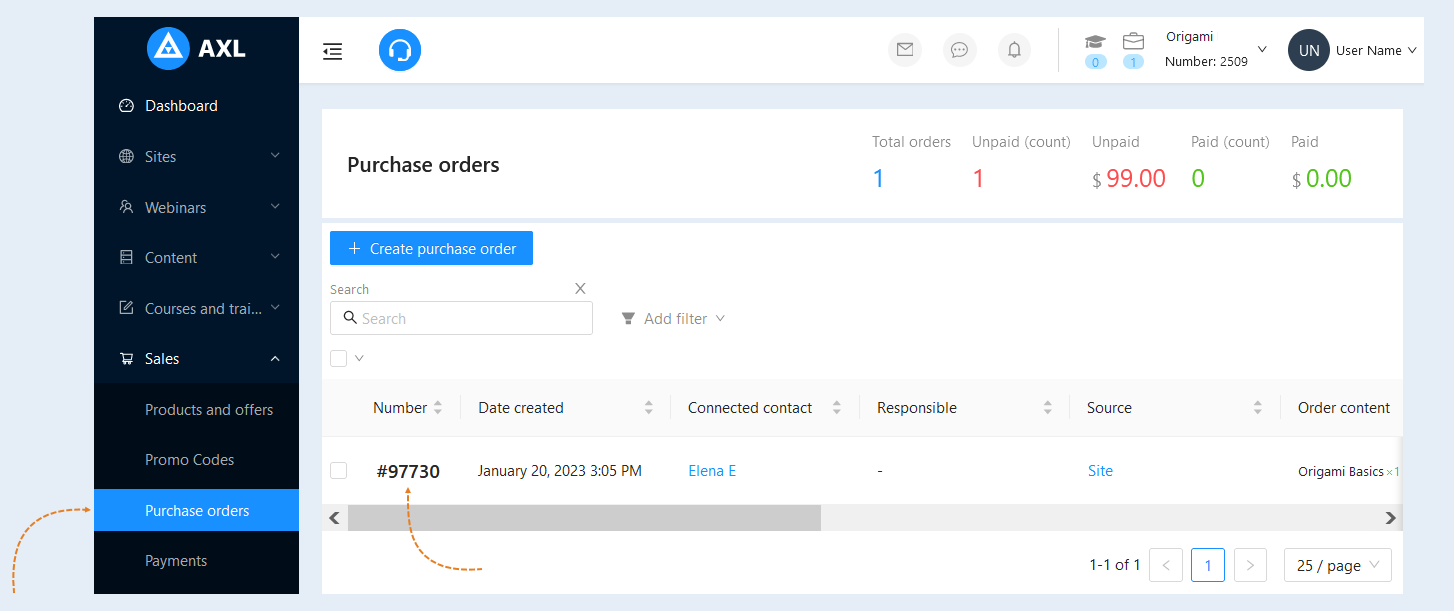
After submitting the form, the client will run a script and an order will be created automatically. After you receive the payment from the customer by bank transfer, you need to change the order status manually. Go to the "Sales" section, the "Purchase Orders" tab. You will see an automatically created order. Click on the order number to open its settings.
In the "Order Info" section, change the order status to the "Fulfilled" status. Click the "Save" button. In the "Order payments" section, click the "Create" button.
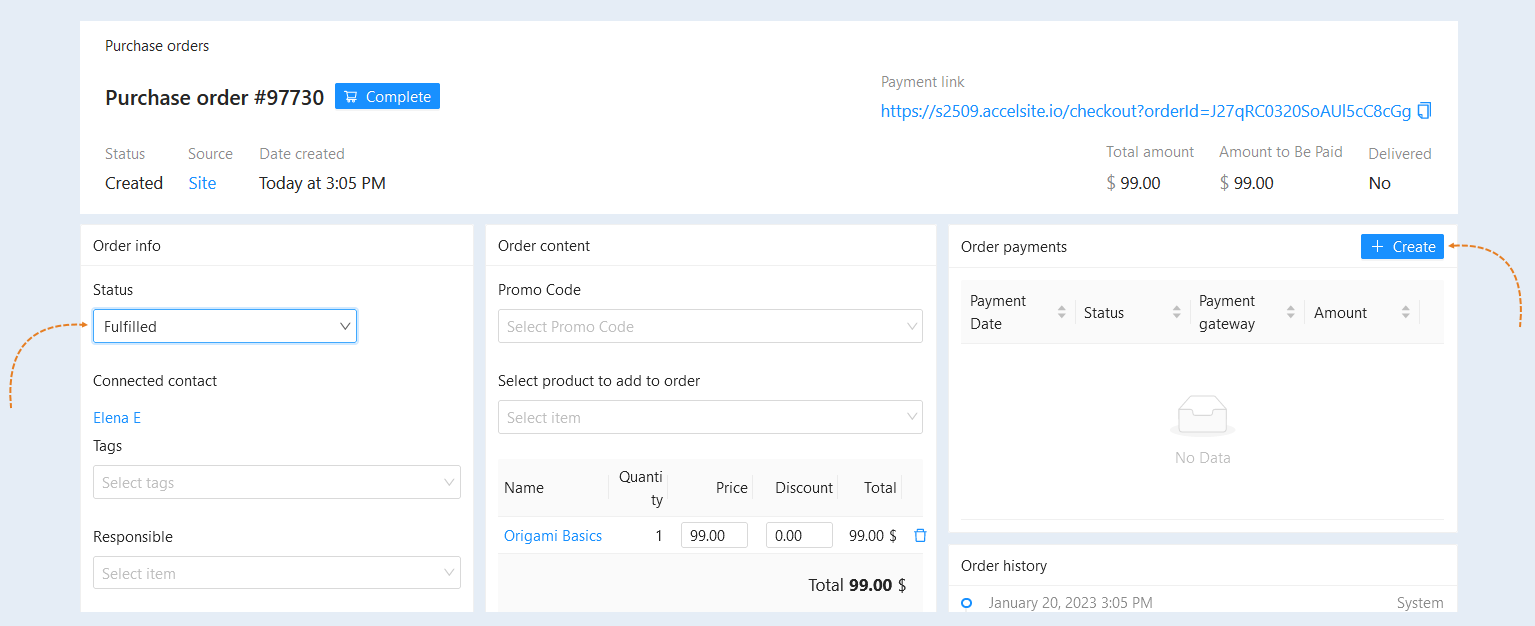
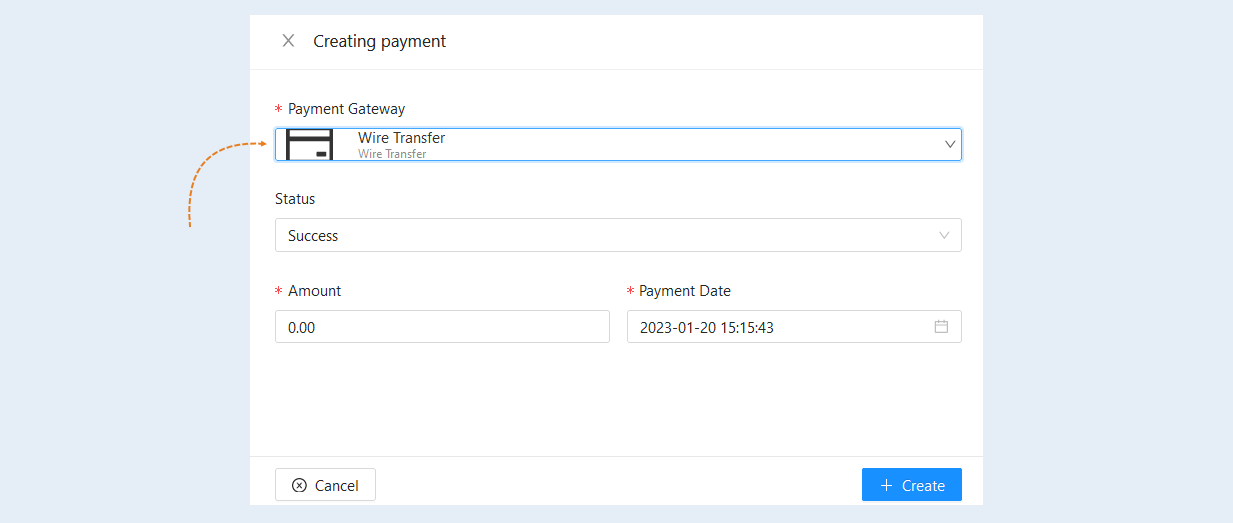
You will see a window for creating a payment. Select the cashless payment integration from the list and specify the amount paid by the client and the payment date.
Click the "Complete" button in the upper left corner of the order card. After that, the user will have access to the course.