A webinar template is a sample webinar where you create events and settings for a future webinar. After you create a webinar template, you can run this template in automatic mode - auto-webinar. Read more in the article "Autowebinars".
The webinar template will help you create an auto webinar from scratch, without having to host a webinar first. You record videos and add events. After that, you can start the Auto Webinar.
Click on the desired section of the article to go to its description:
How to create a webinar template
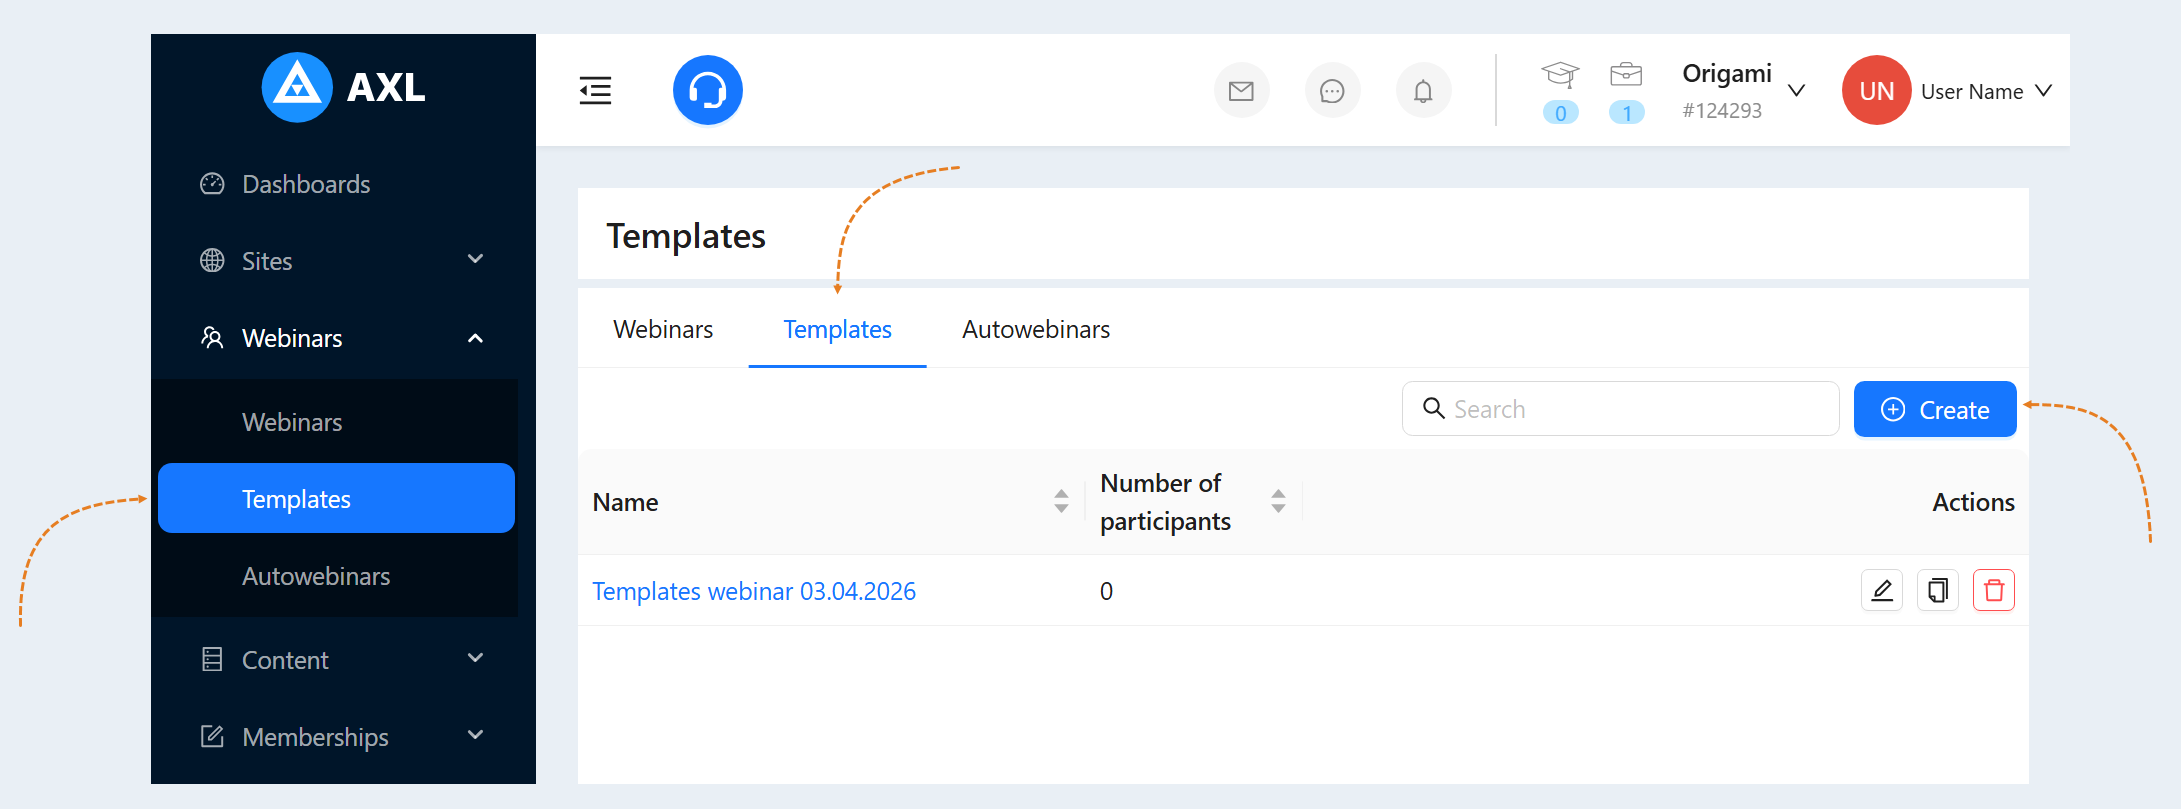
Go to the "Webinars" tab. Go to the "Templates" tab. Here, by default, a webinar template has already been created. Click on "Webinar Template".
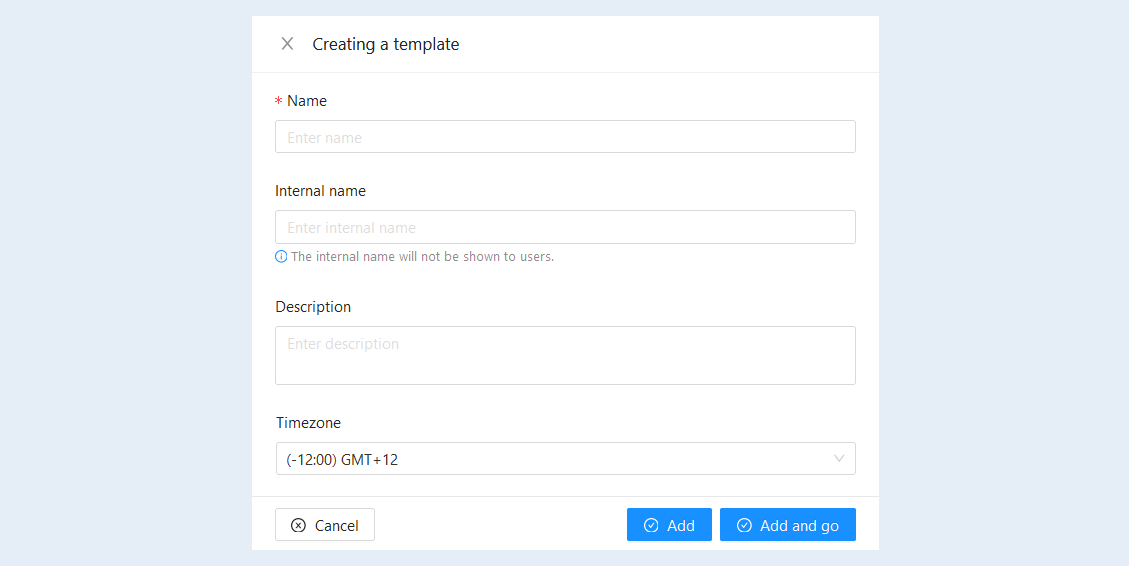
An additional window will open for you. Fill in the fields:
- Name. Enter the name of the webinar template.
Internal name. The internal name will be visible only to you and will not be shown to users.
Description. Add a description for the webinar template.
Time zone. Select a time zone from the list.
Click the "Add" or "Add and Go" button.
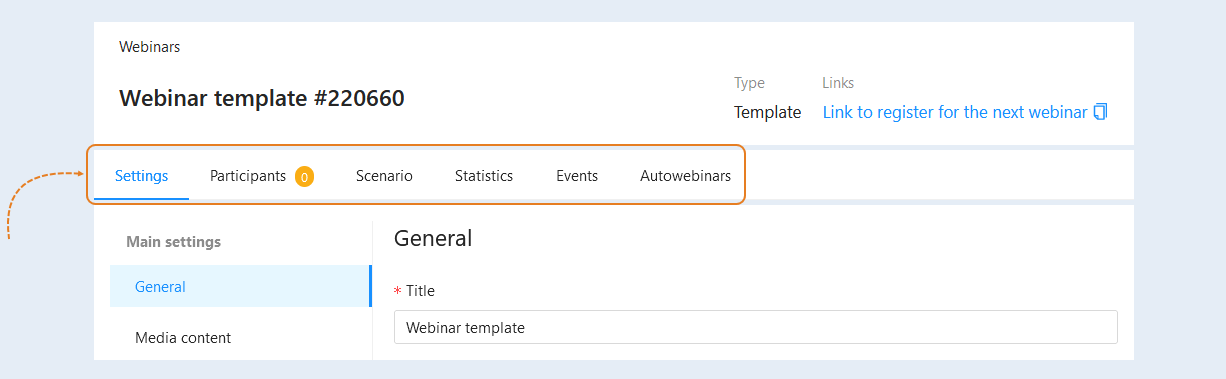
Open your webinar template. The tabs are available to you here:
- Settings. Here you add a description of the webinar, set the time of the webinar, etc. Read more in the article "Webinar settings".
Participants. In this tab you can see the personal data of the webinar participants. You can invite new members or delete them. Read more in the article "Webinar participants".
Scenario. Here you manage the webinar script: add events, actions, perform configuration. Read more in the articles "Webinar scenario", "Types of events in a scenario", "Types of actions in the scenario".
Statistics. In this tab you can see the statistics of the webinar: the number of registrations, the number of participants, the percentage of attendance and views. Read more in the article "Webinar Statistics".
Events. In this tab, you manage the events that will occur during the webinar. Read more in the article "Types of webinar template events".
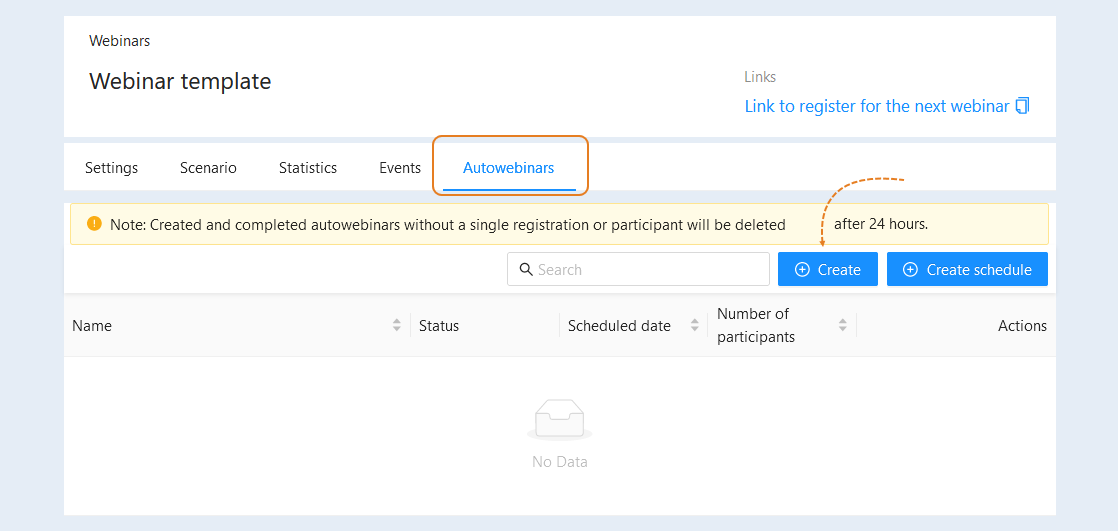
Autowebinars. Here you can set up automatic playback of the webinar at the specified date and time. Read more in the article "Autowebinars".
Events
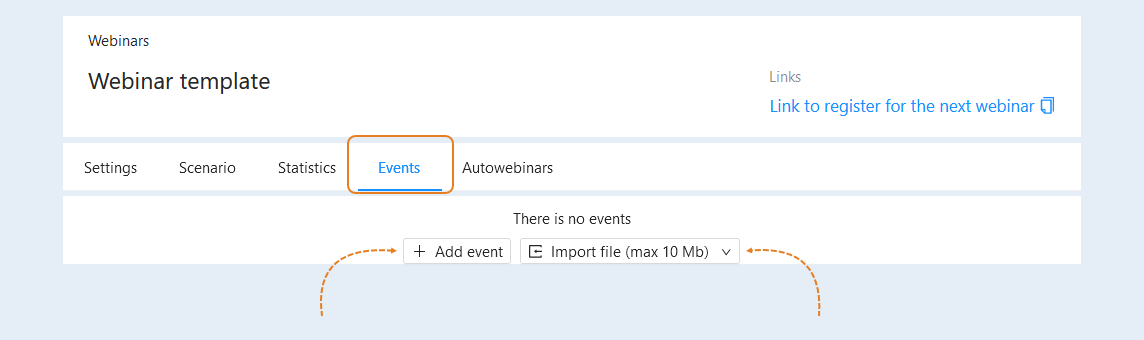
Events are any possible variants of events during a webinar and autowebinar. This is where you create a sequence of events.
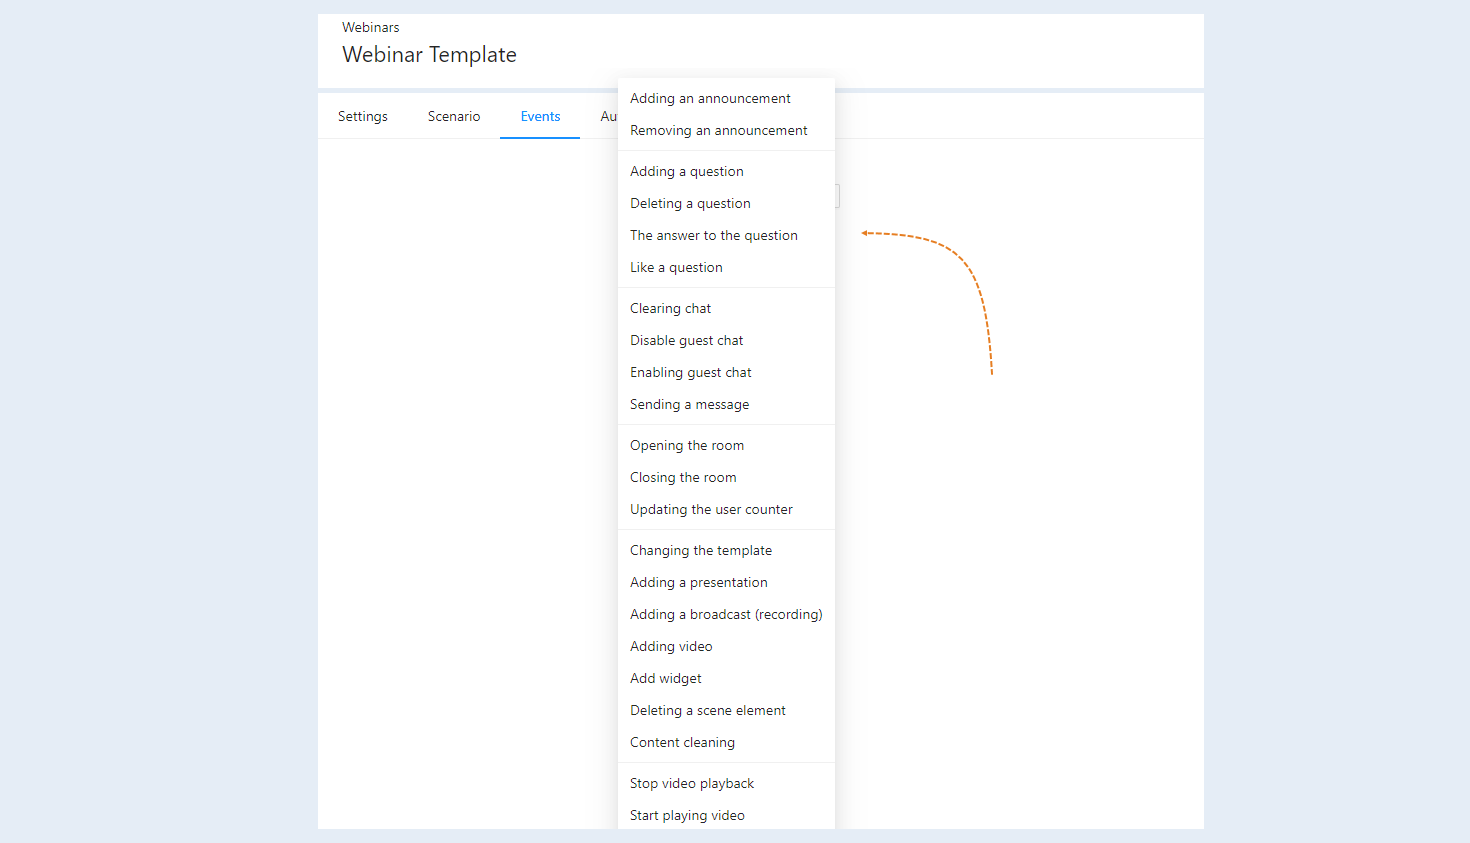
Click the Add Event button. You will see a list of possible events for the webinar. Read more about each event in the article "Types of webinar template events". Click the "Import File" button and upload a file up to 10 MB.
Select an event from the list and click on it. The event will appear in the event list of the template. Now you need to configure the settings for this event.
In our example, we selected the "Opening Room" event. Next, we set the setting "after the start" of the webinar. And set the time. The opening of the room will occur immediately after the start of the webinar without a time delay.
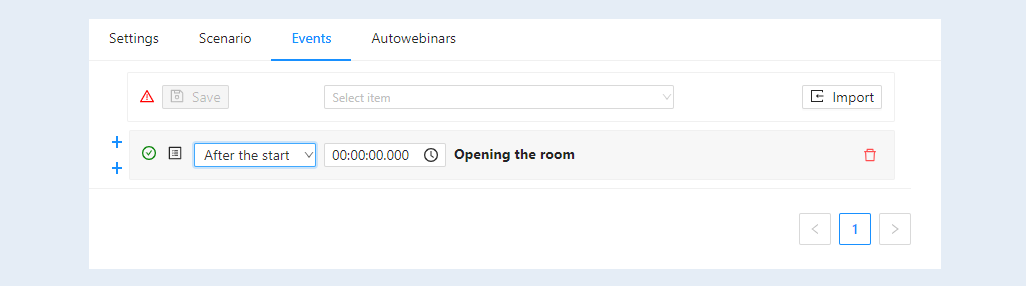
For each event, set the general settings:
- Event addition button. Click the "+" button to add the next or previous event. A window with a list of events will open. Select the event. The top "+" button will add an event above the current one in the list. The bottom "+" button will add an event below the current one in the list. To change the order of events in the list, alter the time. Then the event will move up or down in the list.
Information. A green checkmark means that the event has been added and configured. If you see a red exclamation mark, it means the event is not set up. Check whether the event data is filled in correctly, and add settings or check if the event is correctly positioned relative to other events. Click on the red exclamation mark to see system hints.
List of settings for this event. Click to view general information about the webinar.
Event sequence. Choose when to execute the event: before or after the webinar starts.
Time. Set the launch time for the event, in hours, minutes, seconds, and milliseconds.
Event name. The name of the event is specified here.
Change time. Click to change the time for this and all subsequent events. All events in the list will be moved forward or backward by the chosen time.
"Delete" button. Click to remove the event from the list.

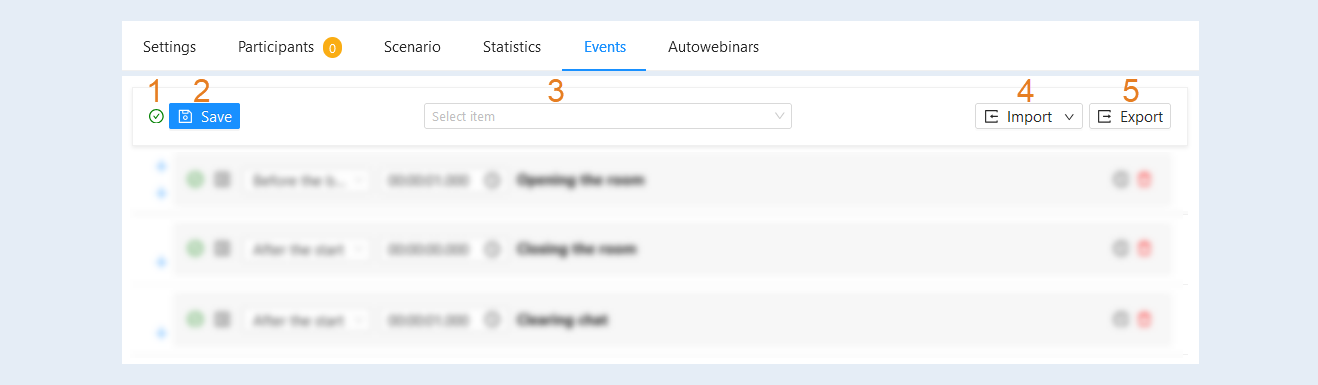
At the top of the webinar event list, you have access to:
- Information. A green checkmark indicates that events have been added and configured correctly. If you see a red exclamation mark, it means that some event is not set up or is incorrectly positioned relative to other events, or that the "Room Opening" and "Room Closing" events have not been added. Click on the red exclamation mark to see system hints.
Save. After you have added and configured all the events of the webinar, click the save button. This button will be active if all events are configured correctly.
List of all added events. Select the desired event from the list to go to its settings. This option is convenient when there are many events.
Import. This is the transfer of webinar events into your account's system on the AXL platform. You can upload a list of events from your device (computer, laptop, tablet) in one file (in json or CSV format). This way, you can quickly transfer a large number of events to your account's webinar. Note that all current events will be deleted after the import. The maximum import file size is 10 MB. Import is possible from BIZON, GetCourse, and AXL.
Export. The "Export" function allows you to export all webinar events in json format. Export is the offloading of the event list from your account to another account. Click the "Export" button and download the file to your device (computer, laptop, tablet) as a single file.
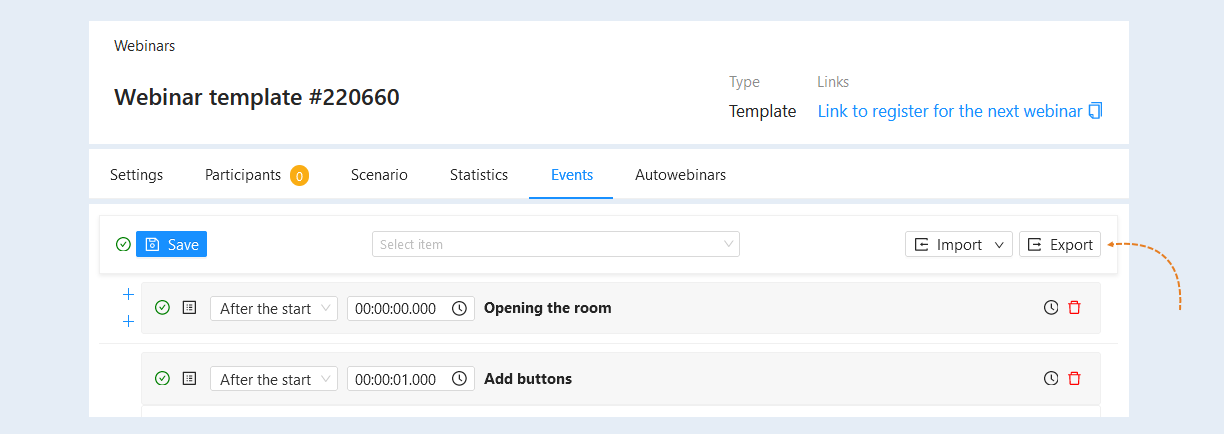
Add a sequence of events for your webinar template. And set the time for each event. For more information about events in the webinar template, read the article "Types of events in the webinar template". After completing the settings of the webinar event list, you can export all the events in json format. In this case, it is convenient to edit events in the file if there were a lot of events in the webinar. To do this, click the "Export" button. You can also import the webinar to another account.
To add video recording, presentation and widgets to your webinar template, go to the "Settings" tab. Select the "Content and Presentations" tab.
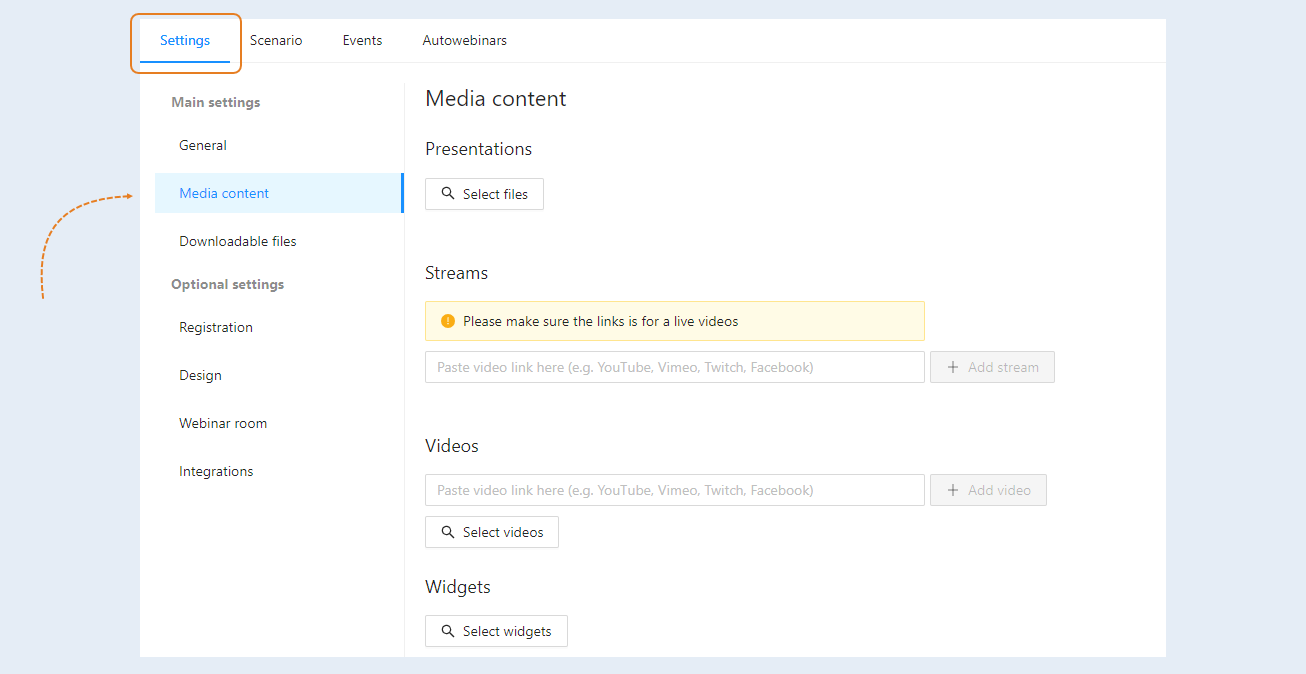
Upload your video, presentation and add a widget if needed. Or select a video and presentation from the list if they were uploaded earlier.
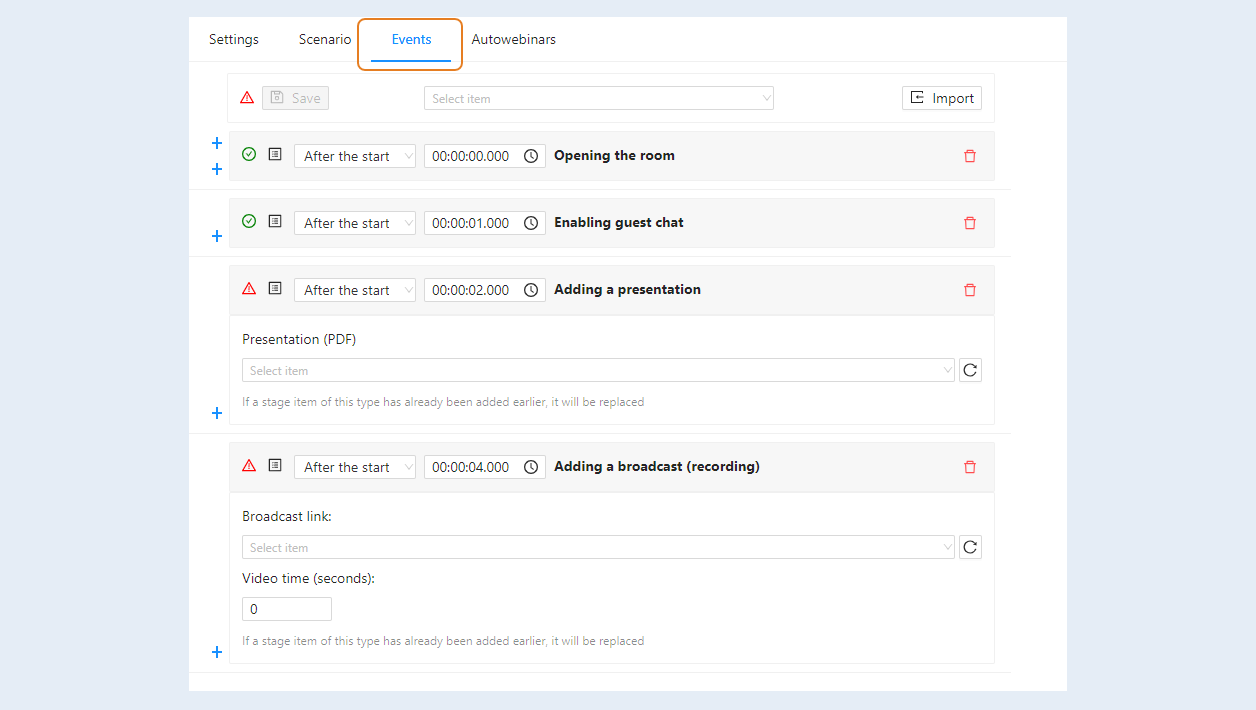
After you have added all the necessary events, go to the "Autowebinars" tab. Click Create.
An additional window will open. Fill in the fields:
- Name. Write a title for your Automated Webinar.
Internal name. The internal name will not be shown to users.
- Description. Add a description.
- Scheduled Date and Time Zone. Enter the date and time zone for the Auto Webinar to run.
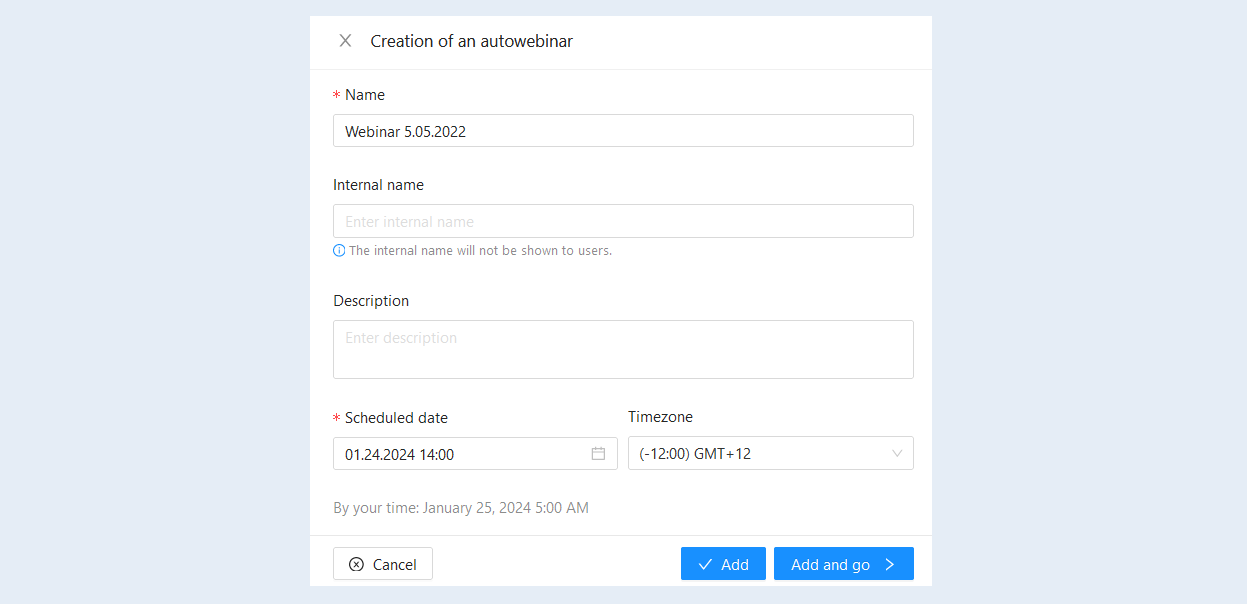
The auto-webinar will start at the date and time you specified. Events during the webinar will occur in accordance with the event scenario of the webinar template.
For more information on what events are in the webinar template, see the article "Types of events in a webinar template".