The "Telegram Groups/Channels" application is a tool that allows for the automation of managing user access to closed groups or channels in Telegram. By using this application, you can automatically approve membership requests for a group or block users in a Telegram group. Additionally, you can use the Scenario to process messages, manage participants, create automatic responses, and perform other actions based on user interactions with your content.
The Scenario is a predefined sequence of actions that are executed automatically in response to specific events, such as sending messages in a group or channel. These actions may include interacting with users, providing information, conducting surveys, sending notifications, as well as distributing educational materials and performing other tasks.
Creating a Scenario for the Telegram Groups/Channels Application
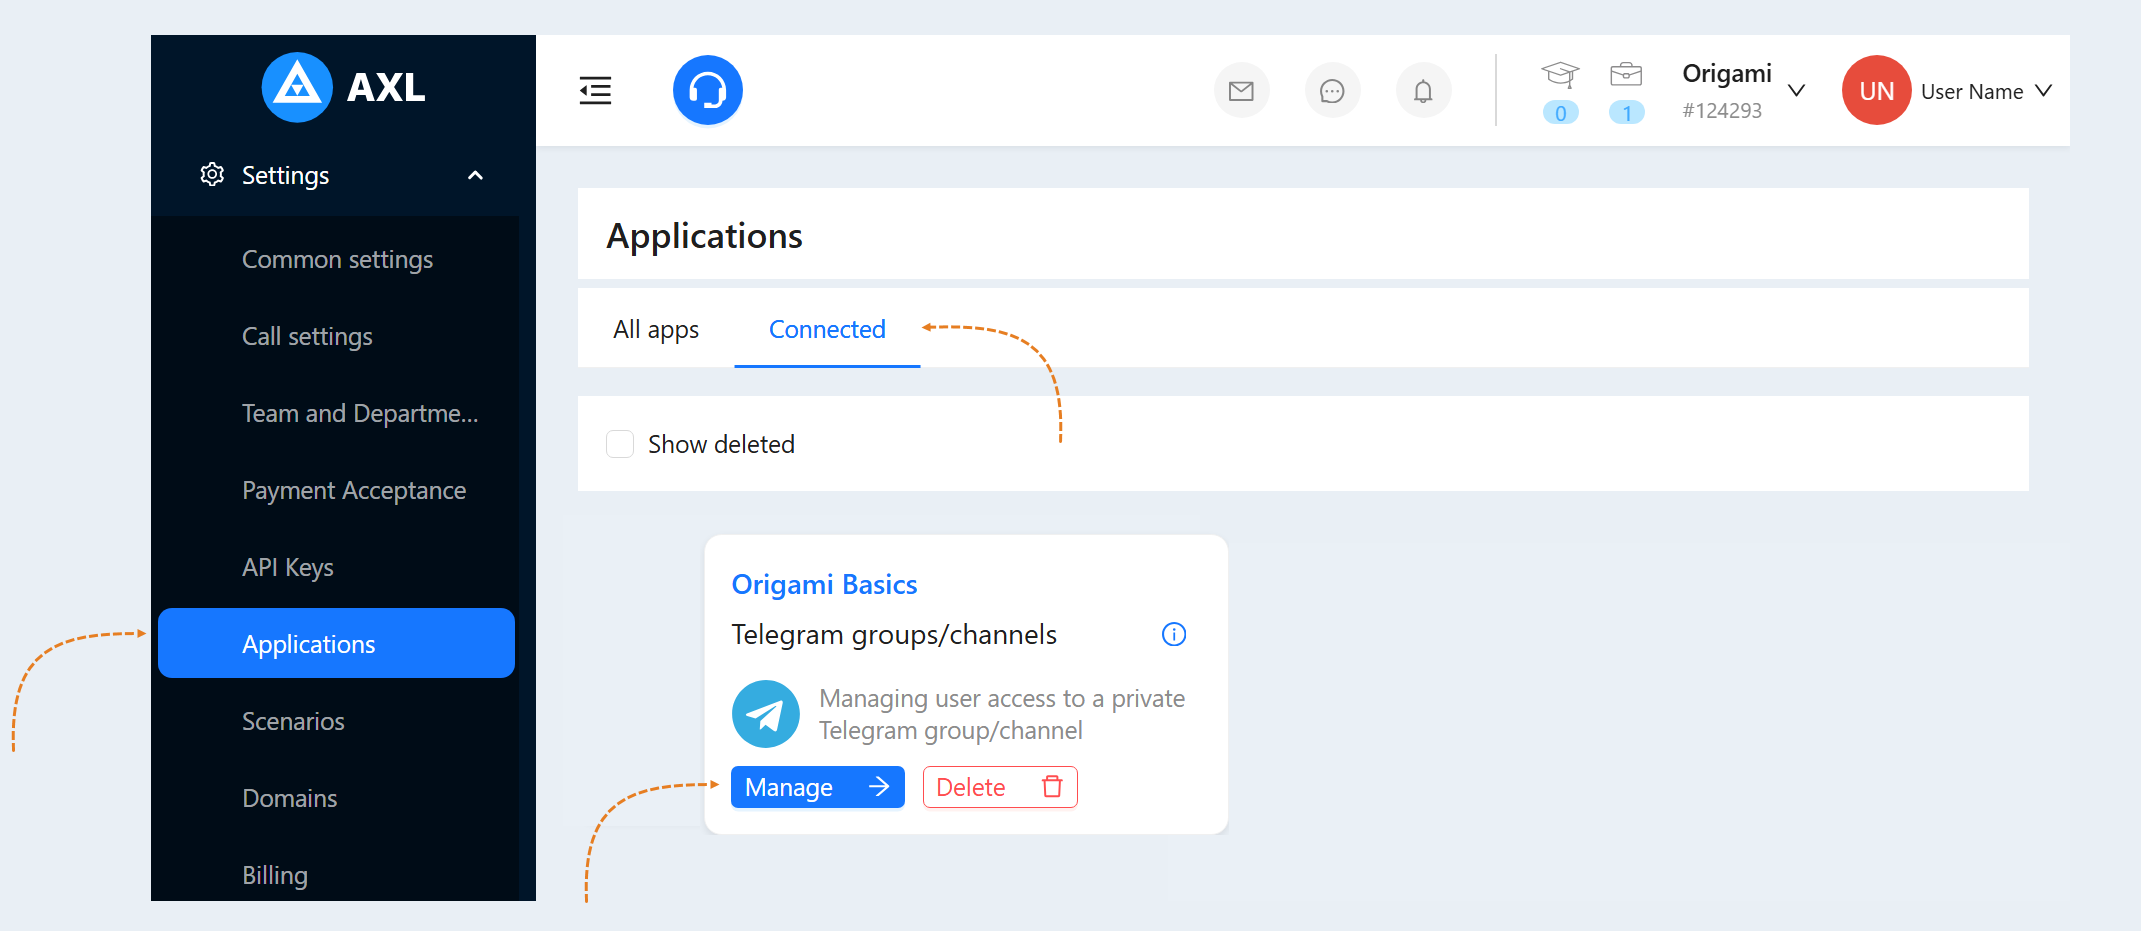
Go to the "Settings" section and select the "Applications" tab. In the "Connected" tab, you’ll see the connected Telegram Groups/Channels application. To proceed with the settings, click the "Manage" button.
For more details on how to connect the application, refer to the article "Application Telegram groups/channels".
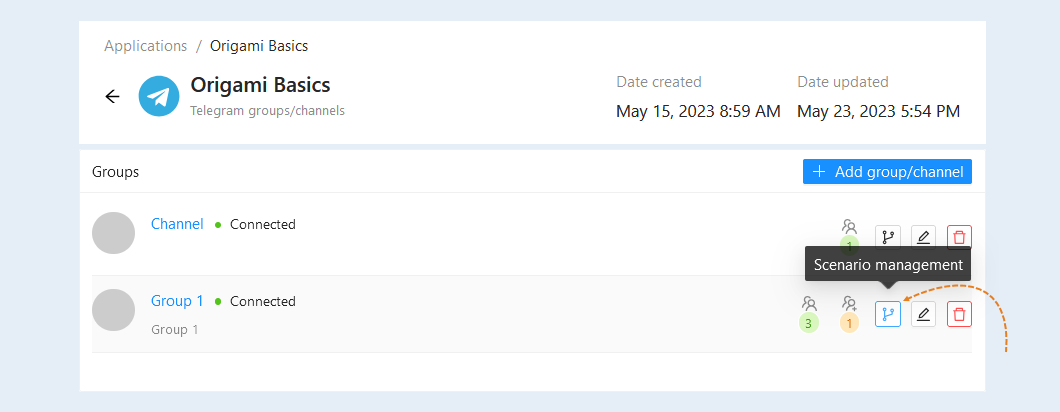
In the listed groups, you can view the complete list of all Telegram groups and channels that have been connected. For more information on how to connect a group and channel, refer to the article "Application Telegram groups/channels".
To manage the Scenario for a specific group or channel, click the "Scenario management" button next to the name of the respective group or channel. This action will open the Scenario settings window.
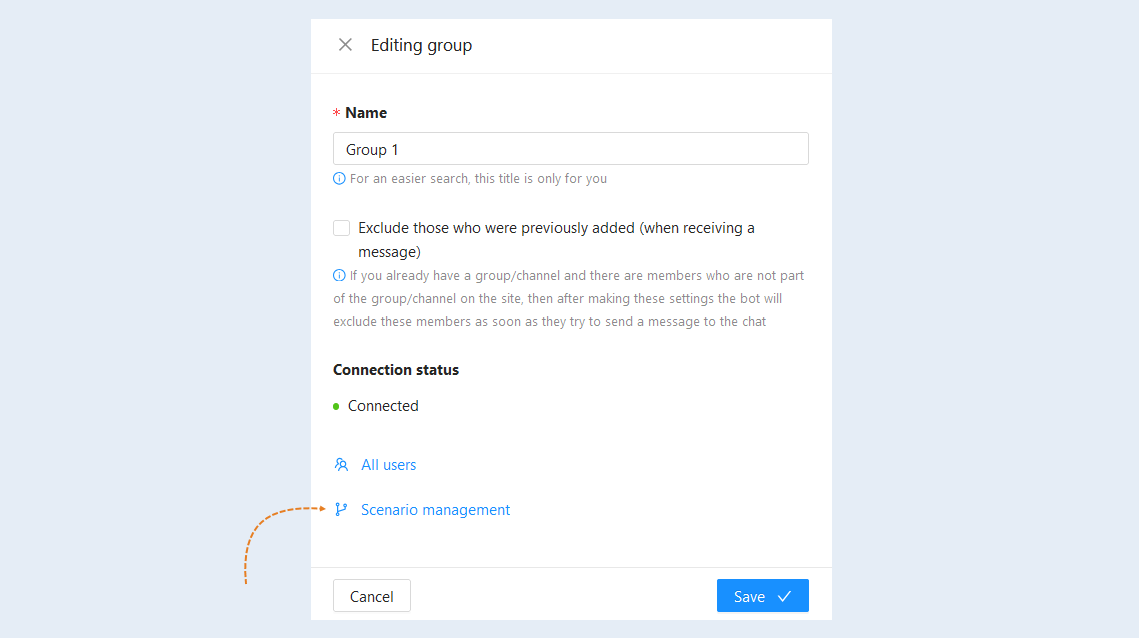
Moreover, if you want to make changes to the group or channel itself, you can click on their name or the "Manage Group" button, which is also located in the list. In the group editing window, you will have access to additional options for modifying group settings. In this window, you will also find the "Scenario management" option, which will open the Scenario settings window.
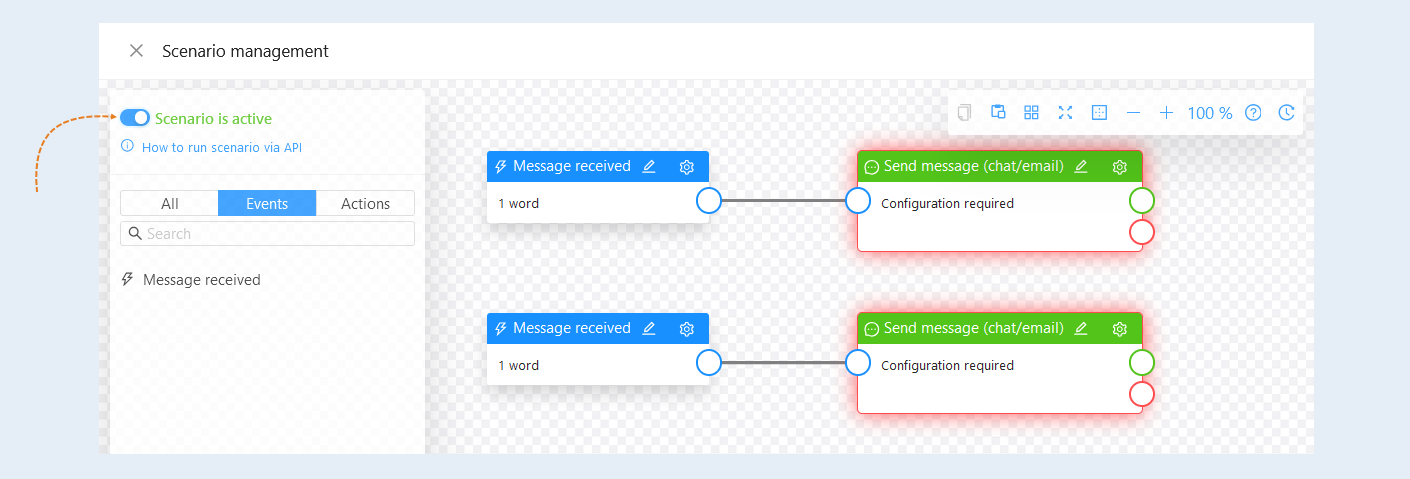
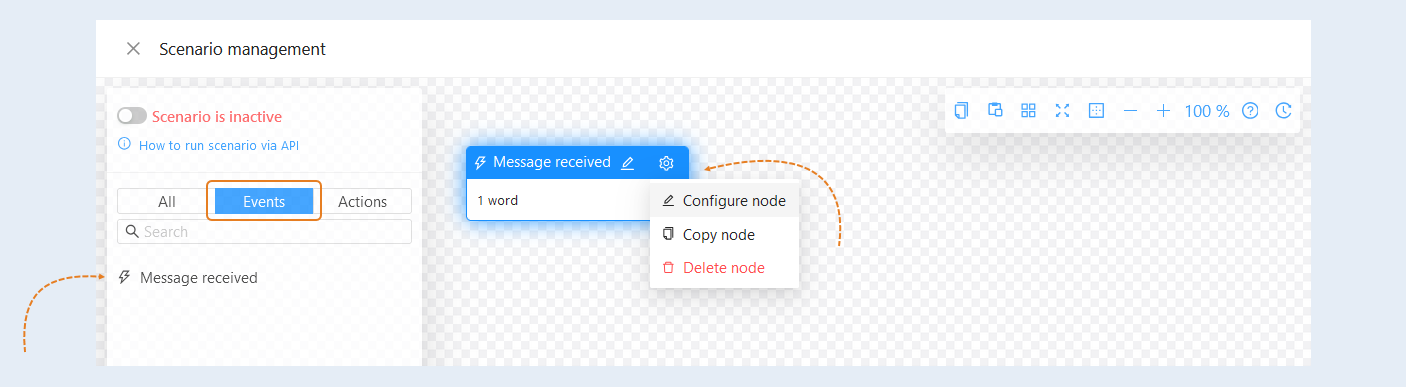
In the Scenario for the Telegram Groups/Channels application, an event that triggers the Scenario is available - Message Received. This event is triggered when a user sends a message to the group containing specific words.
Next, you need to configure the event settings. Click the "Settings" button in the top-right corner, then open the node settings. In the node settings, you can specify the particular words in the message that will trigger the Scenario. The "Message Received" event allows for various Scenarios to be triggered based on the keywords contained in the user's message. Configuring specific words enables automatic responses to be more personalized and helps users receive the information they need more quickly.
You can add one or more words to the event or create multiple events containing different words, thereby setting up multiple branches of the Scenario.
For example, the word: "help." A user sends a message in the chat channel: "I need help with the assignment." Then, they receive a message with instructions, or the responsible administrator is tasked with contacting the user for a personal consultation.
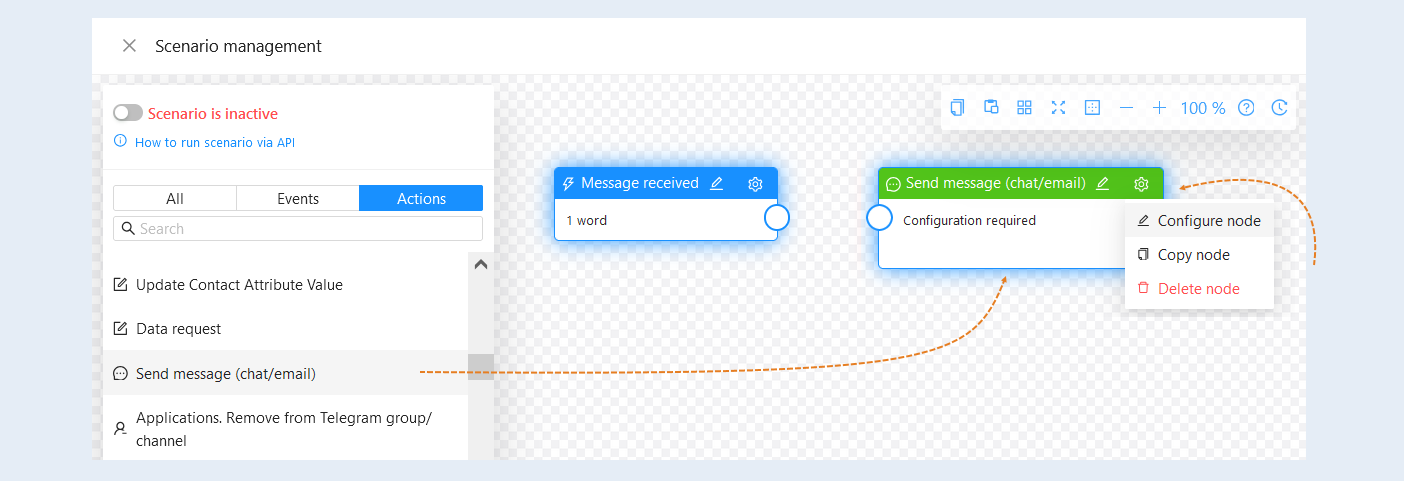
In the node settings, add words that will trigger the Scenario. Below, select the settings:
- Complete Match means that the event node will be activated only if the message contains an exact match with the specified word or phrase. For example, if the word "hello" is specified, the event node will only be activated if that exact word is used, not considering other spelling variations or phrases.
Contains means that the event node will be activated if the specified word or phrase is present in the message, regardless of its location or combinations with other words. For example, if the word "assignment" is specified, the event node will be activated for any message containing that word, such as "there is an assignment," "homework assignment," "assignment for next week," and so on.
Ignore Case means that the event node will be activated regardless of how the specified word or phrase is written - in uppercase, lowercase, or mixed case. For example, if the word "Hello" is specified, the event node will activate for "Hello," "hello," "HELLO," etc. This is convenient for ensuring flexibility and not limiting users by spelling options.
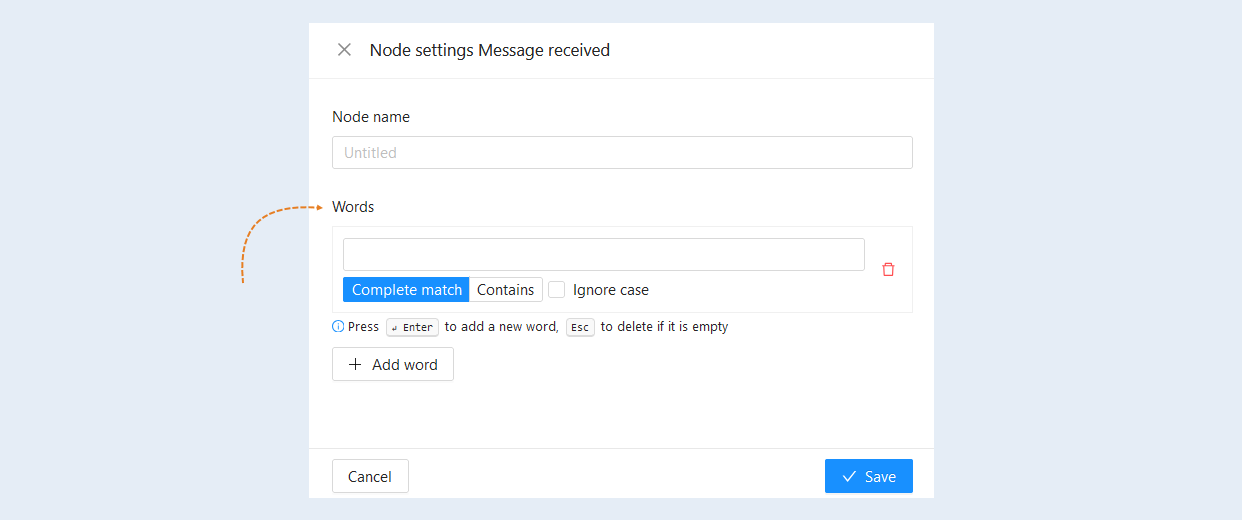
After this, it is necessary to add actions to the scenario. Open the "Actions" tab, select an action from the list, and drag it into the scenario field. For details about actions in the scenario, read the article "Types of actions in the scenario and their configurations".
Next, for each action, you need to perform configurations. Click the "Settings" button in the upper right corner of the action, then open the node settings.
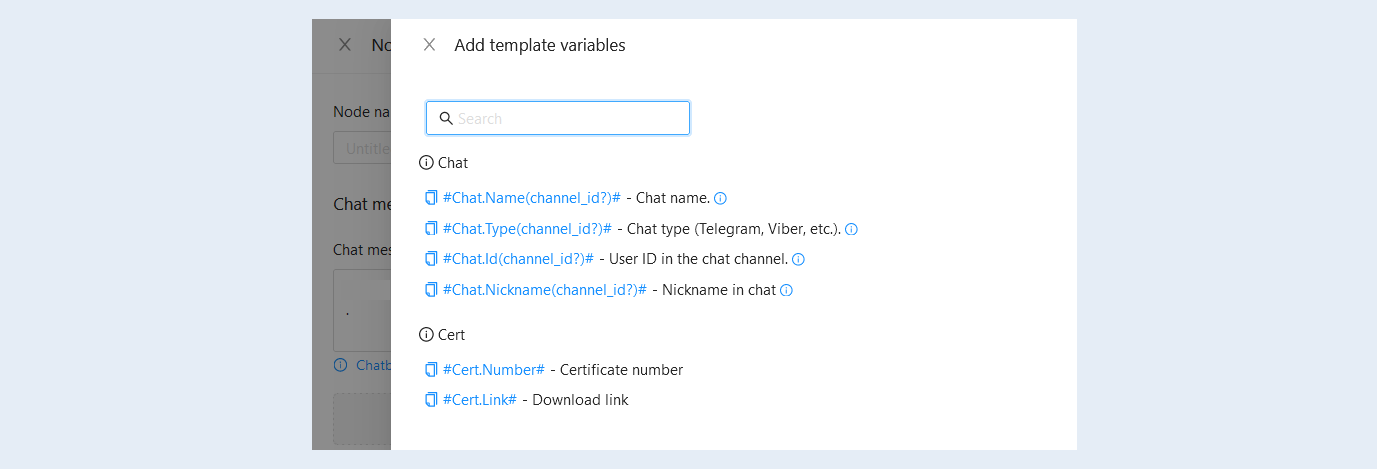
In the node settings for actions such as "Send Email" or others, you can add variables.
A variable is a value for automatic replacement with the data you've chosen. This could be a contact's name, email, account name, order number, etc. Variables will automatically replace data in the email.
Click the "Add Variables" button next to the corresponding section "Telegram Group." A list of variables will open on the right. Select a variable from the list.
- The "Received Message" variable allows you to include the text of the received message in the email text.
For more information about other variables, read the article "Variables in the Scenario".
Next, it is necessary to connect events and actions with each other. You can create one or several connections between events and actions. To remove a connection between scenario elements, double-click on the connection.
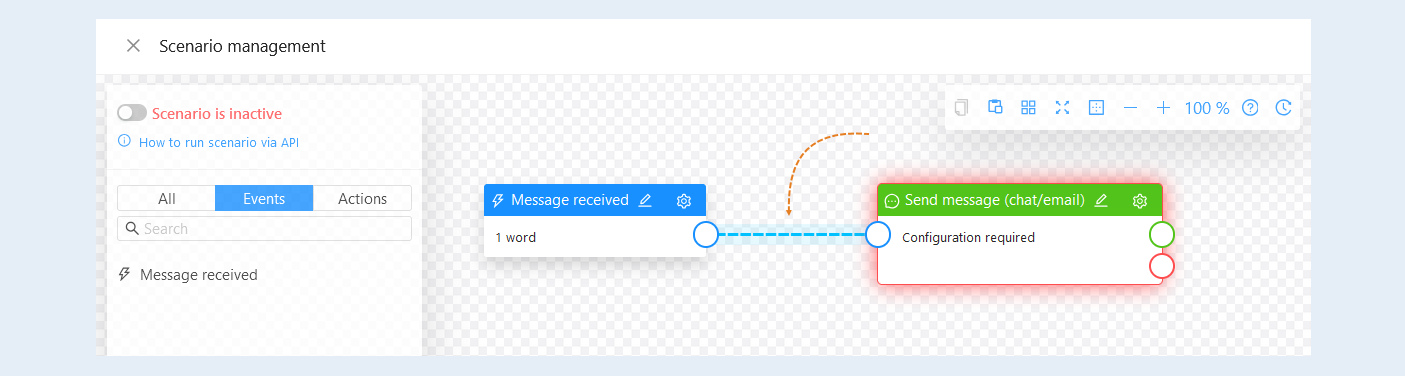
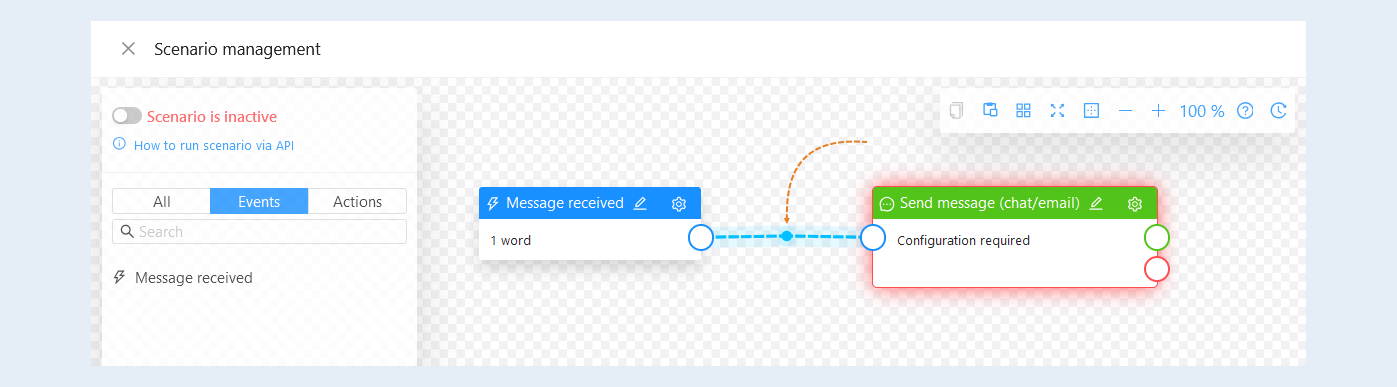
You can use the function of adding points to connections to create chains. To add an anchor point, select a location on the connection line where you want to add the point. Click the left mouse button on the selected spot on the line while simultaneously pressing the Ctrl key on your keyboard. You can then grab the anchor point and move its location within the scenario field. To remove an anchor point, double-click on the point. Double-clicking on the line will remove the line and all anchor points on it.
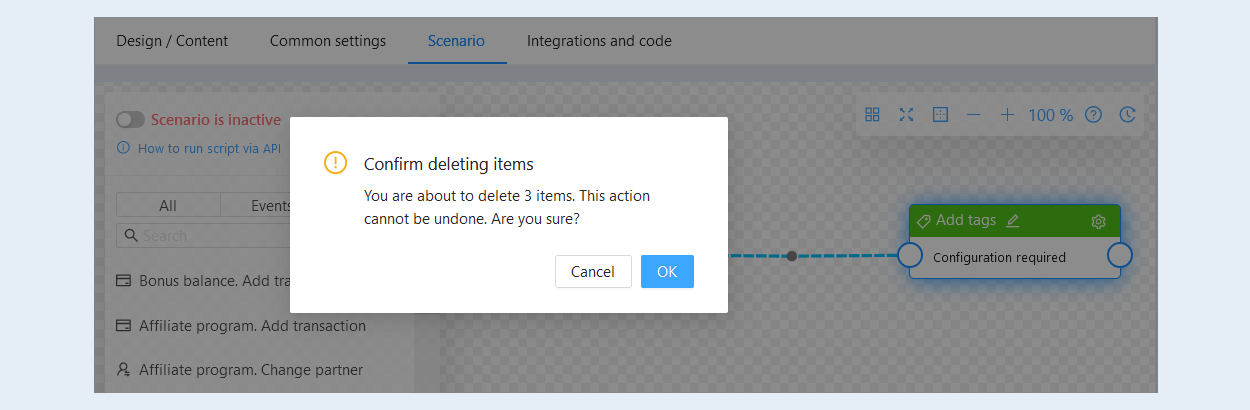
To mass delete scenario steps, hold down the Shift key and select the needed events and actions by clicking on them with the mouse. Then press the Delete or Backspace key and confirm the deletion of the selected scenario steps.
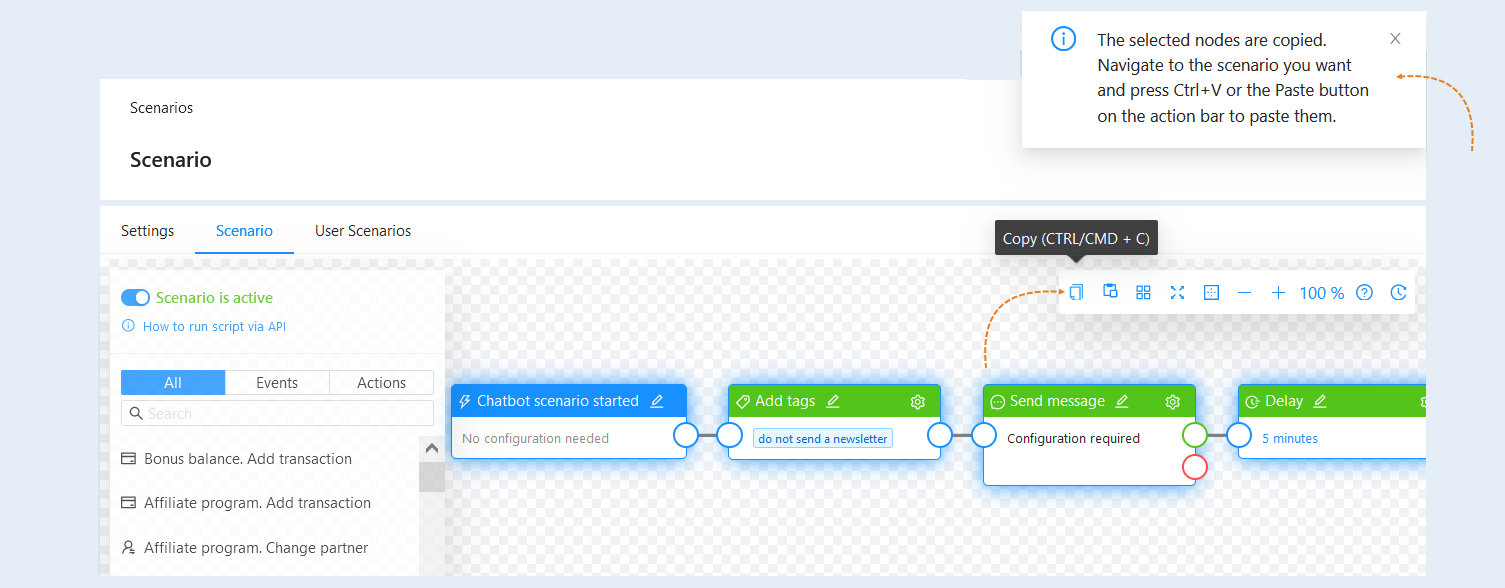
You can copy steps and links between scenarios within the same account. Hold down Shift and select the desired steps by clicking on them with the mouse. The selected scenario steps will be highlighted with a blue border. Then copy the selected steps by clicking the "Copy" button or by pressing Ctrl + C on your keyboard. A message will appear in the upper right corner indicating that the steps have been copied..
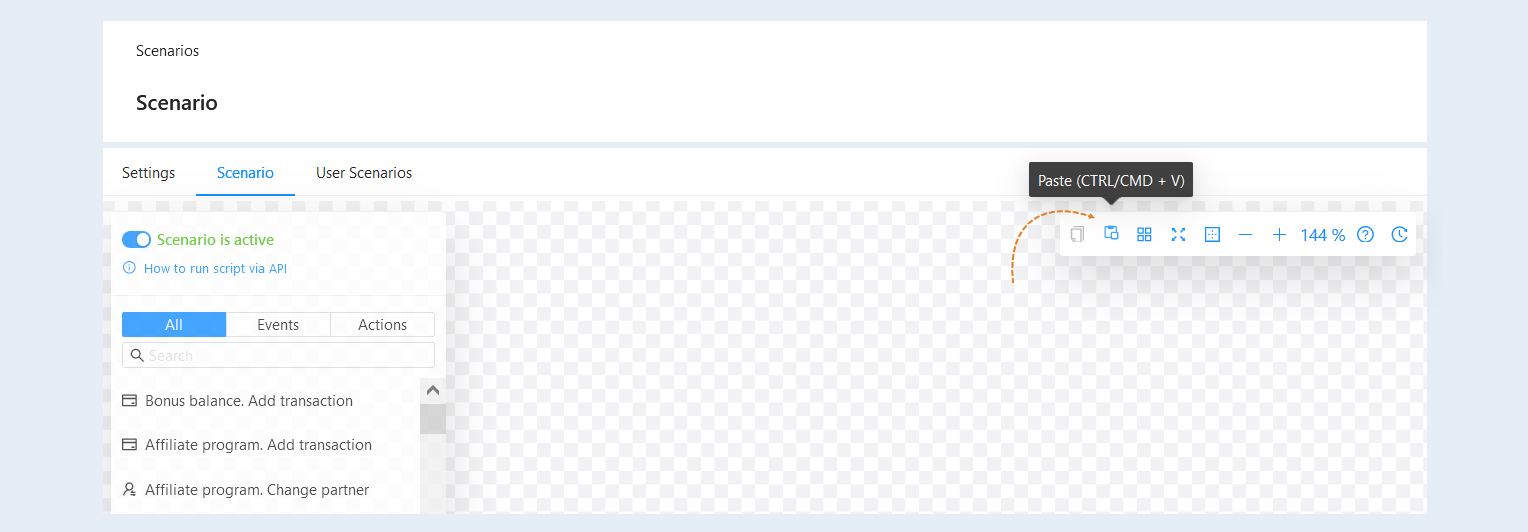
Open another scenario in your account. Please note that moving scenario nodes only works within the same account. Click the "Paste" button or press Ctrl + V on your keyboard. The scenario steps will be copied to the new scenario.
Add the necessary number of events and actions to your scenario. Now your scenario is ready. To activate the scenario, switch the slider to the active position.