After you have gone into editing the created product, you have opened the product settings, the "Common Settings" tab.
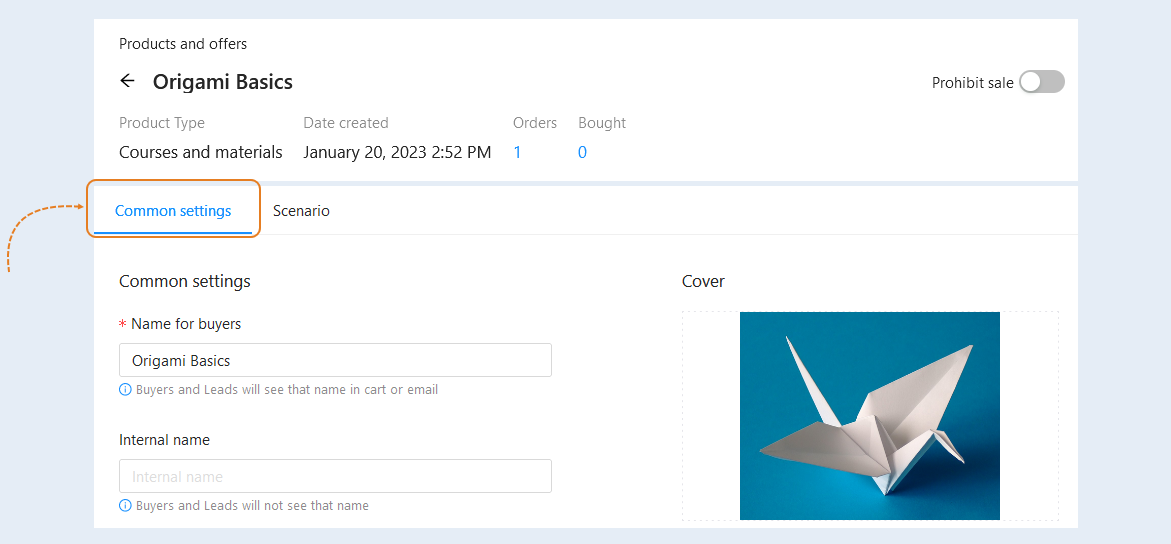
In the "Common Settings" section, you manage the advanced settings of the created product or service.
- Name for buyers. You can change the product name. Buyers and customers will see this product name in the shopping cart or in the email newsletter.
Internal name. The internal name will be visible only to you and will not be shown to users.
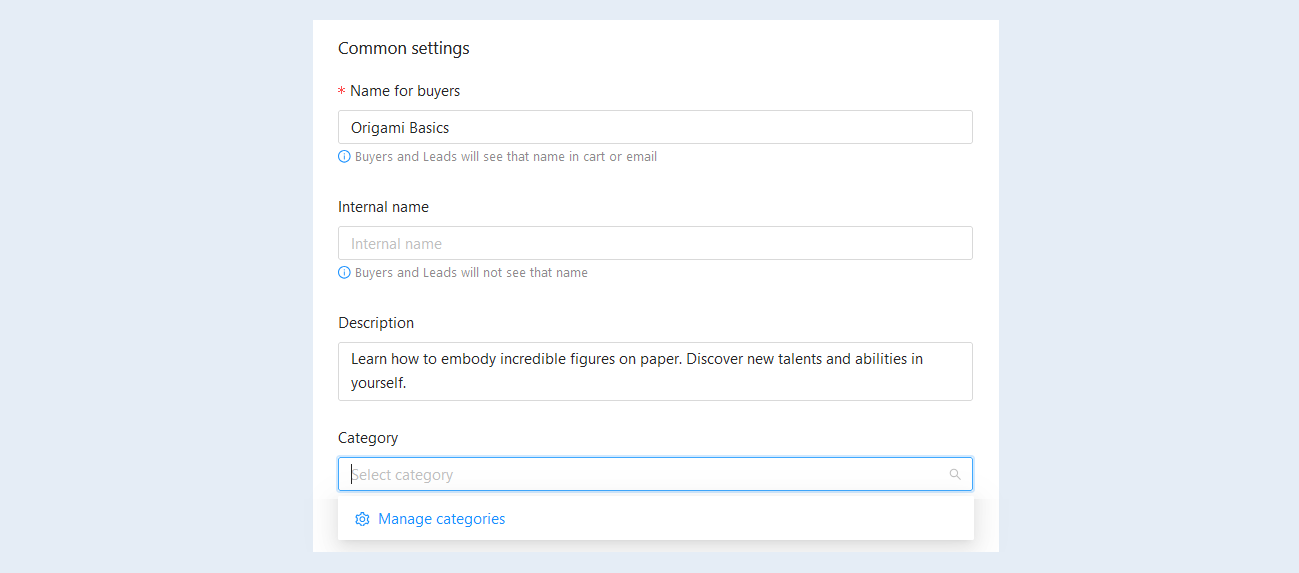
Description. You can add a more detailed product description. The description will also be available to users in the shopping cart or in the email newsletter.
Category. This is a way of grouping products within a single system. Categories help to structure and organize products, which makes it easier to find the information you need. Click on "Manage Categories" and create product and offer categories.
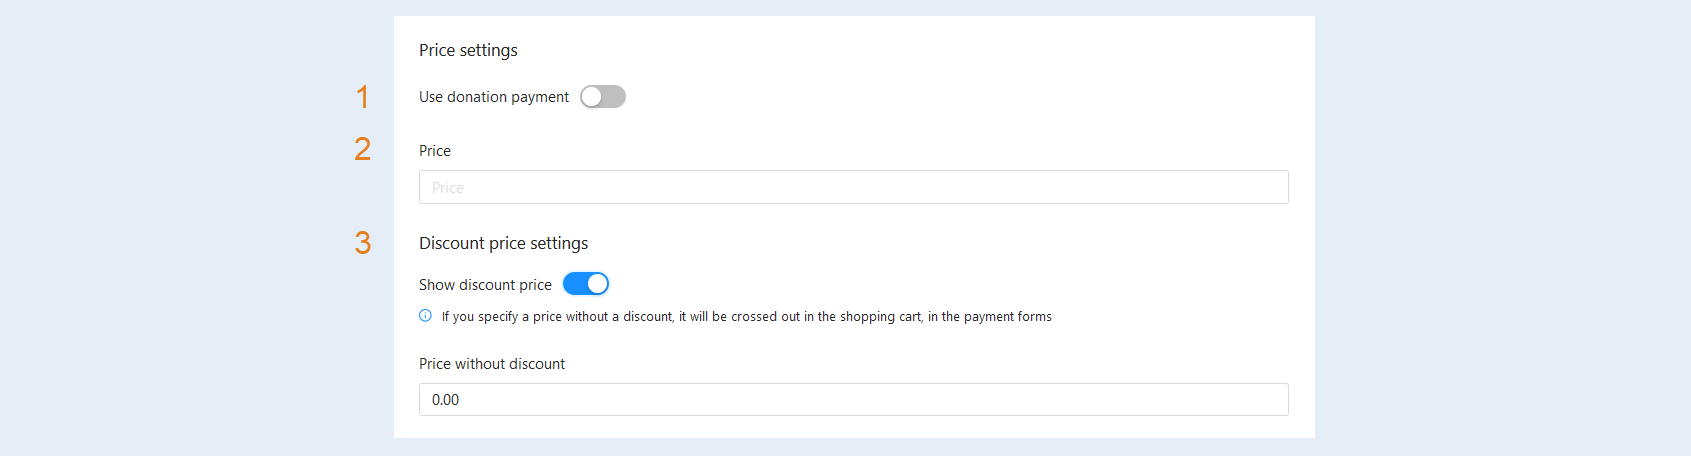
Price Settings. This section allows you to set and adjust the cost of courses and materials offered to users. You can use a "pay-what-you-want" model or set a fixed price for the product:
- Use donation payment. This feature allows the buyer to set their own price for the product or course within a specified range, provided it is not lower than a predetermined minimum amount. Users can make donations and choose the amount they wish to pay. This allows users to determine the price based on their financial situation or perception of the product's value. To activate the "Use donation payment" feature, you need to move the slider to the "on" position and set the minimum amount below which the buyer will not be able to specify their price. This gives buyers more freedom in determining cost, which can help increase consumer interest.
Price. Specify the product price; this amount will be charged to the user's card at the time of purchase.
Discount Price Settings. This section allows you to offer users promotions and discounts on products, which can attract more customers and boost sales.
Show discount price. The discounted price display feature allows you to present the cost of the item with a discount rather than its full price. This can help attract more buyers, as they see that the product is being sold at a lower price than usual. This emphasizes the attractiveness and value of the offer. To use this option, move the slider to the active position, which will open additional fields for setting the discount price.
Price without discount. Indicate the product price without considering the discount; this amount will be crossed out in the cart and on the product payment forms.
Payment for the product with bonuses. Move the slider to the active position so that users can pay part of the cost or the full cost of the subscription with points from the bonus account.
Choose to pay with bonuses in the form of interest or set a fixed amount. Specify the numeric value below. If you have chosen the amount as a percentage, then set how many percentages of the subscription price the user will be able to pay with bonuses. If you have chosen a fixed amount, then set the maximum amount that will be debited by bonuses to pay for the signature.

Subscription period. This field will be available when setting up a subscription. A subscription period is a defined period of time during which a contract for a specific product or service is established. Subscription periods are typically monthly, quarterly, yearly, or for any other specified duration of time. For the user, a subscription period means continuous access to selected services or products for a specified period without the need to purchase or pay individually each time. This can be a convenient and cost-effective way to use certain services or products on a long-term basis.
- Subscription duration. Set the duration of the subscription in days or months.
Limitation of the number of renewals. You can set the maximum number of automatic renewals for a given subscription. When the user reaches this maximum number of renewals, auto-renewal of the subscription is disabled and access to the product will be terminated after the last paid period. The restriction allows you to control how long members can use the subscription and can help prevent situations where users will indefinitely renew their subscription without using the product. By setting a limit on the number of extensions, you can motivate users to take courses more actively and use the material before their access is restricted.
Trial period. A trial period is an offer that allows new users to use a service or product for a specific period at a reduced price or for free. Usually, such an offer is available only for a limited period of time, for example, one week or one month. A trial period allows users to familiarize themselves with the features and benefits of the product or service and determine if it meets their needs. This can help users make a more informed decision about whether to continue using and paying for the service or product. A trial period can also be a way to attract new users and expand the customer base. This is especially useful for new companies that are just starting out to attract attention and create a loyal customer base. Check the box to go to the trial period settings. Please note that a trial period subscription requires the provision of payment information, such as credit card details, and will automatically transition to a paid subscription at the end of the trial period. Payment will be made using the user's saved payment method.
Trial price. Set the price for the trial period.
Trial duration. Set the duration of the trial period in days or months. The trial period can have different durations, ranging from a few days to several weeks or even months. During the trial period, the user has access to all the features and functionalities of the product or service.

Attachments. This field will be available when setting up a digital product. Add files by clicking in the field, a file download window will open. Select the desired file and click "Open".

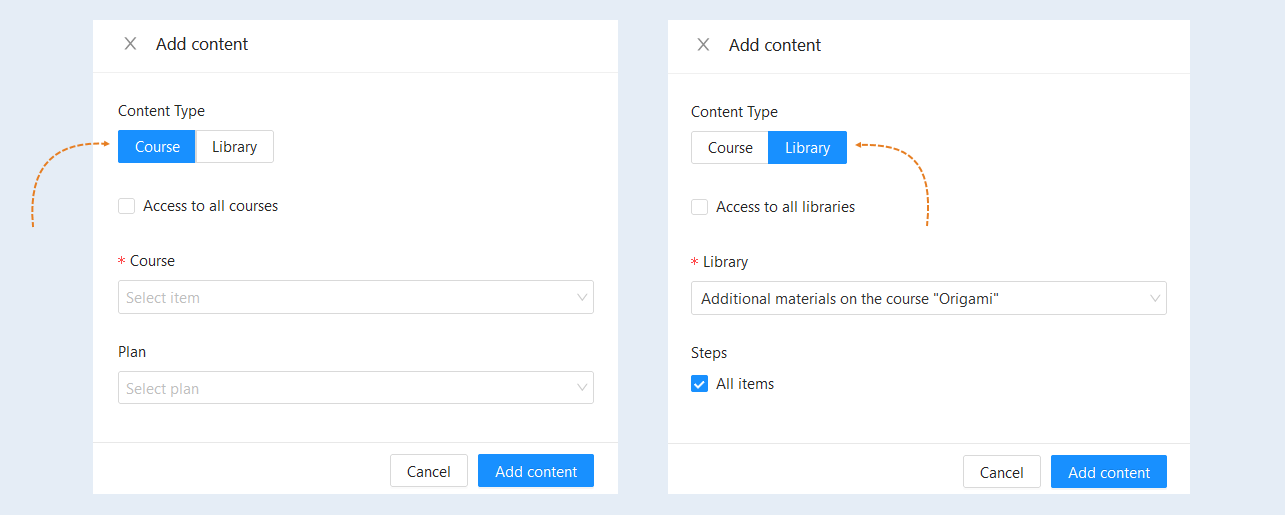
Content. This field will be available when setting up subscriptions, courses, and materials. You can add multiple courses and libraries to the product. Click the "Add Content" button, a new window will open for you.

In the window that opens, fill in the fields:
- Content type. Select the desired content type: course or library.
- Access to all courses/Access to all libraries. Check the box if you want to open access to all courses/libraries for subscription users.
- Course/Library. Select from the list the course/library to which you want to open access in the subscription.
- Plan/Steps. Select a course plan or library sections from the list.
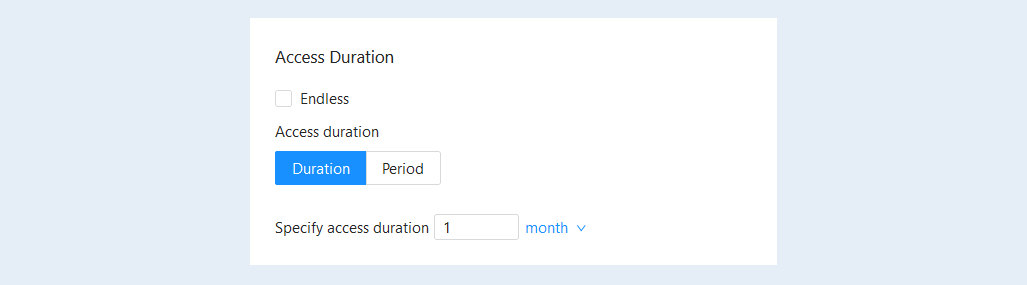
Access Duration. Set the duration of the course. During the selected period, the product will be available to users. You can choose the duration of access by specifying it in days or months, or choose a period by specifying the exact dates of opening and closing access. Also, the duration of access to the product may not be limited by time. To do this, check the "Endless" box.
Additional Settings. This section presents additional product settings.
- Do not send standard email after payment. You can disable the sending of the standard email after product purchase by checking the box. You can configure email sending in the "Scenarios" tab. For detailed instructions on creating scenarios, read the article "Scenario".
Limit order validity time. Check the box to set time limits within which the order will be valid. This feature can be useful for motivating users to complete their order payment. If there is more than one product in the order, the order validity period will be set according to the product that expires first.

Setting up payment methods. This section is intended for managing the methods by which users can pay for access to products or courses. It allows the platform administrator to set various parameters and restrictions for processing payments.
Prohibit payment in installments. Check the box to remove the option of paying for this product in installments. If this option is enabled, users will need to pay the full cost of the course or product upfront, without breaking it into payments. This may be useful for high-cost products, where the company does not want to risk potential losses from non-payments.
Payment gateways for payments. For each product, you can set an individual payment system. For more details on creating and configuring payment integrations, refer to the article "Payment Settings".

Failed payments. This field will be available when setting up a subscription.
- Payment attempts. The first payment attempt will be made at the end of the subscription. Make settings for payment attempts:
- Automatically. This option allows the system to automatically make additional attempts to debit funds from the user's card or account if the first attempt failed. You can set the number of additional attempts and the time period during which they will be made (for example, to make 3 more payment attempts within 7 days). This setting helps to reduce the number of cancelled subscriptions.
Custom. In this mode, the system pauses between payment attempts. The user gets the opportunity, for example, to resolve the issue with the card or replenish the balance. You can determine how long the pause will last after the last failed attempt (for example, the pause after the last attempt is 3 days).
Keep access on failed attempt. This option allows you to keep access to the content or services of the platform, even if the payment was unsuccessful, for the time you set (for example, if an attempt is unsuccessful, access is saved for 7 days). This feature can increase user loyalty, as they can continue to study or use the service while having time to resolve payment issues. This can help retain customers and reduce the likelihood of them unsubscribing.

Renewal and purchase. This field will be available when setting up a subscription.
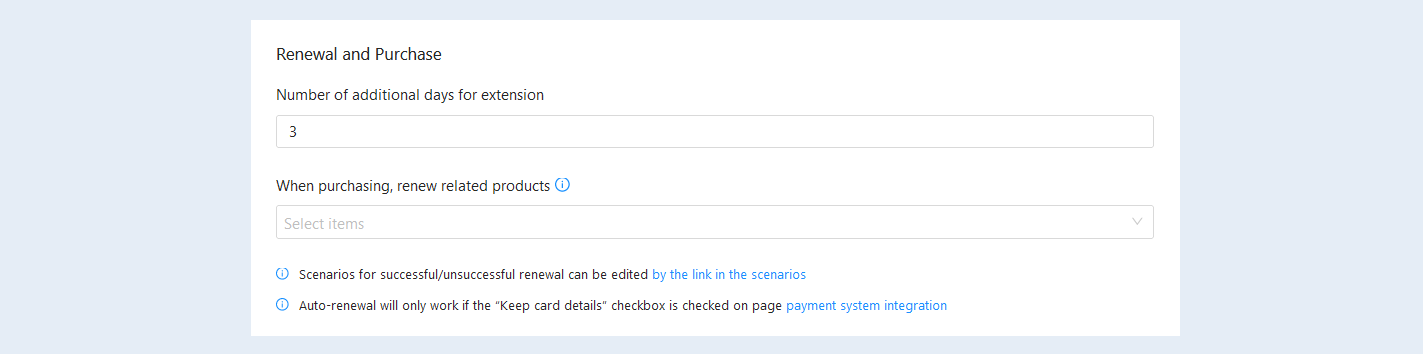
- Number of additional days for extension. Set the number of additional days to extend. Automatic renewal will only work if the “Save card details“ checkbox is checked on the payment system integration page. Set up a subscription script. More details about the flow script settings are described below.
When purchasing, renew related products. Select a subscription from the suggested list so that purchases of related products extend each other for the user and do not overlap. If any of these products are available (active access), it will be extended for the specified time. Further renewal will be continued from the last purchased subscription.
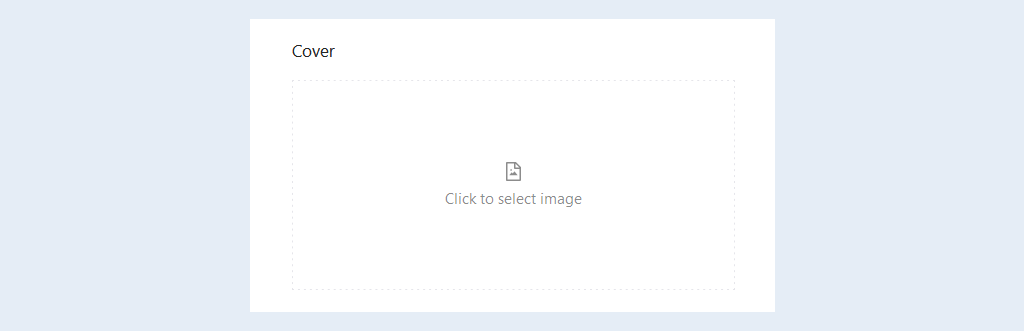
Cover. Upload images for the product avatar. Click on the icon to open the file manager, then upload the image and select it from the already downloaded ones.
Product card preview. In this section you will be able to see the product card in the form in which it will be available to users in the shopping cart or in the email newsletter.

Complete the subscription settings and click the "Save Changes" button.