You can add cash payment to the site. Follow our instructions to connect and integrate cash payment acceptance into your AXL account.
Click on the desired section of the article to go to its description:
1
Create payment integration
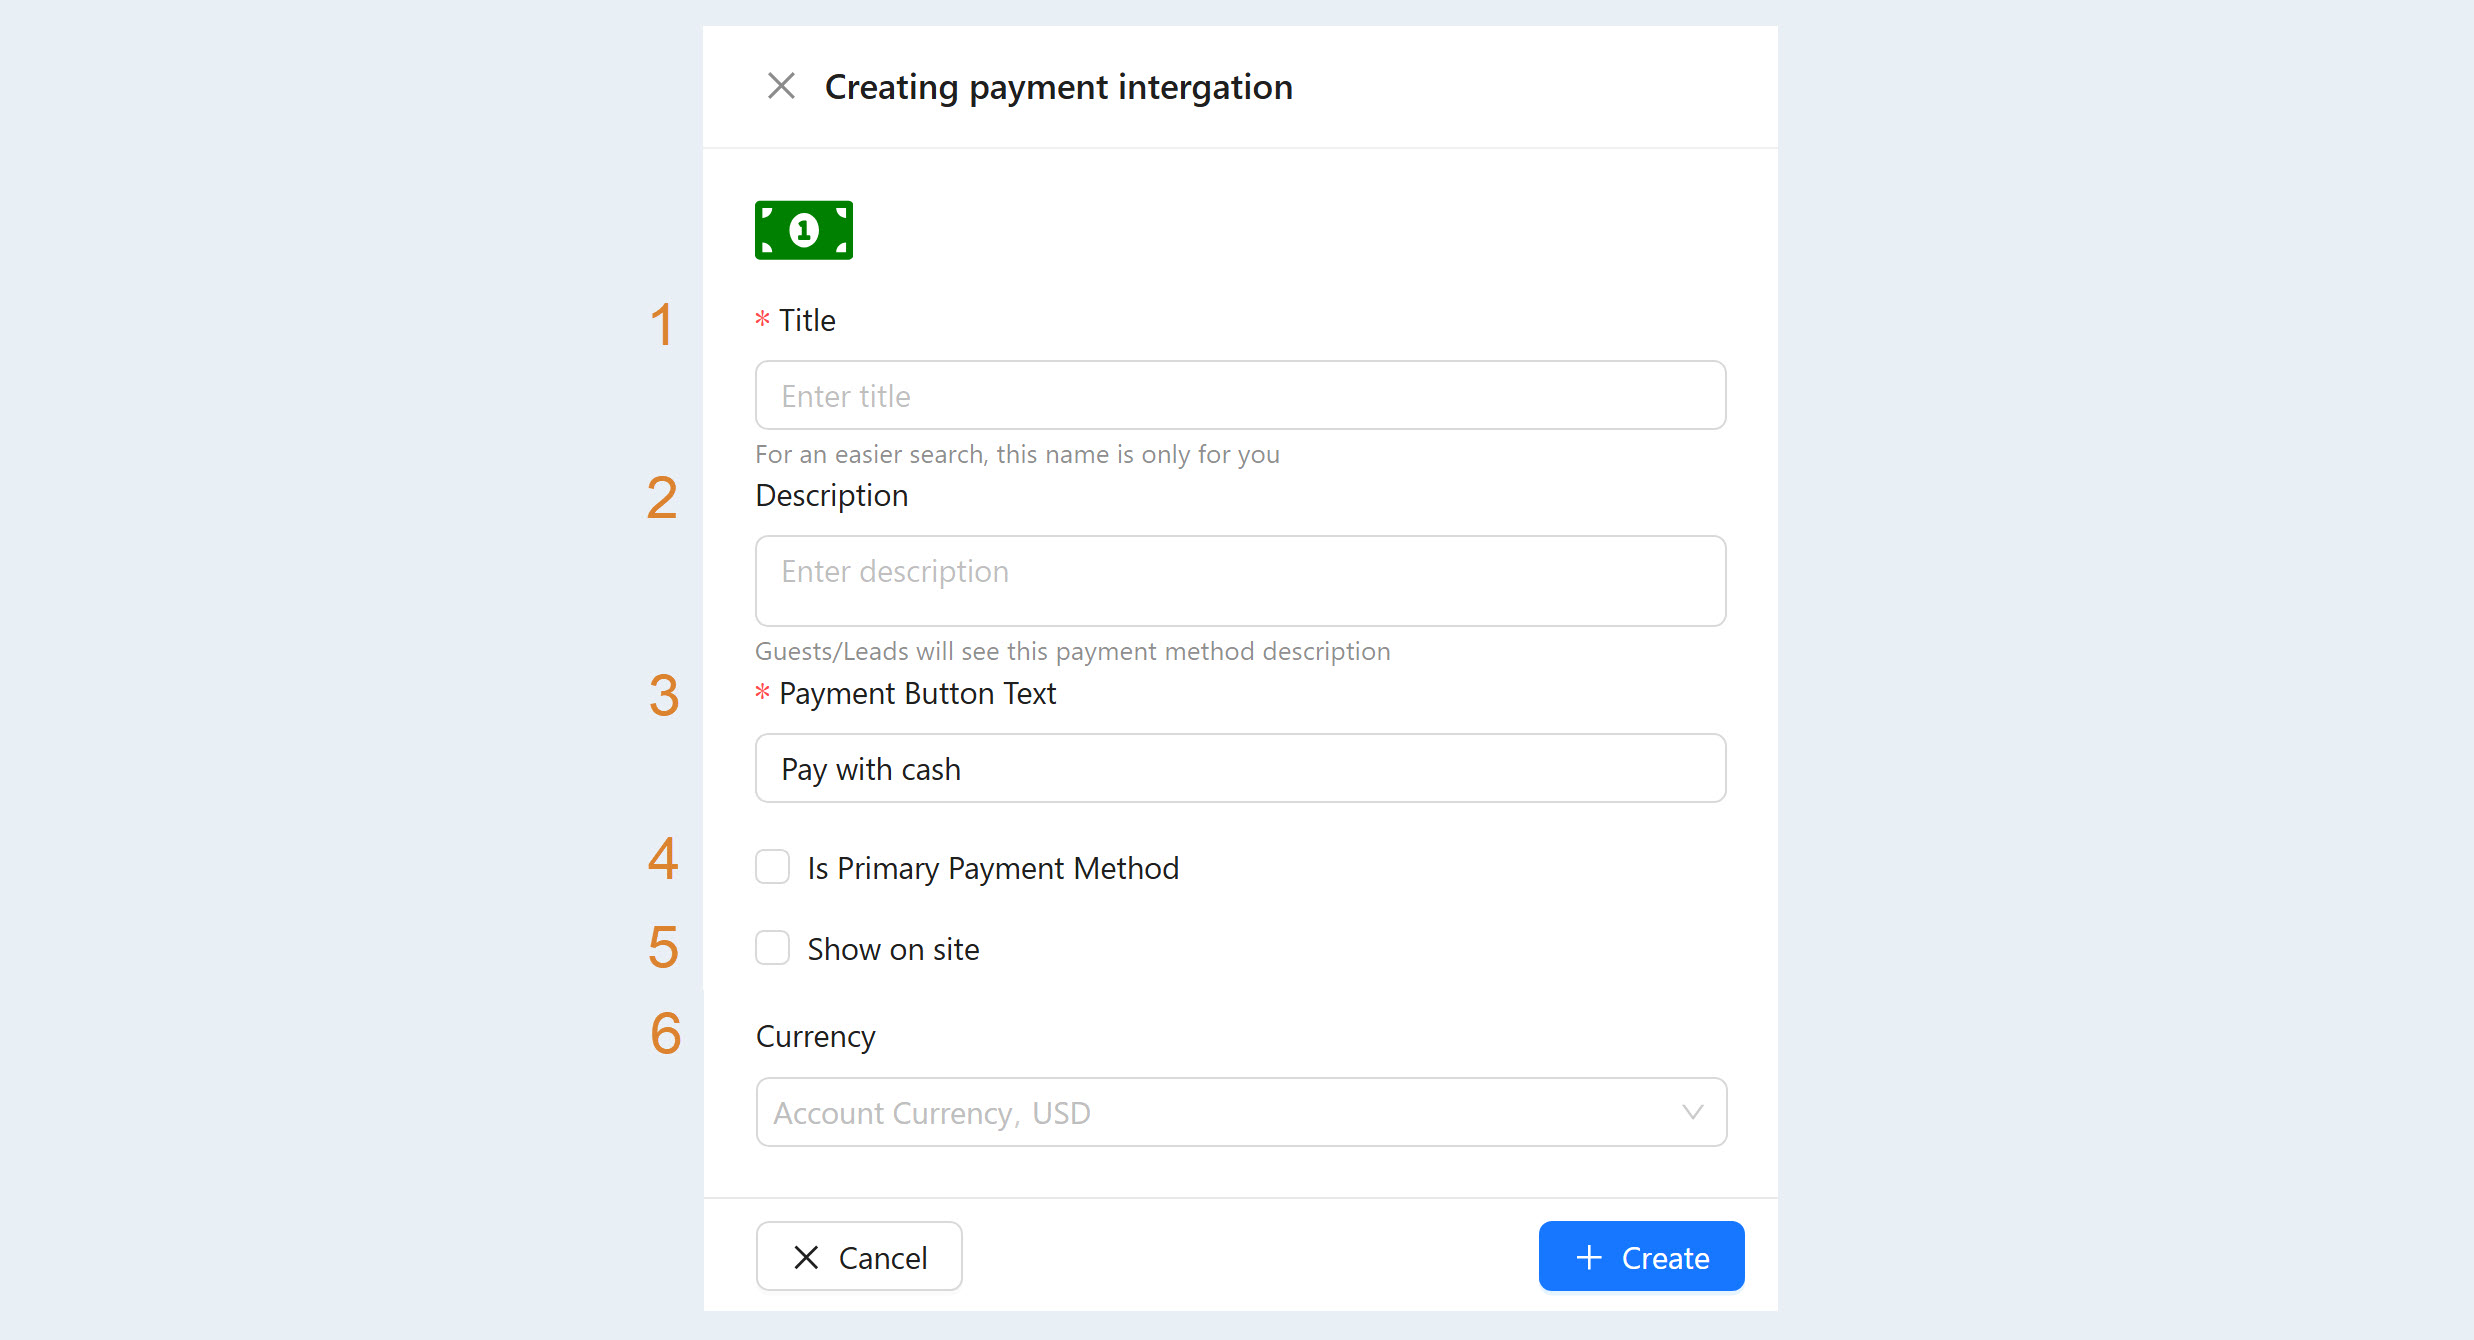
Go to the "Settings" section, the "Payment settings" tab. Click on the "Create Payment Integration" button. Select "Cash" from the list. An additional window will open, fill in the fields:
- Title. Write a name for this payment integration.
- Description. Enter a description for this payment integration. Site visitors and your customers will see the description on the site.
- Payment button text. Enter the text that will be displayed on the button on the site.
- Is primary payment method. Check the box if you want to make this type of payment the main one.
- Show on the site. Check the box if you want this payment method to be visible on the site.
Currency. Choose the currency in which your customers will pay for purchases. If you work in different markets in different countries, you can choose the currency for accepting payments in each payment system. For example, by selling courses in dollars through one payment system, you can accept euros through another payment system. Automatic currency conversion takes place at the international exchange rate.
Click the Create button. Now you have the Cash instrument in the list of payment instruments.
2
Create order
When a customer pays for your services in cash, the system does not receive payment information automatically. You must manually pay for the order. To do this, go to the "Sales" section, the "Orders" tab. Click the "Create order" button.
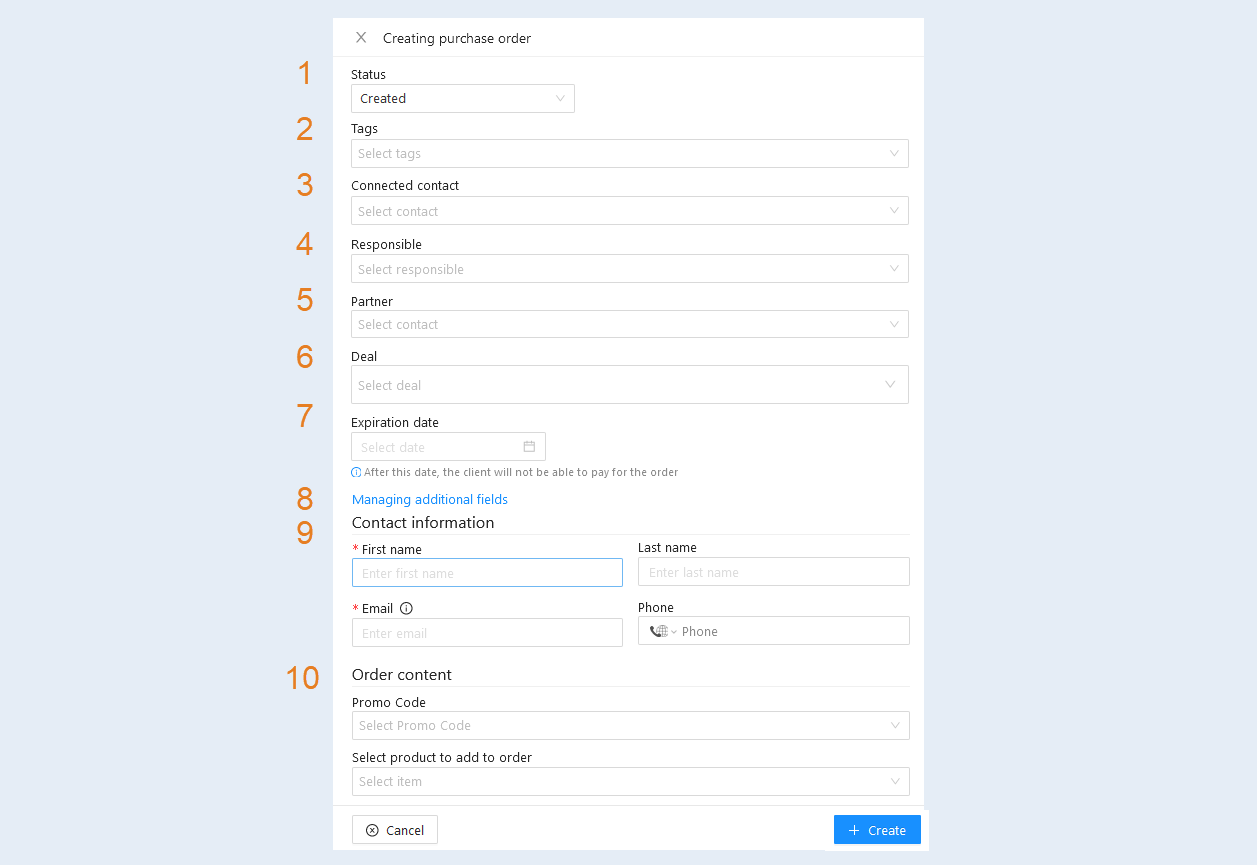
In the window that opens, fill in the fields:
Status. Select an order status from the list.
Tags. Select the tags for the order from the list.
Connected contact. Select the customer's name from the list. If the contact is not in the list, then leave this field blank and fill in the contact information below.
Partner. Specify the partner who will be charged the commission for the affiliate program.
Responsible. Select the responsible administrator from the list.
Deal. Select from the list the number and stage of the deal that are associated with the order.
Expiration date. After this date, the customer will not be able to pay for the order.
Managing additional fields. Click to create additional fields for the order.
Contact Information. Enter customer contact information: first name, last name, email address, phone number.
Order content. Select one or more products from the list to add to the order. Select a promo code for the order.
Click the Create button.
3
Payment for the order
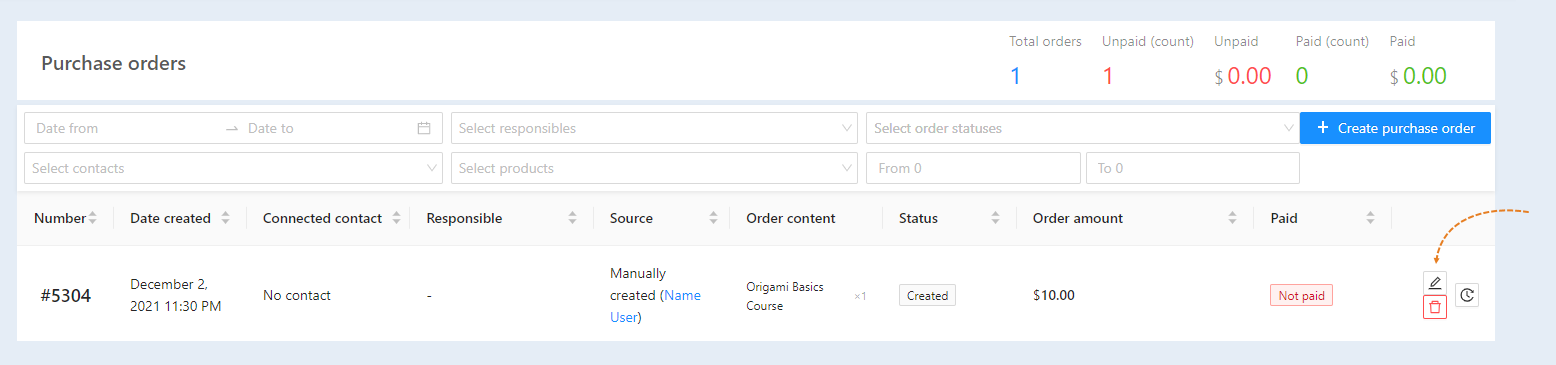
After the order is created and the order status is "Completed", the system will automatically provide access to the selected product. In the list of orders, select the order you just created and click the "Edit" button.
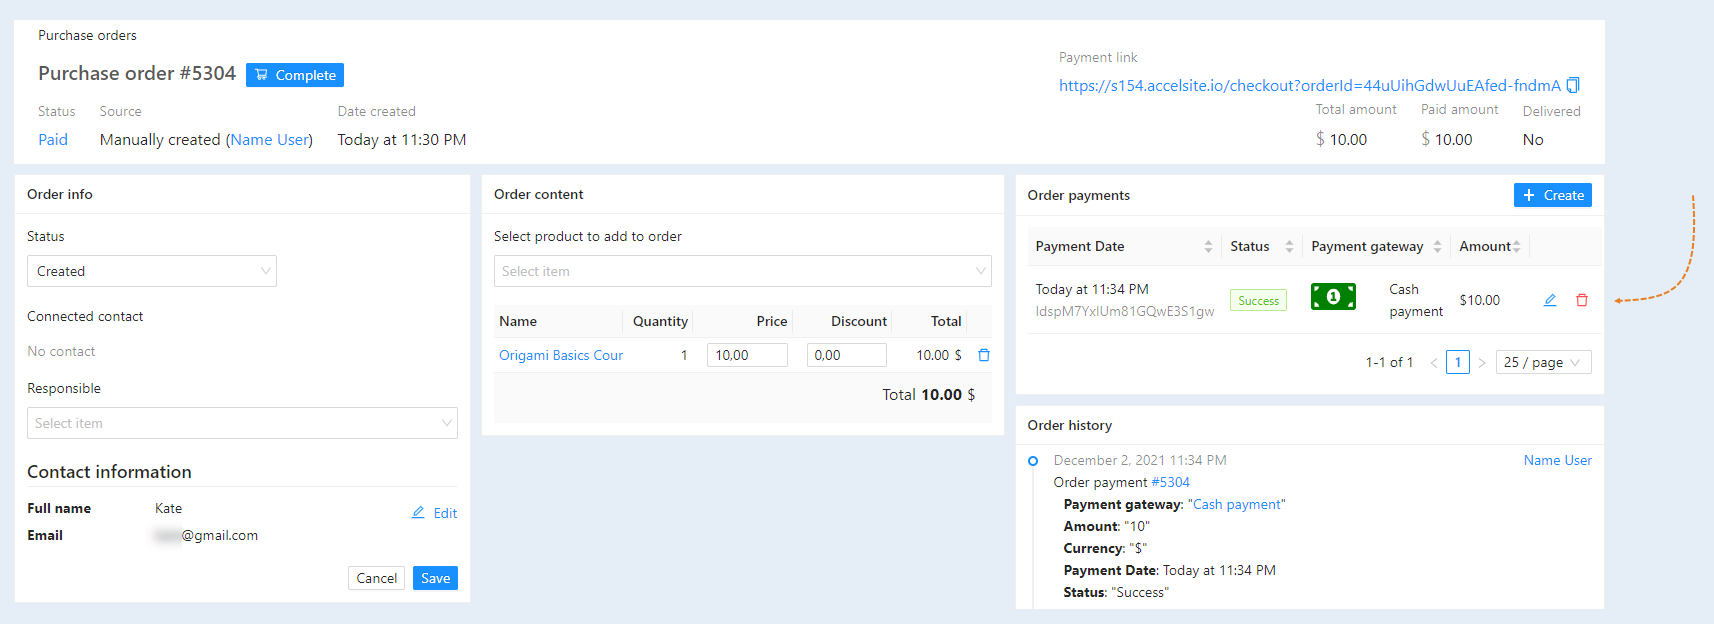
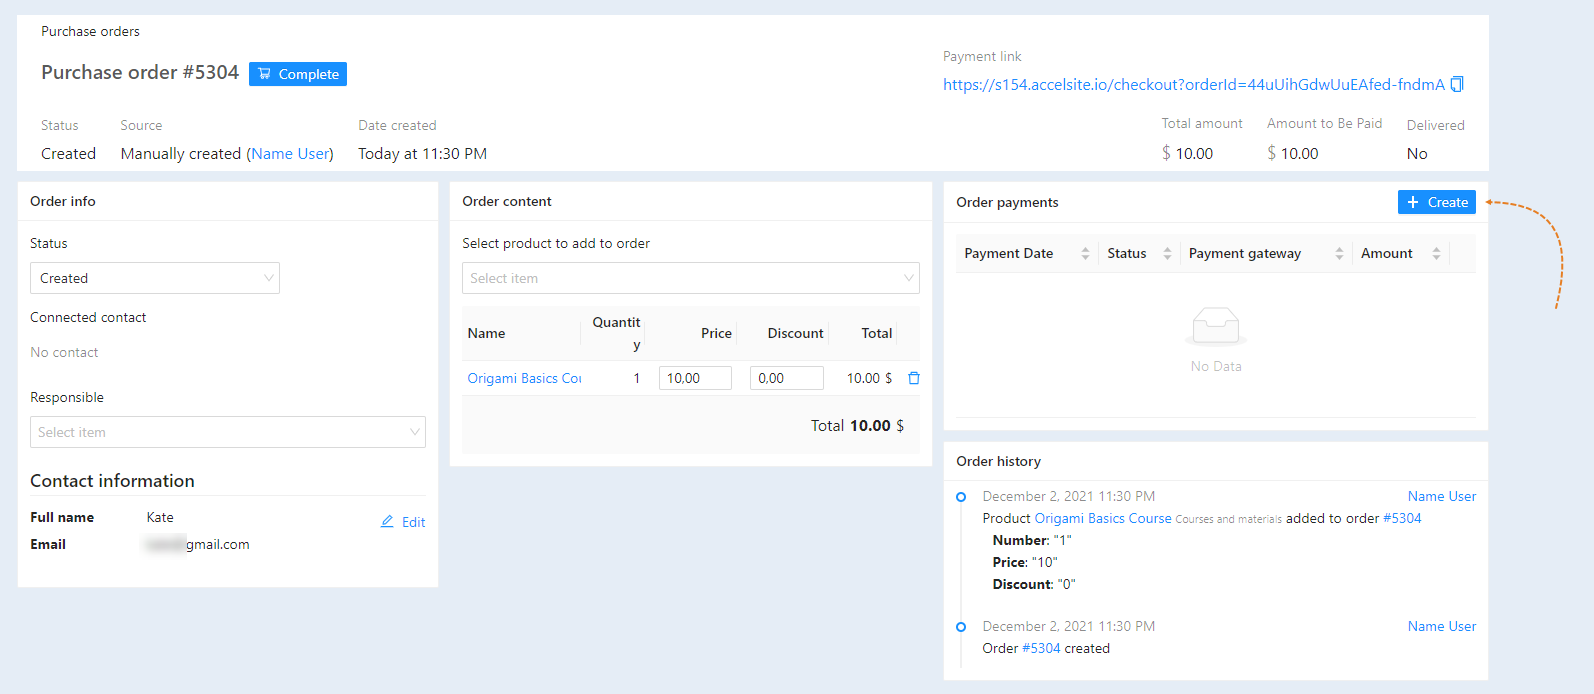
You will see detailed information on the order. Click the "Create" button in the "Order Payment" section and enter your order payment information.
4
Order status
After the order is marked as successfully paid, the customer will be automatically added access to the product. The selected product is listed in the Order Contents section.