Assignments are pre-prepared written assignments for users of the course, in which the user must write an answer in free form.
You can add an assignment to a theoretical lesson or create an assignment as a separate step in the course. And also you can set up automatic check of assignments - the system will accept any user's answer as correct and open access to the next lesson.
Follow our instructions to create a task.
Click on the desired section of the article to go to its description:
Editing a course
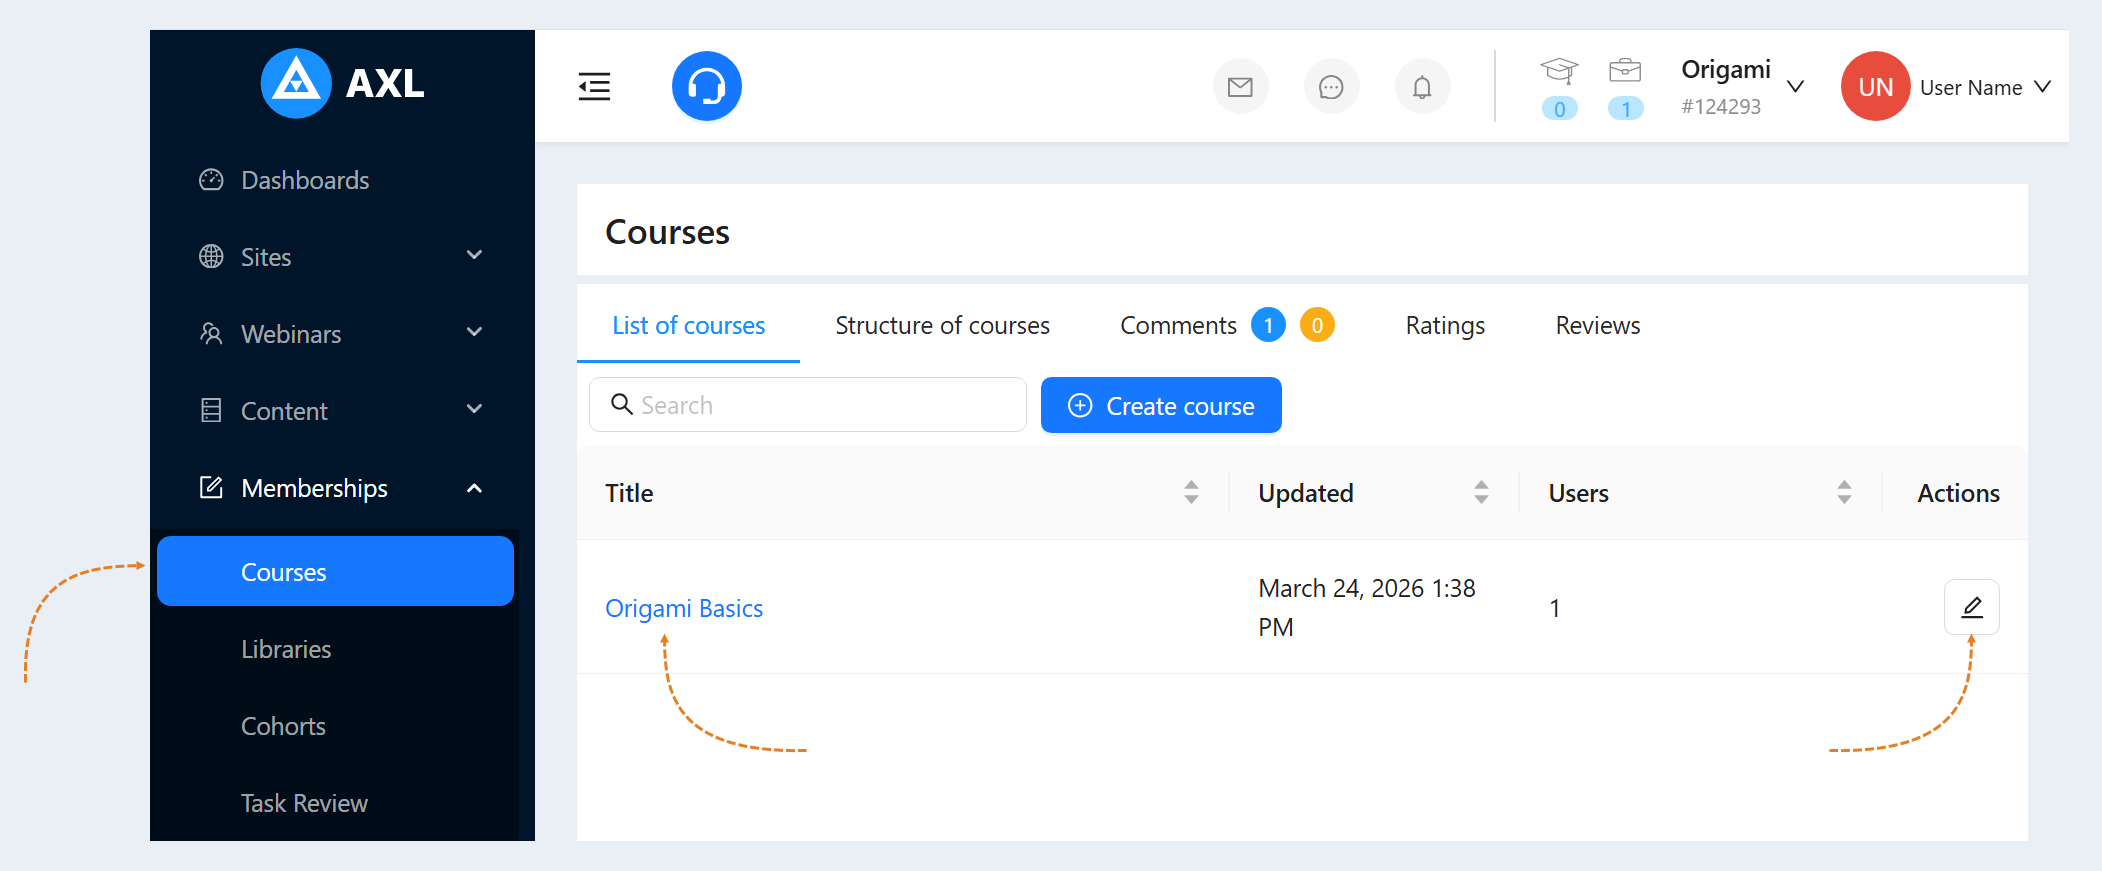
Go to the "Courses" section. Click on the course name or the "Actions" button. This will open a window for editing the course.
Course steps
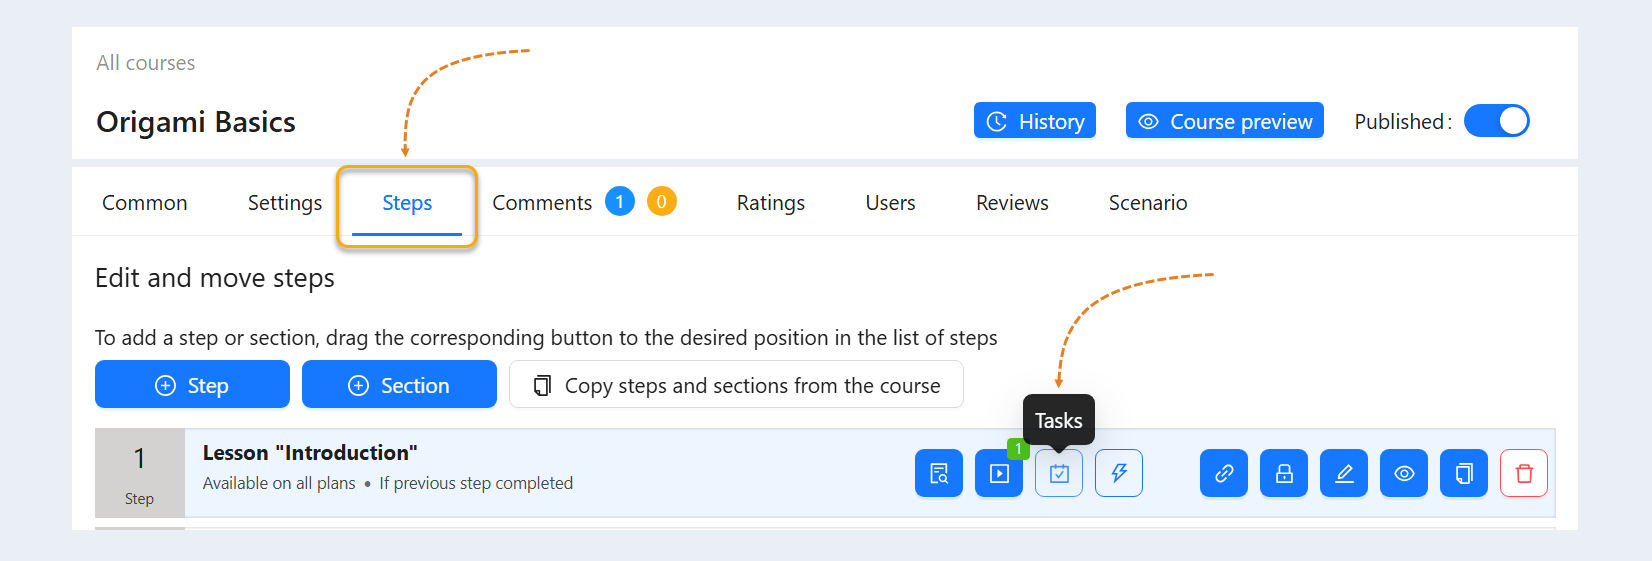
Go to the "Steps" tab. At each step of the course, you can add theory, tests, assignments. You can add all the elements (theory, test and assignment) to one lesson or divide them into separate steps.
Adding a task
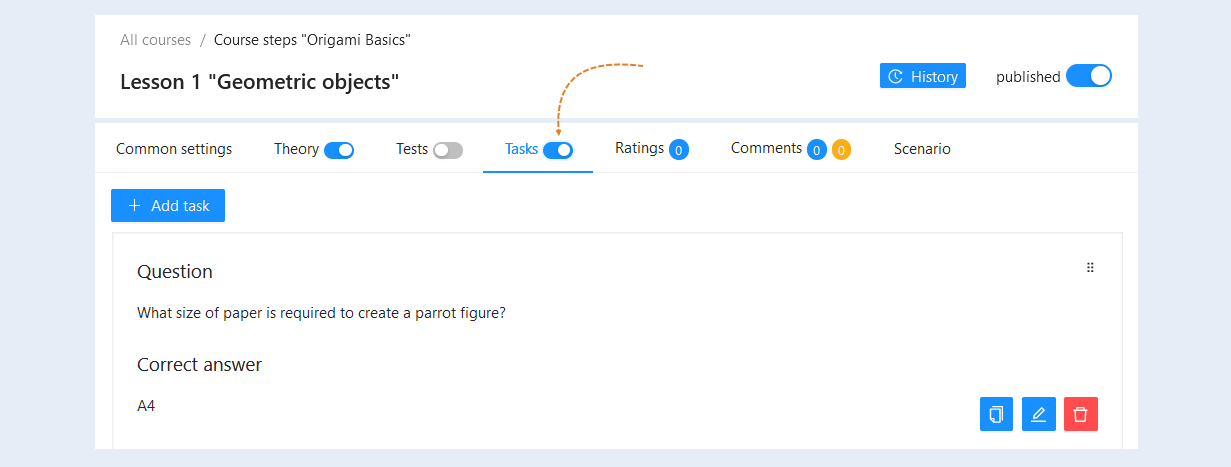
Click the “Tasks” button in the corresponding step. The window for editing a step (lesson) will open. Click the Add Job button.
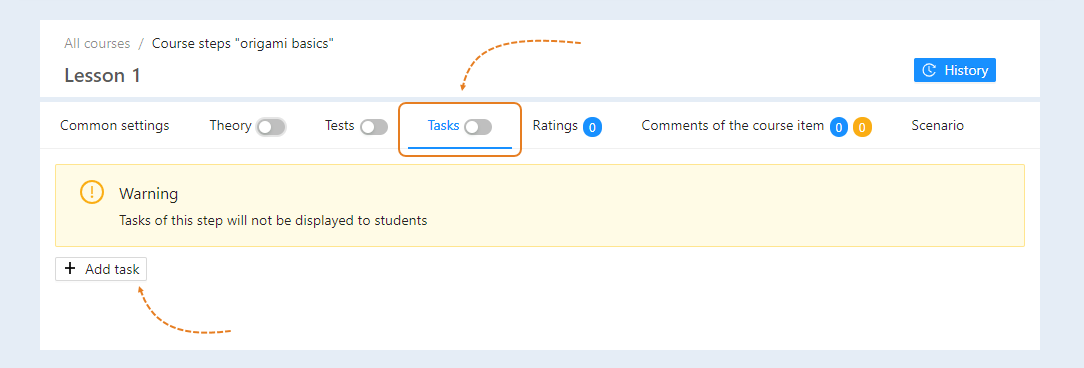
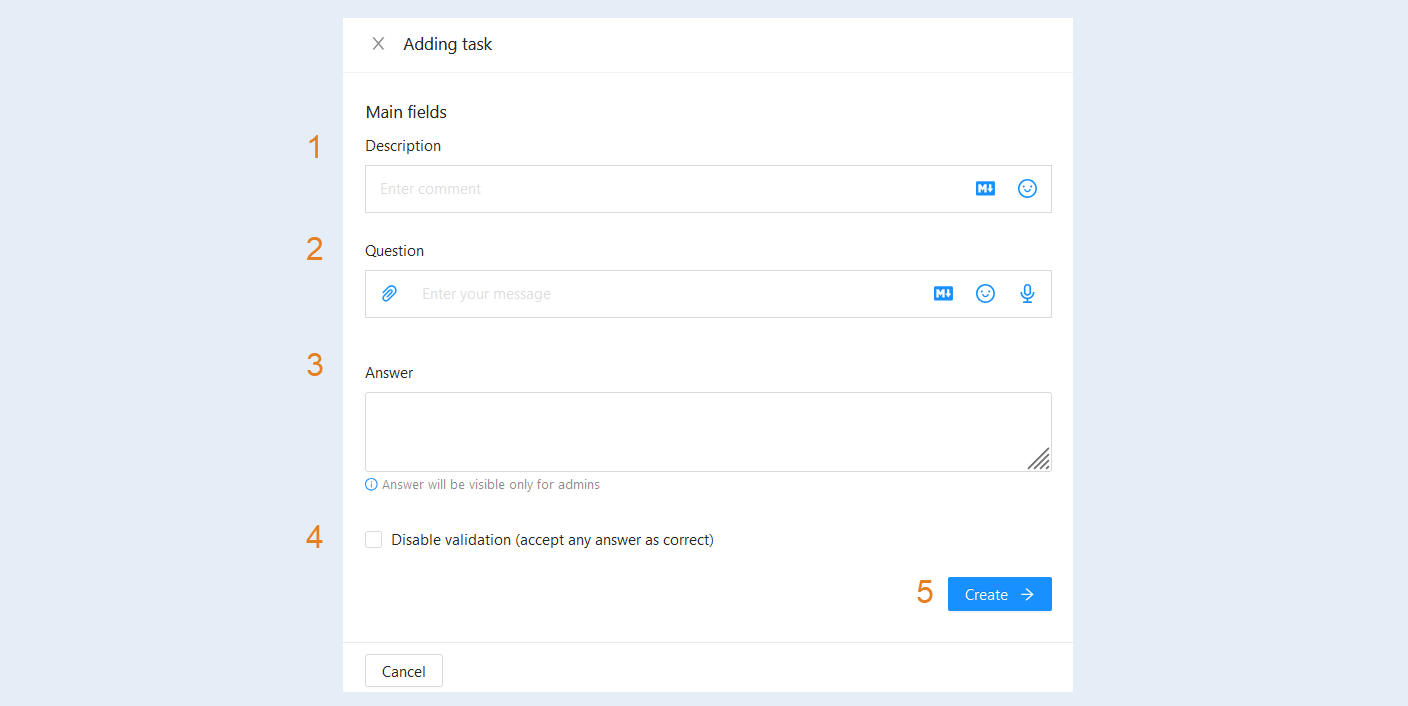
An additional window "Add task" will open. Fill in the fields:
Description. Write the text that will be placed before the question and can explain the essence of the task.
Question. Write a question for the task.
Answer. Write the correct answer to this question. The answer will only be visible to account administrators.
Disable validation (accept any answer as correct). Check the box to disable automatic task checking. If you do not check the box, all user answers will be automatically accepted as correct (completed).
Create. Click the "Create" button to add the task to the lesson.
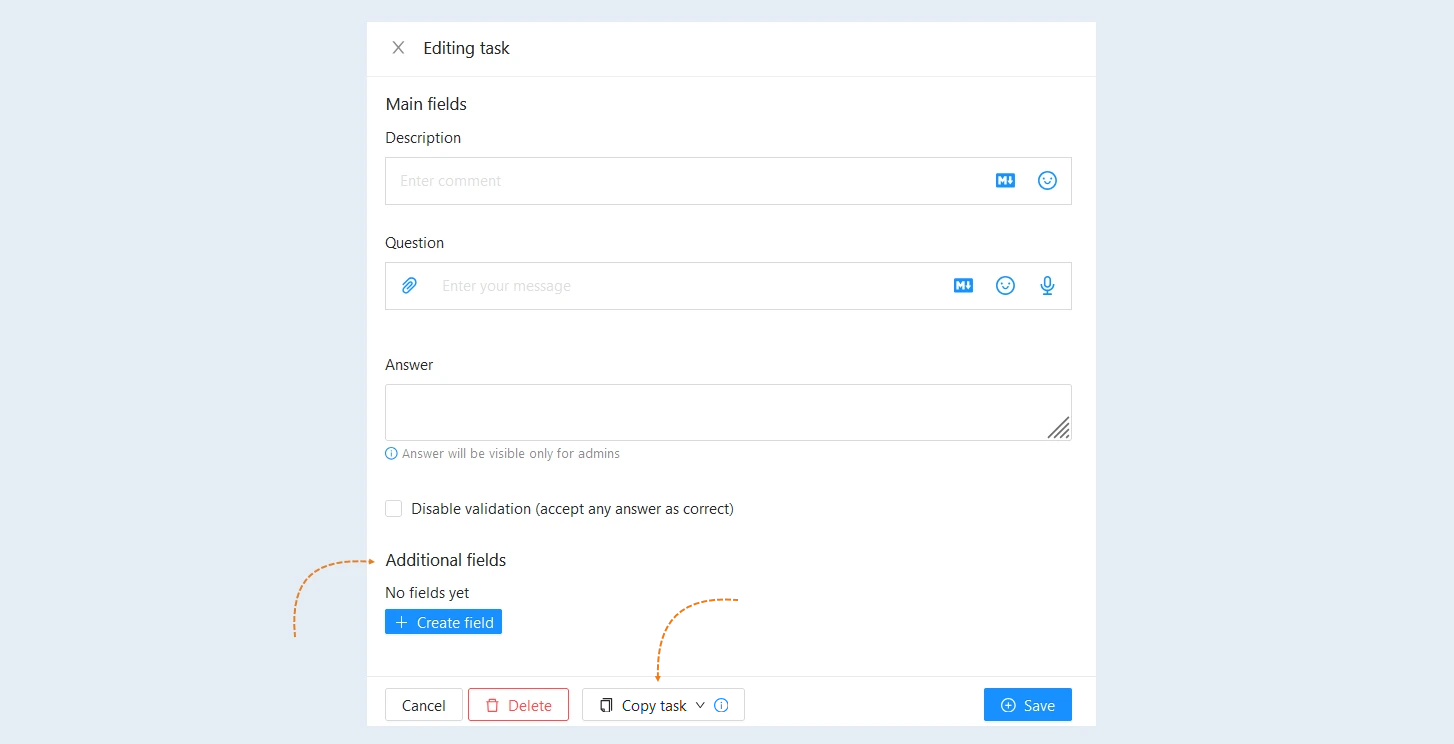
After adding the task, the "Additional fields" section will appear in the window. You can create additional fields in the task. The process of creating an additional field is described in the article below.
The "Copy Task" button will also appear. Please note that only saved data is copied.
- Copy to current step. This feature allows you to copy an existing assignment and instantly add it to the lesson you are currently editing. This way, you save time by avoiding the need to re-create assignments and can focus on other aspects of the courses.
Copy to another step. This option allows you to select a task from another lesson in your course and copy it to the current lesson. This is especially useful if you want to use the same assignments for different lessons.
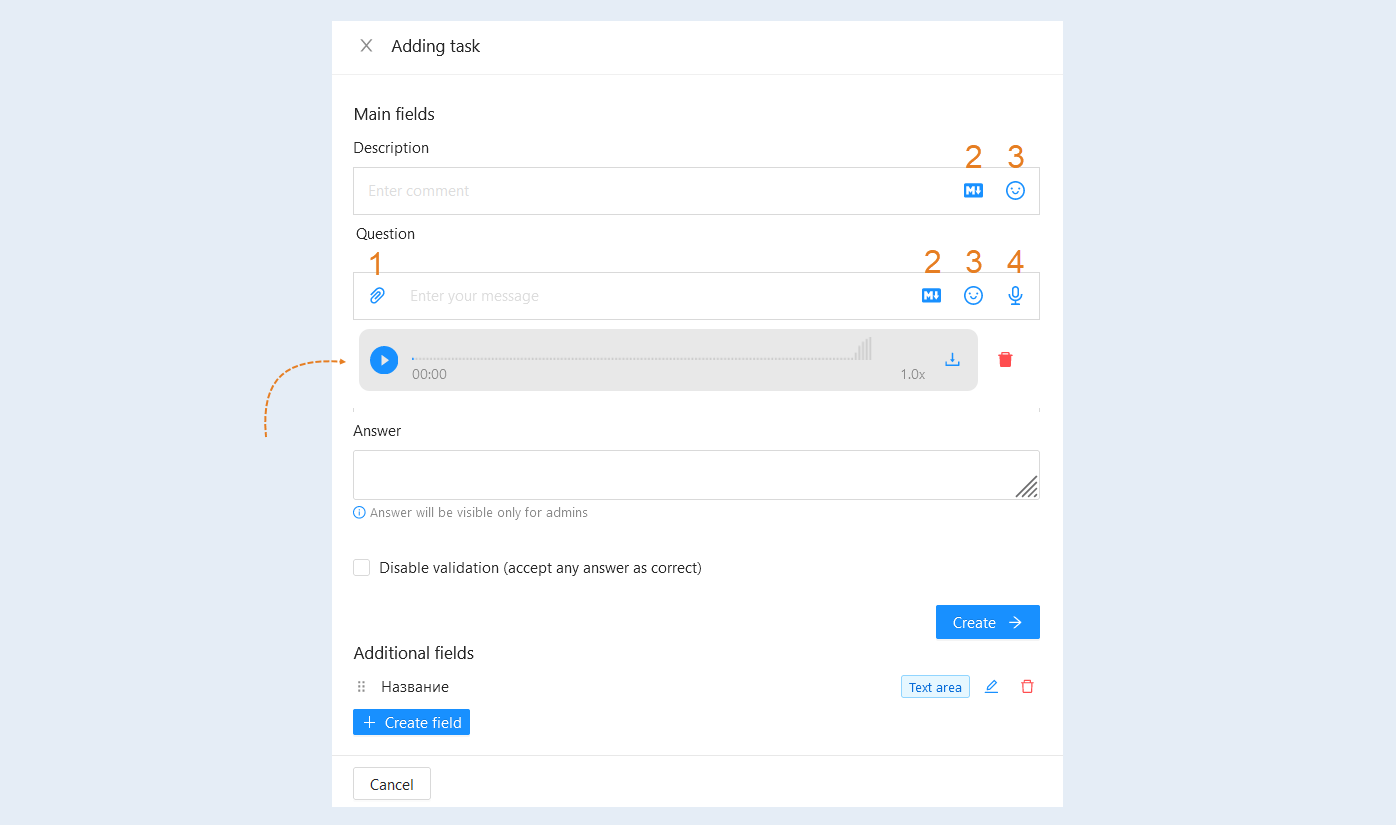
Files. In the "Question" field, you can attach files. Add files by dragging them into the upload field.
Help with formatting. The "Description" and "Question" fields support markdown. Click on the "Markdown" icon for formatting tips. Right-click to preview the text.
Emoji. You can add special characters to the text. They help convey the emotional tone of the text, make it brighter and clearer for the user. In addition, emojis can replace some words or phrases, saving space and improving text perception.
Voice recording. You can add a voice question to the task. Voice input can make learning more interactive, leading to a deeper understanding of the material. Click the "Voice recording" icon to record an audio message instead of typing text. A voice recording field will appear below where you can listen to the question, delete or download the recording.
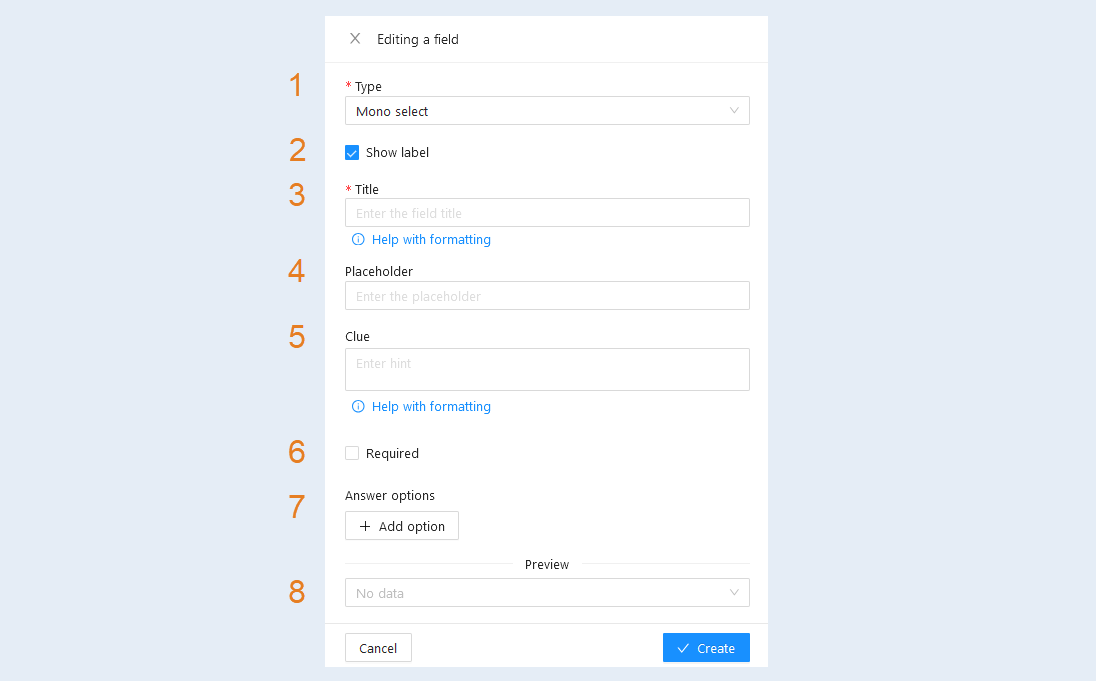
In the "Additional Fields" section, click the "Create Field" button. In the window that opens, fill in the fields:
- Type. Select the type of the new field:
- Text field. This is a one-line field designed for entering a short text response. It is usually used for simple answers such as names, numbers, or short phrases.
Text area. This is a multi-line text field that allows you to enter longer answers. This field is suitable for essays, descriptions, and other expanded texts where more space is required for an answer.
Checkbox. This is a control that allows the user to select or not select a specific option. It is usually used for "yes/no" or "agree/disagree" questions. One checkbox reflects only one value, and it can be used to confirm or deny.
Multiple select. Allows the user to select several options from the suggested list. This type of question is suitable for cases where there are multiple correct answers or when multiple choices such as preferences are required.
Mono select. This format implies the ability to select only one option from the suggested list. It is suitable for questions with a well-defined choice, where you need to choose the only, most appropriate answer.
Show label. You can show or hide the field label.
Title. Write the name of the label. Click the "Help with formatting" icon to get a hint. AXL uses Markdown for formatting.
Placeholder. This is the text in the task field that will help the user better understand what to write in the field. For example: "Enter a description."
Clue. Enter the text of the hint, this text will be shown under the field for the answer. Click the "Help with formatting" icon to get a hint. AXL uses Markdown for formatting.
Required. Check the box so that the fields are mandatory.
Answer options. If you have set the choice of one or more options in the field type, then the "Answer options" field will appear in the window. To add answer options to the task, click the "Add option" button. Next, enter the text of the answer in each answer option.
Preview. This line will display the created field in the form in which the user will see it.
Adding a question
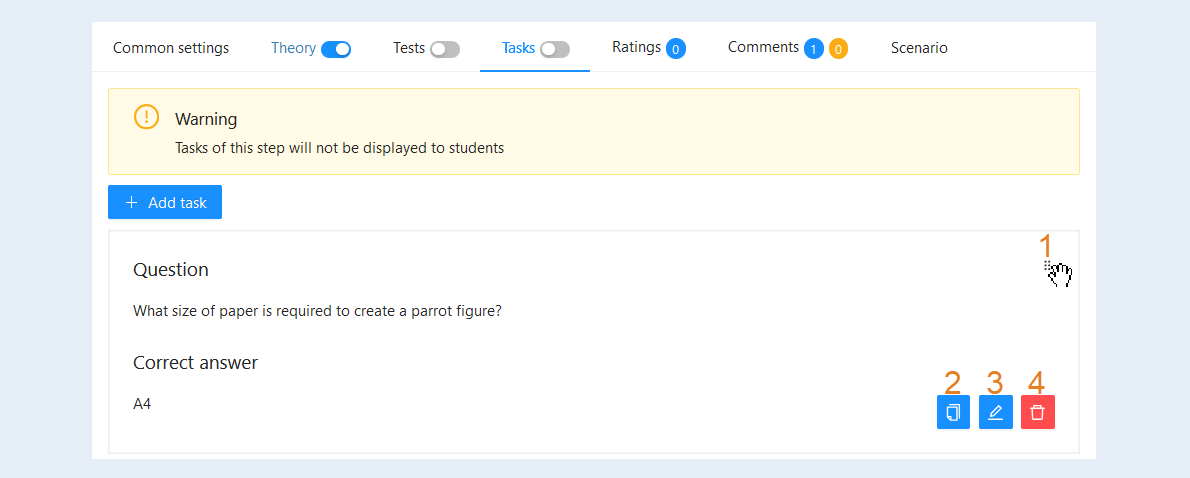
After you have added a question to the task, it will appear in the list. Here you can see the following information:
- The order of the questions. Grab the field with the cursor by clicking on it with the left mouse button and drag it to the desired location. This way you can change the order of the questions.
Copy the question. Click the button to create a copy of the question. A copy will appear in the list below.
Edit the question. Click the button to make changes to the question.
Remove. Click the button to delete the question.
Job visibility
Click the Assignment Visibility button so that users can see the assignment in the lesson and complete it.
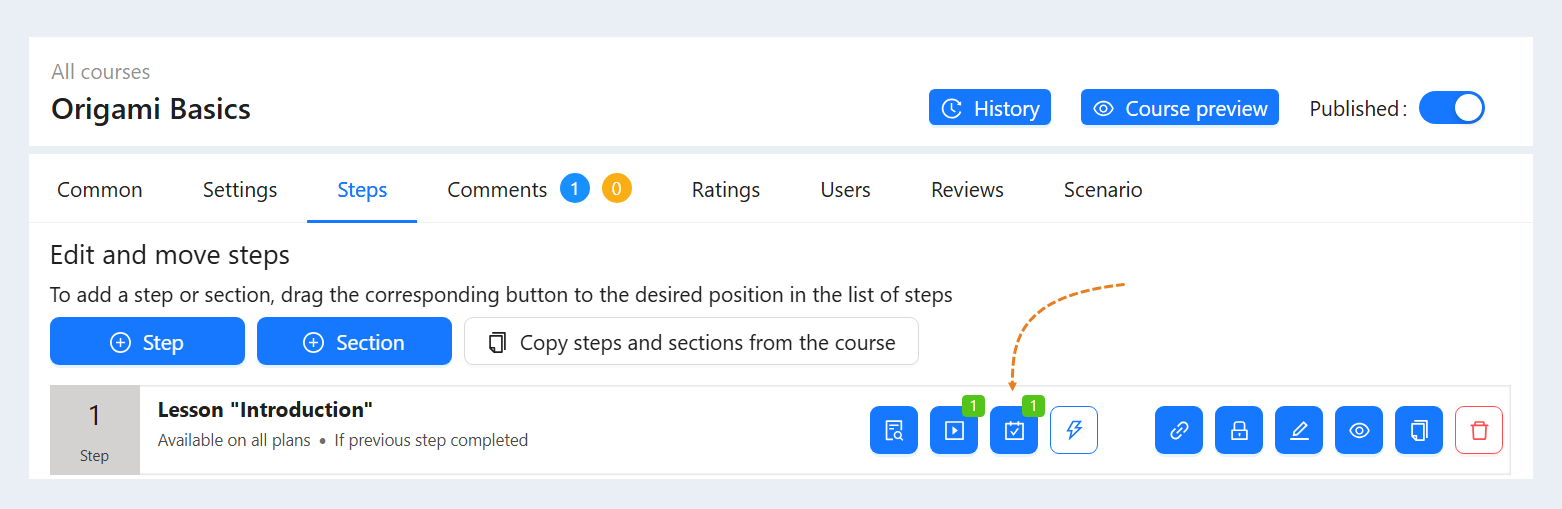
Return to the course page. The "Task" button is highlighted in blue - this means that a task has been created in this step. The green icon shows the number of questions in the assignment.
Open access to users
Click the "Step Visibility" button to make this assignment available for users to complete.
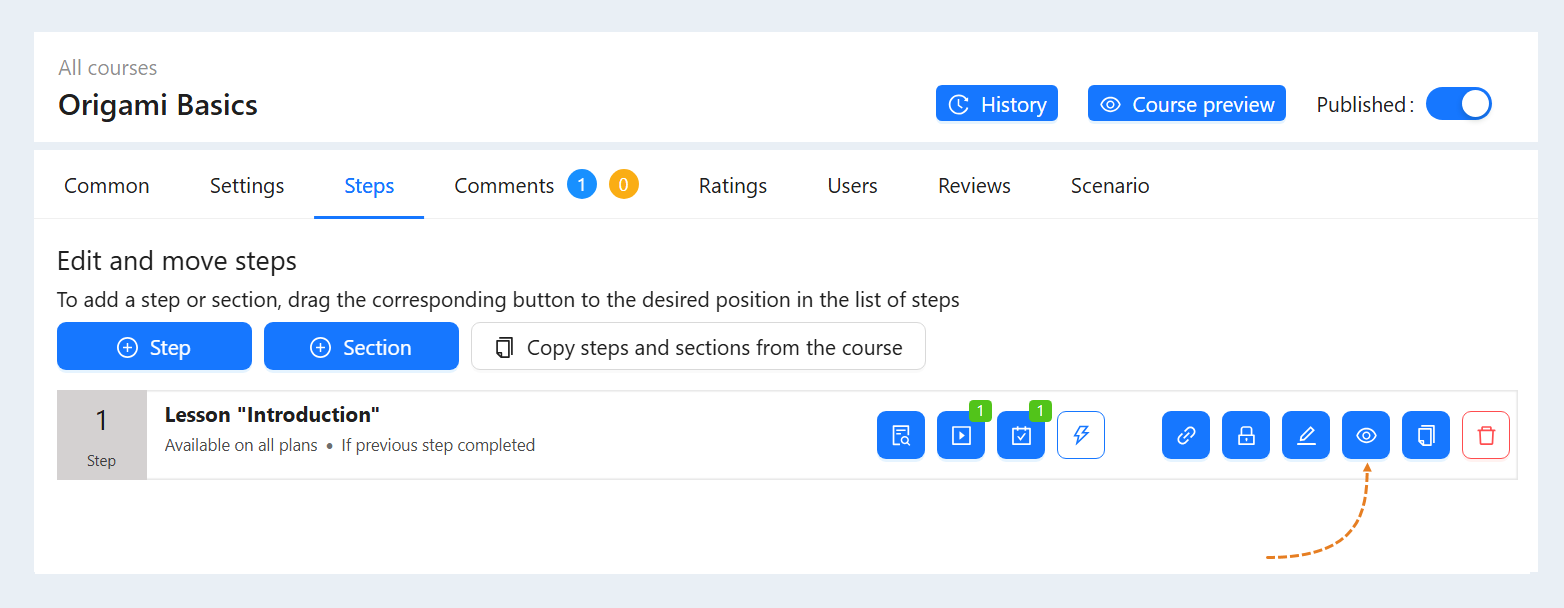
The task is now available for execution. For information on how to check tasks, see the article “Checking assignments”.