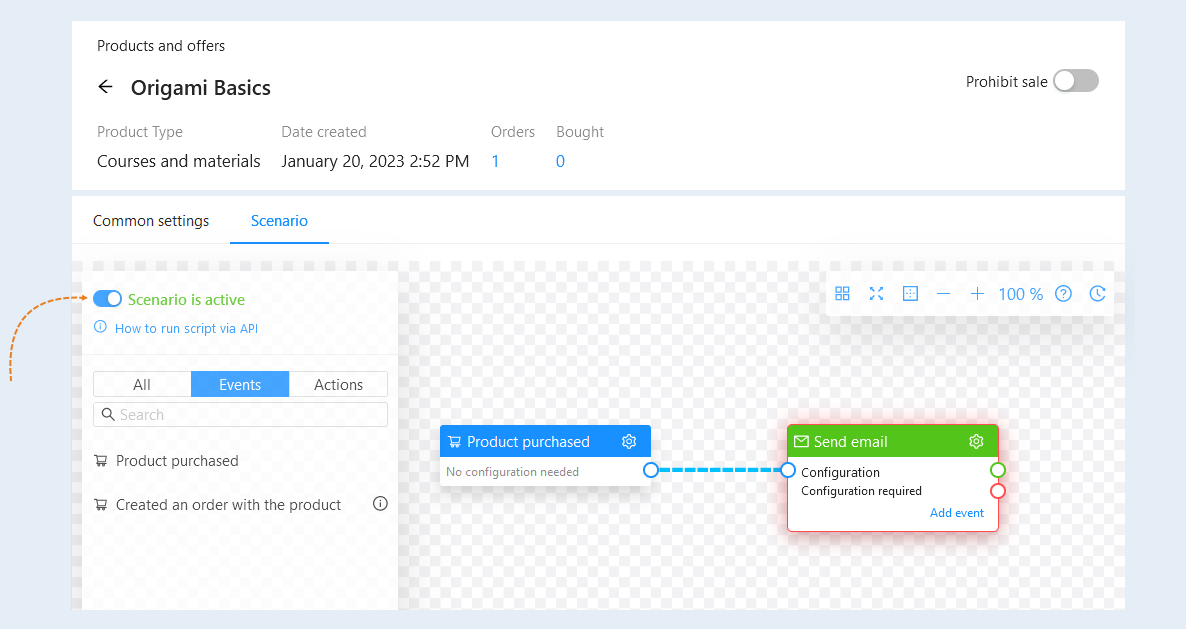
A product scenario is a sequence of events and actions when purchasing a product from your account on the AXL platform.
When creating a script, first set the "Product Purchase" event. This event will be triggered when the user pays the cost of the product. This event will trigger a scenario (a sequence of response actions).
Follow the instructions to create a product script. Settings
Creating a product scenario
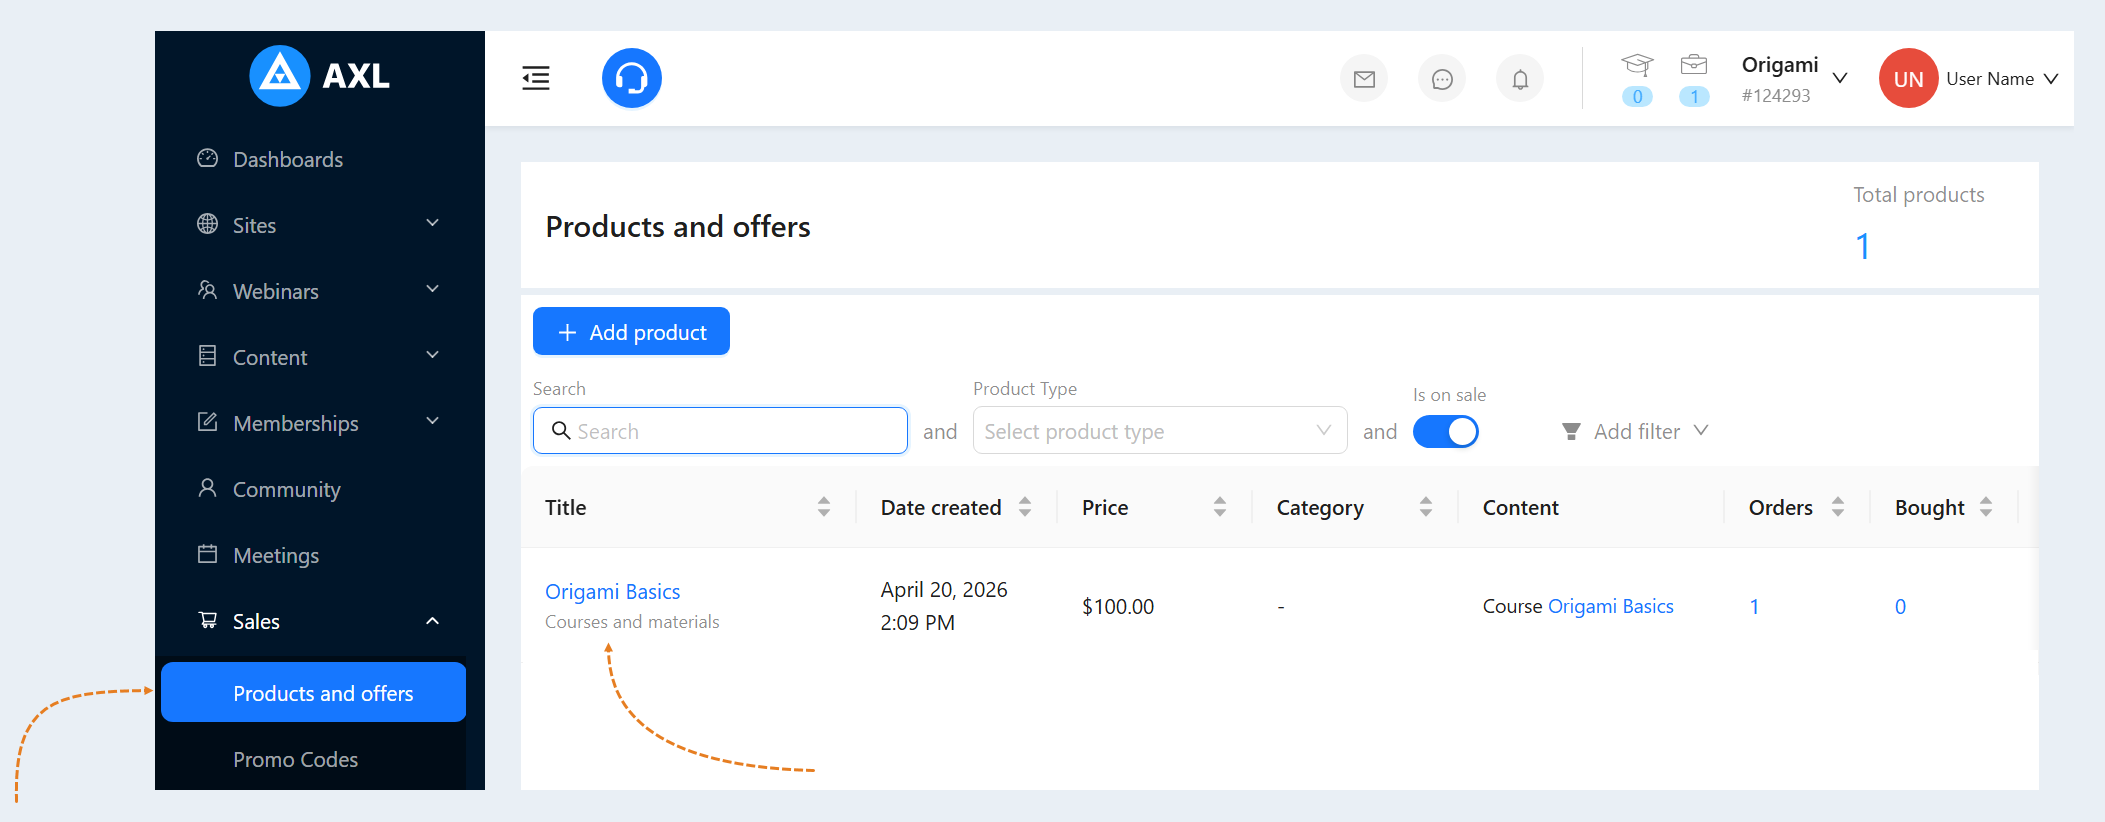
Go to the "Sales" section, the "Products and Services" tab. Create a new product or select an existing one. Read more about how to create a product in the article "Products and offers".
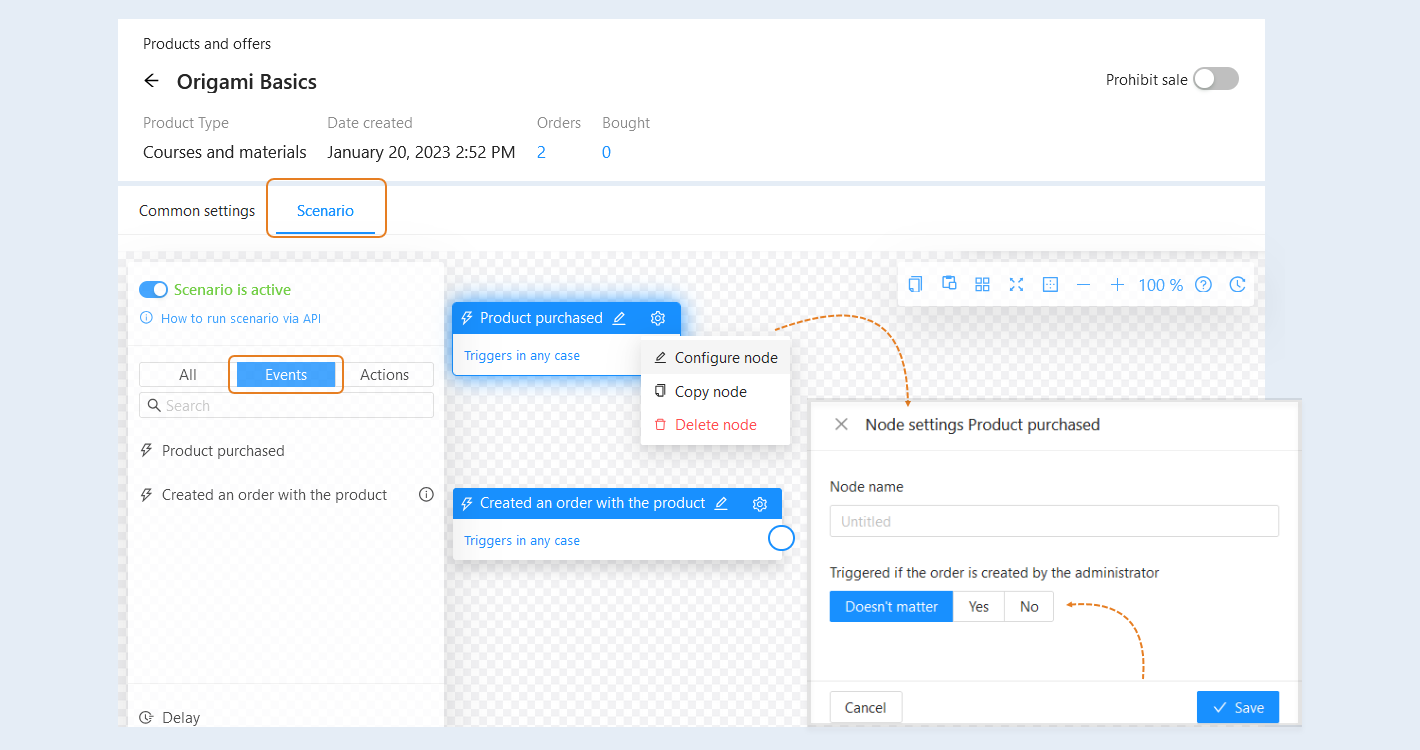
Next, go to the "Scenario" tab and select an event to trigger the product scenario. There are two events possible in the product scenario:
Product purchased. This event triggers the scenario when a user completes the payment for the selected product. Click the "Settings" button in the upper right corner of the event, then open "Configure Node." In the node settings, you can choose the necessary option for the “Triggered if the order is created by the administrator”:
Yes. If you choose this option, the event will only trigger in cases where the order was created manually by an administrator. This means that if the payment was initiated by a user on the site, the event will not trigger. This is useful in situations where you need a connection between manual order processing and subsequent actions in the scenario.
No. If you choose this option, the event will only trigger in cases where the order was created by a user on the site. In this case, if the order was created manually by an administrator, the event will remain inactive. This setting can be useful when you want to track and respond only to automatic requests generated by users through the online platform.
Doesn't matter. When selecting this option, the event will trigger regardless of whether the order was created manually by an administrator or by a user through the site.
Without selecting this option, the event will trigger by default in any case.
Created an order with the product. This event triggers the scenario when a user has created an order with a product but has not paid for it. In the node settings, you can choose the necessary option for the “Triggered if the order is created by the administrator”:
Yes. If you choose this option, the event will only trigger in cases where the order was created manually by an administrator. This means that if the payment was initiated by a user on the site, the event will not trigger. This is useful in situations where you need a connection between manual order processing and subsequent actions in the scenario.
No. If you choose this option, the event will only trigger in cases where the order was created by a user on the site. In this case, if the order was created manually by an administrator, the event will remain inactive. This setting can be useful when you want to track and respond only to automatic requests generated by users through the online platform.
Doesn't matter. When selecting this option, the event will trigger regardless of whether the order was created manually by an administrator or by a user through the site.
Without selecting this option, the event will trigger by default in any case.
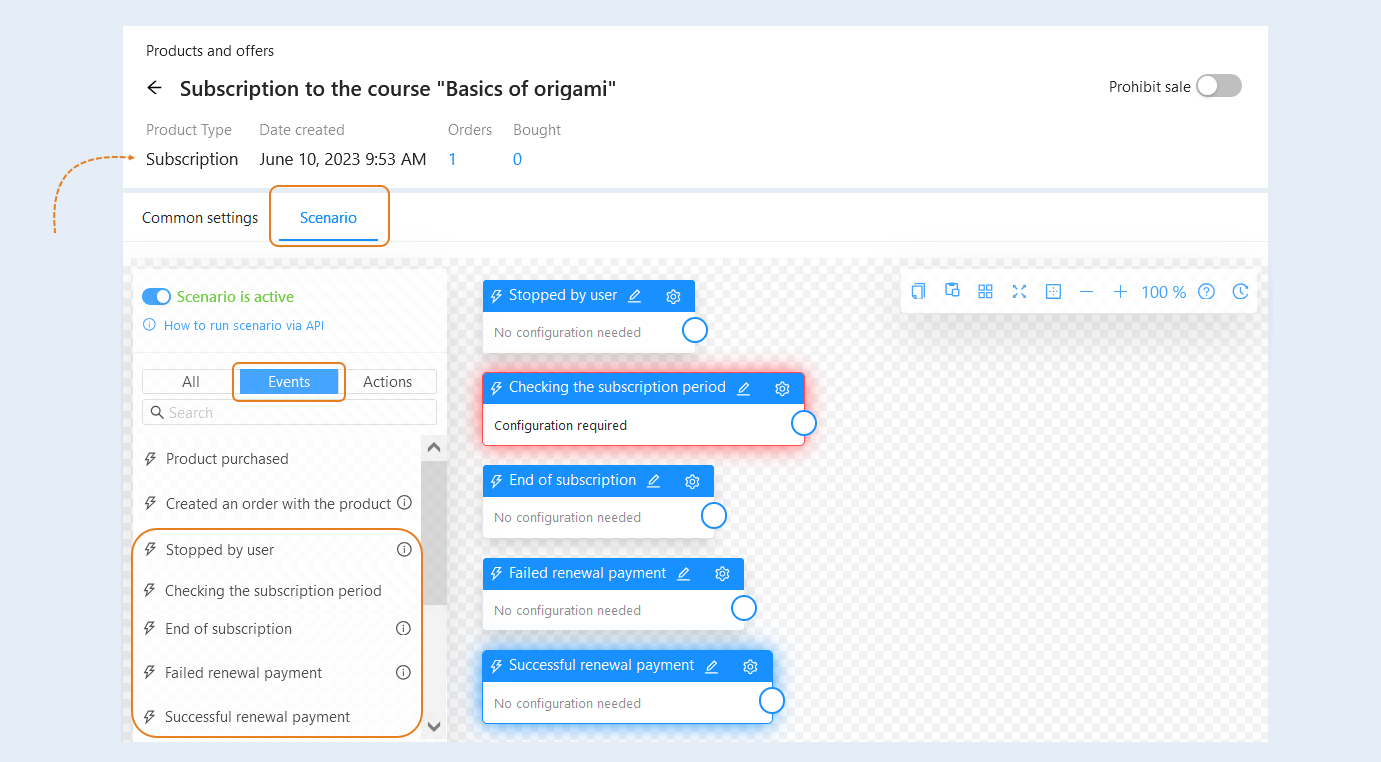
For the "Subscription" product, there are an additional 5 types of events:
- Stopped by user. This event will trigger when a user independently cancels their subscription renewal. This may occur if the user decides that they no longer need access to the materials or wants to temporarily suspend their subscription. Additional settings for the event are not required.
Checking the subscription period. This event triggers within a certain timeframe before or after the subscription expires. The event can be used to notify users that their subscription is about to end or has already expired. In the case of a scenario with this action, you might, for example, notify the user about the need to renew their subscription 3-7 days before the expiration date. Alternatively, you could inform the user about the impending end of their subscription 5 days after the expiration and offer renewal or other actions.
End of subscription. The event will trigger if the subscription is stopped and access ends after all unsuccessful renewal attempts or simply is not renewed. No additional event settings are required. In this scenario, for example, you can notify the user that their access to the platform has been terminated and offer subscription renewal or a switch to another tariff plan.
Successful Renewal Payment. This event triggers in the case of payment for the next subscription period. No additional event settings are required. After that, you can, for example, set up a scenario to send a welcome message about the renewal, provide access to new courses, etc.
Failed renewal payment. The event will be triggered when all attempts to charge and pay within the specified number of additional days for the renewal are unsuccessful. After that, access to the product will be halted. No additional event settings are required. You can then, for example, notify the user of the failure, offer to change payment details, or provide alternative ways to renew the subscription.
Select the "Product Purchased" event and drag it to the scenario field. After that, you need to add actions to the scenario. Open the Actions tab, select an action from the list and drag it to the scenario field. Read more about each action in the article “Types of actions in the scenario and their configurations".
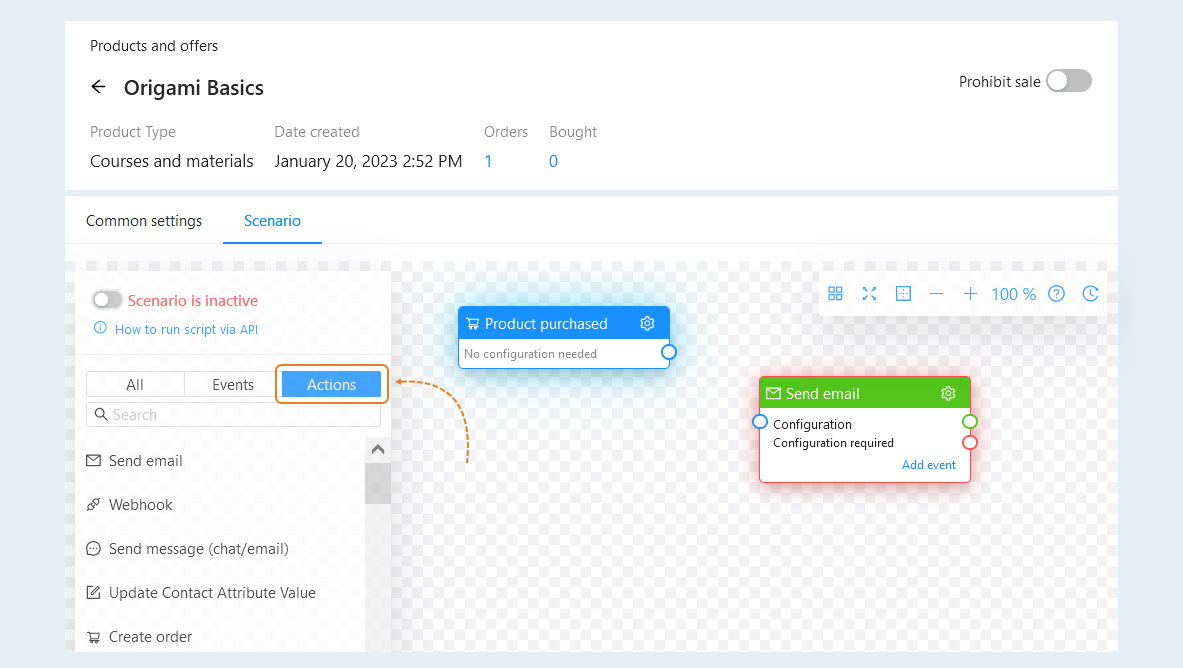
For each action, you need to perform settings - configuration. Click on the "Settings" button in the upper right corner of the action, then open the configure node.
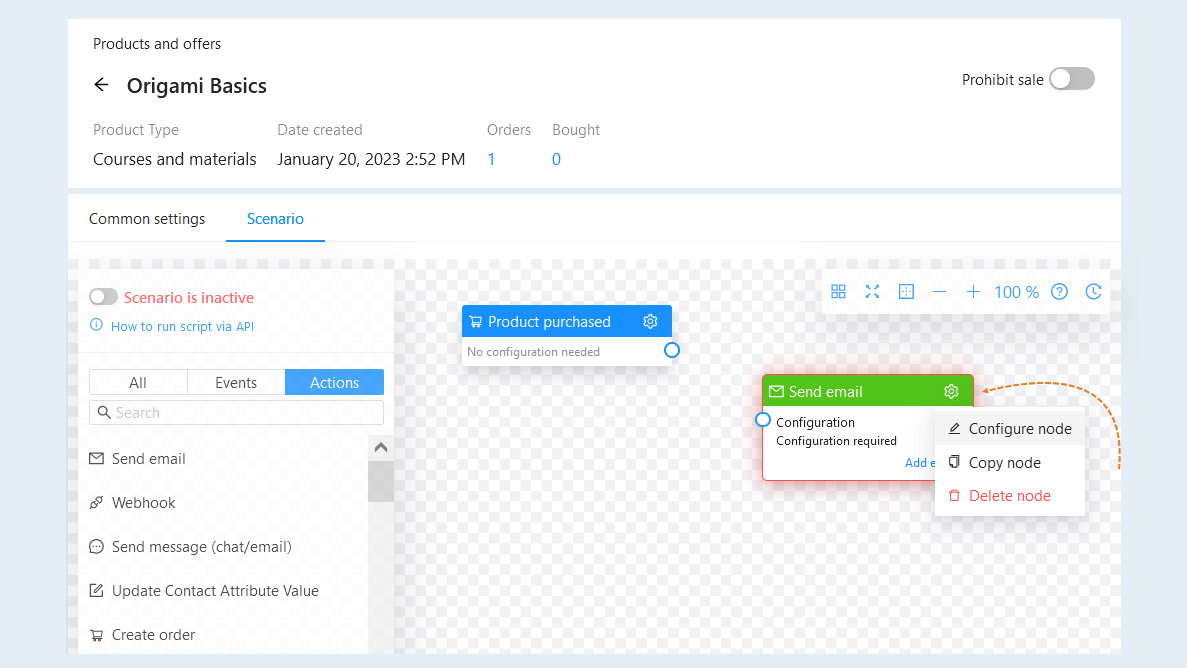
In the configuration settings of the "Send Email" action, you can add variables.
A template variable is a value to be automatically replaced with the data you selected. This can be the contact's name, email, account name, order number, etc. Variables will automatically replace the data in the email. Specify the variable “Contact first name" and when sending an email, this variable is replaced with the recipient's name.
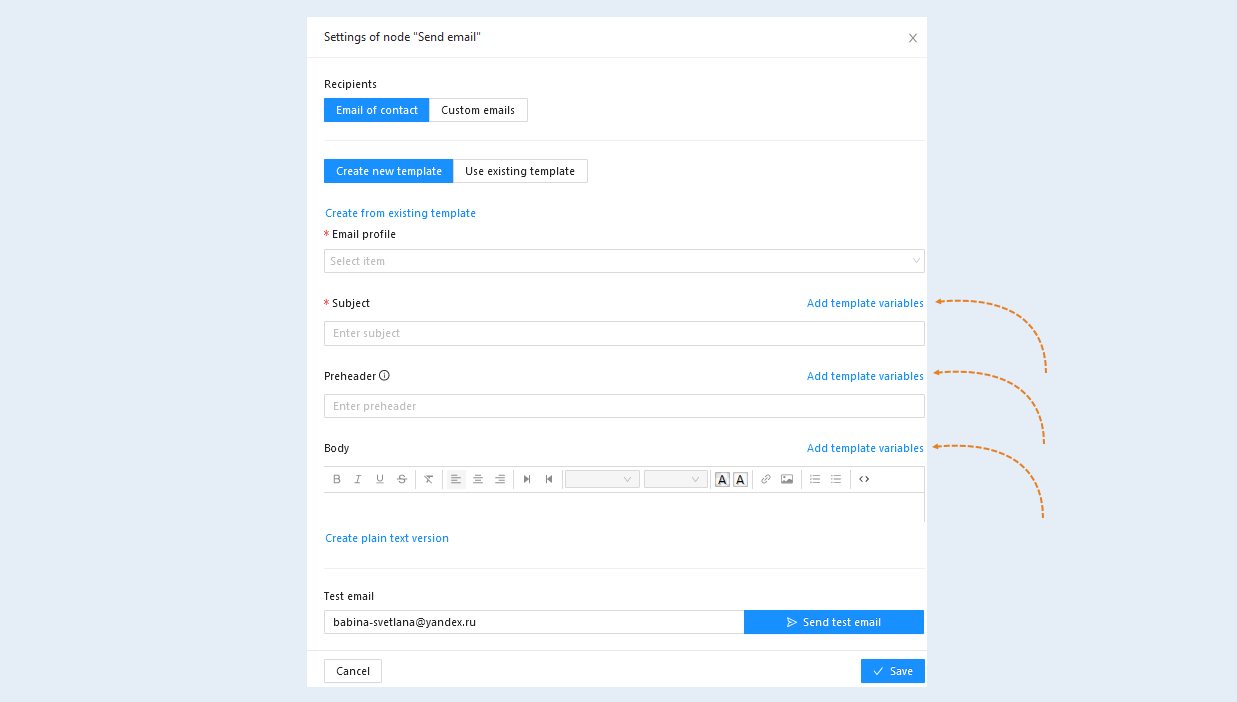
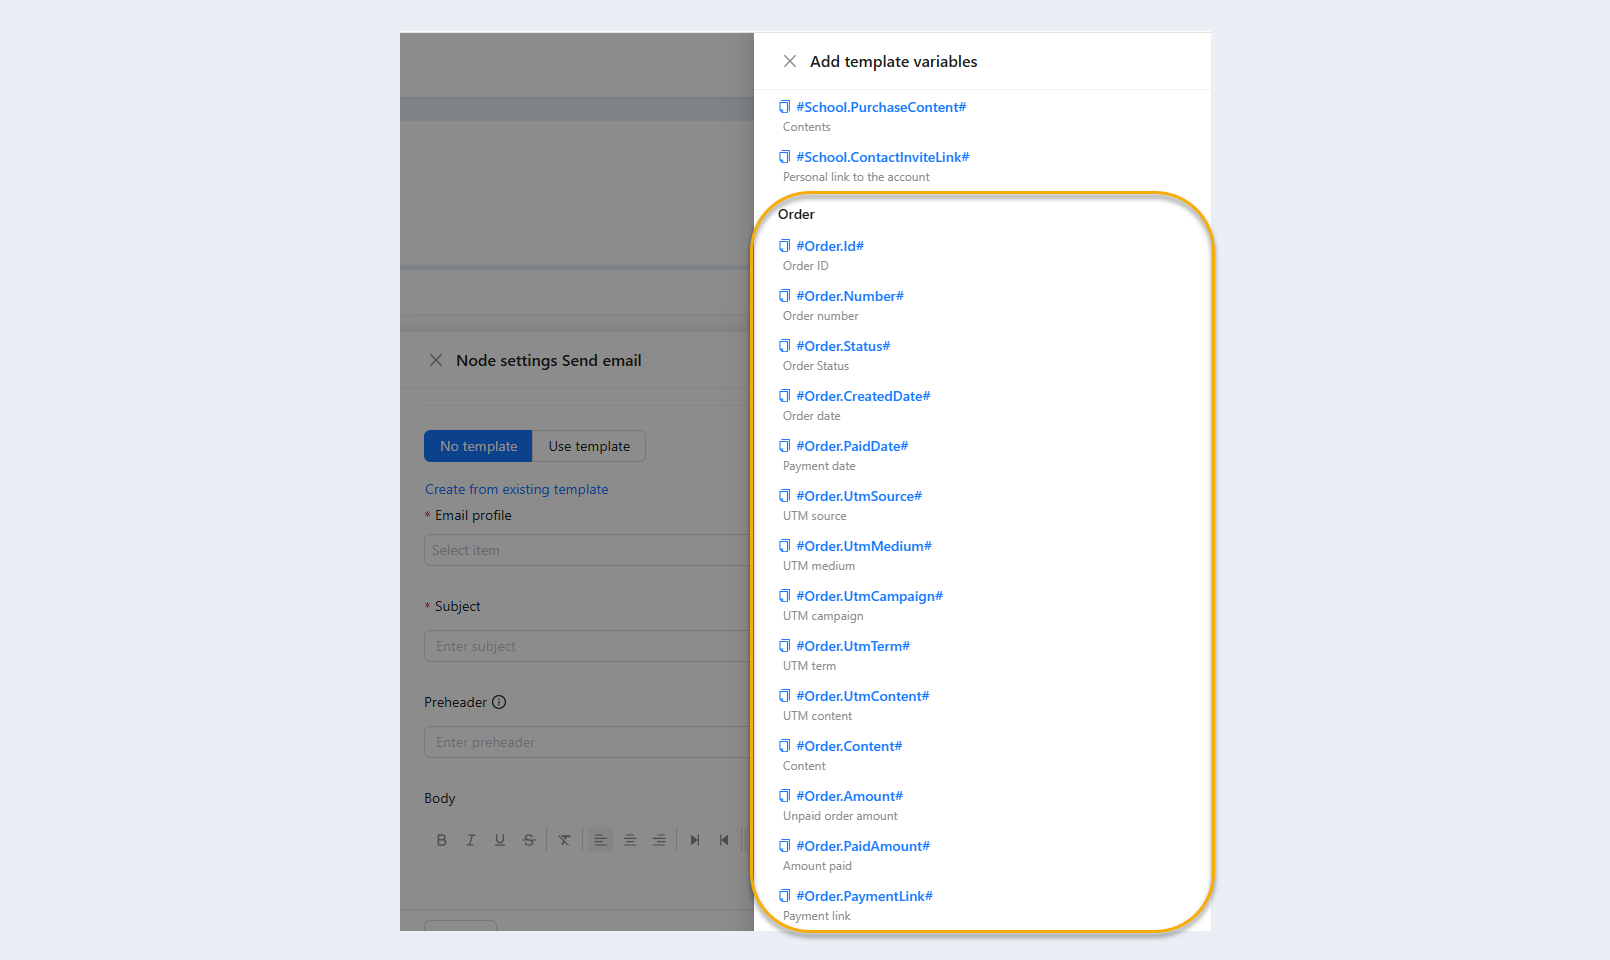
Click the "Add template variables" button next to the corresponding section. A list of variables will open on the right. Select the necessary variables from the list.
The variable "Personal link to the membership portal" is needed after purchasing the product so that the user can follow the link to the membership portal's personal account and access the course. If the user has not previously been registered in your membership portal and follows a personal link to the membership portal for the first time, he will be sent to a page where he will be asked to come up with his password for registration. After that, he will go to the membership portal's personal account.
If the user has previously been registered in your membership portal, then by clicking on the link, he will either immediately get into the user's personal account, or will be sent to the authorization page to enter a login and password.
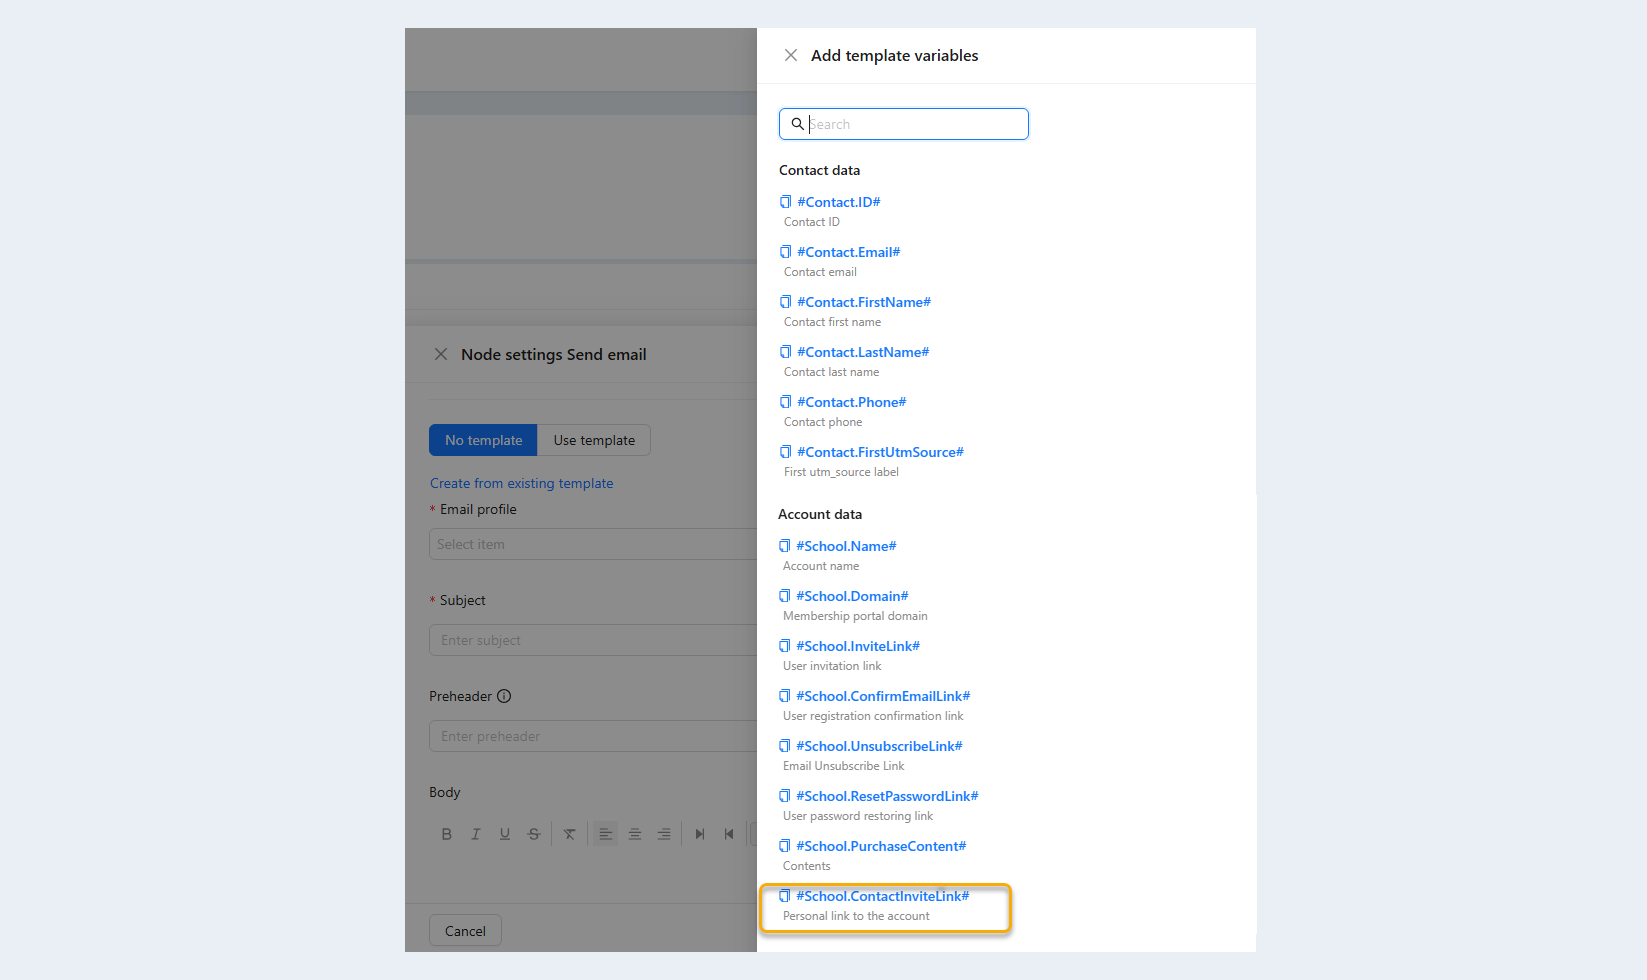
The list of variables also displays variables about the user's order. Variables will automatically replace the data in the email. Specify the variable “Order status” and when sending an email, this variable is replaced with the user's order status.
The event "Created an order with the product" is most often used to increase sales efficiency in the case when a customer has created an order but has not paid for it. When selecting the event "Created an order with the product", you can configure the following scenario. In this scenario, when the user does not pay for the created order, an email will be sent to him after a specified time with a reminder that the order is awaiting payment.
Add the actions "Delay", "Condition" and "Send email" to the script.
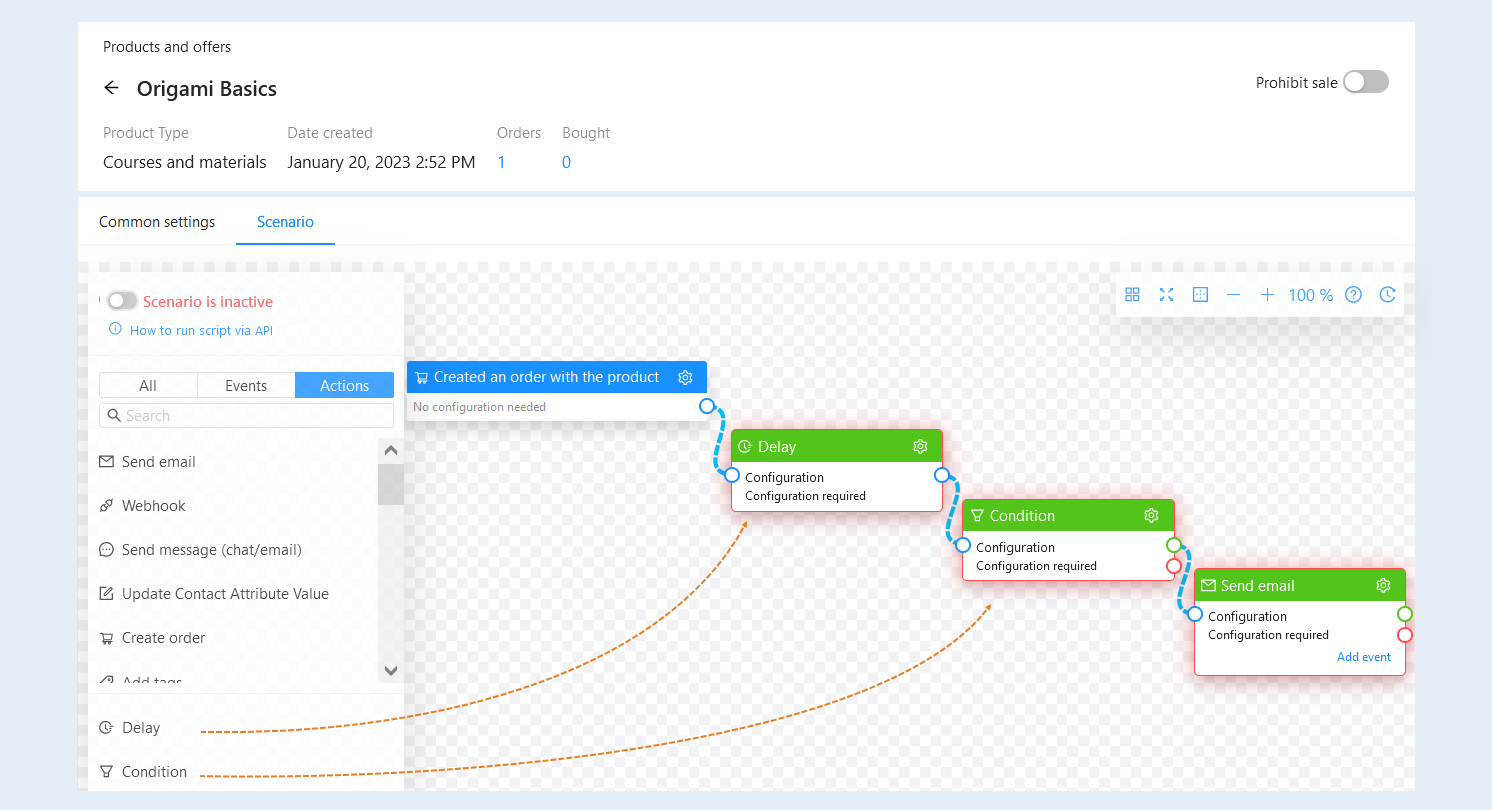
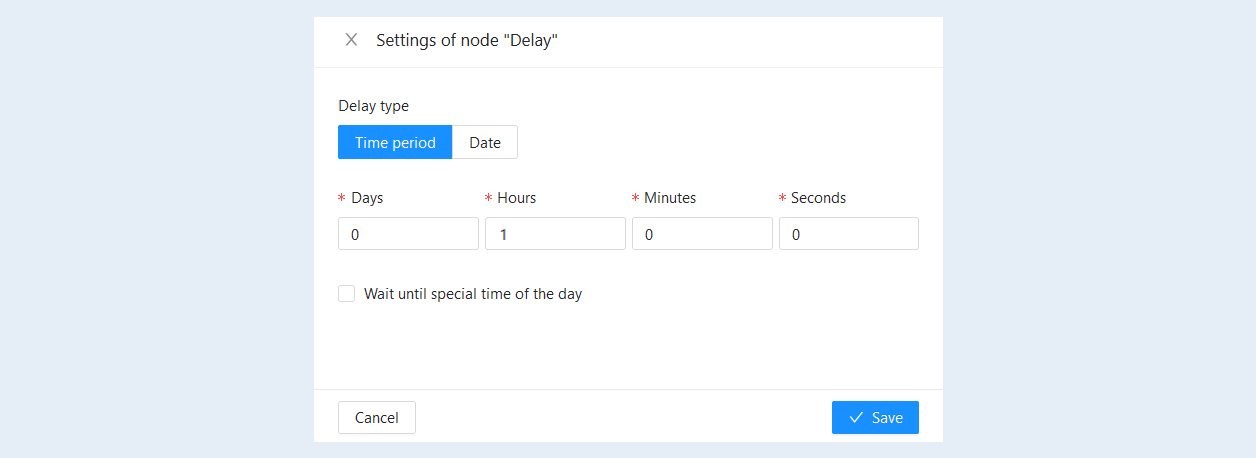
In the configuration settings of the "Delay" action, set the waiting time before the next action. Click the "Save" button.
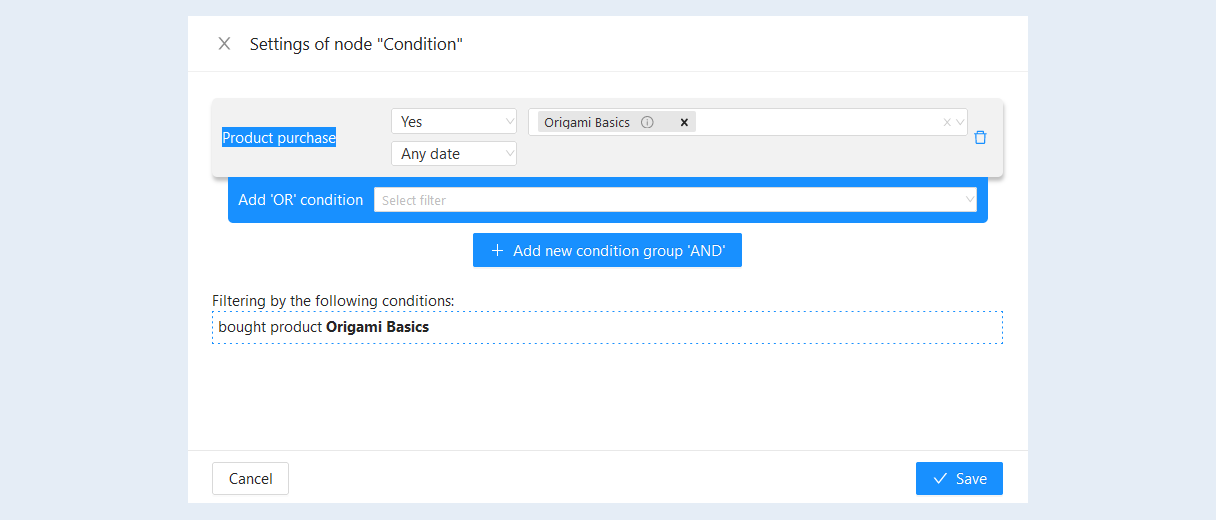
In the configuration settings of the "Condition" action, add a condition - purchase of a product and select the desired product from the list. Click the "Save" button.
In the configuration settings of the "Send email" action, select the sending profile, specify the subject and text of the email. Use variables and add information about the order to the text of the letter: the order number, its status, the content of the order and a link to payment. After completing the settings, click the "Save" button.
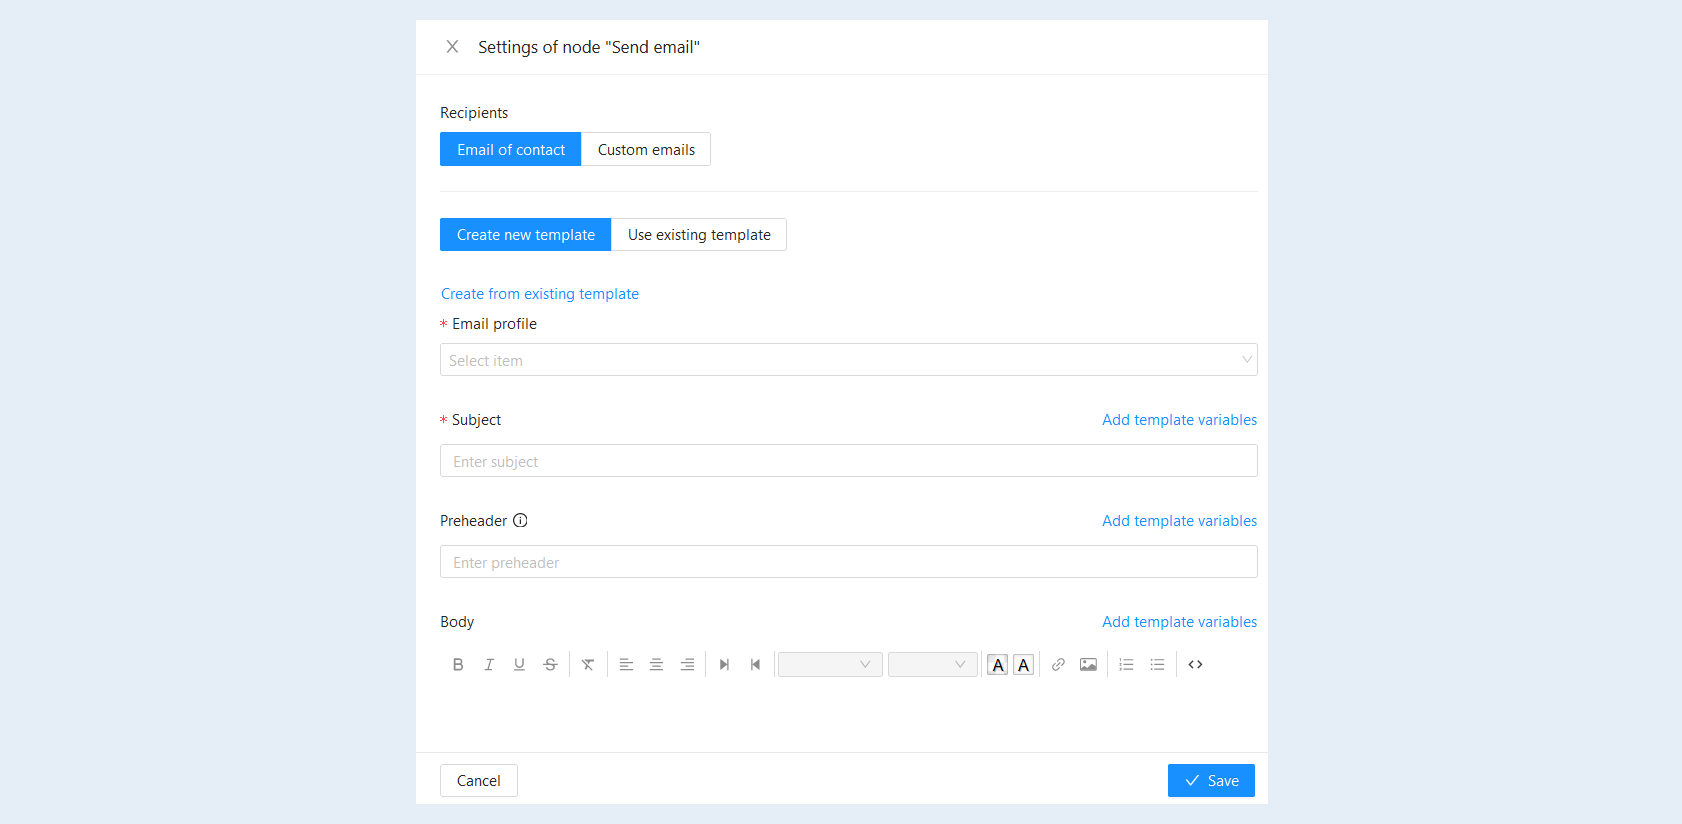
In this way, you can further configure a similar scenario. In the scenario, the system will check whether the order has been paid after a specified time and send the user emails with a reminder of the unfinished order.

Next, you need to connect the event and the action. You can create one or more links between events and actions. To remove the link between the script elements, double-click on the link.
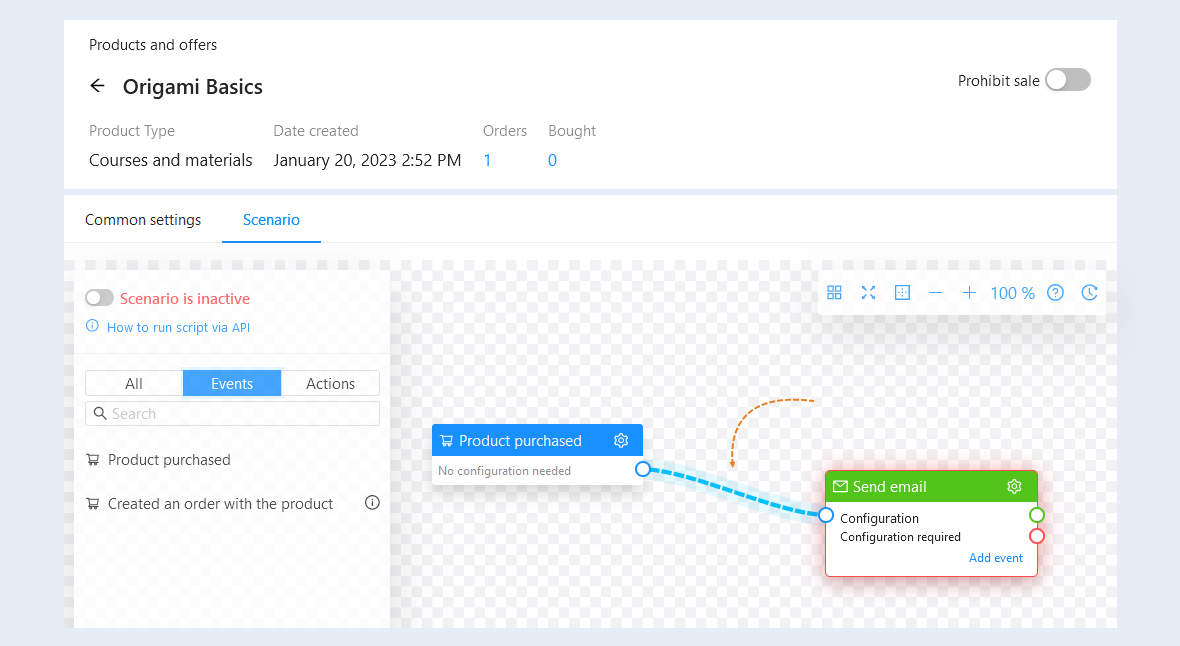
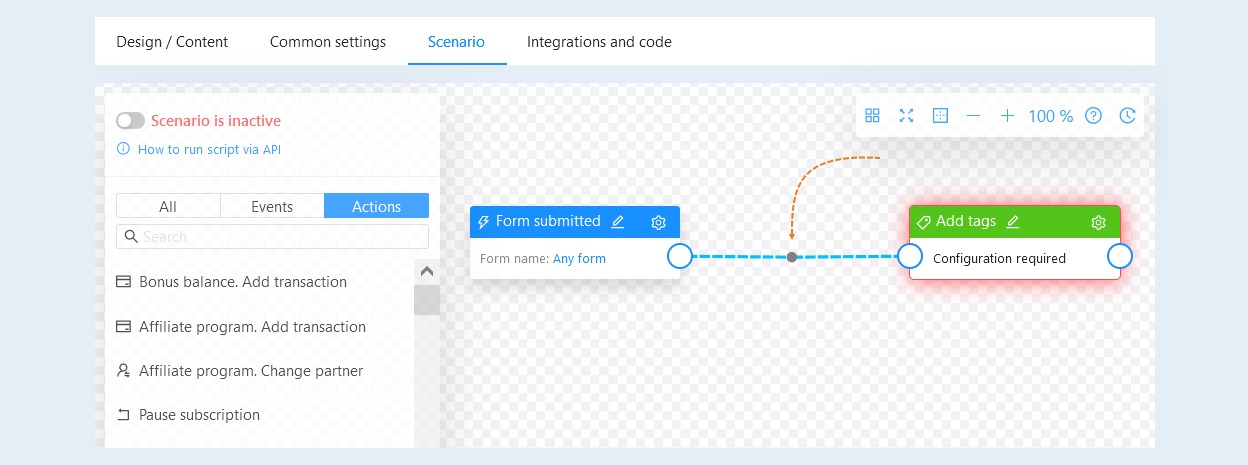
You can use the function of adding points to connections to create chains. To add a reference point, select the location on the communication line where you want to add the point. Left-click on the place selected on the line and simultaneously press the Ctrl key on the keyboard. Next, you can grab a reference point and move its location to the script field.
To delete a reference point, double-click on the point. Double-clicking on the line will delete the line and all reference points on it.
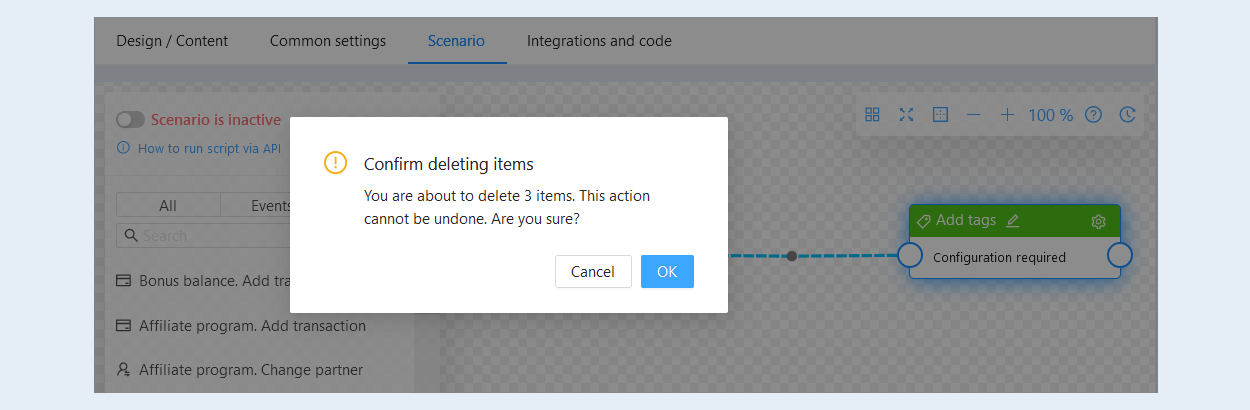
To massively delete scenario steps, hold down the Shift key and select the desired events and actions by clicking on them with the mouse. Next, press the Delete or Backspace key and confirm the deletion of the selected scenario steps.
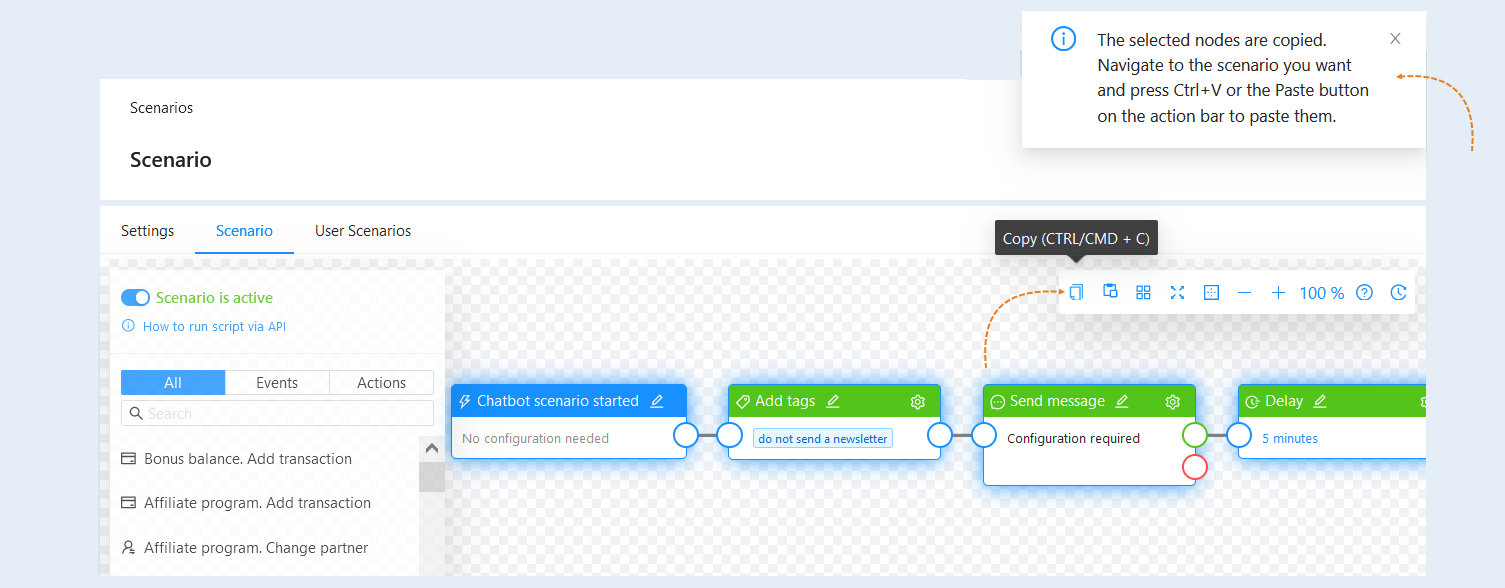
You can copy steps and connections between scenarios within one account. Press Shift and select the desired steps by clicking on them with the mouse. The selected scenario steps will be highlighted with a blue border.
Then copy the selected steps by pressing the "Copy" button or Ctrl + C on the keyboard. A message will appear in the upper right corner stating that the scenario steps have been copied.
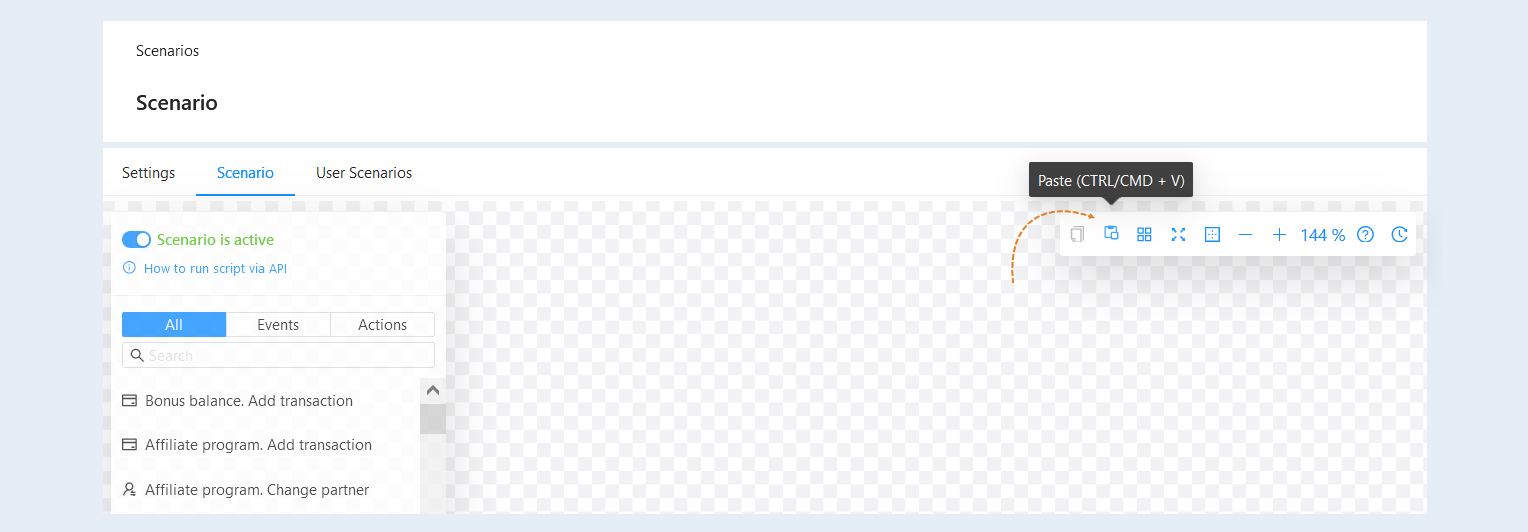
Open another scenario of your account. Please note that transferring scenario nodes only works within the same account. Press the "Paste" button or Ctrl + V on the keyboard. The scenario steps will be copied to the new scenario.
Add the required number of events and actions to your script. Now your script is ready. To activate the script, move the slider to the active position.