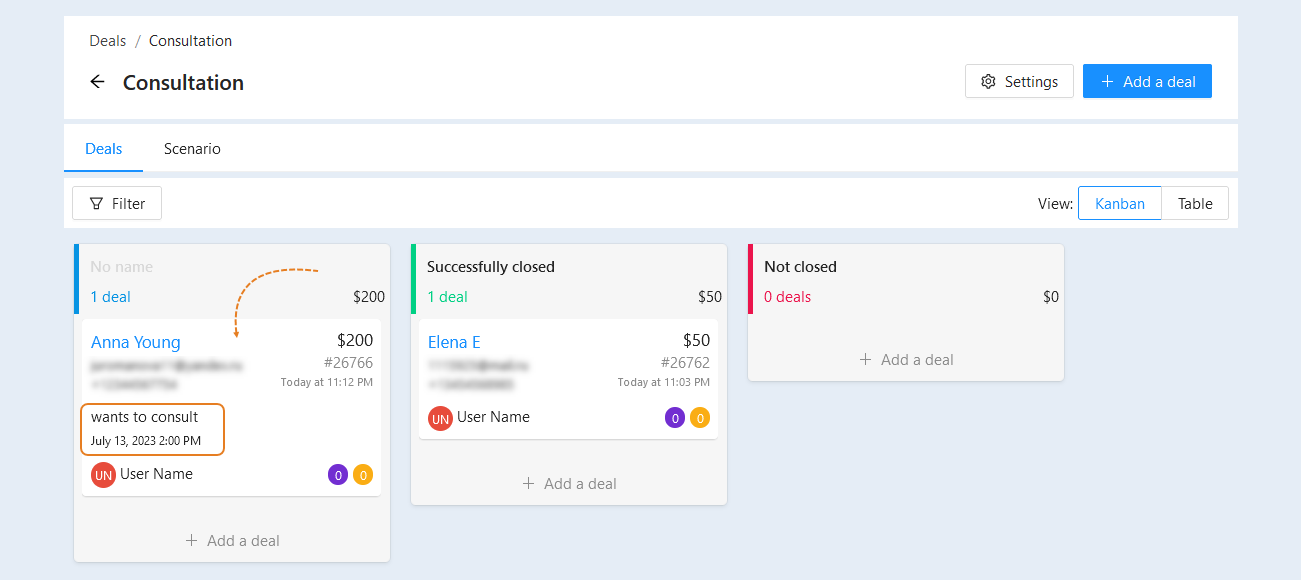
The "Deals" section is a virtual board with tasks on which you can see all the current deals, schedule tasks in one click or complete work with them. This section makes it much easier to work with CRM with a large number of tasks and contributes to an even distribution of workload between employees. In the section, all tasks are presented in the form of cards on the board. Cards are convenient to group, move, add deals and descriptions to them. In this way, you can monitor the execution of tasks and the progress of the project. It is a flexible management system that is easy to use in business.
Click on the desired section to go to its description:
How to create a funnel
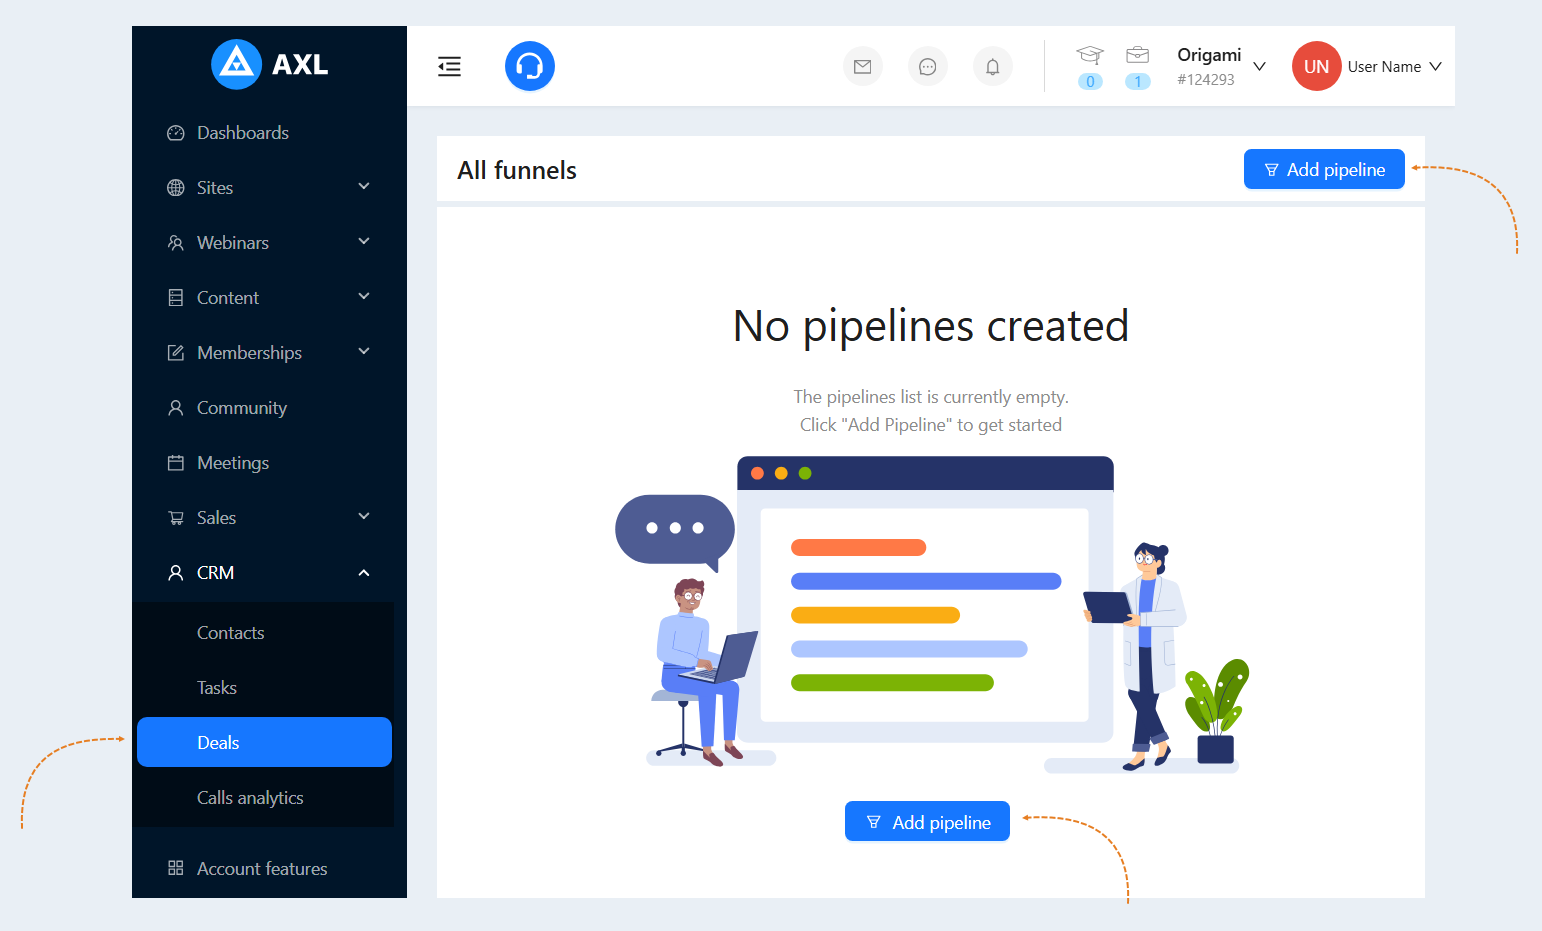
Go to the “CRM” section and select the “Deals" tab. To create a new funnel, click the “Add pipeline” button in the upper right corner.
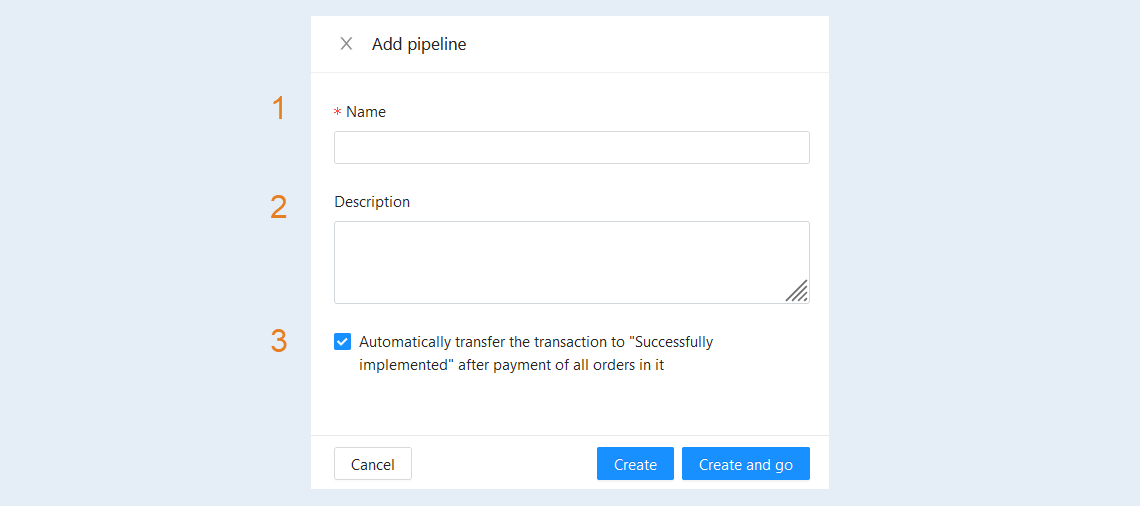
In the window that opens, fill in the fields:
Name. Enter the name of the funnel.
Description. Add a description of the funnel.
Automatically transfer the transaction to "Successfully implemented" after payment of all orders in it. Check the box so that after paying for all orders, the transaction is automatically transferred to the "Successfully implemented" stage.
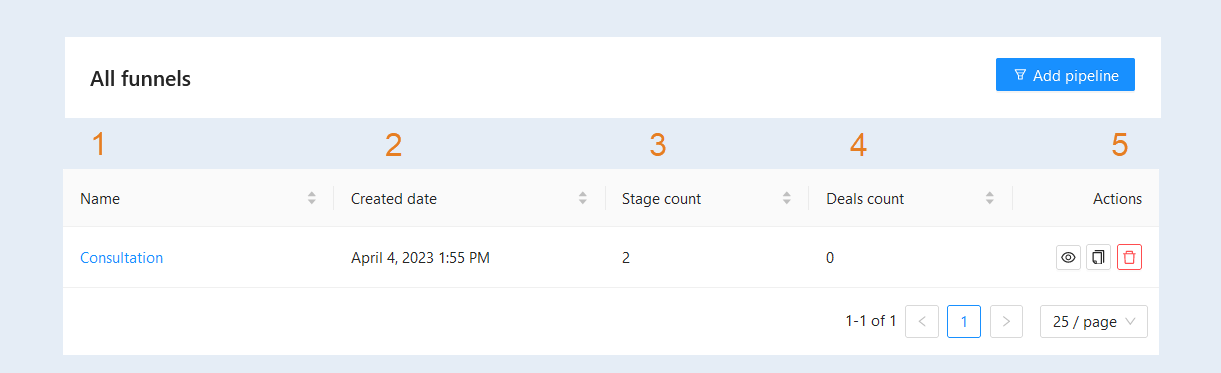
After adding a funnel, it will appear in the list of funnels. Here you can see the following information:
- Name. Click on the name to edit the funnel.
Created date. The exact date and time of the creation of the funnel is indicated.
Stage count. The number of funnel stages is indicated.
Deals count. The number of transactions inside the funnel is indicated.
Actions:
The "Edit" button. Click to open and edit the funnel.
The "Copy" button. Click to create a copy of the selected funnel.
The "Delete" button. Click to delete the funnel.
After you have created a new funnel, you need to arrange its contents. Click on the funnel name or the "Edit" button.
A page will open for you to edit the funnel.
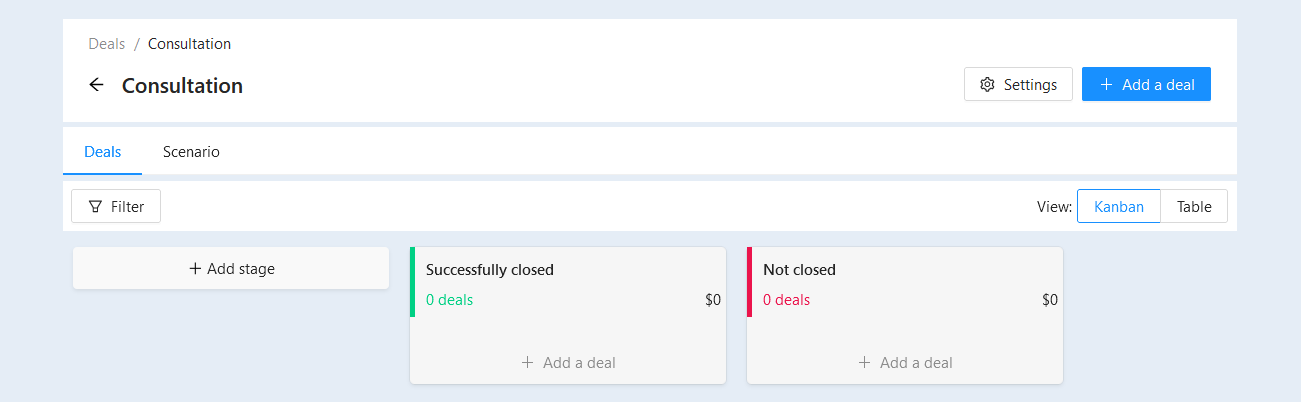
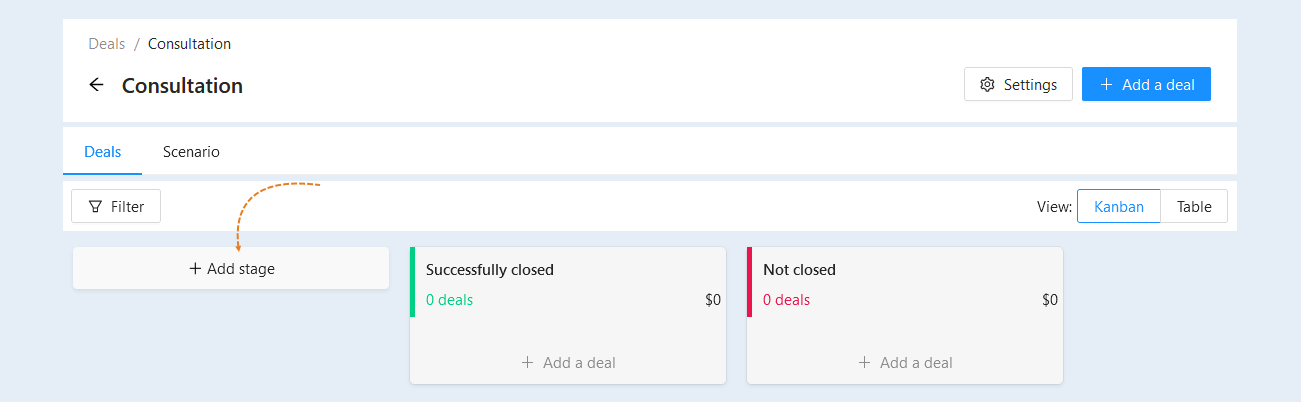
When creating a funnel, two stages will be created automatically: "Successfully implemented" and "Not implemented". You can add the required number of funnel stages by clicking the "Add Stage" button.
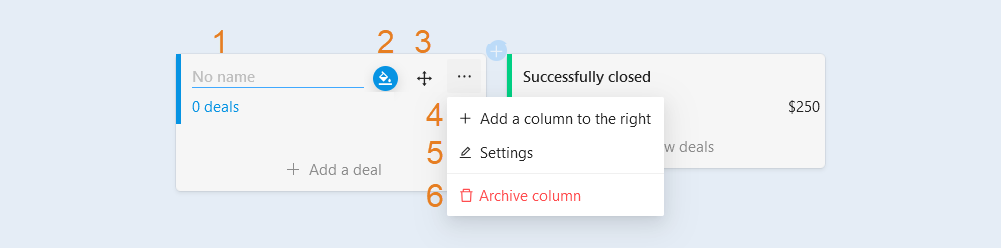
A card will be created for the new stage of the funnel. On the card you can see the following information:
- Name of stage. Enter the name of the funnel stage.
Colour. Change the color of the stage card.
Move. Hold down the "Move" button and drag the stage to another place in the funnel field.
Add a column to the right. Click the button to add a new deal on the right.
Settings. In the stage settings, you can change the stage name, add the card color and additional fields.
Archive column. Click the "Archive" button to delete a stage from the funnel.
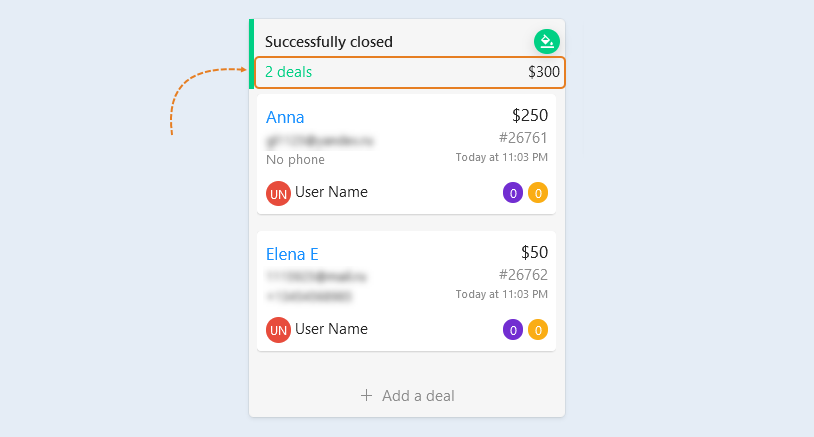
Under the name of each stage of the funnel, data on the amount and number of deals are indicated. Below is a list of deals of this stage of the funnel.
How to add a deal
To add a new deal to the funnel stage, click the "Add a Deal" button in the upper right corner of the window. Also, each stage of the funnel has a "Add a deal" button.
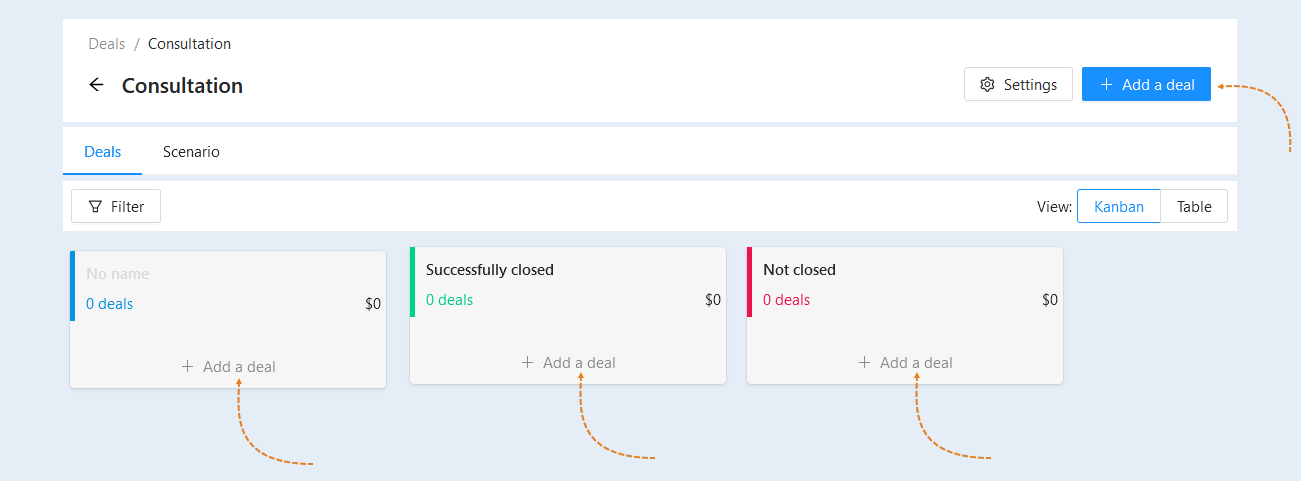
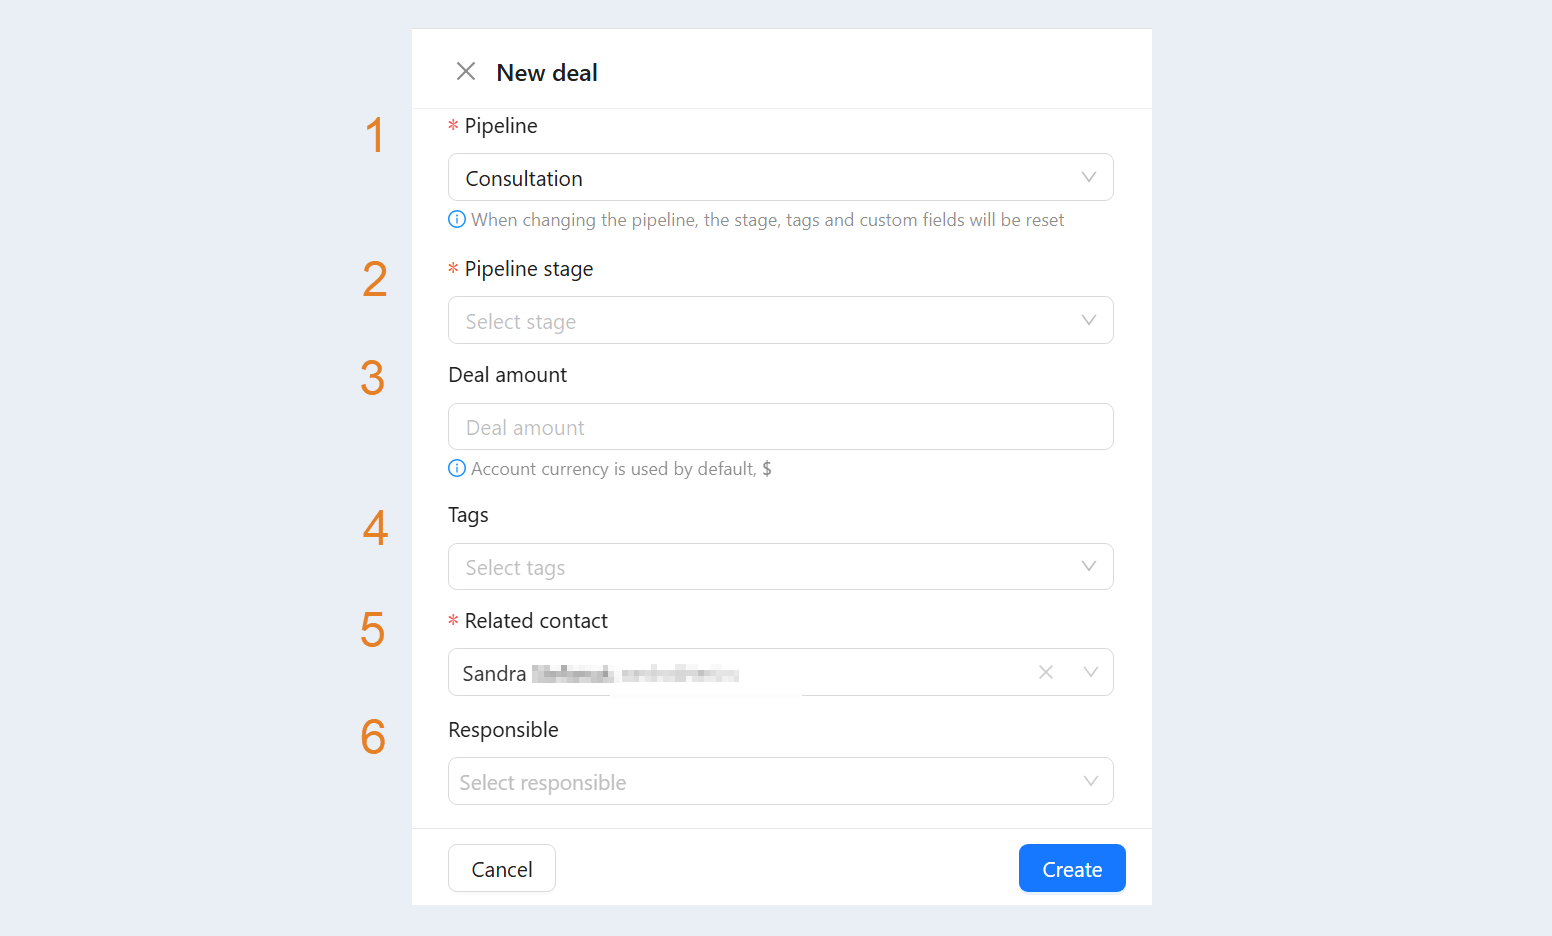
Click the "Add a Deal" button. In the window that opens, fill in the fields:
Pipeline. By default, the pipeline in which you create a deal is selected. You can change the pipeline. Please note that when you change the pipeline stage, tags and custom fields will be reset.
Pipeline stage. Select the funnel stage to which you want to add a new deal.
Deal amount. Specify the transaction amount.
Tags. Add tags to the deal. Click the Manage Tags button to find or create new tags.
Related contact. Add a contact by selecting it from the suggested list. Read about how to create a new contact in the article "Contacts".
Responsible. Set the person responsible for the execution of this transaction.
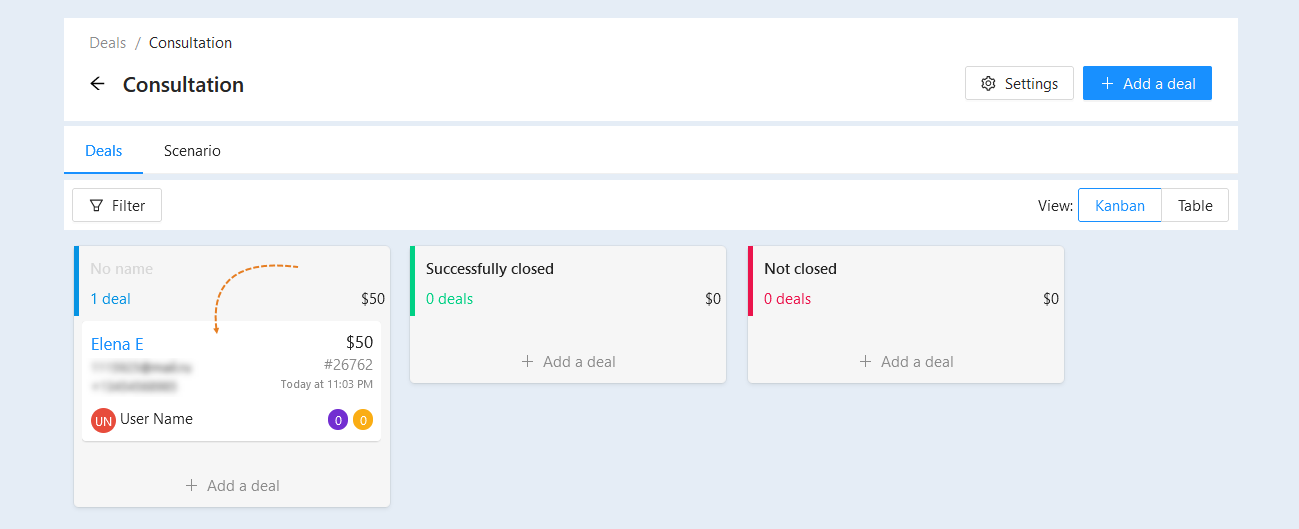
After the transaction is created, it will be added to the selected stage of the funnel. The transaction can be moved in stages. To do this, click on the deal and hold it, drag it to the desired stage of the funnel.
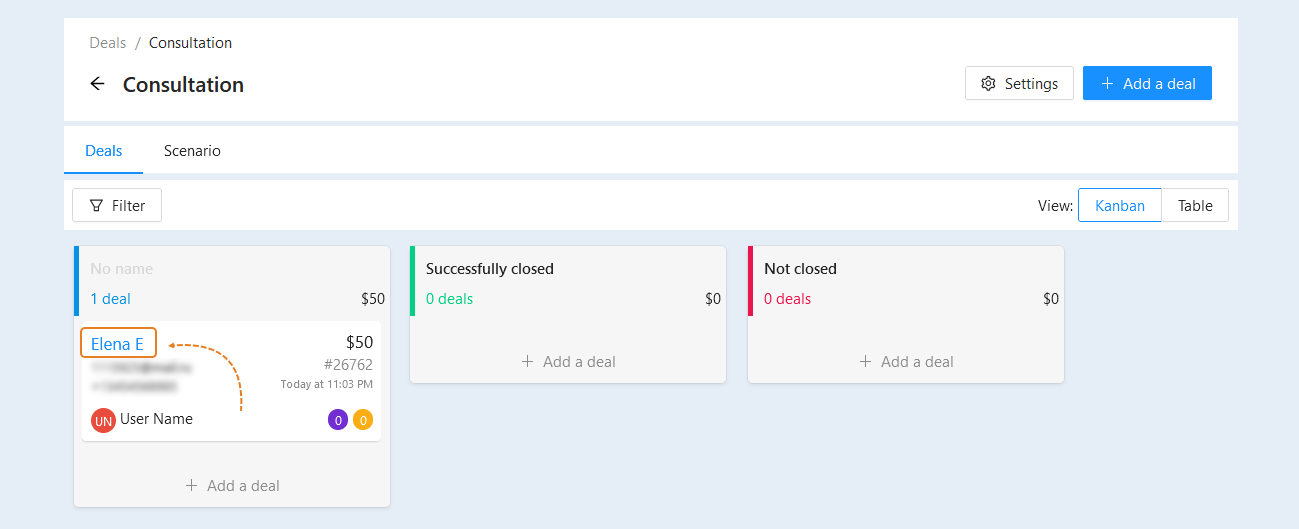
To open the details of the transaction, click on the name of the contact inside the transaction.
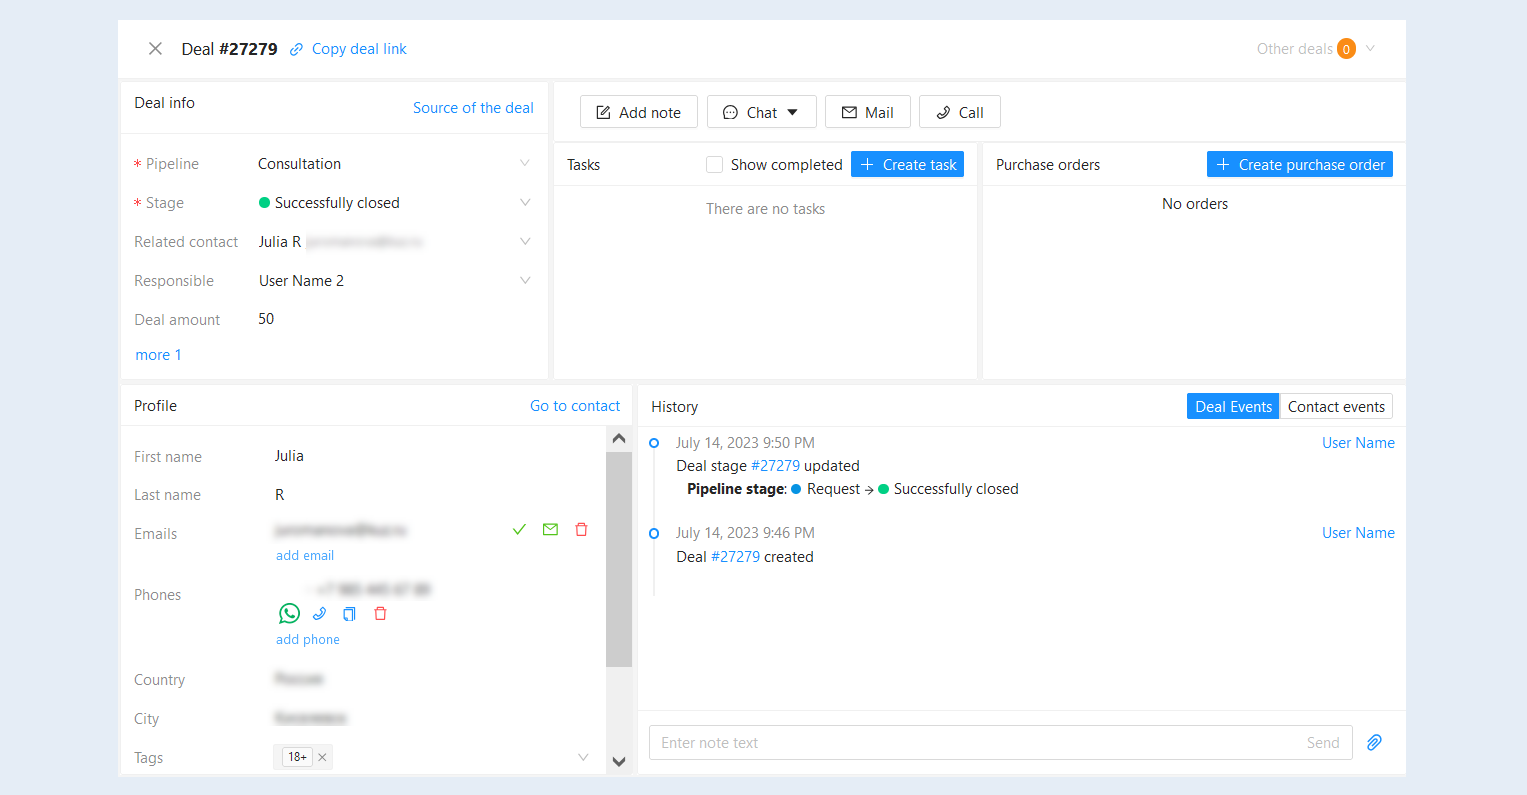
In the window that opens, you can see full information about the transaction: information about the transaction, tasks, orders, contact profile and history. In this section, you can perform the necessary actions and change the transaction settings.
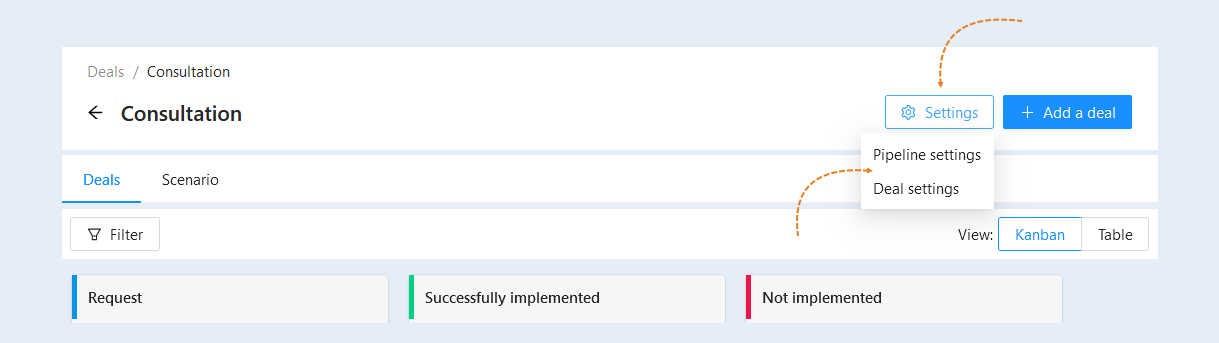
Settings
In this section, you can change the funnel and transaction settings. Click the "Settings" button in the upper right corner of the window and select the section:
- Pipeline settings. In this section, you can change the name of the funnel, add its description and check the box to automatically transfer the transaction to "Successfully implemented" after paying for all orders in it.
Deal settings. In this section, you can add and configure additional fields in the transaction card.
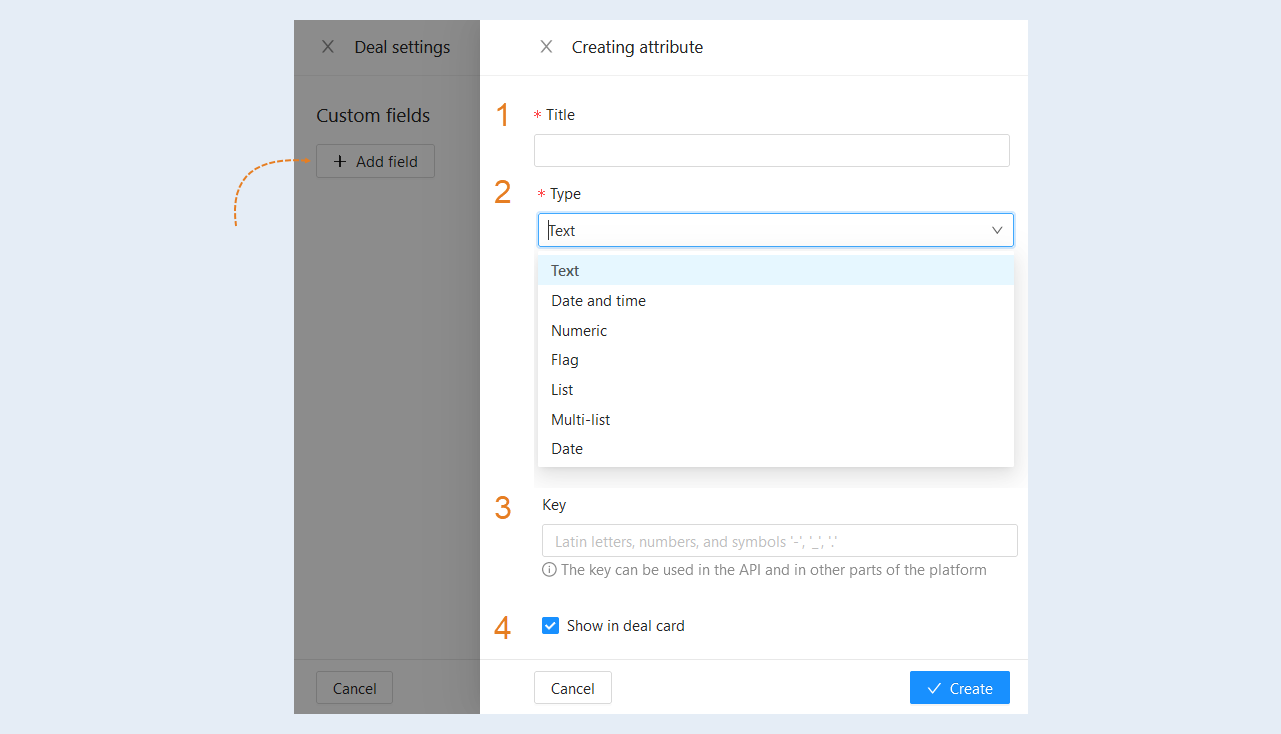
Select the "Deal Settings" section. In the window that opens, click the "Add Field" button. Then fill in the fields:
- Title. Specify the name of the additional field.
Type. Select the type of additional field from the suggested list: text, date and time, number, flag, list, multi-list, date.
Key. Add a key. The key can be used in the API and in other parts of the platform.
Show in deal card. Check the box so that the field is displayed in the transaction card.
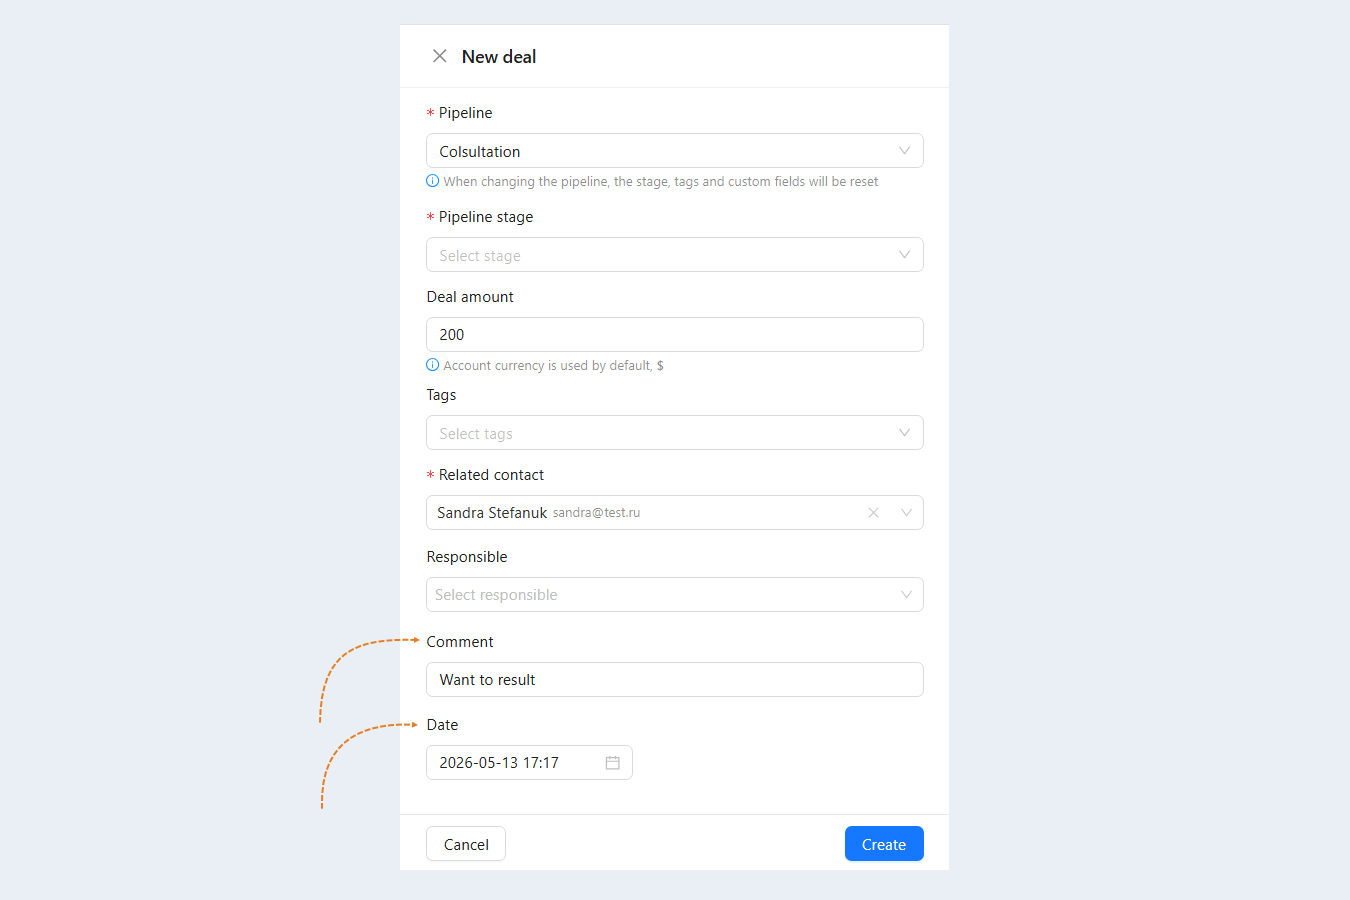
After adding additional fields, they will appear in the window when creating a new transaction.
As well as additional fields will be displayed in the transaction card.
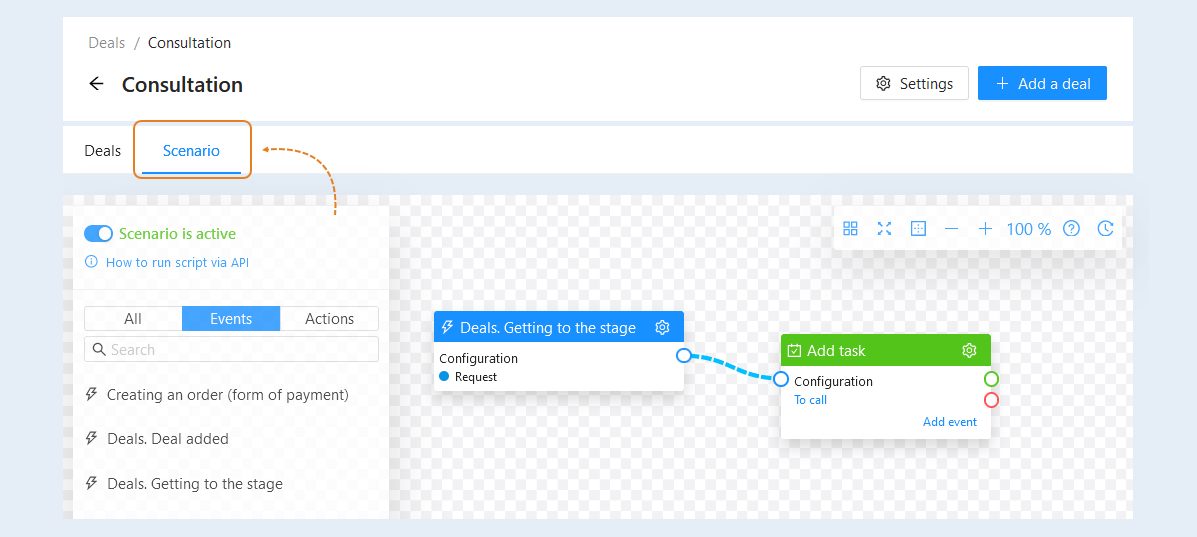
Deal Scenario
In this section, you can automate processes and configure the sequence of events and actions for the funnel. Read more about how to create a script in the article "Scenario".
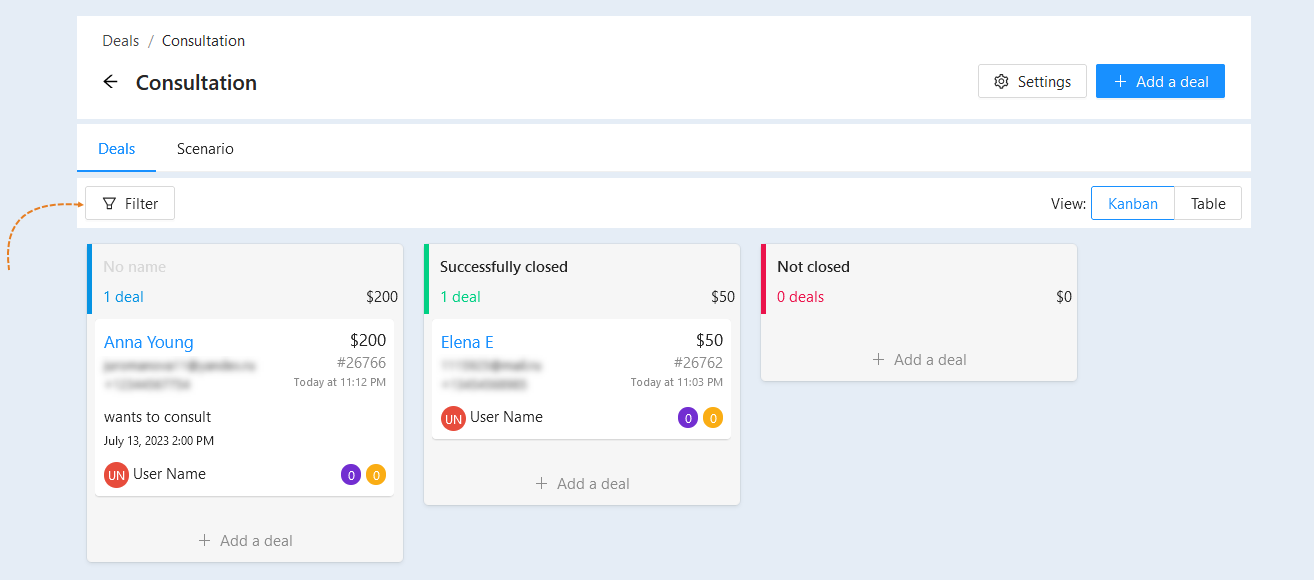
Filter and deal view
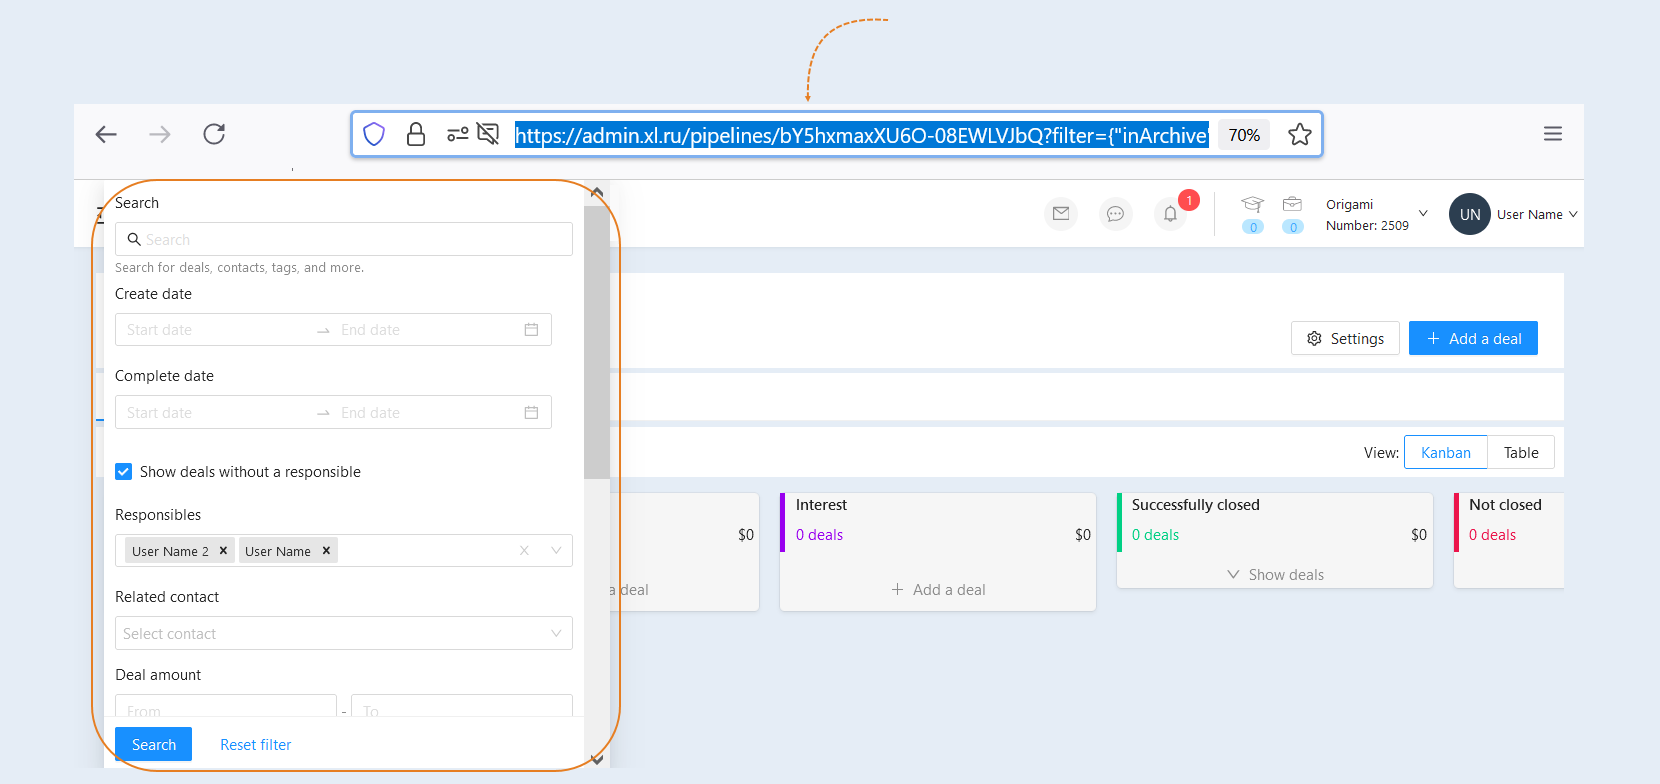
In the upper left part of the page, a search bar and a filter are available to you. Use them to quickly find the right deal. Click the "Filter" button to open the search details.
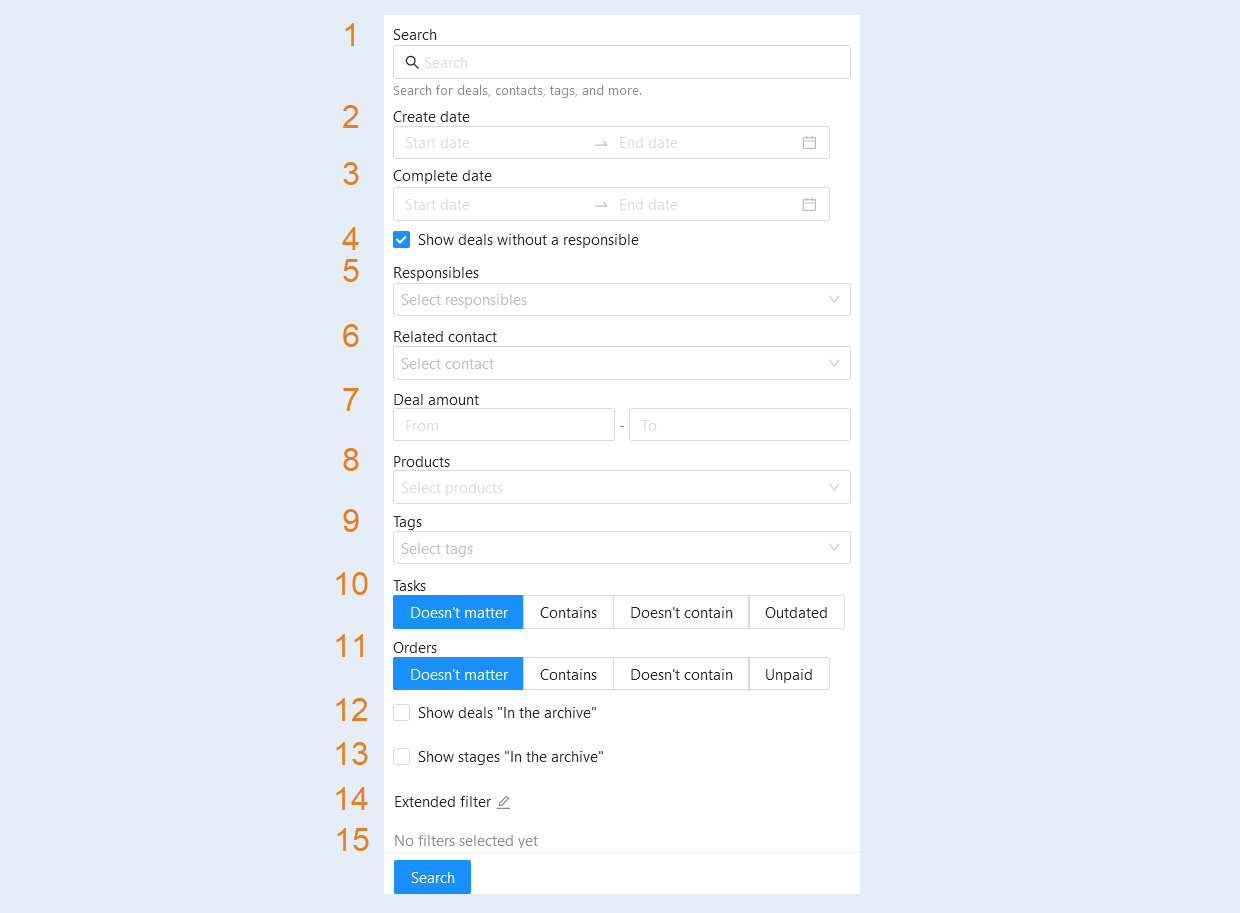
The following filter conditions are available to you:
- Search. Free keyword search. Search for deals, contacts, tags, etc.
Create date. Set the time period for sorting. You can also choose the time period for the search: today, current week, last week, current month or last month.
Completion date. Set the time period for sorting.
Show deals without a responsible. Move the slider to the active position to sort transactions without an assigned responsible executor.
Responsible. Select one or more responsible executors from the list.
Related contact. Select a contact from the list to see his deals.
Deal amount. Set the minimum and maximum of the transaction amount to see the transactions in this interval.
Products. Select a product from the list to see deals with this product.
Tags. You can sort transactions separately by tags.
Tasks.
- Doesn't matter. Select to exclude tasks from the search.
Contains. Select to see the deals with the tasks.
Doesn't contain. Select to see the deals that do not have the assigned tasks.
Outdated. Click to see the deals in which the tasks were overdue.
Orders.
- Doesn't matter. Select to exclude orders from the search.
Contains. Select to see the deals with the orders.
Doesn't contain. Select to see the deals that do not have orders.
Unpaid. Choose. to see deals with unpaid orders.
Show deals "In the archive". Move the slider to the active position to see the deleted trades.
Show stages "In the archive". Move the slider to the active position to see the deleted stages of the transaction.
Extended filter. Click the "Configure Filters" button to open the Advanced filter settings window. For more information about the advanced filter settings, read the article "Filtering and search conditions".
Conditions of the extended filter. This line shows the conditions of the selected extended filter.
By choosing different filter conditions, you can create a “set” filter. The "set" filter will be saved in the page address. You can copy the address of the page and save it for future use. Or you can forward the address of the page to your employees. If an employee follows this link, the "Deals" section of the employee will open with the "set" filter you created.
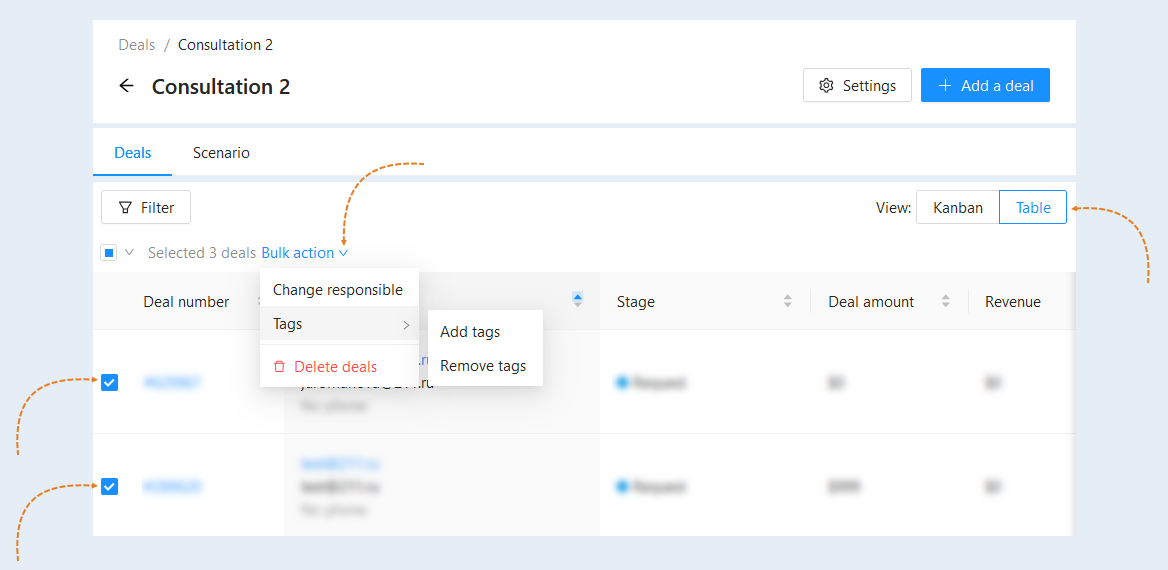
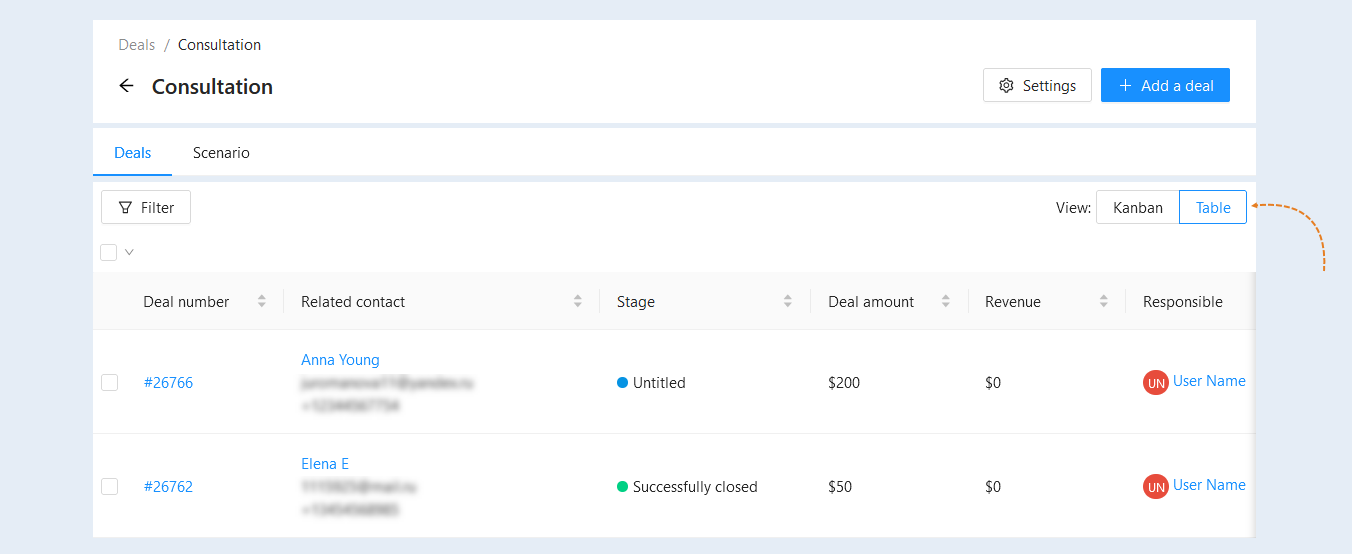
You can change the appearance of the "Deals" section and set it as a boar or a table.
Bulk actions
Using filtering and search terms, you can select the desired transactions and perform mass actions with them. To do this, switch to the “Table" view. Select the desired transactions by ticking the boxes opposite and click the "Bulk action" button. Select an action.
You can massively change the responsible contractor, add and remove tags, or massively remove selected deals from the funnel.