Course management
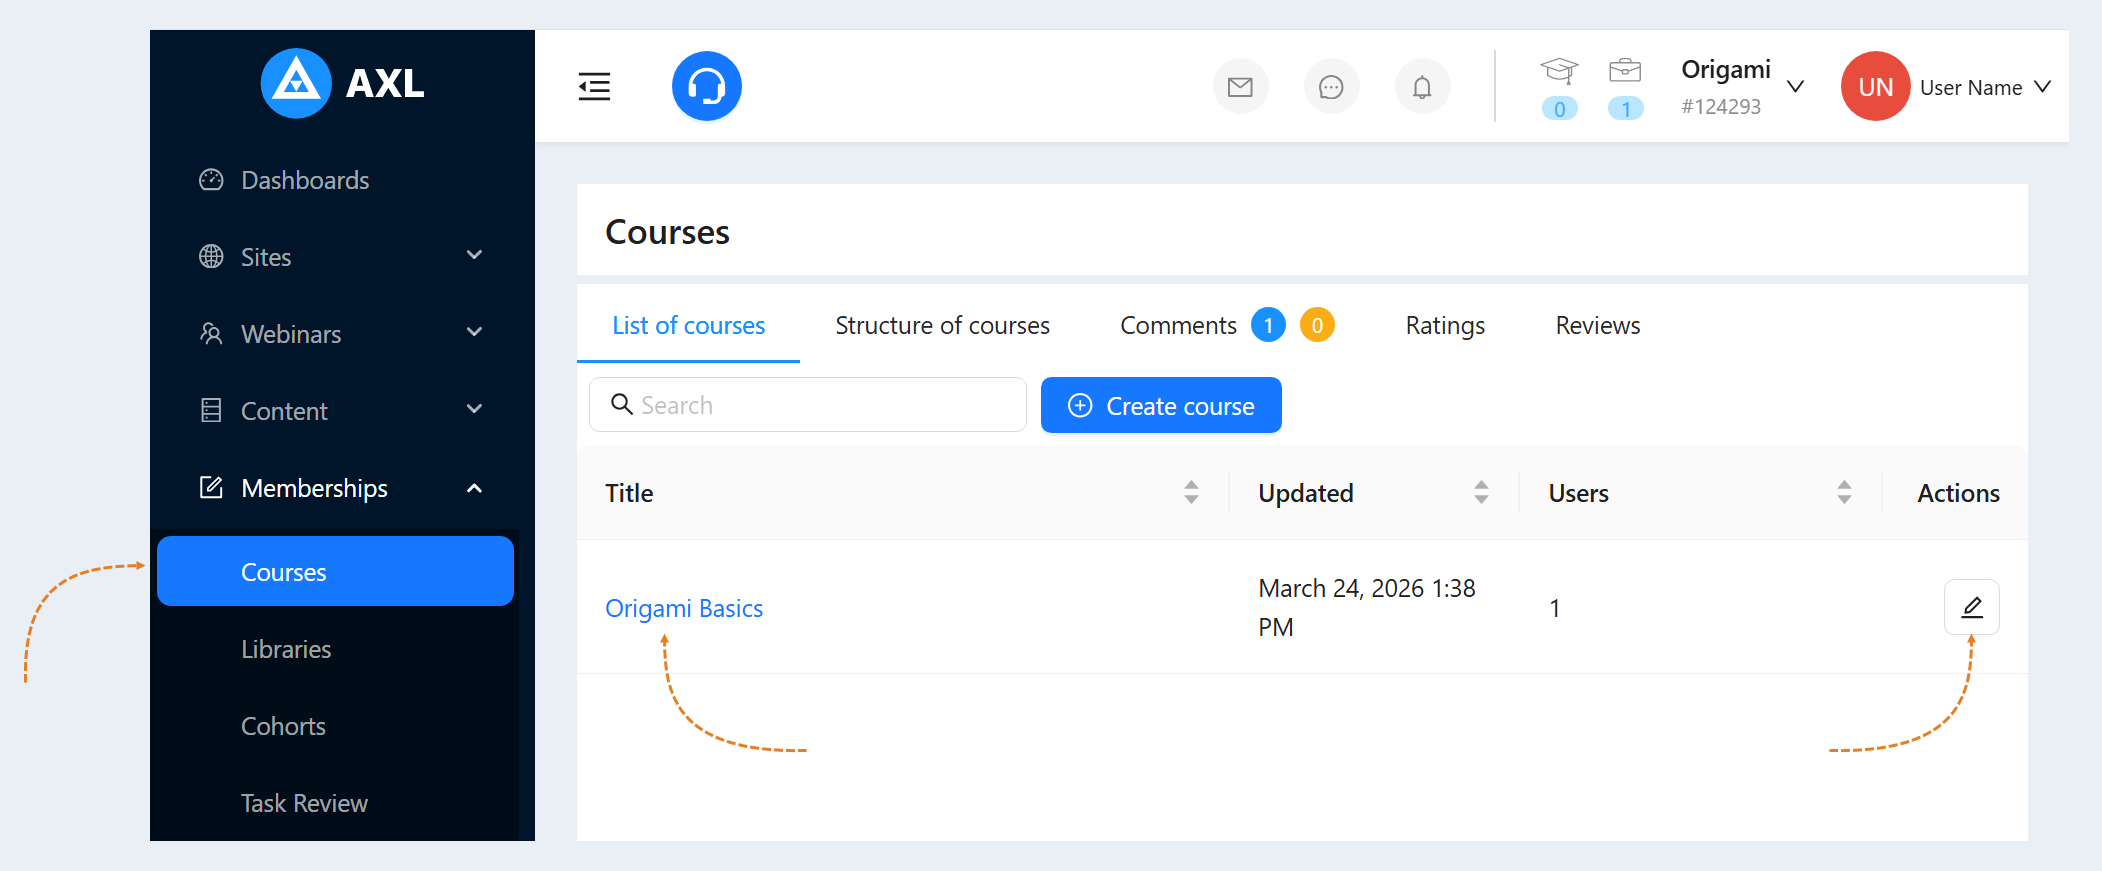
Click on the course name or the “Actions” button.
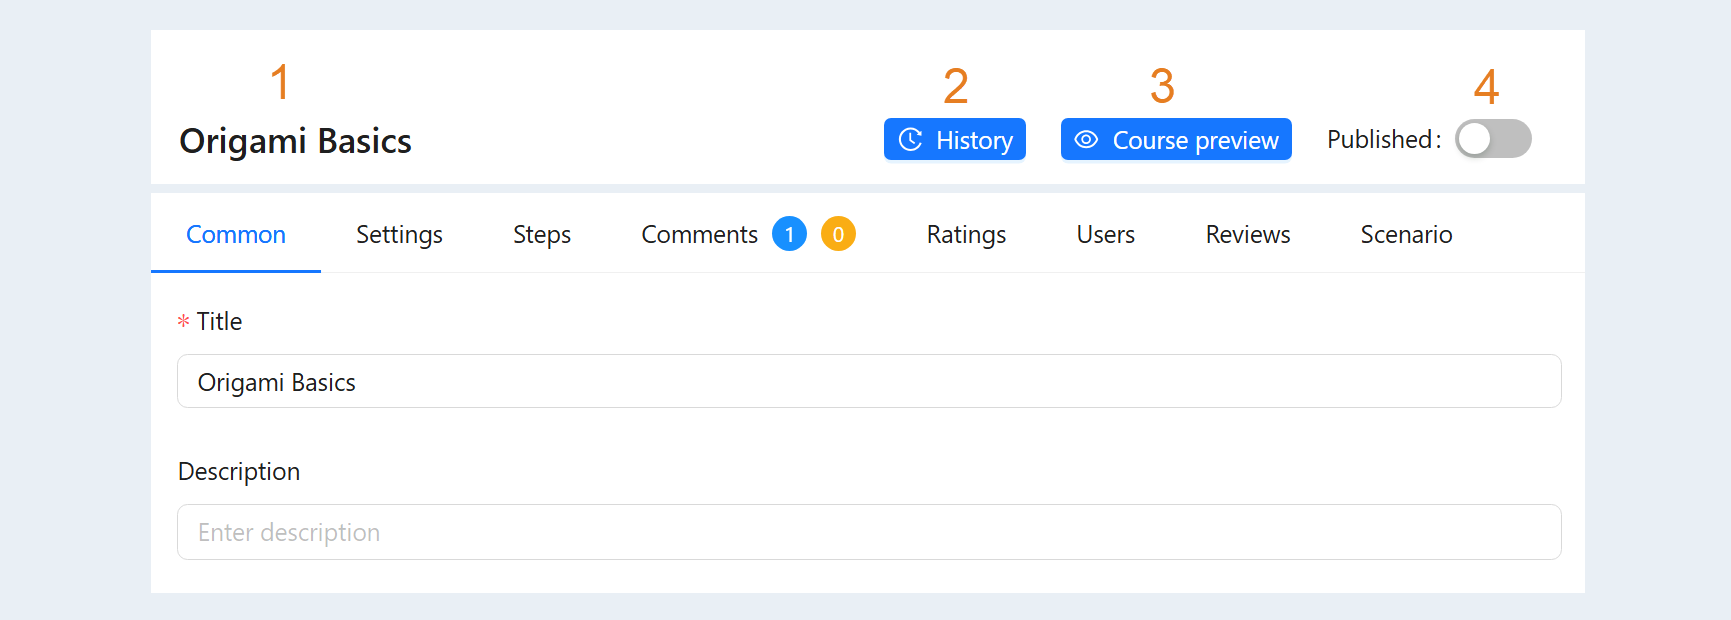
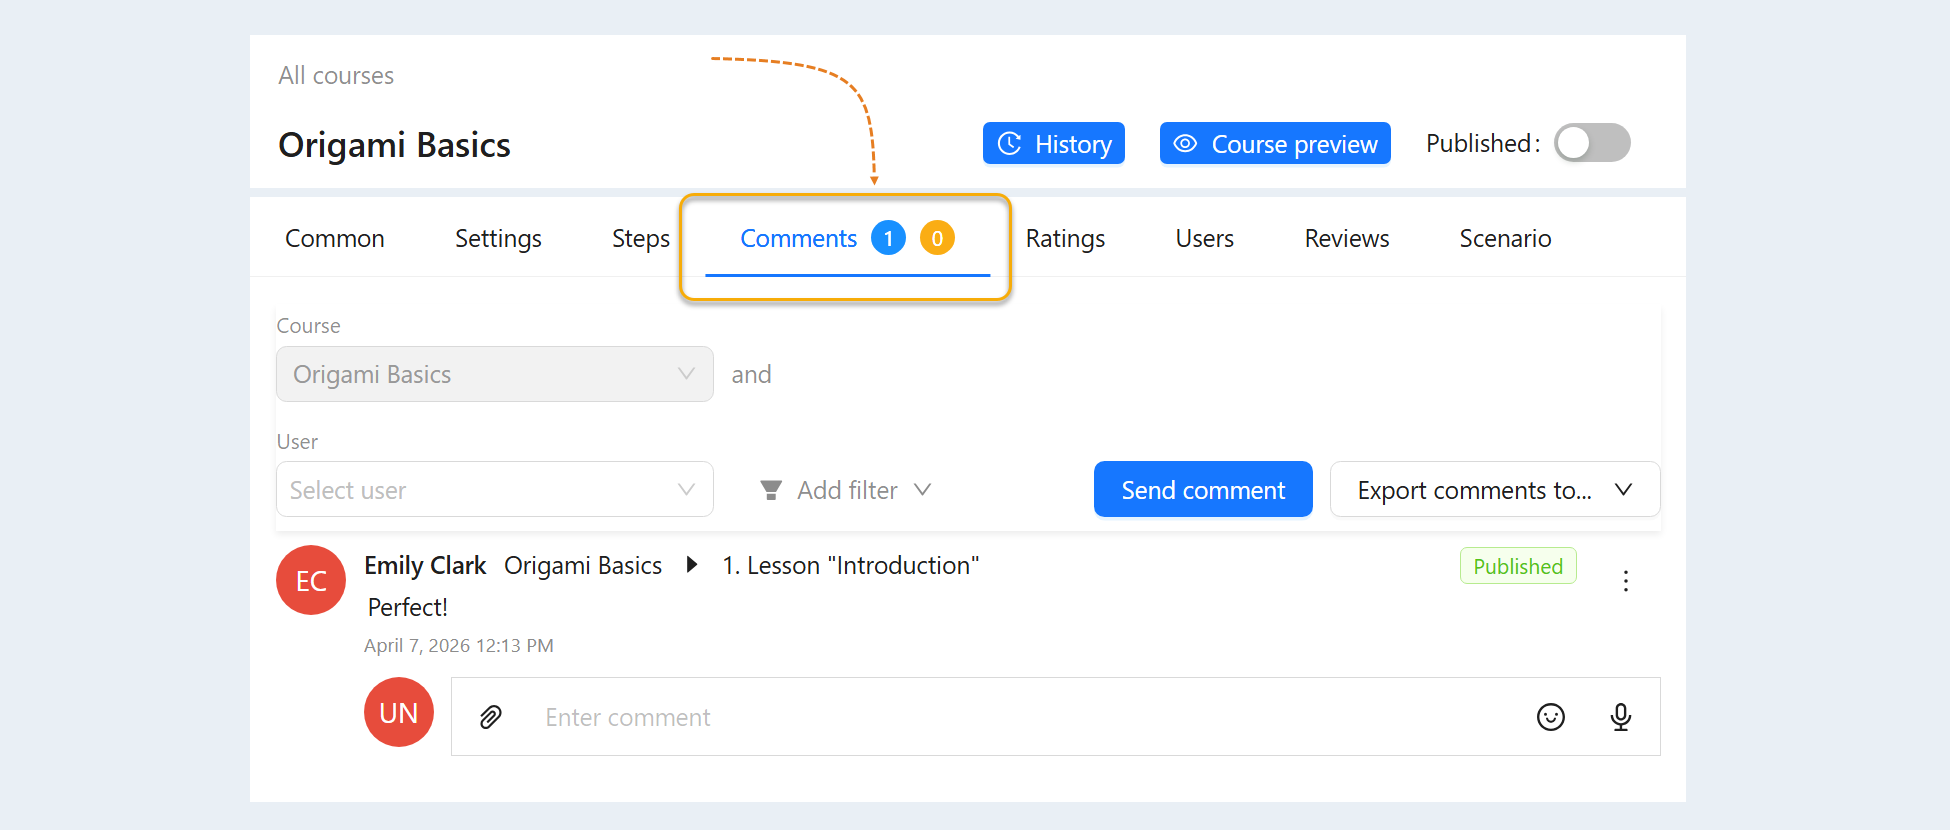
You will be presented with a page for editing. At the top of the page, you see:
- Course name.
- "History" button. The history of course changes is shown here.
- "Course Preview" button. You can go and see how your users see the course.
- "Published" button. Click to publish or unpublish the course.
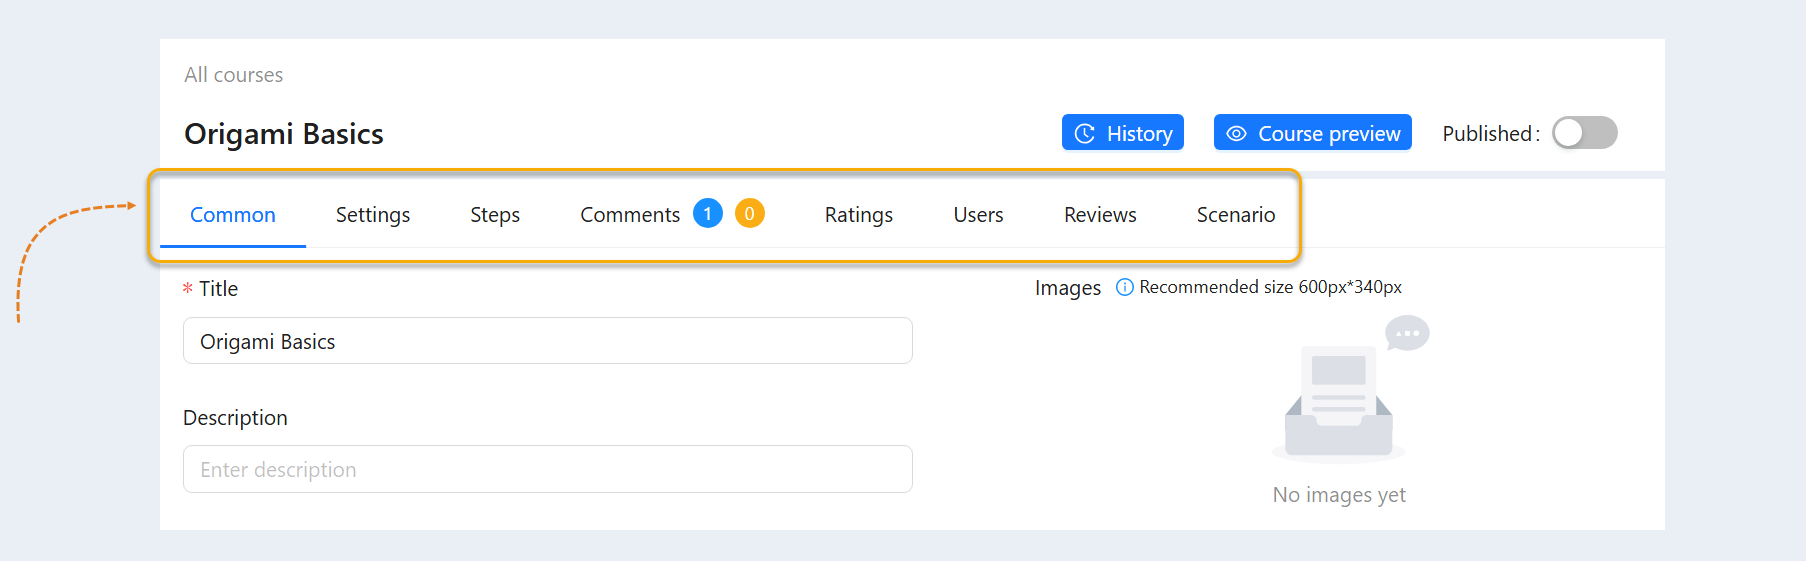
Further on this page, there are tabs on the top line:
- Common
- Settings
- Steps
- Comments
- Ratings
- Users
Reviews
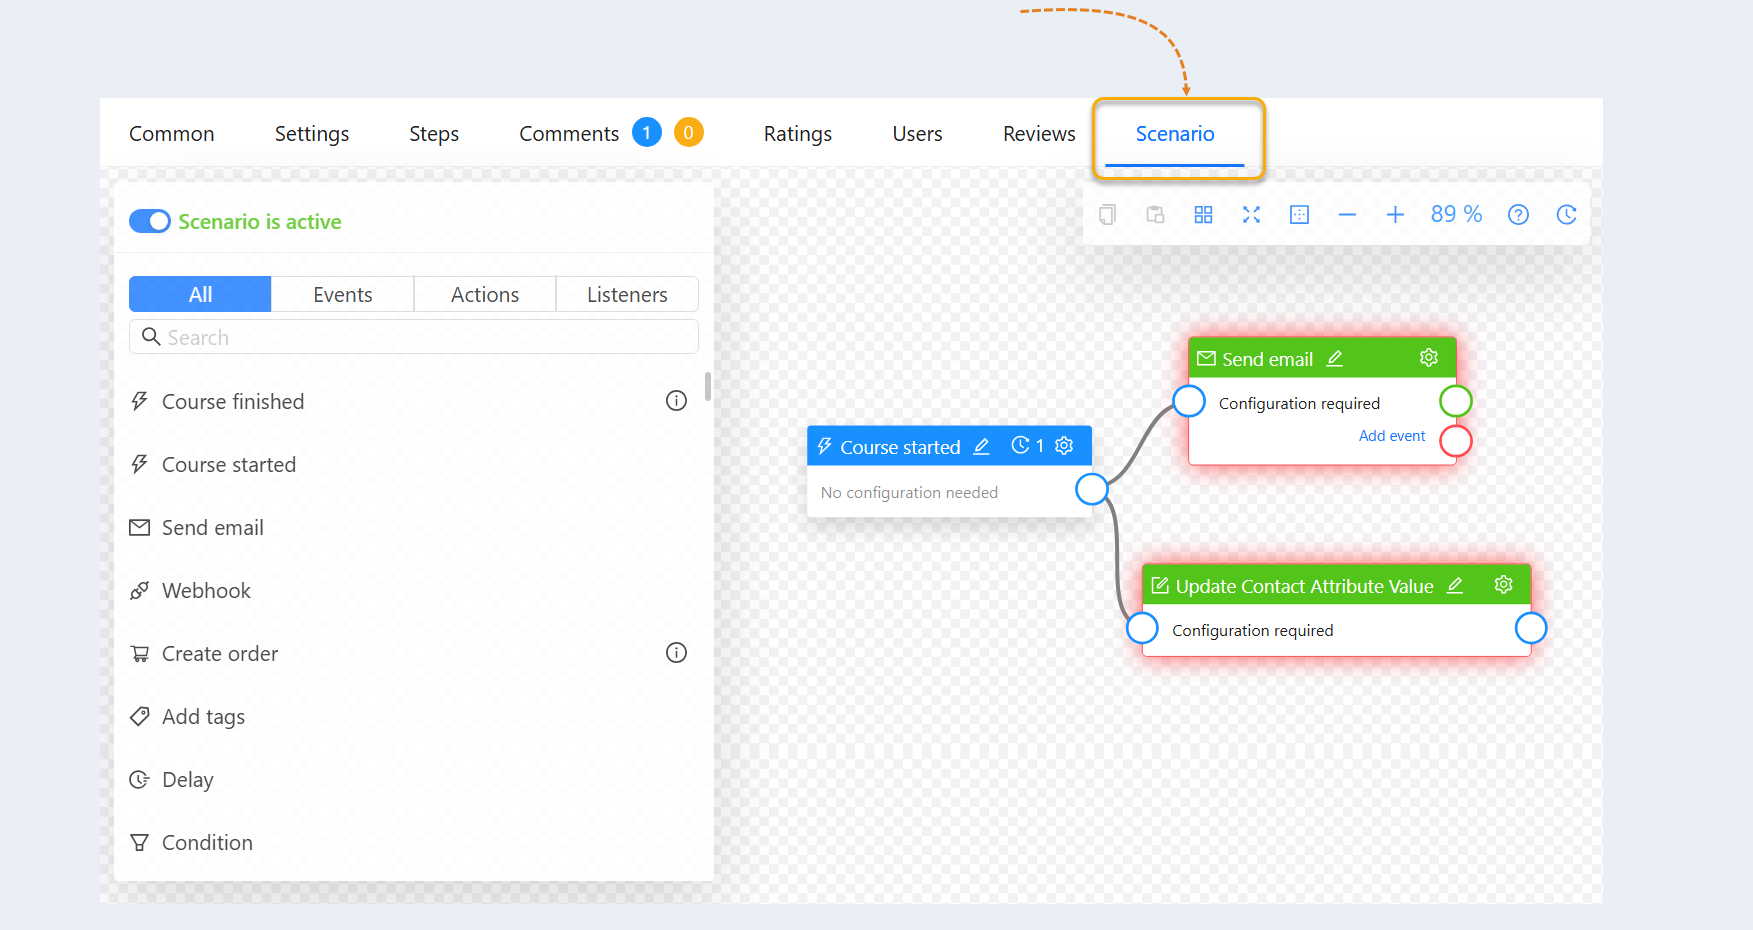
Scenario
Let's take a closer look at each tab in this section.
Common
In this section, you can change:
- Course name. This field is required.
- Description of the course. This field is optional. But you can add a description.
- Categories. Select a category. If you don't have categories yet, click the “Manage Categories” button and create a category.
Course Prerequisite. Without completing the selected courses, the user will not be admitted to this course.
You must complete any of the selected. Check the box so that access to this course is opened to the user upon completion of one of the courses selected in the previous step.
Certificate. A certificate is an official document issued to users who have successfully completed a specific training event. It confirms that the participant has acquired knowledge, skills or competencies in a given area. Obtaining a certificate can serve as motivation to participate in training programs, as they provide a specific goal to achieve. Select the certificate template from the list that will be issued at the end of the course. For more information about the certificate settings, see the article "Certificates".
Tabs names. The default titles will be replaced with the specified ones. If no value is provided, the default title will be used.
- Images. Upload an image for your course.
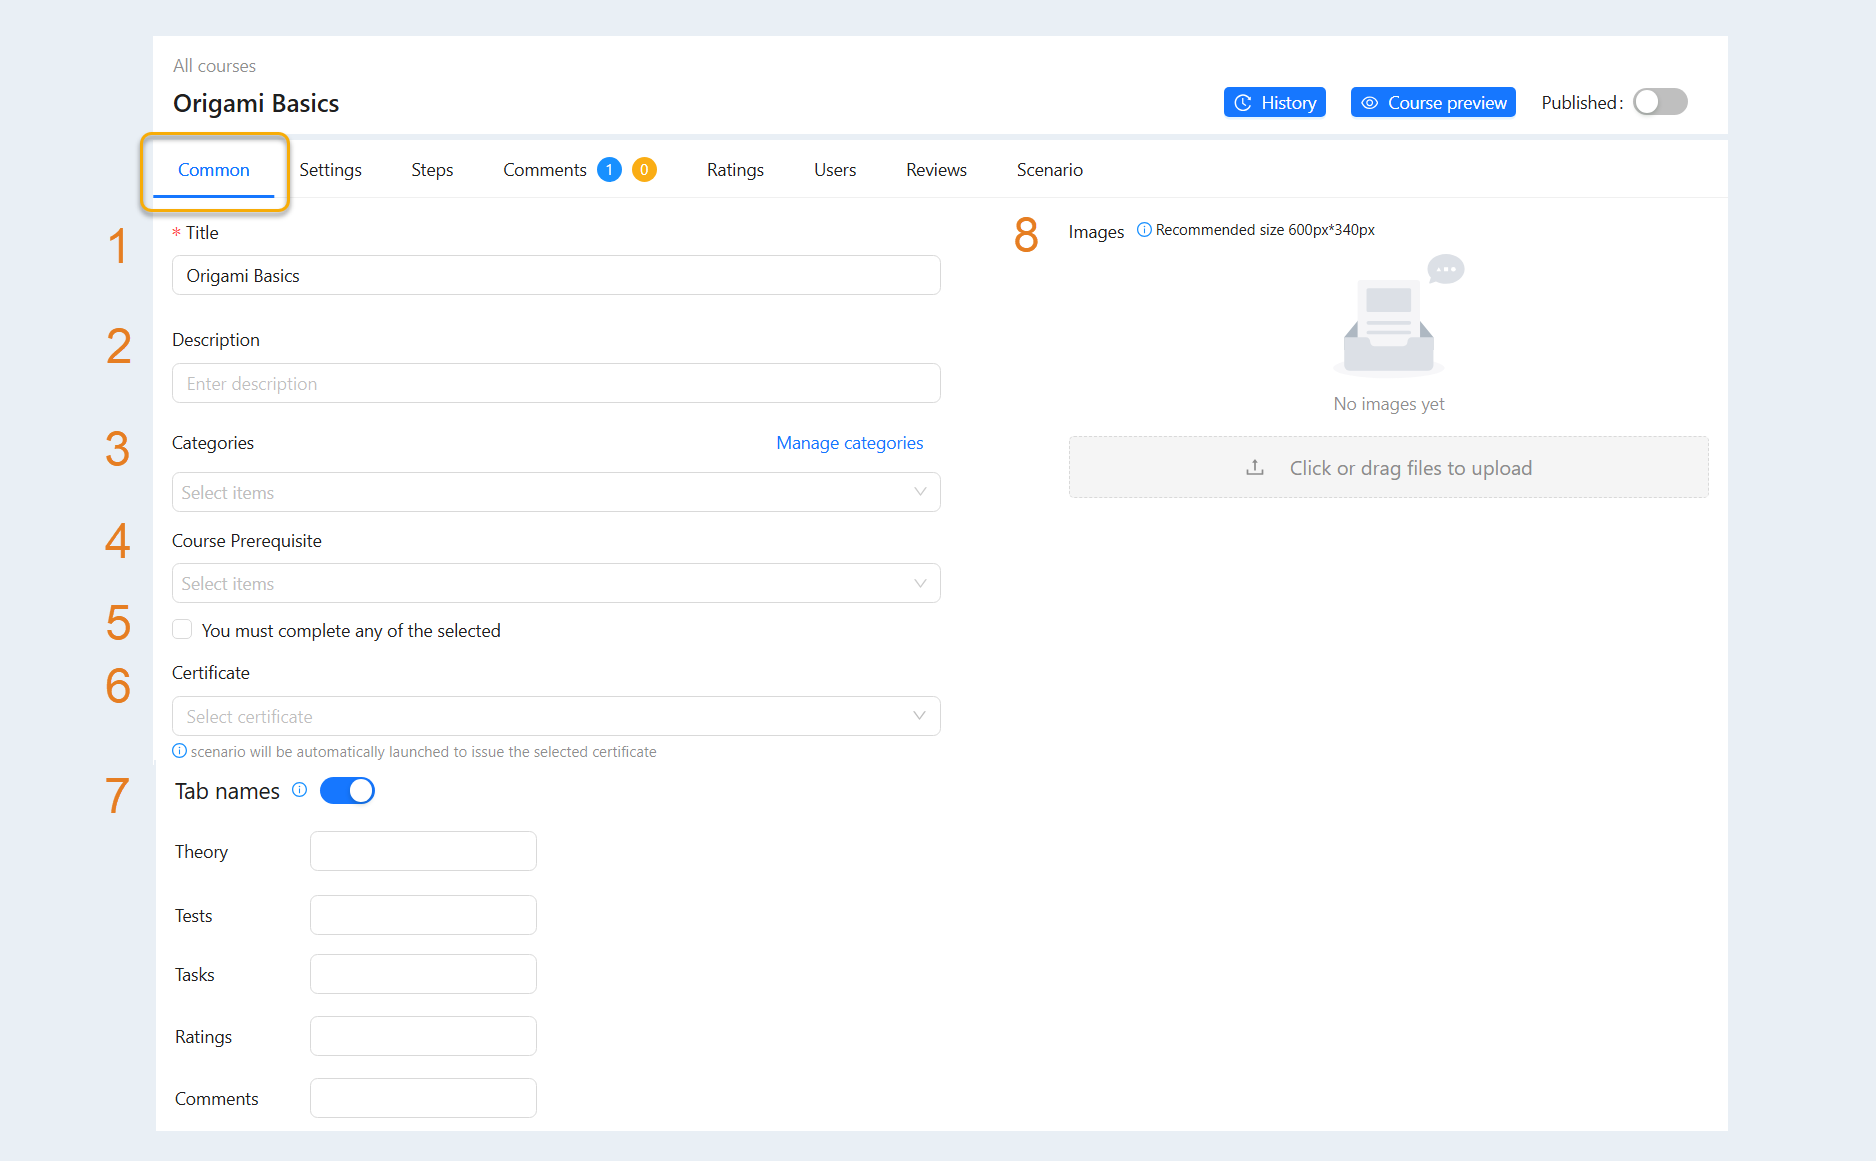
After making changes, click “Save” or “Discard Changes” in case you want to discard the changes.
Settings
In this section, you configure access to the course for users. A detailed description of each setting is later in this article.
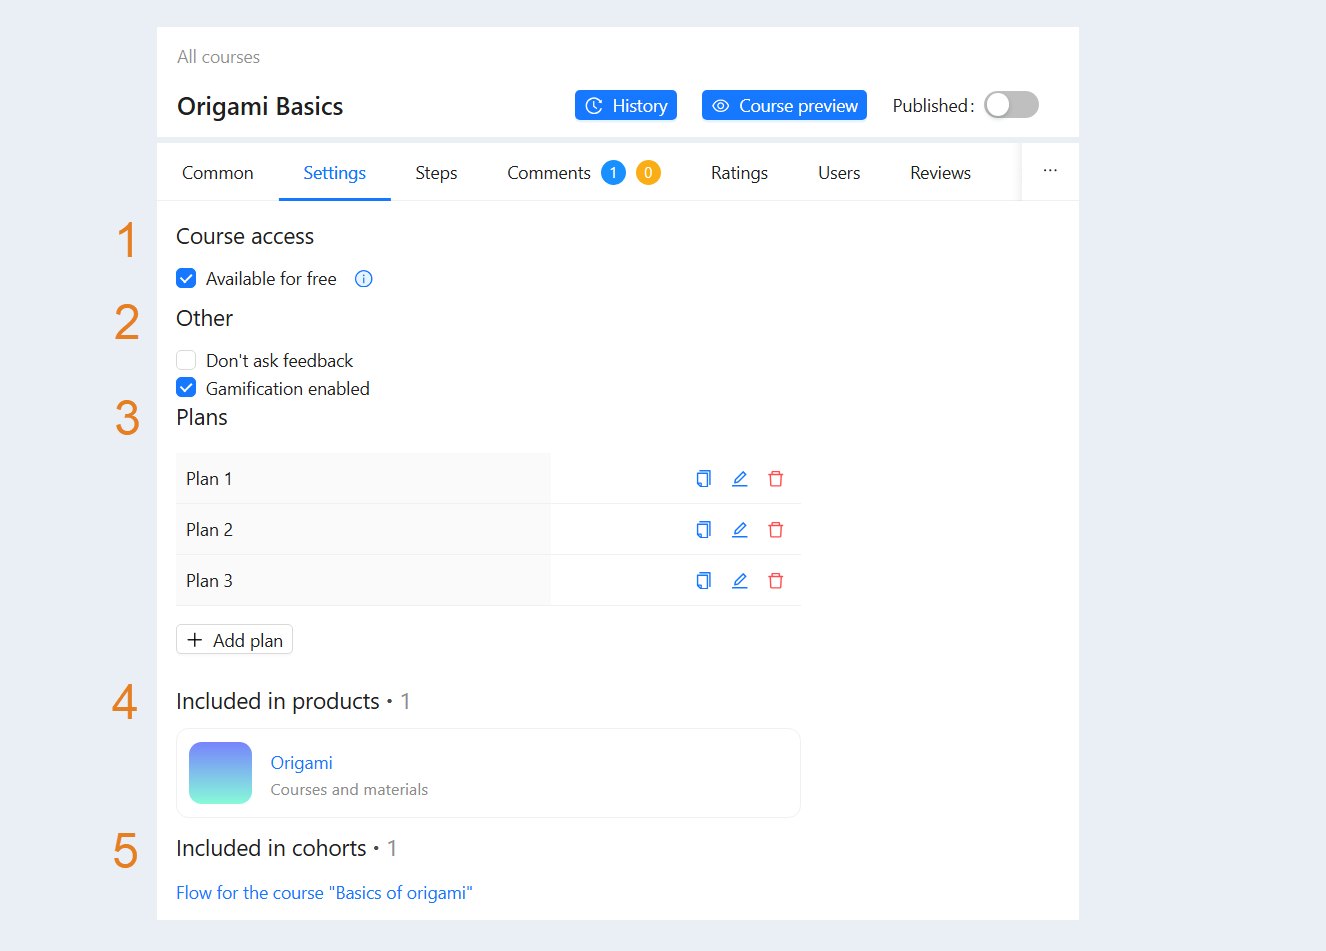
Course access
Available for free - this option opens the course for all registered users for free. If a paid course has free steps, then any registered user will be able to access free steps, even if this option is not selected.
If this option is not selected, then the course will be available only to those users who bought it.

Other
Don't ask feedback. If you check the box, the user will not be prompted to leave a review after completing the course. If you do not check the box, then each user will automatically be prompted to leave a review after the course.
Gamification enabled. Check the box so that users can earn achievements for mastering library materials. Uncheck the box if you do not want this course to participate in gamification.
Gamification is a tool that uses elements of games to enhance the educational experience of users. Gamification helps to stimulate users' interest in learning and keep their motivation at a high level. Game elements such as rewards and achievements create a sense of progress that can inspire users to keep learning and achieve new goals. For more information about gamification settings, read the article "Gamification".

Plans
A rate is a fixed length of study for one of your courses. One training course can have several plans that differ in the duration of training and the cost of the plan (the cost of the plan is set in the "Products" settings, read more in the article "Products and offers")
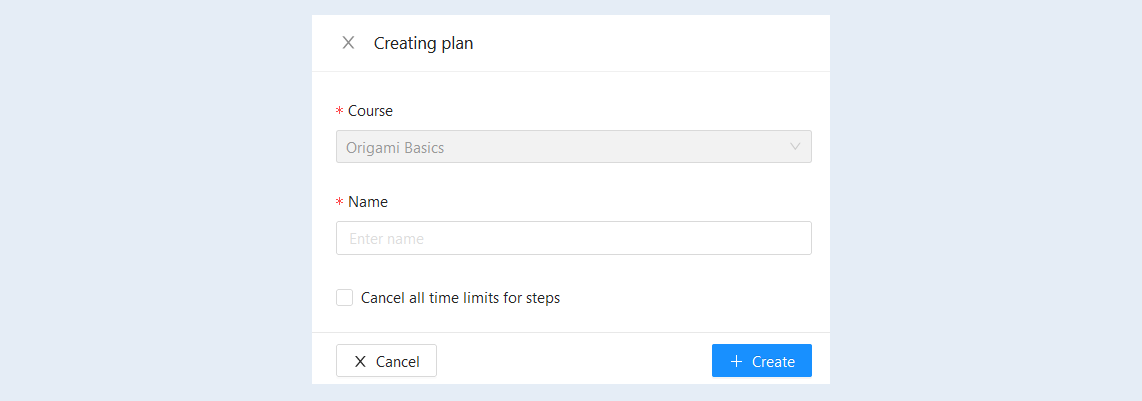
Click the "Add plan" button. You will see the “Creation plan” window.
You will not be able to make changes in the “Course” field. The course you are currently driving is automatically entered here.
Enter the “Name” of the plan. This is a required field.
Check the box "Cancel all time limits for steps" to cancel all time limits for steps for a separate tariff.
Click the “Save” button.
Now in the line “Plan” you have a list of available tariffs for users. On the right there are 3 buttons with which you can manage these plans: copy, edit and delete.

Included in products
Products are one or more combined courses or tariffs. In this section you can see which product this course is part of. Read more about how to create a product and add a course to it in the article "Products and offers".

Included in cohorts
A flow an event on the AXL platform that is tied to a specific date. In this section you can see which flow this course is part of. Read more about how to create a flow and add a course to it in the article "Flows".

Steps
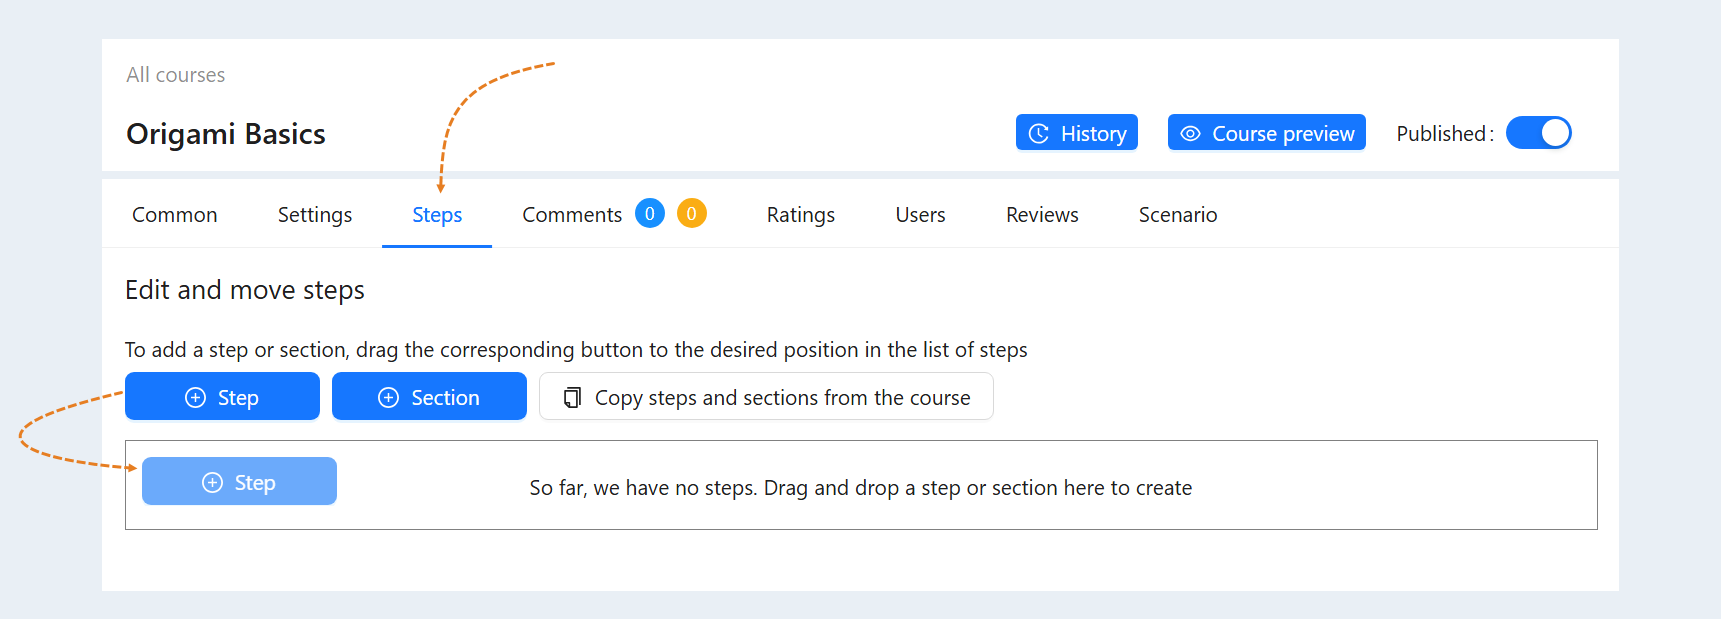
The Steps section is the course builder. Here you can create lessons - video, text, test, assignments. By dragging the "Step" element to the center of the field, you set their order. For example, first there is a video lesson, then a text description (article) and at the end you can add a block of questions - test tasks to control the acquired knowledge.
For more information on how to add lessons to a course, see the "Course Steps" article.
Comments
This section provides user comments about the course or each step of the course. Read more in the article "Comments".
Ratings
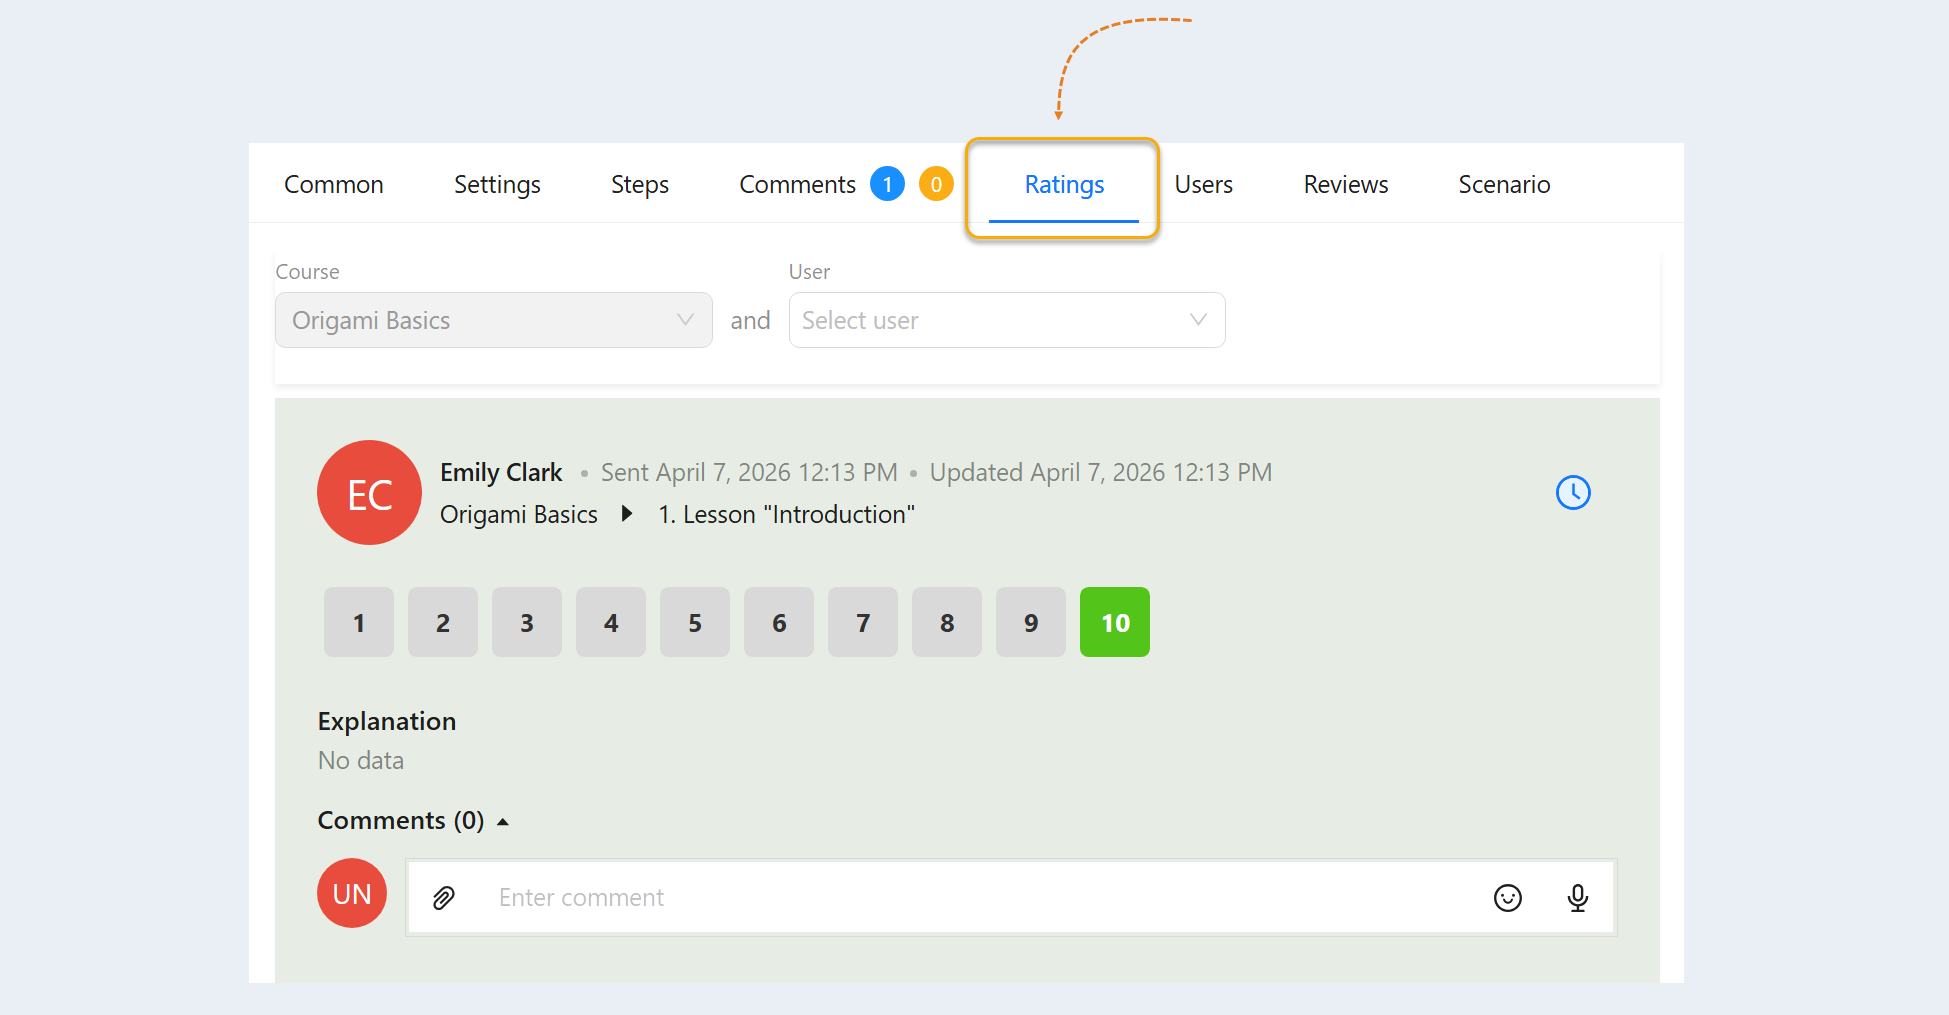
The "Ratings" section is the assessment of a course or step in a course on a scale of 1 to 10 from the users in the course. Users can rate a course or step in a course on a scale of ten, and comment on the course or steps. Read more about grades in the article “Ratings”.
Users
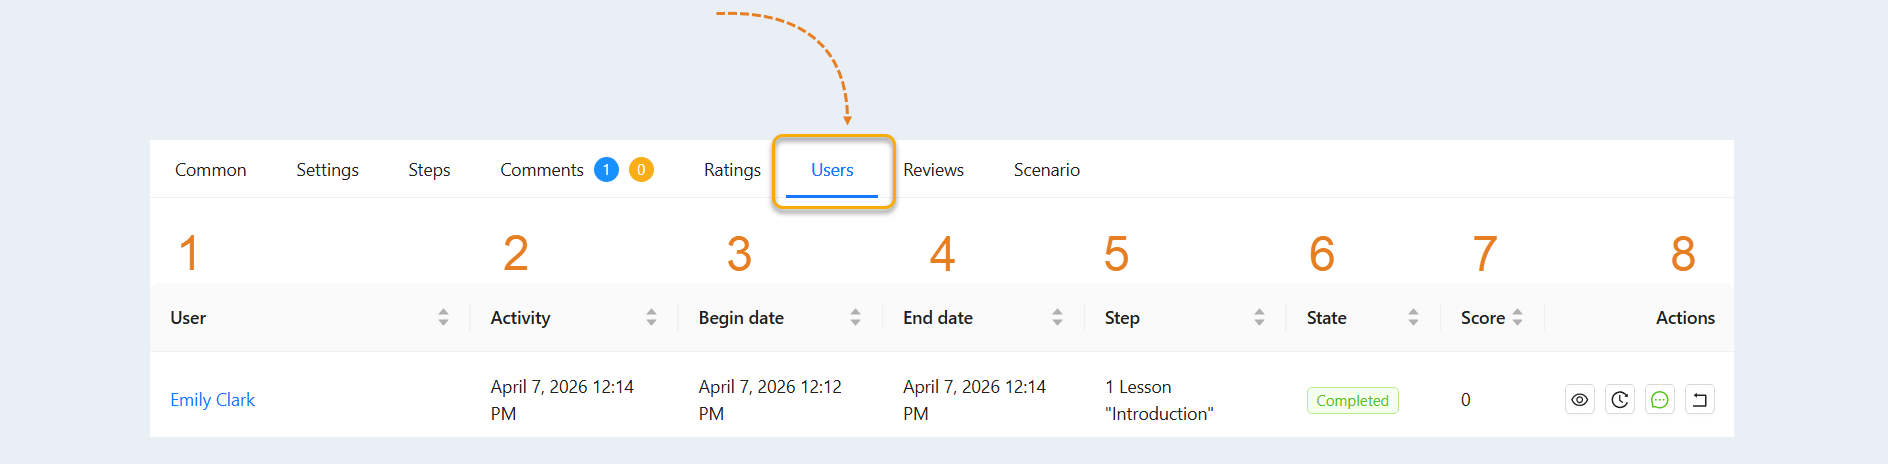
In this section you can see information about the users of the course:
- User. Name and surname of the user. Click on a user's name to view detailed information about this user in the CRM - Contacts section.
- Activity. Date and time of the last visit to the course.
Begin date.
End date (date of completion of the last step).
- Step the user is in.
State (course completed or not).
Score. The number of points awarded for completing assignments and tests will be displayed here.
- Actions. There are four actions available to you here:
- View on behalf of the user. you can go to the website of the membership portal and watch the course of study inside the user's personal account, on his behalf.
History. in a separate window you can see a detailed history of the user's course (steps, date, time, grade, comments.
Feedback. here you can see the feedback about the course that the user has left.
Completion of the course. you can cancel the completion of the course if you see fit.
- View on behalf of the user. you can go to the website of the membership portal and watch the course of study inside the user's personal account, on his behalf.
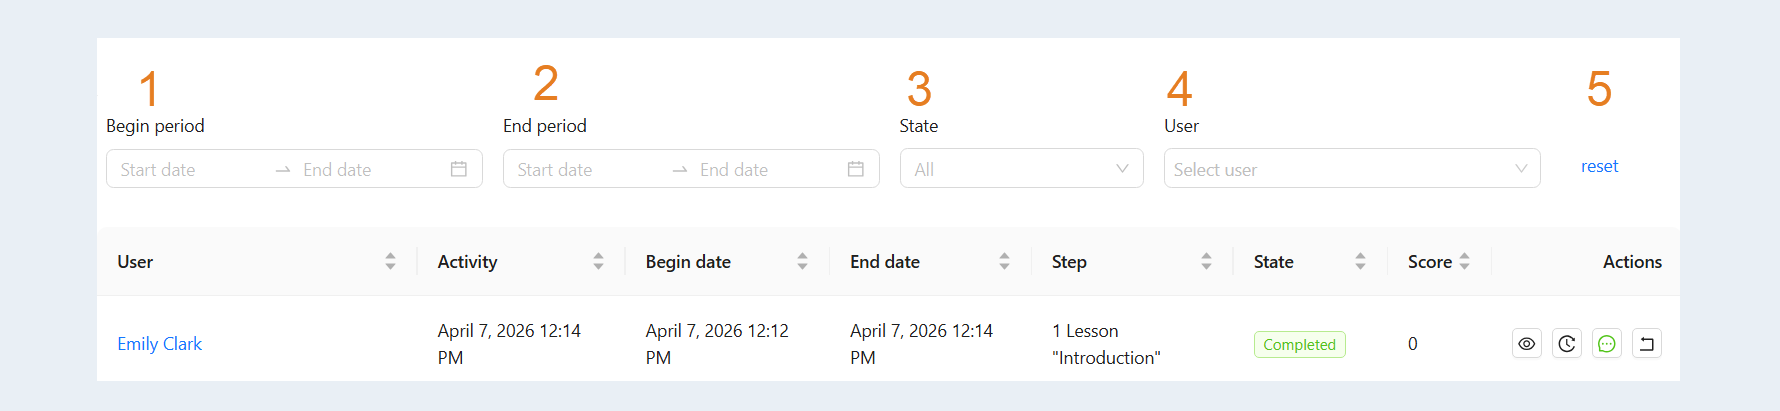
Also in this section you have access to search strings to quickly find the necessary information:
- The period of the beginning of training. Set the start period for training.
- The period of graduation. Set the graduation period.
- Learning state (not started, active, completed). Select a state from the list.
- User. Select a user from your contact list.
- The “Reset” button cancels all filters.
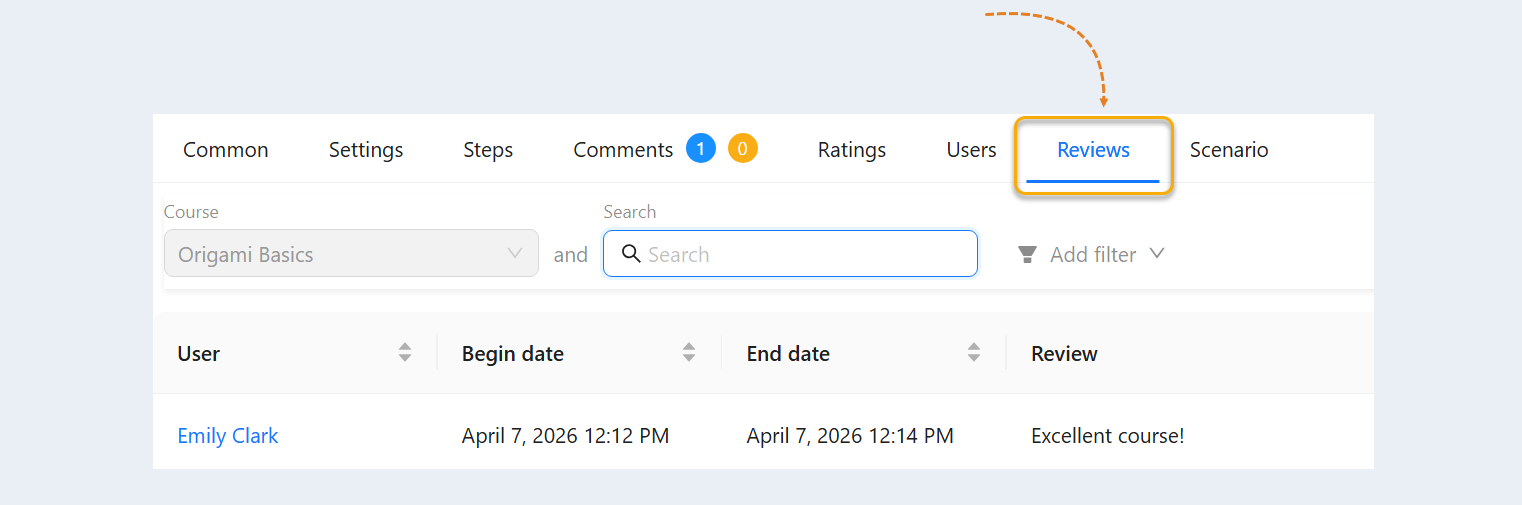
Reviews
After completing the course, the user will be asked to leave feedback about the course. You can see user reviews in the "Reviews" tab.
Scenario
In this section, you can configure the scenarios of interaction between your account and users. For details on how to create scripts, see the article “Course scenario”.