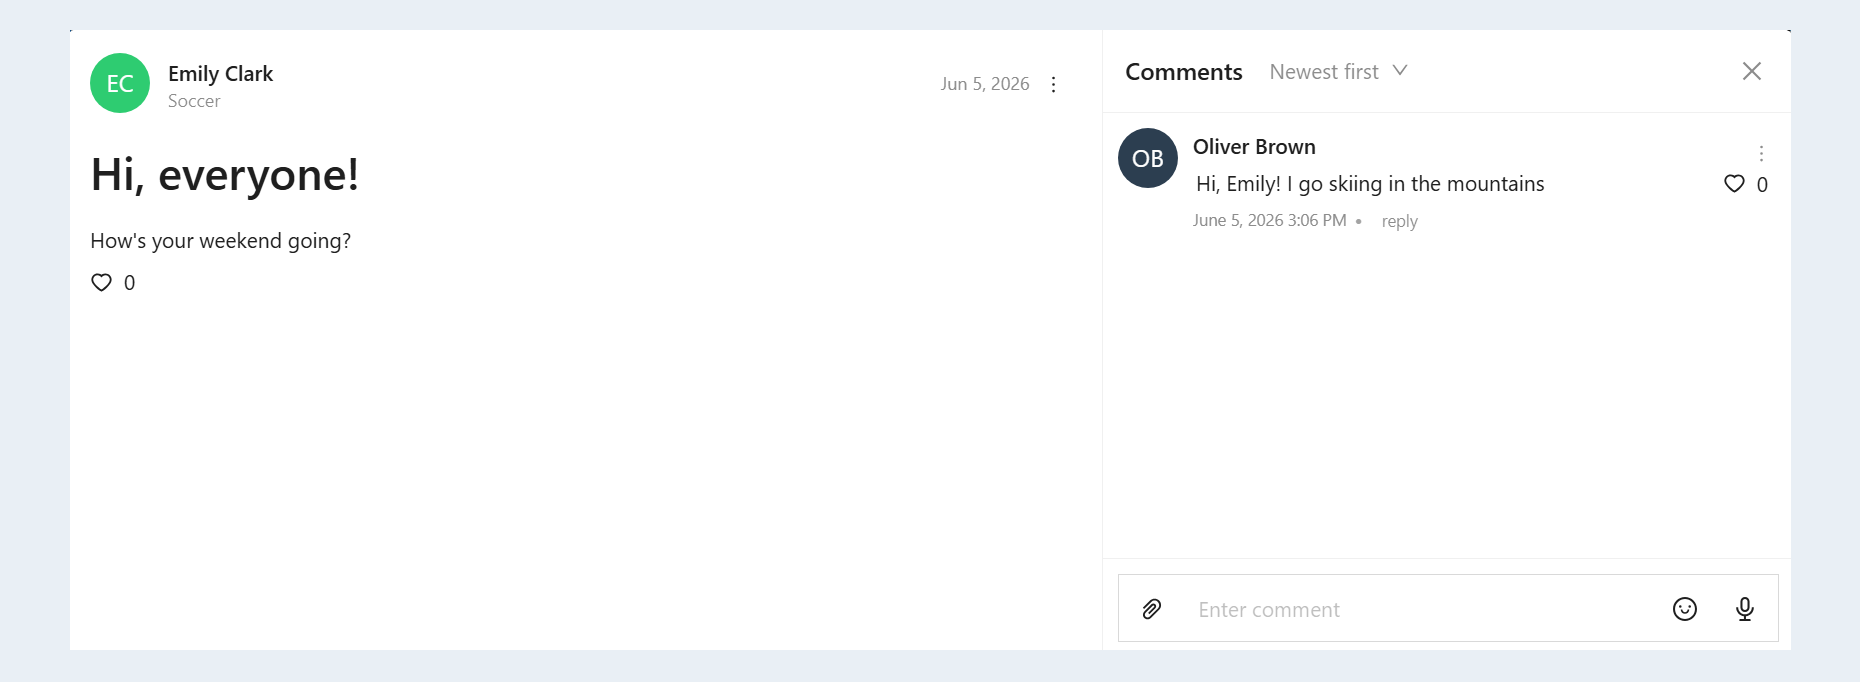
The Community section is a centralized space for communication, content publishing, and user interaction within the AXL platform. It allows you to create fully functional communities without relying on third-party services, bringing learning, communication, and member motivation together in one place.
The main purpose of this section is to provide managed interaction between participants. With communities, you can organize discussions, categorize content by topics, configure access permissions, automate actions, and sustain user activity.
Click on a section below to jump directly to its description:
How to Create a Space/Section
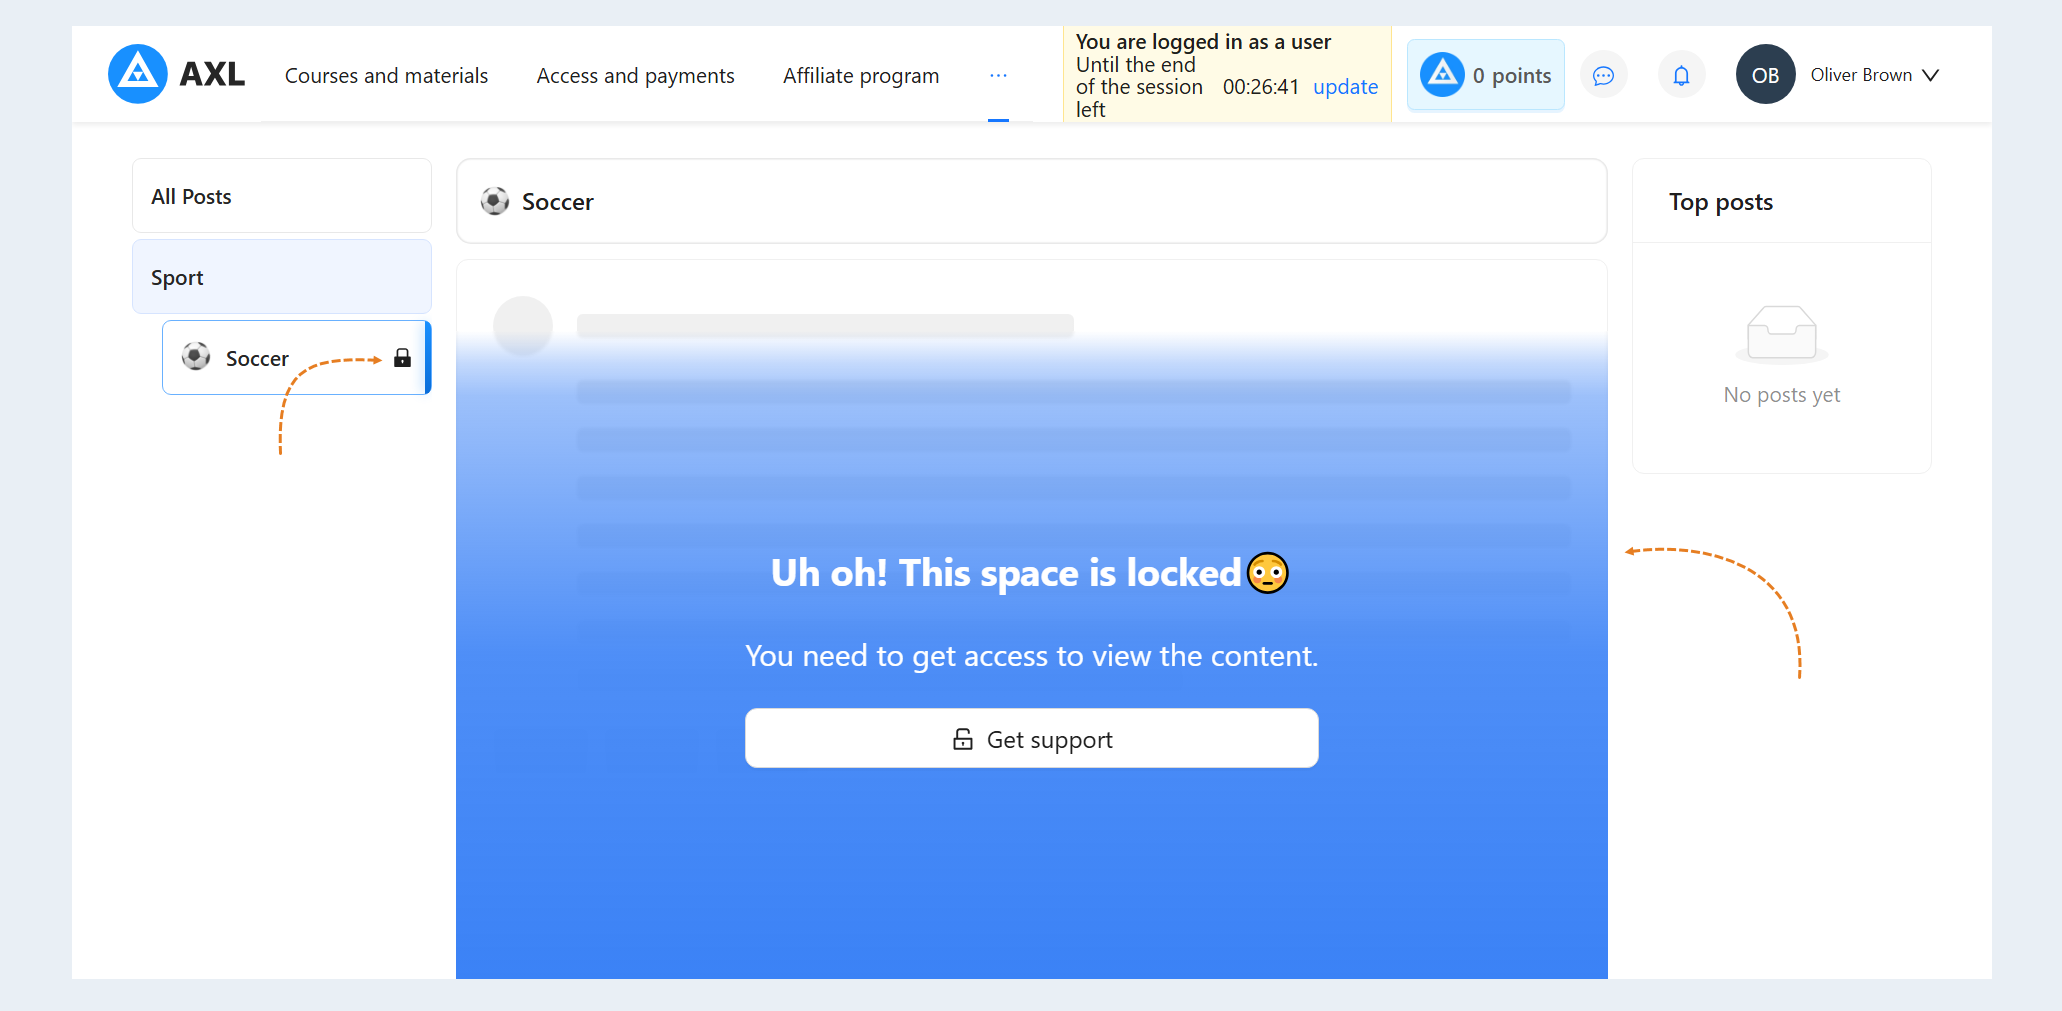
A community consists of spaces. A Space is a dedicated area for hosting content and user communication. Spaces can be grouped into Sections. Sections are used for convenient navigation and logical grouping of spaces within the community. The number of spaces and sections is unlimited. Private spaces are displayed with a lock icon. When trying to enter a private space, the user can be redirected to purchase access.
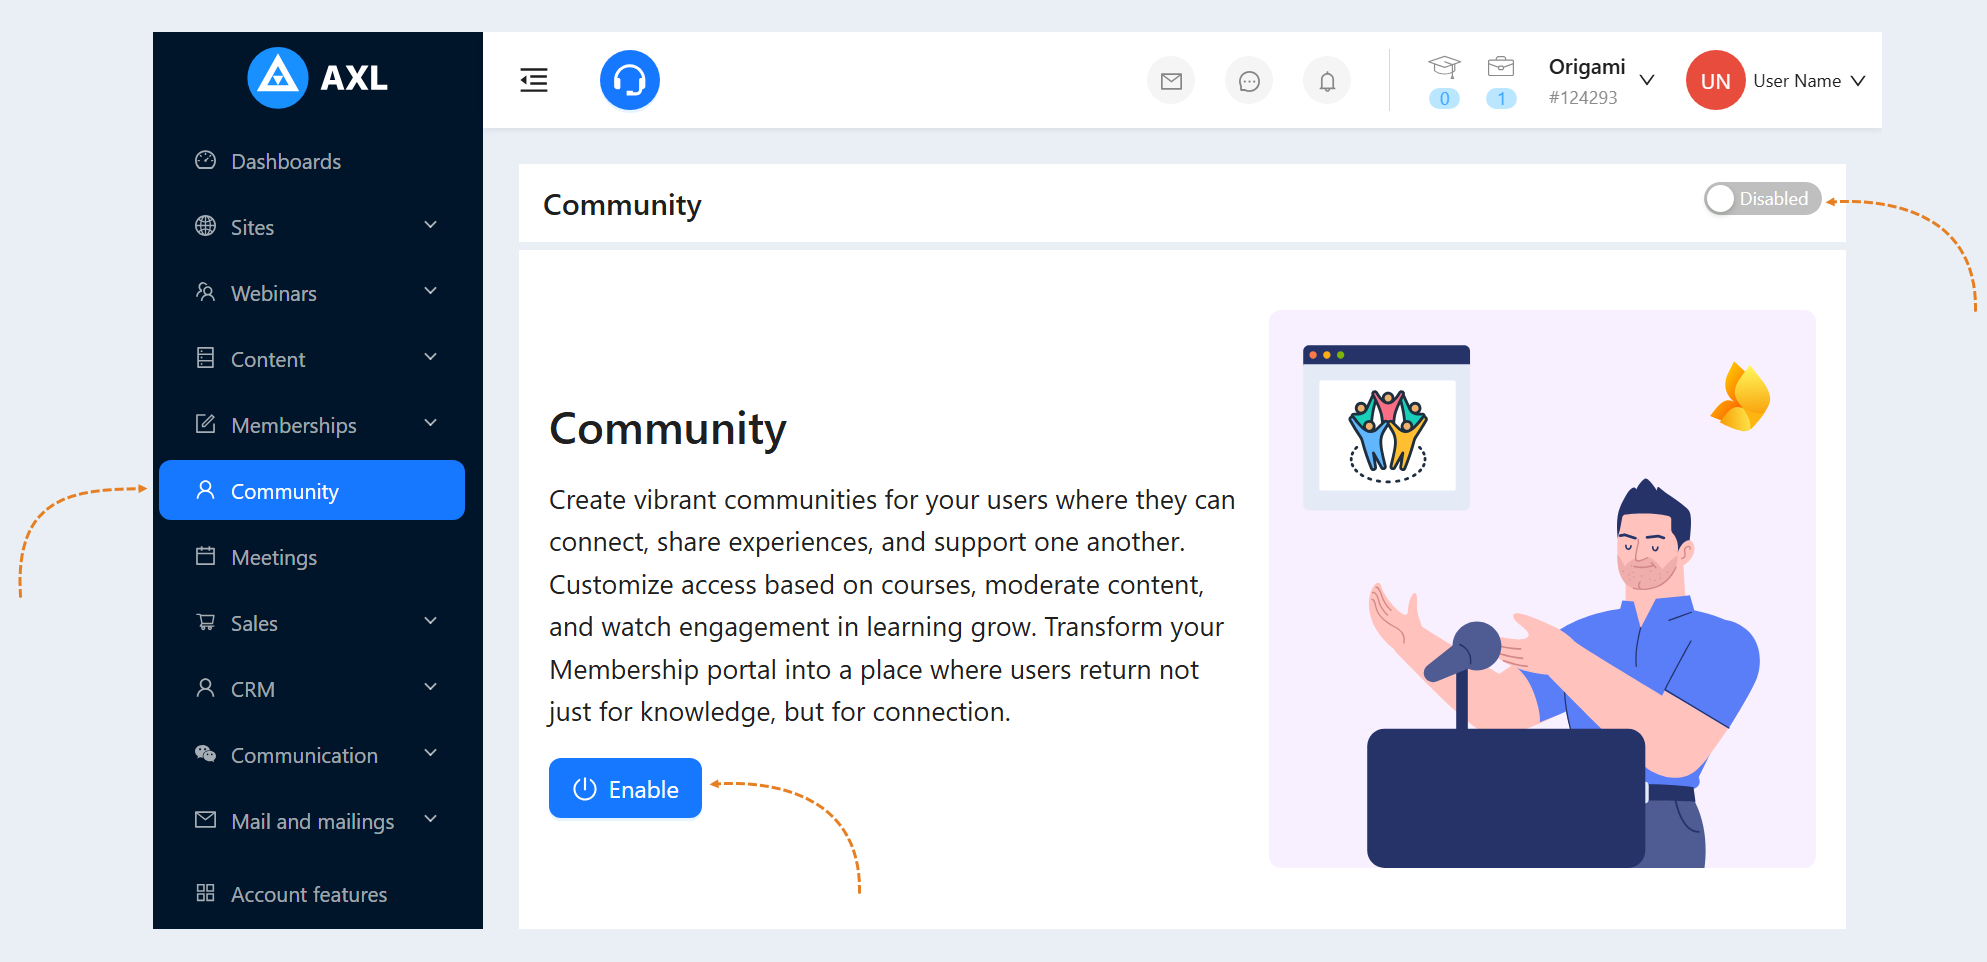
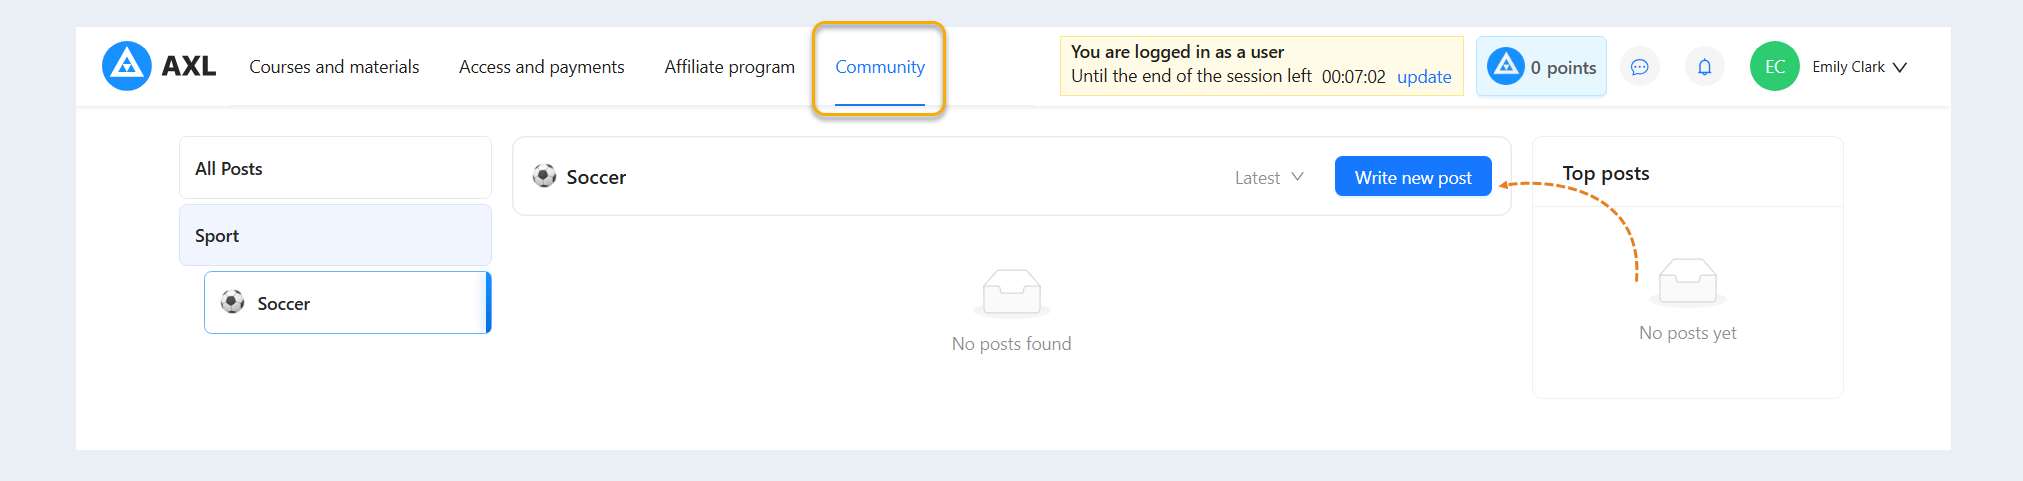
Go to the “Community” section and enable it.
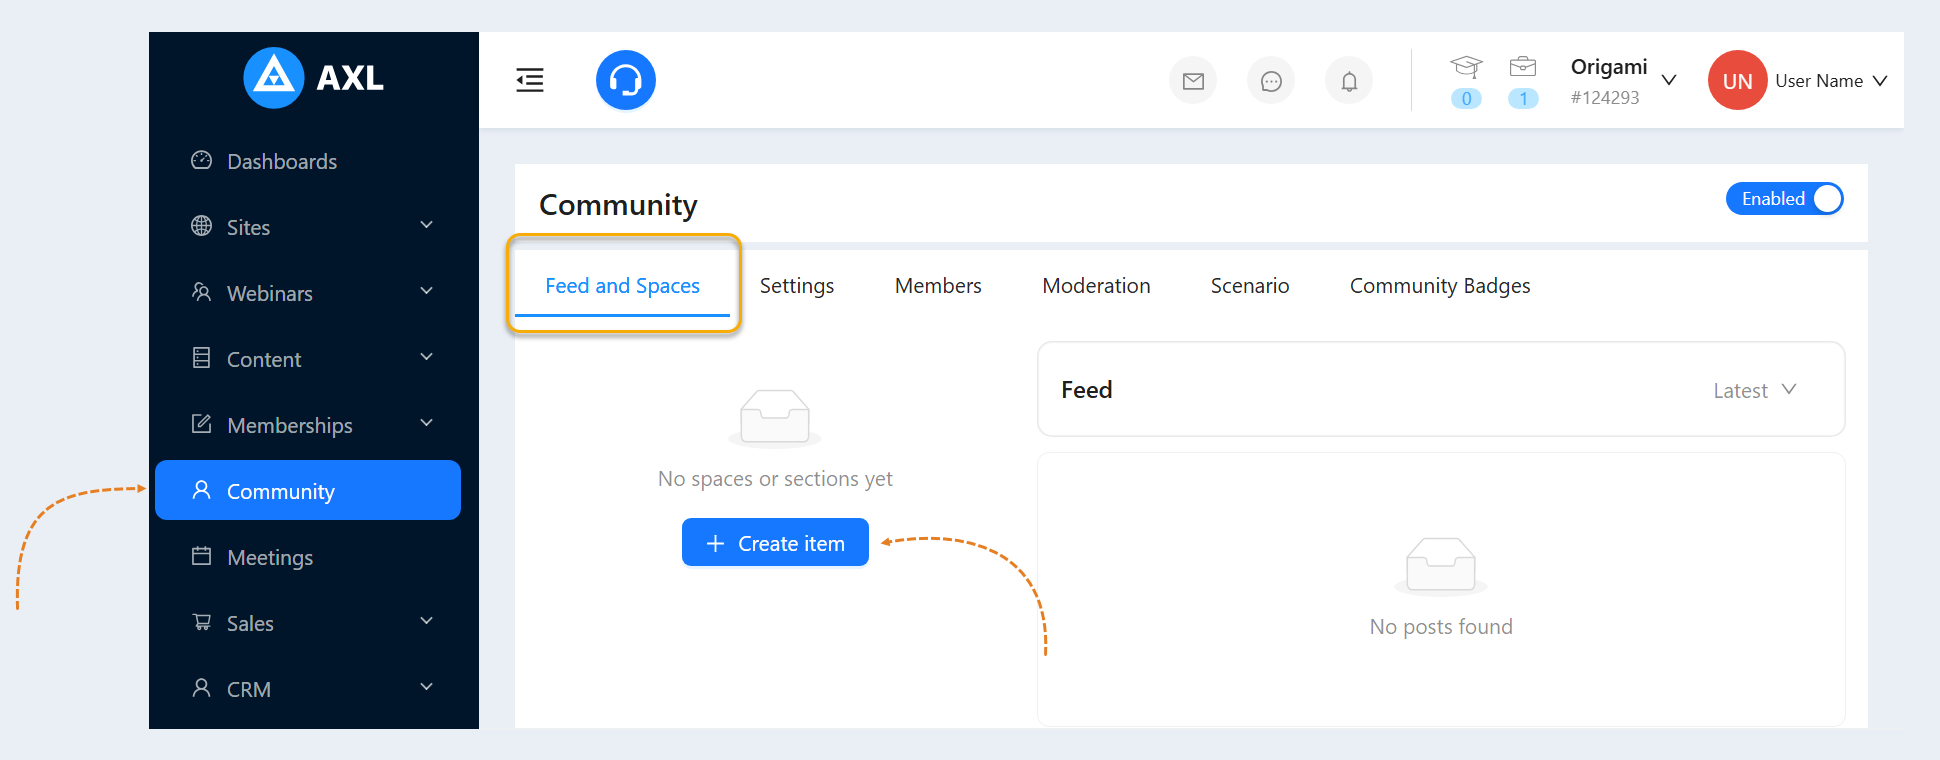
Open the Feed and Spaces tab. Click the Create element button.
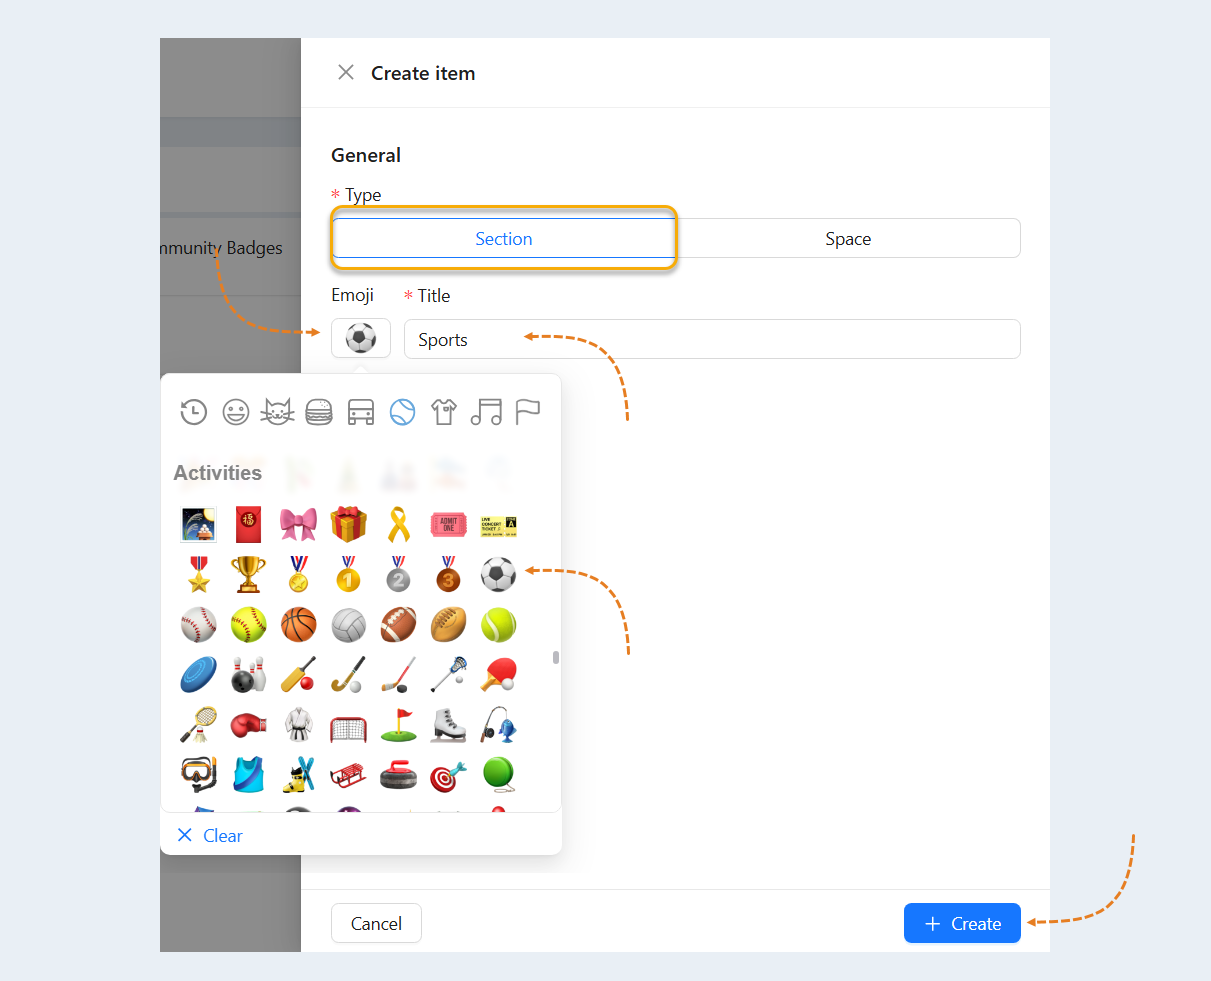
To create a Section, go to the Section tab, enter a name, optionally choose an emoji, and click the Create button.
To create a Space, go to the Space tab and fill in the following fields:
- Emoji. You can choose an emoji for the space or leave the field blank.
- Title. Enter a name for your space.
- Section. Select the section in which the space will be created.
- URL. Enter the page address in the field on the right. Once entered, the full URL of the page will be displayed.
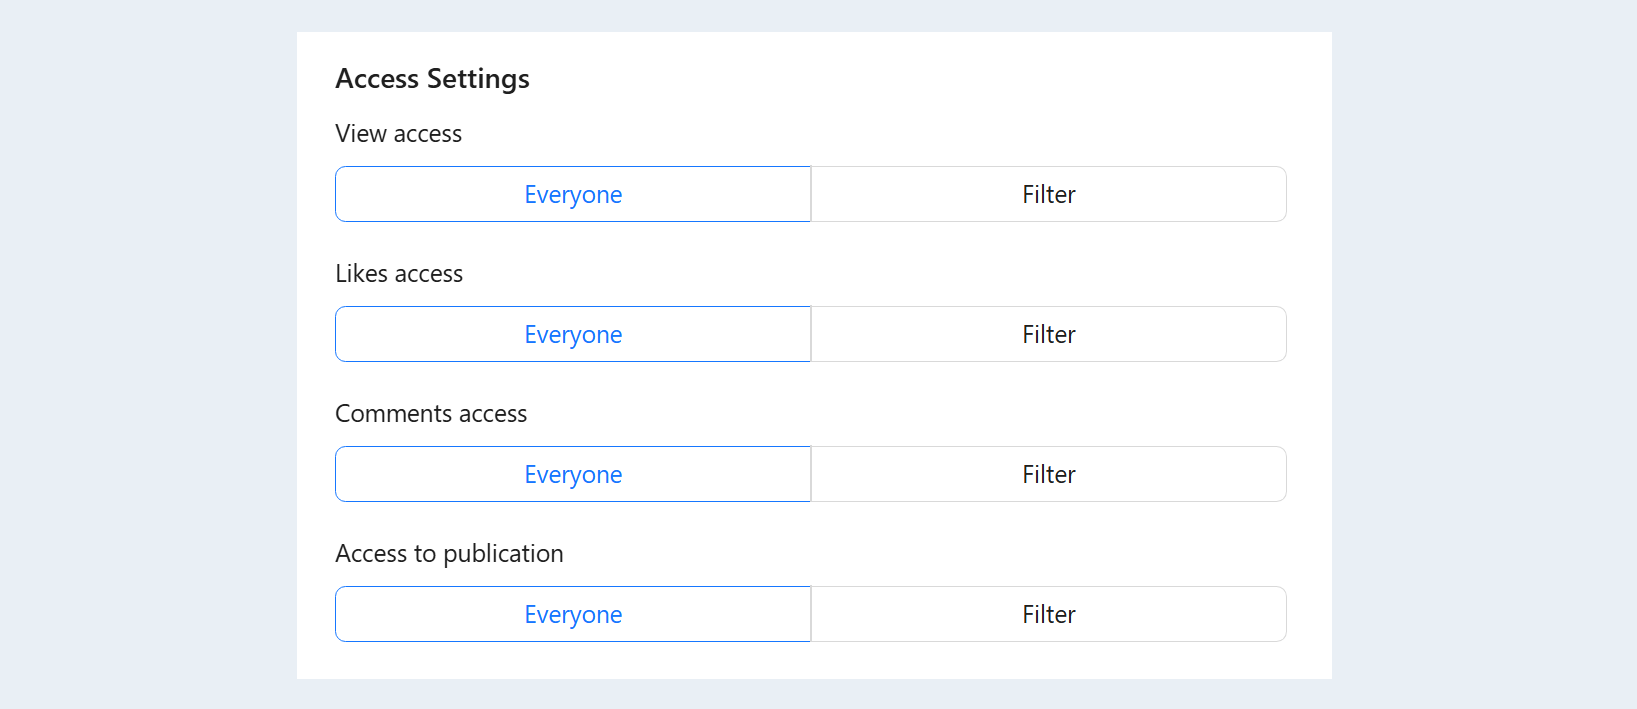
- Access Settings. You can choose who will have access to the following information—All users or Selected by filter:
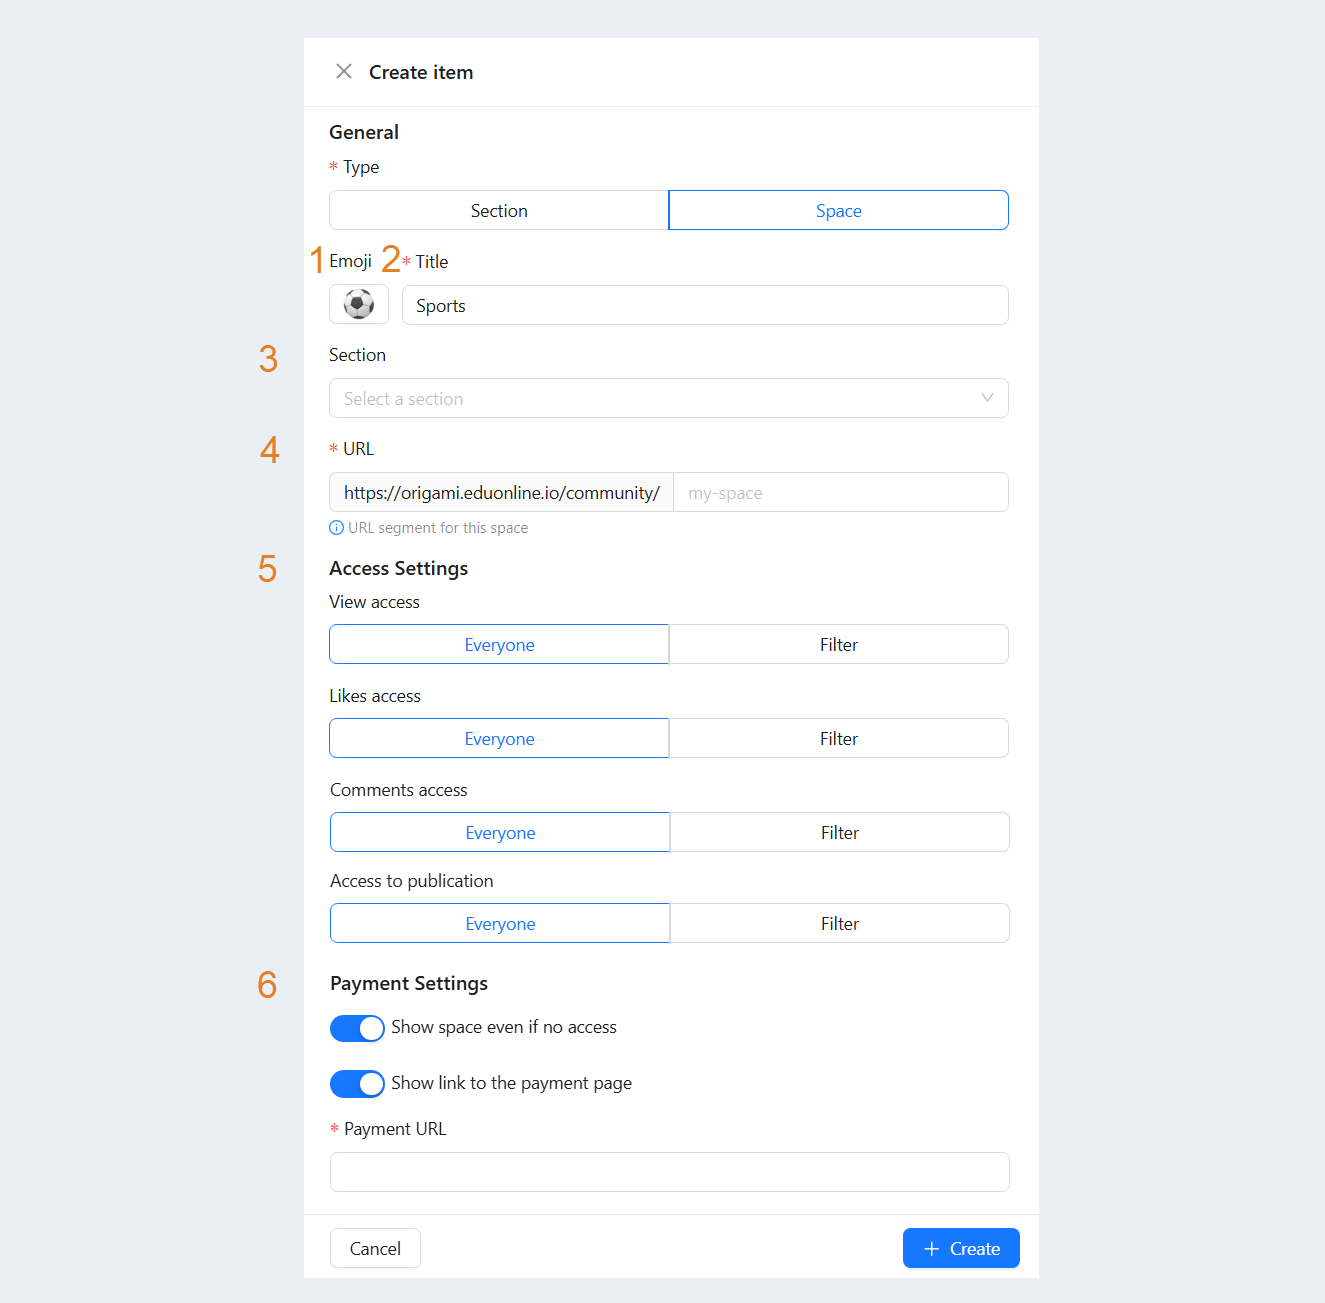
6. Payment Settings:
Show space even if no access - for users without access to the space, it will still be visible in the list but displayed as a closed space with a lock icon.
Show link to the payment page - you can add a link to purchase access to a closed space. Inside the space, the user will see a Get Access button that redirects them to the payment page.
Community Feed
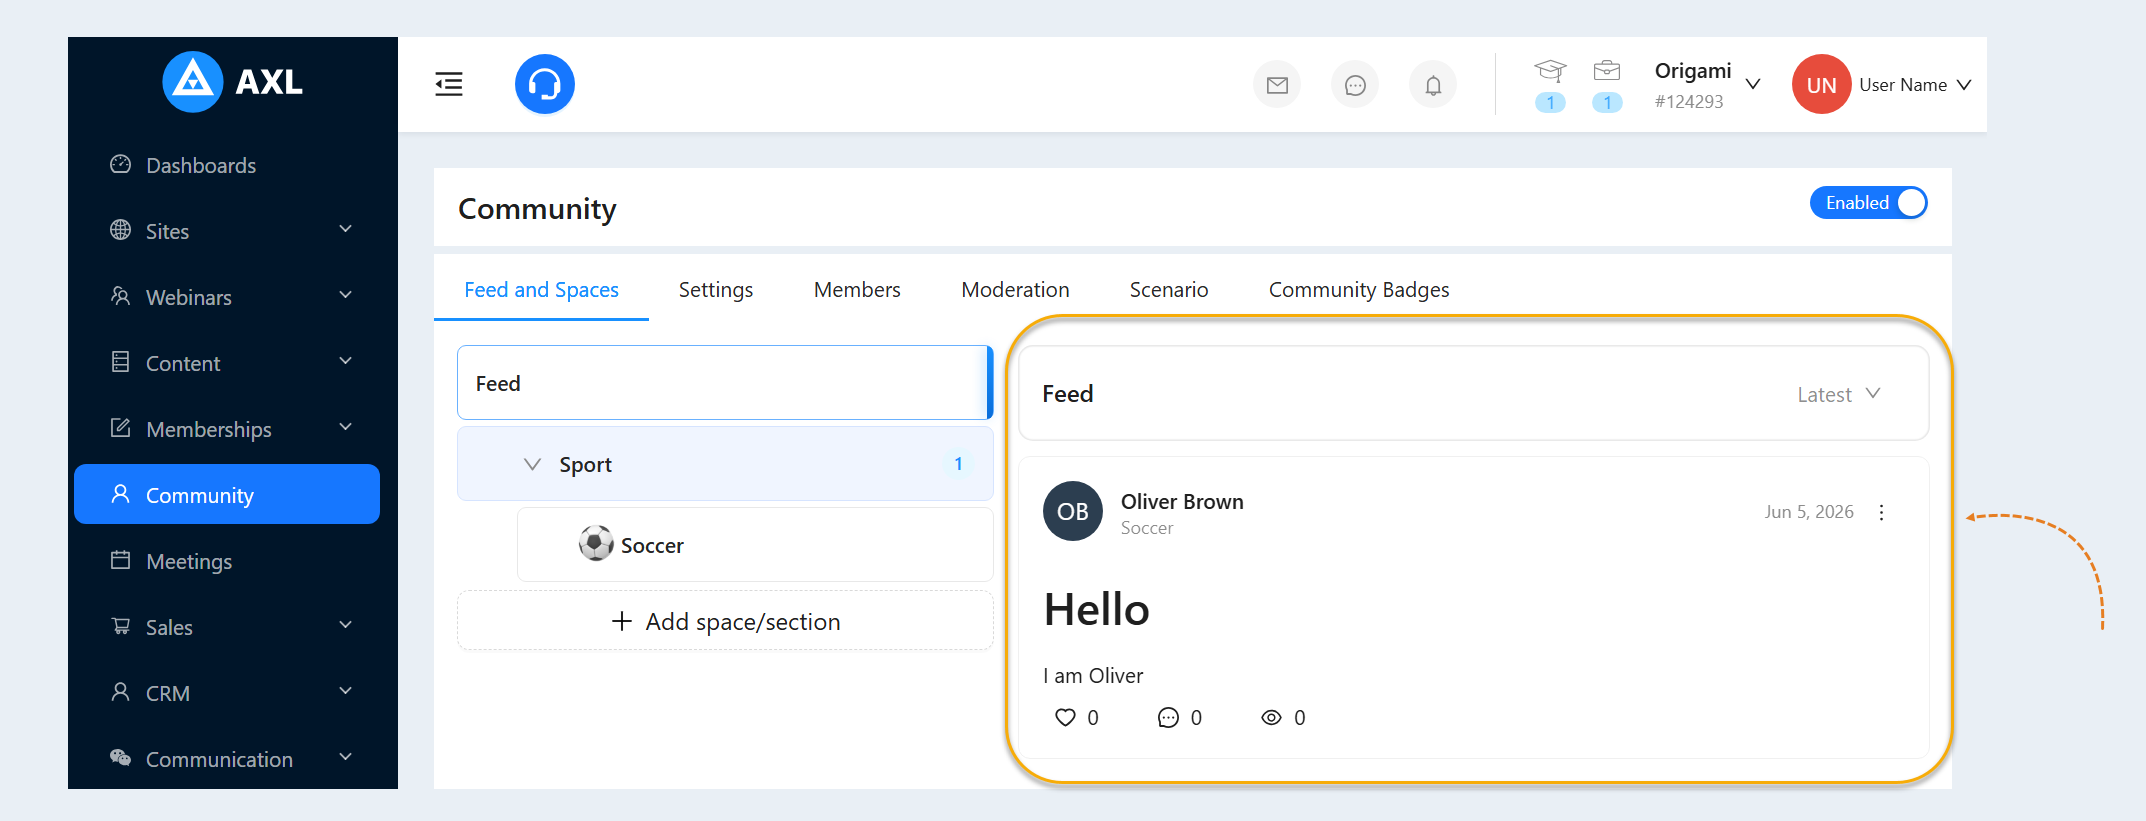
The Community Feed is a chronologically ordered stream of publications within the community. The feed displays all member posts, including text, images, audio, and video. Users can browse posts, leave comments, and add likes. The feed provides a centralized overview of activity within the community, allowing everyone to see new messages and discussions in one place.
The feed can be sorted by three parameters:
- Latest. Posts are displayed in the order they were created, from newest to oldest.
- Most Liked. Posts are sorted by the number of likes received, from highest to lowest.
- Most Commented. Posts with the highest number of comments are displayed at the top of the list.
Settings
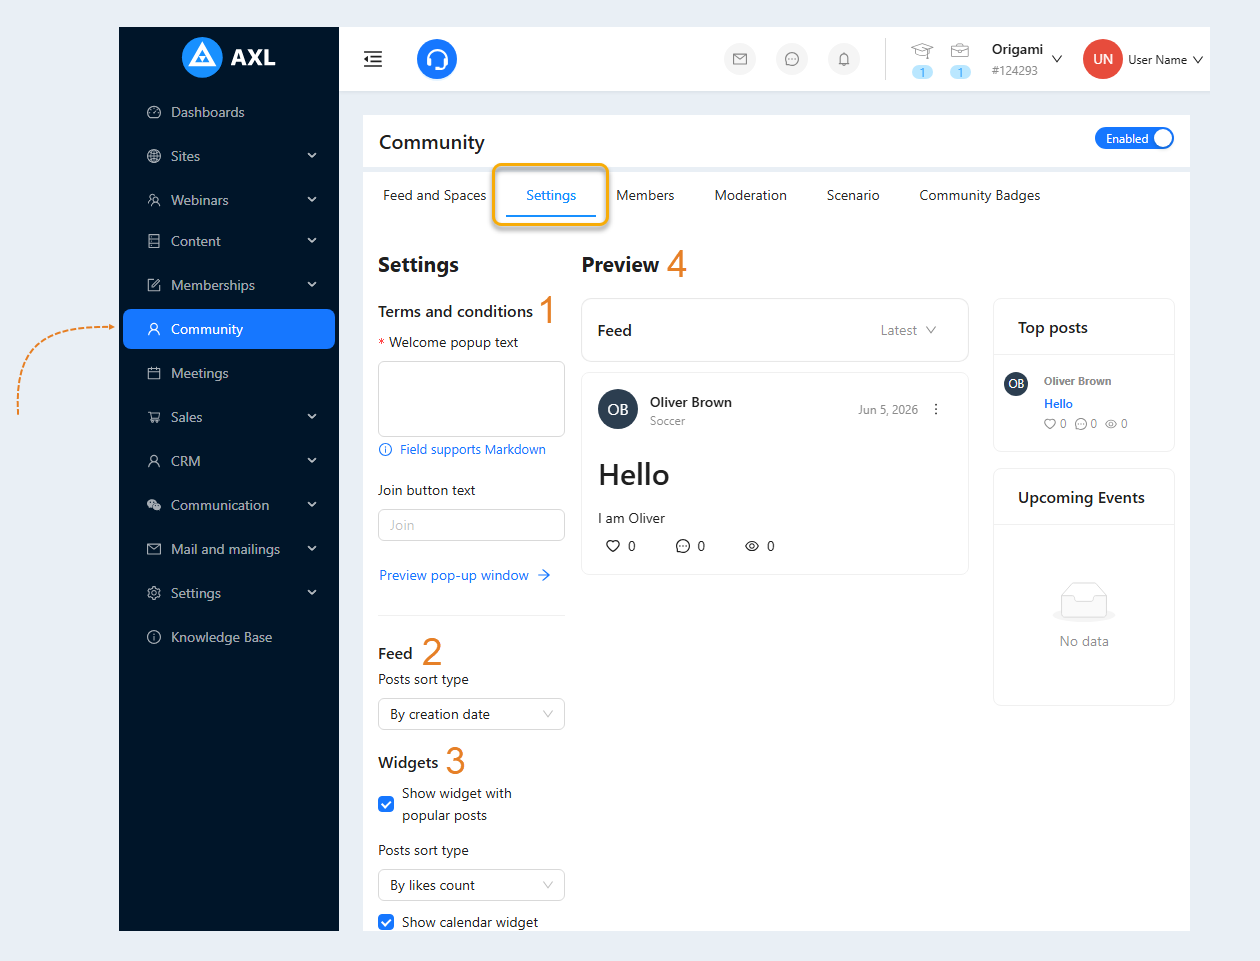
Go to the Community section and open the Settings tab.
Here, you will find the following configuration fields:
- Terms and conditions. Customize the welcome pop-up text displayed when a user enters the community.
- Join button text. Set the text for the action button inside the welcome pop-up window.
- Pop-up preview window. Open a preview to see how the user agreement pop-up looks. - Feed. Set the default sorting for posts in the feed by creation date, number of likes, or number of comments. Sorting by date displays the most recent posts, sorting by likes shows the most popular posts, and sorting by comments highlights the most discussed topics.
- Widgets. Here you can publish and remove sidebar widgets (such as popular posts and a calendar), as well as sort widget posts by creation date, comments, or likes.
- Preview. View exactly how the feed will look inside the user's personal account dashboard.
Members
Go to the Community section and open the Members tab.
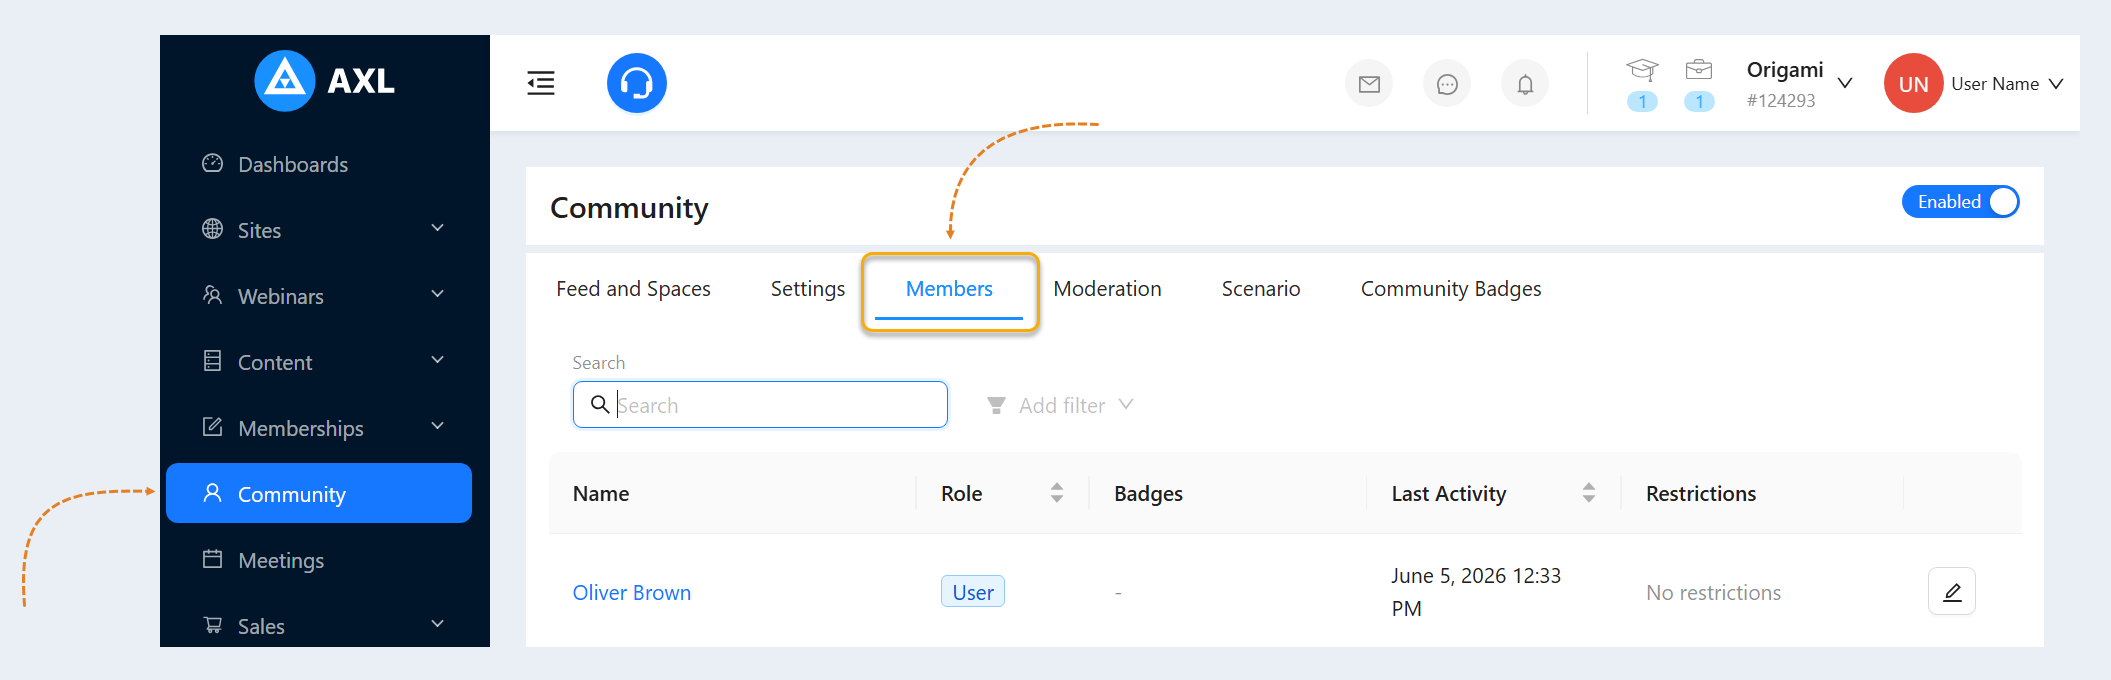
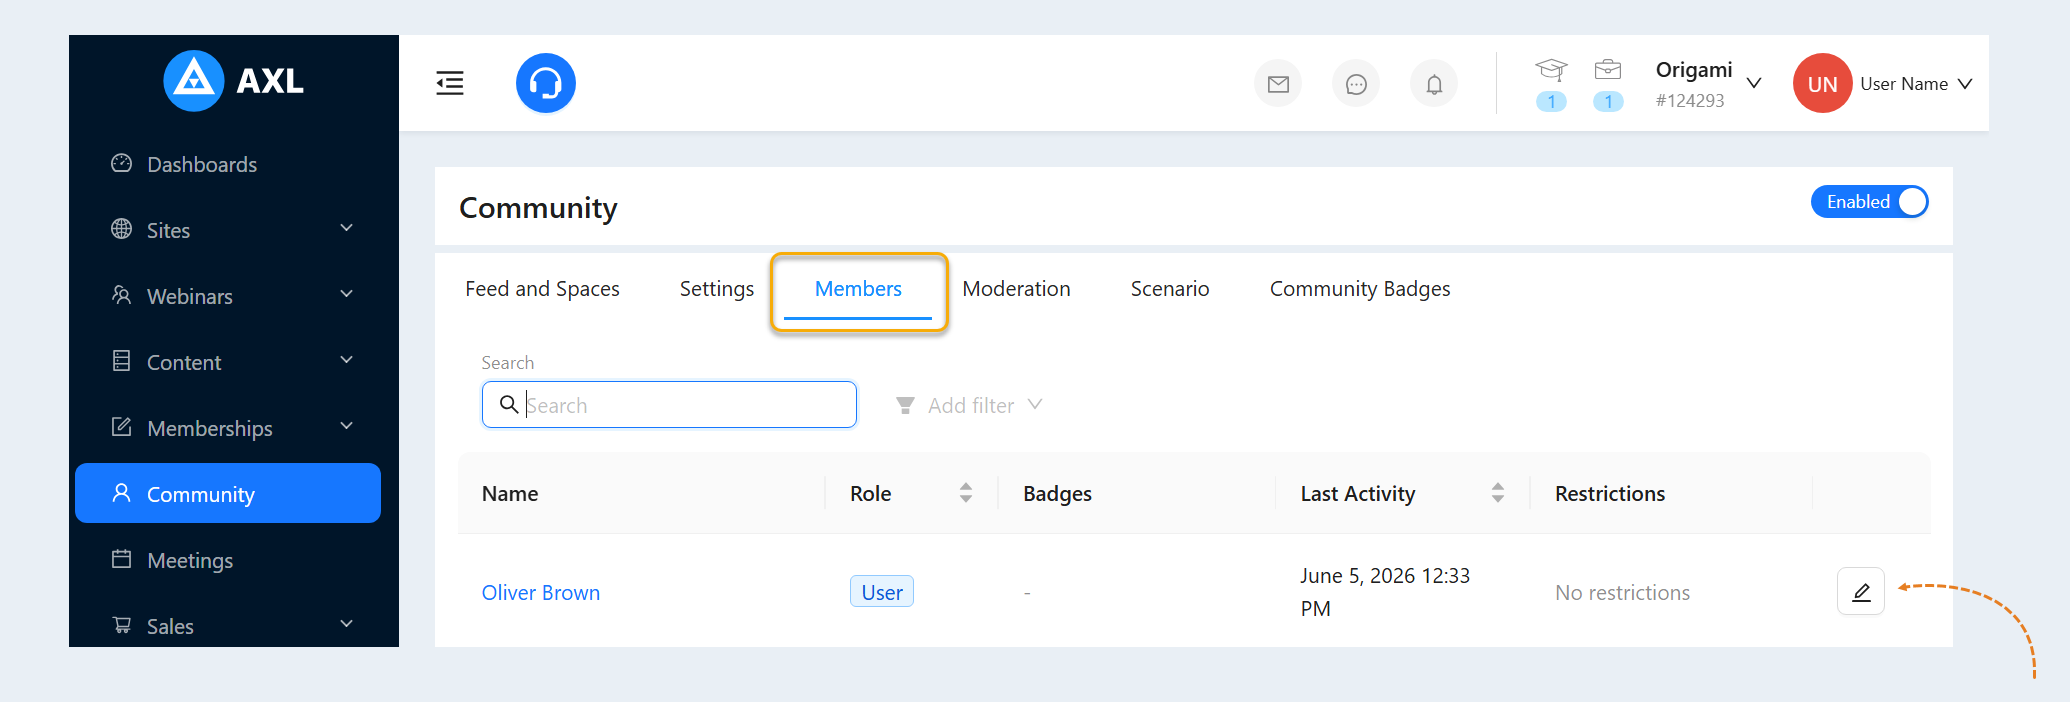
Next, click the “Edit” button.
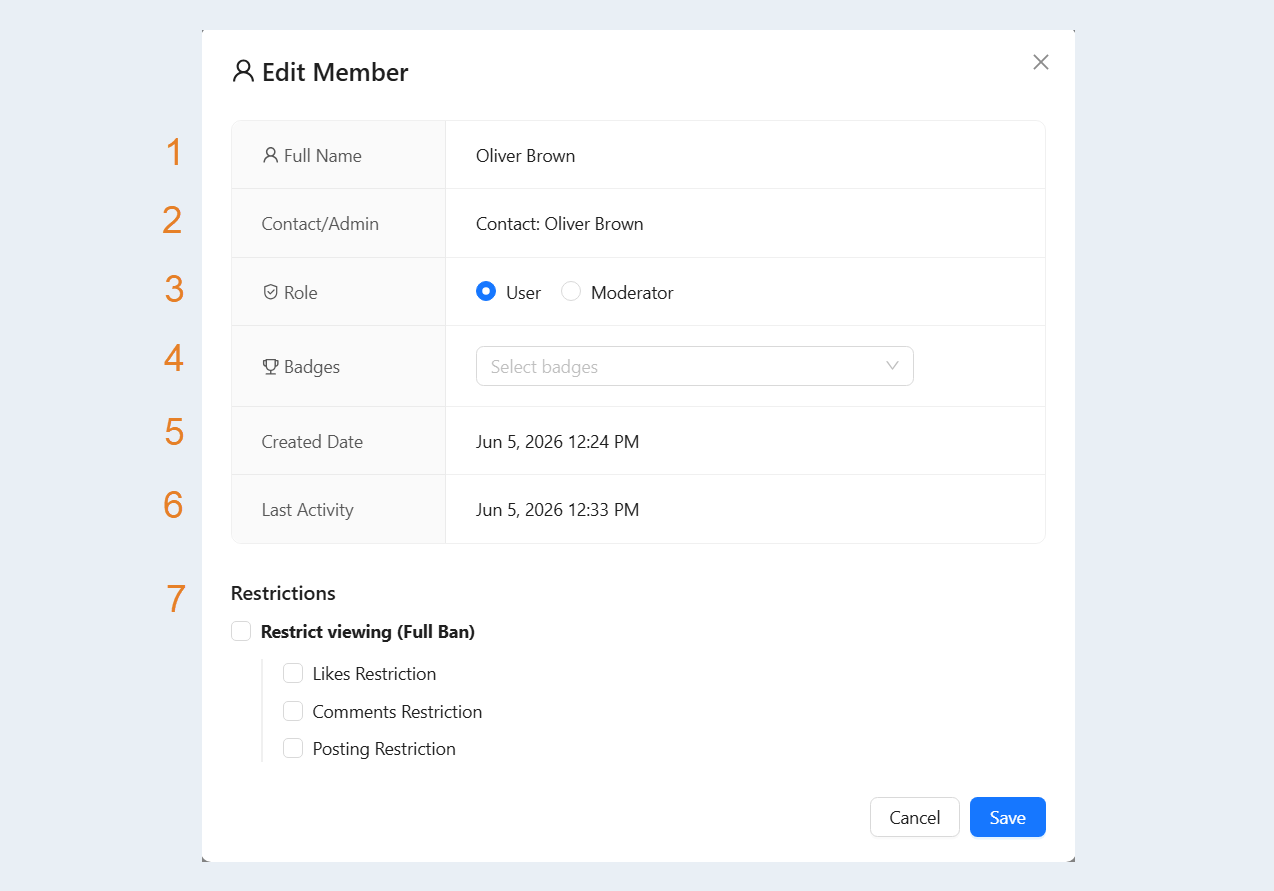
The following fields will be available in the window that opens:
- Full Name. The member's full name.
- Contact/Admin. Indicates whether the member is a standard contact or an administrator.
- Role. The member's specific role (e.g., user or moderator).
- Badges. A field to view, assign, or remove badges for the user.
- Created Date. The date and time of the user's very first login to the community.
- Last Activity. The date and time of the user's most recent interaction within the community.
- Restrictions. You can restrict specific actions for the user, such as liking, commenting, or publishing posts.
Moderation
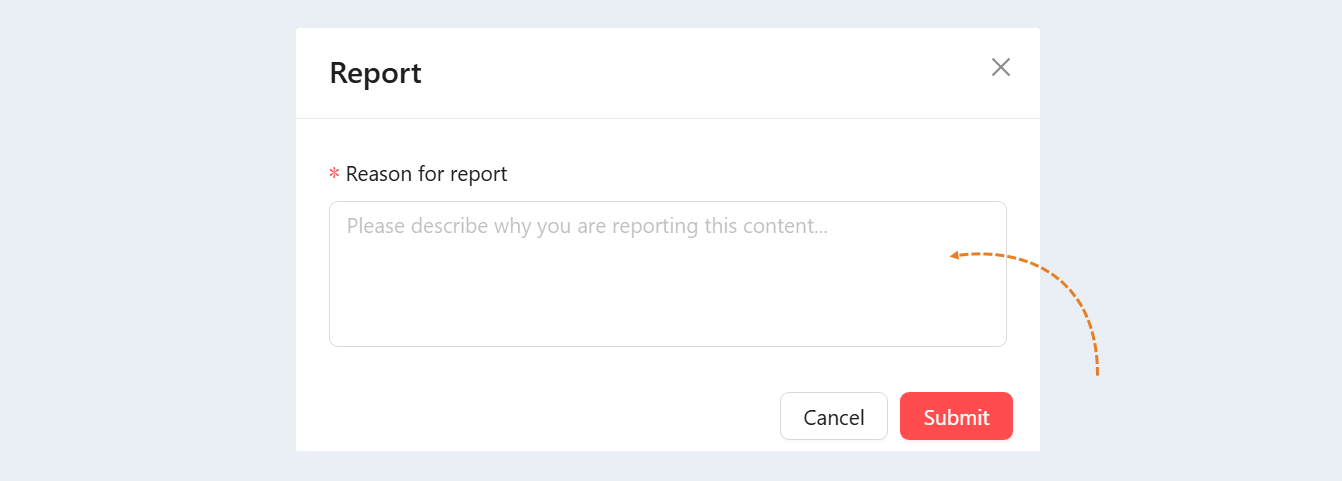
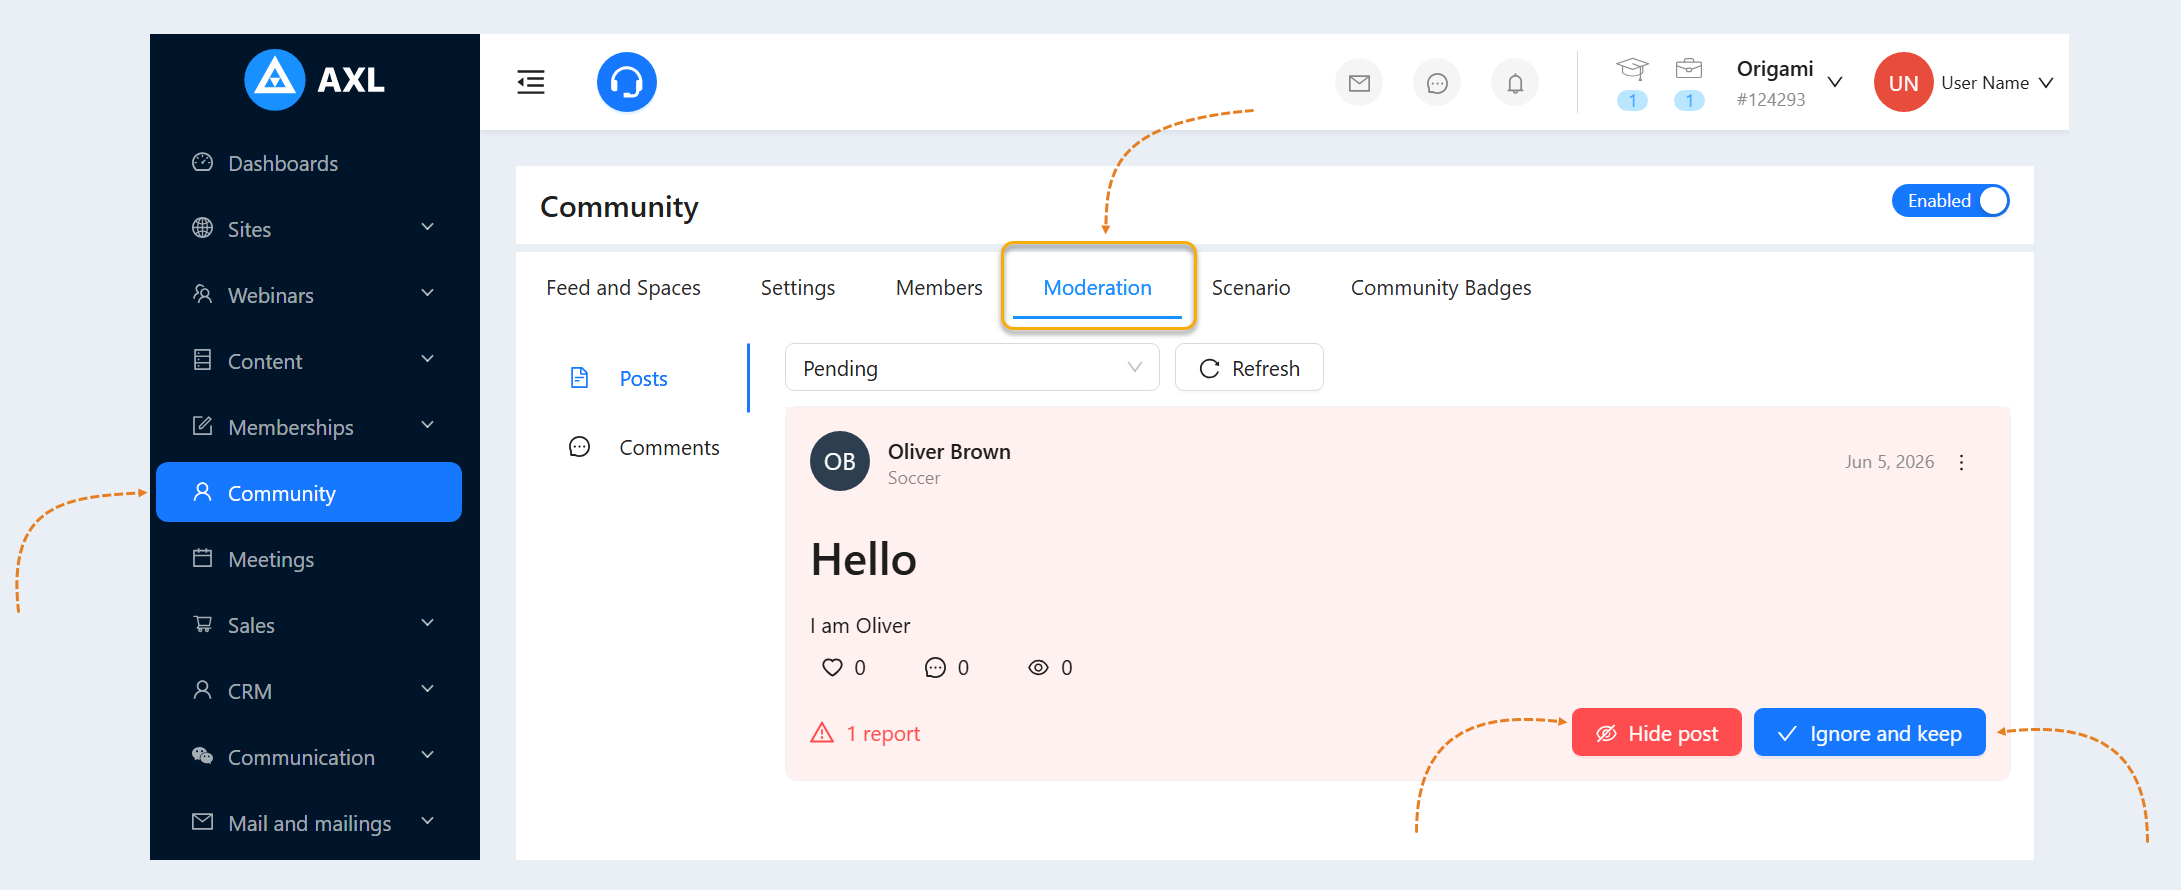
Communities have an integrated moderation system. It allows you to process reports on posts and comments, review problematic content, and make decisions directly within the platform. Content is sent to moderation after a user submits a report specifying the reason.
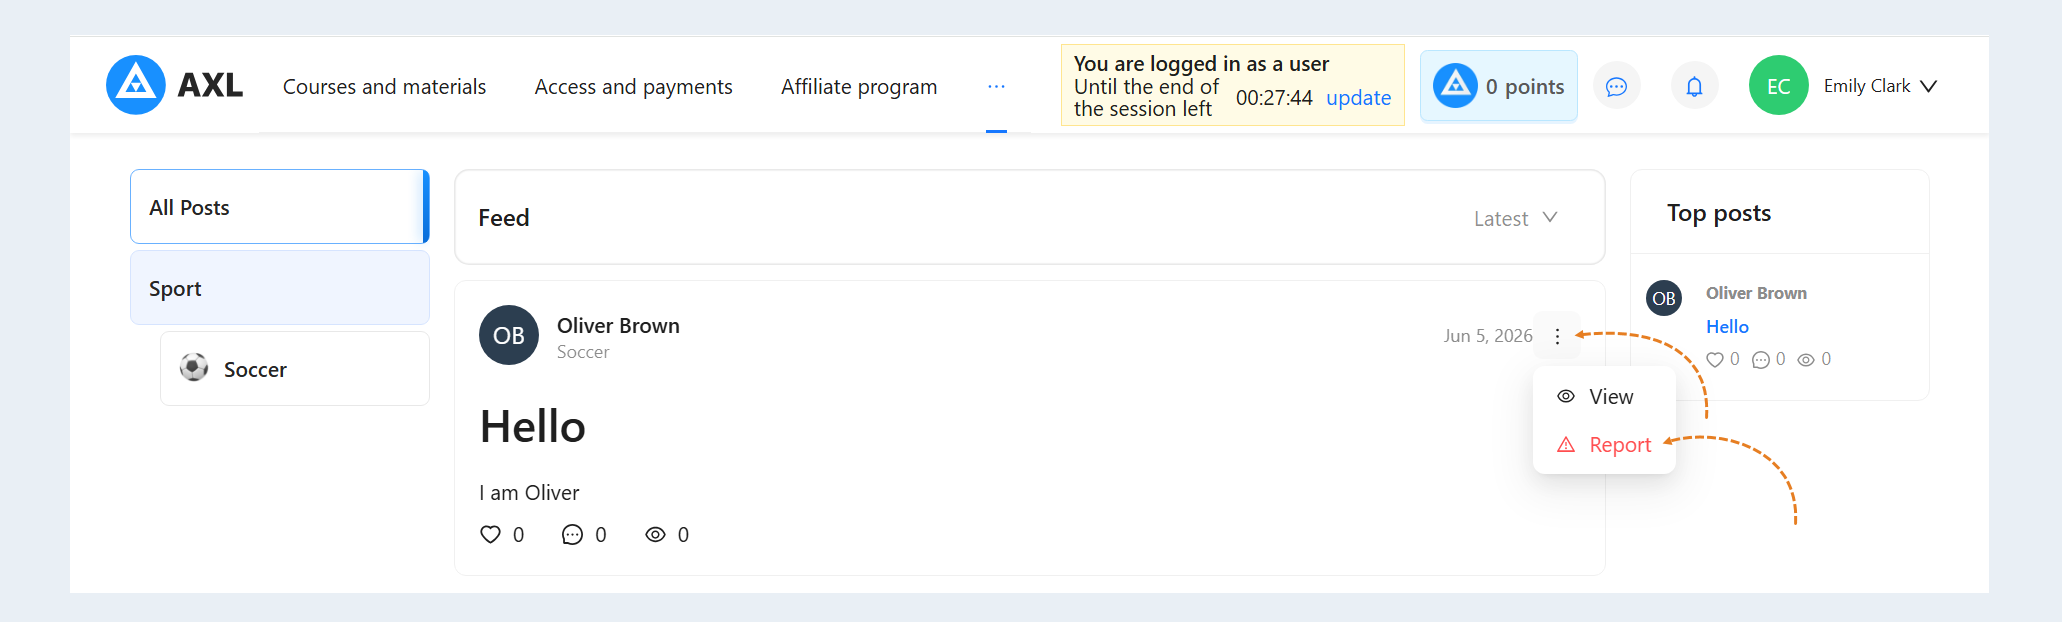
Subsequently, the reported post will appear in the "Moderation" section, giving you the option to either hide the post or ignore the report and keep it visible.
Scenario
Scenario allows you to automatically react to events within the community. This includes actions triggered when a user joins, receives a badge, meets activity conditions, or unlocks access to specific spaces. Automation helps manage user interactions efficiently and significantly reduces manual administration.
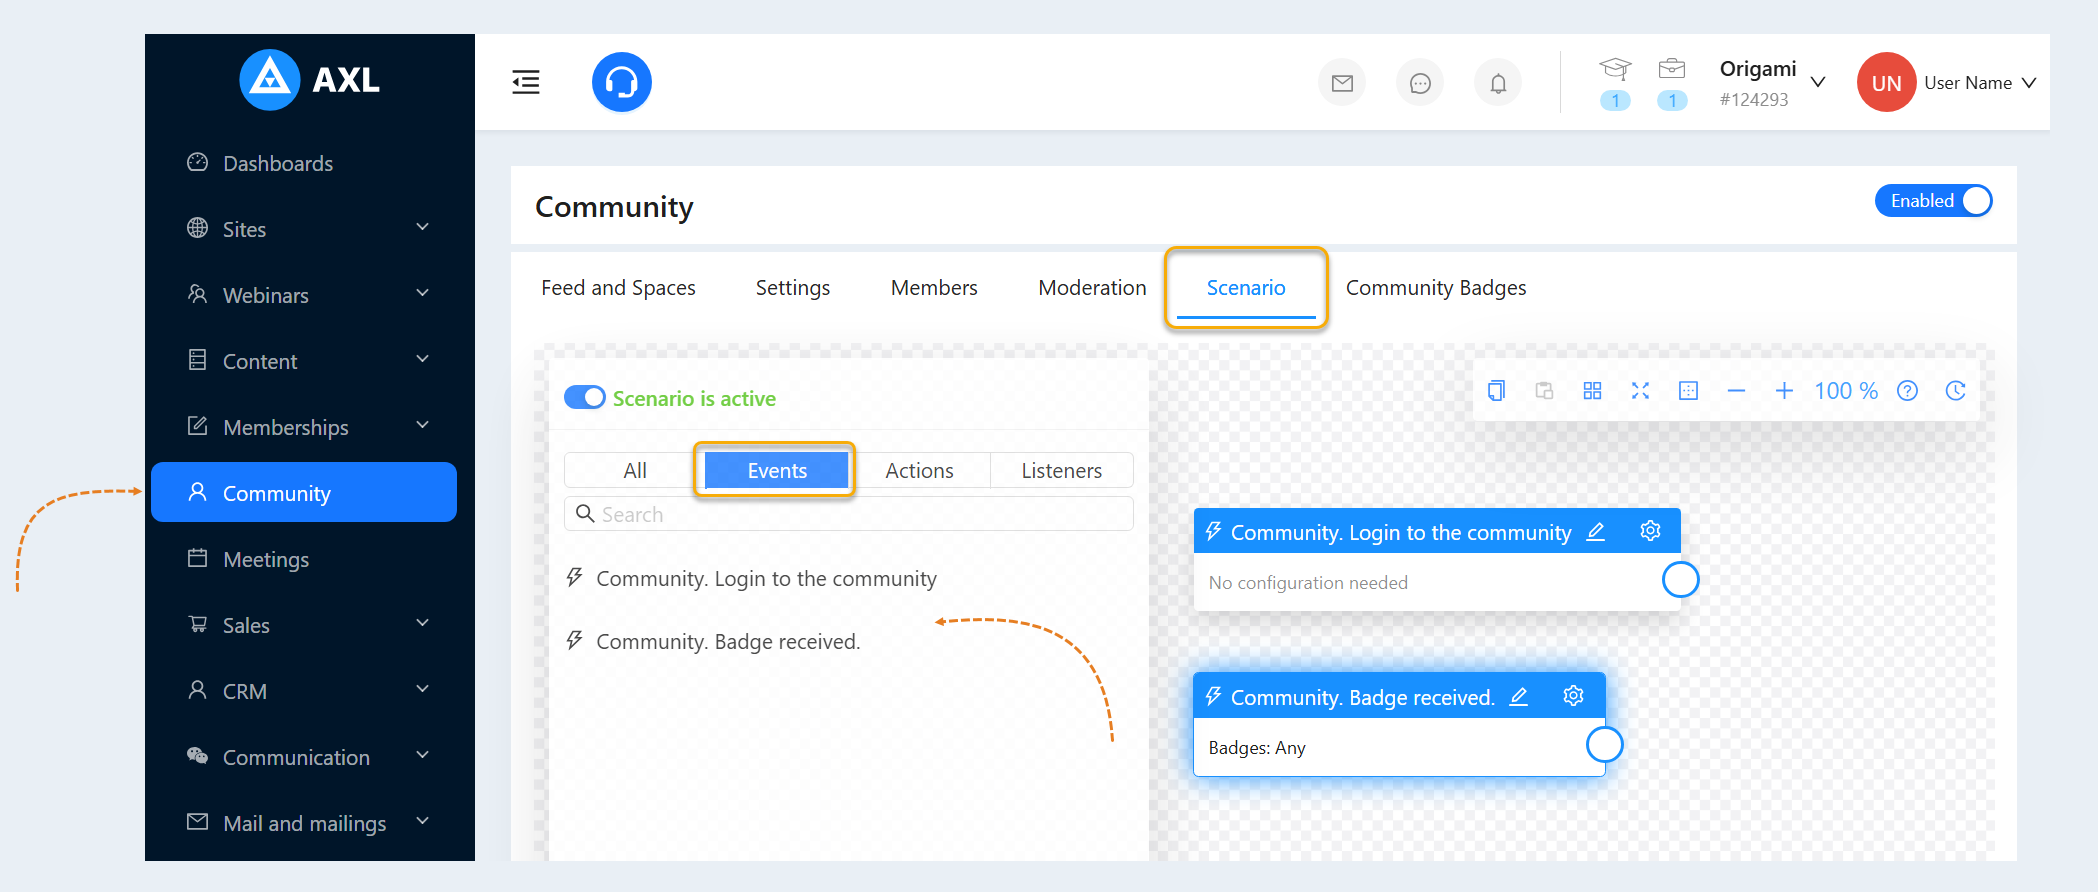
The following events are available in a community scenario:
- Community. Login to the community. Triggers a workflow after a user enters the community.
- Community. Badge received. Triggers a workflow after a user earns a badge. You can set this event to trigger for any badge or for a specific badge. If a specific badge is selected, you can duplicate the event for other individual badges.
To learn more about creating scenarios, read the 'Scenarios' article.
Badges
Badges are used to motivate members and reward active participation within the community.
Badges can be awarded automatically when specified conditions are met. These conditions are configured based on user activity metrics, including publishing posts, receiving likes, and participating in discussions. This gamification system helps increase user retention and fosters a collaborative community culture.
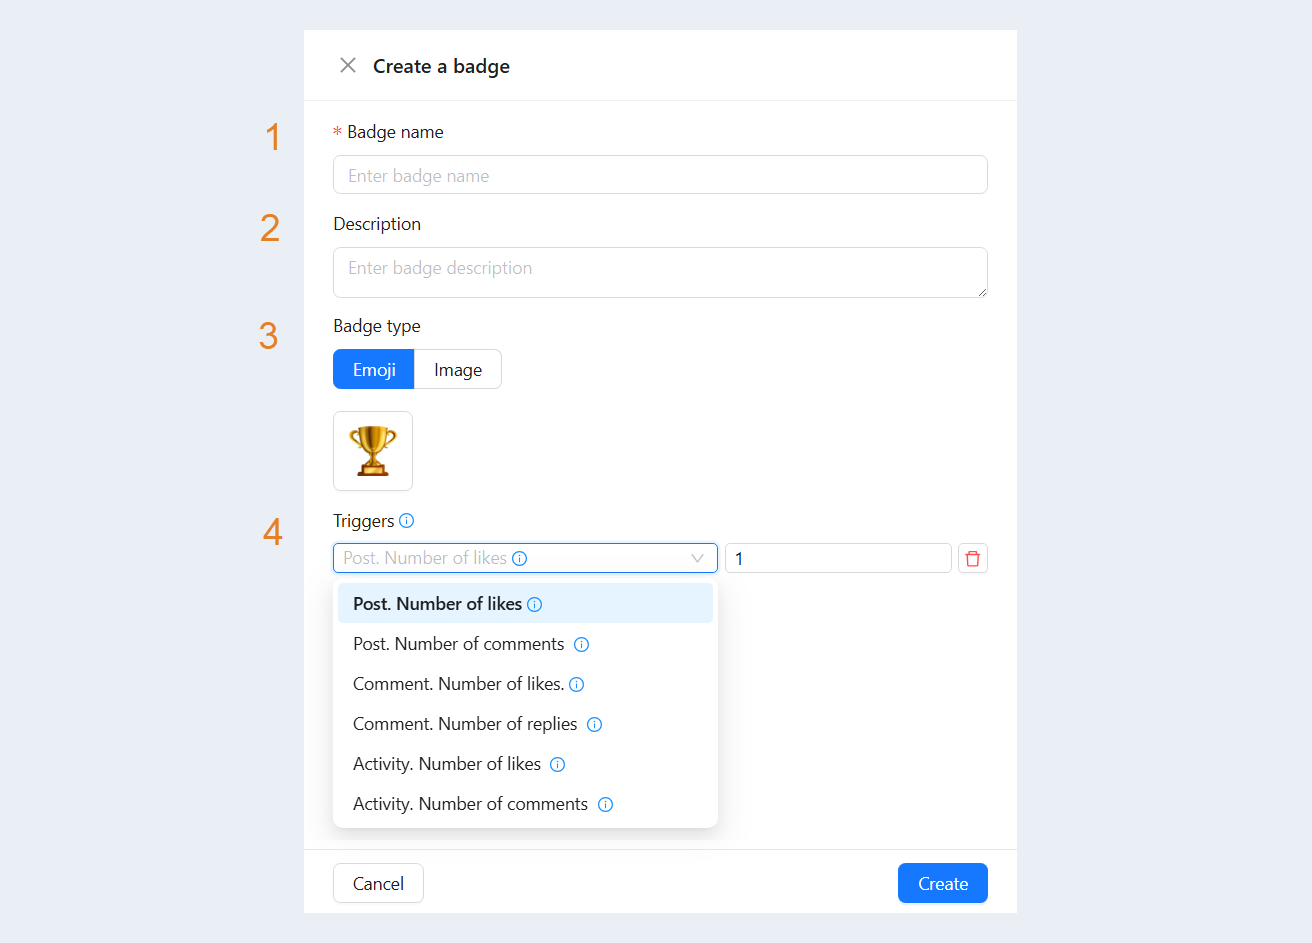
To create a badge, go to the Community section and open the Community Badges tab.
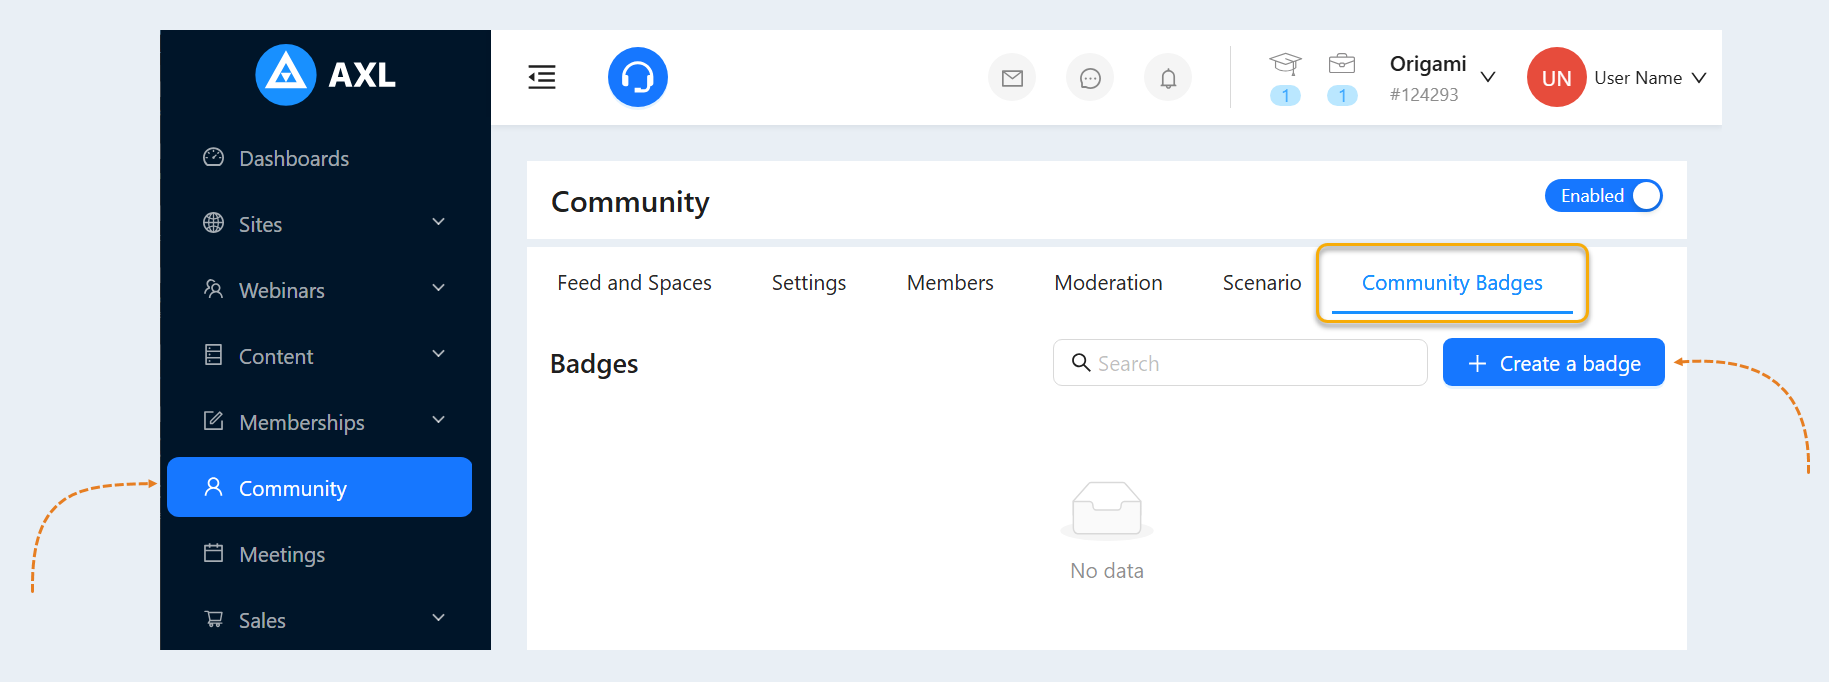
Fill in the following fields:
- Badge Name. Enter a title for the badge.
- Description. Write a short description explaining what the badge represents.
- Badge type. Select an emoji or upload a custom image for the badge icon.
- Triggers:
-Post. Number of comments. The user's post must reach a specific number of comments.
-Comment. Number of likes. The user's comment must reach a specific number of likes.
-Comment. Number of replies. The user's comment must receive a specific number of replies.
-Activity. Number of likes. The total number of likes the user must give to other posts or comments.
-Activity. Number of comments. The total number of comments the user must write across various posts.
Access and Permissions
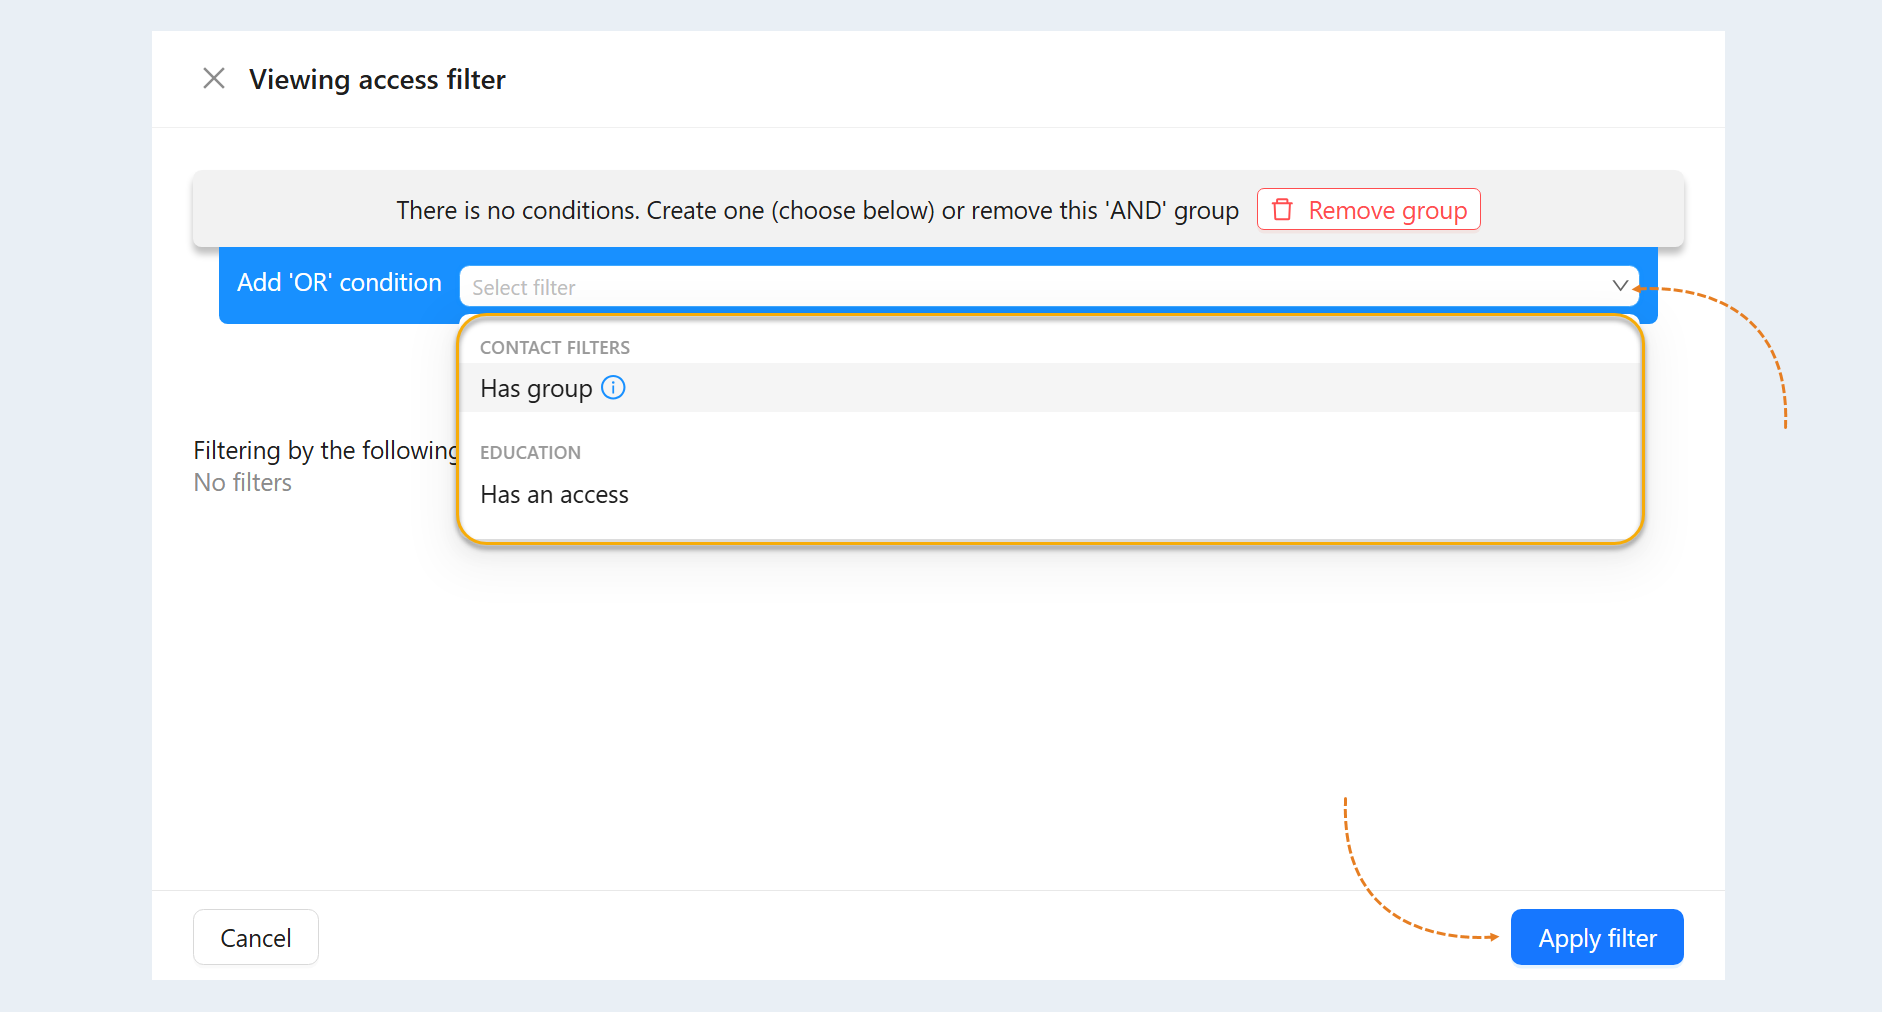
Access settings can be configured for each space individually using filters.
Access can be granted based on the following conditions:
The user belongs to a specific group.
The user has explicit access permissions.
Permissions within a space are configured separately and define exactly what actions a user can perform.
The supported permission levels include:
Viewing content
Ability to leave likes
Ability to leave comments
Ability to publish posts
Publishing Content
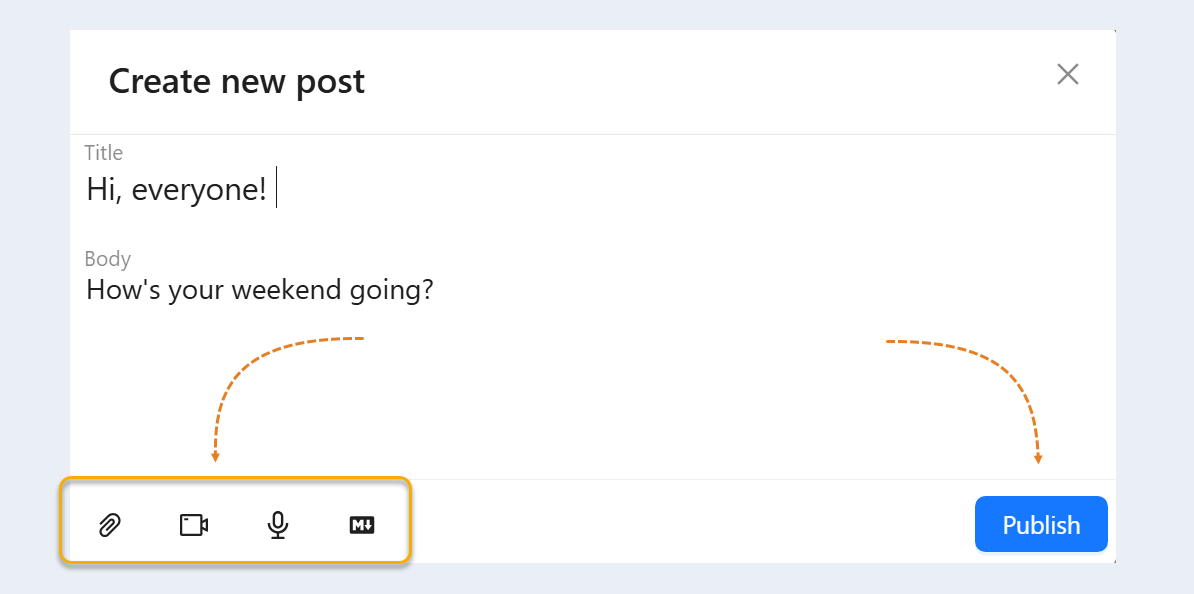
Community spaces support the publication of various content types, making them versatile for different communication needs.
The supported formats include:
Text
Audio messages
Images
Video
Content can be utilized both for quick updates and for hosting comprehensive educational or informational materials.
Comments and Communication
Communities feature a robust commenting system designed to drive user interaction.
Users can leave likes, reply to comments, and engage in threaded discussions. This structure keeps conversations organized and ensures that specific topics can be thoroughly discussed right under the relevant post.