Domain verification for third-party services is required to verify domain ownership and authorize services to interact with the domain. This is done to ensure security and protect users' personal data.
If you want to connect a third-party service (such as a mail client) to your domain, the service may require you to go through the domain verification process. This can be done by uploading files to your website server.
Domain verification allows you to establish that the domain owner has the right to grant the service access to use the domain. It also helps prevent malicious individuals from hijacking other people's domains and using them for fraudulent purposes.
Therefore, domain verification is an important security measure and control that ensures only legitimate domain owners can use them when interacting with third-party services
Now let's go through the domain verification process using Facebook Business Manager as an example.
Click on the desired section of the article to go to its description:
1
Adding the domain to Facebook Business Manager
You can find all cases when Facebook may require domain verification in the Facebook guide.
Log in to your Business Manager account by following the link. Select the "Business Settings" section.
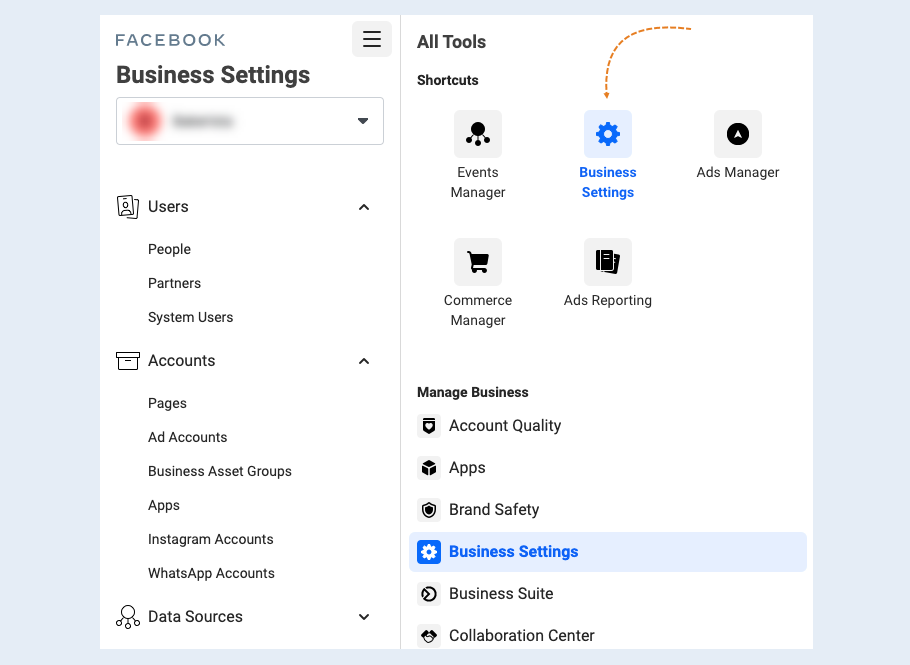
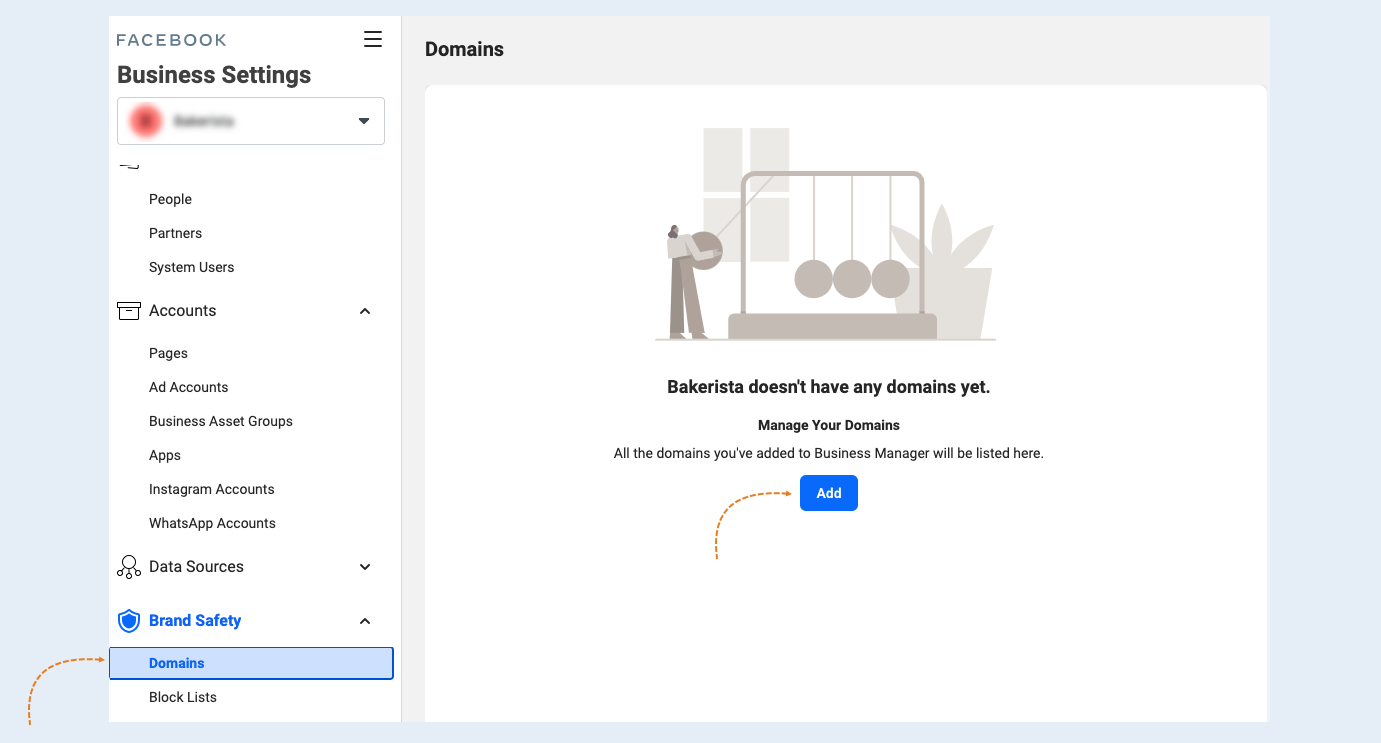
Go to the "Brand Safety" section, open the "Domains" tab. To add a new domain, click the "Add" button.
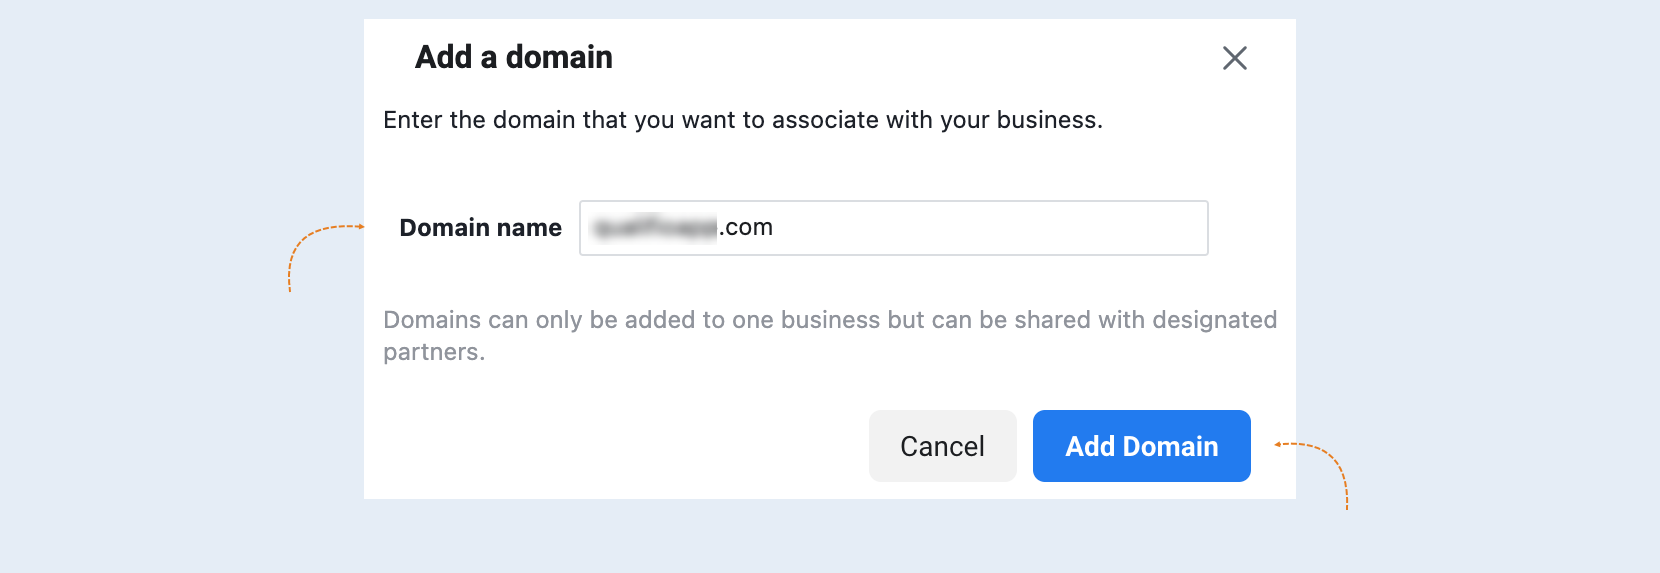
In the popup window, enter your domain name, for example, example.com (without the http:// or https:// protocol). Click the "Add Domain" button.
On the next step, you will see domain verification options. Select the option "HTML file Upload".
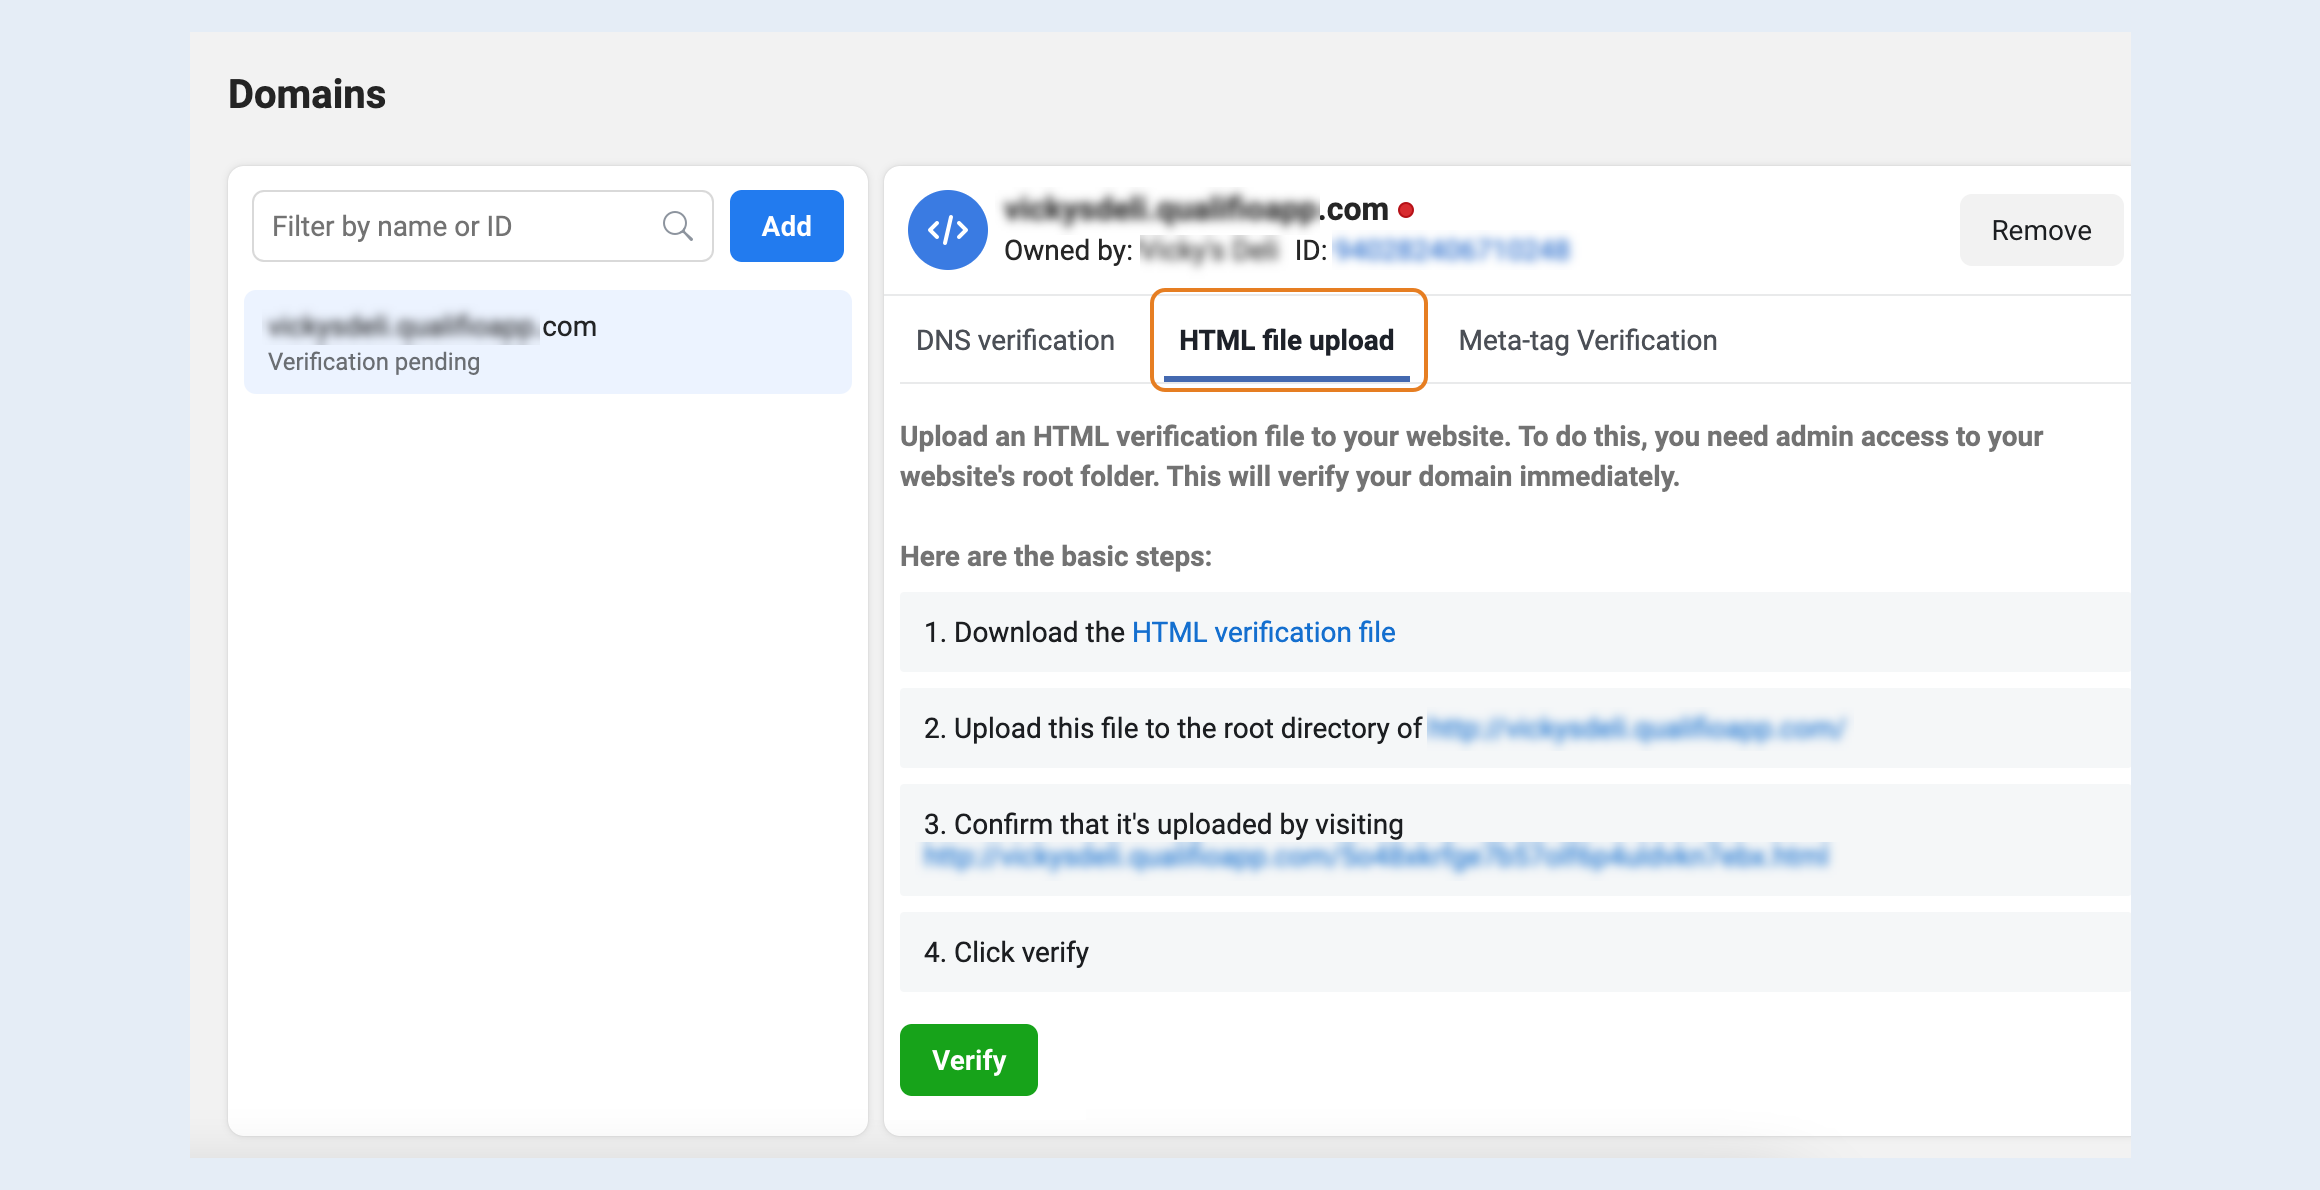
Download the HTML file. Do not modify the file after downloading. You will need this file for step №2.
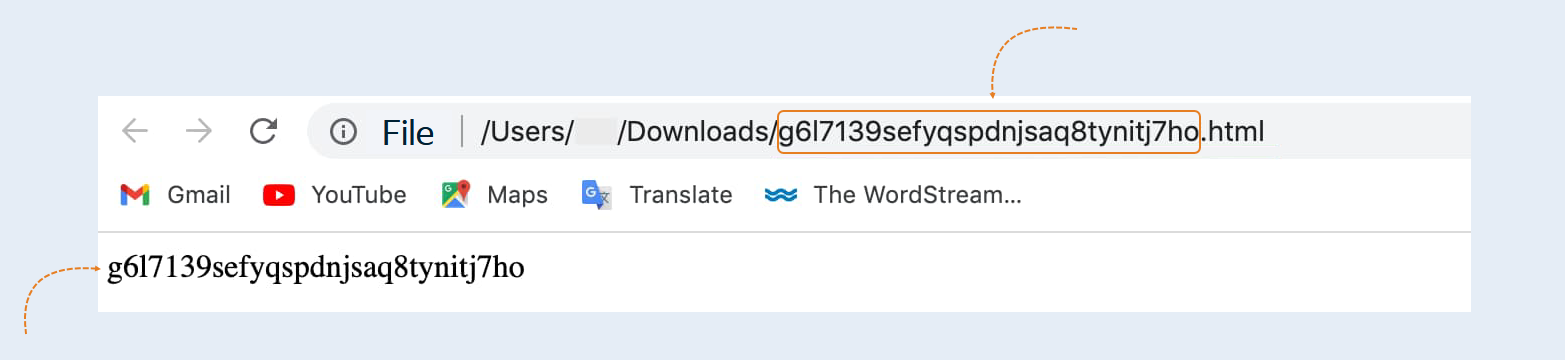
Next, open the file in a browser and copy the name after the word "Downloads" and the file content. In case you downloaded the file multiple times, the name displayed in the browser may have an extra symbol with a sequence number: (1), (2), etc. Make sure to delete it, otherwise, you won't be able to verify the rights.
2
Adding domain verification in AXL
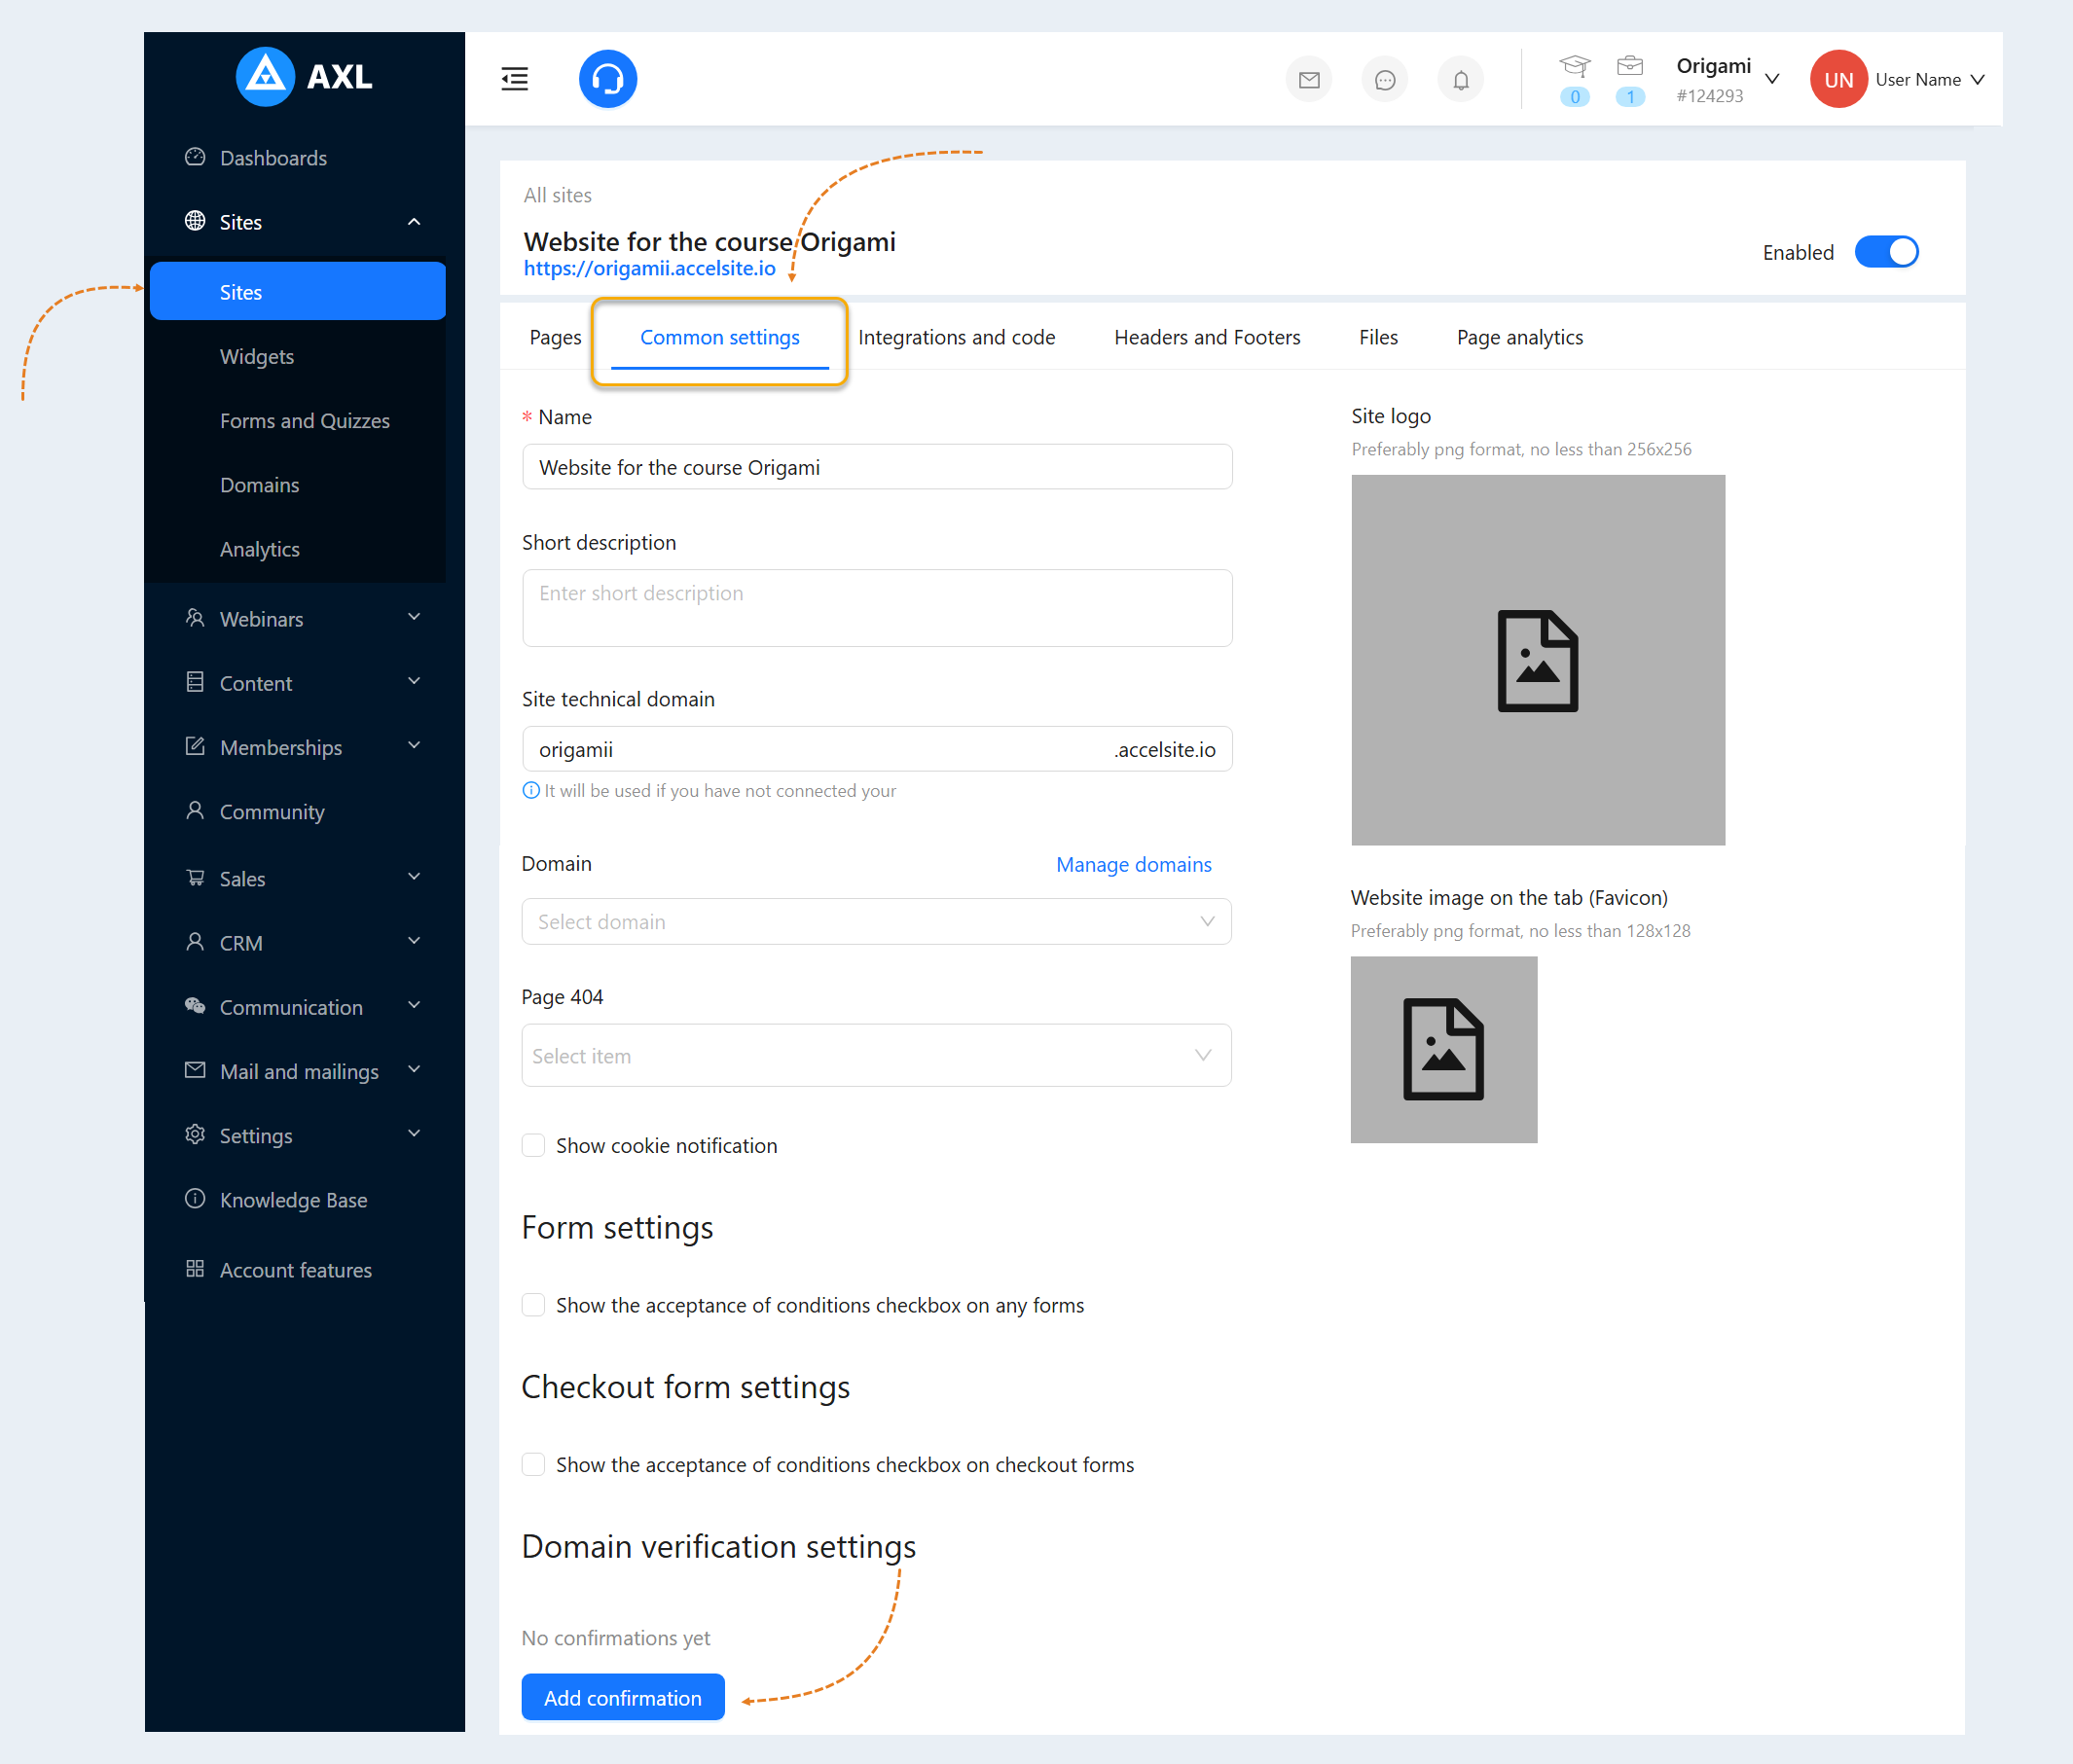
Without closing the Facebook page, go back to the AXL website. Go to the "Sites" tab, open the previously created site or create a new one by clicking the "Add Site" button. Find more information on how to add a site in the article "How to create a site."
Then, go to the "Common Settings" tab. In the "Domain Verification Settings" section, click the "Add confirmation" button.
In the popup window, fill in the fields:
- Name. Enter the filename copied in step №1.
Type. Select the type depending on the requirements of the third-party service: file or content.
File/Content. Add the file or content depending on the selected type.
Path. Specify the file path. For example, /.well-known/apple-developer-merchantid-domain-association
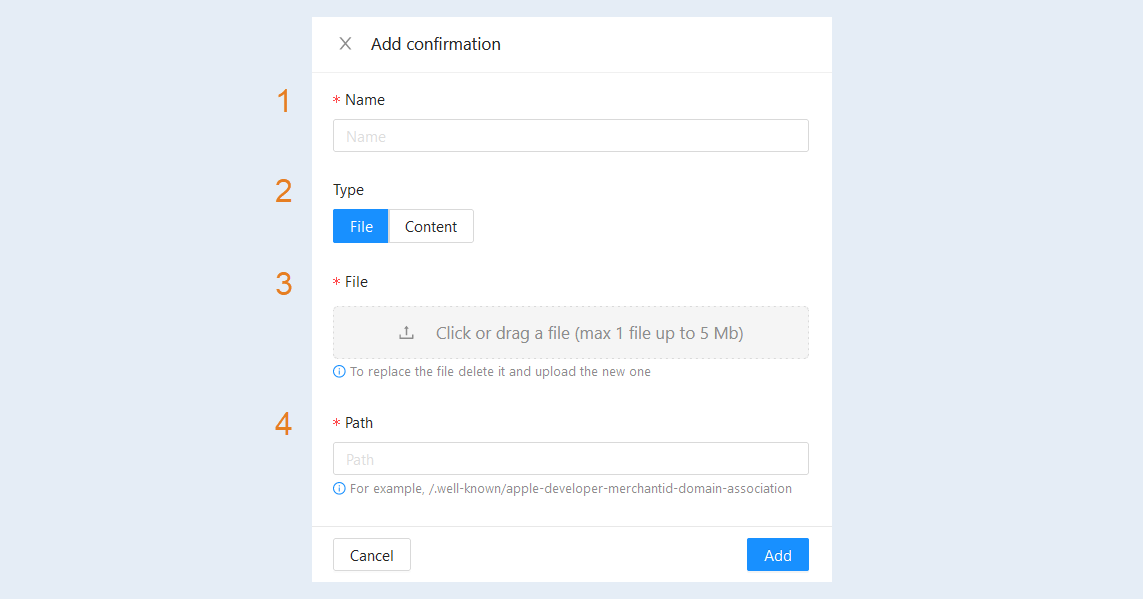
Click the "Add" button.
3
Domain verification
Go back to the Facebook Business Manager page and click the "Verify" button to initiate the verification process.
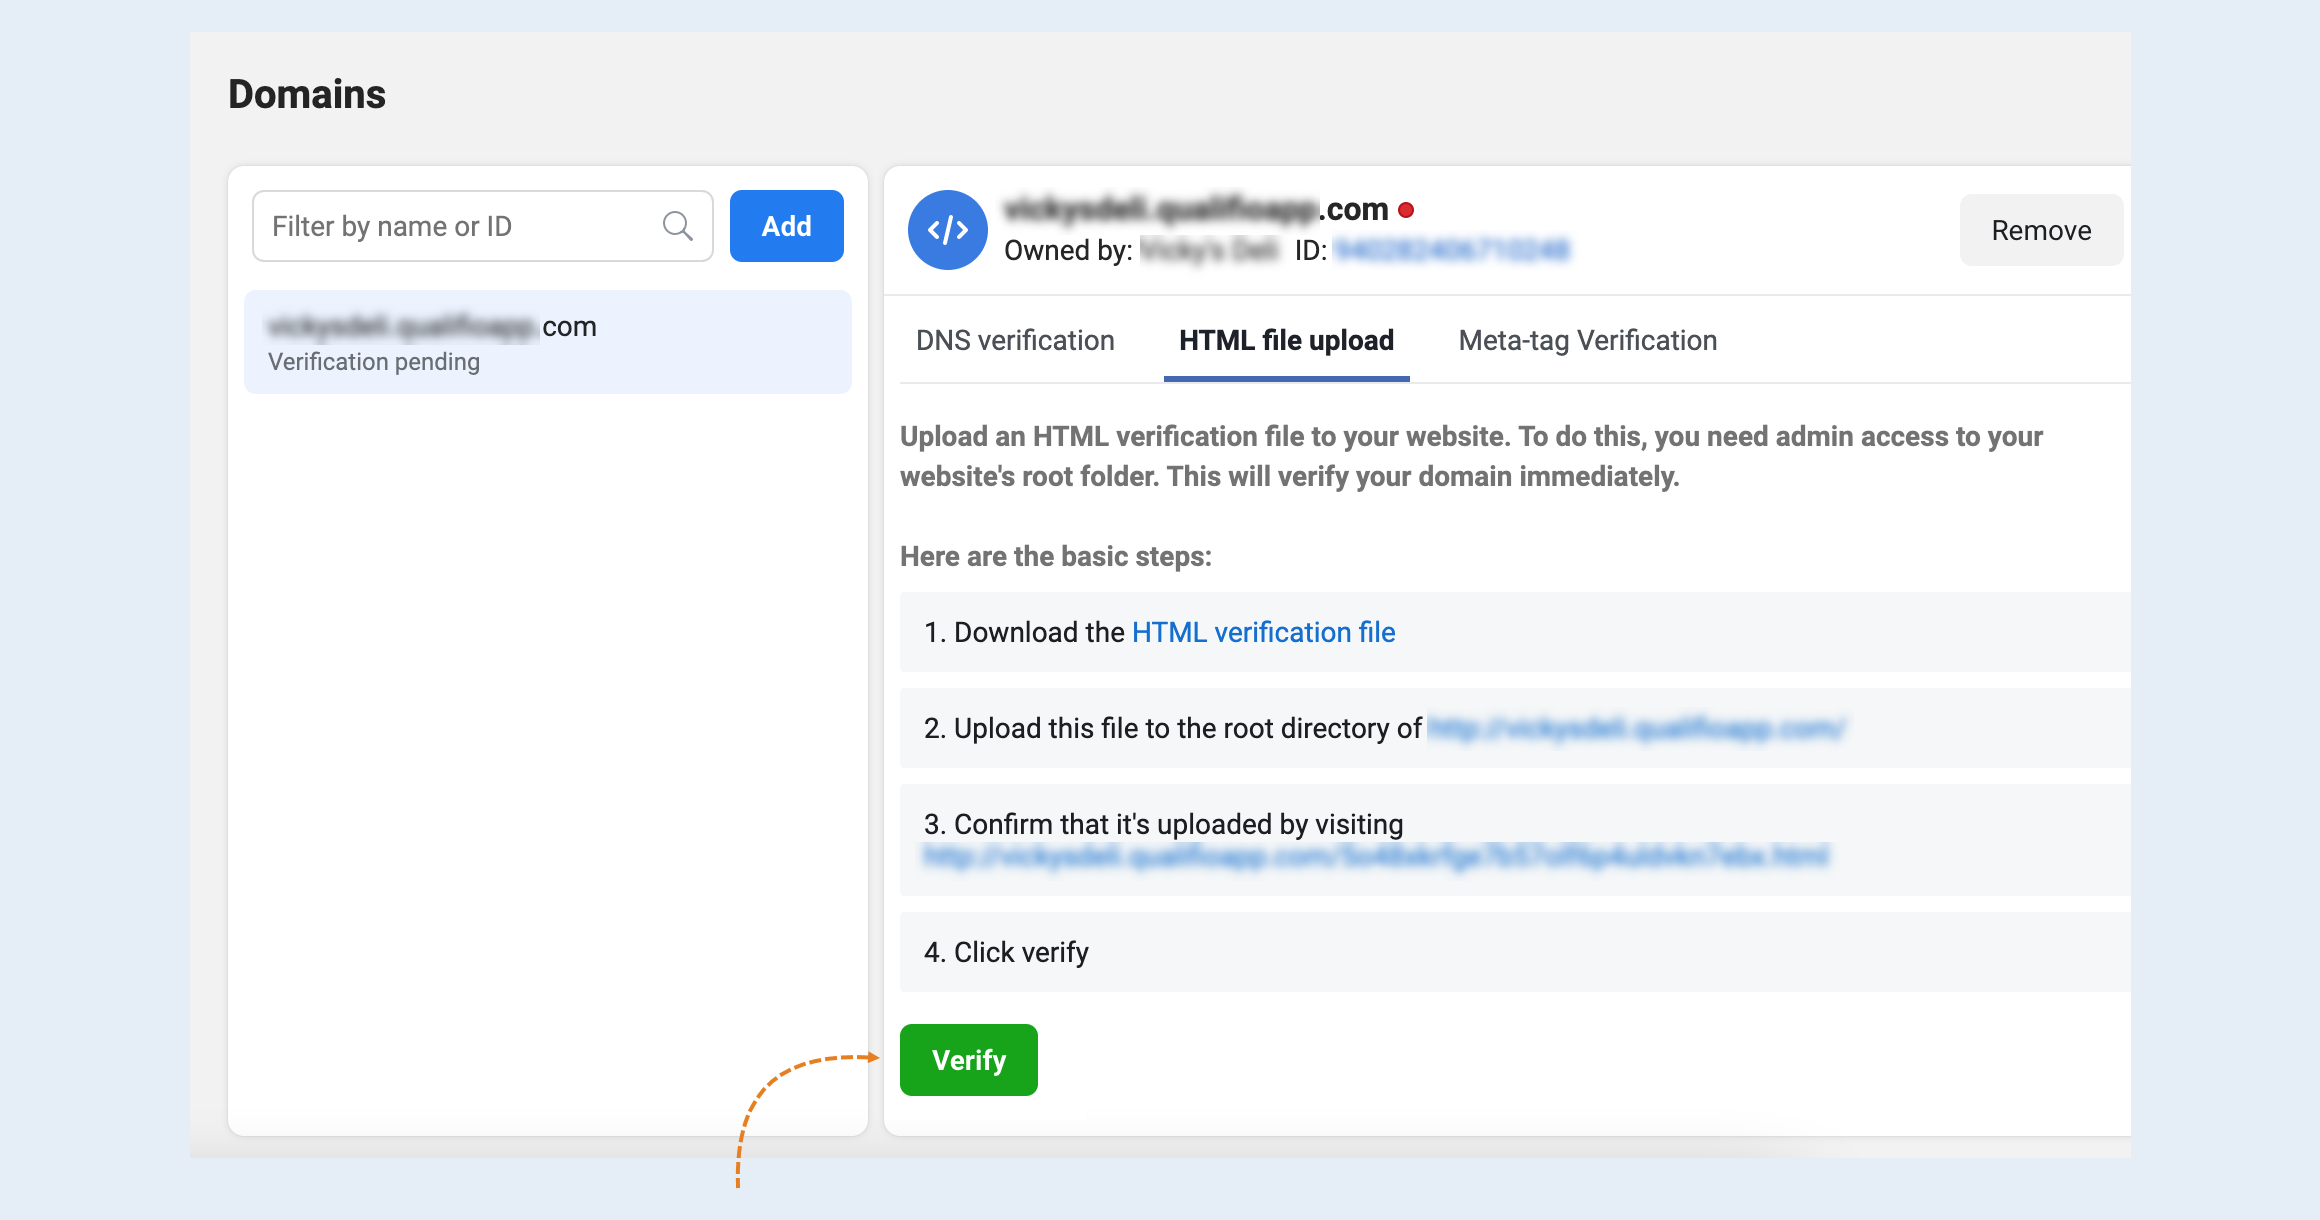
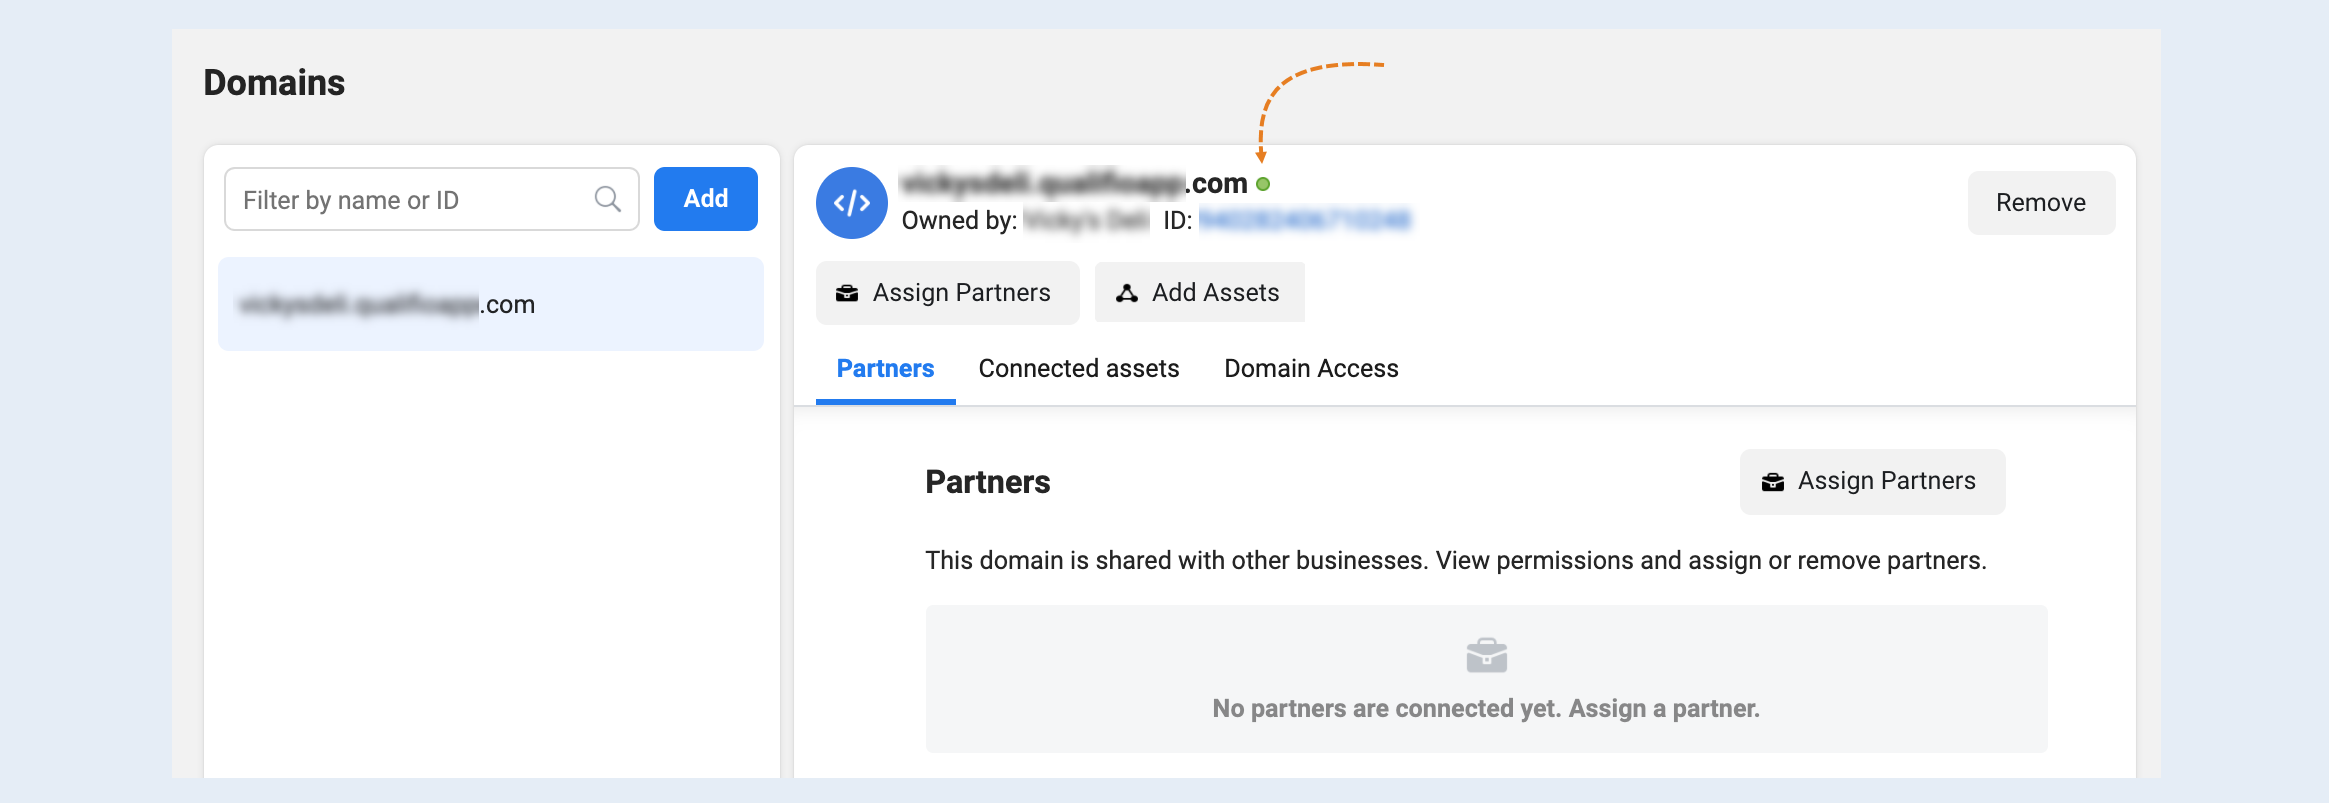
After successfully verifying your domain, you will see a green dot next to your domain name in your Facebook Business Manager account. Hovering over the dot will display a black window with a message indicating that your domain has been verified.