Smart Glocal is smart payment solutions for global businesses. Accept payments for products and services on your website or telegram.
Simple solution for collecting one-time or recurring payments from your customers. The widget can be easily integrated through our open API. Once it’s done, you can send links to the payment page directly to your clients. With our widget, you can also create a QR code and post it to the different platforms you use, so your clients always have easy access to your payment page.
Click on the desired section of the article to go to its description:
1
Registration in Smart Glocal
To connect Smart Glocal, you need to have an account. Register on the official Smart Glocal website at this link.

After registration, a Smart Glocal manager will contact you, help you gain access, and answer your questions. Your Smart Glocal manager will tell you the name of the Project, Private and Public key, which are necessary for integration with the AXL platform.
2
Integration with AXL
Next, you need to integrate the payment instrument into AXL. In order for your customers to be able to pay for the services of your account, it is necessary to embed payment forms in your account.
Go to the AXL website. Select the "Settings" section and the "Payment Settings" tab. Click the "Create Payment Integration" button.
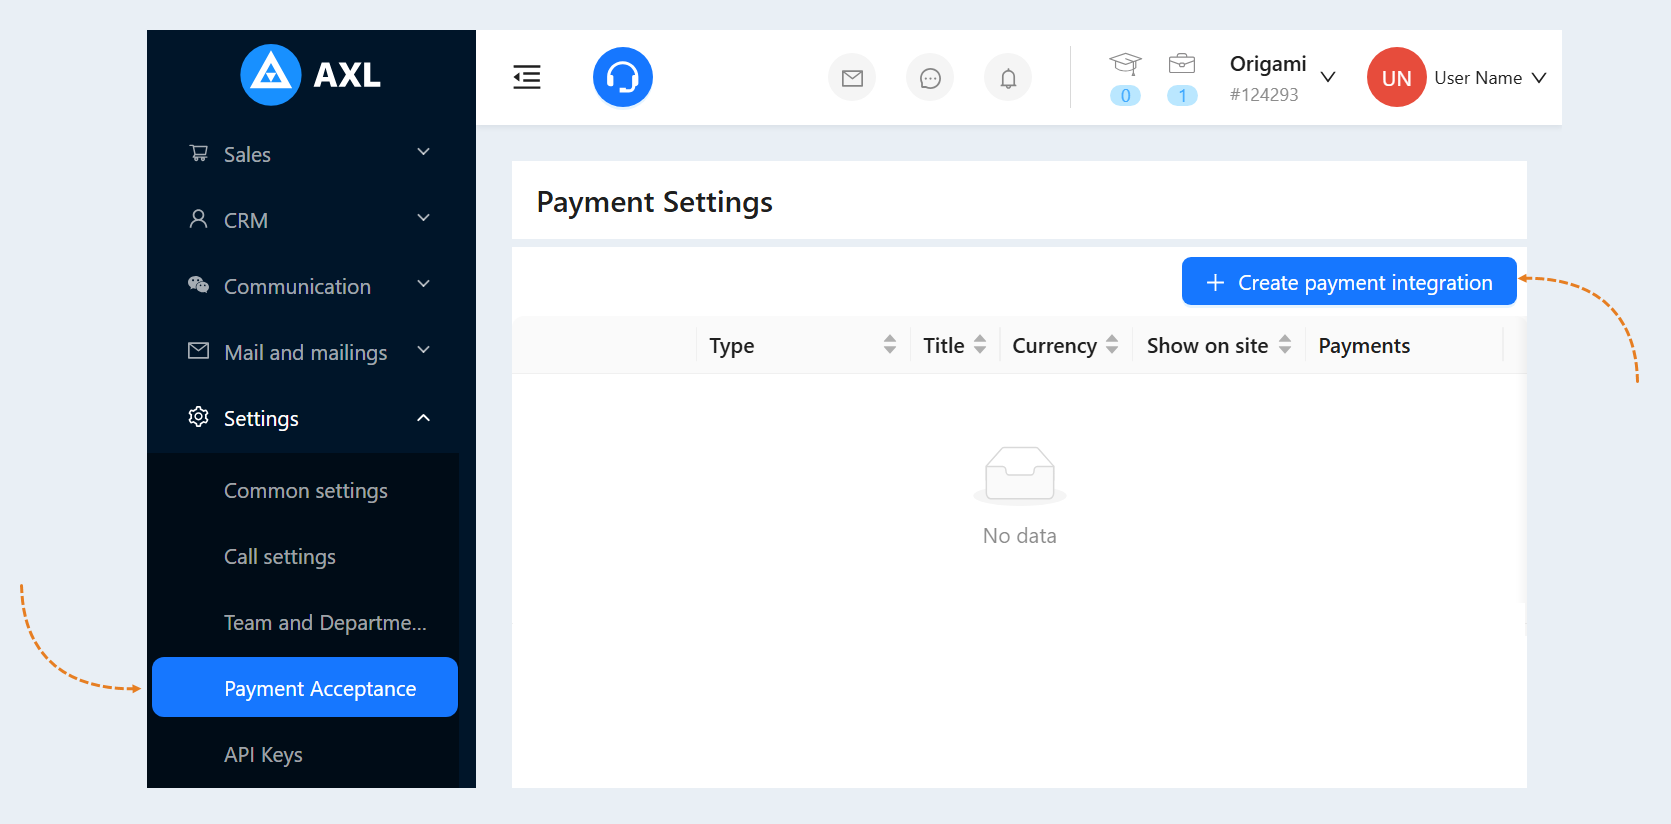
Select "Smart Glocal" from the list. In the window that opens, fill in the fields:
- Title. Write the name of the payment instrument.
Description. Add a description of this payment instrument. Customers will see this description on the website.
Payment Button Text. Write the text that will be displayed on the payment button on your website.
Is Primary Payment Method. Check the box if this payment method will be the main one in your account.
Show on site. Check this box to make this payment method available on your website.
Save card details for further payments, where applicable. Check the box in this line so that when paying for repeated orders, the user does not have to enter the bank card data again. In this case, the subsequent payment will be available to the user in one click. This setting is necessary for making recurring payments. Please note that during the test payments it is necessary to uncheck this box, as test payments may not pass. When you launch payment integration in combat mode, then you should check the box.
Currency. Select the currency in which you plan to accept payments. If you work in different markets in different countries, you can choose the currency for accepting payments in each payment system. For example, by selling courses in dollars through one payment system, you can accept euros through another payment system. Automatic currency conversion takes place at the international exchange rate.
Project. Enter the project name in Smart Glocal.
Private key. Enter the private key that Smart Glocal manager told you.
Public key (issued smart-glocal). Enter the public key that Smart Glocal manager told you.
Test mode. Check the box to make a test payment (without money).
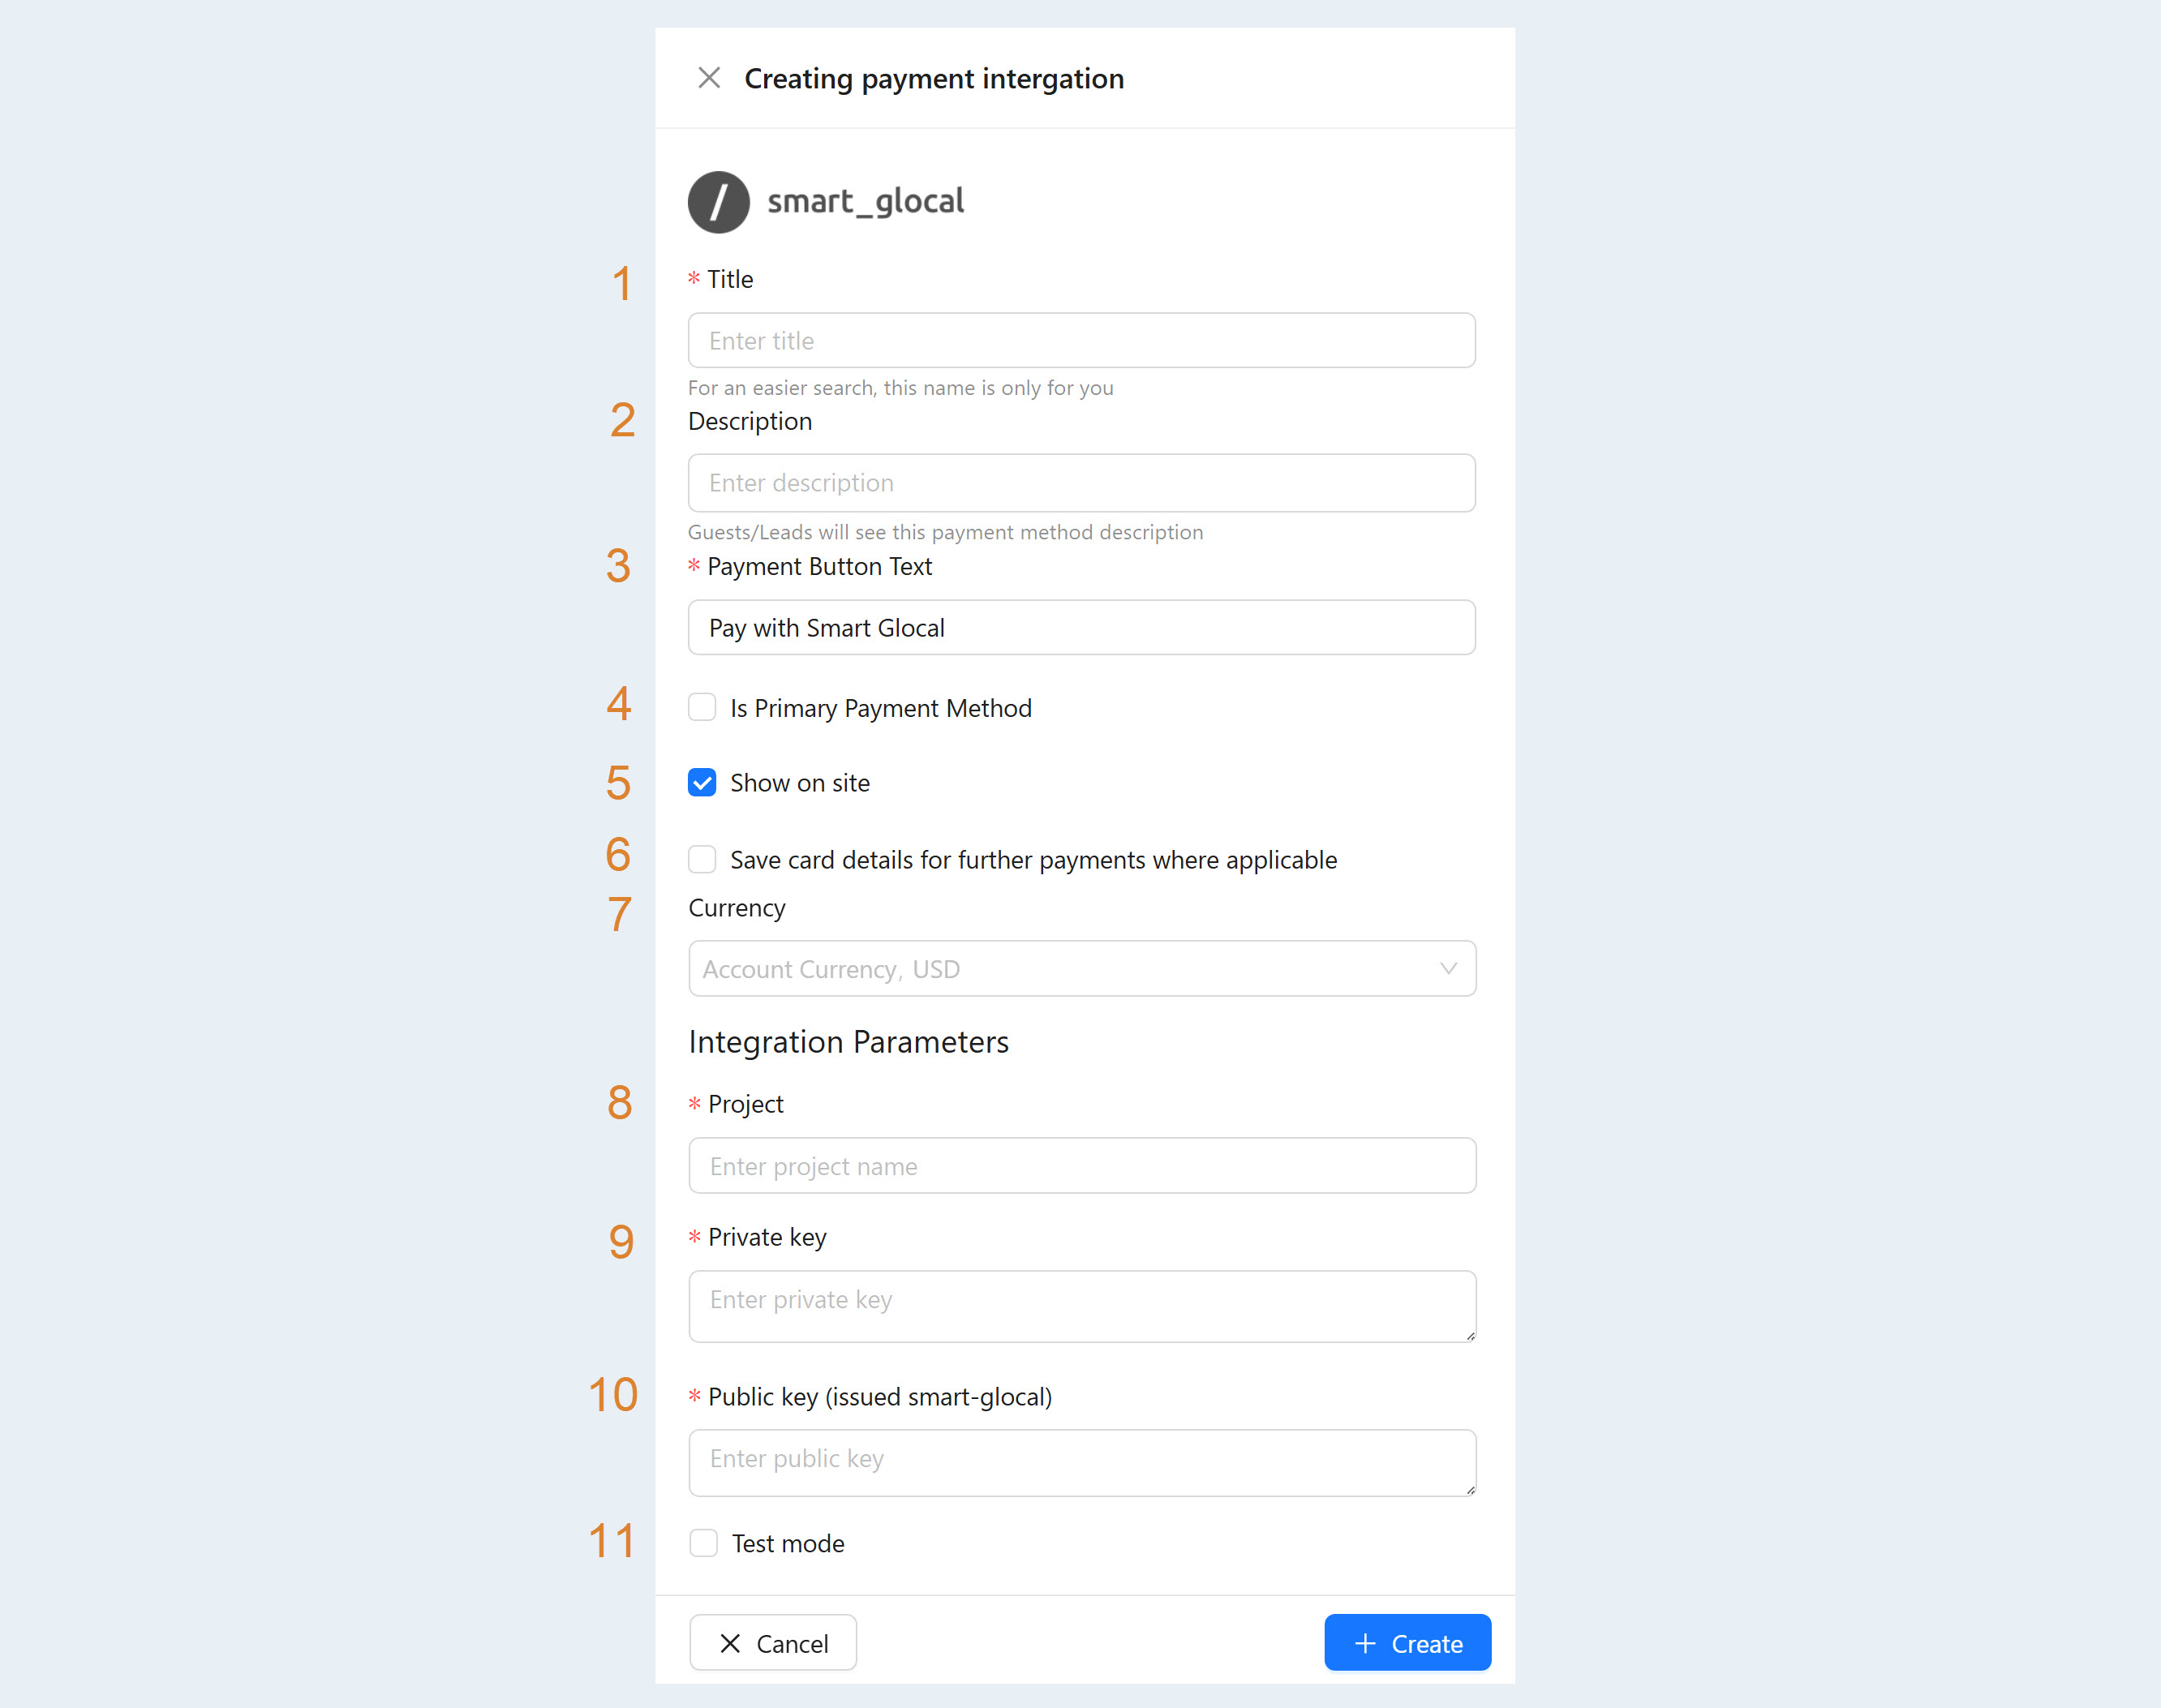
After filling out the form, click "Create". Now you have the "Smart Glocal" tool in the list of payment instruments.