Webinar participants are guests who registered for the webinar on their own on the site or were added manually by the administrator. Also, webinar participants include account administrators, presenter and moderators.
Click on the desired section of the article to go to its description:
How to add a webinar participant
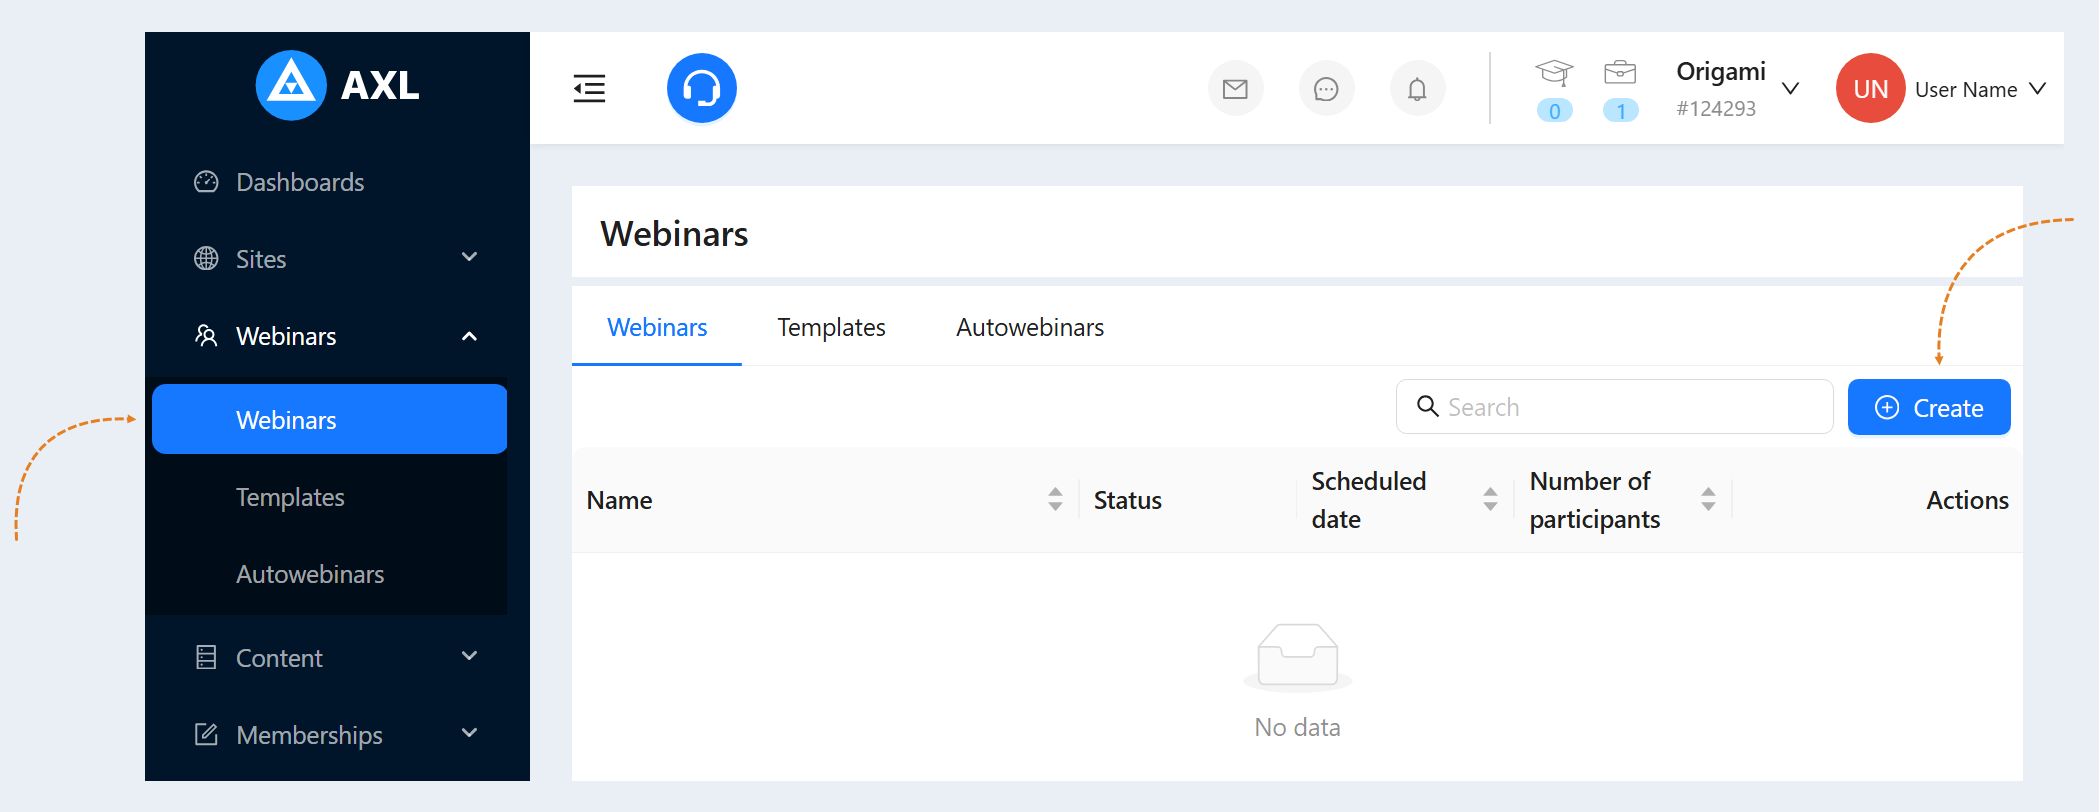
Go to the "Webinars" section. Create a new webinar or log in to an existing one. For more information on how to create a webinar, see the article "Webinars".
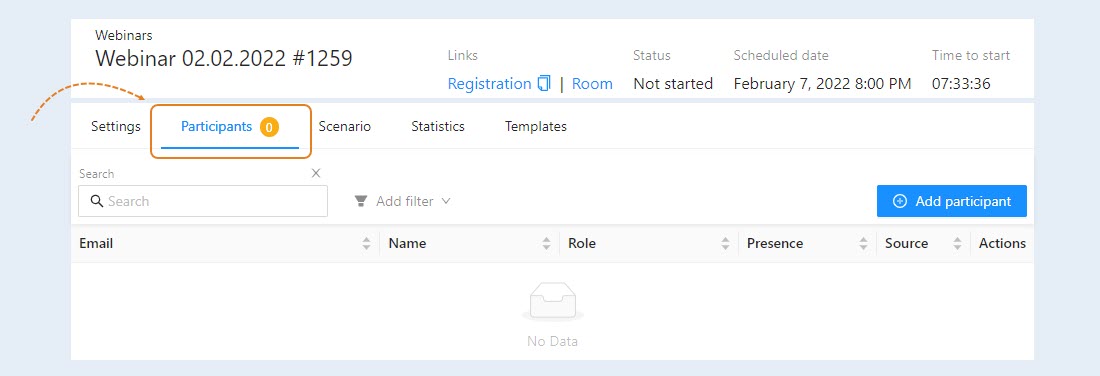
Select the Members tab. Users who have registered for the webinar on their own on the site will be displayed here. Or were added manually by the administrator.
To add a webinar participant manually, click the "Add Participant" button.
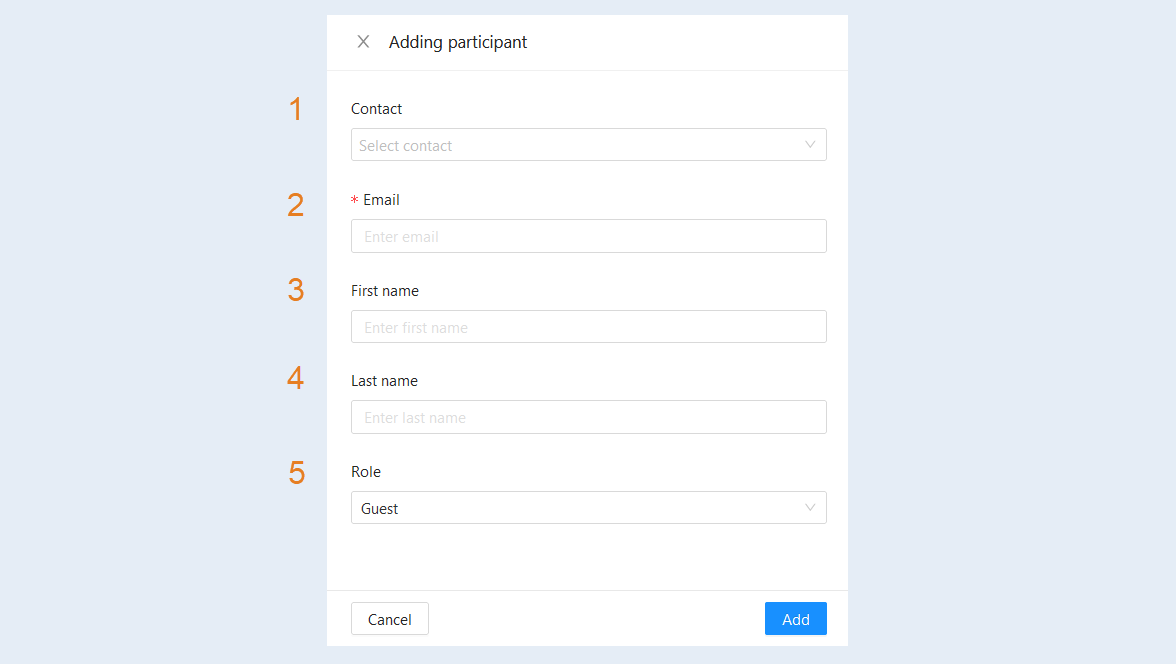
An additional window will open for you. Fill in the fields:
- Contact. Select a participant from the contact list. The contact list is the registered users of your account. If the contact is already registered at your account, then you can find him in the contact list. The remaining fields will be filled in automatically.
Email. Enter the participant's email address. This field is required to be filled in.
First name. Enter the participant's name in the field.
Last name. Enter the participant's last name.
Role. Select a role from the list:
- Guest. The main audience of the webinar. These are users who have come to receive information, ask questions, and participate in the discussion. They have the lowest level of access, usually only viewing and limited interaction through chat and surveys. This role has already been selected by default.
Host. This is the main face of the webinar, an expert in the topic who shares his knowledge and experience. Has full control over the presentation, microphone and video (if used).
Moderator. This is the person who provides technical and organizational support for the webinar. It has a high level of access, but with an emphasis on management rather than presentation of content. Has access to the webinar platform settings.
Click the "Add" button.
List of participants
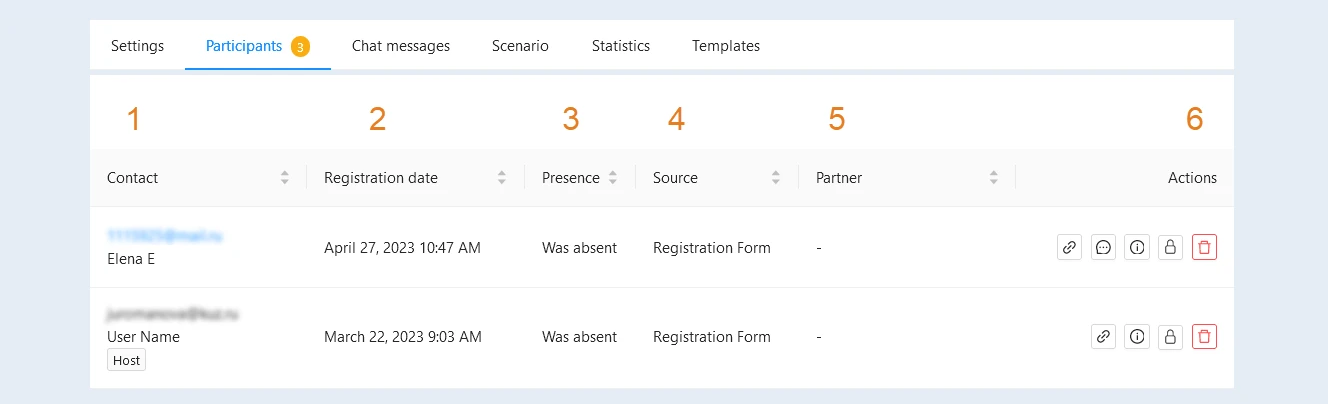
After adding a participant, it will appear in the list. Here you can see the following information:
- Contact. Here you can see the email address, first name and last name of the participant, which he indicated during registration. Allows you to quickly find the right person in the list. If this participant is a moderator or moderator, their role will be indicated in the field.
Registration date. The exact date and time when the participant registered for the webinar is shown. It helps you understand when it is best to promote a webinar, and how much time usually passes between registration and the start of the webinar.
Presence. Displays whether the participant was at the webinar. If the participant was present, then you can see the amount of time he was in the webinar room. There are two values available to you: hours, minutes, and seconds, and a percentage of the total time of the webinar. It allows you to evaluate audience engagement, identify those who missed the webinar and to whom you can send an entry.
Source. Shows the path where the participant registered for the webinar. Allows you to evaluate the effectiveness of various promotion channels.
Partner. The partner whose link the participant signed up for is shown. It helps to understand which partners are most effective and motivate them to continue cooperation.
Actions:
- The "Copy link" button. Click on the button to copy the link to the webinar for a specific user, moderator, or moderator.
The "Webinar chat messages" button. This button opens an additional window with a list of messages in the webinar chat.
The "Webinar participant Information" button. This button opens an additional window with detailed information about the webinar participant and session information.
The "Ban" button. Click the button to block this user. It allows you to remove violators, prevent spam and unwanted behavior. Maintains order and a comfortable atmosphere at the webinar.
The "Delete" button. Click the button to remove this user from the list of participants. Removing unwanted or erroneously registered participants.
Webinar Participant Information
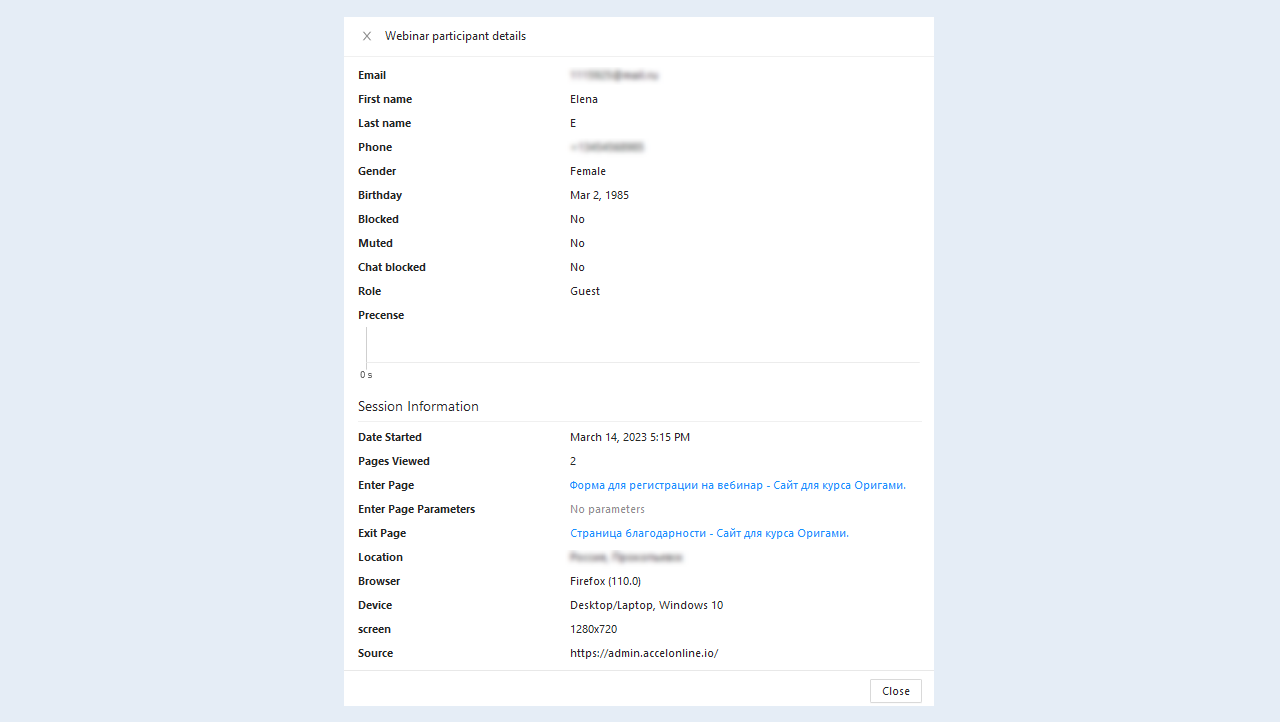
Click the "Information" button next to the webinar participant. An additional window opens on the right, where you can see detailed information about the participant. This information allows you to get a complete picture of the webinar audience, their behavior and engagement. Analyzing this data helps to conduct more successful webinars and achieve your goals.
Details about the webinar participant:
- Email. The data from the participant's contact card is shown. They are needed to identify the participant, send notifications (reminders about the webinar, recordings, additional materials), and be able to contact after the webinar.
First name. The participant's name is shown.
Last name. The participant's last name is shown.
Phone. The participant's phone number is shown. This is an alternative way of communication, it provides an opportunity to contact the participant, in particular for sale, additional consultation.
Gender. The gender of the participant is shown (if it was specified during registration). It is needed for audience analysis.
Birthday. The participant's date of birth is shown (if it was specified during registration). As a rule, it is not used for webinars, but it can be useful for building closer relationships with users. Helps you understand the demographic of your audience.
Blocked. It shows whether the participant was blocked. Makes it clear if the participant was banned.
Mute. It shows whether the sound was turned off for the webinar participant. It shows the participant's activity and involvement in the process.
Chat blocked. It shows whether the ability to send chat messages to a participant has been blocked.
Role. The role of the webinar participant is shown: moderator, moderator, or guest.
Presence. Here you can see a graph on which the time of the participant's presence at the webinar is marked in green. You can also see at what time the participant joined the webinar, at what time he left the webinar room, and whether he logged in again.
Session Information:
Date Started. Here you can see the date and time of the start of the participant's session at the webinar. It helps to assess at what point the participant joined the webinar.
Pages viewed. The number of pages viewed by the participant is shown. Allows you to evaluate the participant's activity inside the webinar.
Enter Page. Click to open the login page. Allows you to track users' paths to the webinar.
Enter Page Parameters. Additional parameters transmitted from the login page are shown (for example, UTM tags for tracking advertising campaigns), if available. A more detailed analysis of traffic sources.
Exit page. The page where the participant left the webinar is shown. It helps to determine the moment when the participant lost interest in the webinar.
Location of the webinar participant. It shows the country and city where the webinar participant was located (determined by the IP address). It is needed to analyze the geography of the audience and adapt content to different regions.
Browser. The type and version of the browser used by the participant. Helps to identify compatibility issues.
Device. The type of device used by the participant (for example, "Computer", "Phone", "Tablet").
Screen. The screen resolution of the device used by the participant is shown.
Source. The website that the webinar participant clicked through from is specified.
Participant roles
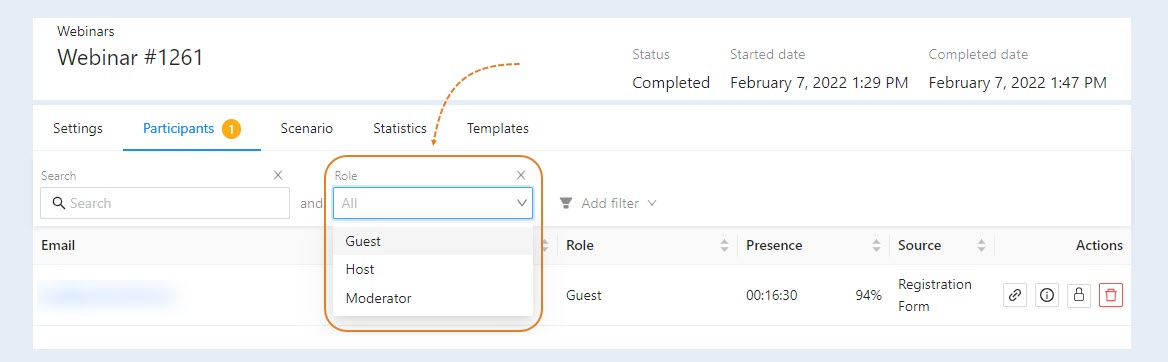
In the list of participants, you see the roles of the participants:
- A guest is a webinar participant who has independently registered for the webinar or received a personal invitation by e-mail from the organizer. He has access to the online event broadcast, live chat, and all the materials used. Guests can participate in interactive webinar elements such as polls, quizzes, or voting to express their opinions or test their knowledge. Guests have the opportunity to ask questions to the moderator or other participants via chat. To participate in the webinar, the guest does not need to create their own account at your account.
The moderator is the administrator of the account. The person who helps the presenter in organizing and conducting the webinar. The moderator provides technical support, monitors the chat, answers questions, and helps maintain order during the webinar. This is an invisible assistant that does everything to make the webinar go smoothly. The moderator can delete messages, block participants, reply to participants in writing, send announcements to the chat, etc.
A host is a person who conducts a webinar, shares his knowledge, experience, or presents a product/service. The host is the face of the webinar, and he is responsible for the content and quality of the presentation. The presenter creates and presents content, maintains audience engagement, answers questions from participants, etc.
Search for a webinar participant
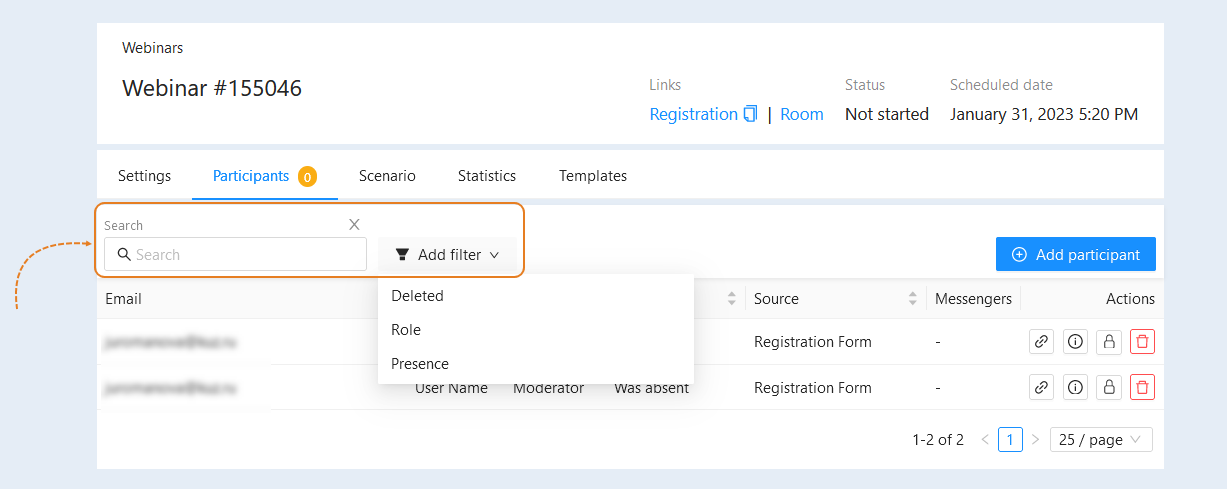
The search bar and filter are available at the top of the section. Use them to quickly find the right member:
- Search. Enter the email address or the name of the webinar participant in the search box.
Add filter. Click the "Add Filter" button and select the filter condition from the list:
- Deleted. This condition highlights users who were previously registered for the webinar, but were subsequently excluded from the list (for example, by the decision of the organizer).
Role. This condition identifies webinar participants with a specific role.
Presence. This filter allows you to display the participants who attended the webinar during a certain time. This is useful for analyzing audience engagement and identifying the most active participants.
Expor Users in
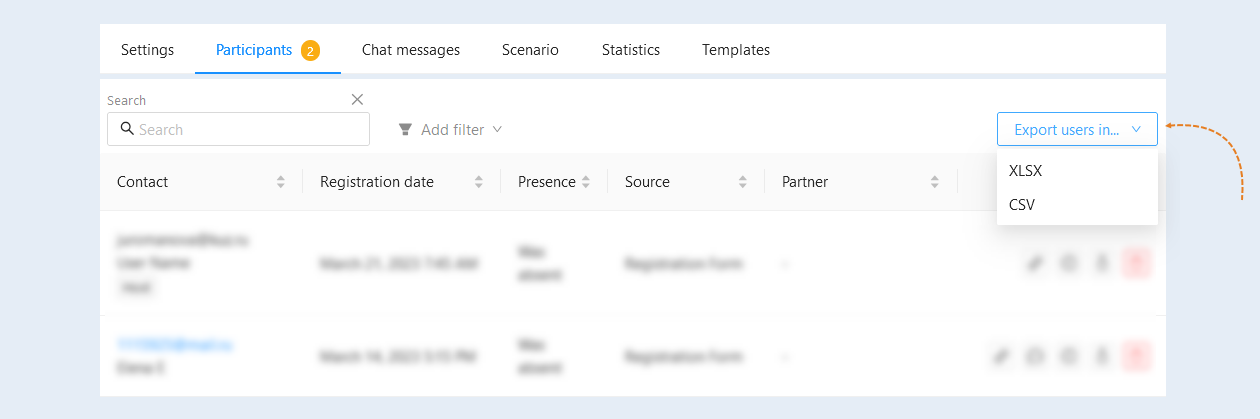
In the upper right corner of the page, there is a button labeled "Export Users To". Exporting users allows you to save and analyze webinar participant data outside the platform. The export feature provides a list of webinar participants in a format convenient for analysis.
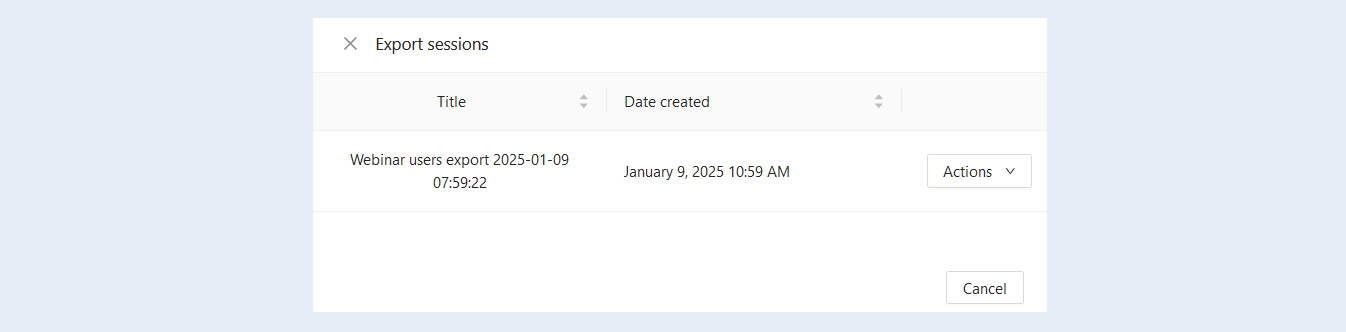
Export sessions will be saved and displayed on the panel. Here, the number of sessions conducted is indicated. Click the "Details" button to perform actions with the saved sessions.
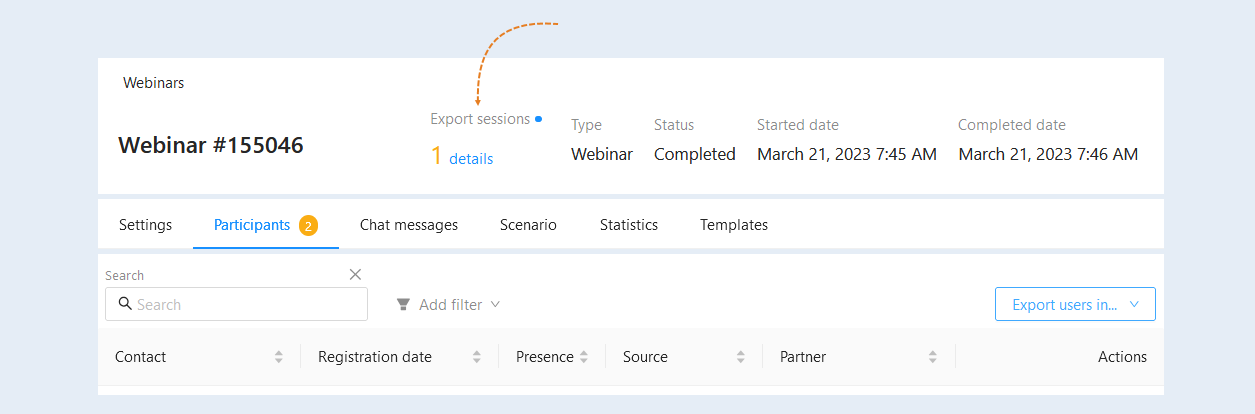
In the window that opens, all previously created user export sessions will be available. You can re-download the created files by clicking the "Actions" button and selecting the "Download" action.