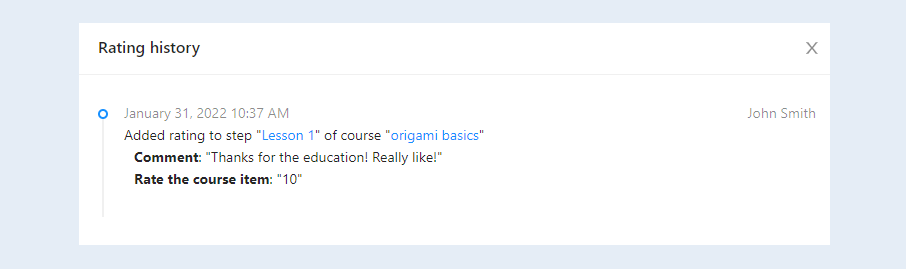
In the "Grades" section, you can see the grades of the users of your courses or individual steps within the course.
The grade is assigned on a scale from 1 to 10. Users can grade the course by assigning a grade to the course or individual step. And add a textual explanation to your assessment. Also, the user can write a comment on the assessment.
Click on the desired section of the article to go to its description:
How to enable grades
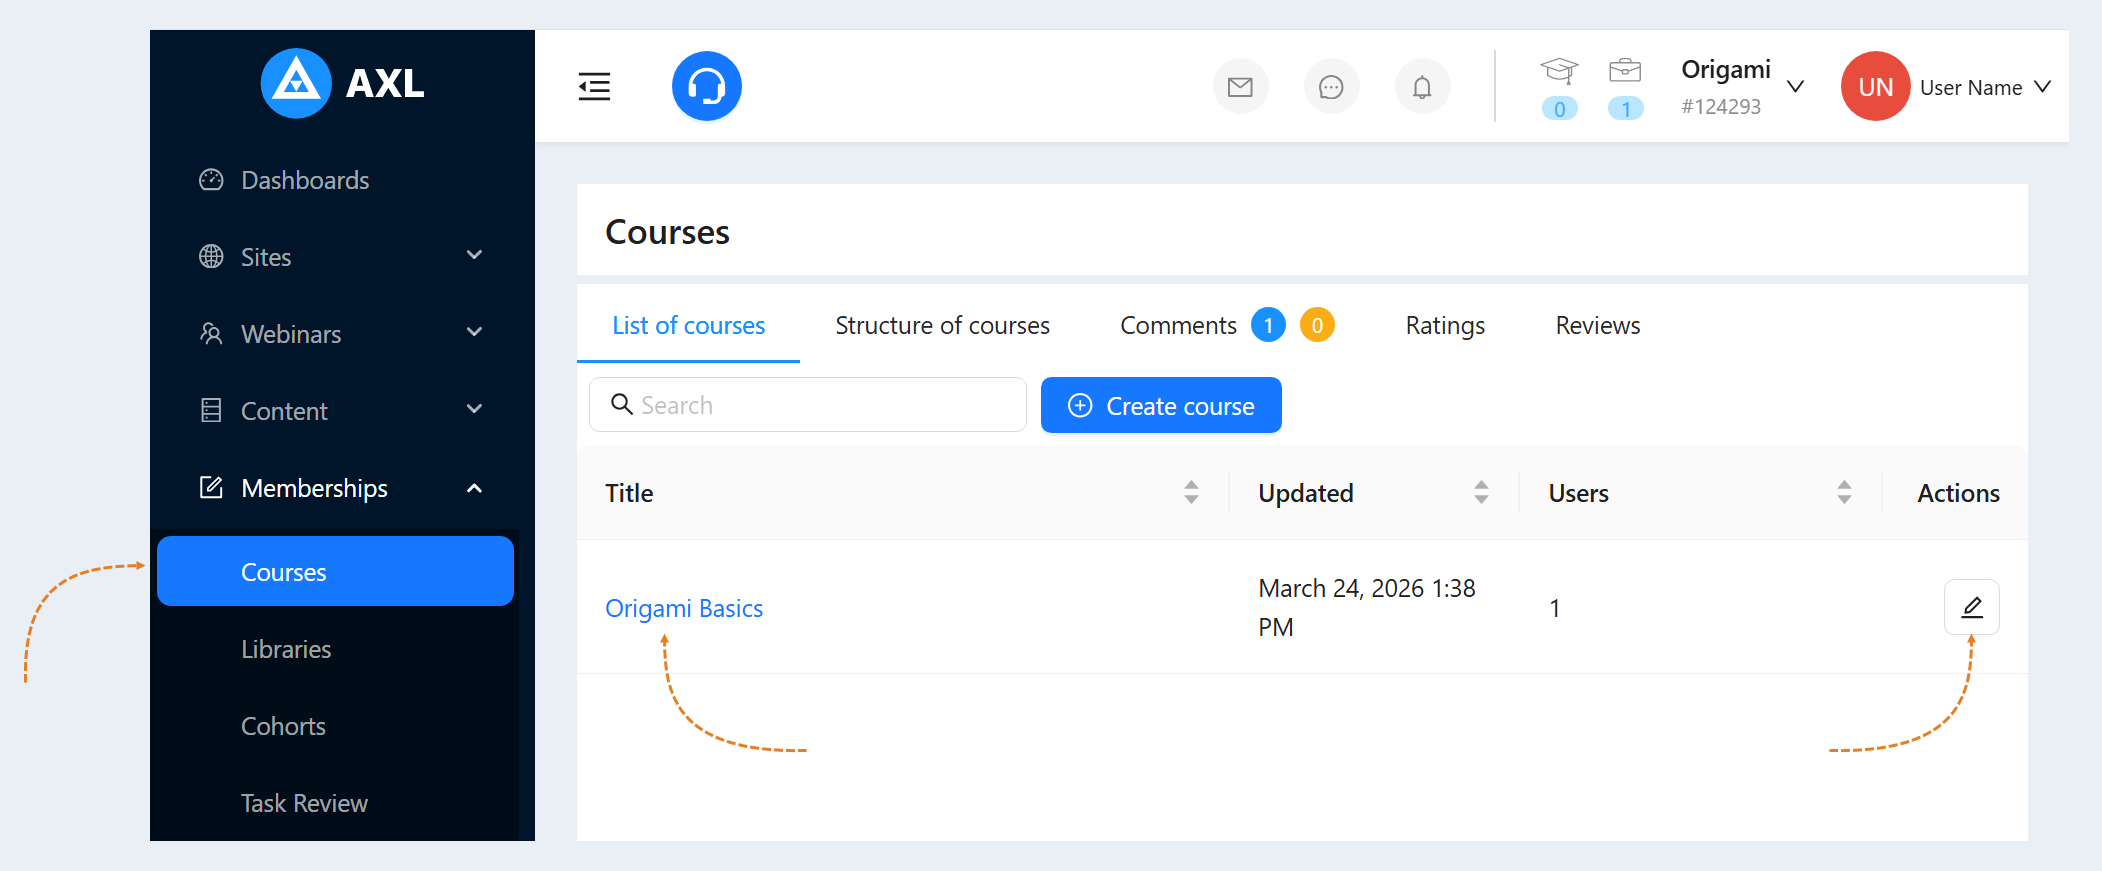
Go to the "Courses" section. Click on the course name or the "Actions" button. This will open a window for editing the course.
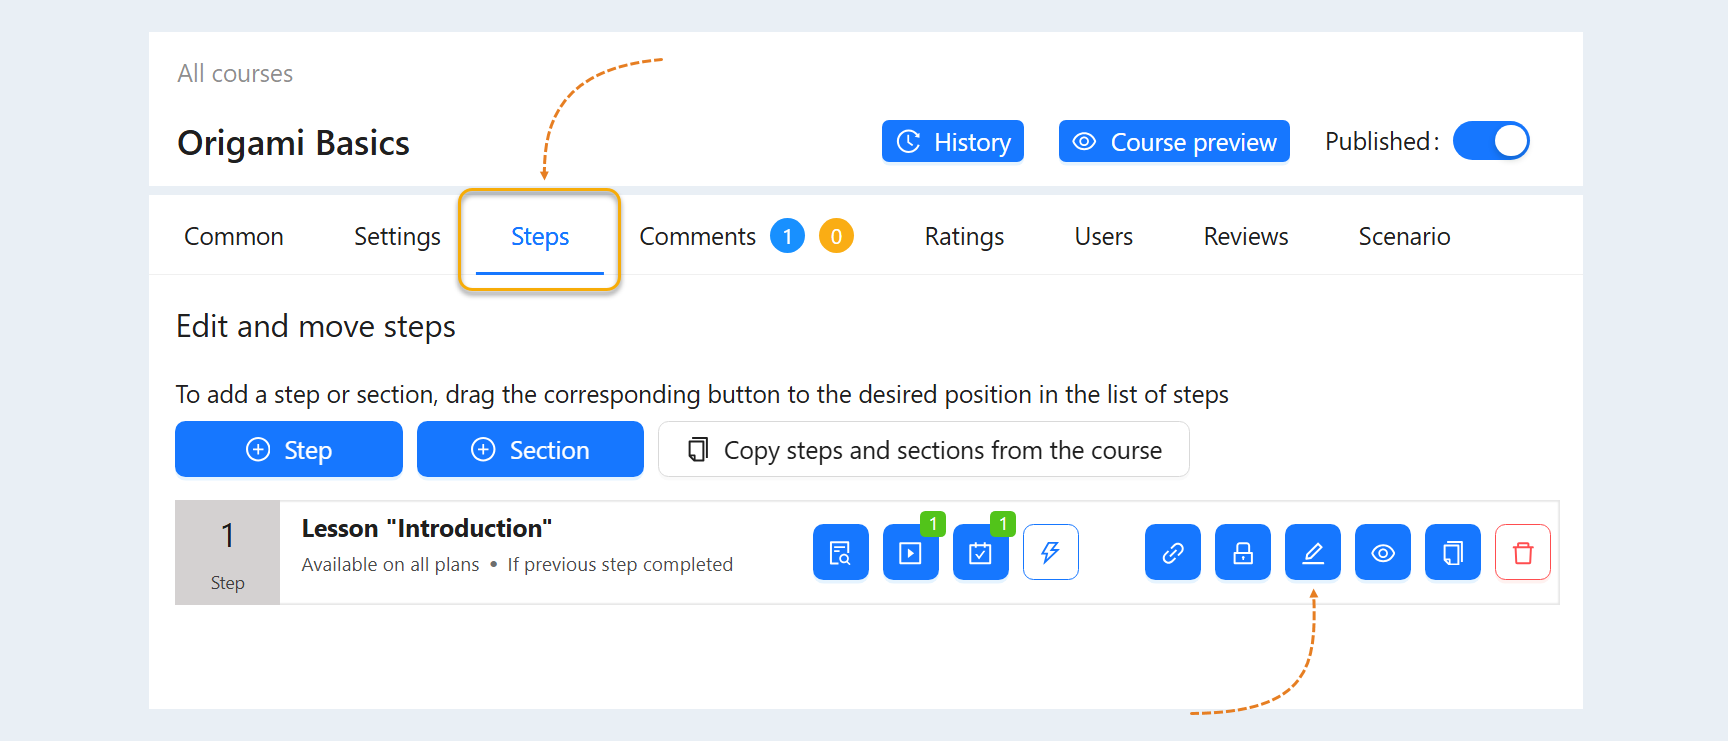
To enable the Grades option go to the Course Steps tab. Select a step and click “Edit”. This will open the General Settings page.
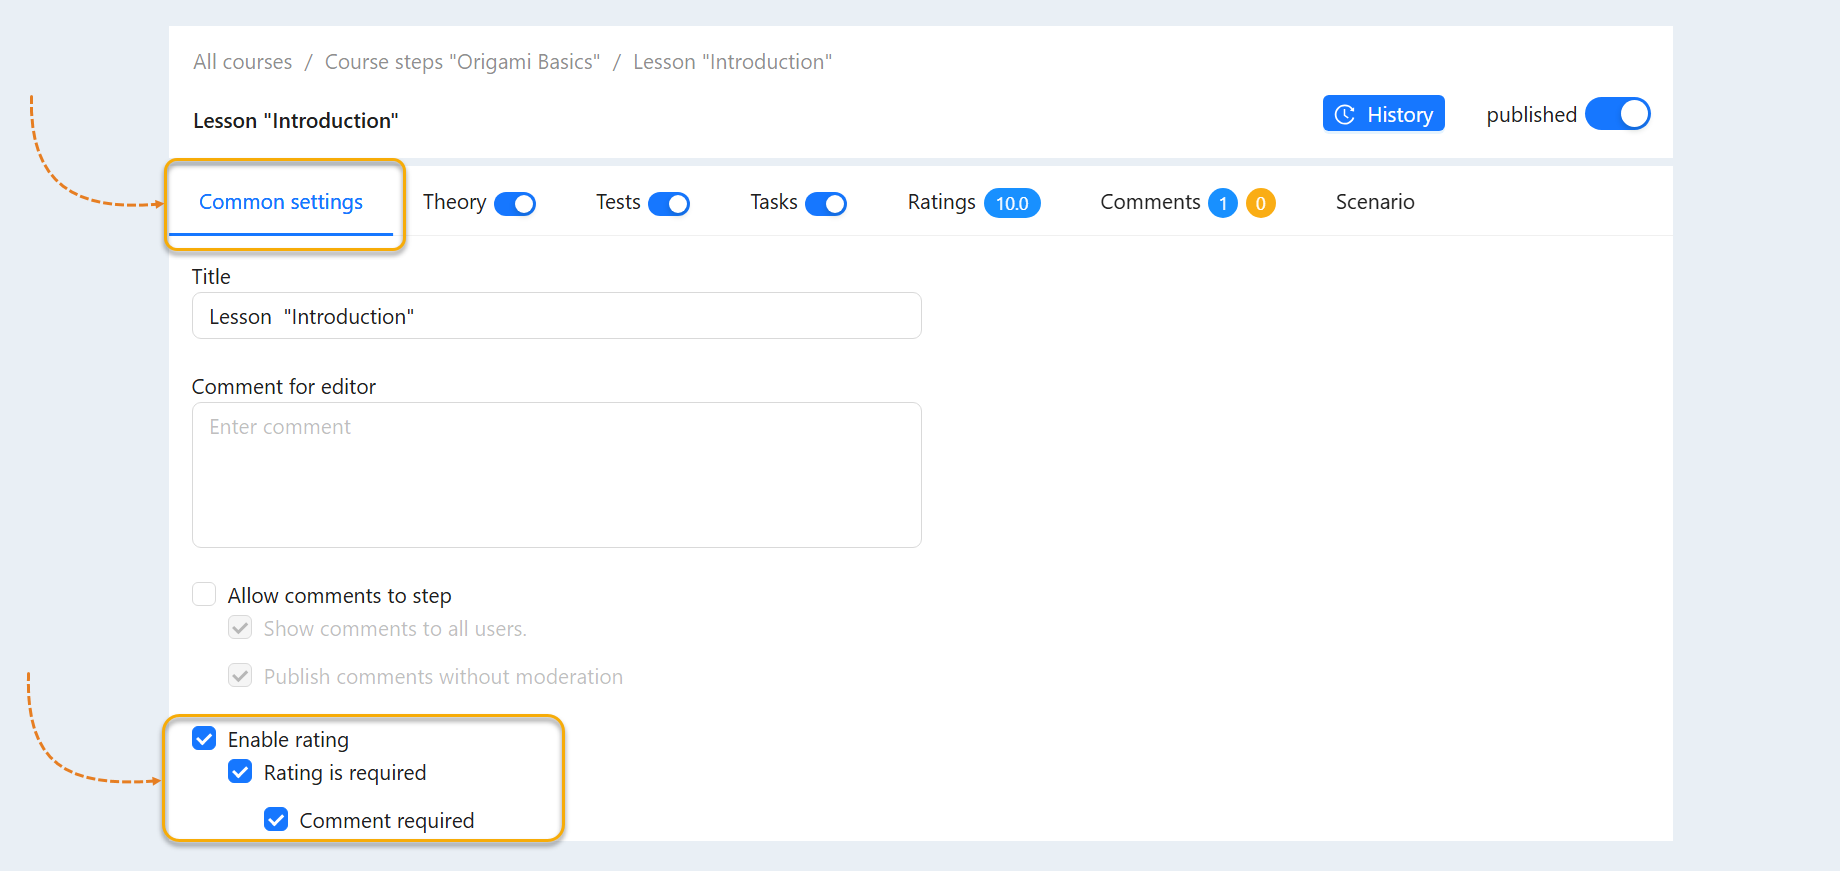
To allow users to give grades, check the boxes in the lines:
- Enable rating. Check the box to activate the grading system for this step or lesson. This allows users to rate the lesson content on a scale from 1 to 10. This will give users the opportunity to express their opinions about the quality of the material, its accessibility and usefulness. Also, thanks to this feature, teachers will be able to collect feedback on their work to further improve the course. Enabling this option can help identify the strengths and weaknesses of the lesson.
Rating is required. This option means that users must leave their grade before continuing their studies or moving on to the next step of the course. Without an assessment, the next step will not be available to the user. This may encourage users to be more attentive to the material, as they will be required to think about how they perceived it. At the same time, it can increase the amount of feedback collected and improve the quality of the course.
Comment required. When this option is activated, users will have to leave an explanatory comment on their grade, explaining why they set such a grade. This helps to receive more detailed and constructive feedback, allowing teachers to understand the reasons for user satisfaction or dissatisfaction. Such explanations can be used to introduce changes and adjustments to the lecture or the course as a whole.
Return to "Course Steps" to include Grades for other steps.
General list of ratings
Go to the "Courses" section, open the "Grades" tab. This tab displays a general list of user grades for all courses.
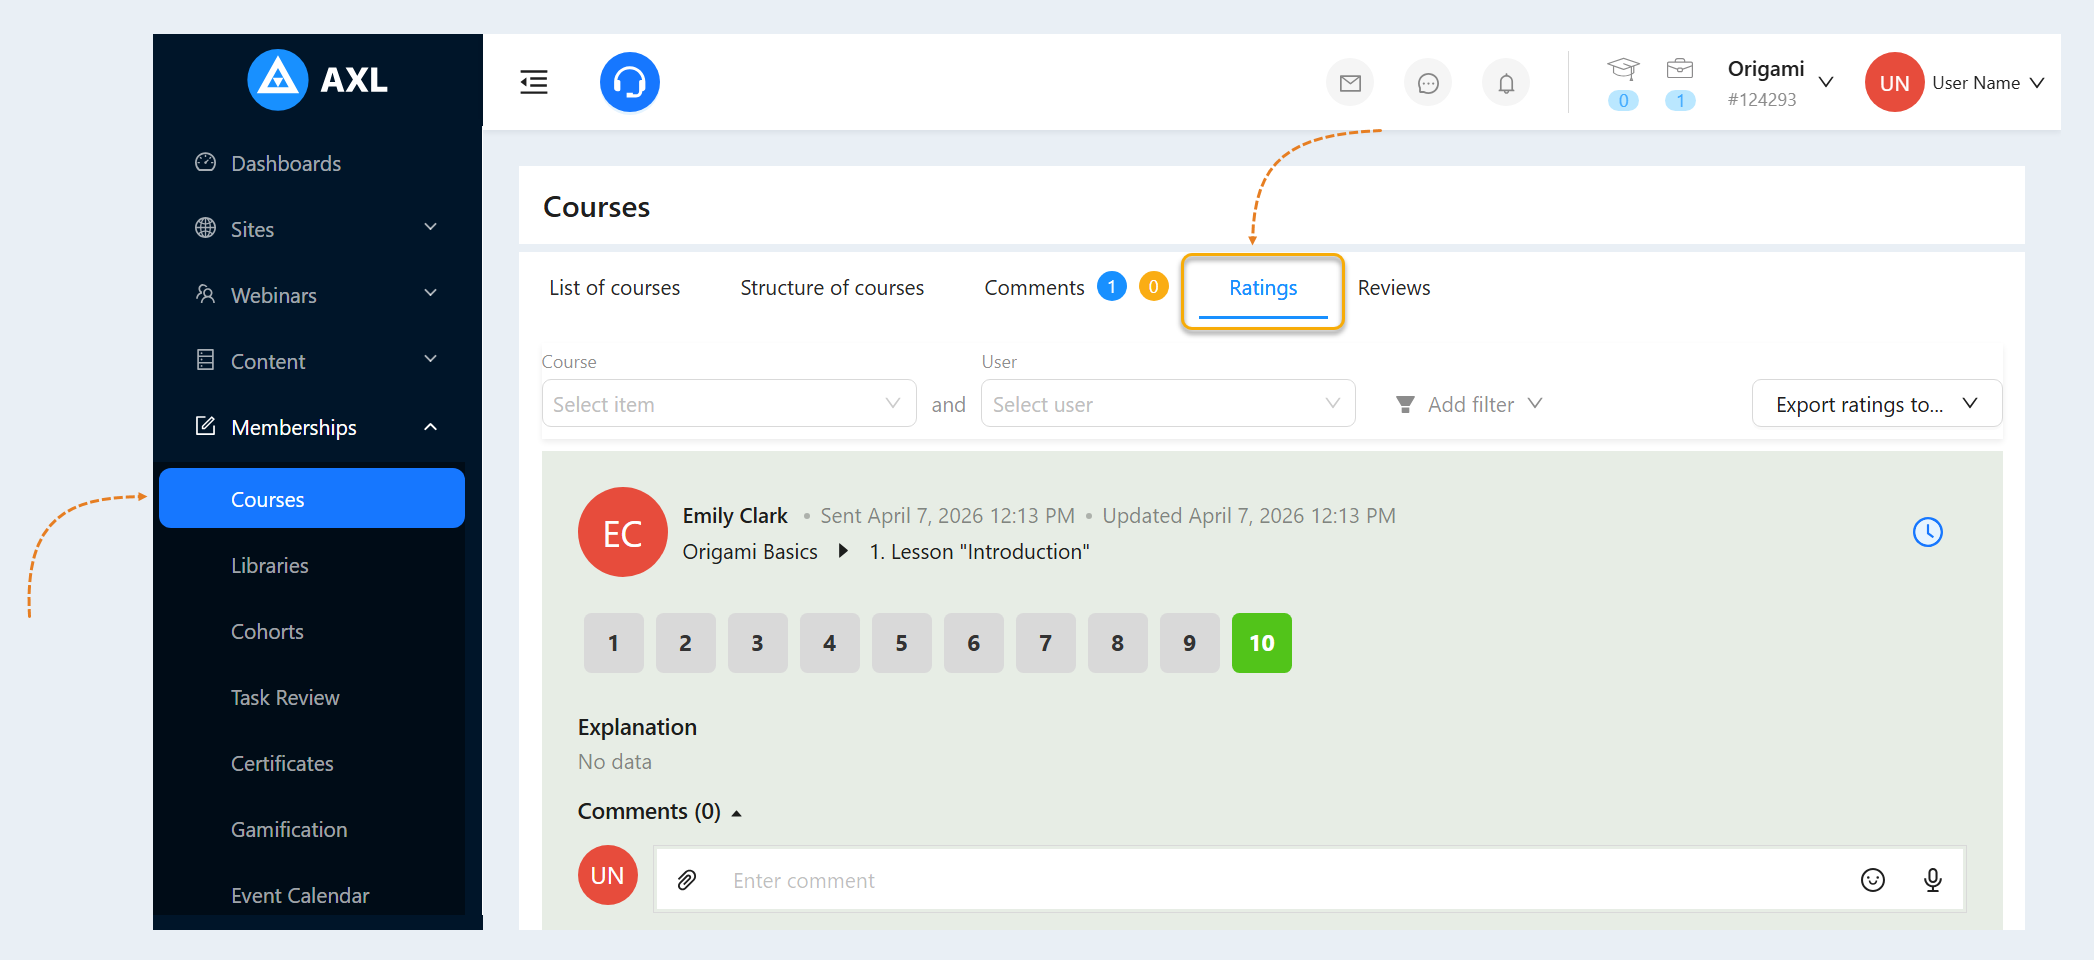
List of course grades
Go to the “Courses" tab. Open the previously created course. To do this, click on the course name or the "Actions" button.
Next, go to the "Grades" tab. Users' grades for this course will be displayed here.
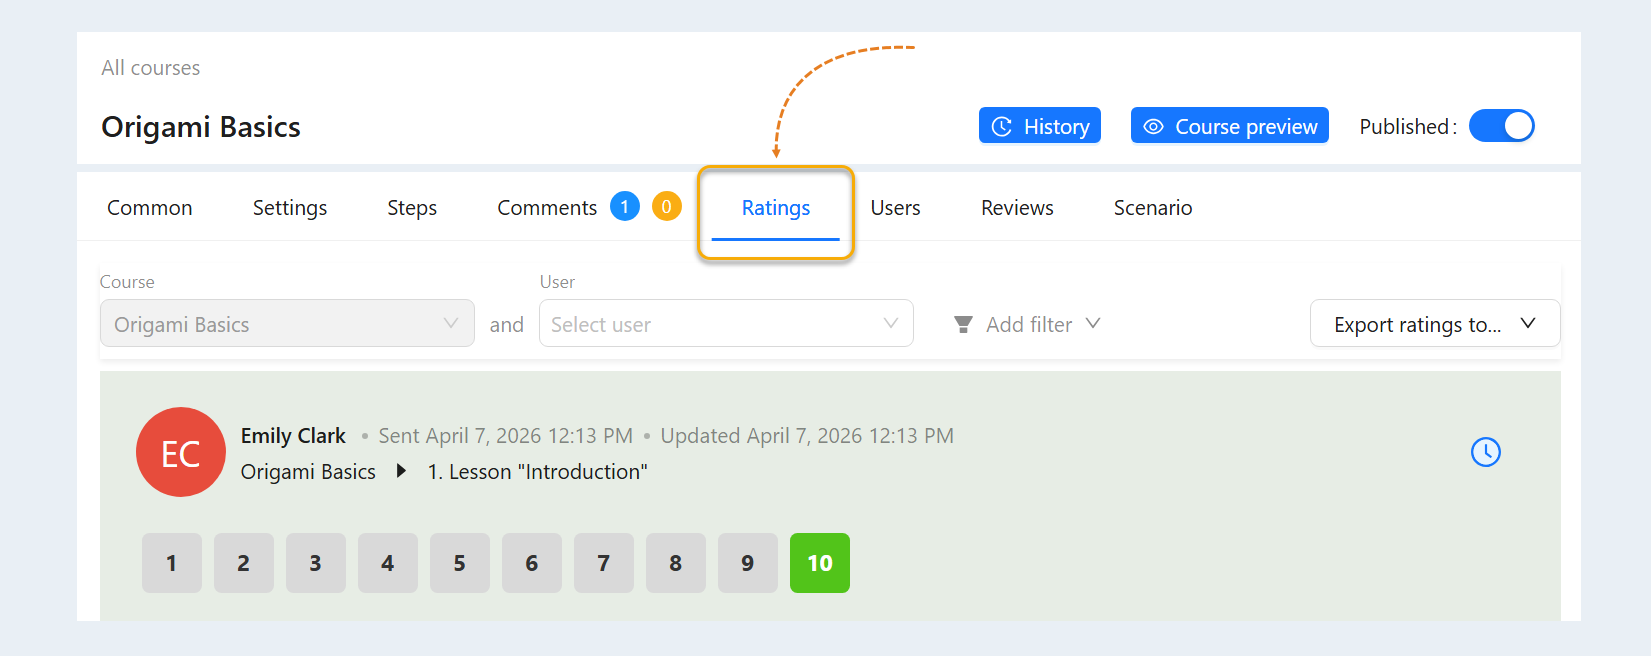
At the top of the page, there are fields for filtering:
- Course. This filter allows you to select grades for a specific course. For example, if you have multiple courses, you can choose the one you are interested in and see all the grades of user s who took that course.
User. This filter is designed to select the grades of a specific user. It helps to identify preferences or issues in the learning of that particular user.
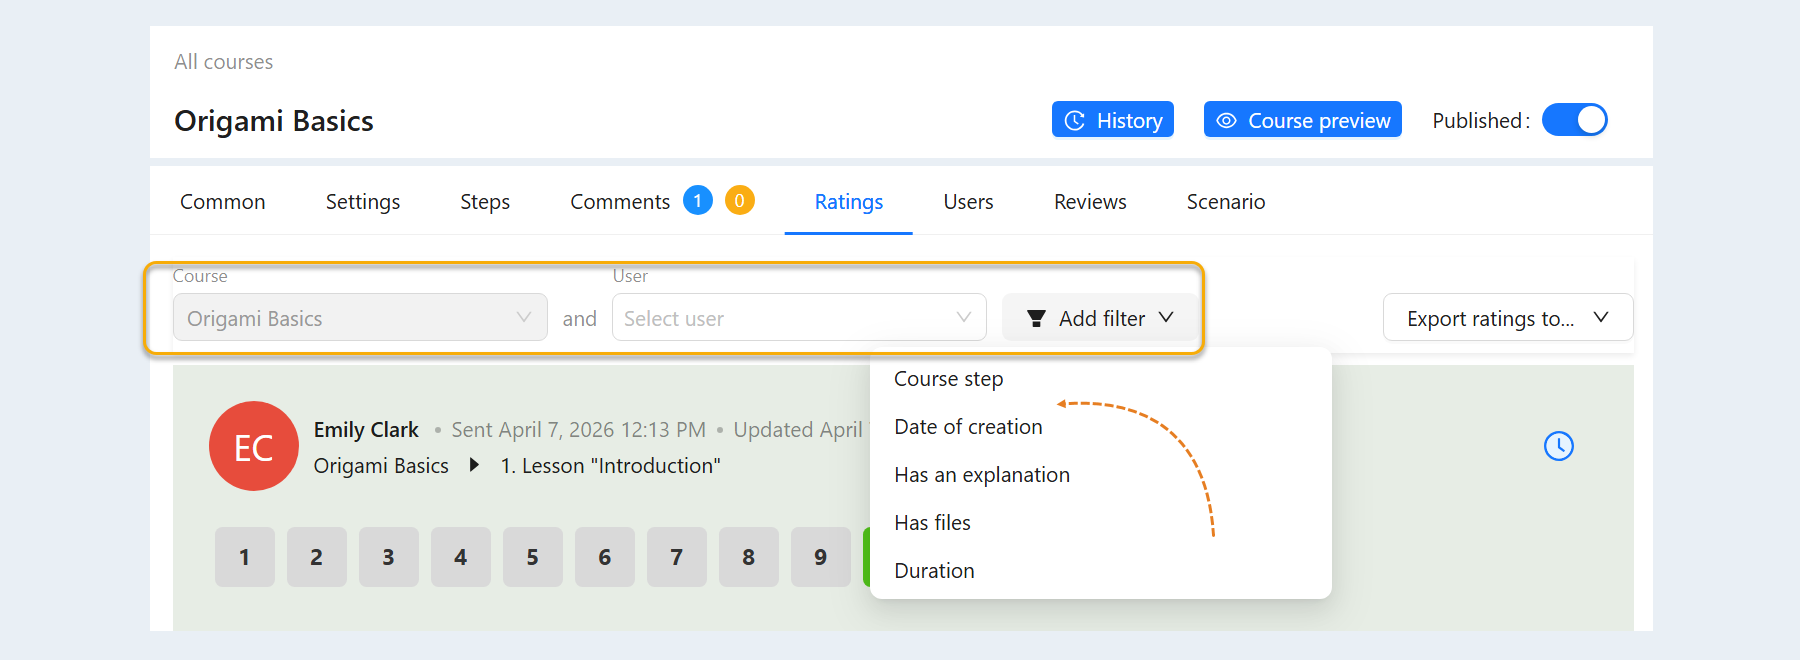
Add Filter. Click the "Add Filter" button and choose a filter condition from the list:
Course step. This filter allows you to select grades for a specific step of the course. You can see all the grades of the users who have completed the selected step of the course.
Creation Date. This filter allows you to select grades based on the time they were recorded. You can choose a period (for example, for a week, month, or specific dates) and see the grades that were recorded only in that interval.
Has Explanation. This filter allows you to select grades to which comments or explanations have been added. This helps to understand which grades were given with justification and identify the reasons why users rate the lesson. It can be useful for pinpointing problematic areas in the course.
Has Files. This filter allows you to see only those grades that have additional files attached. You can see how actively users attach materials to their grades and how this impacts their evaluations.
Duration. This filter allows you to select grades within a specified range. This helps to understand the distribution of grades better and to identify both high and low grades. It is useful for identifying issues related to specific lessons, as well as for analyzing the overall quality rating of the course.
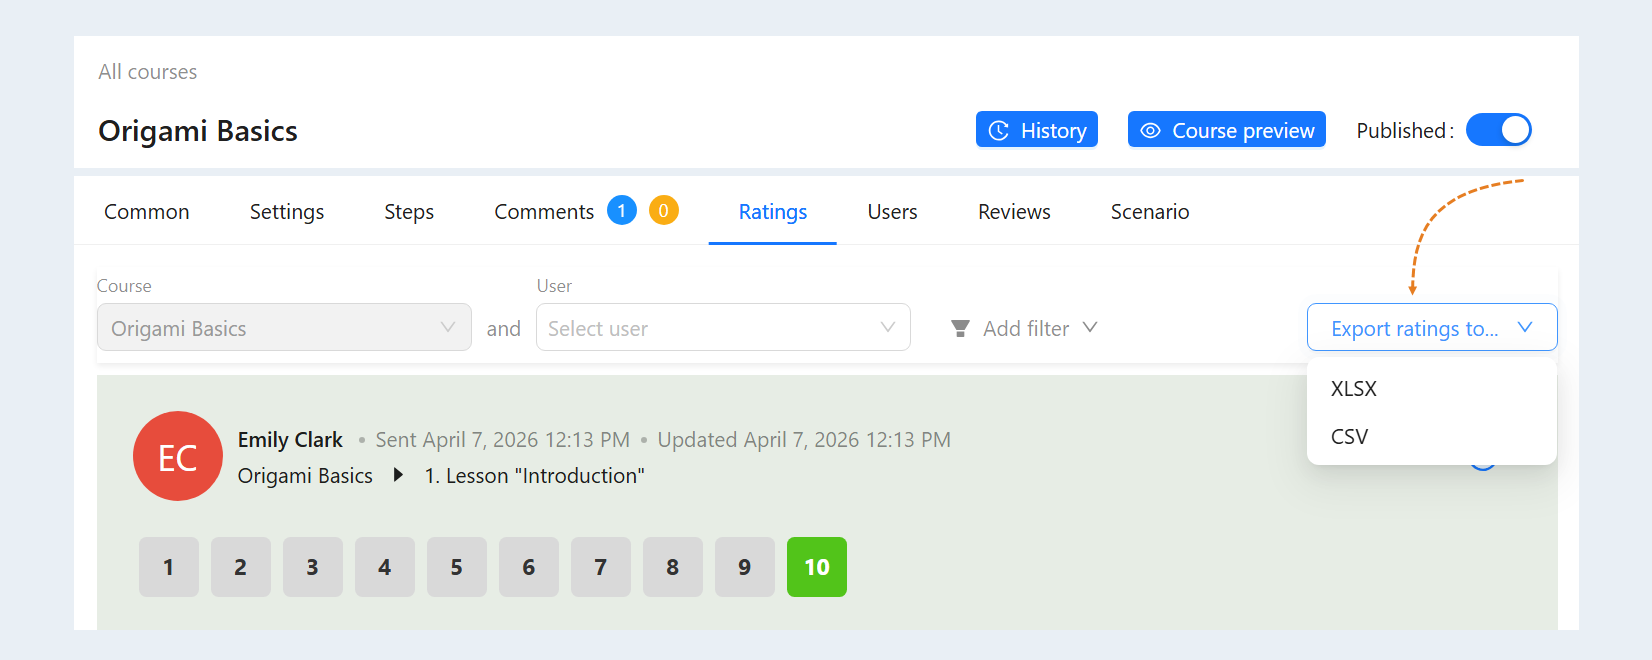
You can download the list of ratings to your device (computer, laptop, tablet) in one file (in CSV or XLSX format). This way you can quickly transfer a large number of course grades.
To export grades in XLSX or CSV format, click the "Export Grades to" button and select the desired format.
A message export window will open for you. Click the "Action" button and select the desired action from the list: download, download and close or close.
The list of ratings will be saved to your device (computer, laptop, tablet).

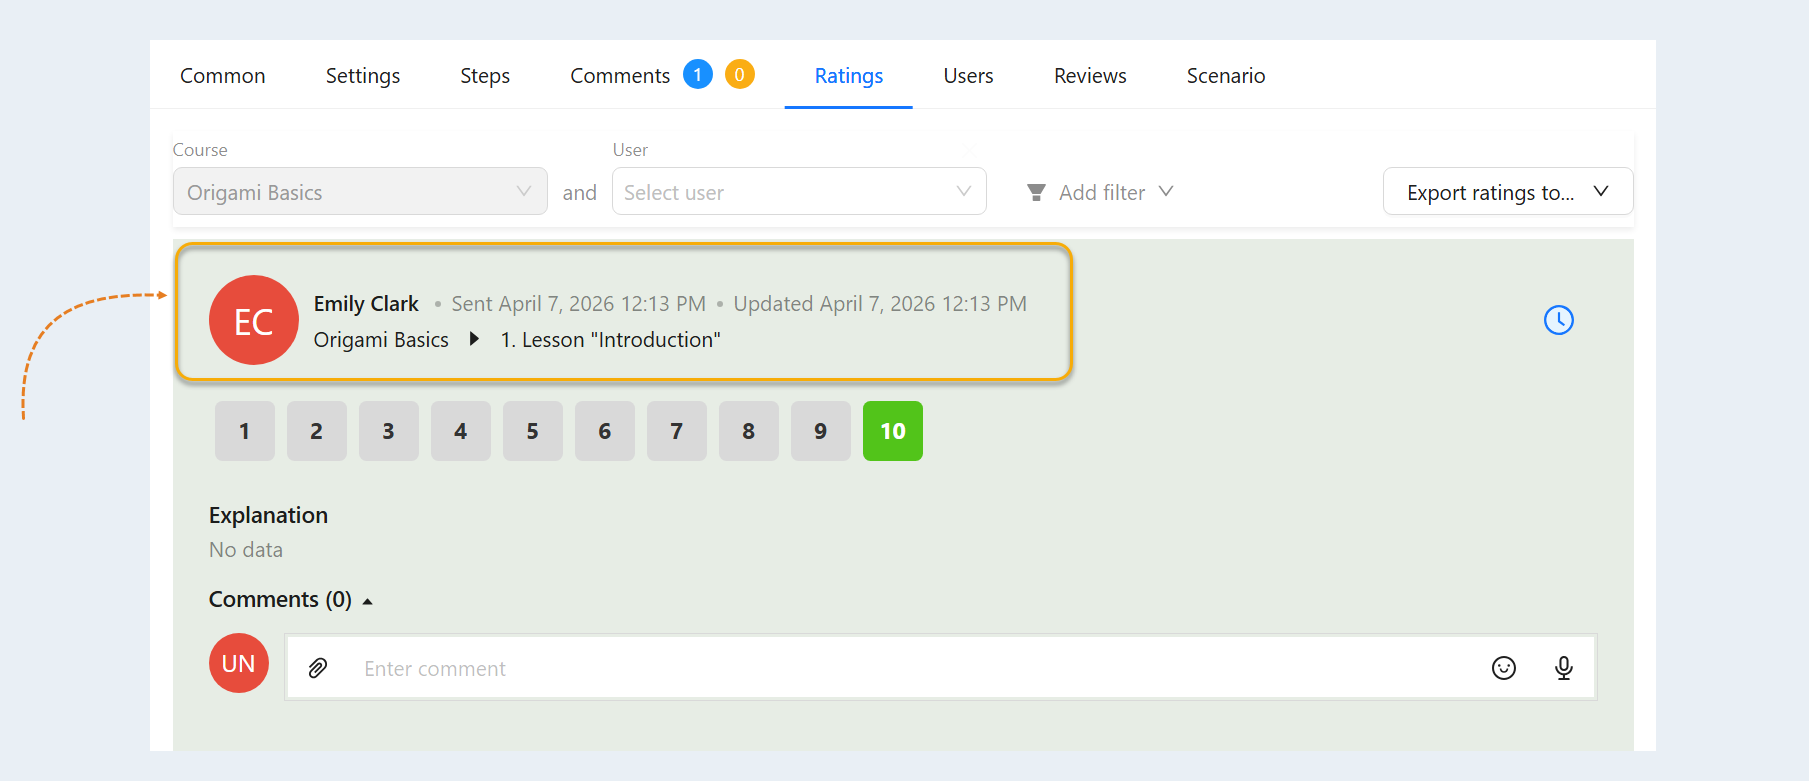
Below is a list of ratings. Each grade is displayed on a separate card and contains the following information:
- User avatar. A photo of the user will be shown in a round window if he has uploaded it in his personal account.
- Name and surname of the user.
- Assessment date. The exact date and time when the grade was given.
- Course, course section, and grade lesson.
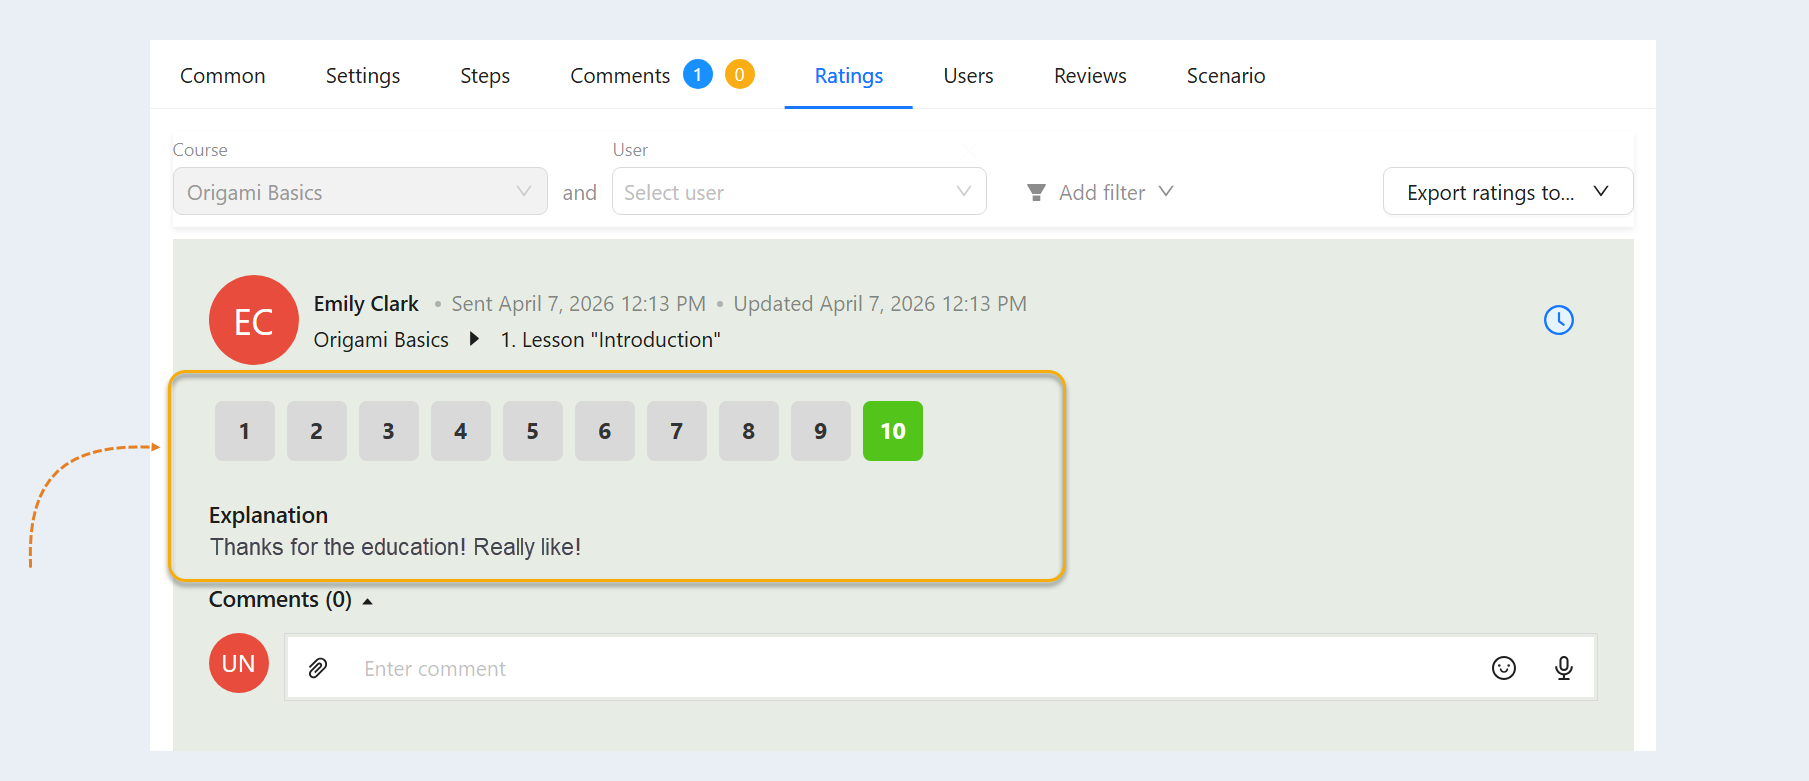
- Rating on a scale from 1 to 10.
- Explanation of the assessment. The user writes an explanation for his assessment - why he gave just such a grade.
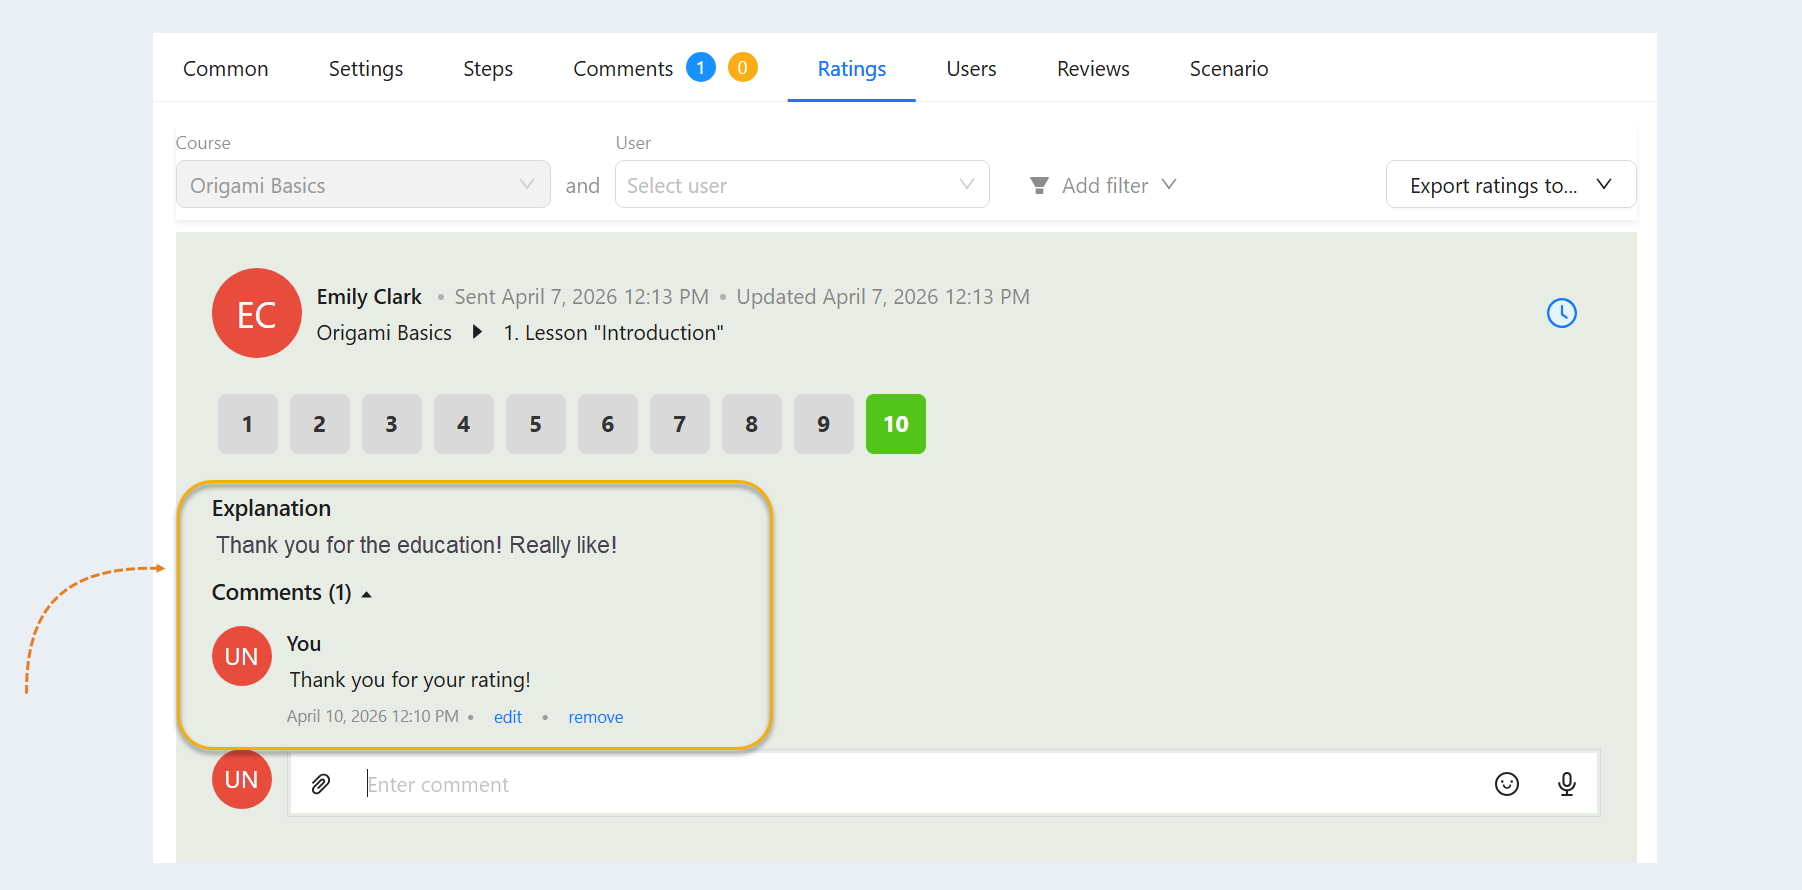
- Commentary on the assessment. Here you can see the user's comment on this grade.
- Your comment on the evaluation. Your commentary on the user's assessment will be located here. You can edit or delete your comment.
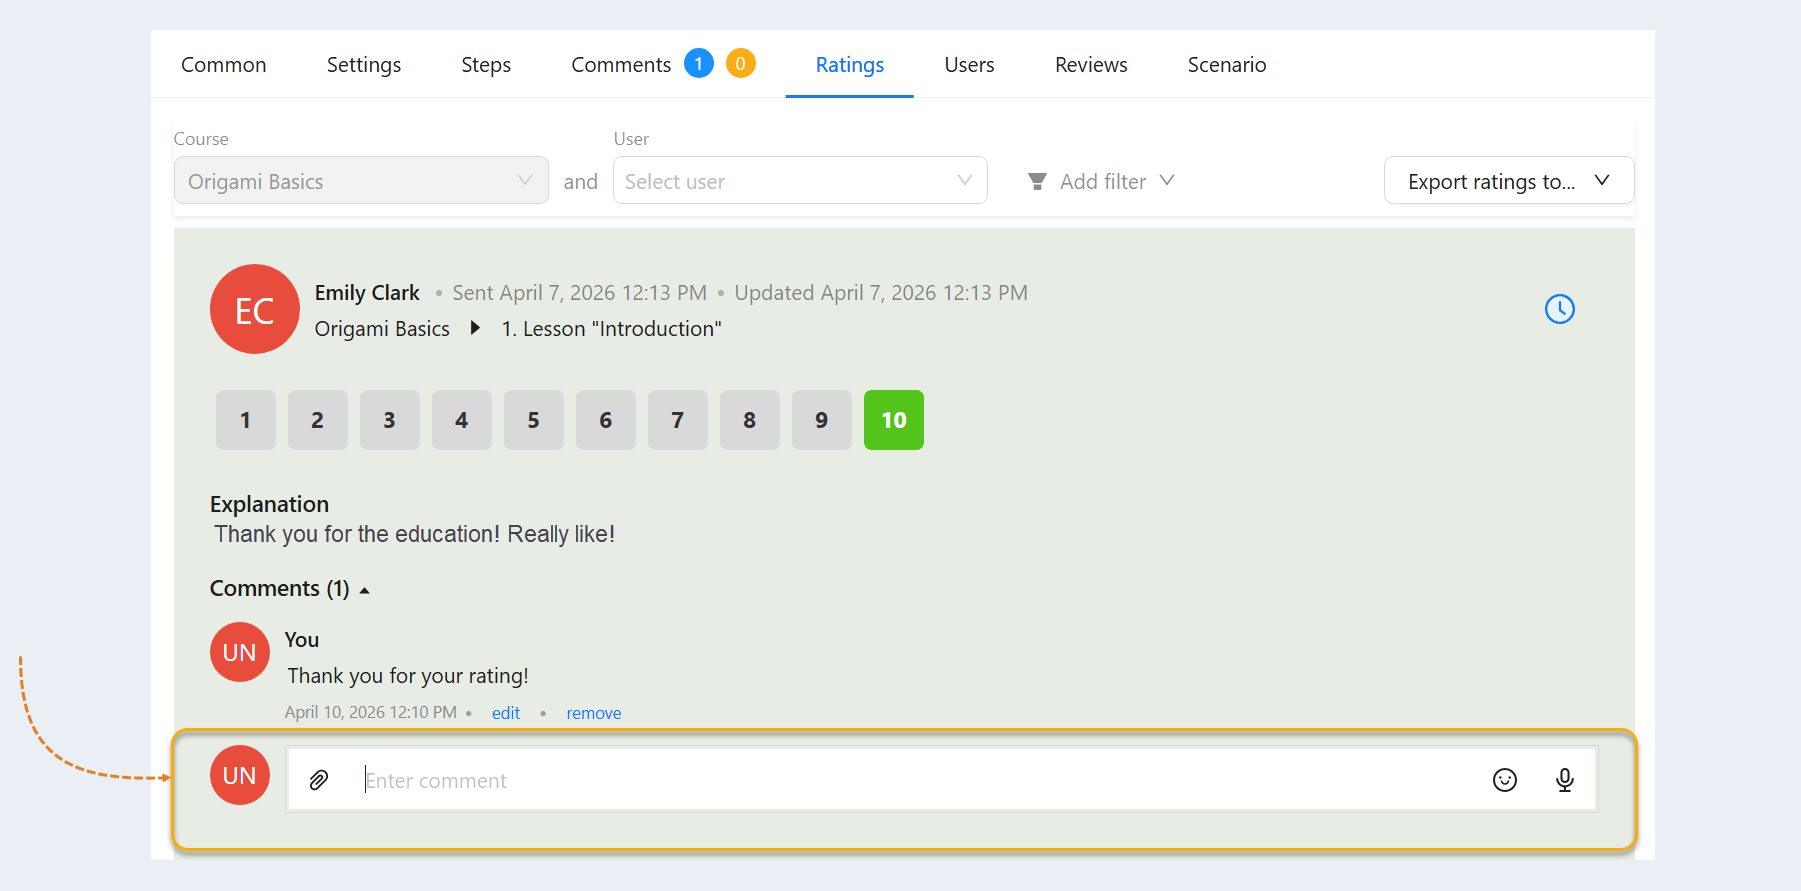
- The field for the comment to the rating. Here you can write an answer to the user's grade and attach files.
- Rating history. Click on the button to view the detailed history of the user's assessment: additions, changes.
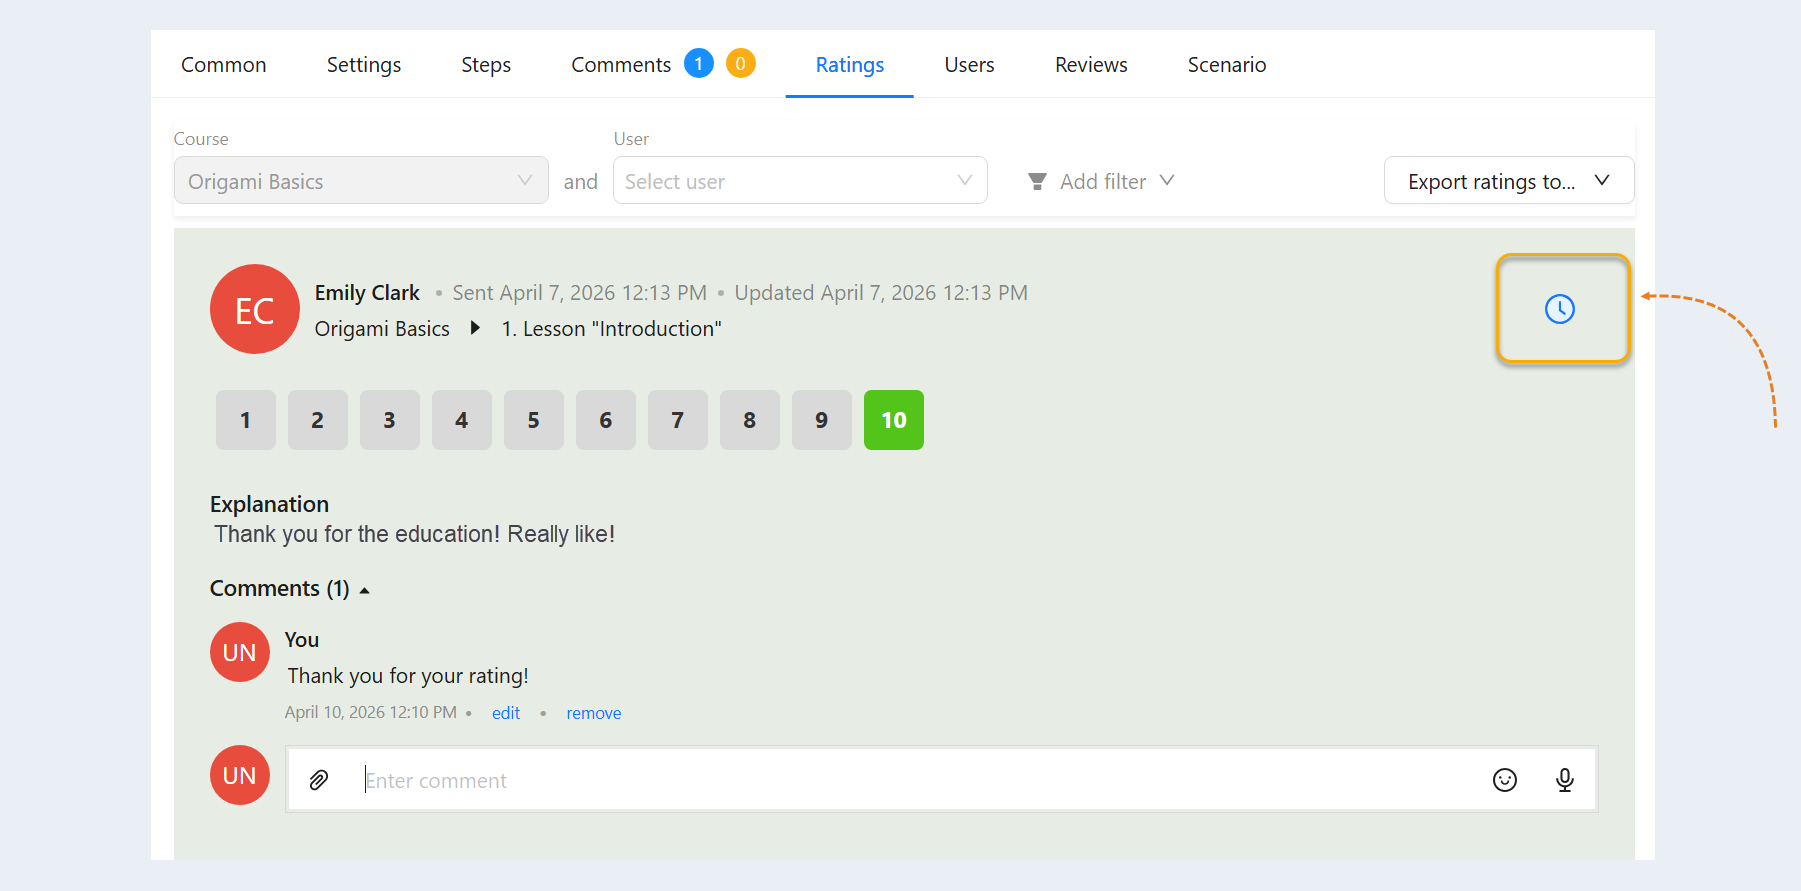
The history of the assessment changes will be shown here.