Courses are the section of AXL where you create training courses for your account.
In this section, you create and manage the list of courses within the account: add new ones, edit, delete, change the name, description and other data about the courses.
A training course is a set of sequential steps to be presented to the user.
In AXL, a course consists of many steps (video, text, test, assignments) grouped by a specific topic that users study online. You provide access to each course or all the courses of your account at once. Access can be either paid or free.
Click on the desired section of the article to go to its description:
Course List
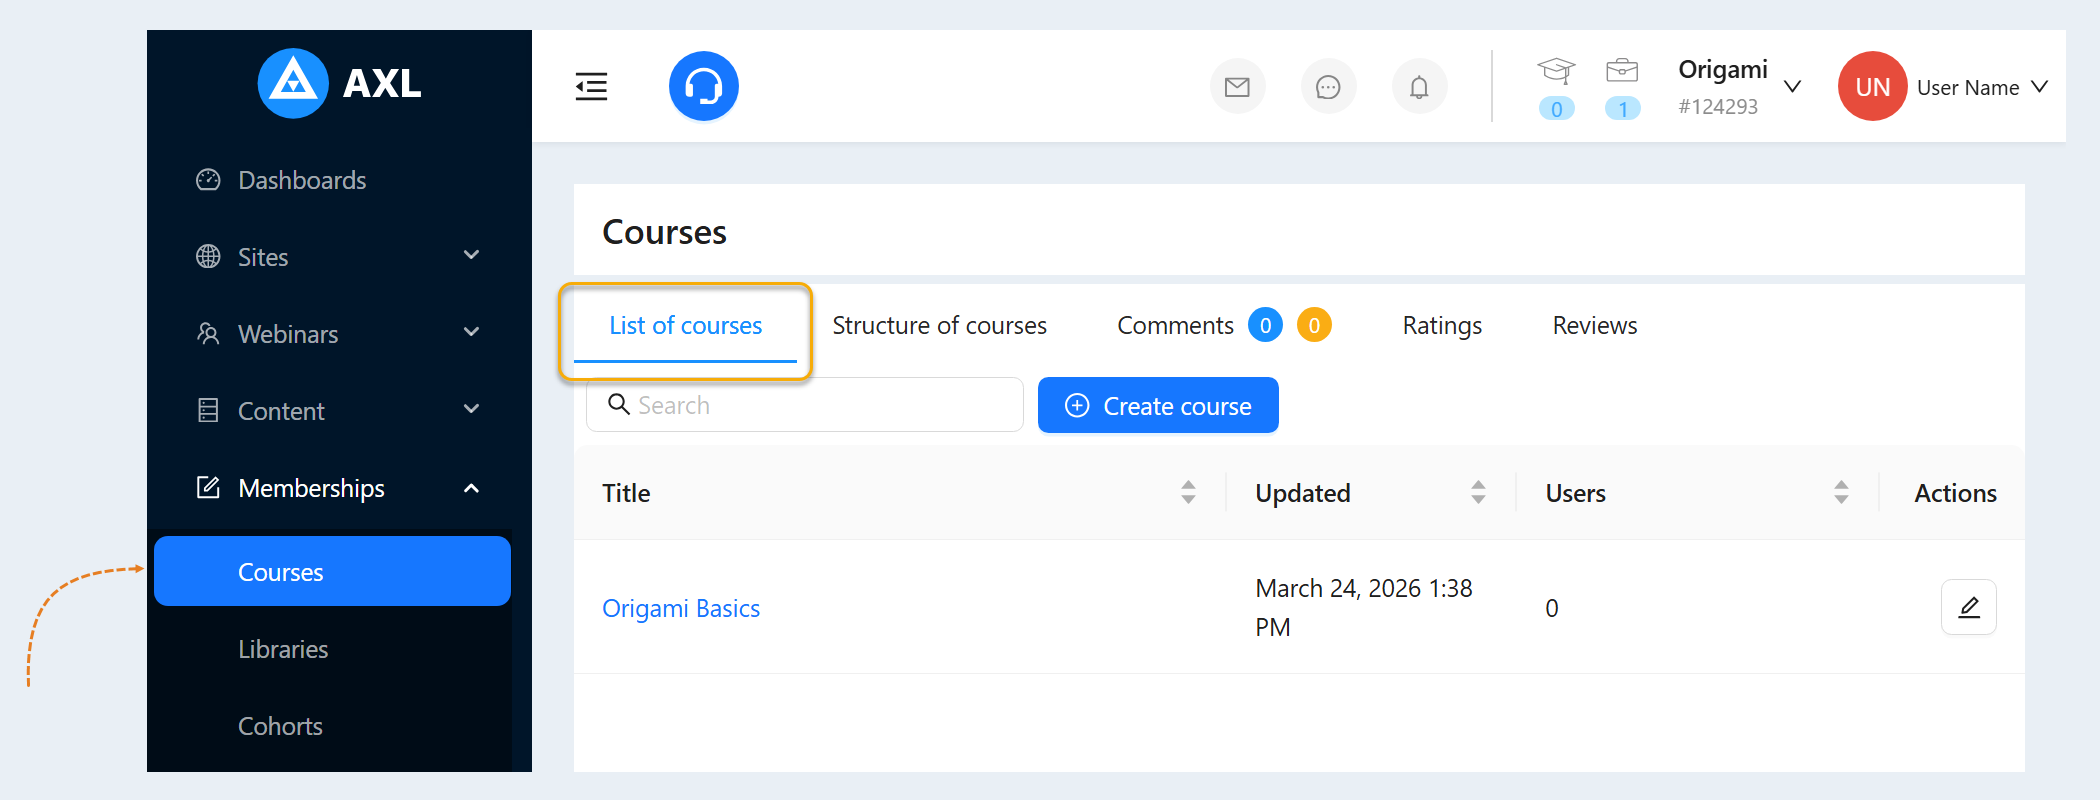
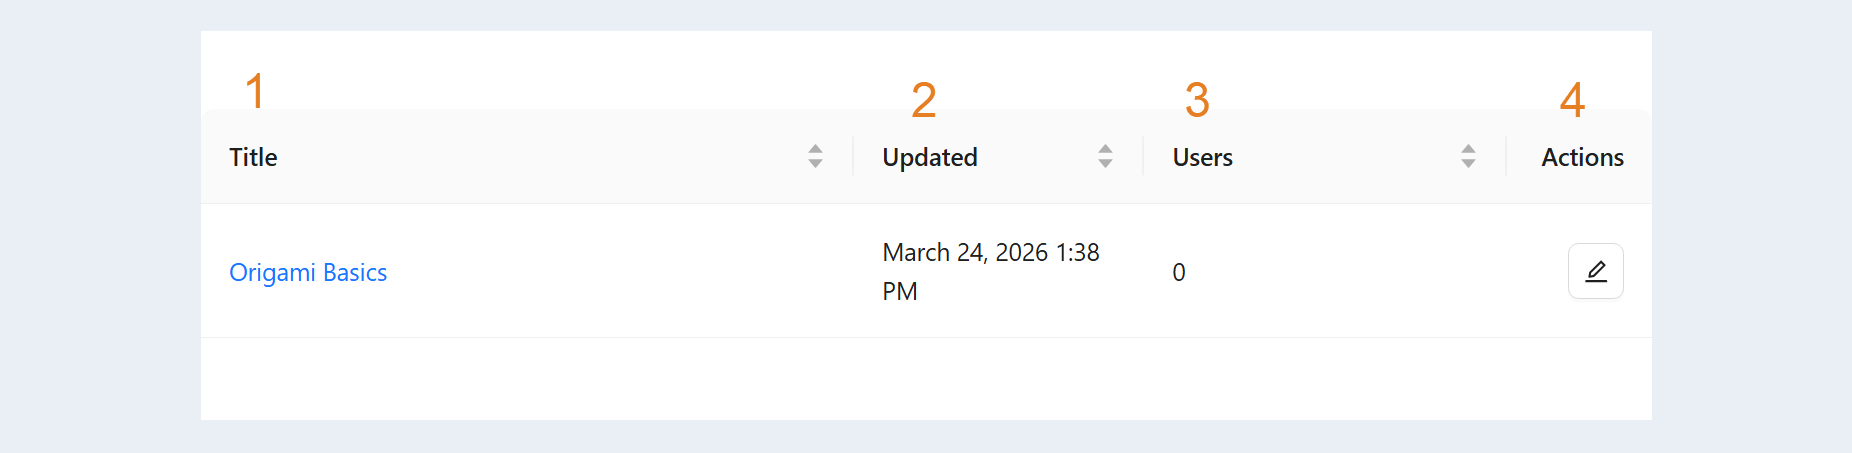
Go to the "Courses and Training" section, "Courses" tab. A list of courses will open. Here you can see the following information:
- Course name. Click on the title to edit the course.
Updated. Date and time of the last changes in the course.
Users. The number of users taking this course.
Actions. The “Actions” button duplicates the “Title” and is intended for making changes to the course.
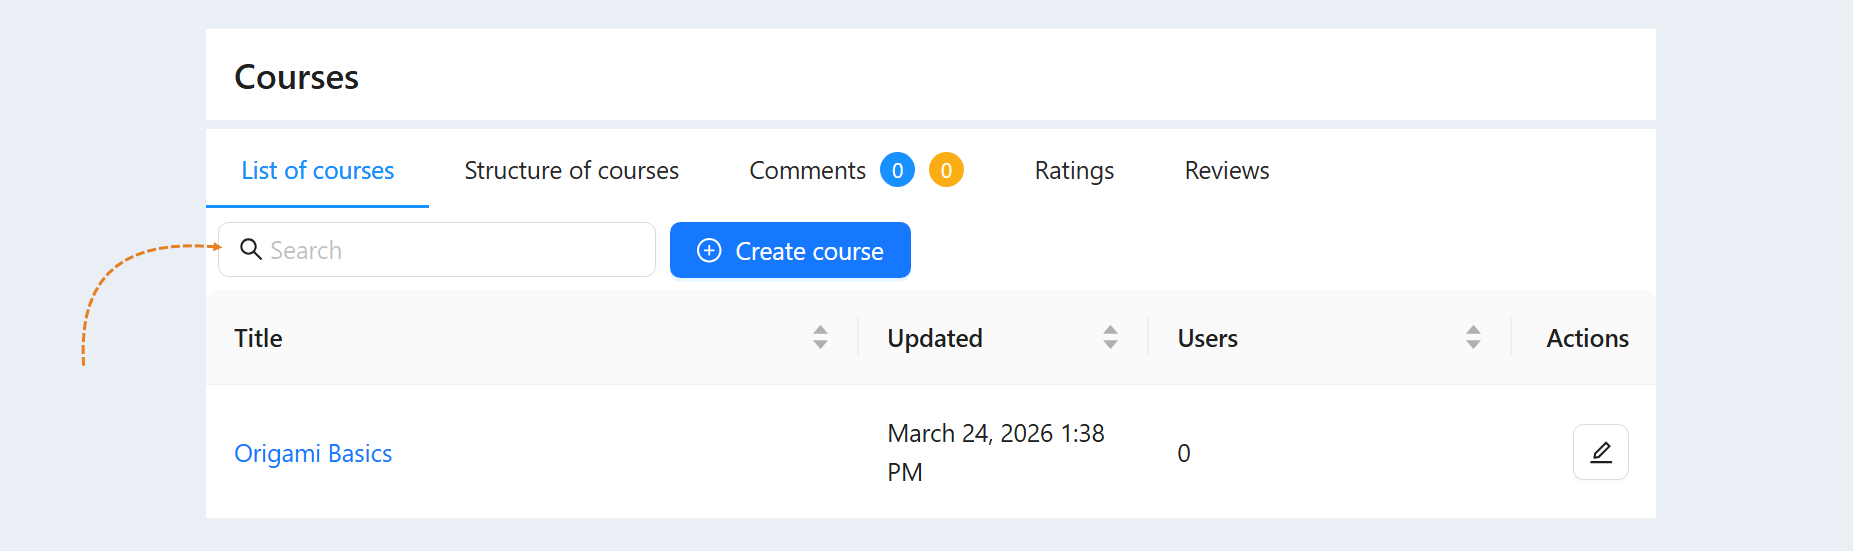
The Courses page has a Search line for quick sorting of courses. Enter the course title in the string or a keyword that appears in the title. Only courses that contain this word in the course title will appear in the list.
How to create a course
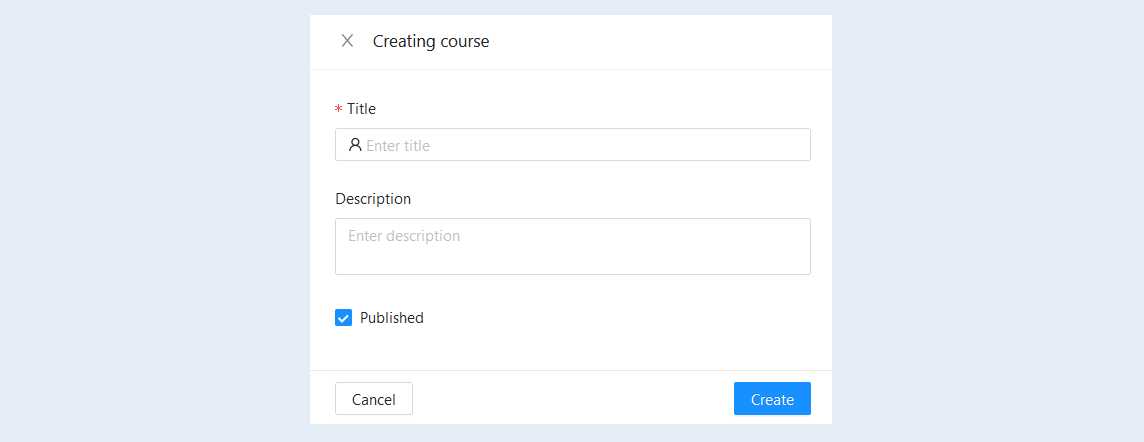
To add a course to your account, click the "Create Course" button. In the window that opens, fill in the fields: course name and course description (this field is optional). Check the box "Published" to publish the course or uncheck the box to remove it from publication. Click the "Create" button.
When you created a course, it appears in the course list. You can now manage this course. Read more in the article "Course Management".
Course structure
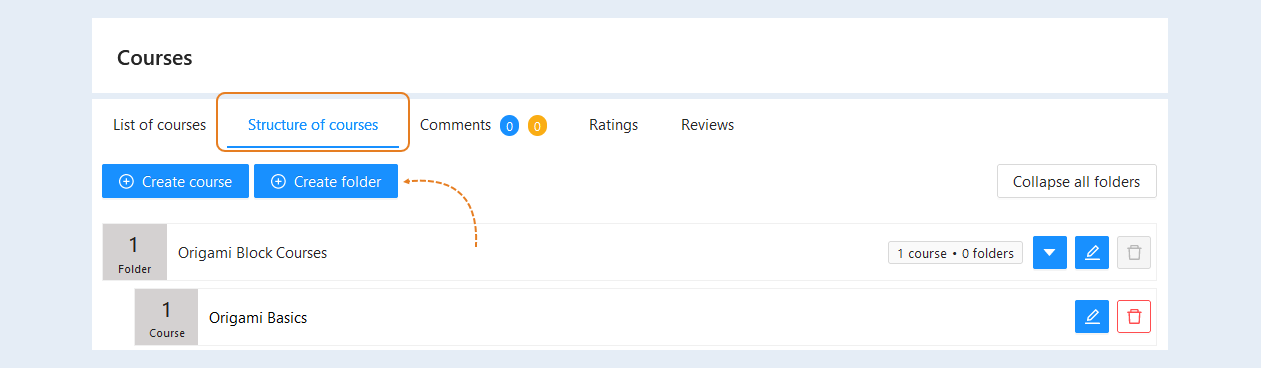
In the "Course Structure" tab, you can create a sequence and hierarchy of courses. The structure of the course is the logical organization of its content. The structure determines which modules and sections the course consists of, in what order they are arranged and how they are interconnected.
Create folders and fill them with courses. Click the "Create Folder" button.
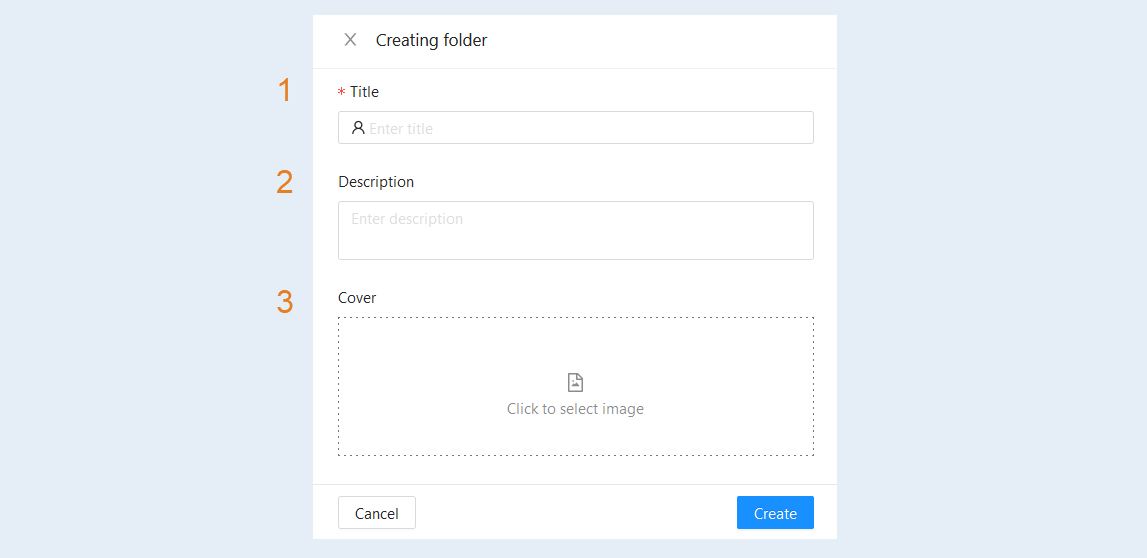
In the window that opens, fill in the fields:
- Title. Specify the folder name.
Description. Add a brief description of the folder for easy search.
Cover. You can add a cover to a folder. Click to select an image and upload it from your device (computer, tablet, laptop).
Click the "Create" button.
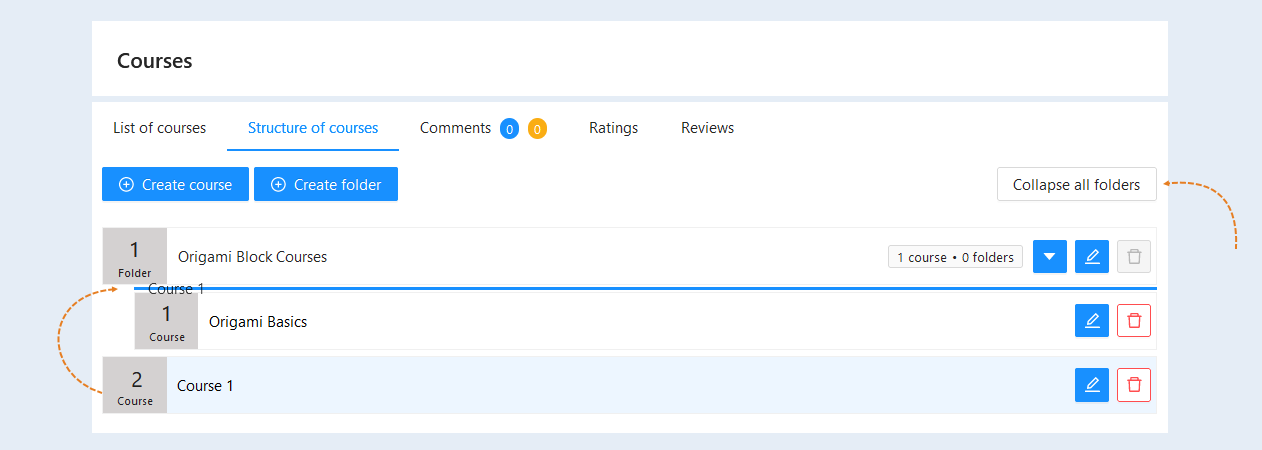
Next, add courses to the folder. You can change the sequence of courses inside the folder by dragging the courses between each other. Hover the cursor over the course name, hold down the left mouse button and move the course relative to the others, higher or lower.
In the upper right corner there is a button "Collapse all folders". Click to hide all subfolders and courses in the list and leave only the main folders.
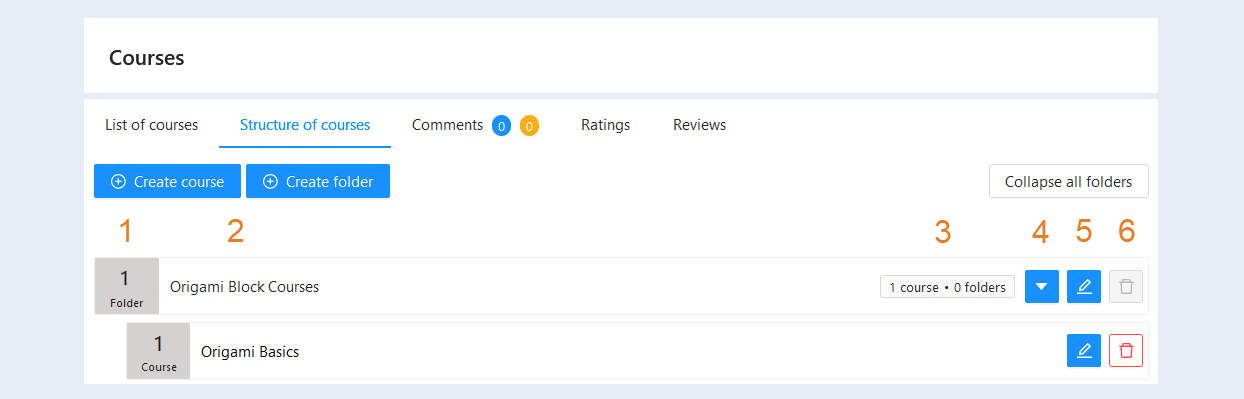
Now you have a course structure. You see the following information:
- The content (folder or course) and the number in order.
The name of the folder or course.
The number of courses and folders inside the main folder.
The "Hide/Expand" button. Click to collapse or expand the course structure.
The “Edit" button. Click to change the folder data or to fill the course with content.
The “Delete" button. Click to delete folders or a course.
Comments
The "Comments" tab displays all user comments about the courses or about each step of the course.
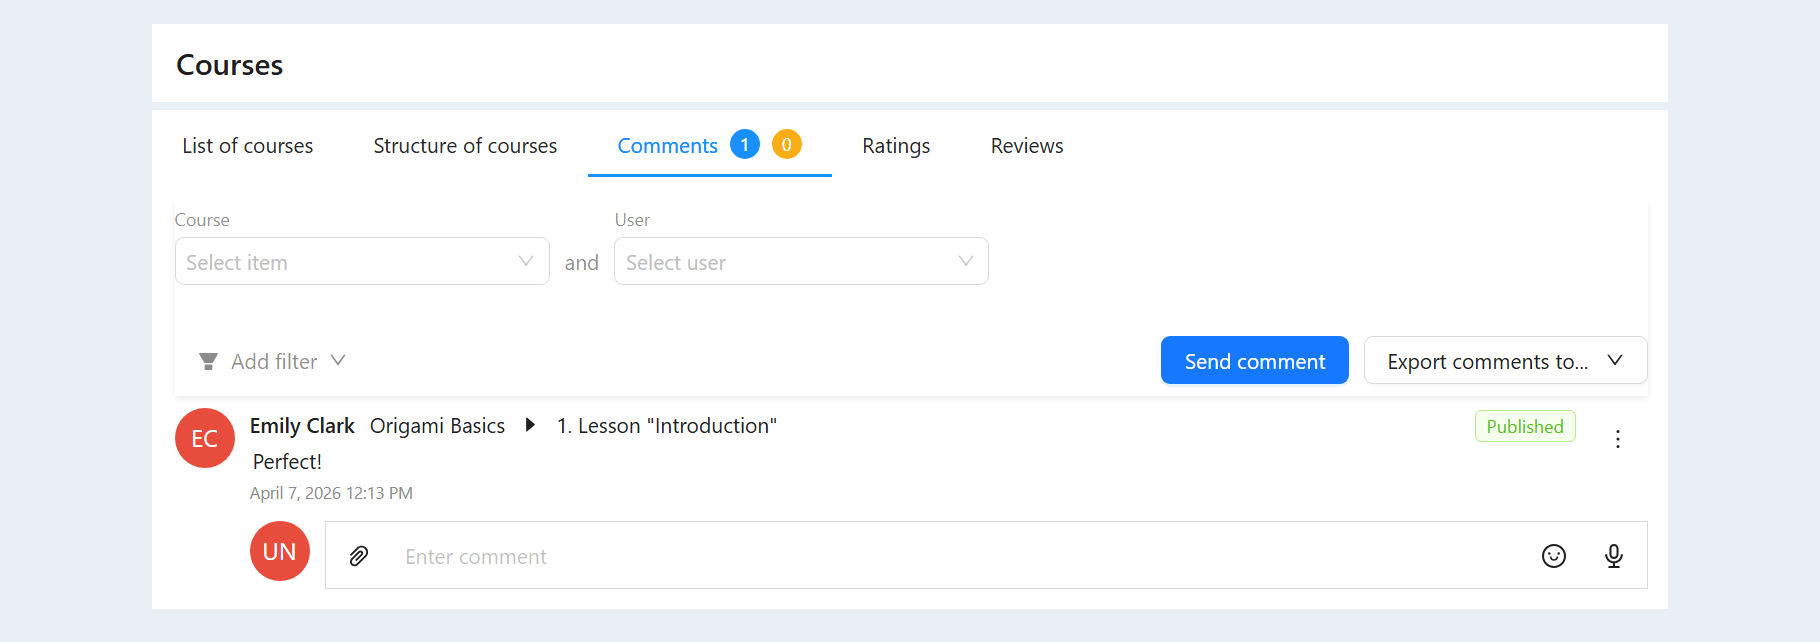
Next to the name of the Comments tab, you can see the number of comments and the number of comments on moderation. The data is placed in the name of the tab for easy access to them.
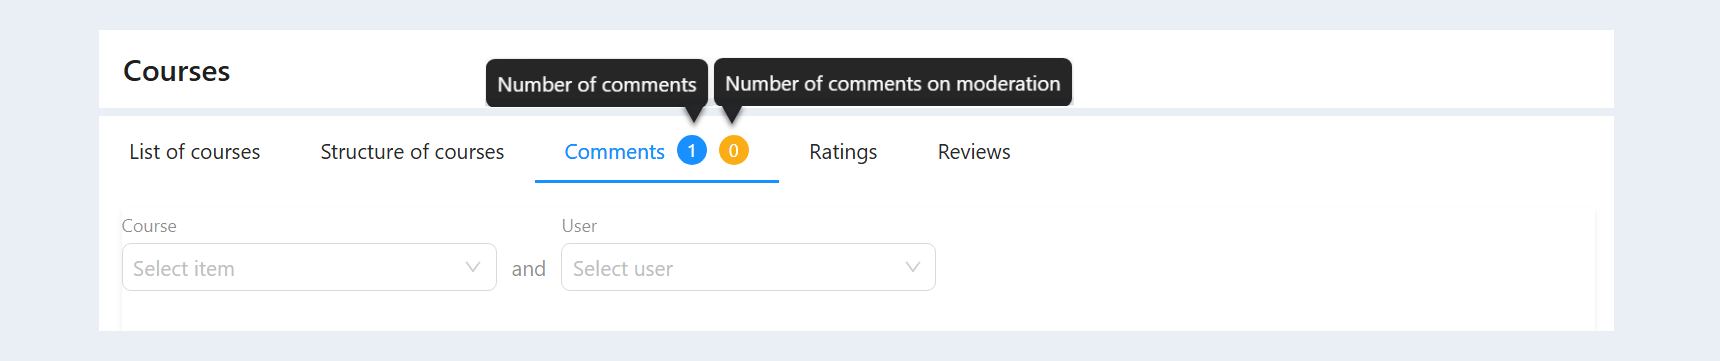
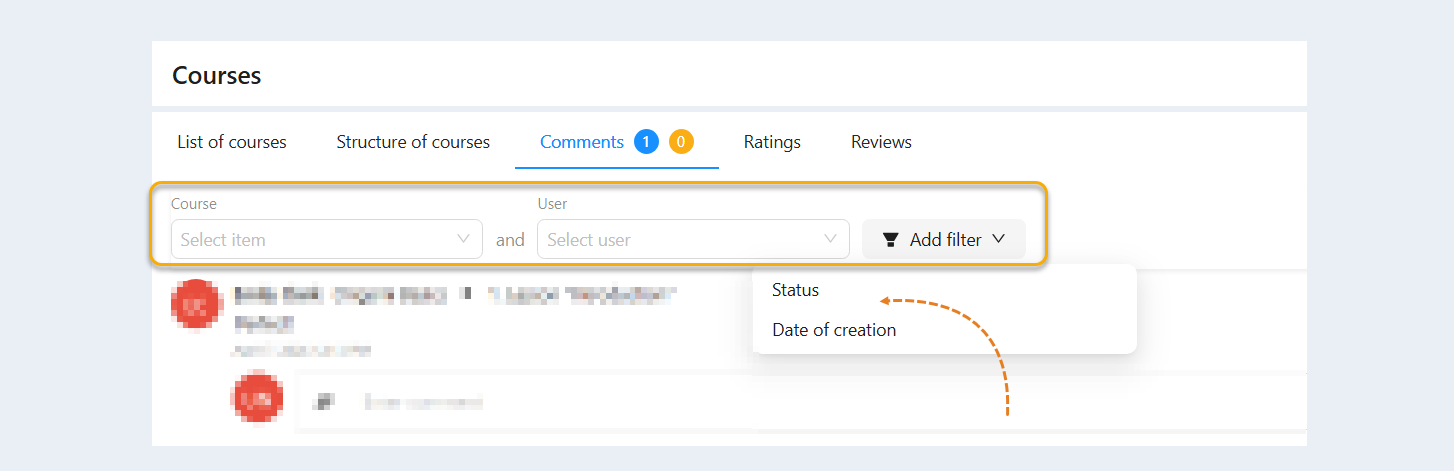
At the top of the page there are search lines for managing comments. You can select comments by the following parameters:
- Course. Select from the list the course to which comments have been left.
User. Select from the list the name of the users who have left comments.
Add a filter. You can also add additional filters: status and date of comment creation.
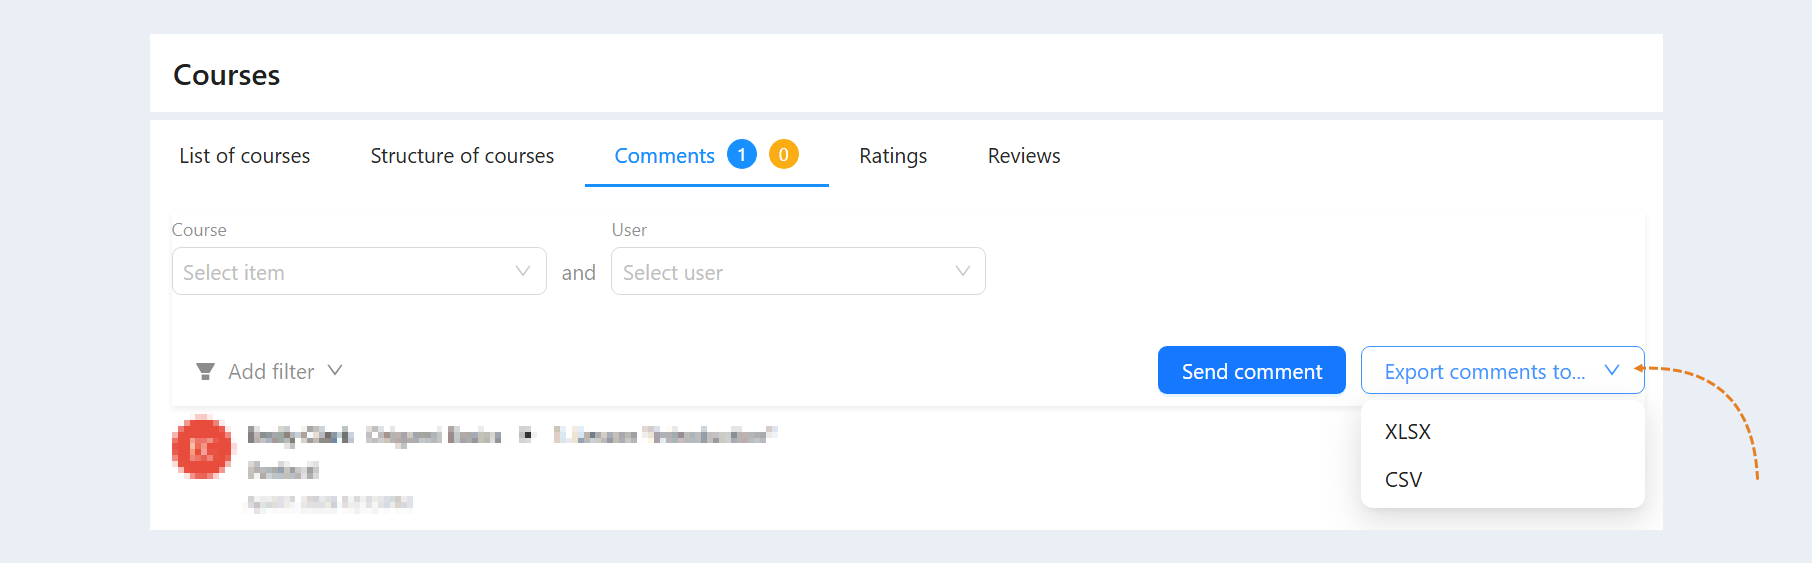
The "Export comments to" button is located in the upper-right corner of the page. Exporting allows you to save and analyze data outside the platform in XLSX or CSV format.
This option is needed to analyze user feedback, identify frequently asked questions, problematic topics, or technical difficulties. This helps to improve the course content and respond promptly to user requests.
Read more about this section in the article "Comments".
Ratings
Users can rate a course or a course step on a ten-point scale, as well as write an explanation for the assessment and a comment. You can see all the users' grades in the "Ratings" tab.
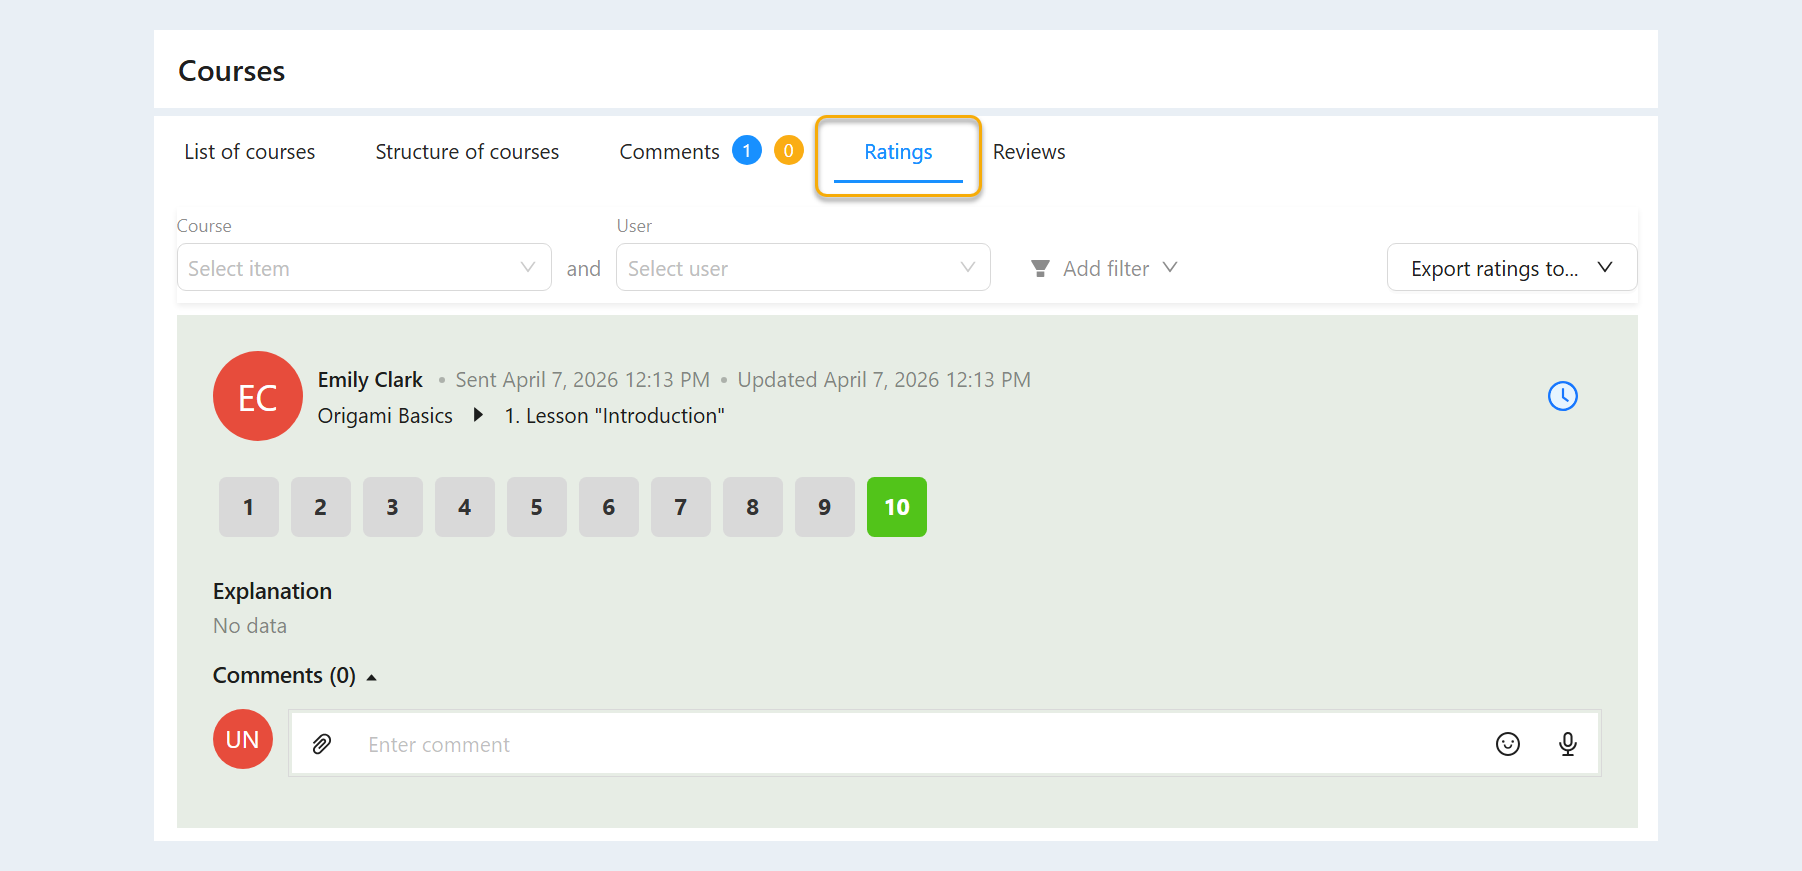
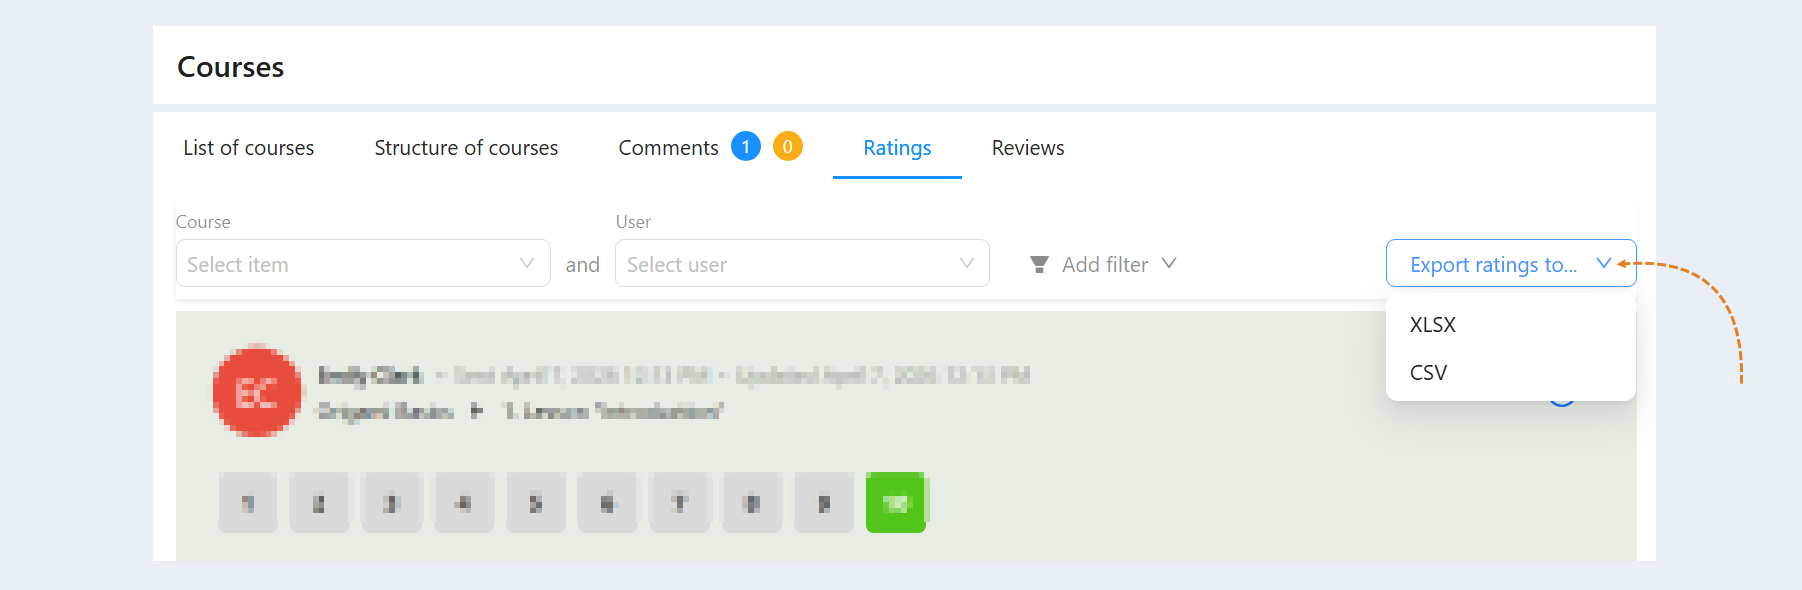
The "Export ratings to" button is located in the upper-right corner of the page. Exporting allows you to save and analyze data outside the platform in XLSX or CSV format.
This option is needed to analyze the success of the course, identify popular or unpopular lessons, as well as to compile statistics and reports on academic performance or ratings.
Read more about this section in the article "Ratings".
Reviews
After completing each course, the user will be asked to leave a review. You can see all user reviews in the "Reviews" tab.
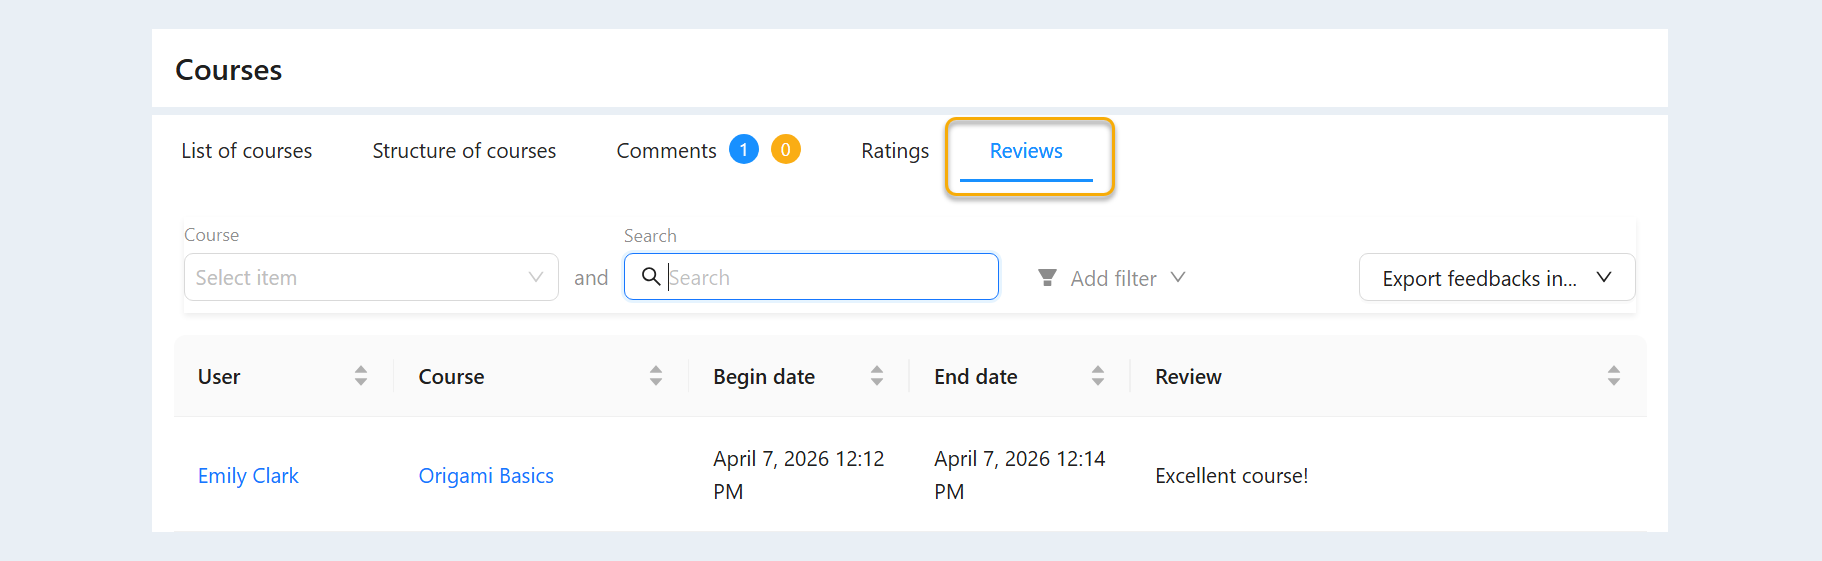
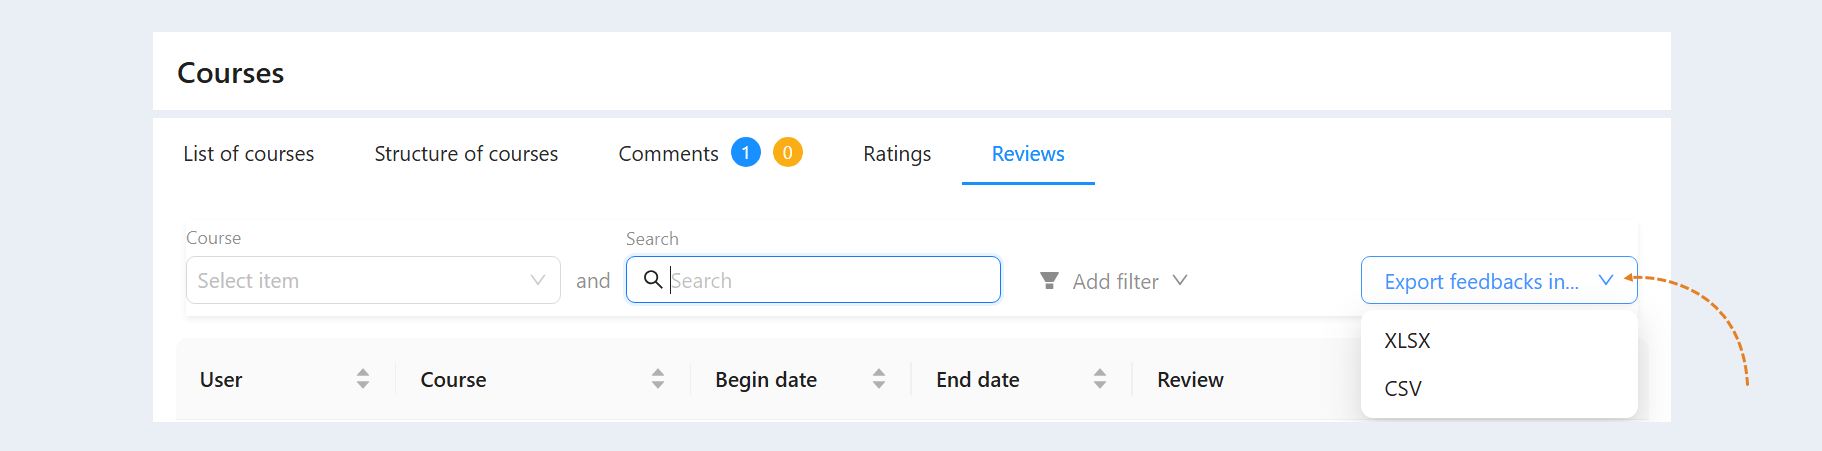
The "Export feedbacks in" button is located in the upper-right corner of the page. Exporting allows you to save and analyze data outside the platform in XLSX or CSV format.
This option is needed to assess user satisfaction, identify the strengths and weaknesses of the course, and use reviews for marketing purposes (for example, posting positive reviews on a website).
Read more about this section in the article "Reviews".