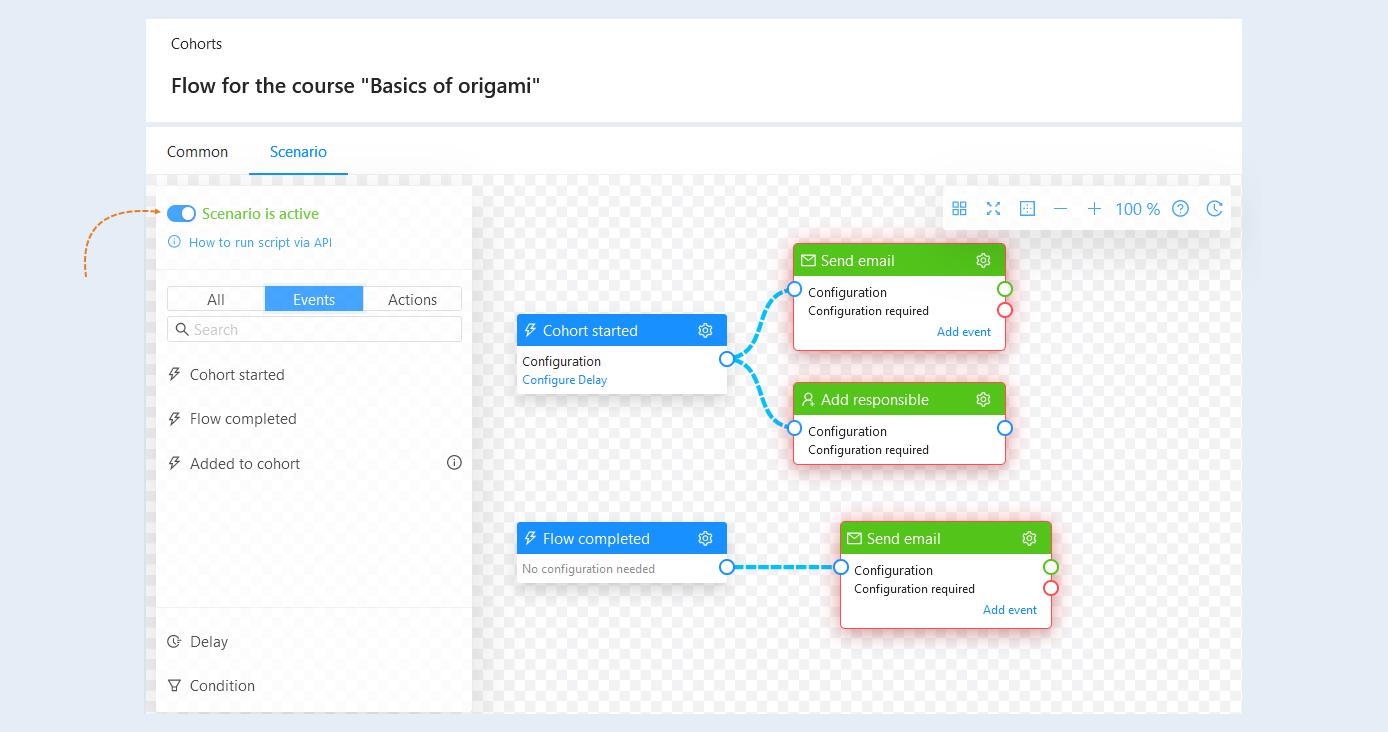
A thread script is a sequence of events and actions within a thread.
When creating a script, first set the "Cohort started" event. This event will be triggered when the date and time that you set when creating the flow. This event will trigger a scenario (a sequence of responses).
Next, you need to add actions in the flow: send a letter, add a responsible person, etc. Connect events and actions. This is how you define the sequence of actions in the script.
How to create a cohort scenario
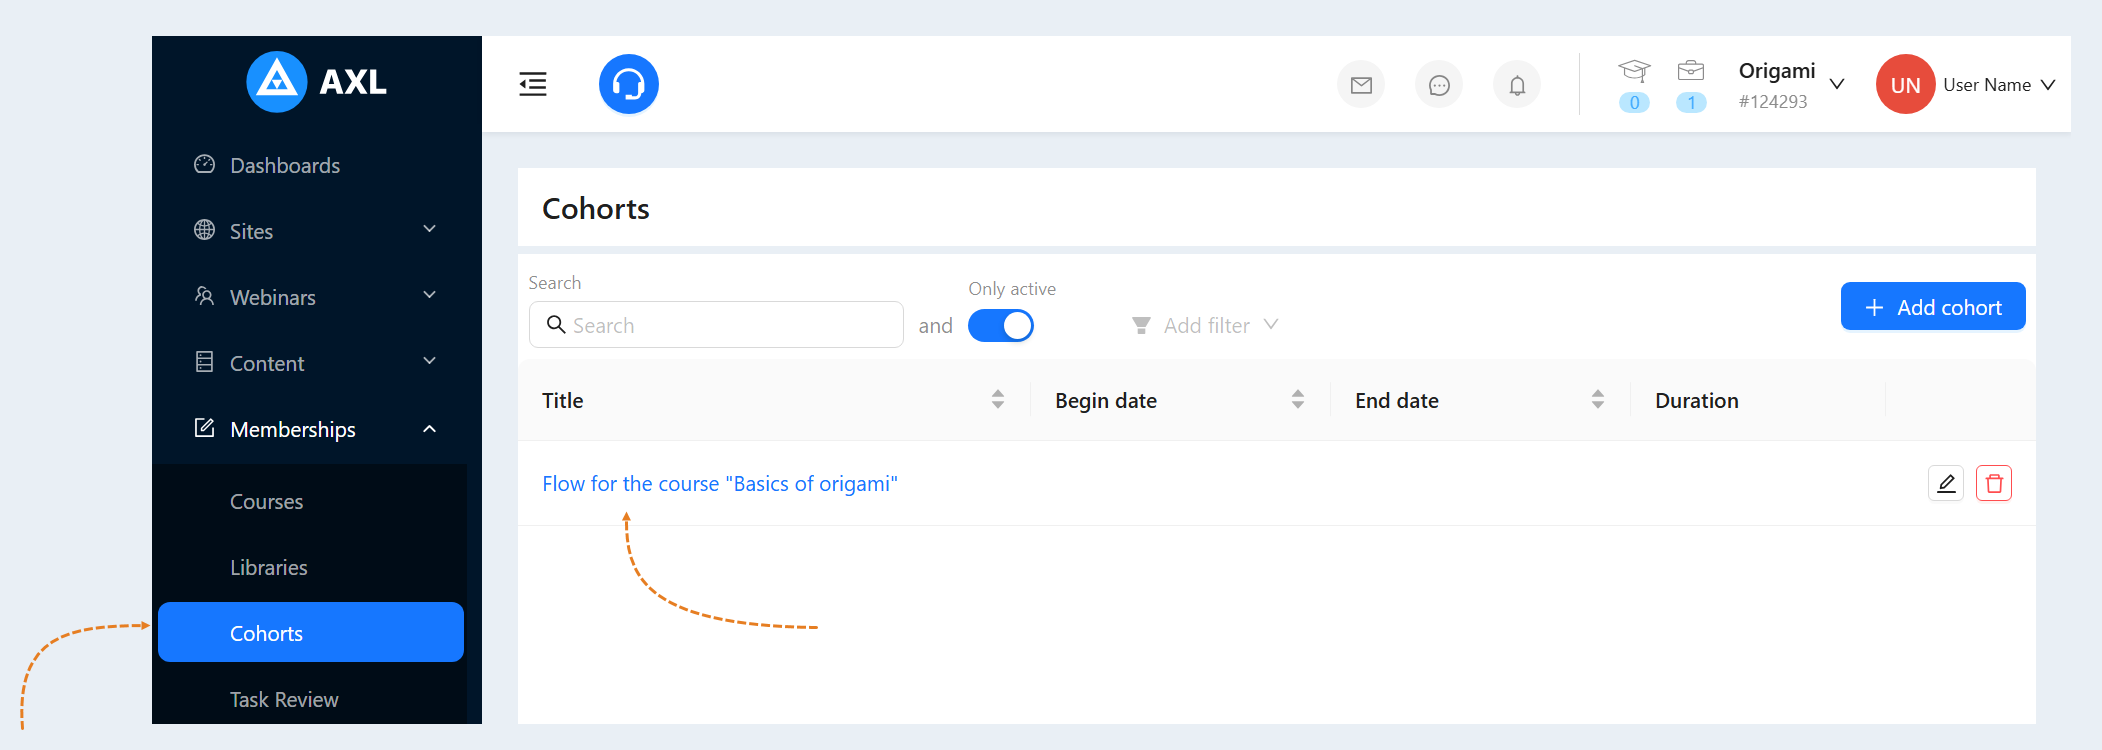
Go to the "Courses and Training" section, the "Cohprt" tab. Create a new thread or select an existing one. Read more about how to create a cohort in the article "Cohort".
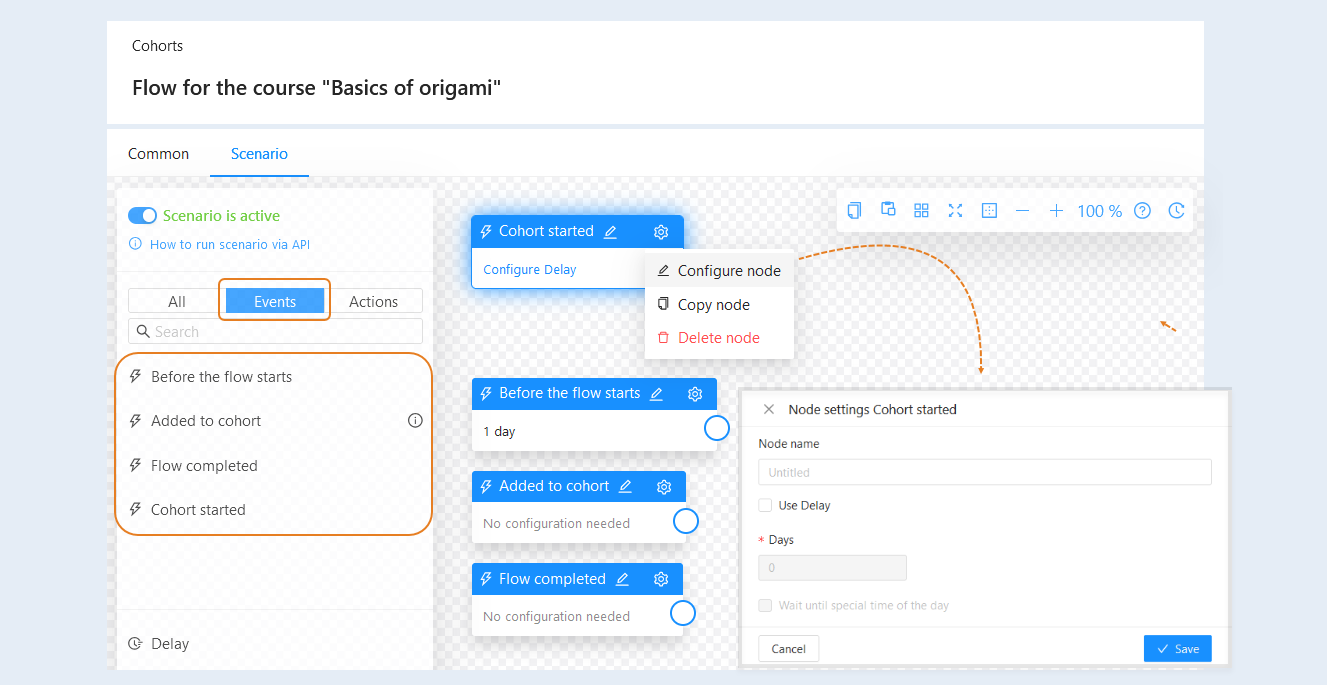
Go to the "Scenario" tab. To create a flow scenario, select the "Cohort started" event and drag it into the field, this event will trigger a chain of scenario actions.
The following types of events are available for the stream:
Before the flow starts. The event is triggered one or more days before the start of the stream. In the node settings, specify how many days before the start of the stream you want the event to trigger.
Cohort started. This event will be triggered when the date and time that you set when creating the stream. Here you can set the delay for starting the stream. Press the "Configure delay" button and fill in the fields in the window: specify the number of days to delay the start of the stream. Click the "Save" button.
Flow completed. This event will be stopped when the date and time that you set as the end of the stream arrives.
Added to cohort. The event is triggered when the stream is attached to a person, after the license is sold or added.
After that, you need to add actions to the script. Actions in a scenario are a sequence of steps (actions) in response to an event. After the thread has been started (the "Thread started" event), the system performs automated actions (for example: send a letter, add a responsible person, etc.).
Open the Actions tab, select an action from the list and drag it to the script field. Read more about each action in the article “Types of actions in the scenario and their configurations".
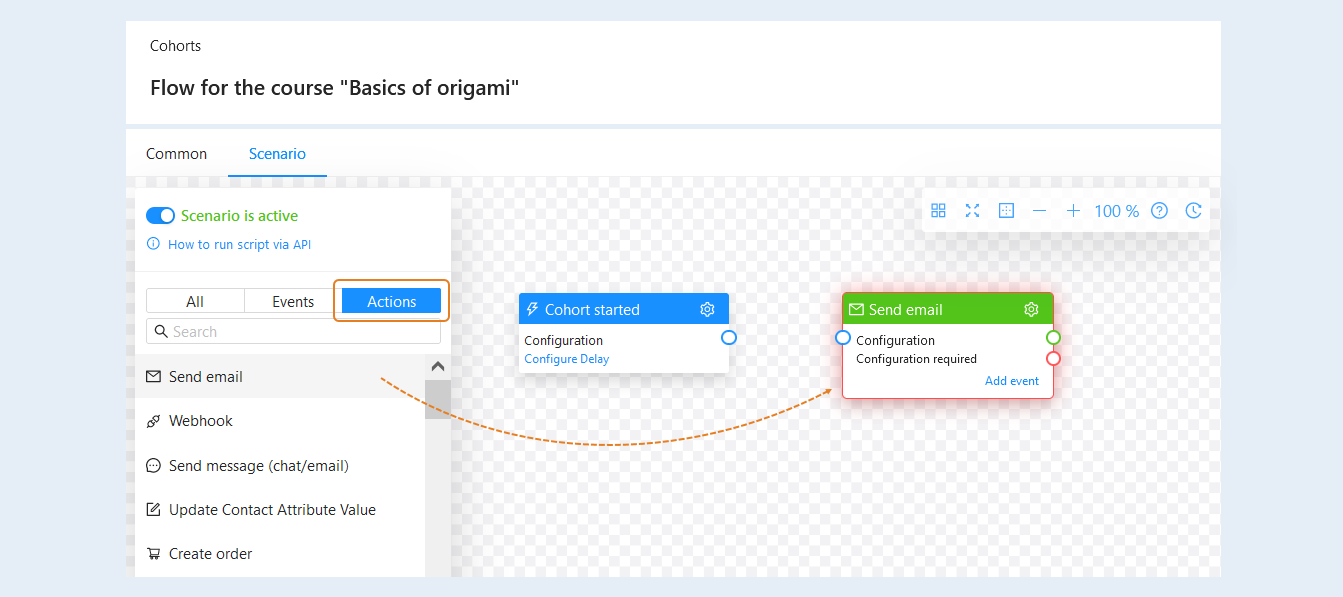
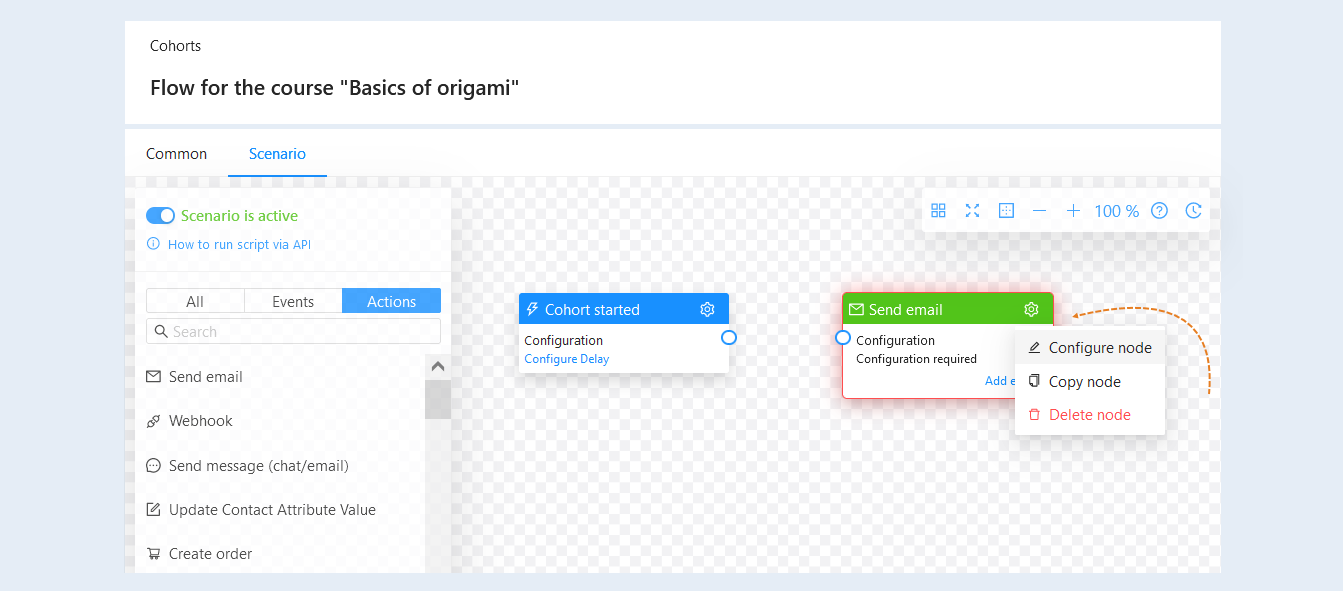
For each action, you need to perform settings - configuration. Click on the "Settings" button in the upper right corner of the action, then open the node settings.
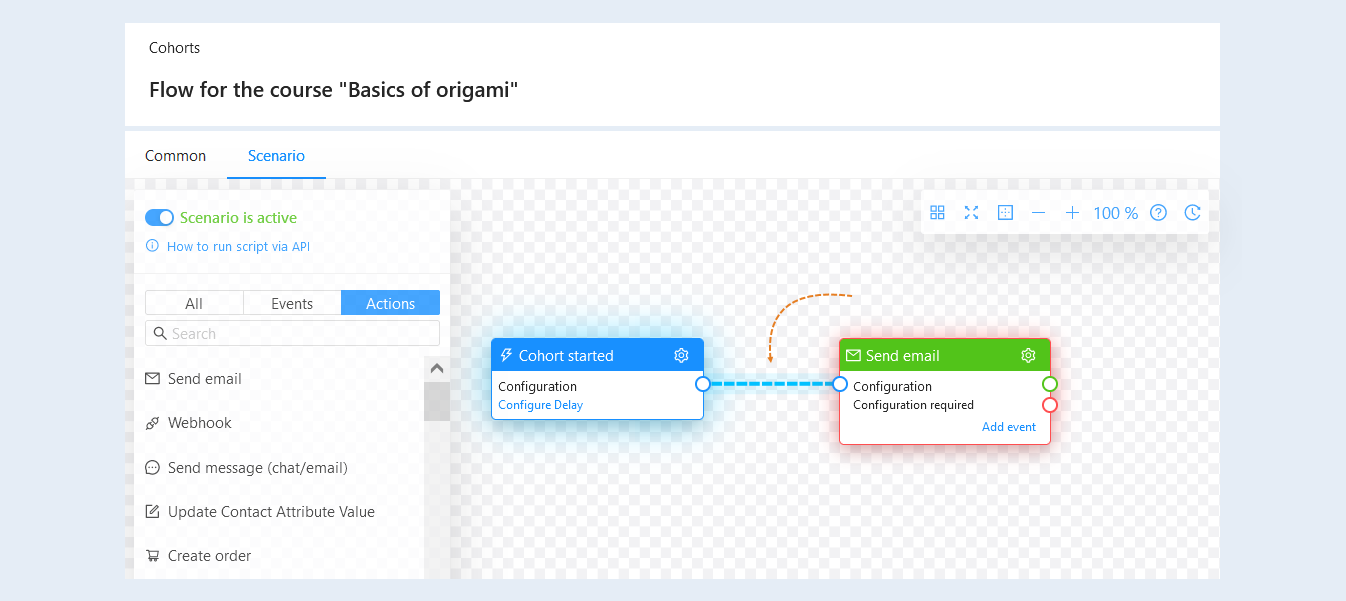
Next, you need to connect the event and the action. You can create one or more links between events and actions. To remove the link between the script elements, double-click on the link.
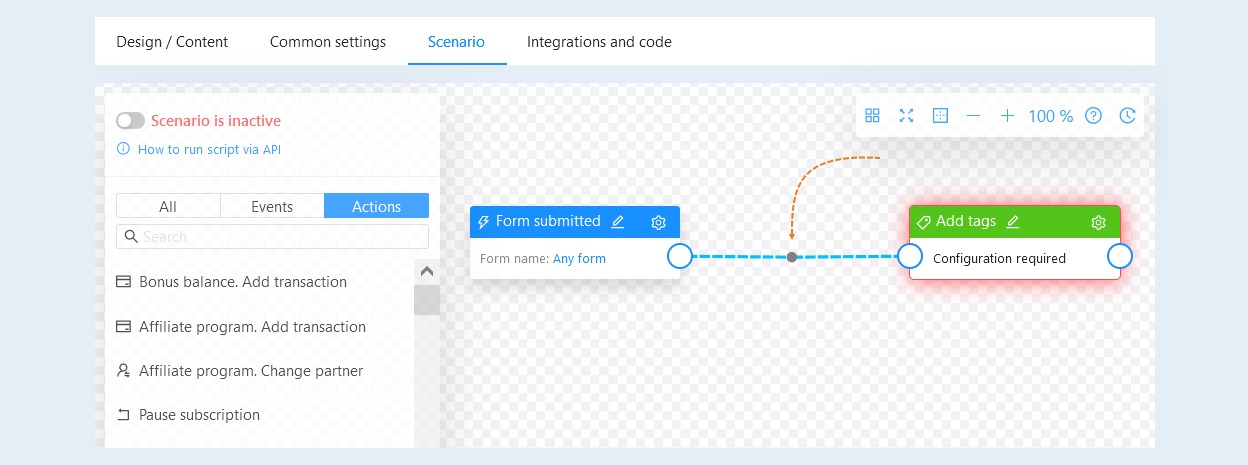
You can use the function of adding points to connections to create chains. To add a reference point, select the location on the communication line where you want to add the point. Left-click on the place selected on the line and simultaneously press the Ctrl key on the keyboard. Next, you can grab a reference point and move its location to the script field.
To delete a reference point, double-click on the point. Double-clicking on the line will delete the line and all reference points on it.
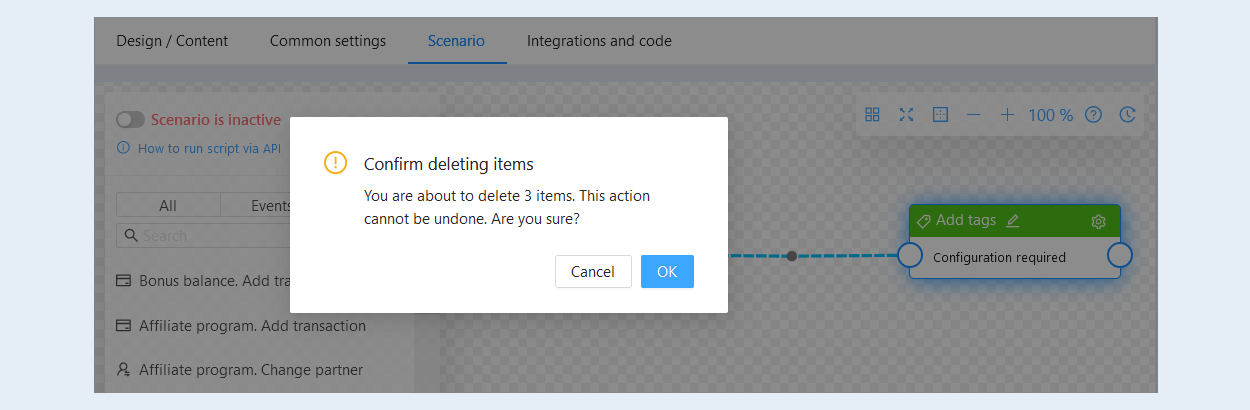
To massively delete scenario steps, hold down the Shift key and select the desired events and actions by clicking on them with the mouse. Next, press the Delete or Backspace key and confirm the deletion of the selected scenario steps.
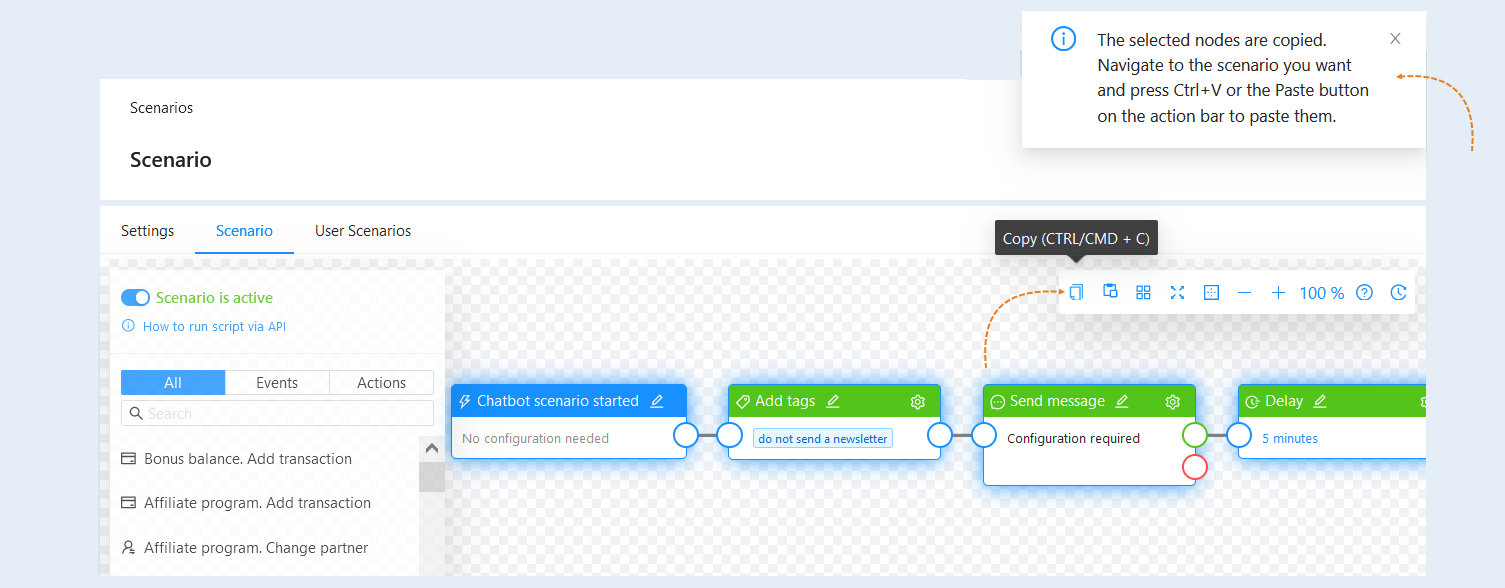
You can copy steps and connections between scenarios within one account. Press Shift and select the desired steps by clicking on them with the mouse. The selected scenario steps will be highlighted with a blue border.
Then copy the selected steps by pressing the "Copy" button or Ctrl + C on the keyboard. A message will appear in the upper right corner stating that the scenario steps have been copied.
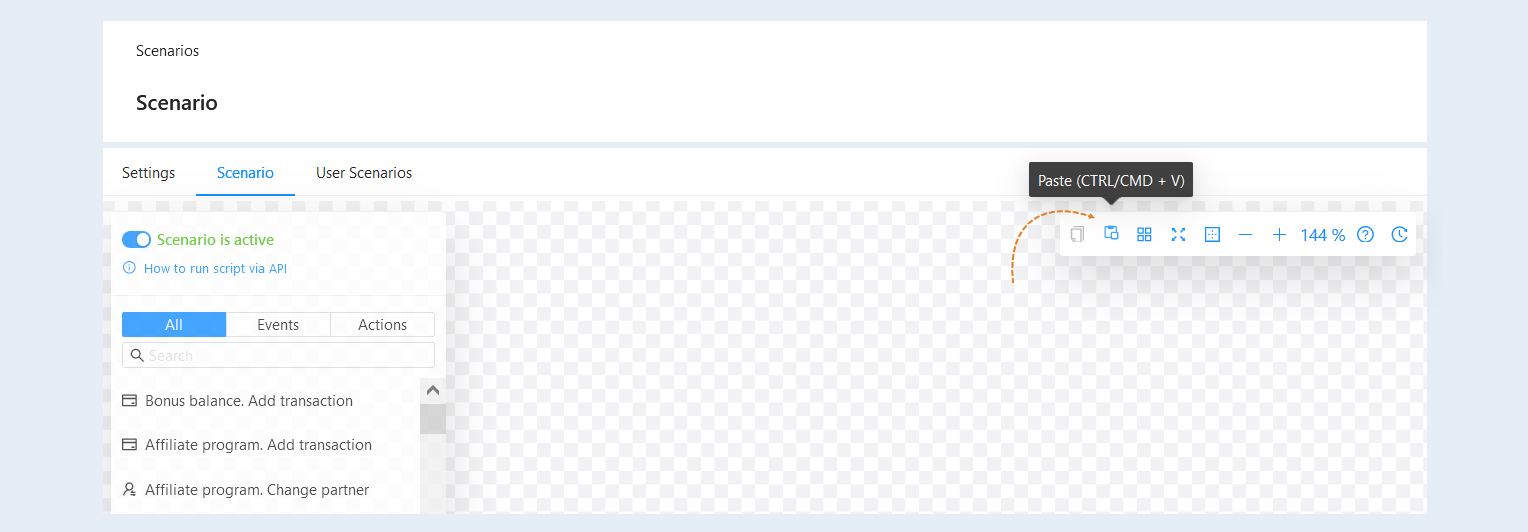
Open another scenario of your account. Please note that transferring scenario nodes only works within the same account. Press the "Paste" button or Ctrl + V on the keyboard. The scenario steps will be copied to the new scenario.
Add the required number of events and actions to your script. Now your script is ready. To activate the script, move the slider to the active position.