Contacts is a list of account users who have registered with the account, have been created by the account administrator, or have been manually uploaded by the account administrator in AXL CRM.
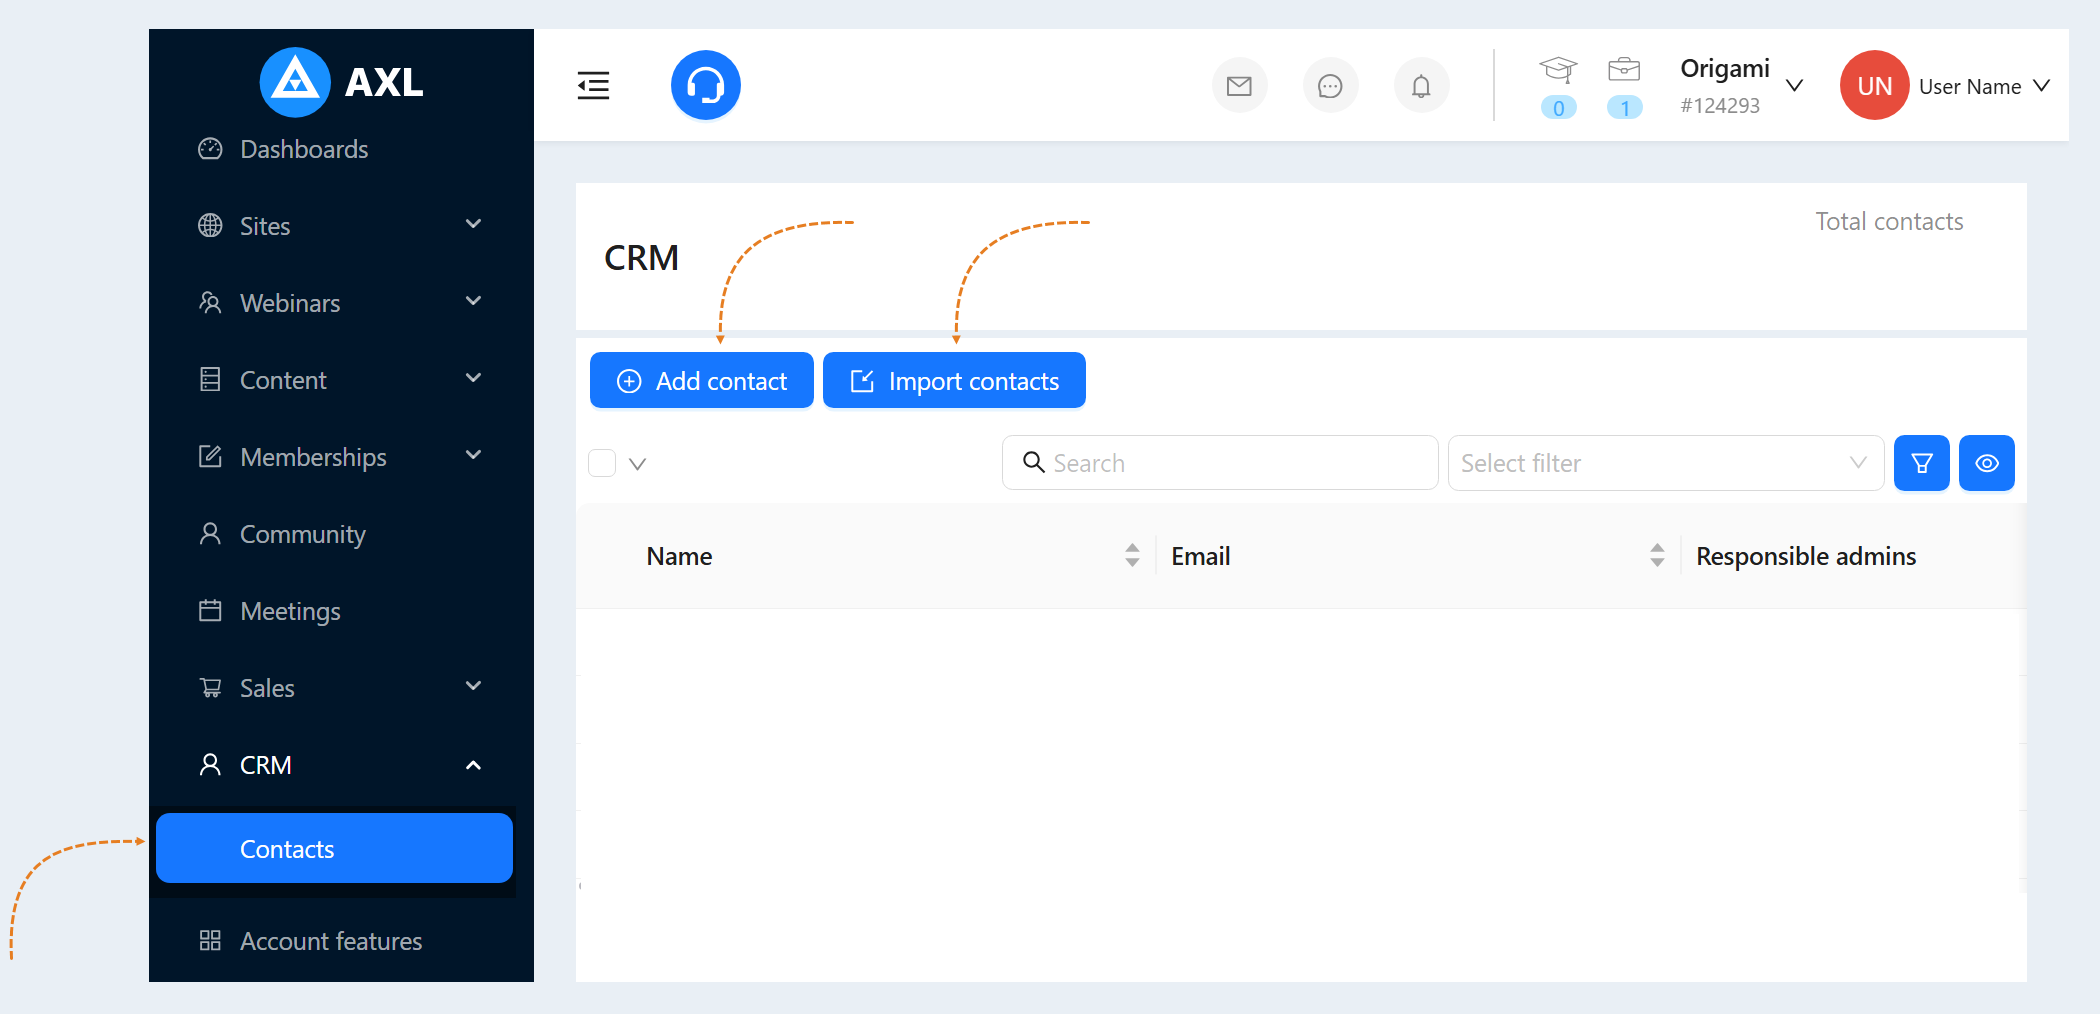
In the "CRM" - "Contacts" section, a list of customer and site visitors data is displayed.
At the top of the page there are “Add Contact” buttons - you can manually add contacts to the list.
And the button "Import contacts" - you can upload customer data from your computer to the CRM system of the account.
Click on the desired section to go to its description:
How to add a contact
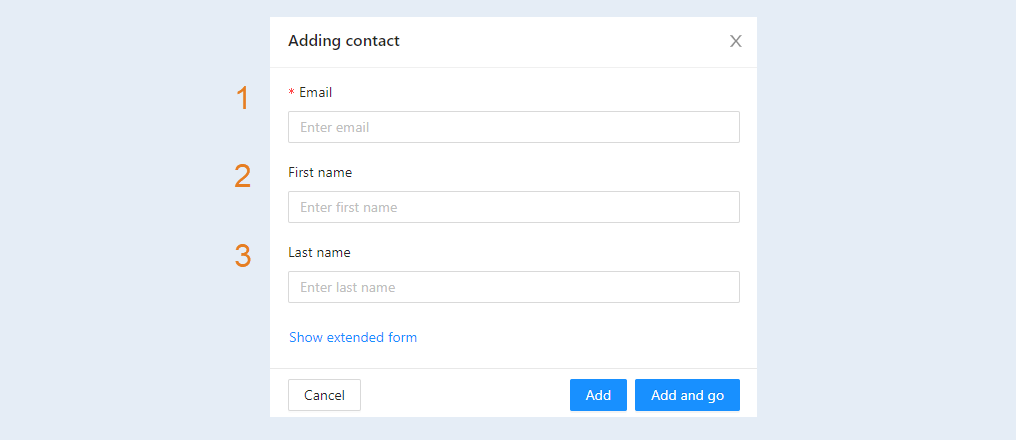
Click the "Add contact" button and fill in the fields in the window that opens:
- Email address. Enter the contact's email address.
- Name. Enter the contact's name.
- Surname. Write the last name of the contact.
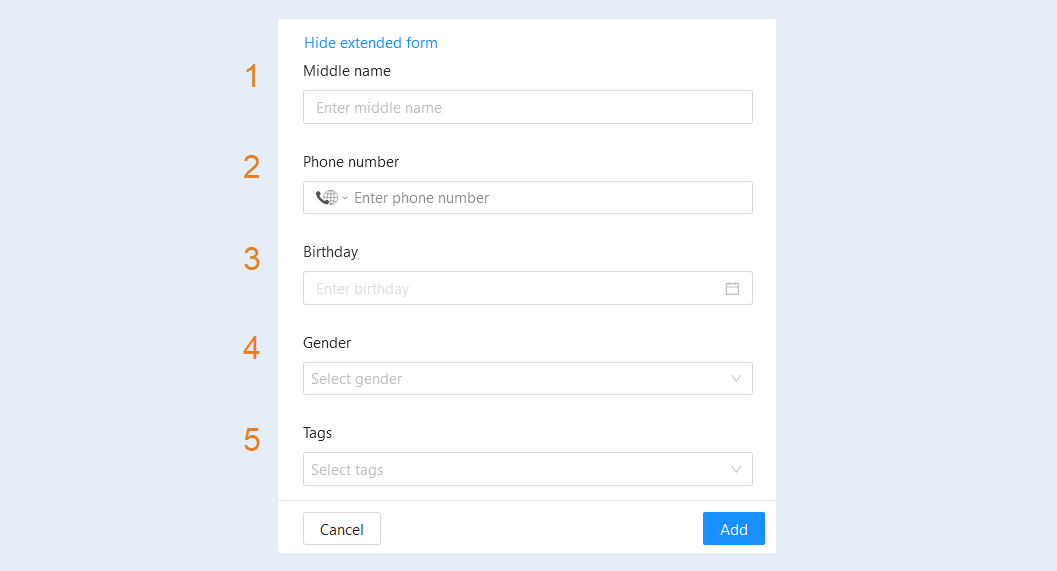
You can also enter detailed information about the client, if you have it. Click “Show Advanced Form”:
- Surname. Add the client's middle name.
- Phone number. Enter the number in international format. Select a country if necessary.
- Birthday. Enter the date in the special field.
- Floor. Choose from the list: male or female.
- Tags. Select from the list of existing tags or write a new tag.
How to import contacts
Importing contacts is the transfer of a list of contacts (customer base) to the CRM system of your account on the AXL platform. You can download the list of contacts from your device (computer, laptop, tablet) in one file (TXT, CSV, XLSX format). Thus, you can quickly transfer a large number of contacts of your clients to the CRM of your account.
For more information on how to import contacts, read the article "Importing contacts".
After adding a contact manually or importing contacts, they will appear in the contact list. When adding a new contact, the system will check for possible matches and offer to combine them or refuse.
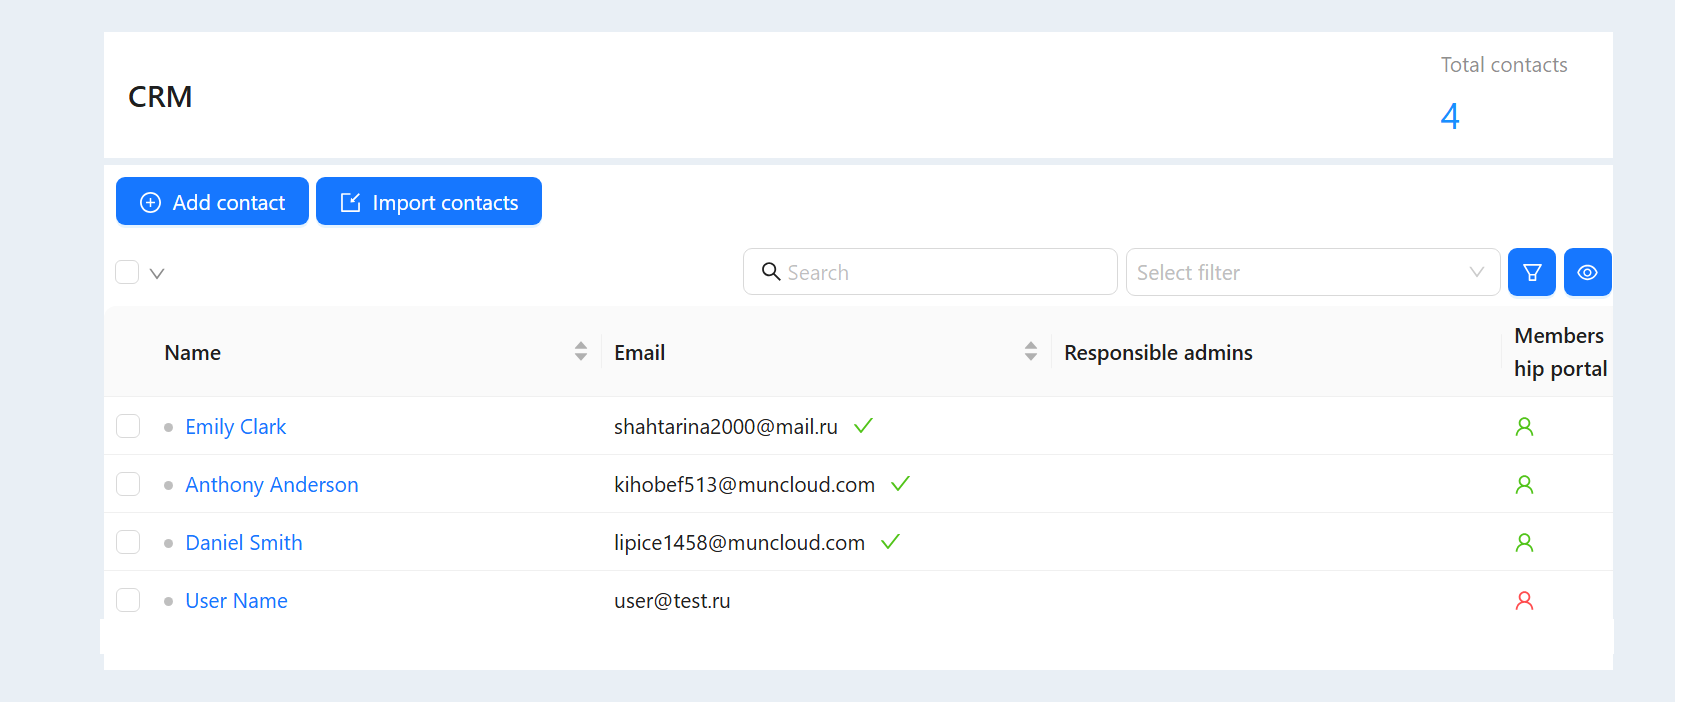
List of contacts
In this list, you see information about contacts. You can manage this list. Click the Column Management button.
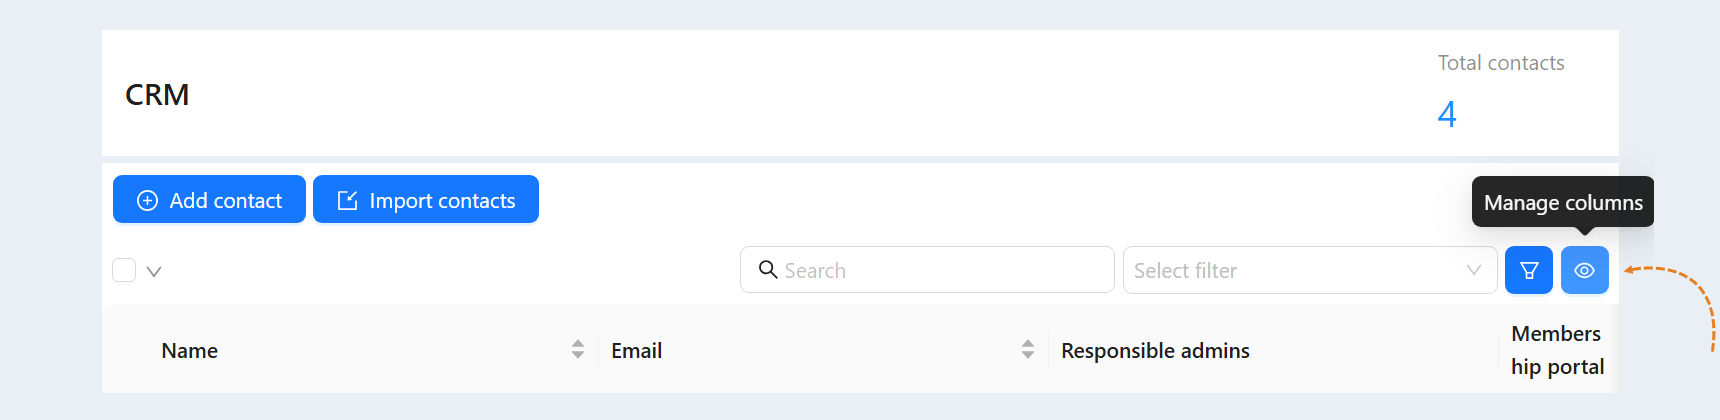
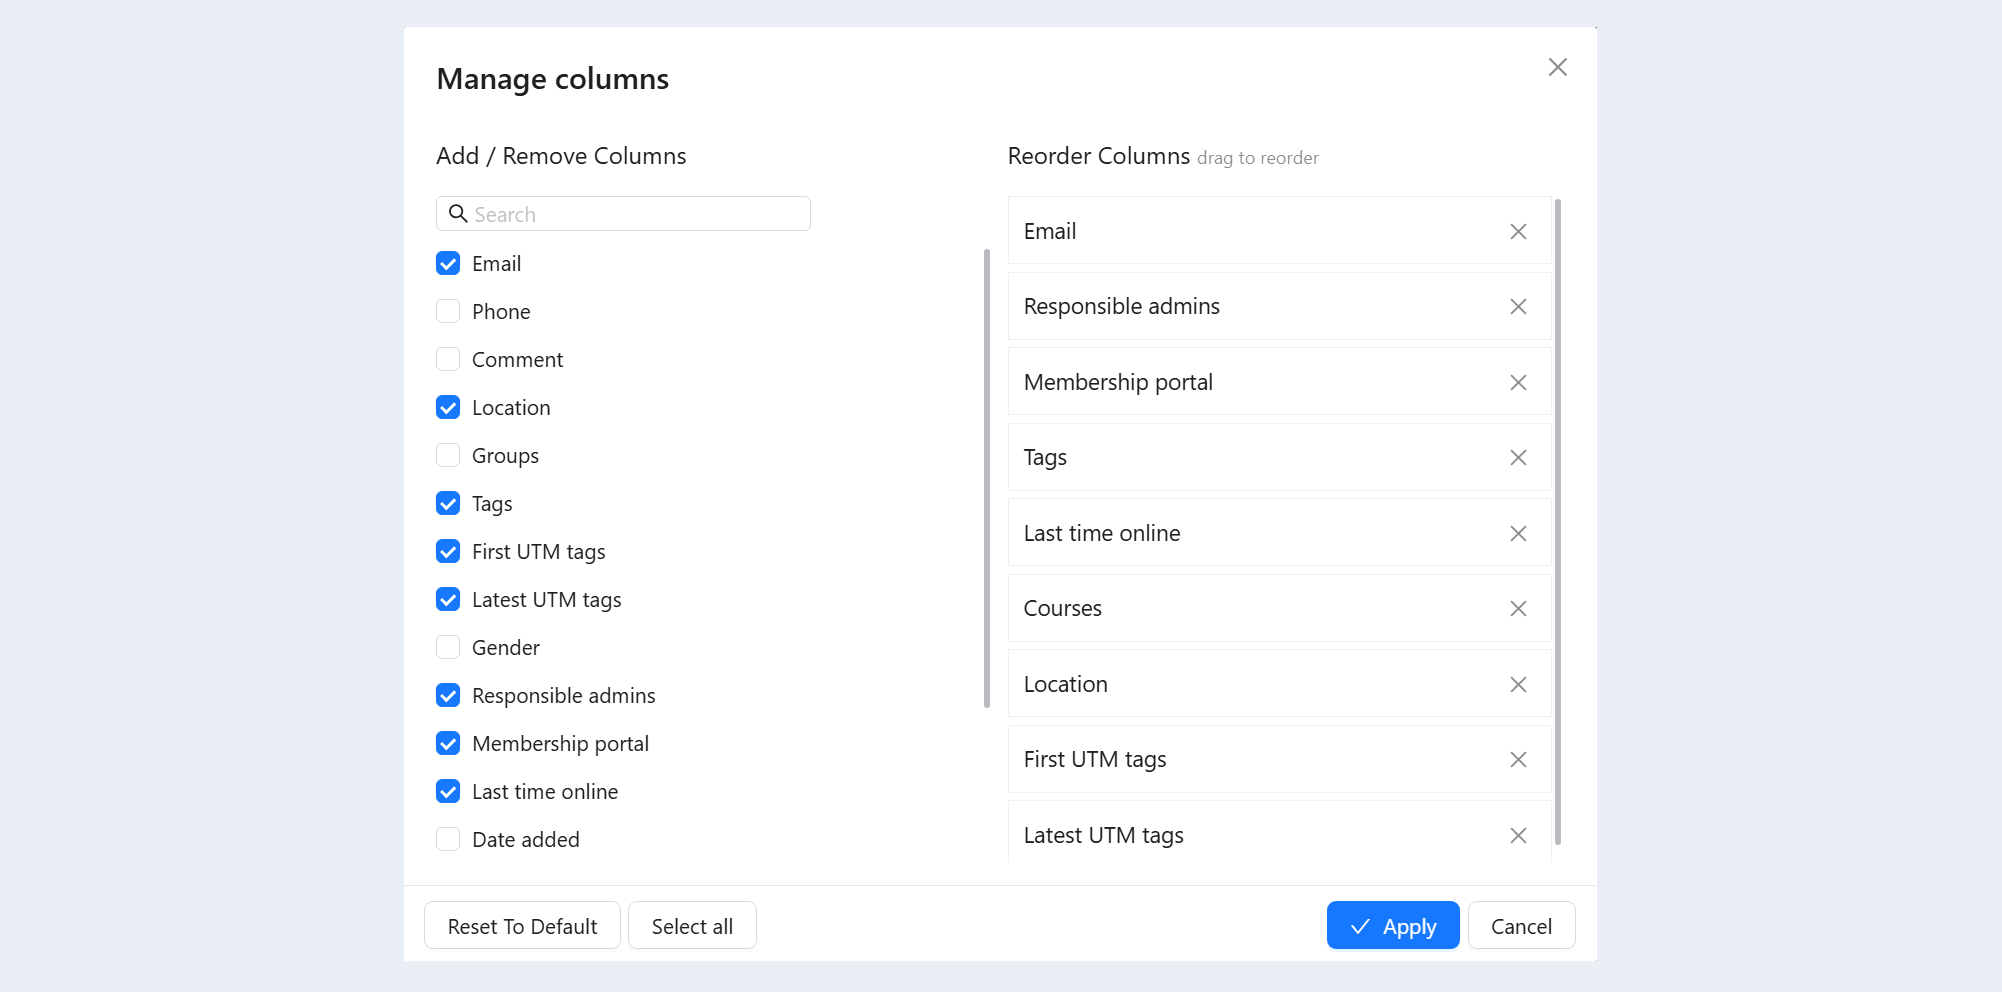
An additional window will open for you. Here you can select columns from the list. Add or remove columns in the contact list. This way you manage your contact list.
Check the boxes next to the columns that you want to display in the list of orders. Or click the "Default" button to return to the original view.
The full list of possible columns is shown on the left side:
Email. Here you can see the contact's email address.
Phone. This column shows the contact's phone number.
Comment. This column displays the comment left for this contact.
Location. This column displays the territorial location of the contact and its time zone.
Groups. This column displays the groups in which the contact is a member.
Tags. Here you will see the tags that are attached to this contact.
First UTM tags. This column displays the first UTM tags of the contact.
Latest UTM tags. This column displays the last UTM tags of the contact.
Gender. This column shows the gender of the contact.
Responsible admins. This column will display the responsible administrator of your account. The responsible person is the one who is responsible for this client.
Membership portal. This column will indicate whether the contact is registered as a user of the membership portal.
Last time online. The date and time when the client was online will be shown here.
Date added. Here you can see the date the contact was added.
Courses. Here you will see the name of the training course that the client is currently studying.
Amount of payments. This column will indicate the total amount of the contact's payments.
Partner. The contact of the partner in the affiliate program is indicated.
The right side contains a list of the columns you have selected. You can change the order of the columns. To do this, grab the column and drag it up or down. After completing the settings, click the "Save columns" button.
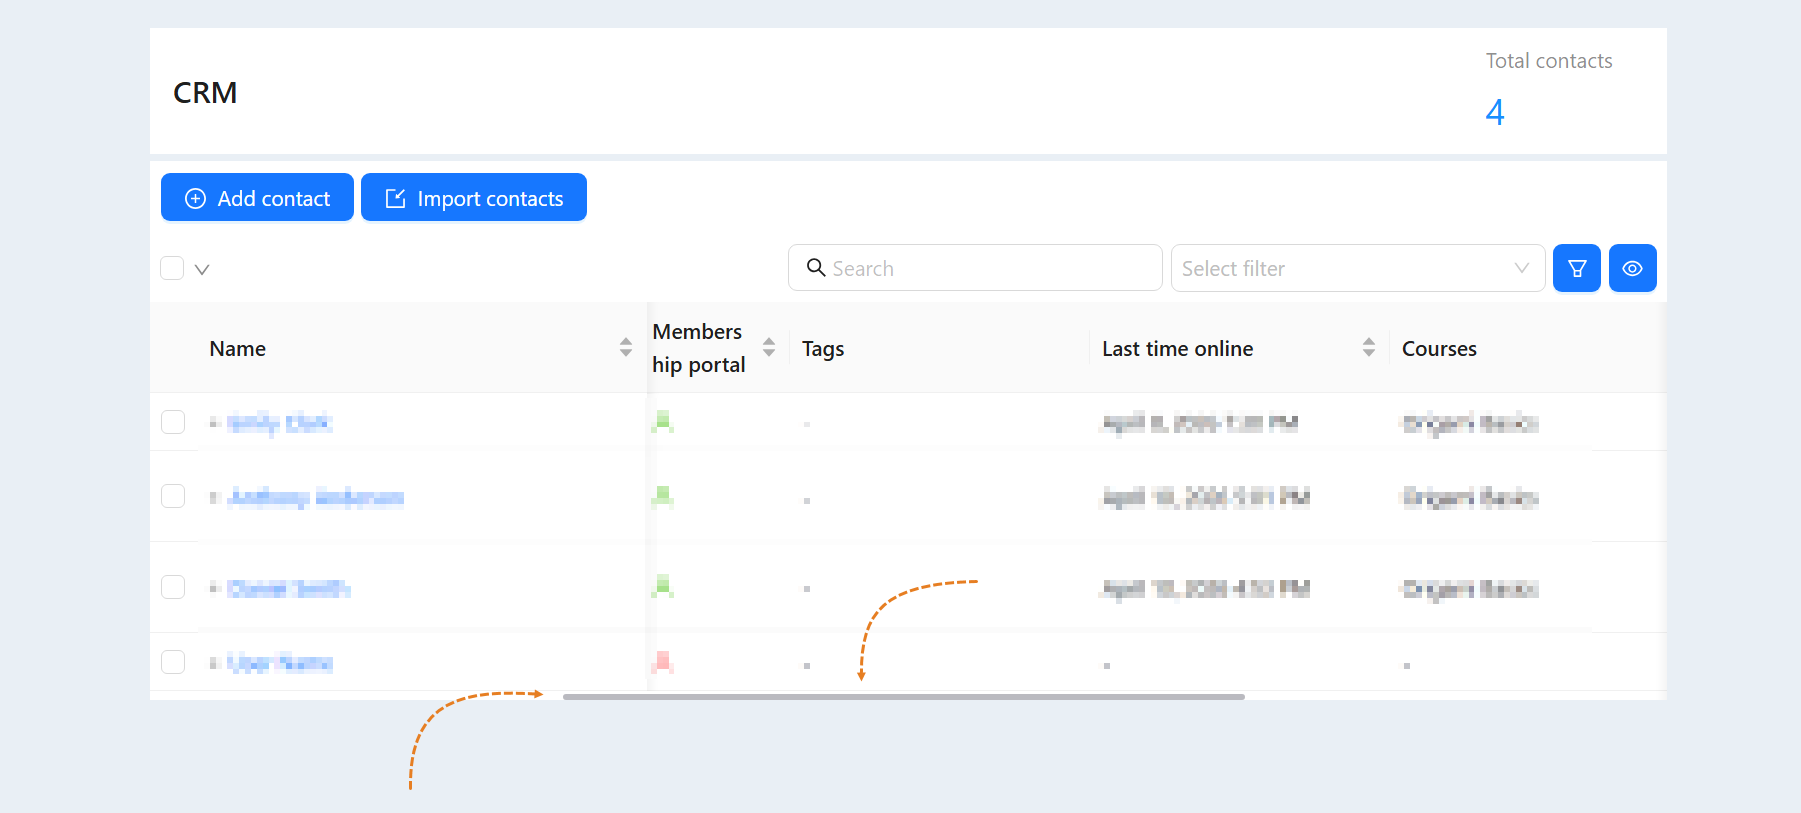
If the number of columns in the contact list exceeds the width of the screen, horizontal scrolling can be helpful. It allows users to easily view all available columns by moving horizontally. Using horizontal scrolling promotes more efficient use of available space and simplifies navigation through the contact list.
To use horizontal scrolling, hold down the Shift key on the keyboard and scroll the mouse wheel up or down to scroll the contact list in the corresponding direction. Alternatively, use the scroll bar located at the bottom of the contact list.
Search bar and filter
A search bar and a filter are available at the top of the section. Use them to quickly find the right contact.
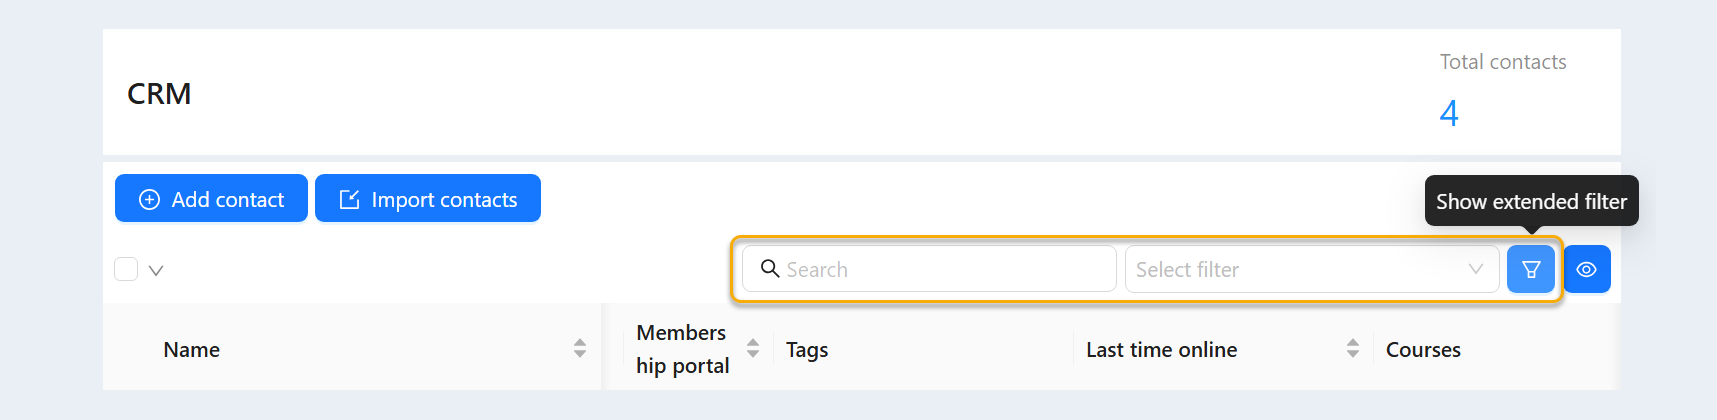
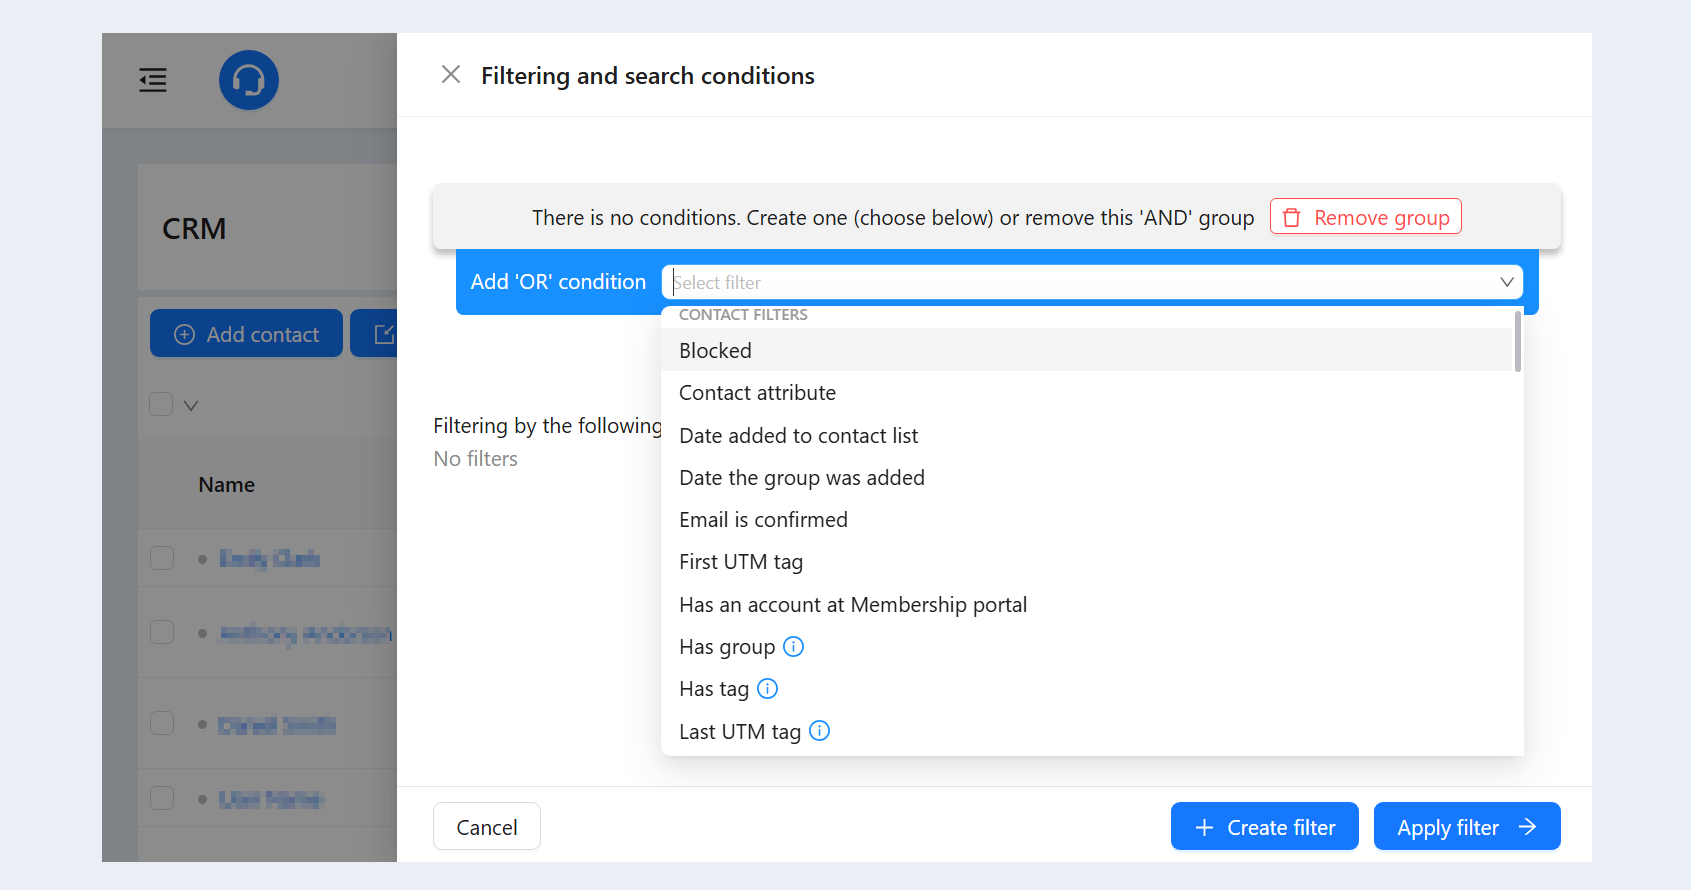
Click the "Show extended Filter" button and select a search term from the list. For more information about the advanced filter settings, see the article "Filtering and search terms".
Mass actions with CRM contacts
Using filtering and search terms, you can select the necessary contacts and perform mass actions with them. For more information on how to use filtering, read the article "Filtering and search terms".
Select contacts and click the "Bulk Action" button.
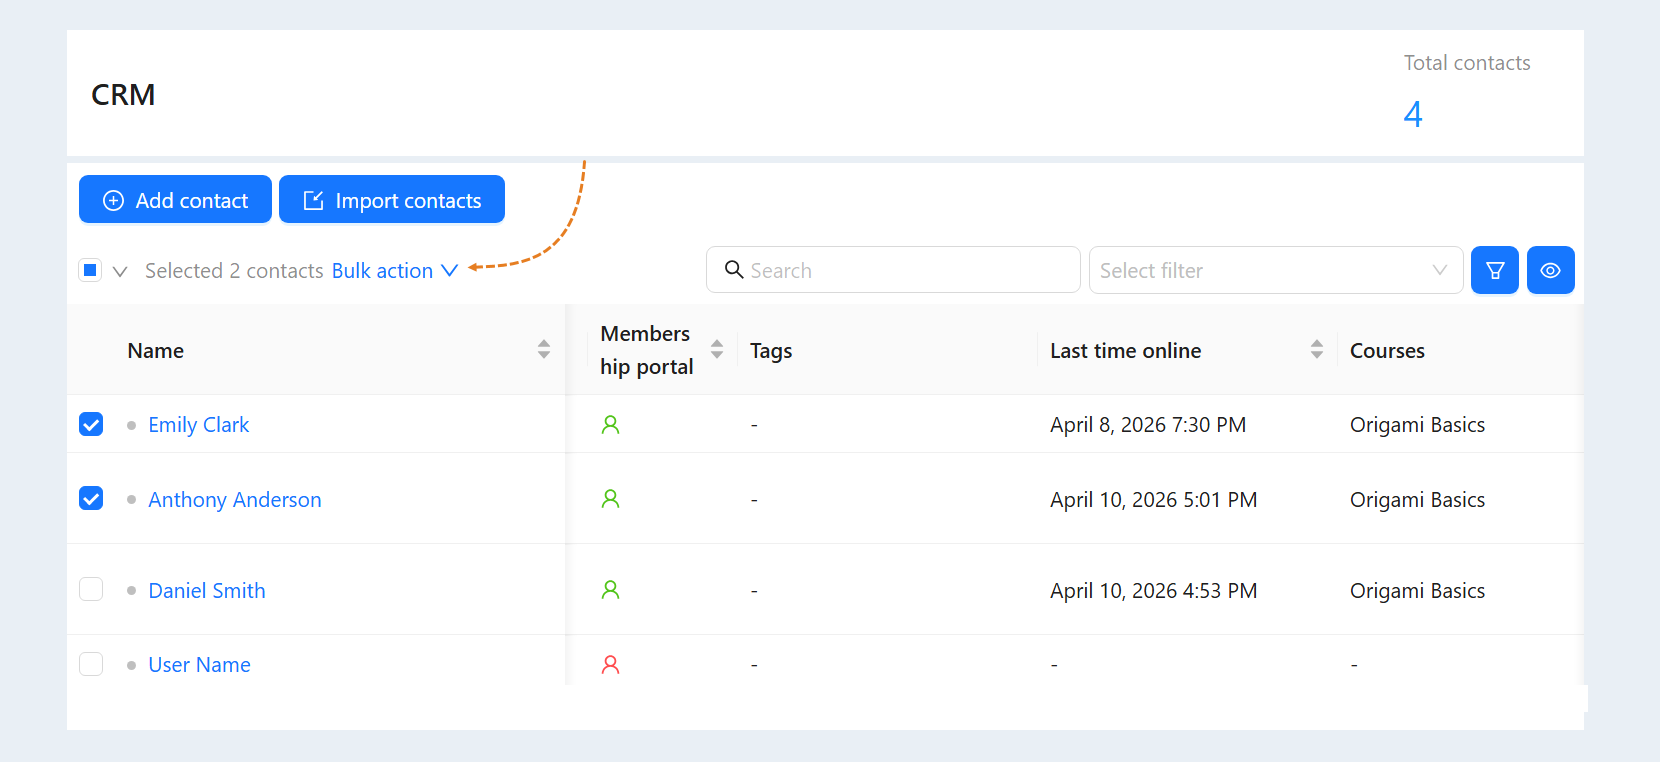
You will see a list of possible actions. This way you trigger an action for all the selected contacts.
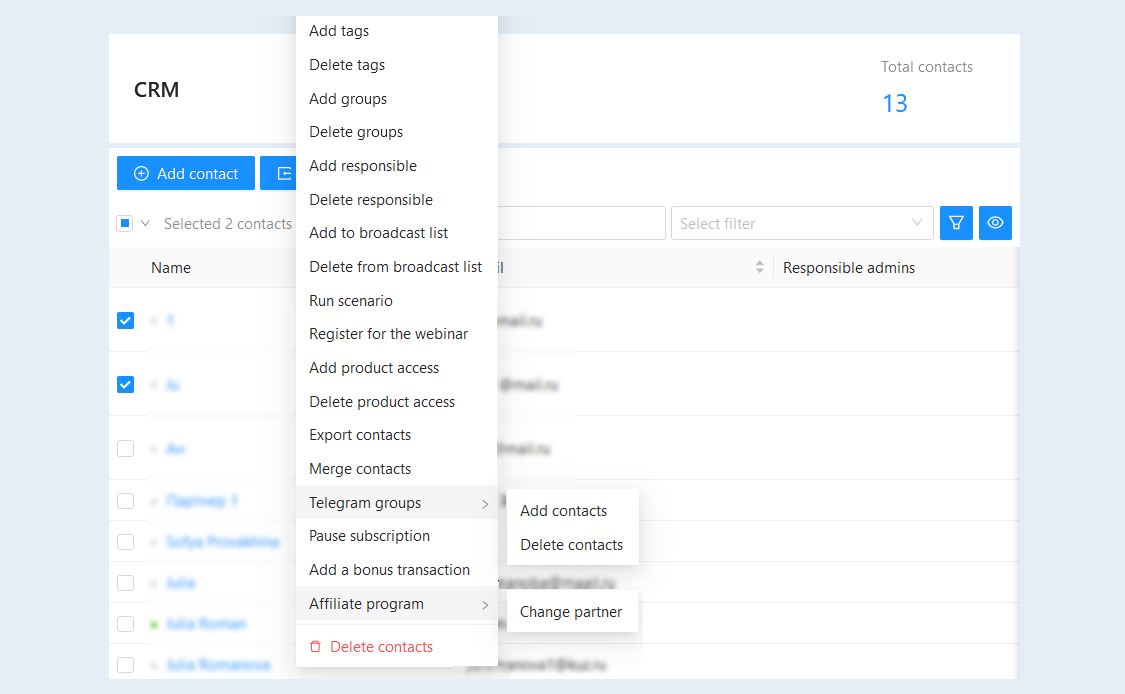
Let's briefly consider the main actions:
- Add a note. This action adds a note to the contact card.
Add a task. This action adds a task for all selected contacts. Read more about creating CRM tasks in the article "Tasks".
Add tags. This action adds tags to the contact card.
Delete tags. The action removes the selected tags from the contact card.
Add groups. Create a contact group and add the selected contacts to the group.
Delete groups. This action removes the selected contacts from the contact group.
Add responsible. This action adds or replaces the responsible contractor for orders or adding contacts to groups.
Delete responsible. This action removes the responsible executor.
Add to broadcast list. This action adds the selected contacts to the mailing list. Read more about creating a mailing list in the article "Mailing Lists".
Delete from broadcast list. This action removes the selected contacts from the mailing list.
Run scenario. This action starts the scenario. Read more about the script settings in the article "Scenario".
Register for the webinar. This action registers the selected contacts for the webinar. Read more about the webinar settings in the article "Webinars".
Add product access. This action adds access to a course, product, stream, or library for a specified period. Read more about creating products in the article "Products and offers".
Delete product access. This action removes access to the course, product, stream, or library.
Export contacts. This action exports all selected contacts in XLSX or CSV format.
Merge contacts. This action allows you to combine several contacts into one, automatically transferring all data, accesses and the history of contact actions. For more information about merging contacts, read the article "Merging contacts".
Telegram groups. This action adds or deletes contacts to the Telegram group. Read more about the Telegram group settings in the article "Telegram Group Application".
- Add contacts. This action adds contacts to the Telegram group associated with a specific training course or program. Adding a Telegram group provides an opportunity for active communication and collaboration with other users and teachers, which contributes to more effective learning and additional support. Being in a group allows users to feel part of the educational community, which encourages participation in discussions.
Delete contacts. This action removes contacts from the Telegram group. Removing from the group allows teachers and administrators to control the participants in the training. For example, if members violate the rules of the platform or exhibit unconstructive behavior, they can be removed from the group to prevent possible conflicts.
- Add contacts. This action adds contacts to the Telegram group associated with a specific training course or program. Adding a Telegram group provides an opportunity for active communication and collaboration with other users and teachers, which contributes to more effective learning and additional support. Being in a group allows users to feel part of the educational community, which encourages participation in discussions.
Suspend access. This action can be used to temporarily block users' access to certain content or functionality. The action helps to control and regulate user access, ensuring proper and efficient use of resources.
Pause subscription renewal. This action allows you to temporarily stop payments and user access to the subscription. You can suspend your subscription to avoid paying for an inactive period. Read more about product subscriptions in the article "Subscription".
Add a bonus transaction. This action creates a transaction for depositing or debiting from the user's bonus account. The bonus account is presented in the form of bonus credits, which are reflected in the user's personal account in the currency of the account. The user can use them to purchase products or receive certain privileges or services. Bonus credits are not subject to withdrawal. You can massively replenish your bonus account and massively debit bonuses. To do this, select the type of transaction in the settings: replenishment or debit.
Affiliate program. Change partner. This action allows you to replace the contact's partner or reset the partner. If you want to reset the partner, leave the "Partner" field empty. For more information about the affiliate program, read the article "Affiliate Program".
Certificate. Issue a certificate. This action issues certificates for the selected contacts. For more information about certificates, see the article "Certificates".
Gamification. Read more about the achievements in the article "Gamification".
Add achievement. This action means that users can be awarded a certain achievement or reward for completing certain goals, tasks, or completed learning stages. This action performs the function of stimulating users, motivating them to achieve better results and progress in their studies. For completing an achievement, users are awarded points on the achievement account. Awarding points to users can also be used as a tool to assess their success and progress in learning.
Reset achievements. The action removes achievements from the list of user achievements. This action performs the function of stimulating users, motivating them to achieve better results and progress in their studies.
Delete contacts. This action removes all selected contacts from the CRM.
Merging contacts
If contacts are duplicated, you can select up to 5 contacts and combine them into one. When merging contacts, all related objects will be merged into one. Not only all information from other contacts (full name, phone, email, date of birth, etc.) will be transferred to it, but also the history of contacts' actions (contact purchases, courses, payments, chatbots, site visit history, etc.).
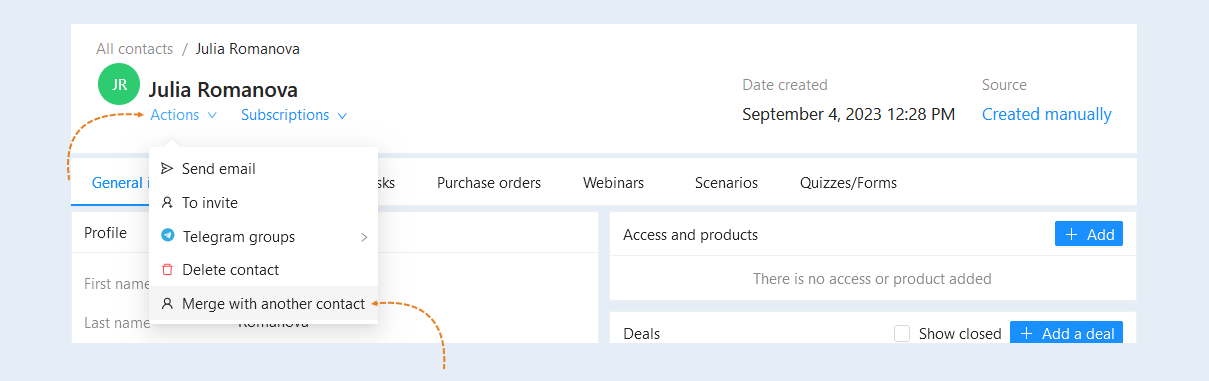
To do this, click "Actions" in the contact card and select "Merge with another contact". For more information about merging contacts, read the article "Merging contacts".
Please note, this action is irreversible!