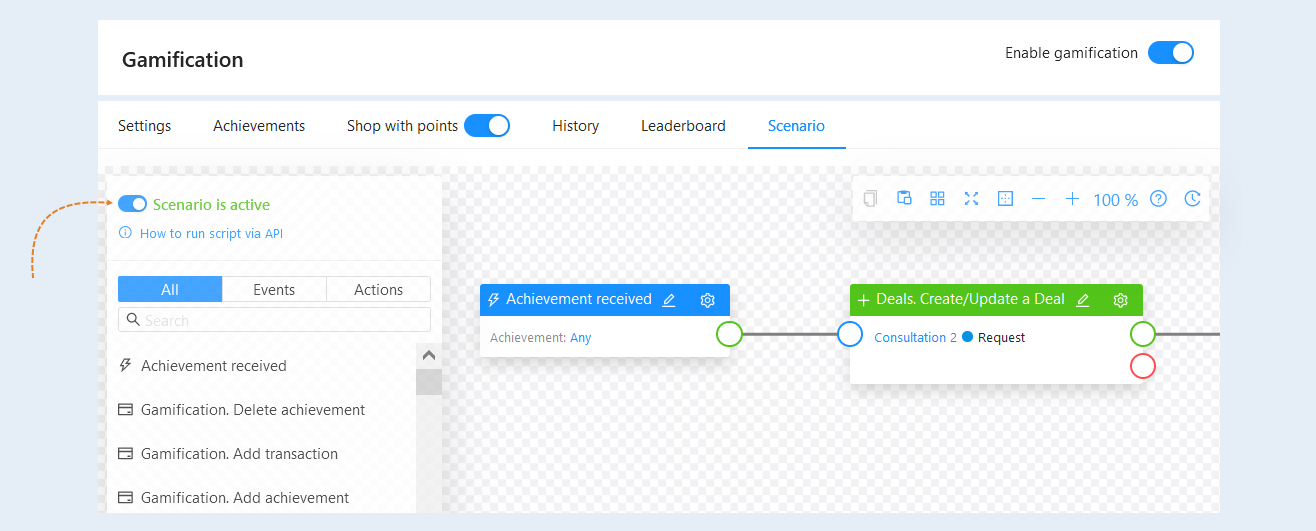
The "Gamification" section is a special section where gaming elements are used to provide a more interesting and motivating learning experience for users. It includes various gaming mechanics, rewards, and achievements that are designed to motivate users and make learning more engaging and enjoyable.
The scenario for the "Gamification" section is a specific sequence of steps and actions that automate the process of earning achievements for successfully completing tasks and allocating points to the user's achievement account. The scenario allows for automatic addition of achievements after tasks are successfully completed, participant completion of specific courses or programs, freeing organizers from manual processes and saving them time and resources.
Creating a scenario
Go to the "Courses and Training" section and select the "Gamification" tab.
To start working with this section, click on the "Enable Gamification" button. For more information on how to set up the section, refer to the "Gamification" article.
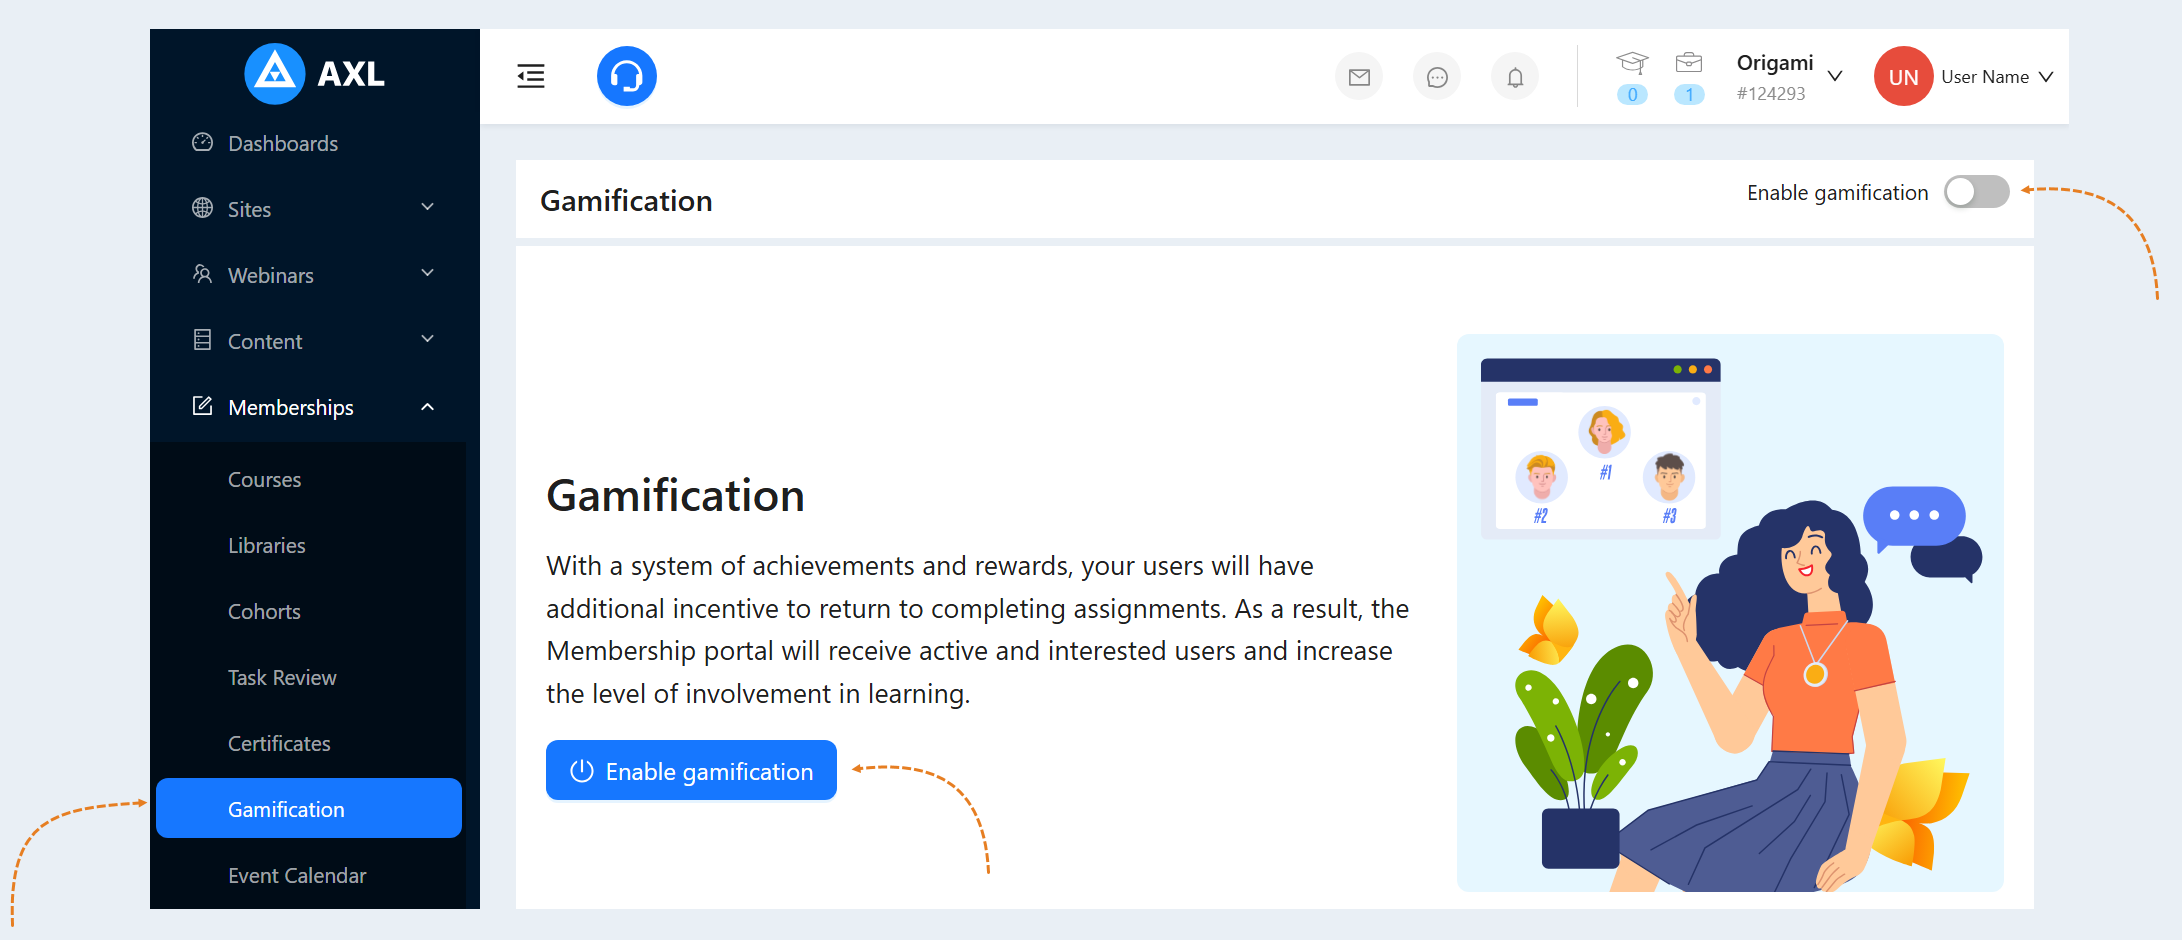
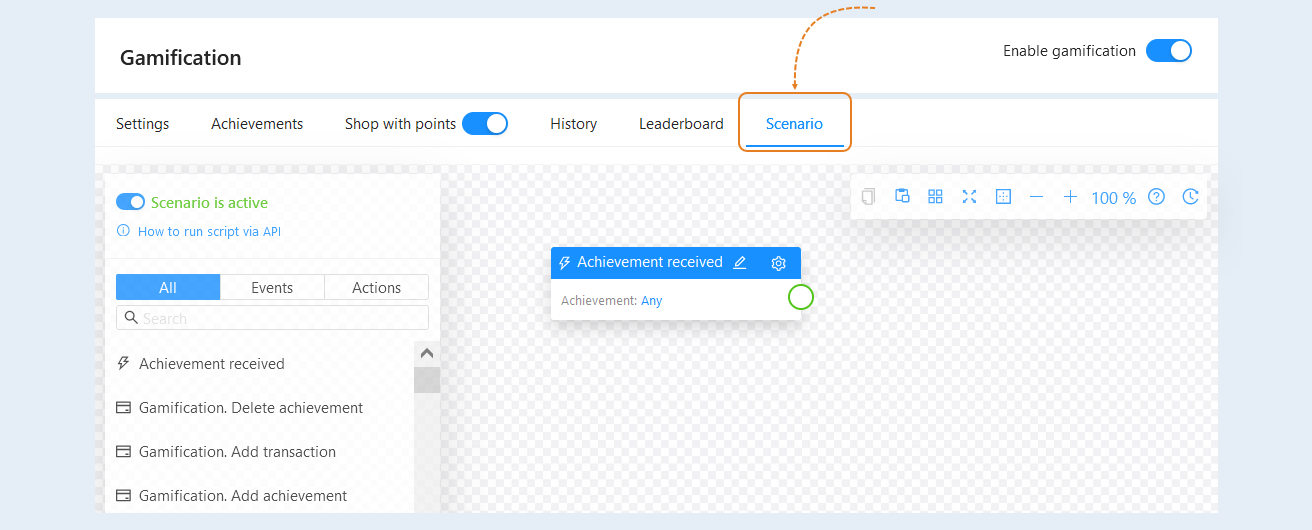
Next, go to the "Scenario" tab.
In the "Scenarios" section, you can automate the process of adding achievements, allocating points, rewards, granting access to products, sending emails, and more.
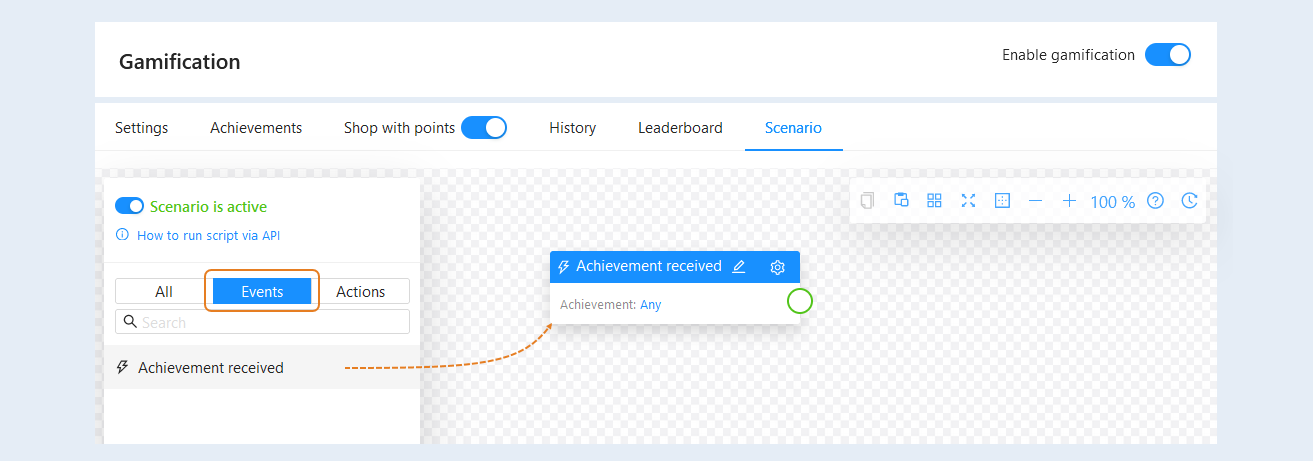
For gamification, an event is available that triggers the scenario:
- Achievement received. This event is triggered when a user successfully completes a task and earns an achievement. For example, after successfully completing three courses on the platform, a user will receive 150 points and a free consultation. In the node settings, you can select a specific achievement from the list or leave any achievement by default.
Read more about other events in the "Types of events in the scenario and their configurations" article.
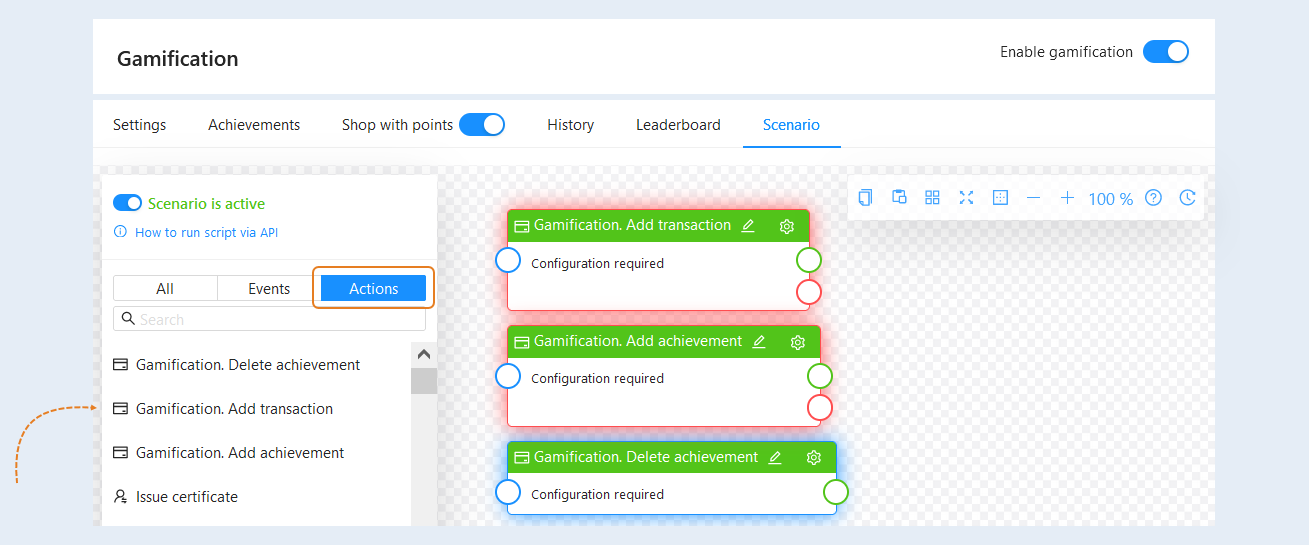
After that, you need to add actions to the scenario. Open the "Actions" tab, select an action from the list, and drag it to the scenario field.
- Action "Gamification. Add Transaction": This action creates a transaction to credit or debit points from the achievement account in the "Gamification" section.
Points for achievements are a reward system and a measurement of user progress. Points are credited to the achievement account, which is reflected in the user's personal account. The user can use them to purchase products or receive certain privileges or services in the "Points Store". Points cannot be withdrawn.
Transaction to credit the user's achievement account means crediting a certain number of points to their account. Points can be earned, for example, for successfully completing tasks, passing tests, participating in additional activities, and achieving specific goals. Transaction to debit from the achievement account means deducting points from the user's account. Points can be deducted, for example, for poor performance in a group project, submitting homework one day late, or violating behavior rules on the platform.
This functionality allows to stimulate users to actively participate in the educational process, encourage task completion, achieve specific results, or participate in promotions. Action "Gamification. Add Achievement": This action allows assigning a specific achievement or reward to the user for achieving specific goals, tasks, or completed learning stages. This action serves to motivate the user to achieve better results and progress in learning.
Users receive points for achieving an achievement. Point allocation to the user can also be used as a tool to assess his successes and progress in learning.
Action "Gamification. Delete Achievement": This action removes a specific achievement from the user's list of achievements.
For detailed information on other actions, refer to the "Types of actions in the scenario and their configurations" article.
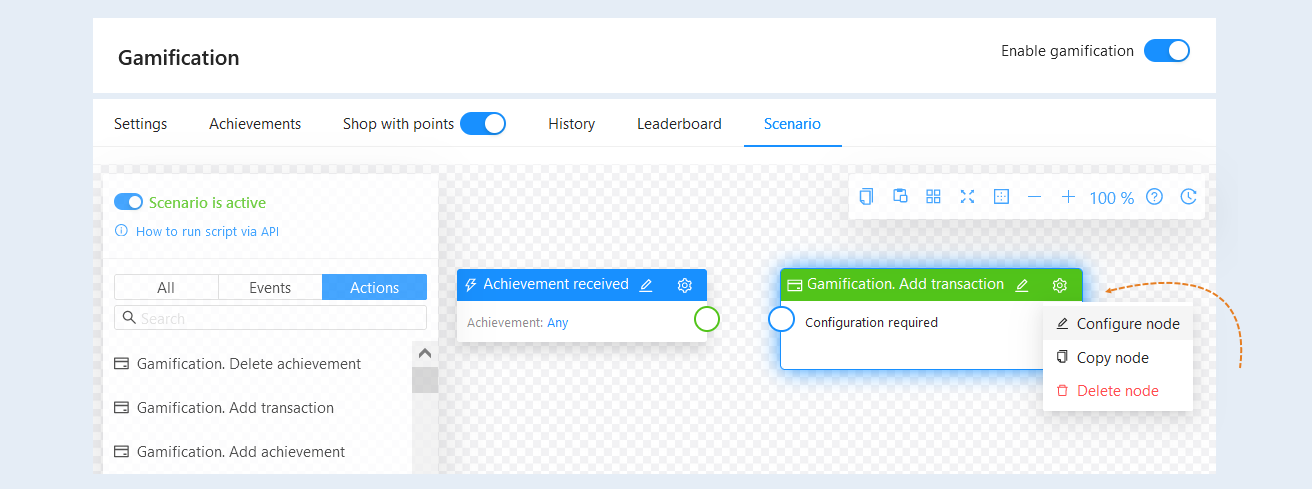
Next, for each action, you need to configure the settings. Click on the "Settings" button in the top right corner of the action, then open the "Configure node".
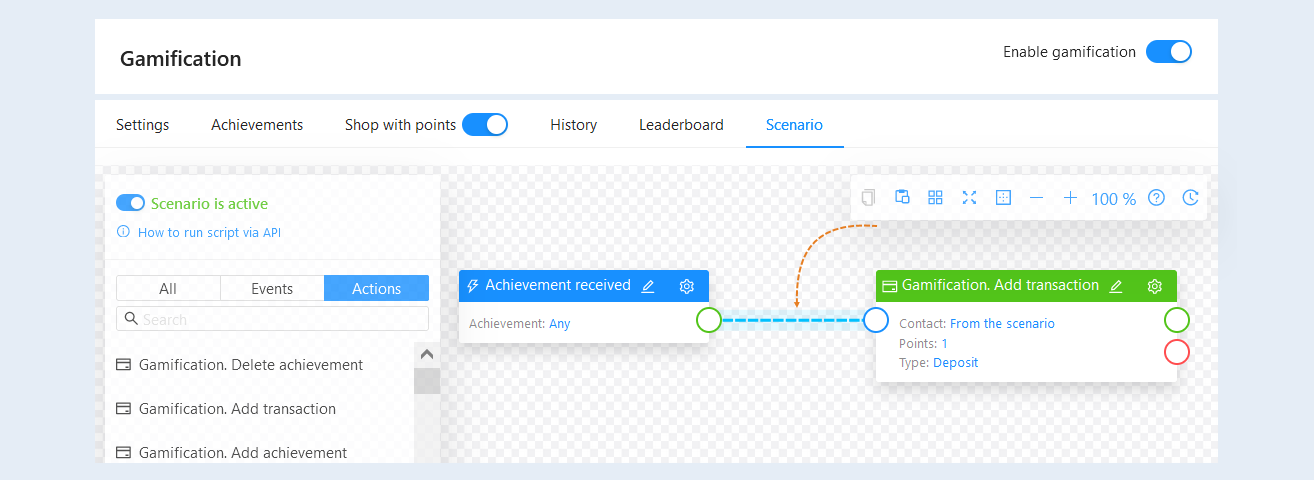
Once you have added the actions, you need to connect all the elements of the scenario. You can create one or several links between events and actions. To remove a link between elements of the scenario, double-click on the link.
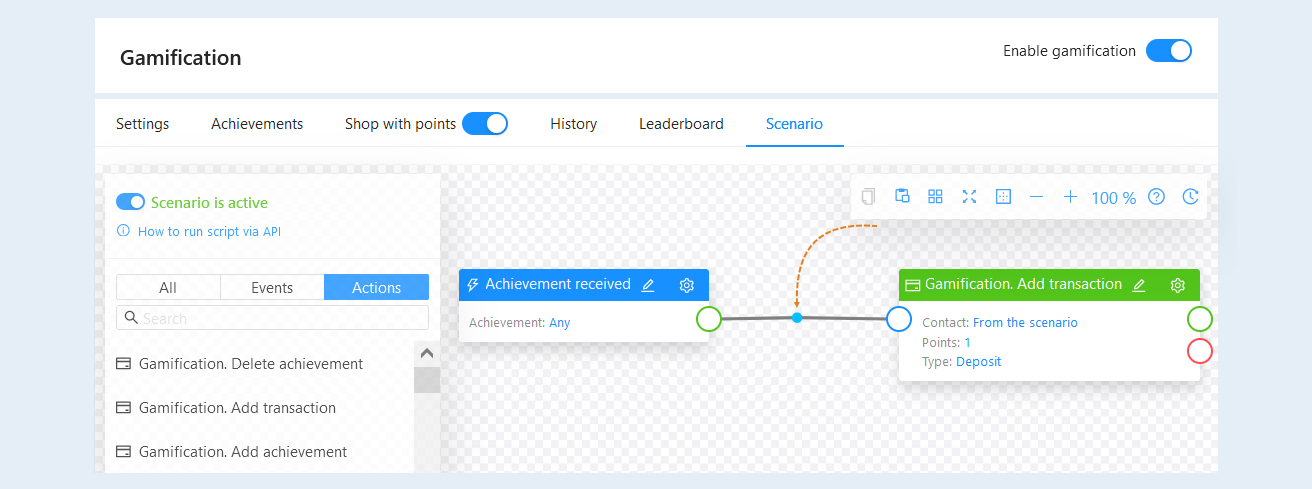
You can use the function of adding points at the connections to create chains. To add a reference point, select the location on the link where you want to add the point. Click the left mouse button on the selected location on the link and simultaneously press the Ctrl key on the keyboard. Then you can grab the reference point and move its location in the scenario field.
To remove a reference point, double-click on the point. Double-clicking on the line will delete the line and all reference points on it.
To massively delete scenario steps, hold down the Shift key and select the desired events and actions by clicking on them with the mouse. Next, press the Delete or Backspace key and confirm the deletion of the selected scenario steps.
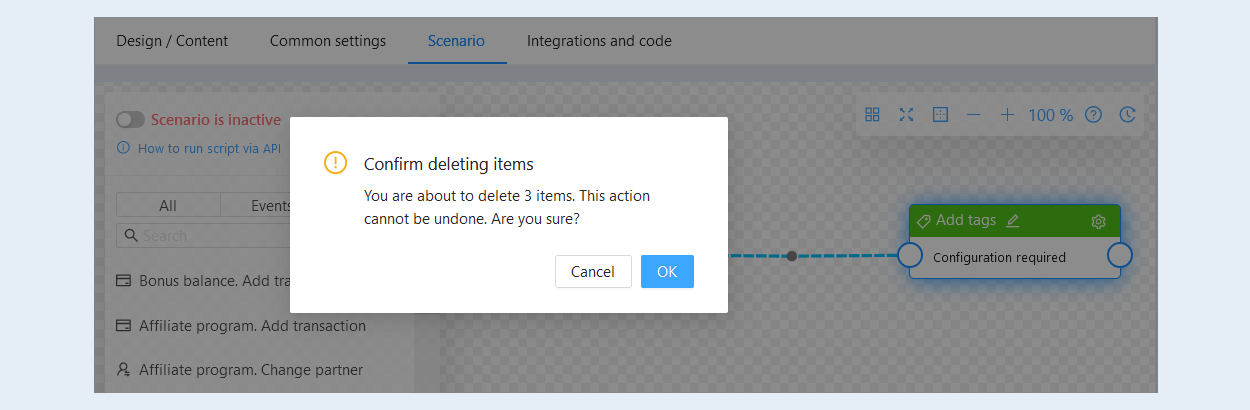
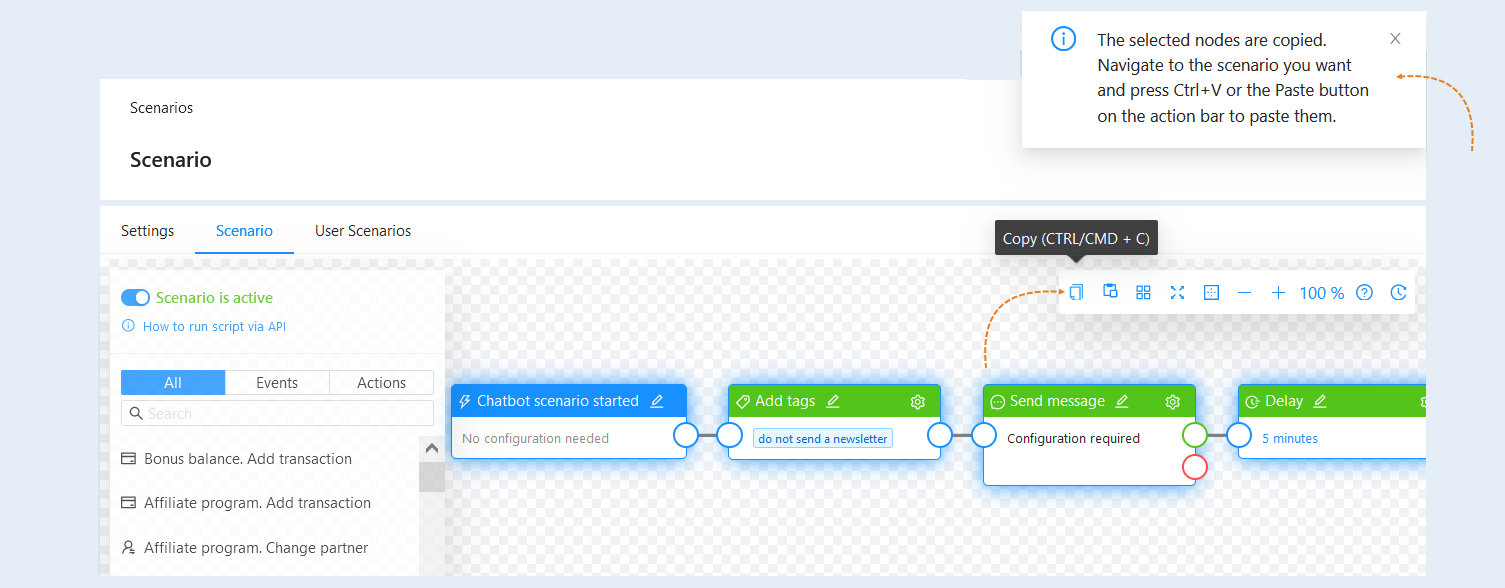
You can copy steps and connections between scenarios within the same account. Press shift and select the necessary steps by clicking on them with the mouse. The selected steps of the scenario will be highlighted with a blue frame.
Next, copy the selected steps by clicking the "copy" button or pressing CTRL + C on the keyboard. A message will appear in the upper right corner indicating that the steps of the scenario have been copied.
Then, open another scenario of your account. Please note that transferring nodes of the scenario works only within the same account. Click the "paste" button or Ctrl + V on the keyboard. The steps of the scenario will be copied to the new scenario.
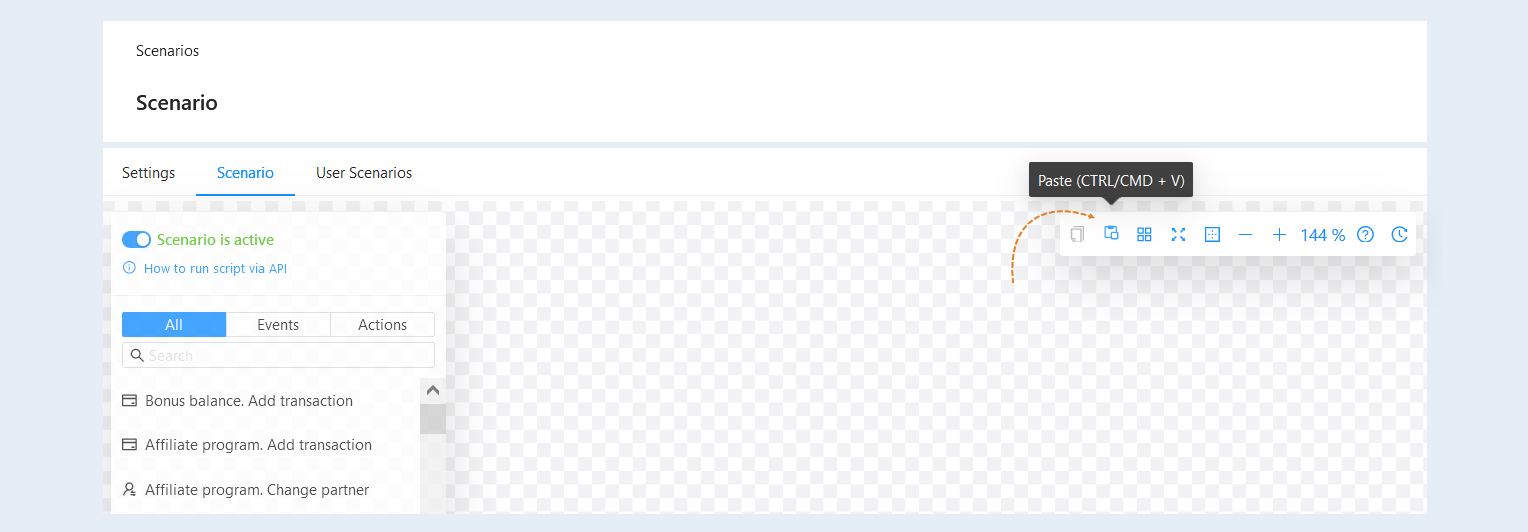
After completing the scenario settings, move the slider to the active position to activate the scenario. Now your scenario is ready.