A website scenario is a sequence of events and actions on the websites of your account on the AXL platform.
The scenario reacts to user manipulation on the site and takes responsive actions. Basically, it is a sequence of interactions between a merchant (that is, you) and site visitors, through automated processes (for example, sending an email).
When the scenario is created, the “Form submitted” event is set first. This event will trigger the site scenario. Next, you need to establish response actions: send a letter, add a responsible person, etc.
How to create a scenario for a website
Go to the "Sites" section. Select one of your sites and open it.
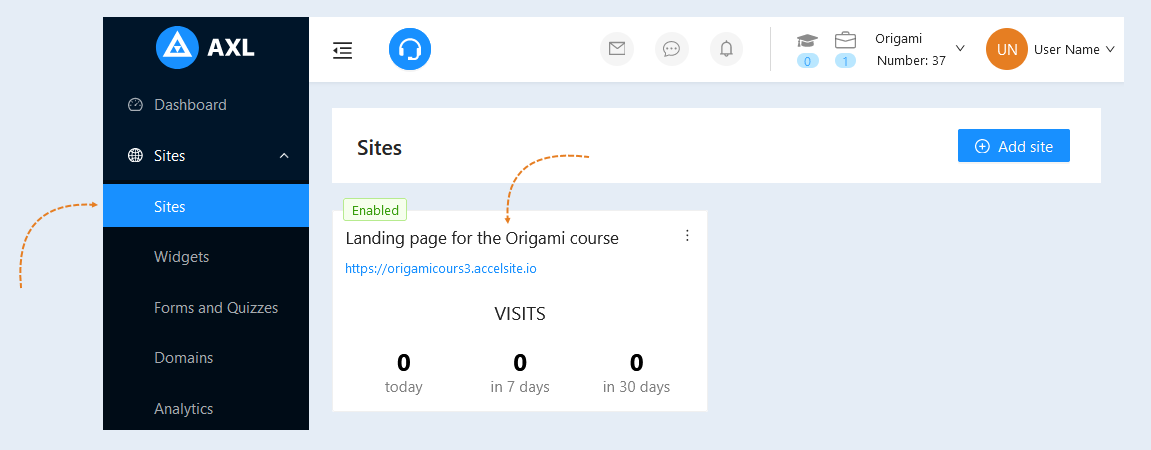
Next, go to the "Pages" tab. Select one of the pages and click on the page title or the "Edit" button.
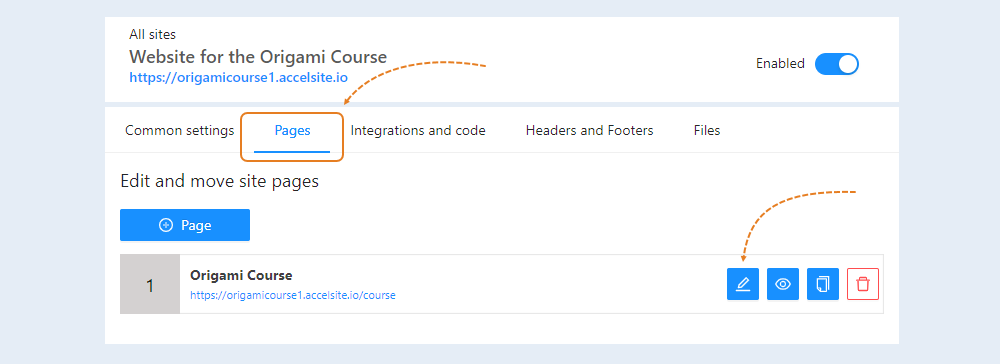
To create a website scenario, select an event from the list and drag it into the scenario field. There are 4 event options for the website scenario:
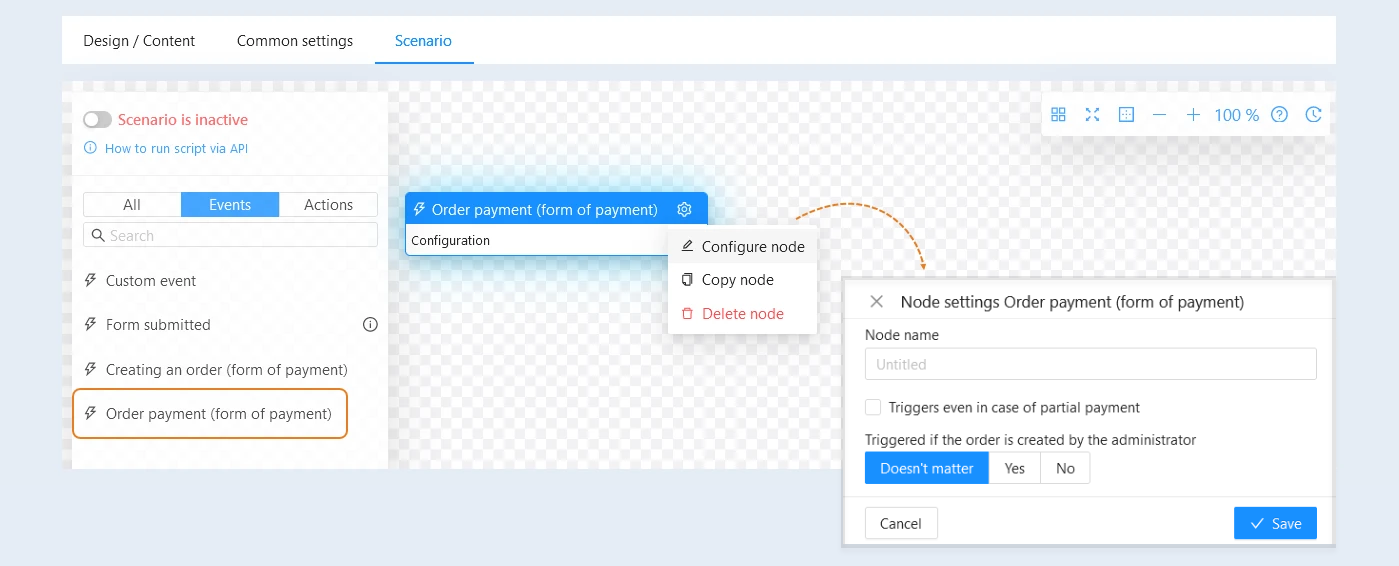
Order payment (form of payment). The order payment is a step in the scenario when the user confirms their order and makes a payment for the purchased course or other educational material. The user selects a course or educational material on the website. They then proceed to the order checkout in the payment form. After successful payment, the event will trigger, and further actions in the scenario will commence. For example, the user receives an email confirming their order and a link to their user dashboard.
Configure the settings for this event by clicking the "Configure Node" button. In the opened window, fill in the fields:
- Node Name. Specify the name of the node; you can name the nodes in the scenario at your discretion.
Triggers even in case of partial payment. Check the box so that the scenario triggers even if the order is partially paid. After finishing the settings, click the "Save" button.
Triggered if the order is created by the administrator. Choose the required option:
- Yes. If you select this option, the event will only trigger if the order was created manually by the administrator. This means that if the payment was initiated by the user on the website, the event will not trigger. This is useful in situations where it's necessary to link manual order processing with subsequent actions in the scenario.
No. If you select this option, the event will only trigger if the order was generated by the user on the website. In this case, if the order was created manually by the administrator, the event will remain inactive. This setting can be helpful when you want to track and respond only to automated applications generated by users through the online platform.
Doesn't matter. Selecting this option means that the event will trigger regardless of whether the order was created manually by the administrator or by the user through the website.
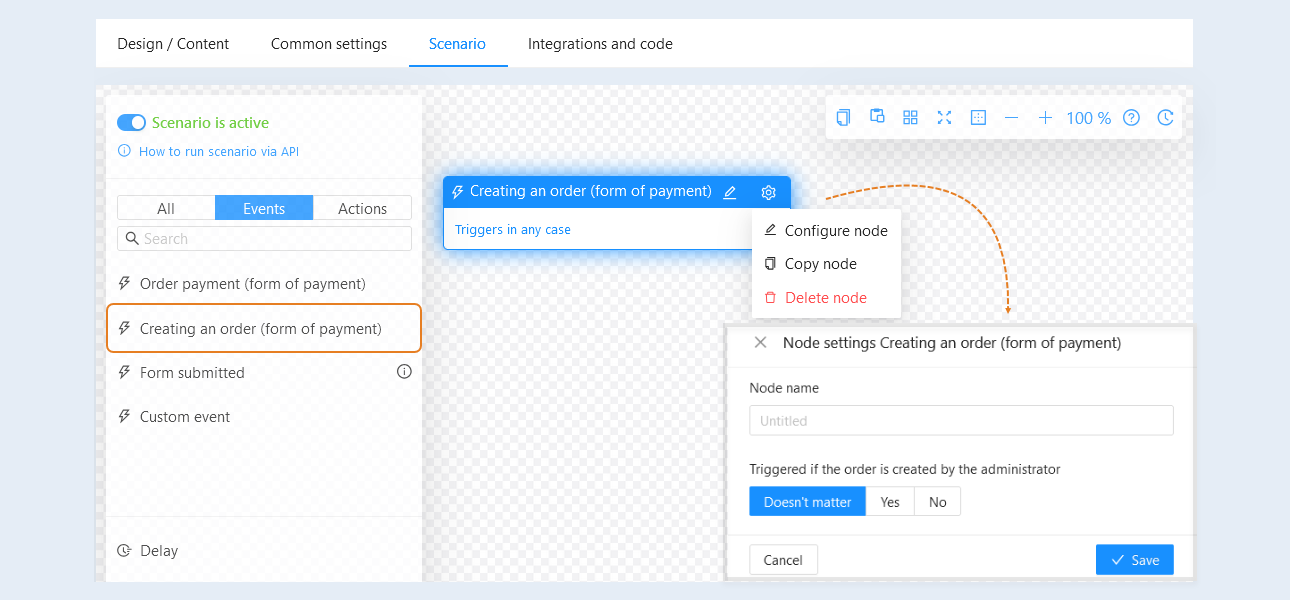
Creating an order (form of payment). The event triggers when a visitor creates an order in the payment form.
After the user creates an order in the payment form but does not complete the payment, the event will trigger, and further actions in the scenario will commence. For example, the user will receive an email reminder that the order payment has not been completed. The email may offer a promo code for an additional discount if the payment is completed within the next 12 hours or access to an exclusive webinar, which will help encourage the user to complete the payment.
Configure the settings for this event by clicking the "Configure Node" button. In the opened window, fill in the fields:
- Node Name. Specify the node's name; you can name the nodes in the scenario at your discretion.
Triggered if the order is created by the administrator. Choose the required option:
- Yes. If you select this option, the event will only trigger if the order was created manually by the administrator. This means that if the payment was initiated by the user on the website, the event will not trigger. This is helpful in situations requiring a link between manual order processing and subsequent scenario actions.
No. If you select this option, the event will only trigger if the order was created by the user on the website. In this case, if the order was created manually by the administrator, the event will remain inactive. This setting may be useful if you want to track and respond only to automated requests generated by users through the online platform.
Doesn't matter. Choosing this option means the event will trigger regardless of whether the order was created by the administrator manually or by the user through the website.
Without selecting this option, the event will trigger by default in any case.
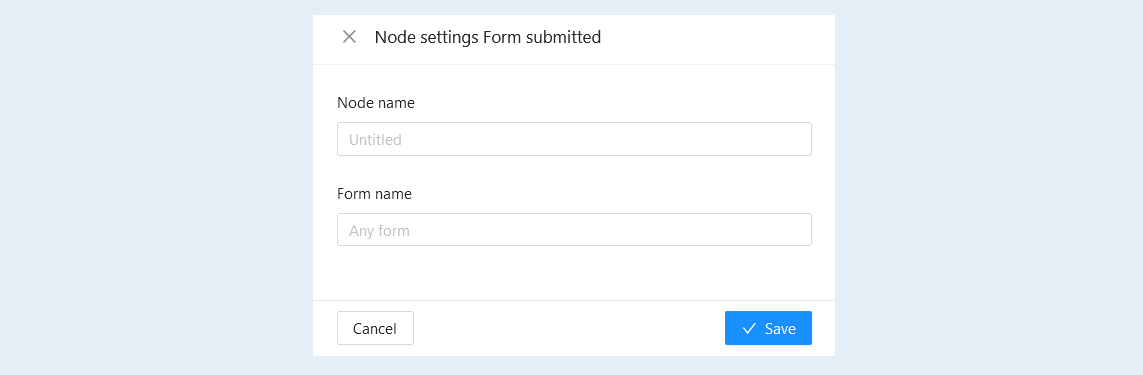
Form submitted. The event triggers when a visitor fills out and submits a form on any web page of your account.
Configure the settings for this event:
- Node Name. Specify the name of the node; you can name the nodes in the scenario at your discretion.
Form Name. Select the form's name from the list. Read more on how to create a form in the article "Form Element." Once you finish the configurations, click the "Save" button.
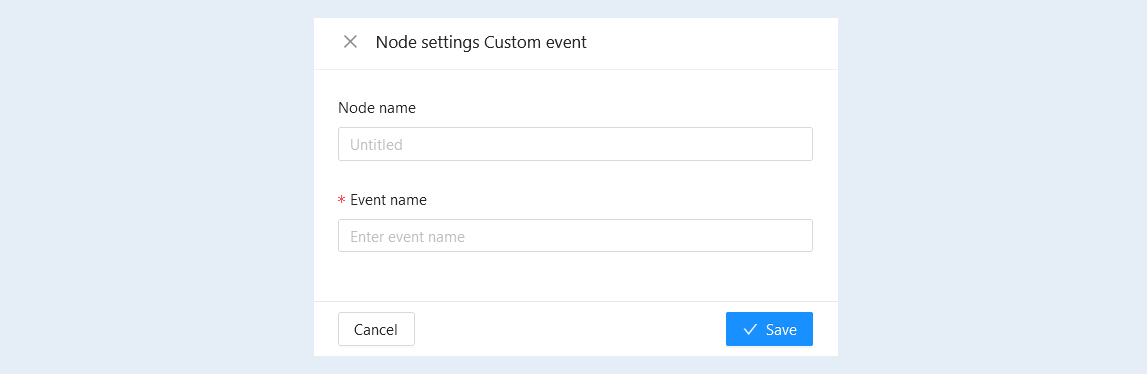
Custom Event. You can create any event that will trigger the scenario.
A custom event is a step that can be added to the scenario to document some user interaction with the platform. It can be used for various tasks, such as monitoring and analyzing user activity, personalizing learning, assessing course effectiveness, etc.
Configure the settings for this event:
- Node Name. Specify the name of the node; you can name the nodes in the scenario at your discretion.
Event Name. Write the name of the event. Click the "Save" button.
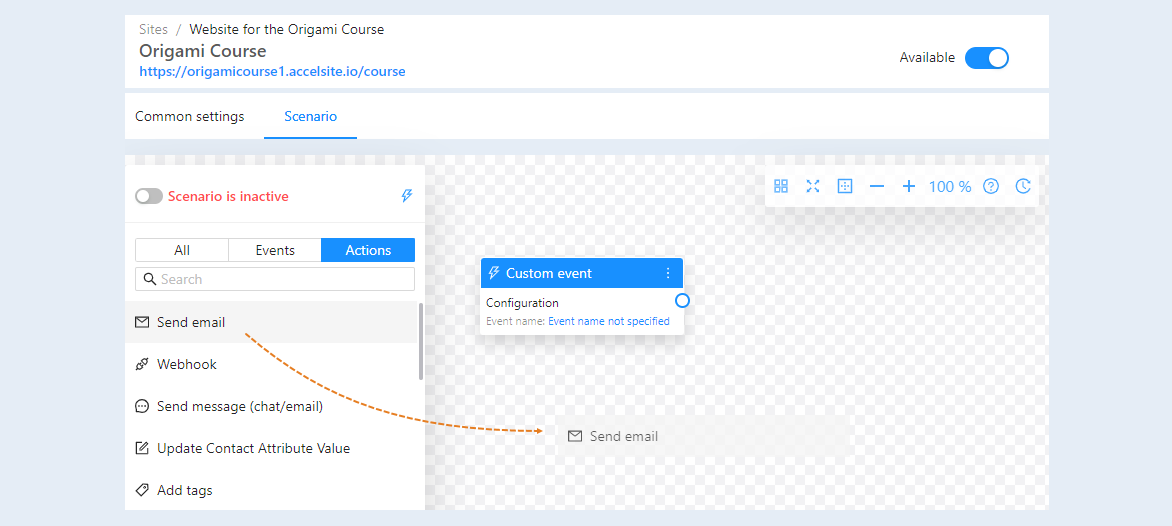
Add the action to the scenario. Open the Actions tab, select an action from the list and drag it to the scenario field. Read more about actions in the article “Types of actions in the scenario and their configurations”.
For each action you need to make settings - configuration.
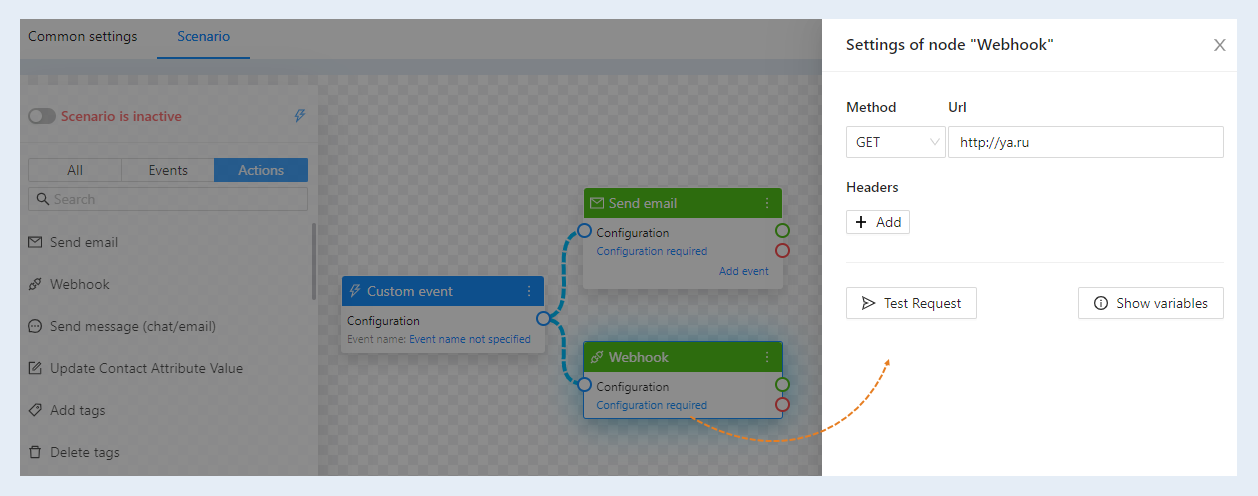
Next, you need to connect the event and the action. You can create one or more links between events and actions.
To remove the link between the elements of the scenario, double-click on the link.
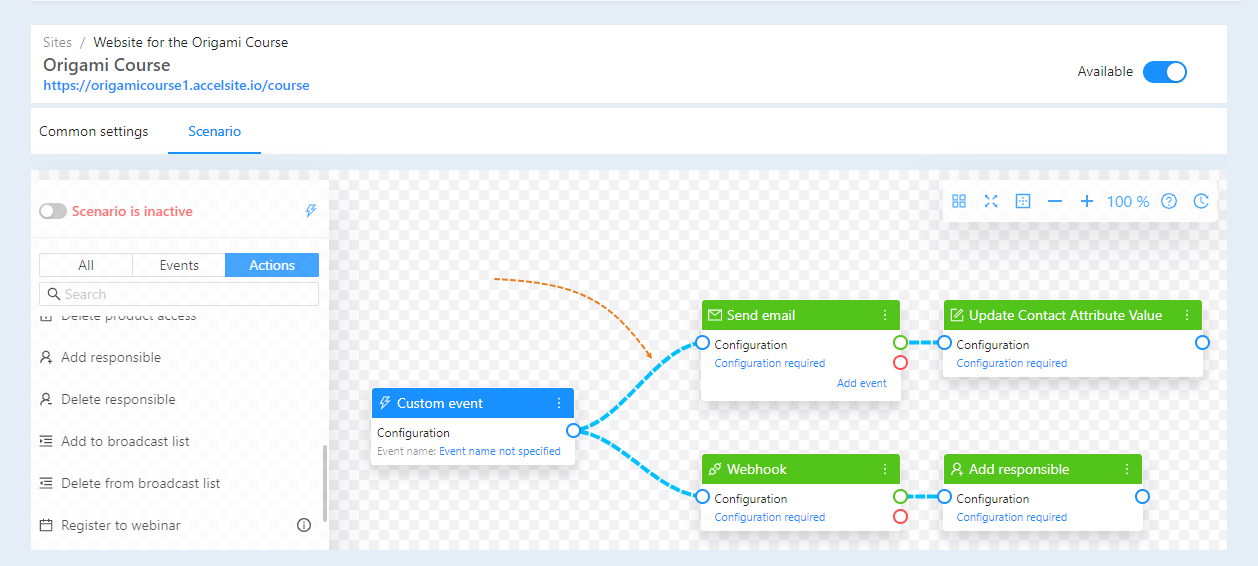
You can use the function of adding points to connections to create chains. To add a reference point, select the location on the communication line where you want to add the point. Left-click on the place selected on the line and simultaneously press the Ctrl key on the keyboard. Next, you can grab a reference point and move its location to the script field.
To delete a reference point, double-click on the point. Double-clicking on the line will delete the line and all reference points on it.
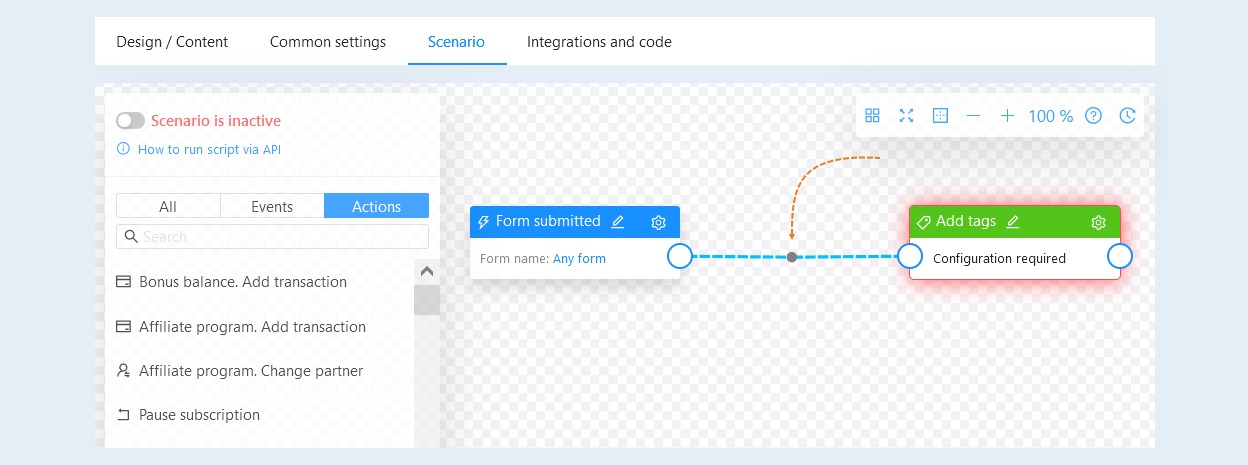
To massively delete scenario steps, hold down the Shift key and select the desired events and actions by clicking on them with the mouse. Next, press the Delete or Backspace key and confirm the deletion of the selected scenario steps.
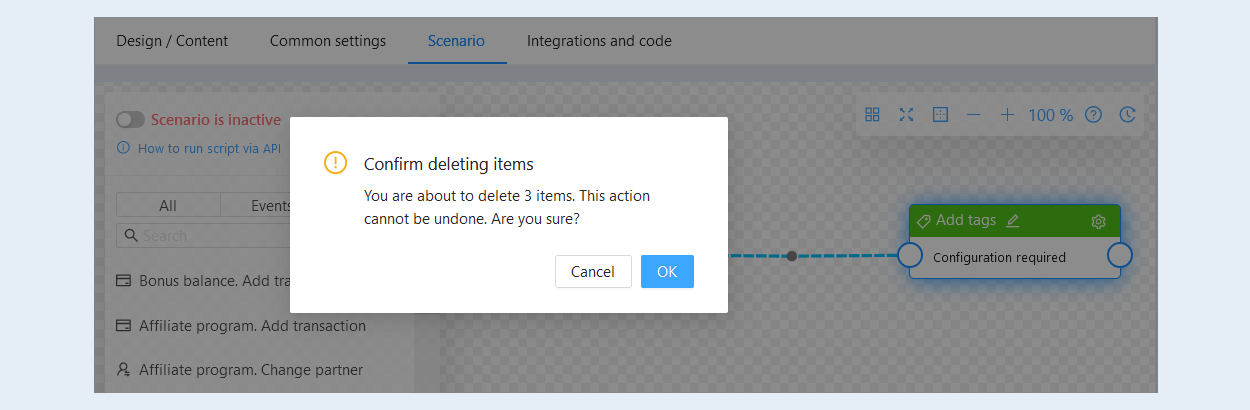
You can copy steps and connections between scenarios within one account. Press Shift and select the desired steps by clicking on them with the mouse. The selected scenario steps will be highlighted with a blue border.
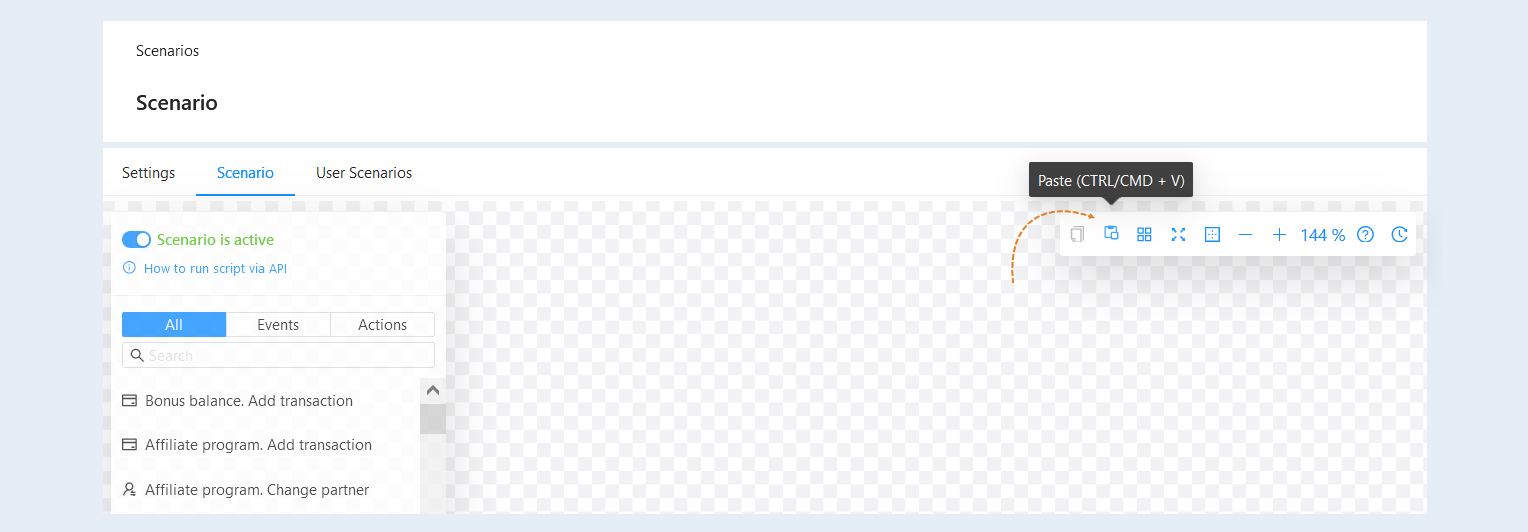
Then copy the selected steps by pressing the "Copy" button or Ctrl + C on the keyboard. A message will appear in the upper right corner stating that the scenario steps have been copied.
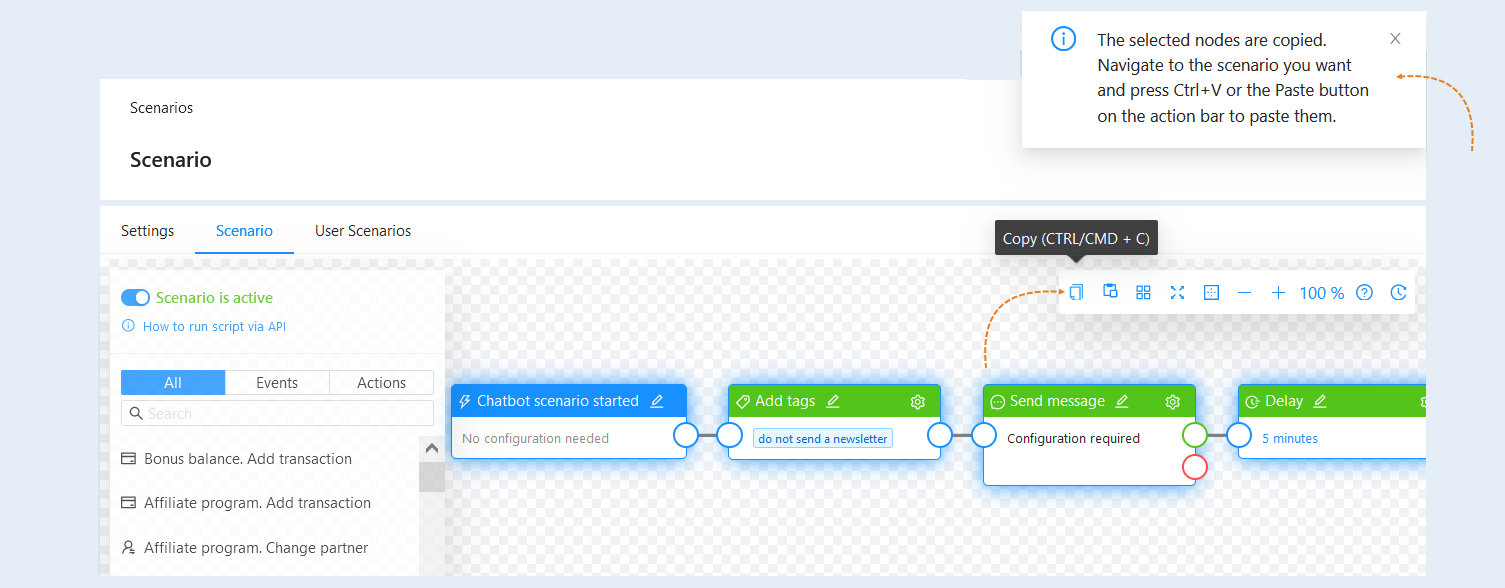
Open another scenario of your account. Please note that transferring scenario nodes only works within the same account. Press the "Paste" button or Ctrl + V on the keyboard. The scenario steps will be copied to the new scenario.
To run this scenario, switch the "Scenario inactive" slider to "Scenario is active".
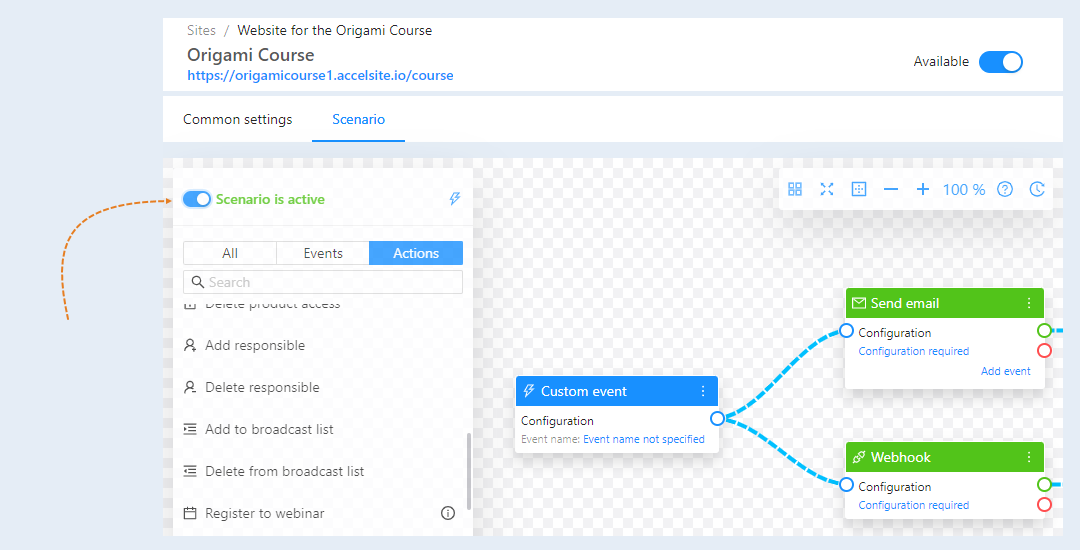
Add as many events and actions as needed to your scenario. Your scenario is now ready.