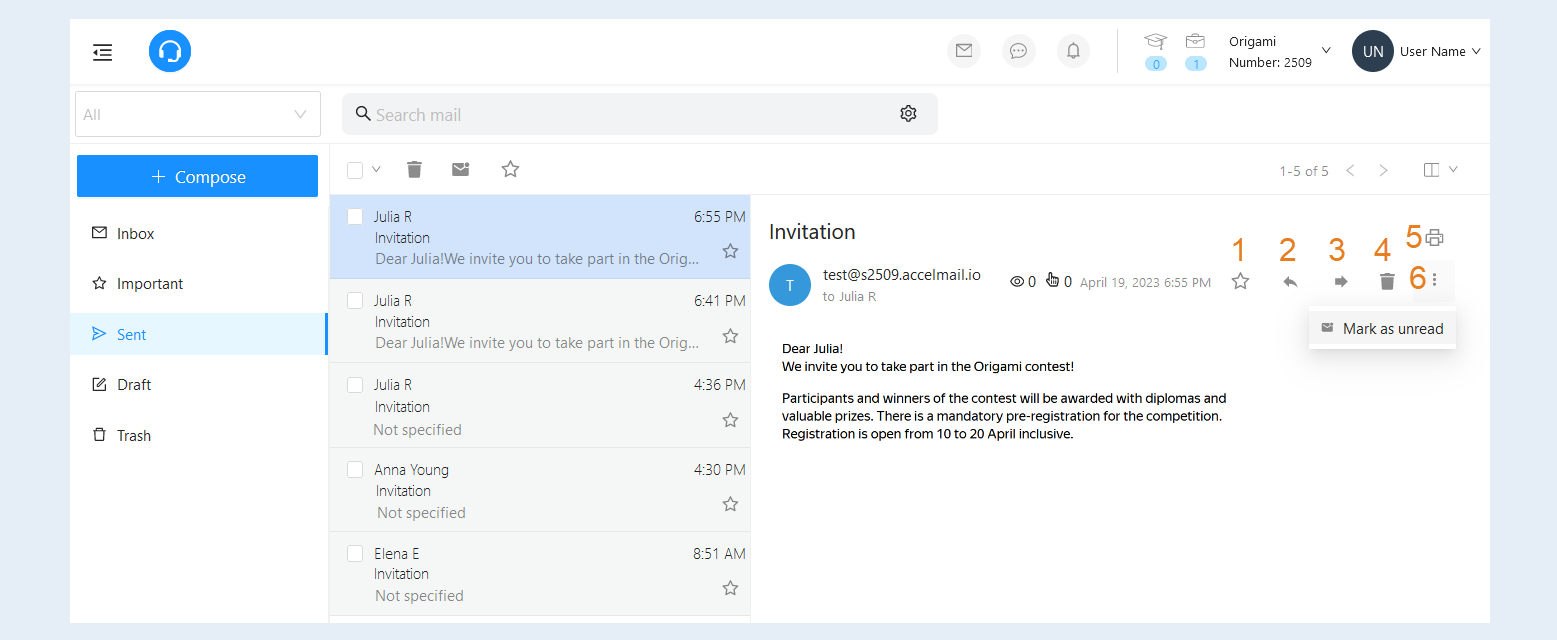
The mail client allows you to work with different mailboxes on the AXL platform. The client performs all the standard functions of email: it allows you to receive and send emails, sort messages and store them.
You can assign a separate mailbox to each member of your team or set up multiple email addresses for one employee. This way you will get a kind of corporate mail, where you will receive responses from contacts.
Click on the desired section of the article to go to its description:
Messages
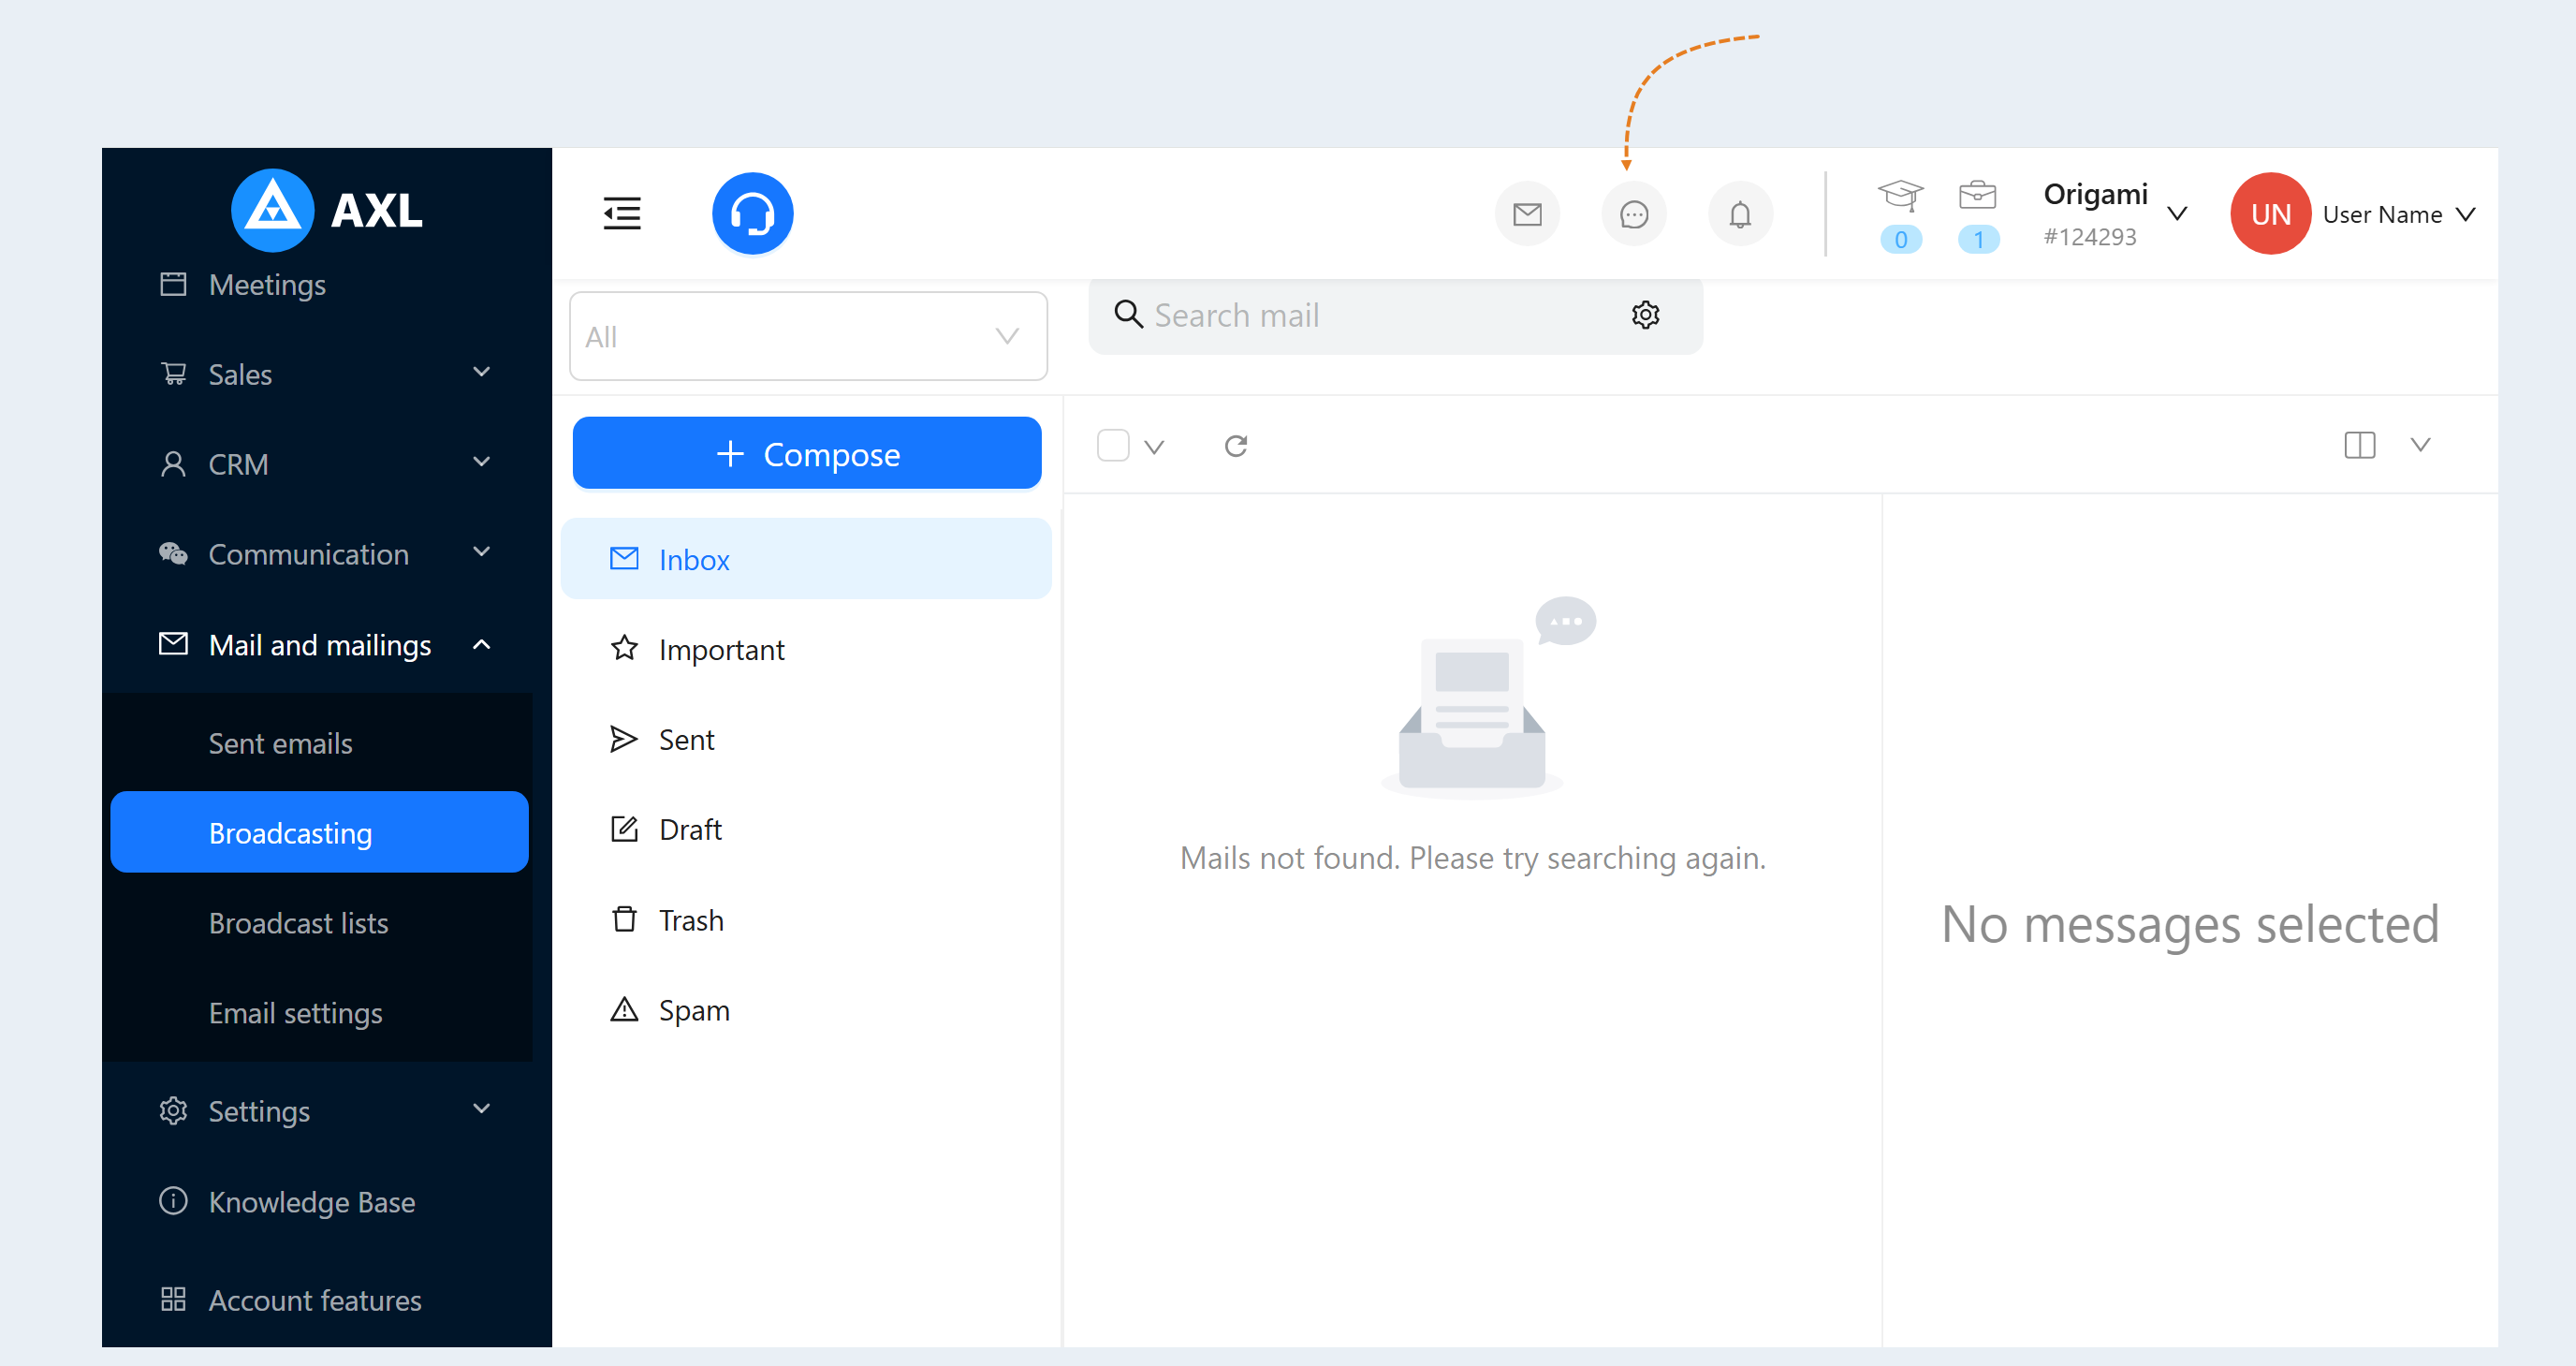
At the top of the page on the toolbar, click the "Messages" icon. Here you will see the messages that arrive at your email address. In order for the mail client to become available for working with it, it is necessary to configure incoming mail.
Incoming Mail Settings
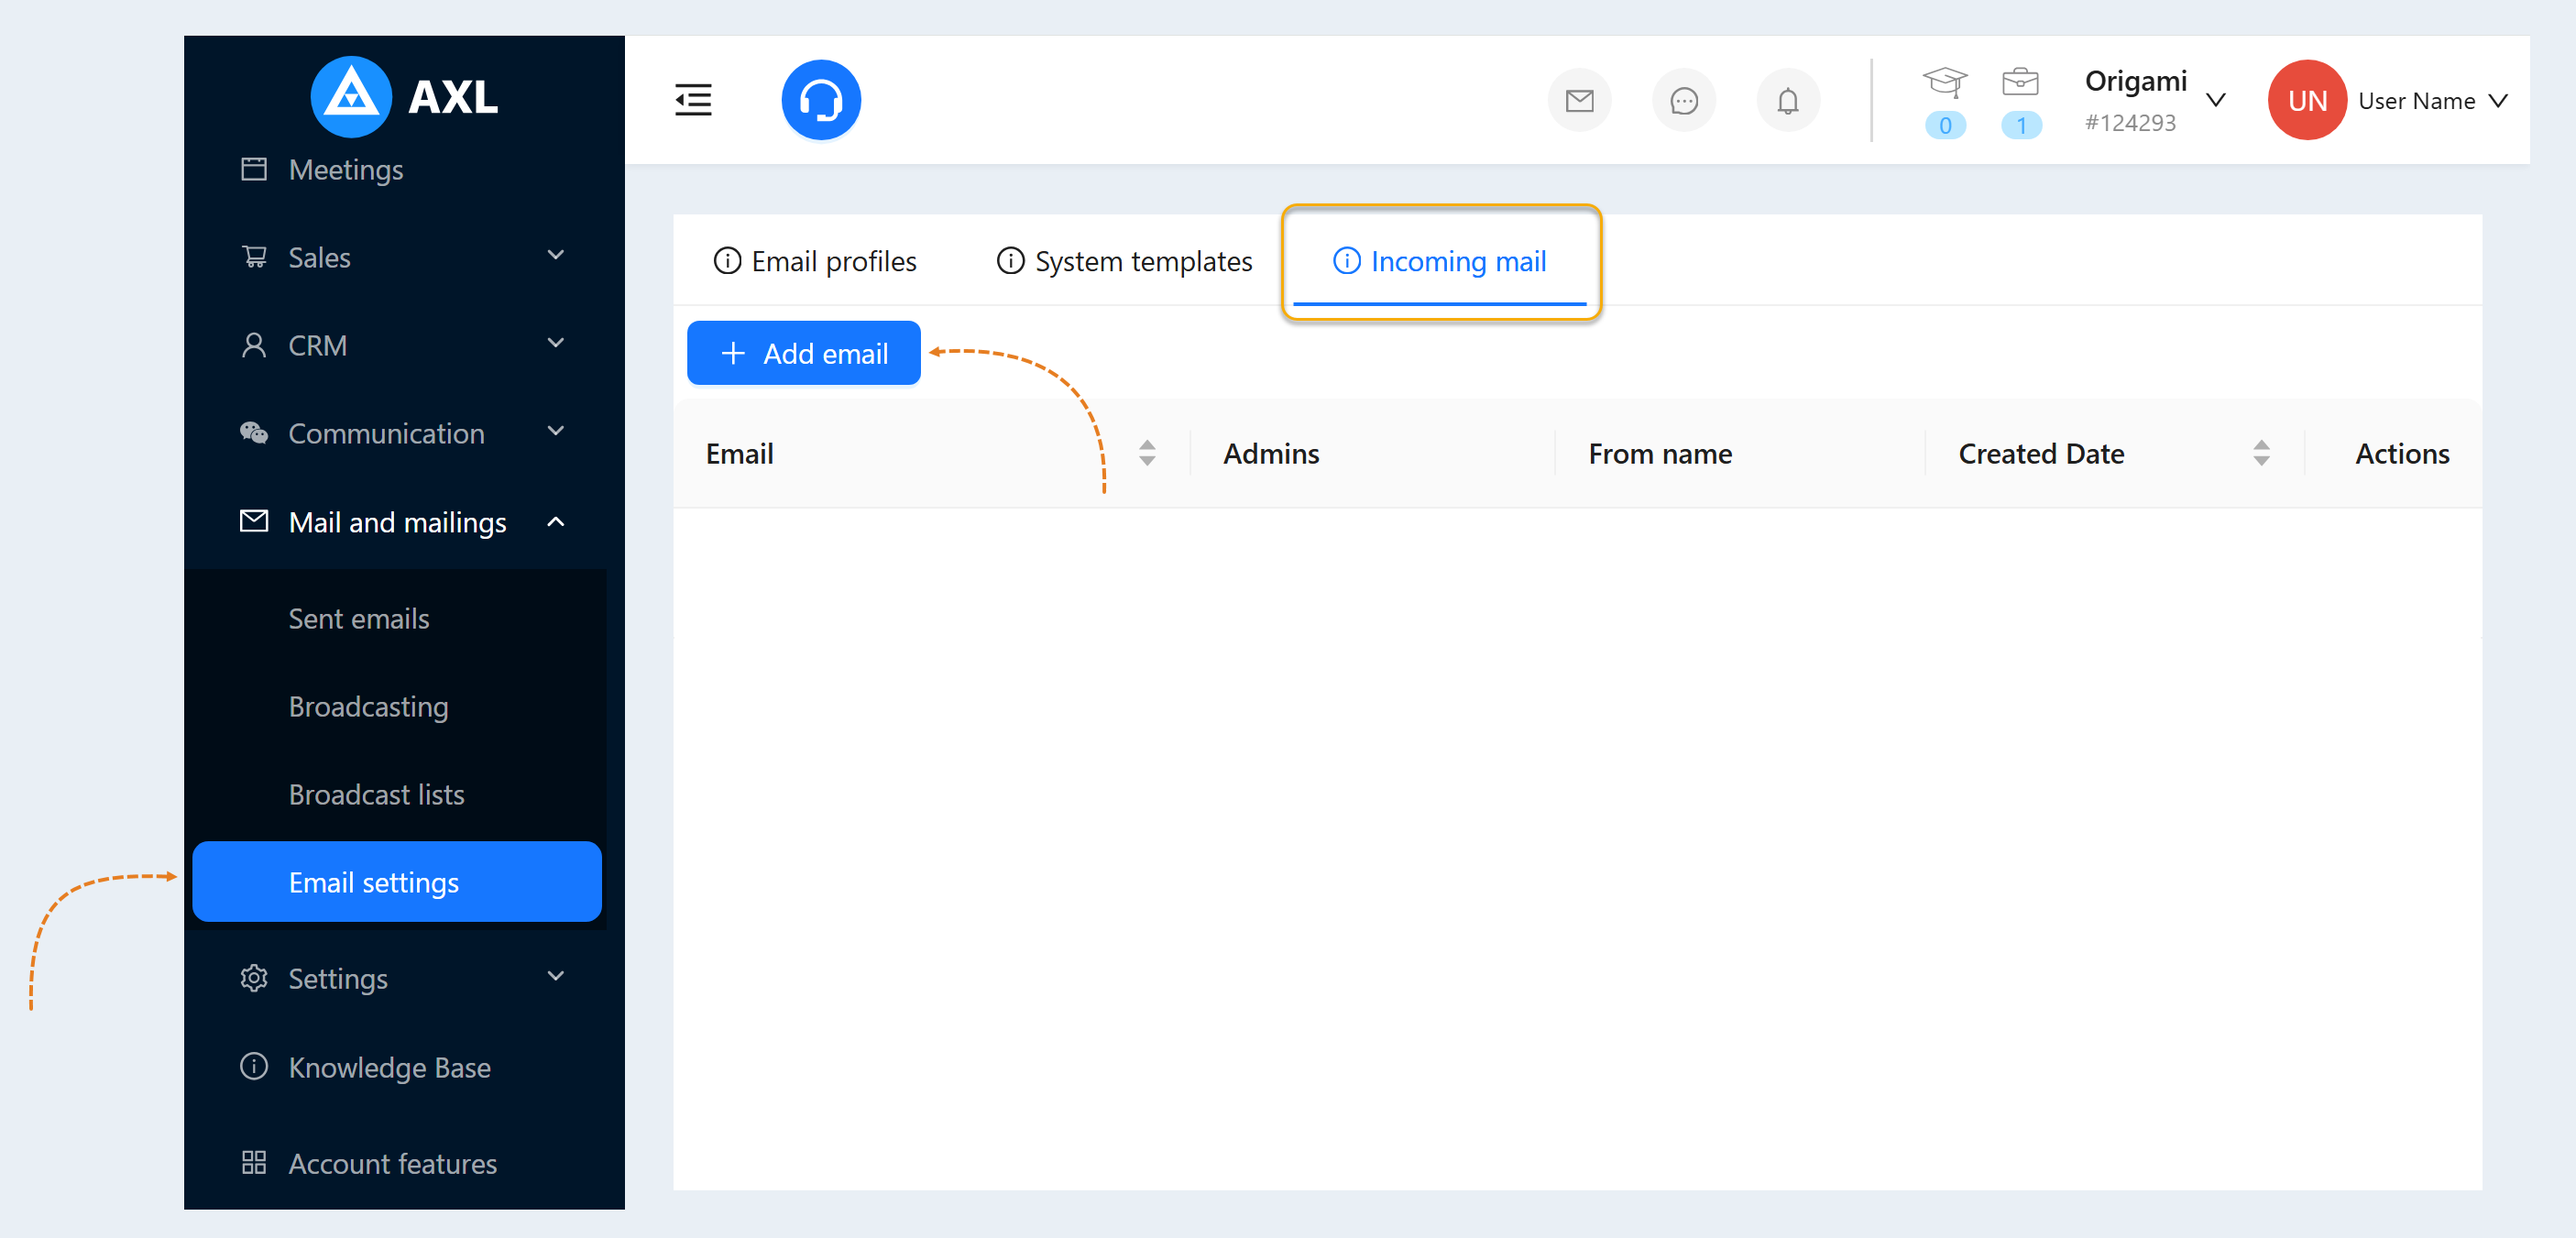
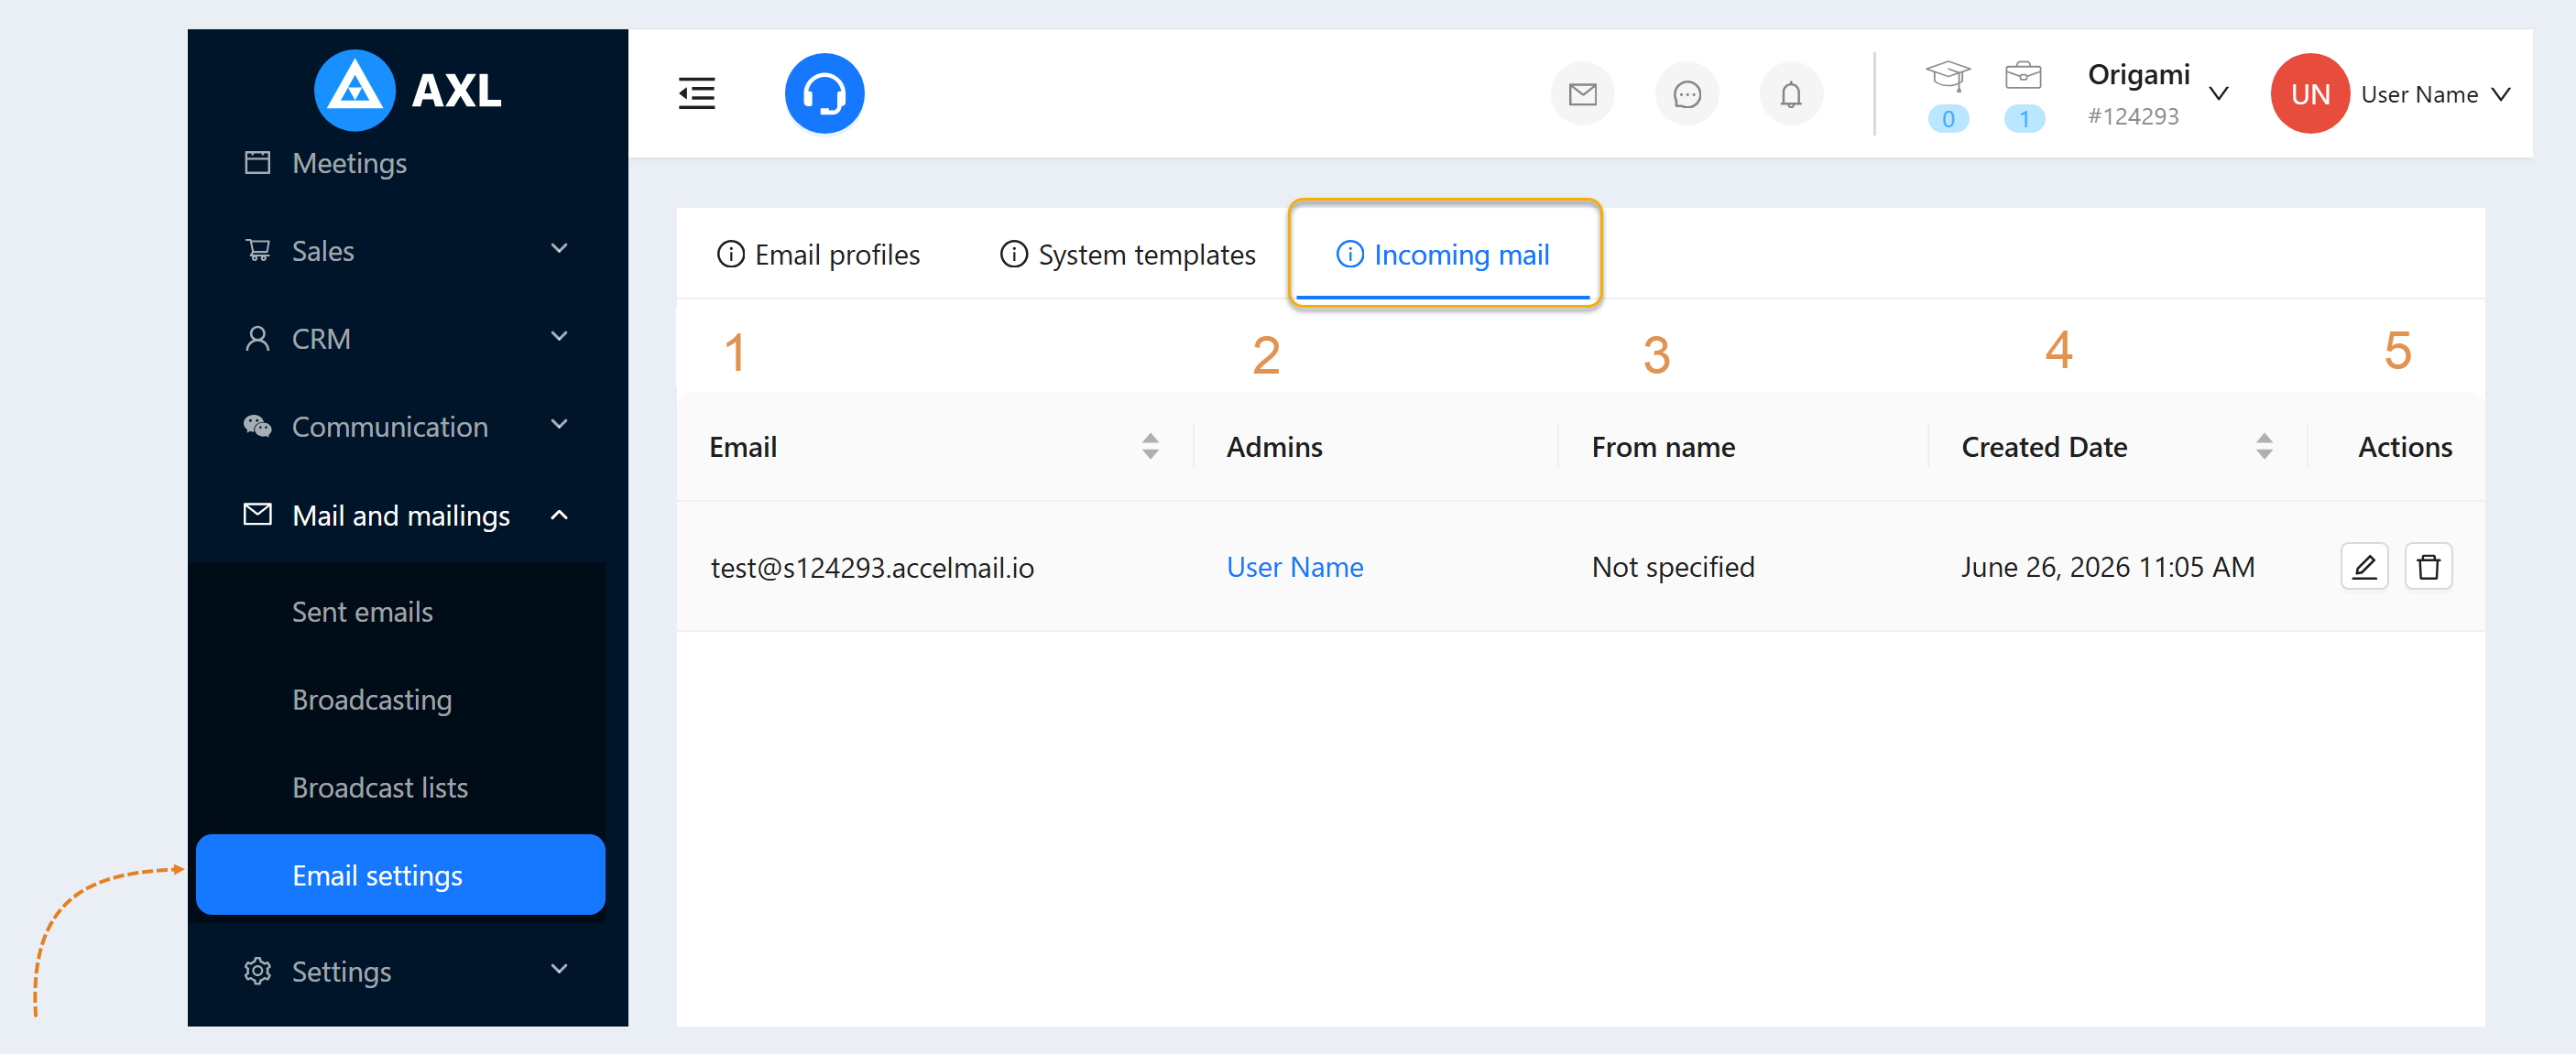
Go to the "Mail and mailings" section, the "Email Settings" tab. Next, select the "Incoming mail" tab and click "Add email".
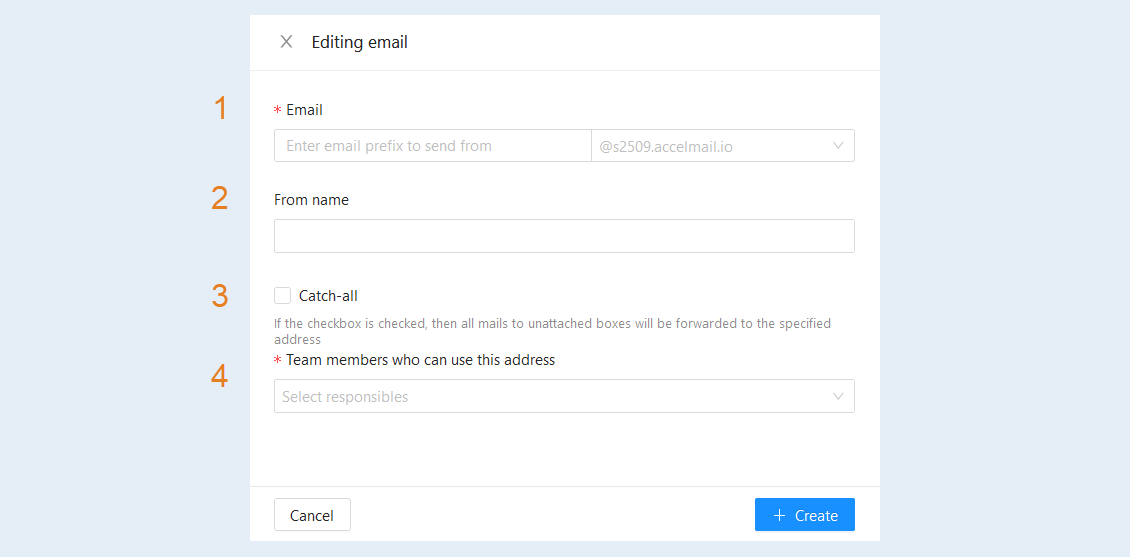
In the "Email Editing" window that opens, fill in the fields:
- Email. Enter the email prefix to send and select the domain.
From name. Specify the sender's name.
Catch-all. Check the box so that all emails sent to non-linked mailboxes are forwarded to the specified address.
Team members who can use this address. Choose from the list of administrators of your team.
To select a domain, click in the domain field and select the previously configured domain. If the domain has not been created yet, click the "Manage email domains" button.
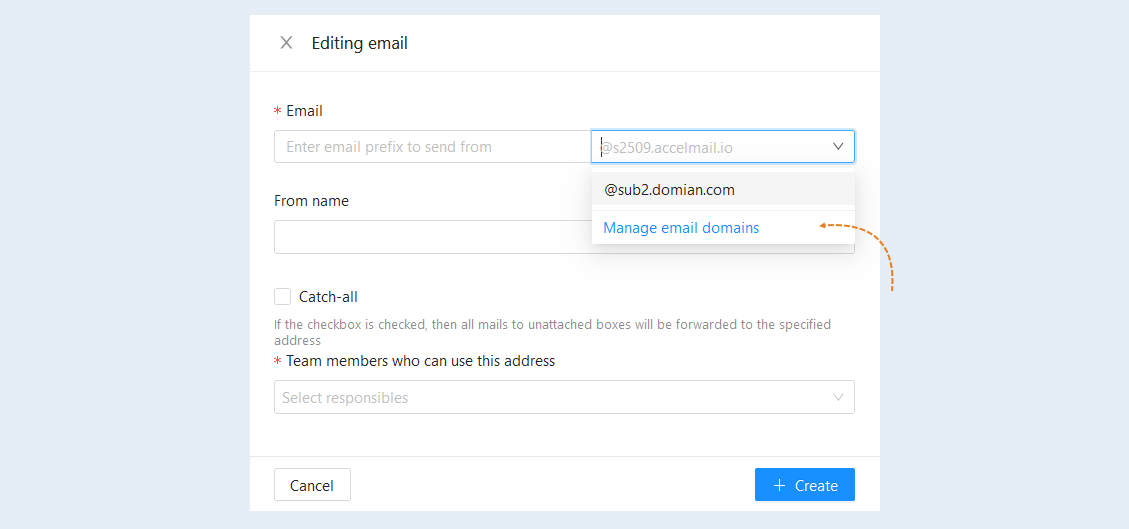
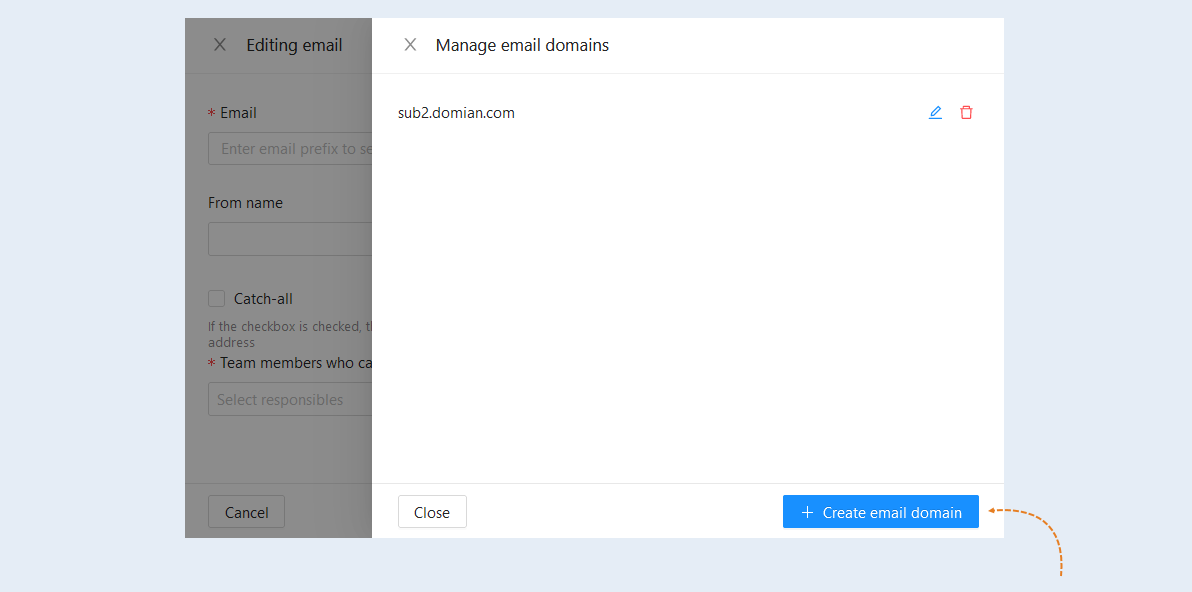
A window will open where you can edit the domain or add a new mail domain. Click the "Create email domain" button, enter the domain name and click the "Create" button. Read more about how to create and configure a mail domain in the article "Domains".
After adding a new email, it will be displayed in the incoming mail list. You can add a separate email for each member of your team.
In the email list you see:
- Email. The email address is specified.
Admins. The team members who can use this address are indicated.
From name. The sender's name is specified.
Created Date. The exact date and time of the email creation are specified.
Actions:
The "Edit" button. Click to open and edit the email.
The "Delete" button. Click to delete the email.
Mail Client Management
At the top of the page on the toolbar, click the "Messages" icon. After setting up incoming mail, this section will be available for working with it.
To send a new email, click the "Compose" button. In the new message window that opens, specify the recipient, add the subject and text of the letter, and you can also add a file. Click the "Send" button.
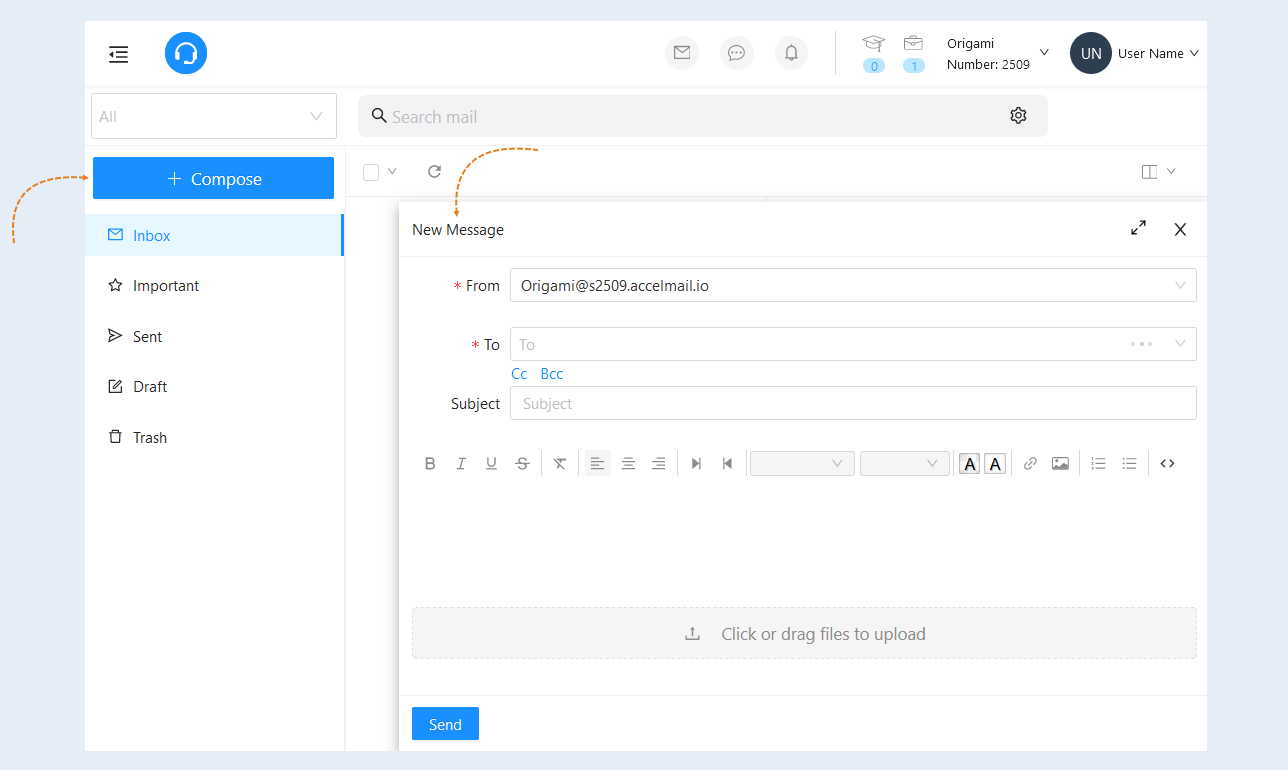
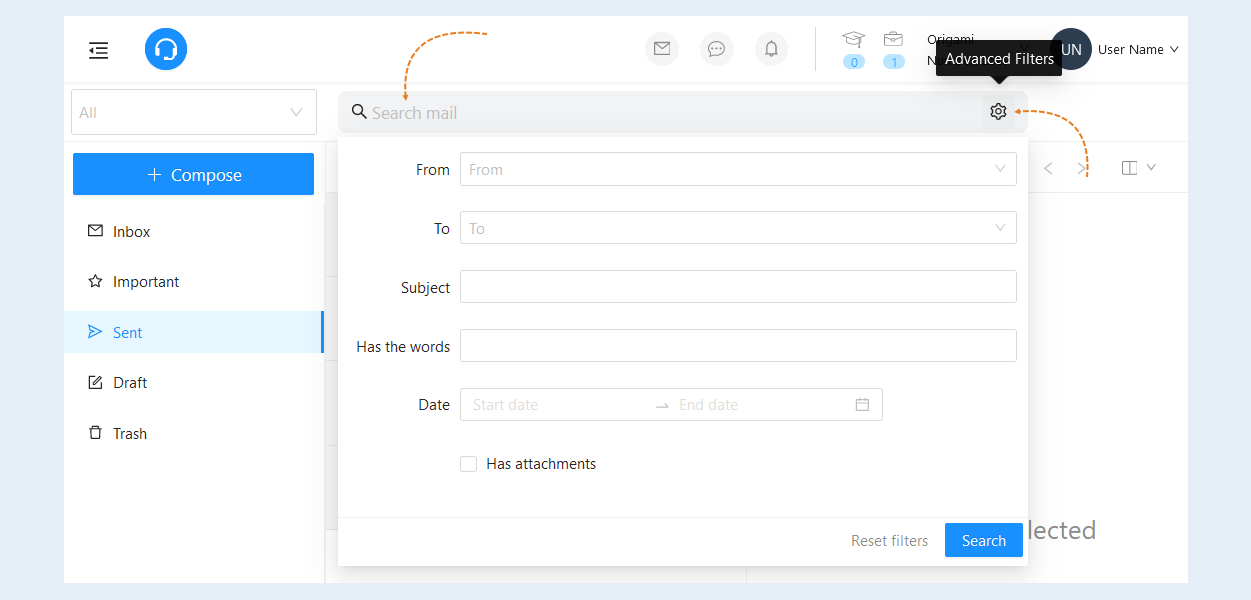
A search bar and an advanced filter are available at the top of the page. Use them to quickly find the desired message. Click the "Advanced Filter" button to open the search details.
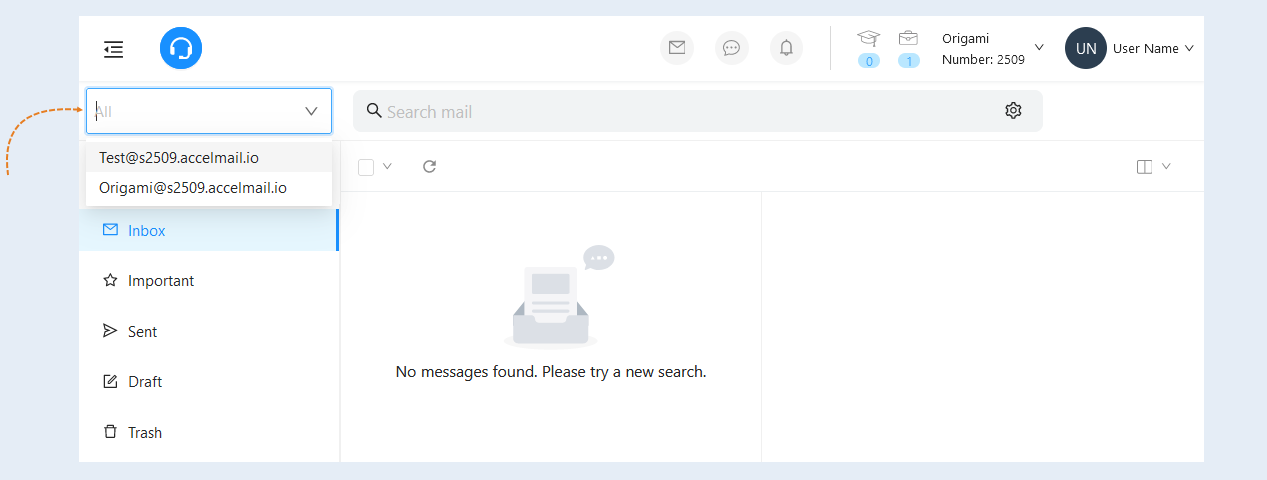
The mailbox filter is available on the left. If one employee has several mailboxes configured, you can sort emails by incoming mail address.
The following commands are available in the list of emails:
- Select. Click the "Select" icon and select the criteria for selecting emails: emails from the current page, read, unread, important and unimportant emails. After that, you will have access to buttons for working with selected emails: delete, mark as unread and mark as important.
Update. Click the icon to refresh the page and upload changes and new messages.
View. You can change the appearance of the page: without dividing the page or with vertical separation.
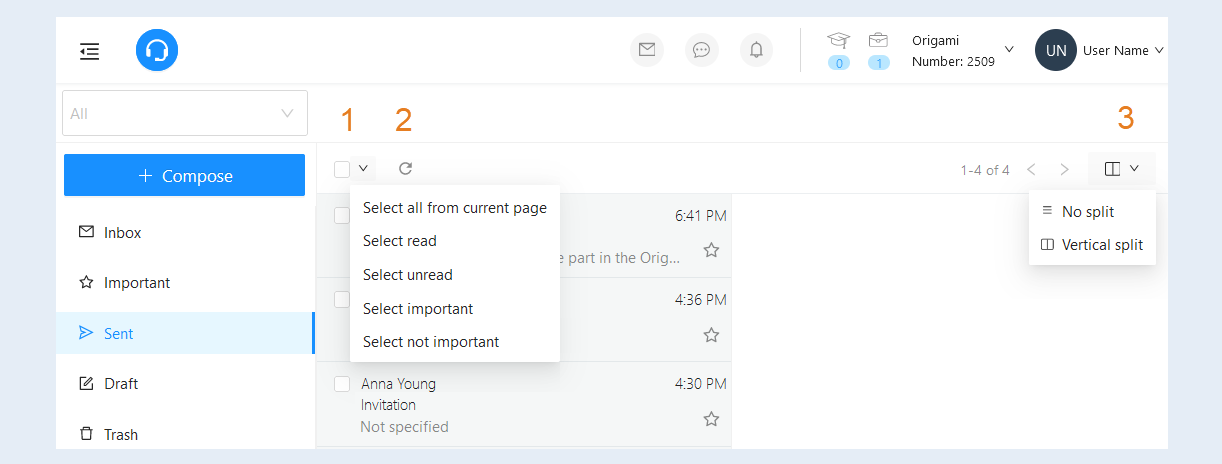
If you select the vertical split, you will be able to see the contents of the email without opening it. Select the letter so that the text contained in the letter is displayed in the right window.
The following commands are available for each email:
- Mark as important. Click the button to add the email to the important category.
Reply. Click the button to send a reply email.
Forward. Click the button to forward the email to another recipient.
Delete. Click the button to delete the email.
Print. Click to send the email to print.
Mark as unread. Click to add the email to the unread category.