Autowebinars are a repetition of a webinar in automatic mode, which was held earlier and recorded.
Once you have hosted a live webinar and saved the webinar recording, you can create an auto webinar on the AXL platform. That is, launch a replay of this webinar, which will be perceived by the webinar participants as a live broadcast.
In the "Webinars" section, "Autowebinars" tab, you create an autowebinar template, add previously recorded video to the template, and set up events that will occur during the autowebinar. Read more in the articles: "Webinar template", "Types of events in a webinar template".
The webinar is fully automated. You cannot start or stop the broadcast while the autowebinar is running. Also, you do not need to set up a broadcast connection. You can moderate the chat of autowebinar participants, answer questions in writing, add or remove participants.
Click on the desired section of the article to go to its description:
How to create an autowebinar based on an existing webinar
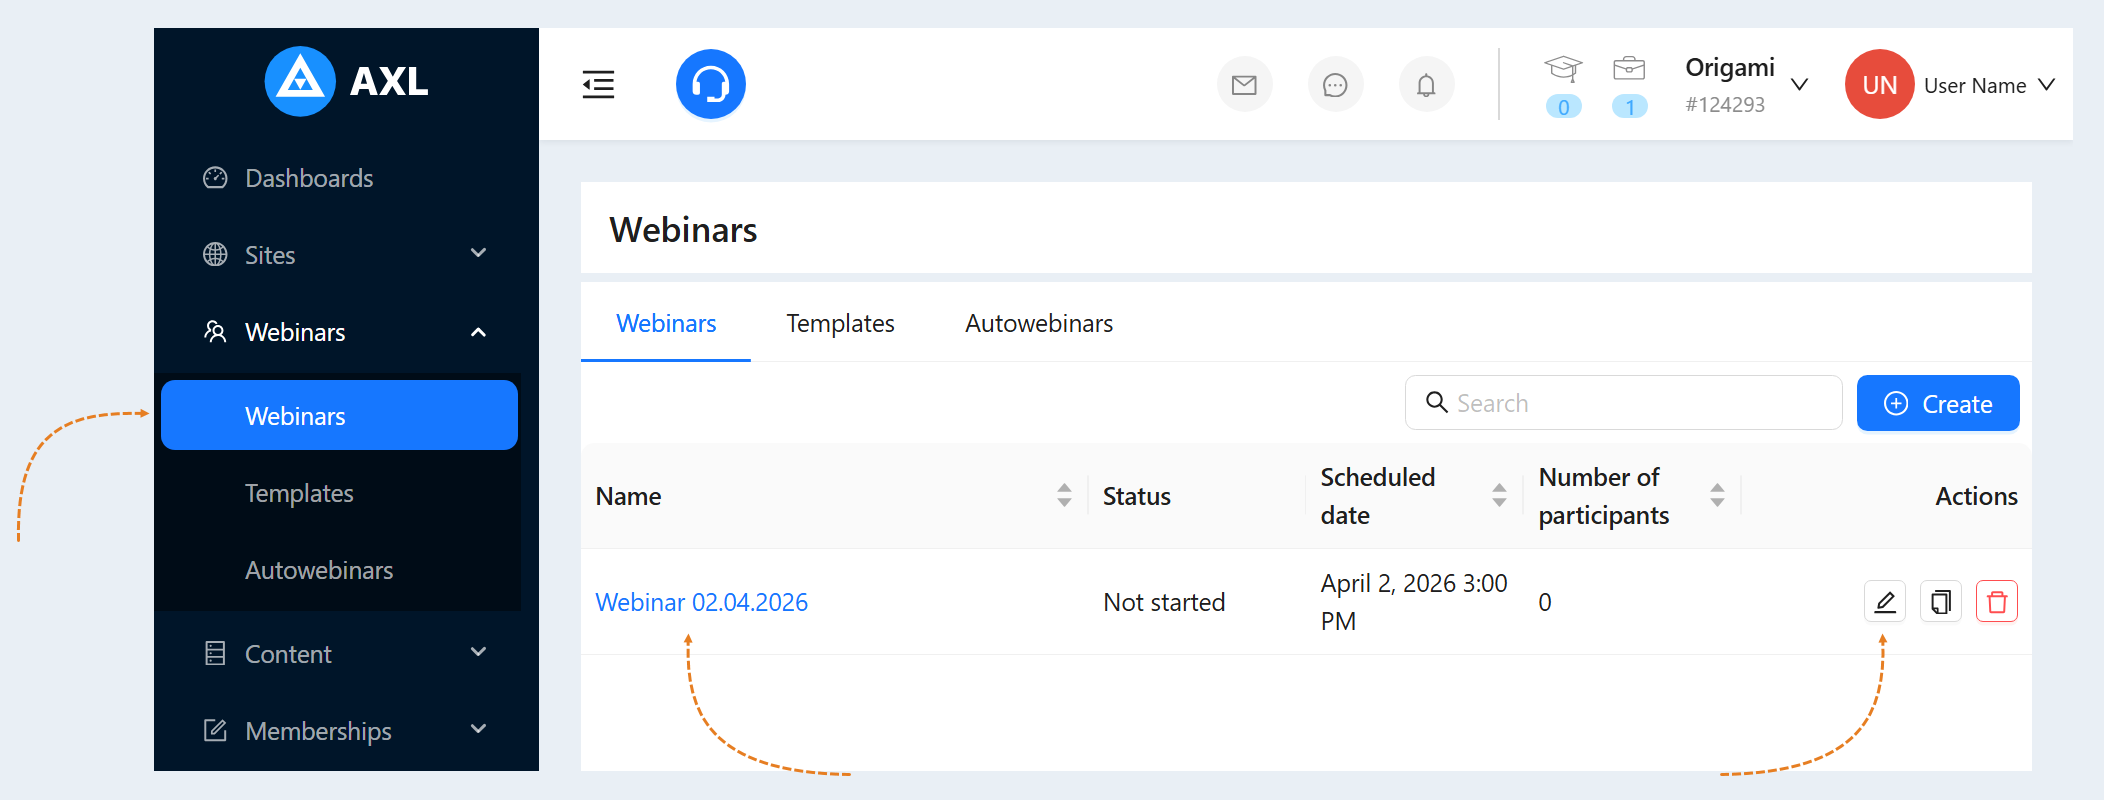
Go to the "Webinars" section. Select from the list of previously held webinars the webinar that you want to run automatically. Click on the title of the webinar or the "Edit" button.
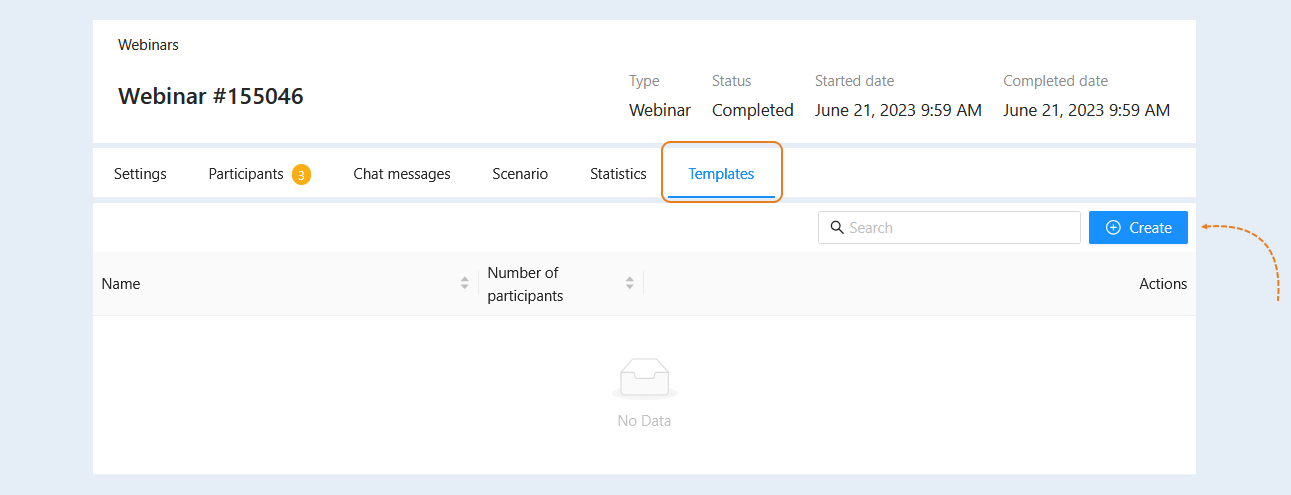
Go to the "Templates" tab. Click the "Create" button.
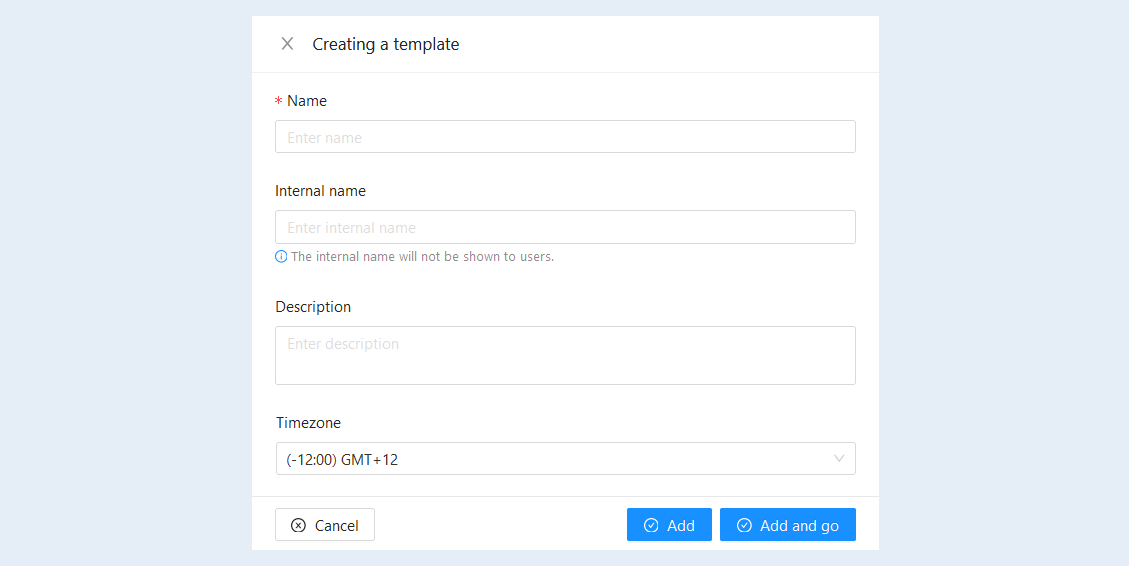
An additional window will open for you. Fill in the fields:
- Name. Enter a name for the webinar. Do not use the word "autowebinar" because participants will see this name in the webinar room window.
Internal name. The internal name will be visible only to you and will not be shown to users.
- Description. Add a description for this autowebinar. The description will also be available to the webinar participants. The detailed description explains that participants will find out why they should attend the webinar, who the speaker is, and inform them about the content of the webinar.
Time zone. Select the time zone in which the auto-webinar will be held from the list.
Click the "Add" or "Add and Go" button. The template appeared in the list of templates. Click on the template name or the "Edit" button.
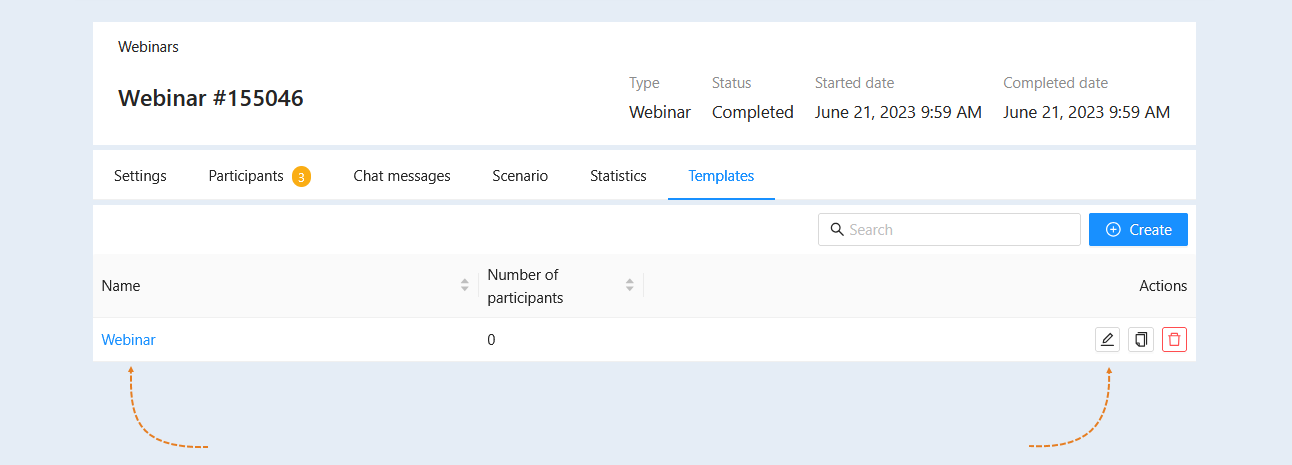
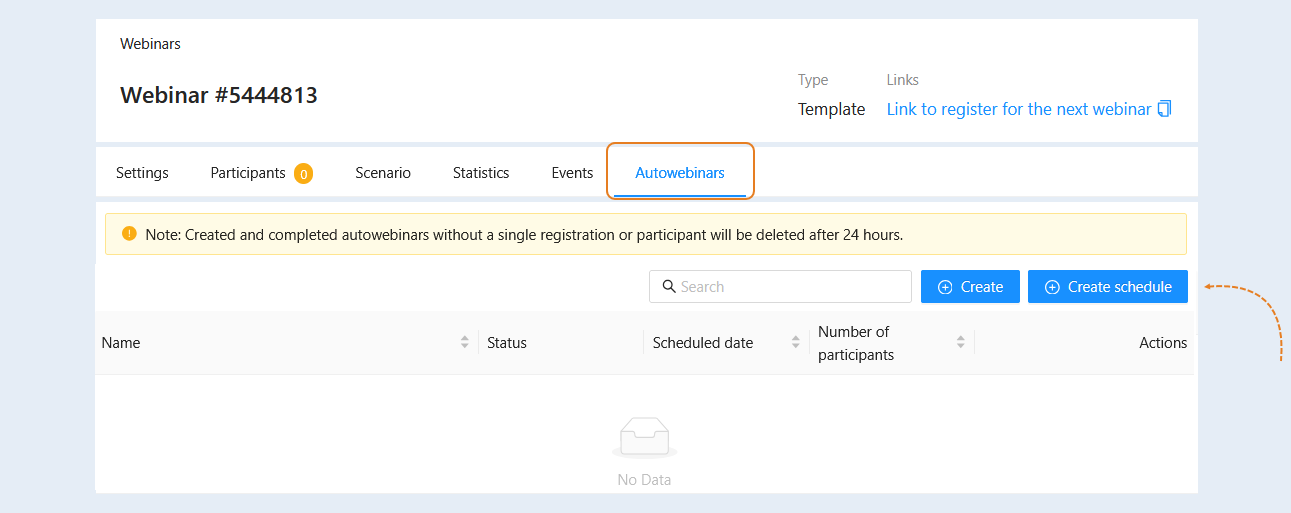
Next, go to the "Autovebinars" tab. The following buttons are available here:
- Create. This option implies the creation of a single, one-time autovebinar. You choose a specific date and time when the recording of your webinar will be shown to the audience. This is useful if you have content that is relevant for a certain period of time, or if you want to host a special event.
Create schedule. This option allows you to set up a regular auto-webinar according to a preset schedule. The schedule determines when your auto-webinar will be available for viewing by registered users. For example, you can set up a webinar every Tuesday and Thursday at a specific time. The schedule makes it possible to reach more people at a convenient time for them and maintain a constant flow of traffic to your offer.
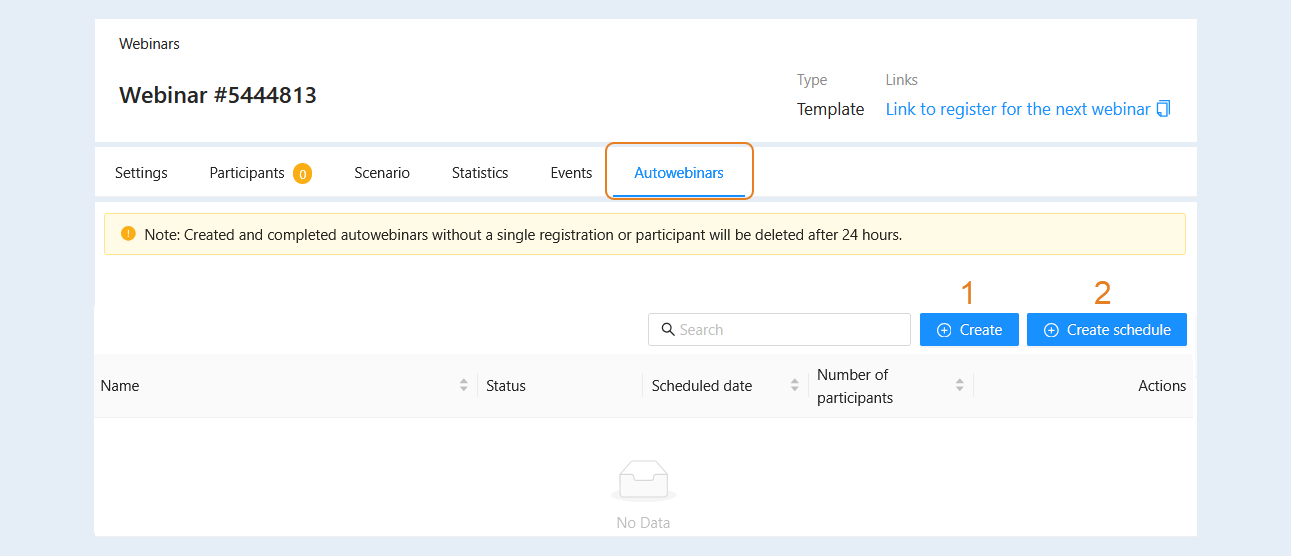
If you click the "Create" button, an additional window will open for you. Fill in the fields:
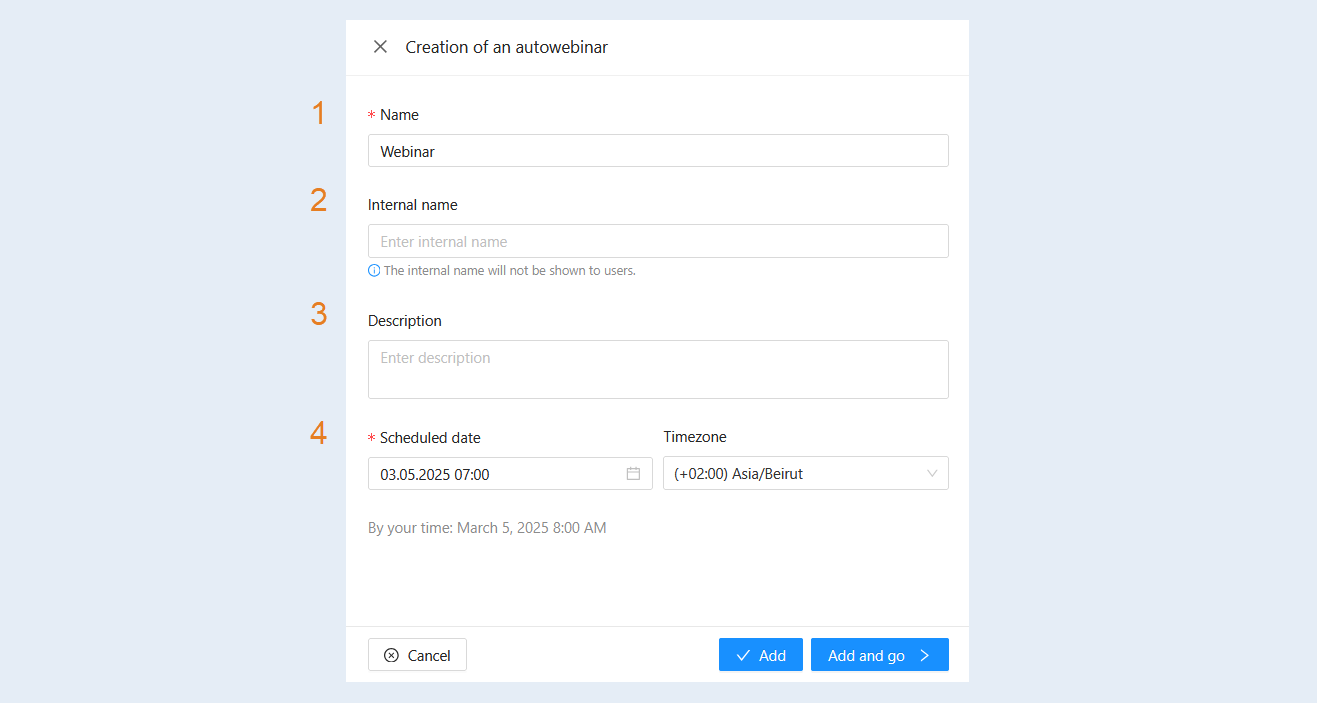
- Name. by default, the template name is specified. Participants will see this name in the webinar room window.
Internal name. The internal name will be visible only to you and will not be shown to users.
Description. Add a description for this auto-webinar. The description will also be available to the webinar participants.
Scheduled date and Time zone. Specify the date and set the time zone for launching the autowebinar.
Click the "Add" button.
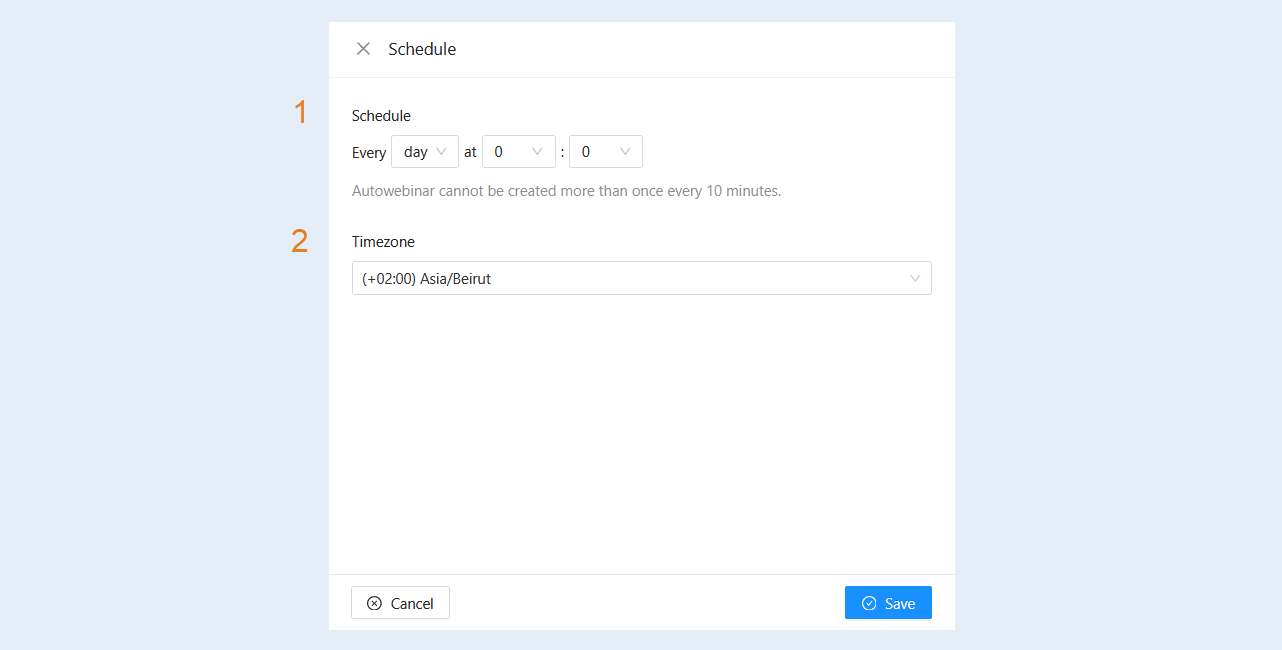
If you click the "Create schedule" button, set the schedule for the auto-webinar:
- Schedule. Choose the frequency: every hour, every day, every week, every month, every year. Set the time for the auto-webinar.
Time zone. Select the time zone in which the auto-webinar will be held from the list.
Click the "Save" button.
Next, refresh the page. The autovebinar you created has appeared in the list of autovebinars. Next, click on the title or the "Edit" button. You will see the settings of the autovebinar.
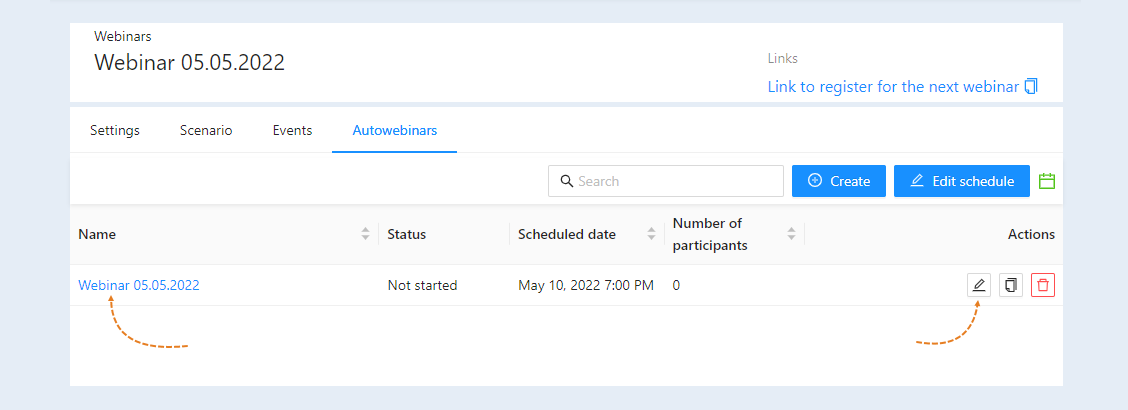
How to create an autowebinar using a template
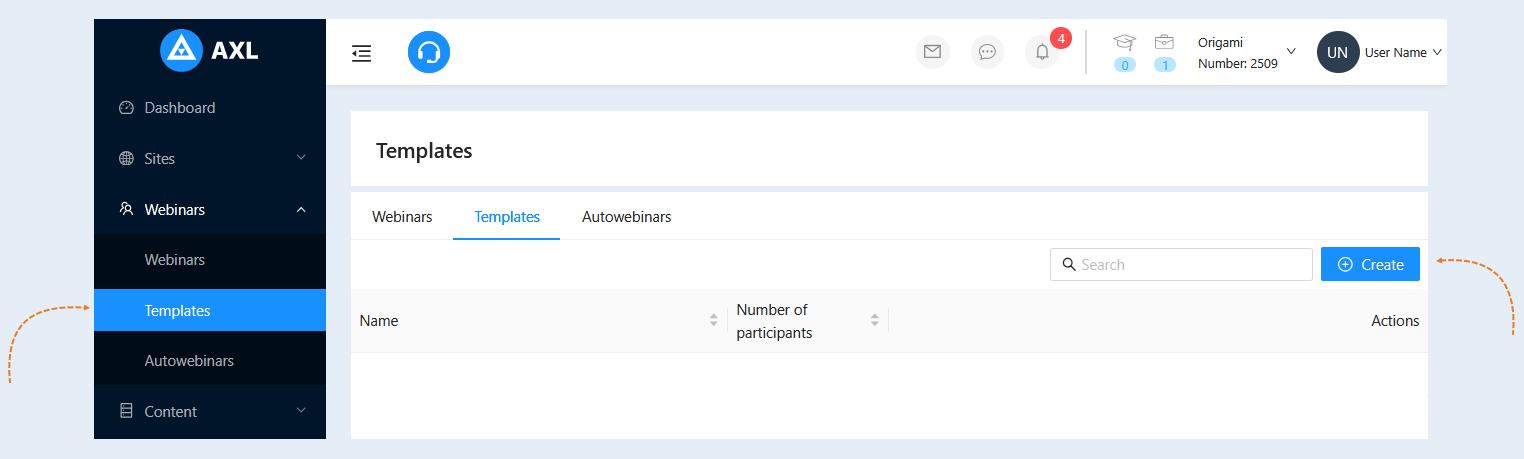
In the "Webinars" section, go to the "Templates" tab, click the "Create" button. You are creating a template for a future autowebinar. For more information on how to create a webinar template, see the "Webinar Template" article.
After that, select the created template - click on the template name or the "Edit" button and go to the "Autowebinars" section. Click the "Create Schedule" button. In the window that opens, set the autowebinar schedule. And click "Save". Autowebinar created.
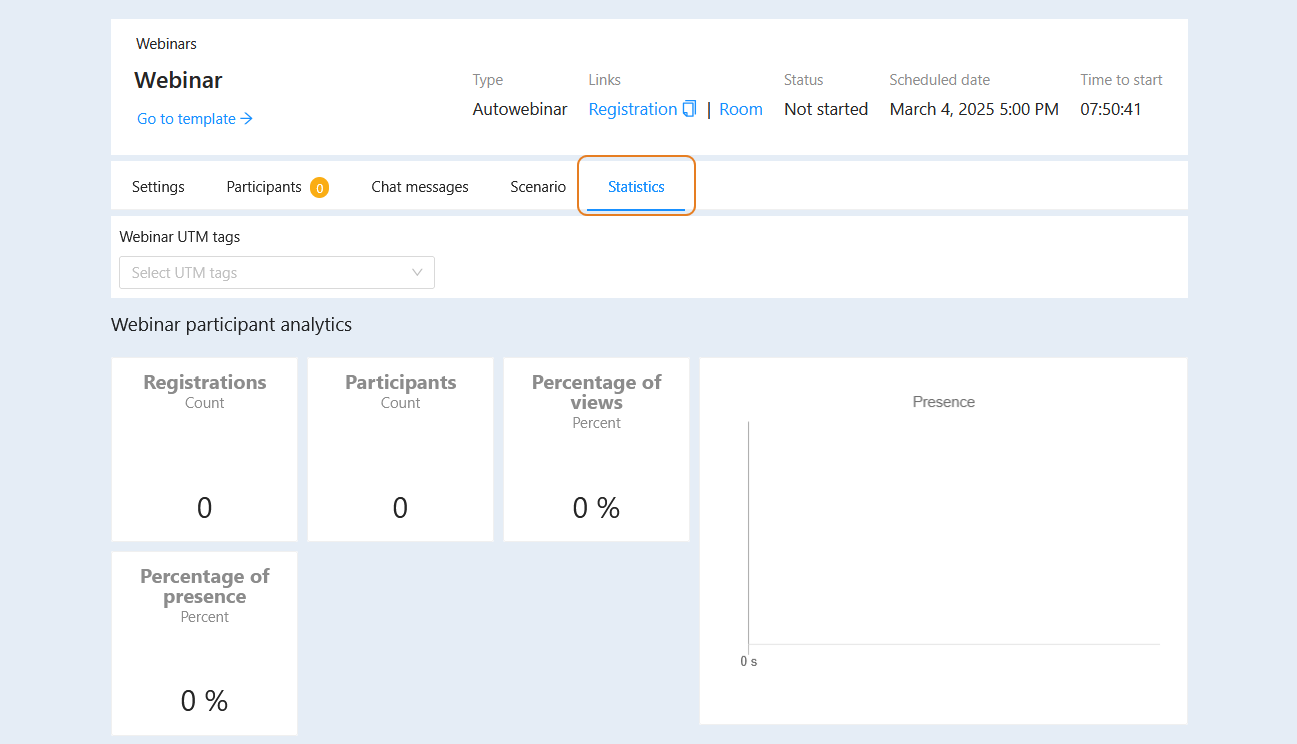
You can edit the webinar settings, title, date and time at any time, replace files in the autowebinar, replace events, change the script, etc. You can also take part in the autowebinar as a moderator or guest, write questions and answers in the participants' chat. You can see the statistics of your autowebinar. To do this, click on the name of the "Webinar Template" or the "Edit" button. And go to the "Statistics" tab. Read more about statistics in the article "Webinar Statistics".
Autowebinar settings
You have opened the section with the settings of the autovebinar. Here you can make changes to the avtovebinar: the name, description, date and time of the avtovebinar. You can make changes to the webinar registration page, webinar room settings, add participants, edit the autovebinar script, and track autovebinar statistics.
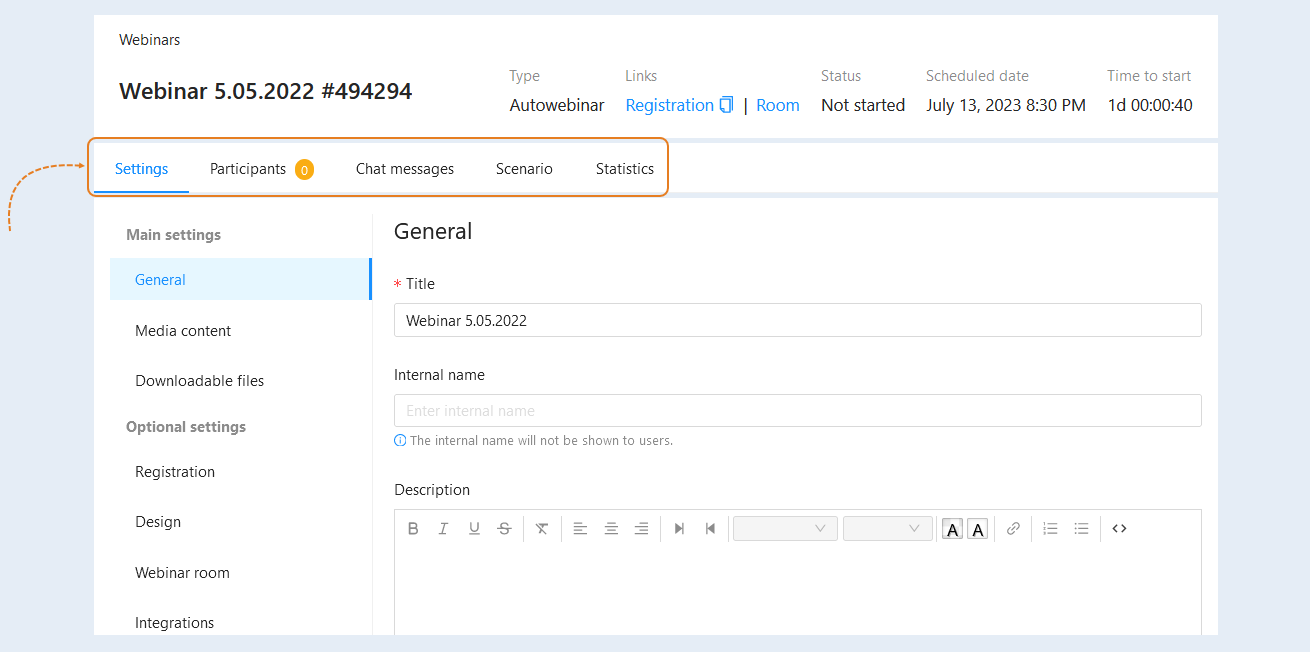
You can see the tabs at the top of the page:
- Settings. In the "Settings" tab, you can see information about the auto-webinar. This tab is completely identical to the settings of a regular webinar. Read more in the article "Webinar settings".
Participants. In this tab you can see the personal data of the participants of the autovebinar. You can invite new members or delete them. Read more in the article "Webinar participants".
Chat messages. In this tab you can see the messages of the participants of the autovebinar. You can export messages in XLSX and CSV format. Read more in the article "Webinar Chat Messages".
Scenario. This is where you set up the sequence of events and actions for the auto-webinar. Read more in the article "Webinar scenario".
Statistics. In this tab, you can see the statistics of the autovebinar: the number of registrations, the number of participants, the percentage of attendance and views. Read more in the article "Webinar statistics".
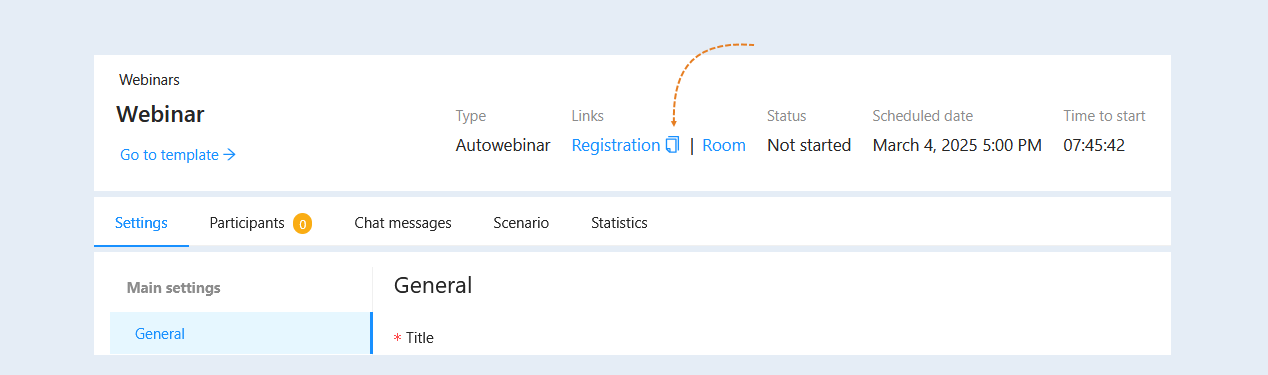
You can copy the registration link and send it to the webinar participants. This action is not necessary - all participants receive a link to the webinar automatically after registration. You can configure sending messages and other actions in the webinar scenario.
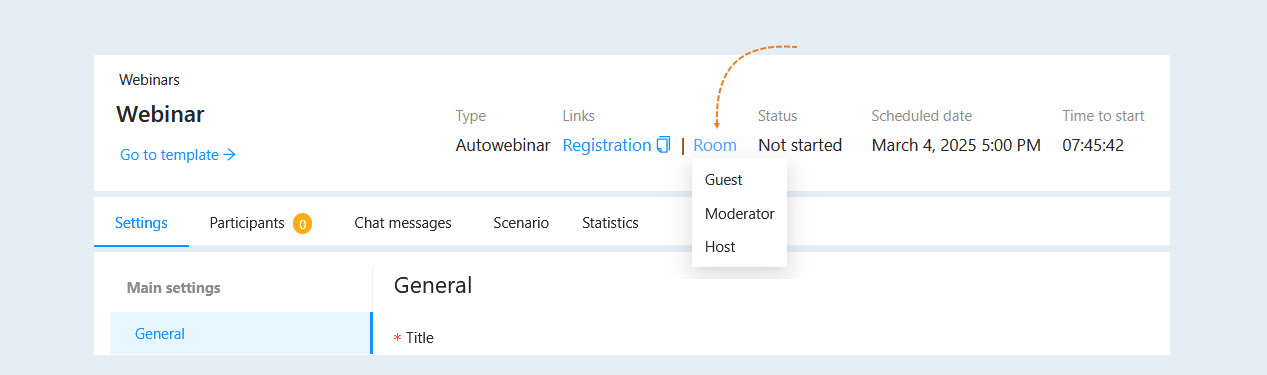
Also, here you can enter the webinar room to monitor the participants' chat and answer questions in writing during the auto-webinar. You can see the following roles in the list of participants:
- Guest. It allows you to see the autovebinar through the eyes of an ordinary participant, make sure that everything is displayed correctly and the links are working.
Host. It gives access to the presenter's functionality, for example, to launch a presentation or video.
Moderator. Provides tools for managing the chat and participants during the autowebinar. This is useful for checking and debugging the autovebinar before launching to make sure that everything is working correctly and participants will have a good experience.
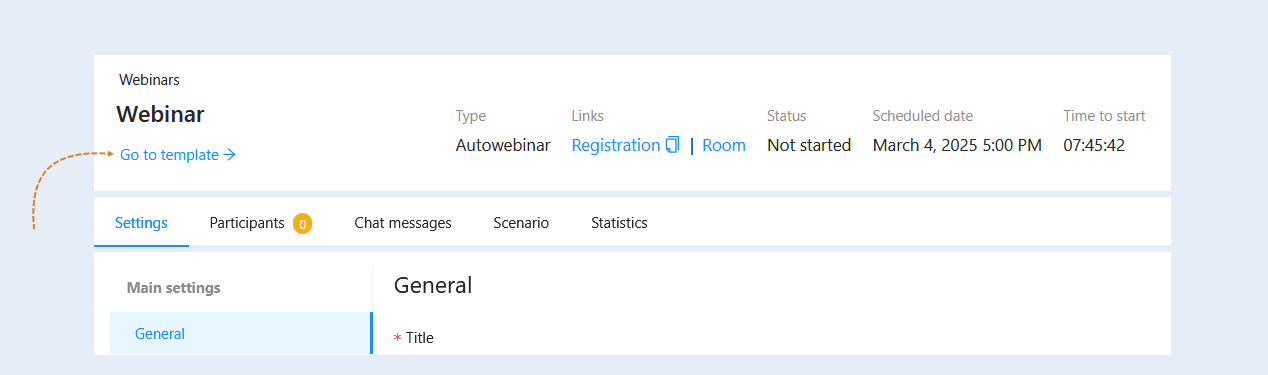
The "Go to template" button allows you to quickly return to the original template on the basis of which the current auto-webinar was created. This is useful if you need to remember which settings were set in the template, or if you want to make changes to the template. This is convenient for comparing, making changes to the template, and maintaining the uniformity of your autowebinars.
Autovebinar scenario
In the "Scenario" tab, you can change the sequence of events and actions for a specific autowebinar.
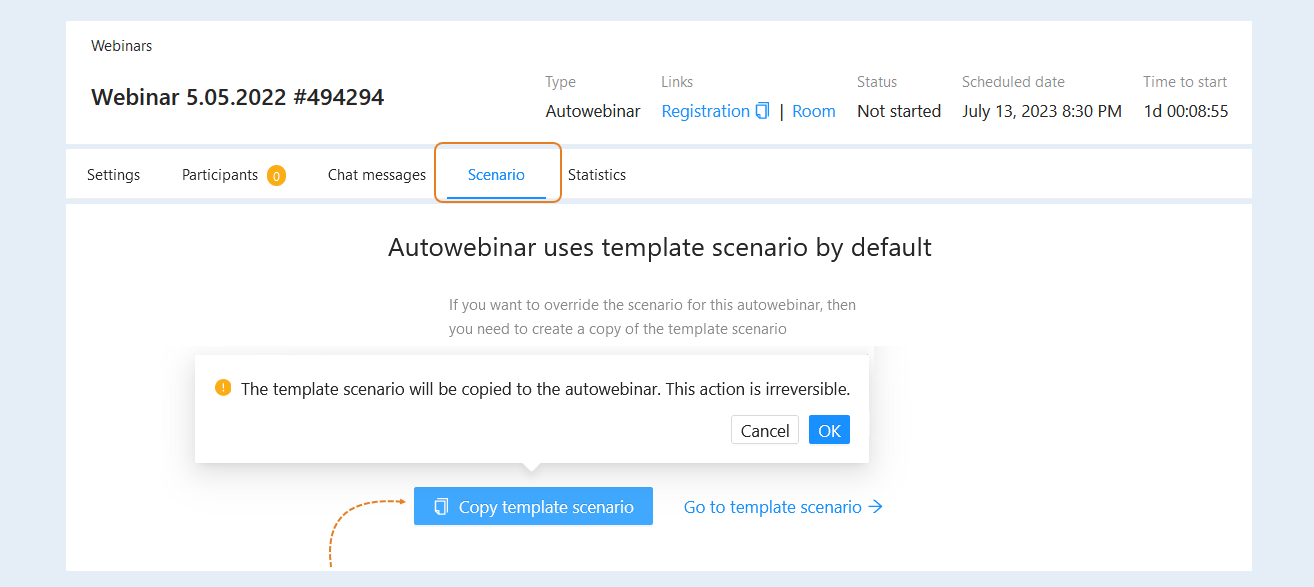
By default, the autowebinar scenario is associated with the scenario of the template from which the autowebinar was created. If you want to make changes to the autowebinar scenario, then you need to untie the scenario. This allows you to track the work of your scenario among all autowebinars.
To do this, click the "Copy Template scenario" button. After clicking the button, the template scenario will be copied to this autowebinar. This action is irreversible. Thus, you untie the template scenario from this autowebinar. And then you can make changes to the autowebinar scenario. For more information on how to set up a scenario, read the article "Webinar Scenario".