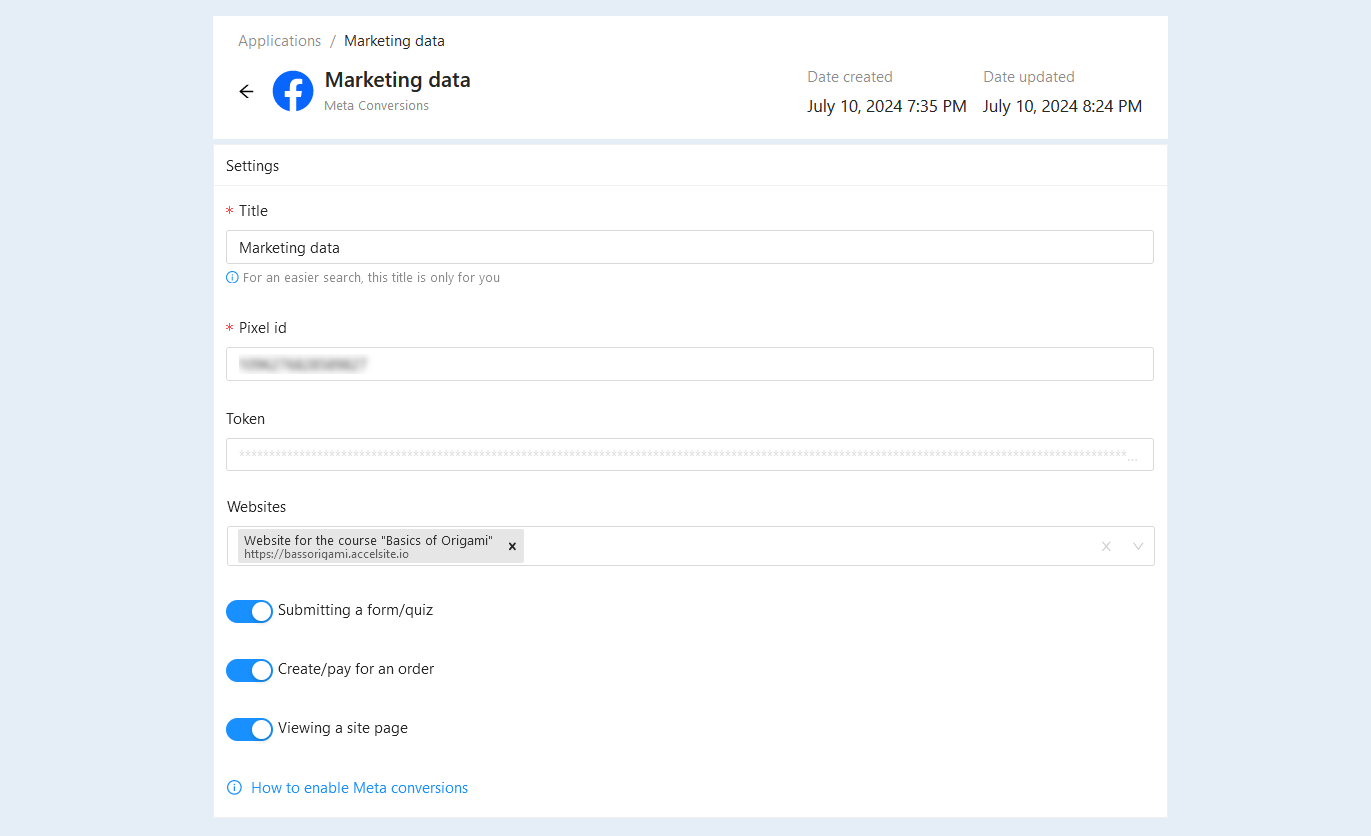
The Meta Conversion app is designed for analyzing and optimizing the process of converting visitors into customers. It is a tool that helps to track and measure user actions on the site, as well as determine the effectiveness of marketing campaigns.
The app helps improve business results, increase website efficiency and conversion. It allows you to identify weaknesses and take action to address them, ultimately leading to increased profits and improved user experience.
The Conversions API is designed to establish a connection between the advertiser's marketing data (such as events on the site, in the app, chat events with the company, and offline conversions) with the advertiser's server, website platform, mobile app, or CRM systems with Meta systems that optimize ad targeting, help reduce the cost per result, and measure results.
To connect the application, follow the instructions in this article. Click on the desired section to go to its description:
1
Create a business portfolio in Meta Business Suite and Business Manager
You must have a personal Facebook account. You'll use it to log into Meta Business Suite or Business Manager, where you can create your business portfolio.
A business portfolio allows organizations to bring their Facebook Pages, Instagram accounts, ad accounts, product catalogs and other business assets together, so they can manage them from one place with business tools such as Meta Business Suite and Business Manager.
To create a business portfolio. Go to business.facebook.com in a desktop browser. You will also use this address to log into Meta Business Suite or Business Manager.
Log into your personal Facebook account. If you don’t have an account, click "Create account" to sign up for one.
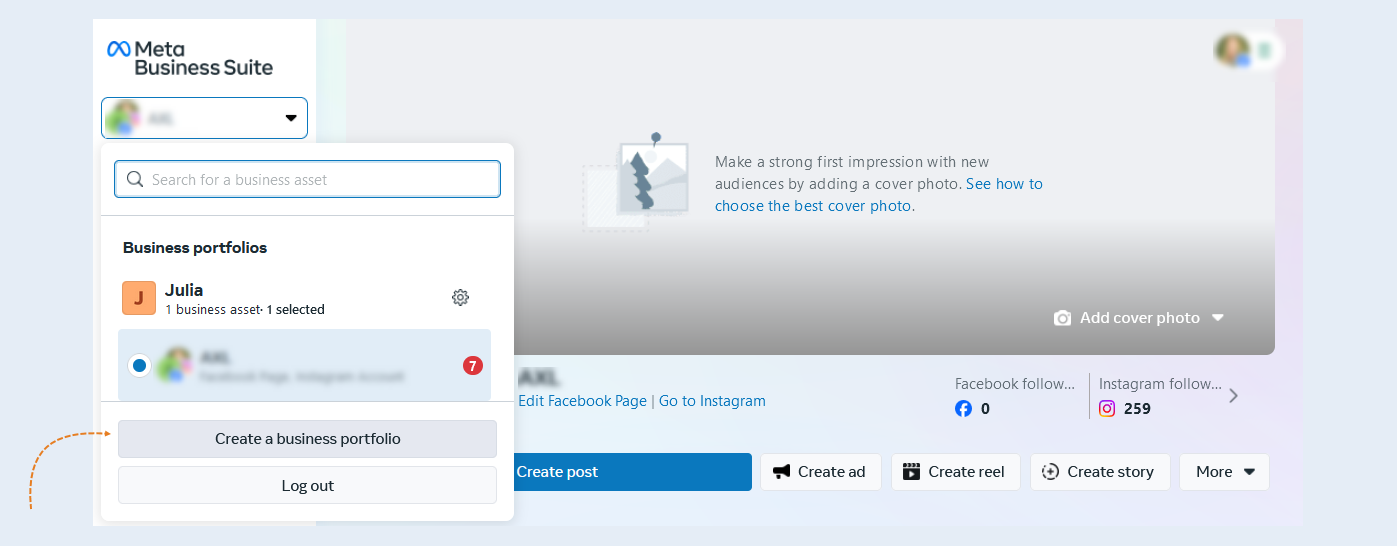
If you already have access to Meta Business Suite and Business Manager, you can also click the dropdown menu located at the top of the left navigation bar. Click "Create a business portfolio".
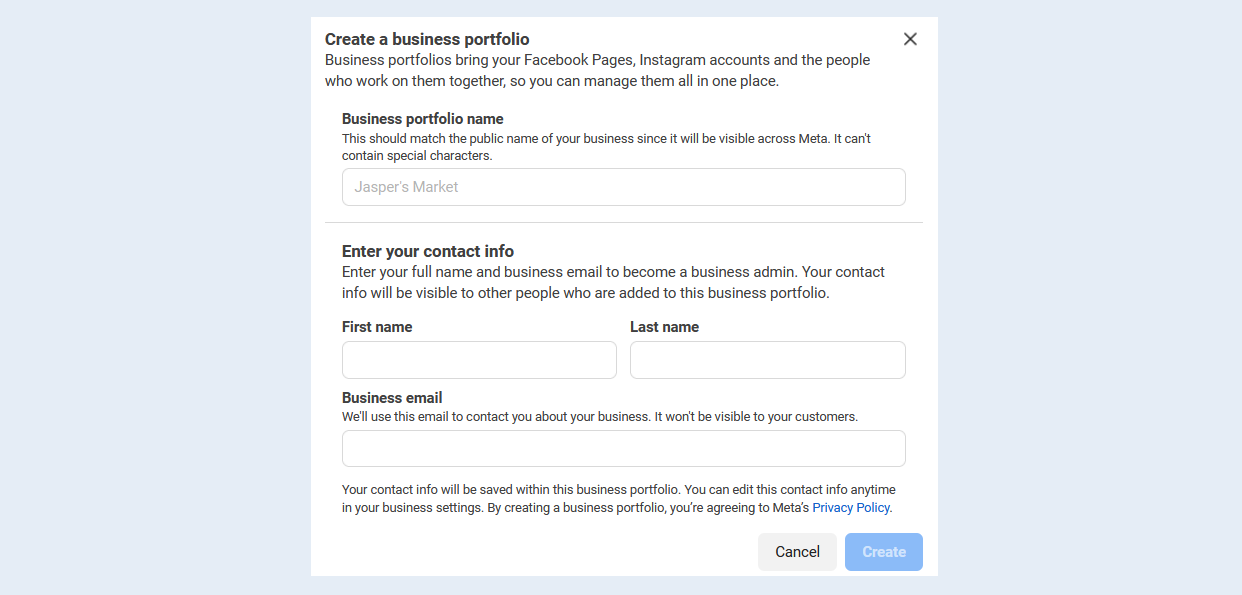
Enter your business details.
- Business portfolio name. It should match the public name of your business or organization, since it will be visible across Meta. It can't contain special characters.
Your name.
Business email. Meta will use this email to contact you about your business. It won't be visible to your customers.
Click "Create" to create your portfolio. You’ll get an email asking to confirm your business email address.
Once you’ve created your business portfolio, you can add business assets, such as Pages, ad accounts, datasets and Instagram accounts.
2
How to set up and install a Meta Pixel
There are 2 steps to set up a pixel:
- Create your pixel and set up the pixel base code on your website. You can use a partner integration if one is available to you or you can manually add code to your website.
Set up events on your website to measure the actions you care about, like making a purchase. You can use a partner integration, the point-and-click event setup tool, or you can manually add code to your website.
There are several options for how to set up your pixel and events, and you’ll be guided through the available options during setup. If you choose to set up your pixel or events manually, you may need help from a developer to add the code to your website.
If you use your pixel to share events with Meta, we recommend that you also use the Conversions API. The Conversions API works with your Meta Pixel to help improve the performance and measurement of your Meta ad campaigns.
Before you begin.You need a website for your business. For more information on how to create a website on the AXL platform, read the article "How to create a website".
You or your developer must be able to update your website's code if you plan to set up the pixel manually using code.
Set up the Meta Pixel and events on your website.
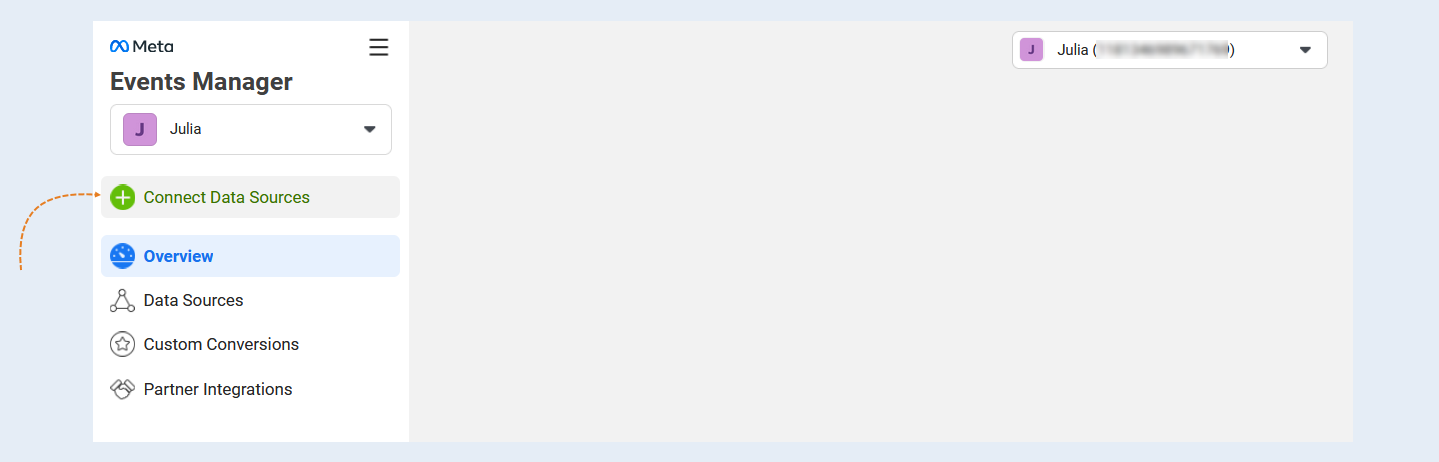
Go to Meta Events Manager. Click "Connect data sources".
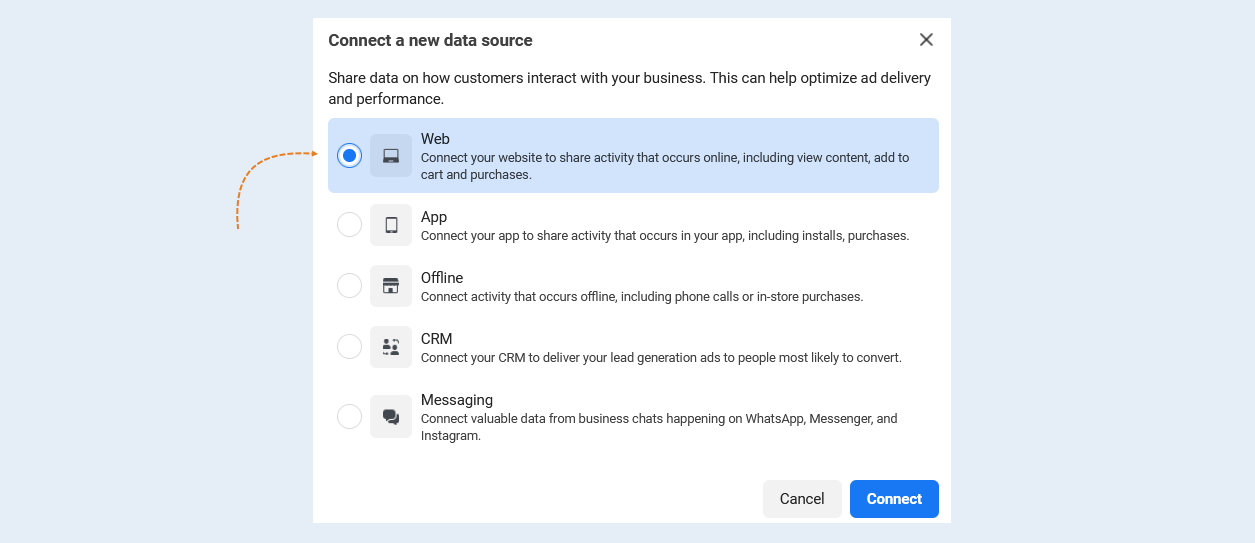
Select "Web". Click "Connect".
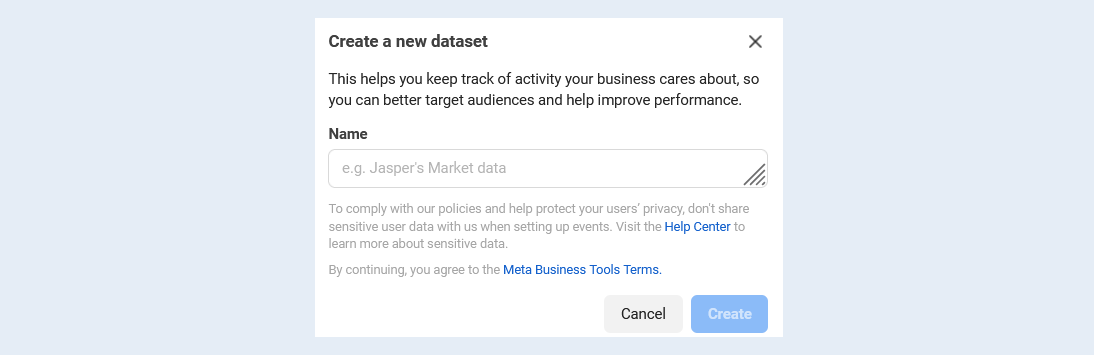
Enter a name for your pixel and click "Create pixel". This will create a new ID that you can view in Events Manager. Note: Events from your Meta Pixel are shared to a dataset, which groups events from different sources. Your new dataset ID is the same as your new pixel ID.
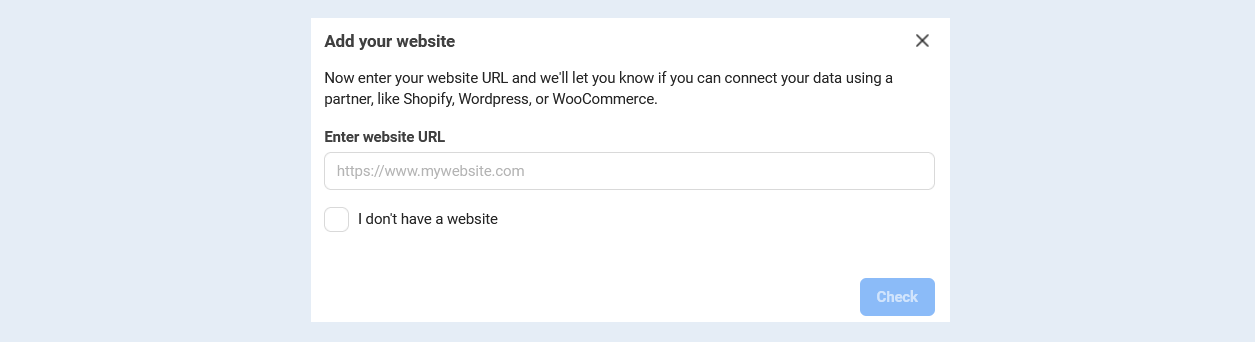
Your next steps depend on if you have a website or not.
- If you have a website, enter your website URL to check for easy partner integration setup options and click "Check".
- If a partner integration is available to you, you’ll see it on the screen. Click "Next" and follow the onscreen instructions to set up your pixel and events through your partner’s website.
If a partner integration is not available, click "Next".
If you don’t have a website, click to check the box next to "I don't have a website" and click "Continue".
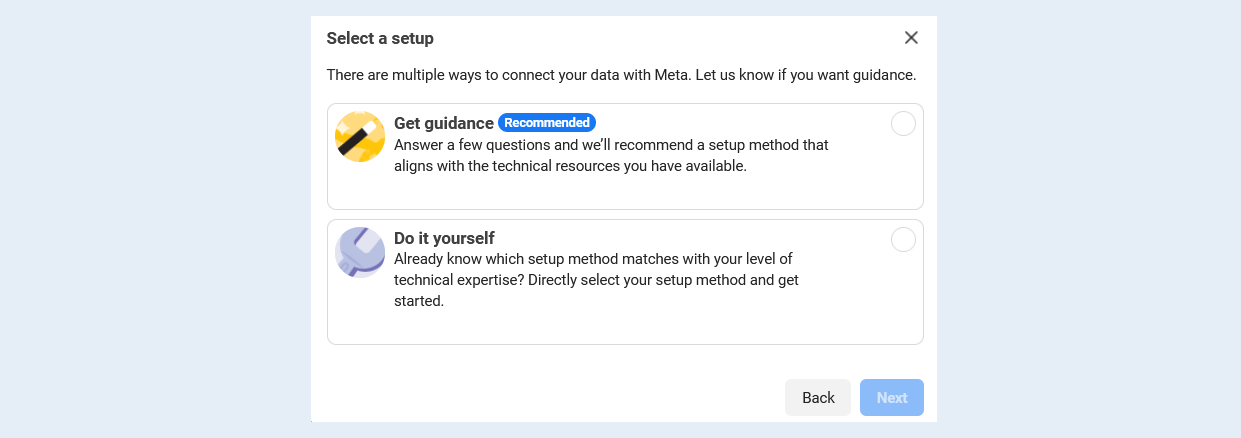
Select how you would like to connect your data with Meta: Get guidance (recommended) or Do it yourself.
- Select "Get guidance" if you would like setup recommendations. You can skip the rest of the instructions in this article if you select this option, and you can follow the onscreen instructions in Events Manager instead.
Select "Do it yourself" if you already know how you’d like to connect your data and don’t want setup recommendations. If you select this option, follow the rest of the instructions in this article.
Select Conversions API and Meta Pixel or Meta Pixel only as your setup option, then click "Next".
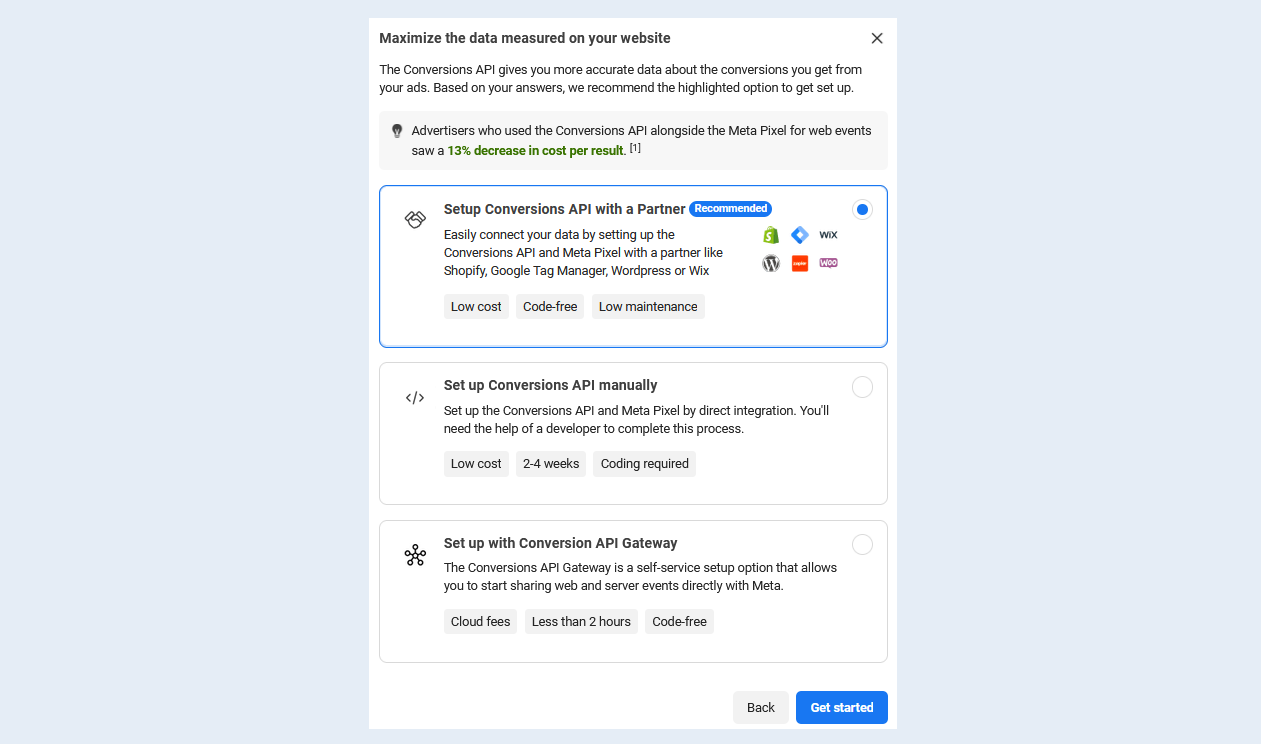
- If you select Conversions API and Meta Pixel, choose how you want to set up the Conversions API and pixel: Set up with partner integration, Set up with Conversions API Gateway or Set up manually. If you’re not sure which option to choose, you can compare Conversions API setup options by cost and complexity.
- If you select Set up with partner integration, select your partner and follow the onscreen instructions to set up the pixel, Conversions API and events.
If you select Set up with Conversions API Gateway, follow the onscreen instructions to set up the pixel, Conversions API Gateway and events.
If you select Set up manually, follow the onscreen instructions to create personalized instructions to set up the pixel, Conversions API and events. On the last screen, you’ll have the option to set up the Conversions API yourself using the personalized instructions or send the instructions to a developer. If you need help creating the instructions, you can learn how to set up the Conversions API using personalized instructions.
If you select Meta Pixel only, choose how you want to set up your pixel code: Install code manually or Check for partner. If you have a developer who will set up your pixel for you, you can click Email instructions instead.
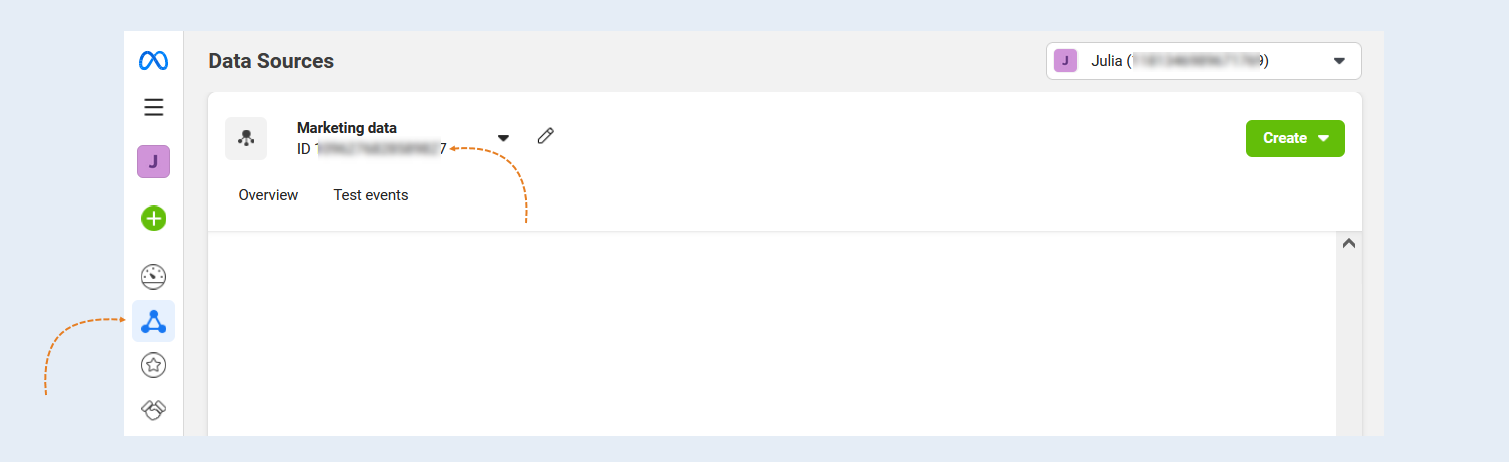
Copy the Meta pixel ID. You will need it to connect the Application in step №4 of this article.
3
Configuring the Meta Access Token
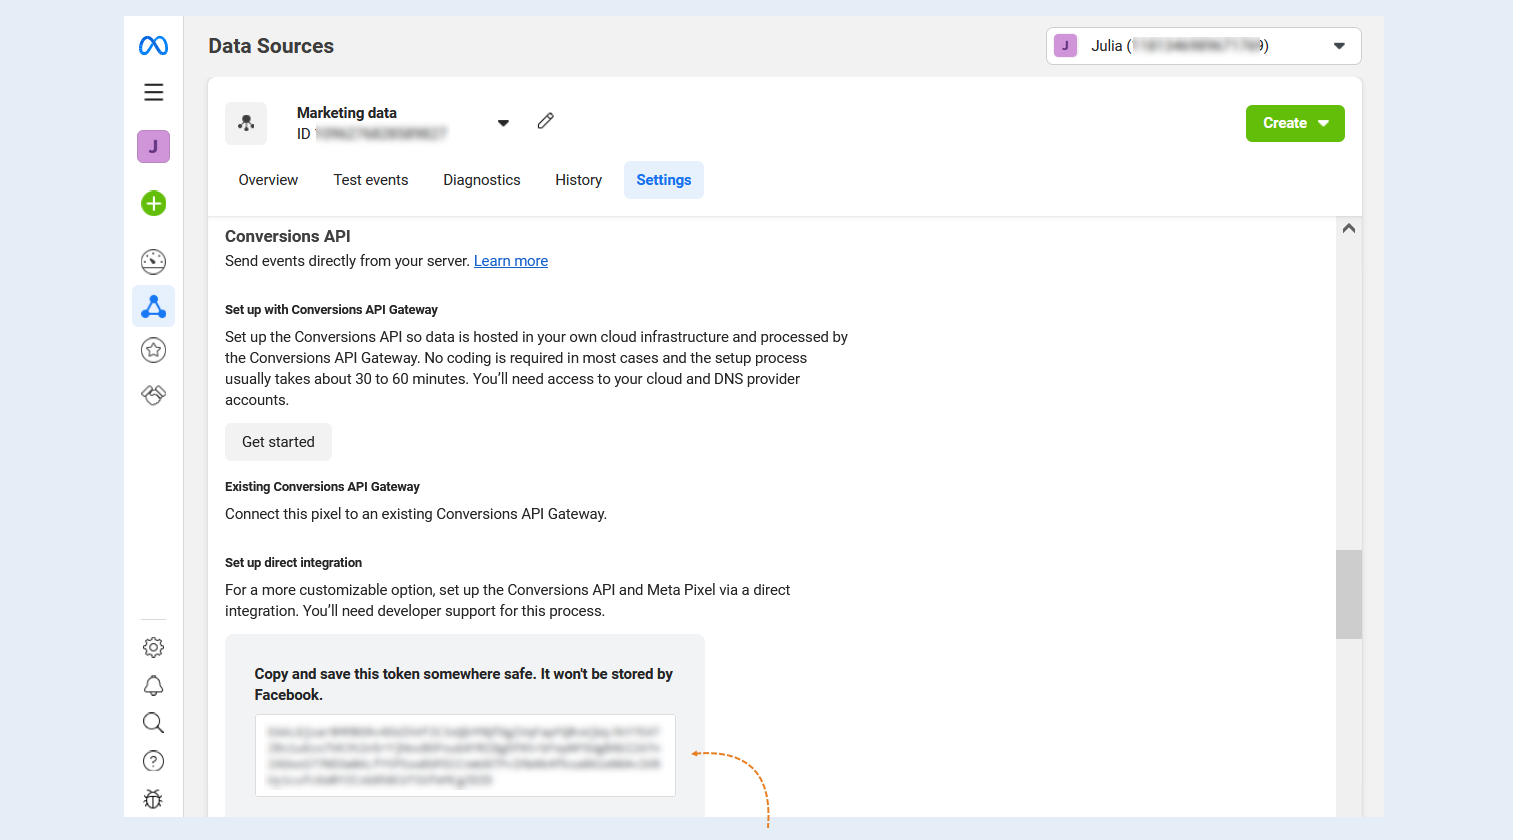
To obtain an access token, go to Events Manager, select the pixel you want to embed, go to the "Settings" tab, find the "Conversions API" section and click the "Generate Access Token" link in the manual settings section, then follow the instructions in the pop-up window.
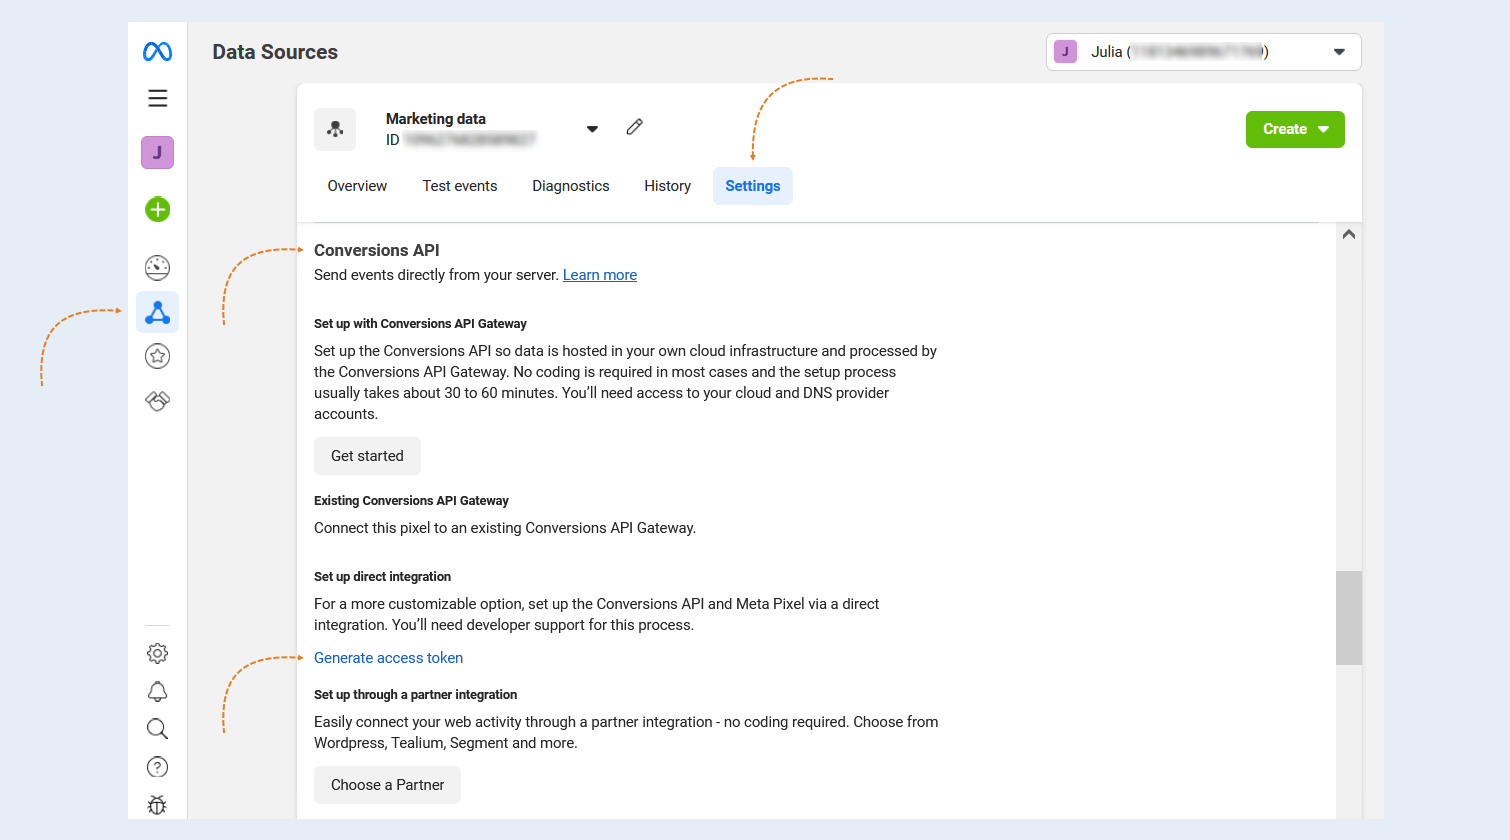
Copy and save this marker in a safe place. You will need it at the next stage of connecting the Application.
4
Integration with AXL
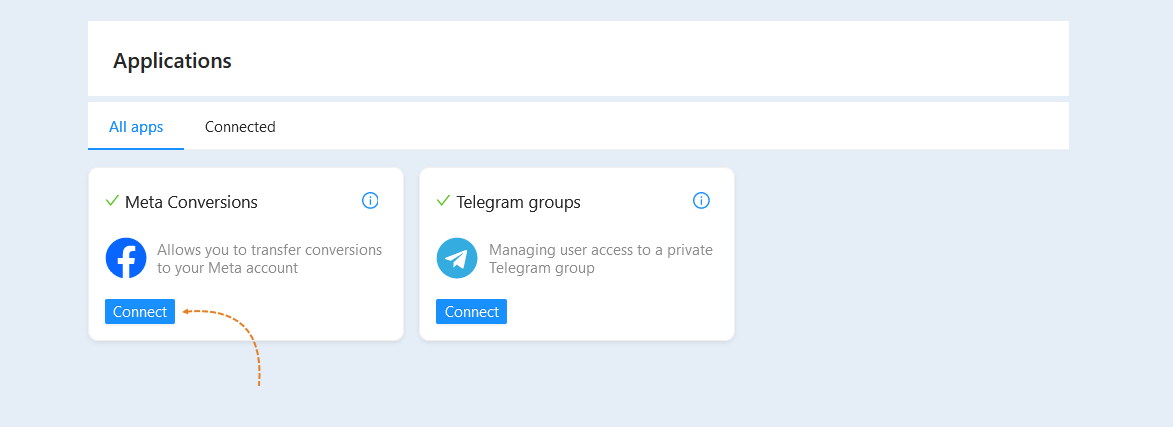
Next, return to the AXL platform. Go to the "Settings" section, the "All Applications" tab. In the "All applications" tab, a list of all possible applications for connecting to your account will be available.
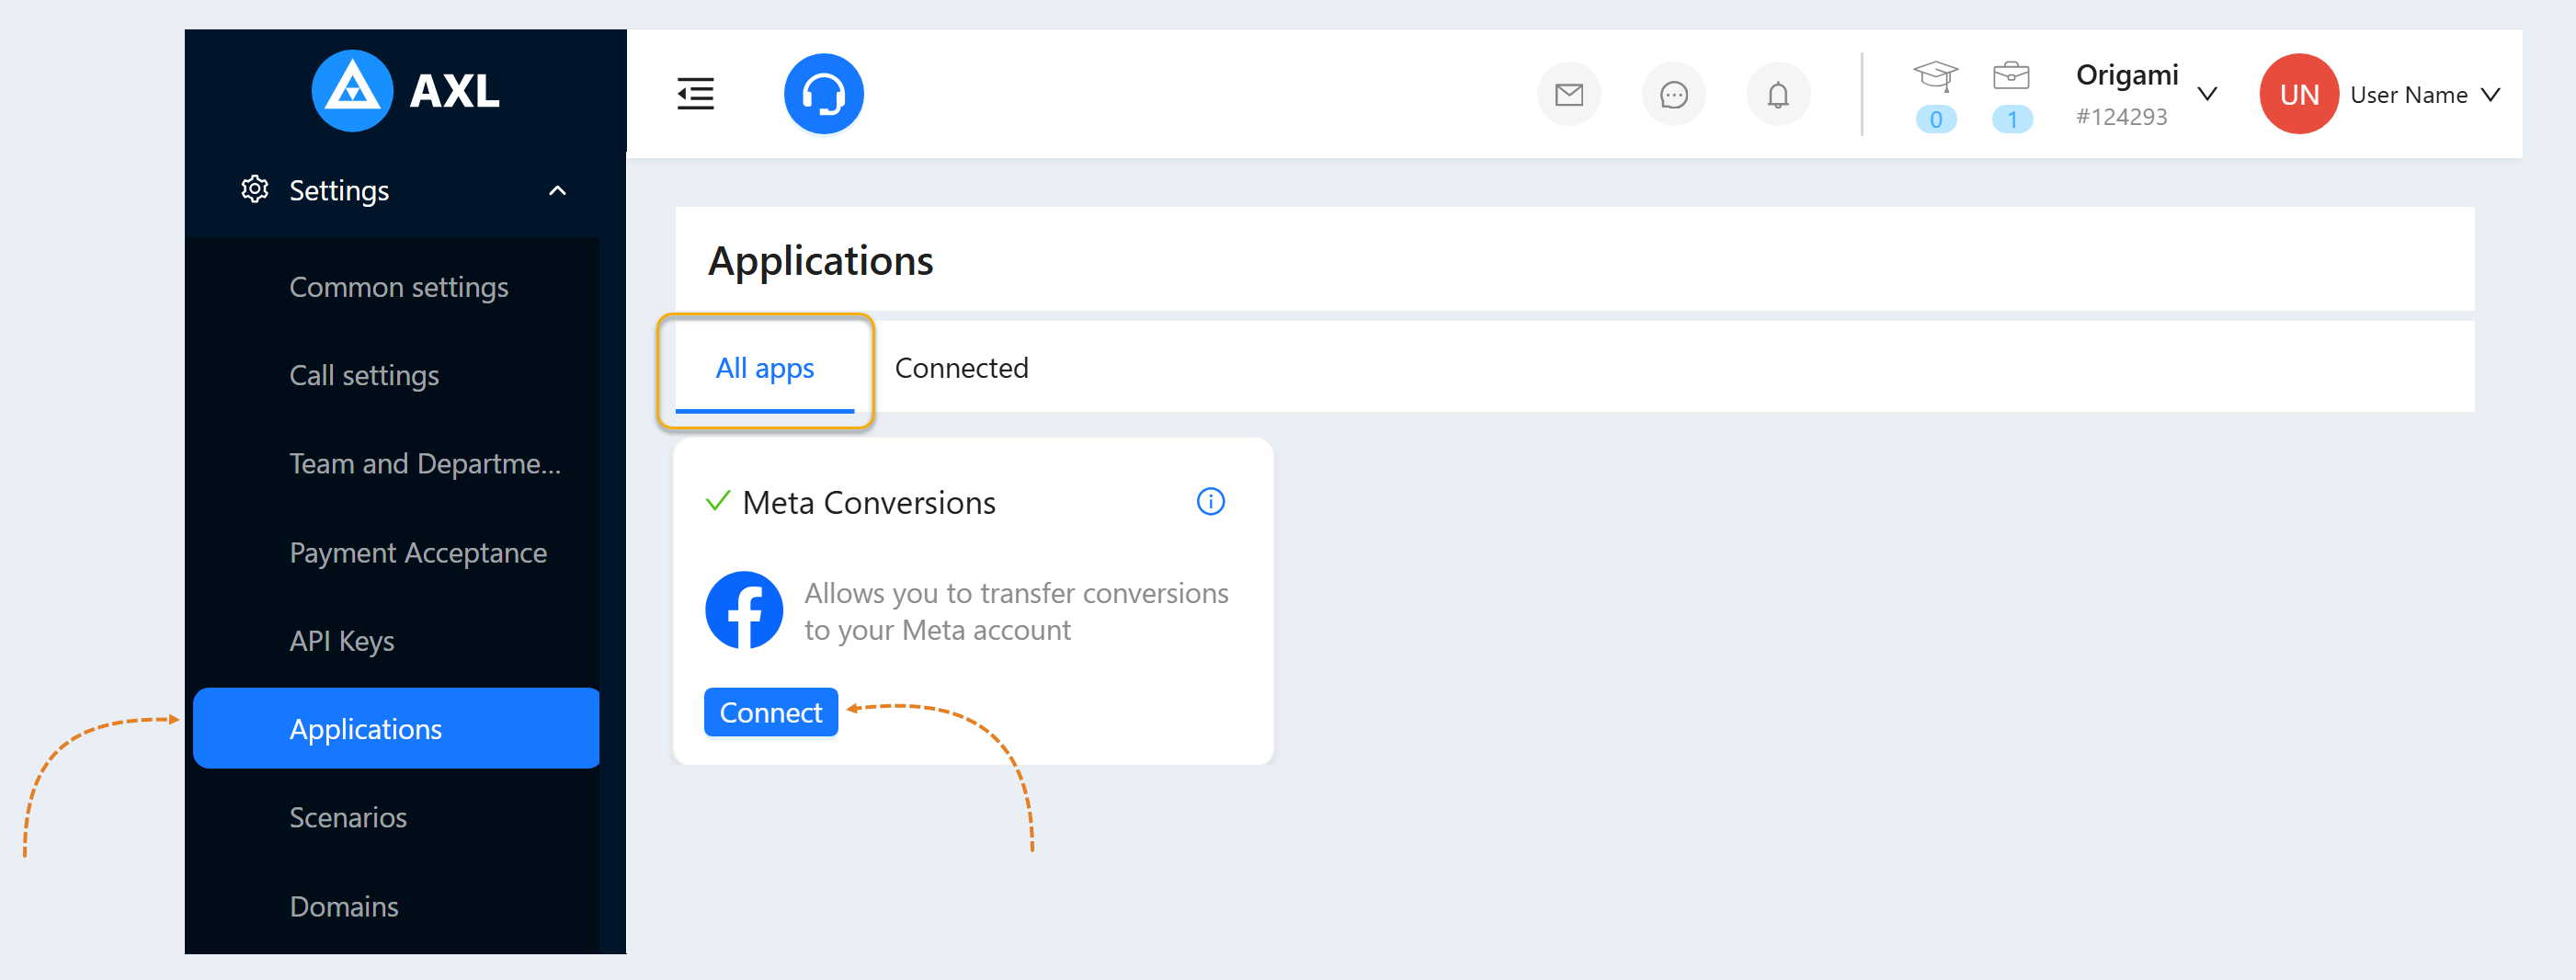
In the Meta Conversions application window, click the Connect button.
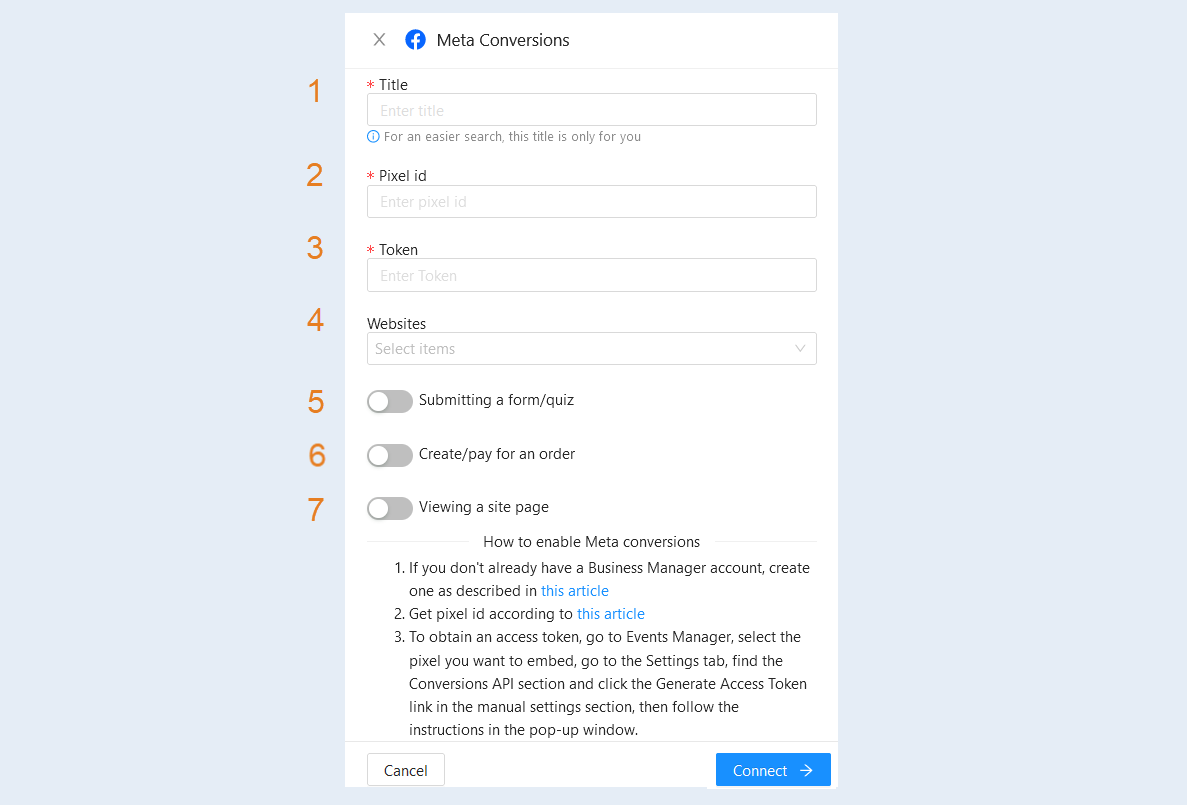
In the window that opens, fill in the fields:
- Title. Enter the name of the application to facilitate the search, this title is just for you.
Pixel ID. Enter the Pixel ID that you copied on the Meta Events Manager website in step №2.
Token. Insert the Token copied in step №3 of this article into this line.
Sites. Select sites from the suggested list.
Submitting a form/quiz. Move the slider to the active position to analyze the submission of forms/quizzes on the site.
Create/pay for an order. Move the slider to the active position to analyze the creation/payment of orders.
Viewing a site page. Move the slider to the active position to analyze the site page views.
Click the "Connect" button.
The connected Meta Conversion application will be displayed in the "Connected" tab.
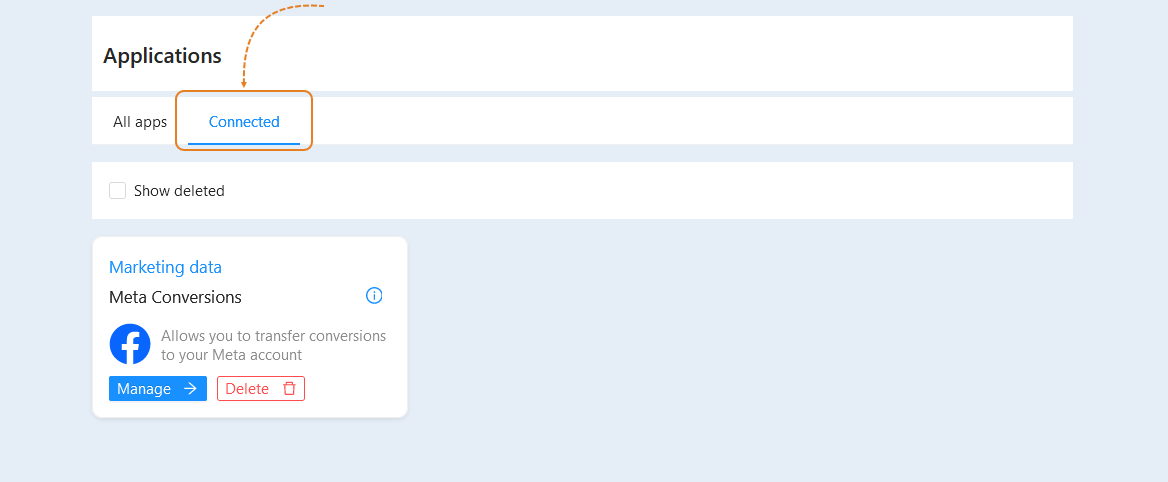
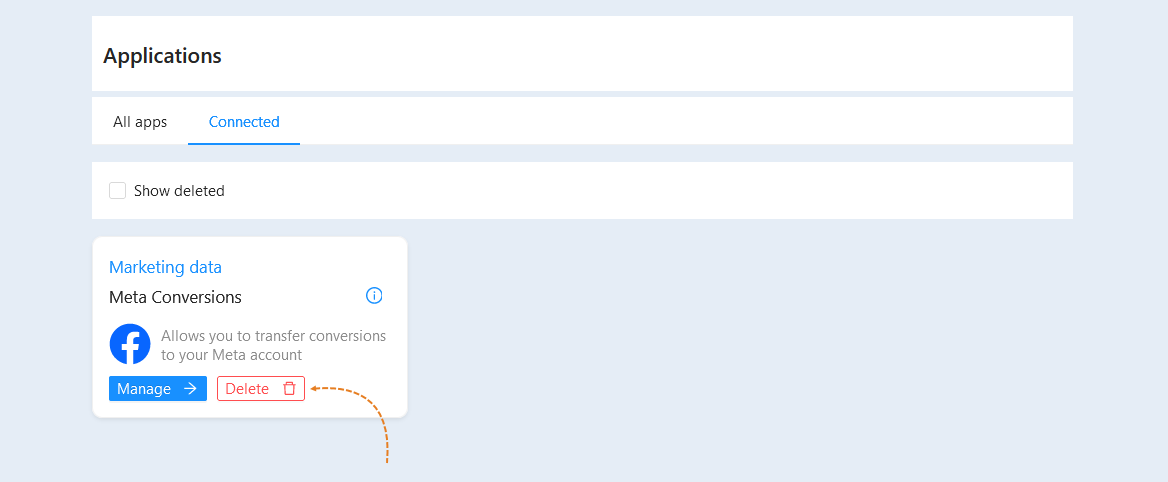
Click the "Delete" button in the card to delete the application.
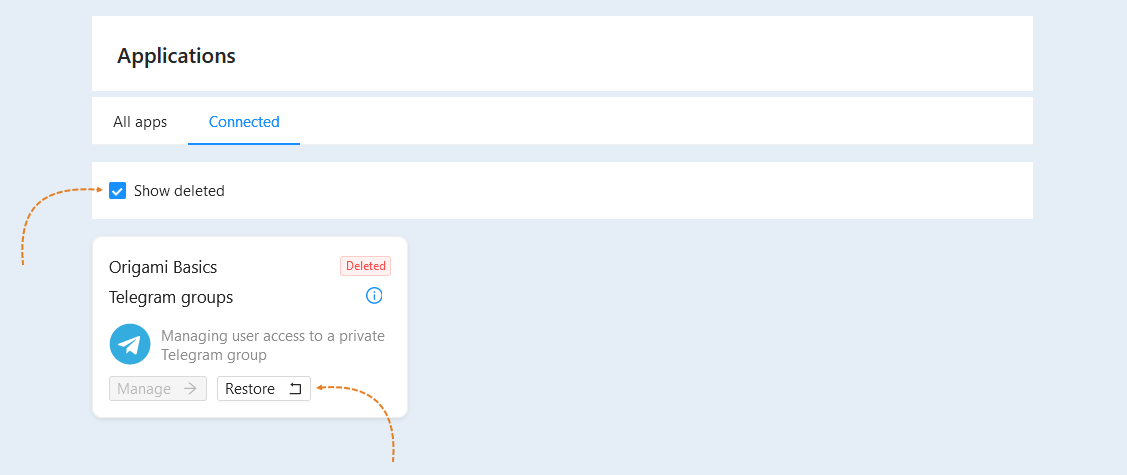
Check the "Show deleted" box to see the list of deleted applications. You can restore a previously deleted application.
5
Application Settings
To continue configuring the application, click the "Manage" button.
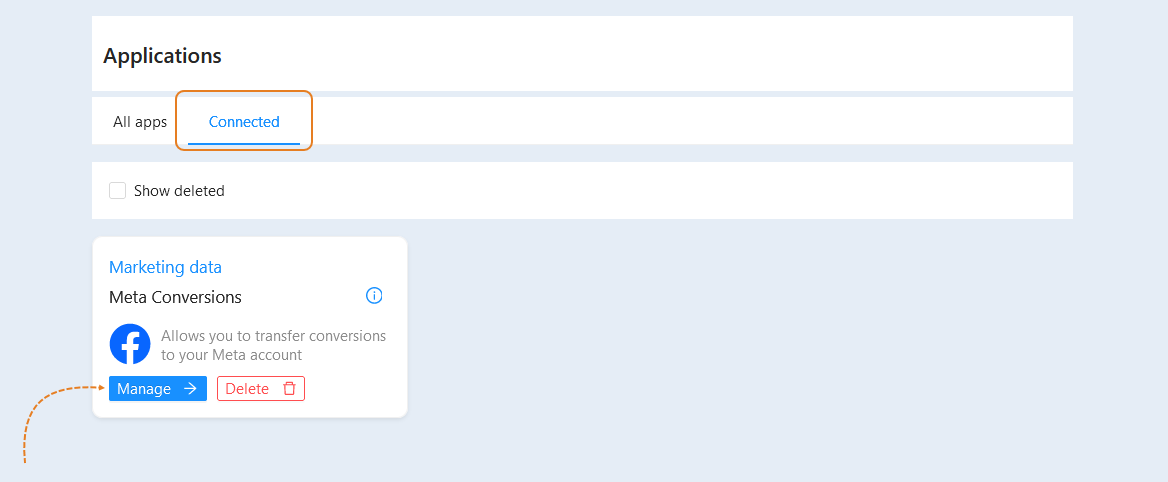
In the window that opens, you can change the application settings.