A webinar room is a virtual space designed for online events such as webinars, conferences, lectures, presentations, trainings, and other interactive online events. Its main function is to enable the presenter to interact with the audience in real time.
The AXL platform has created its own platform for online streaming. You create a webinar in your personal account and then go to the webinar room. The live broadcast must be launched on additional services: youtube, vimeo, facebook, etc.
In the webinar room, you control the presentation and interact with the webinar attendees.
Click on the desired section of the article to go to its description:
How to enter the webinar room
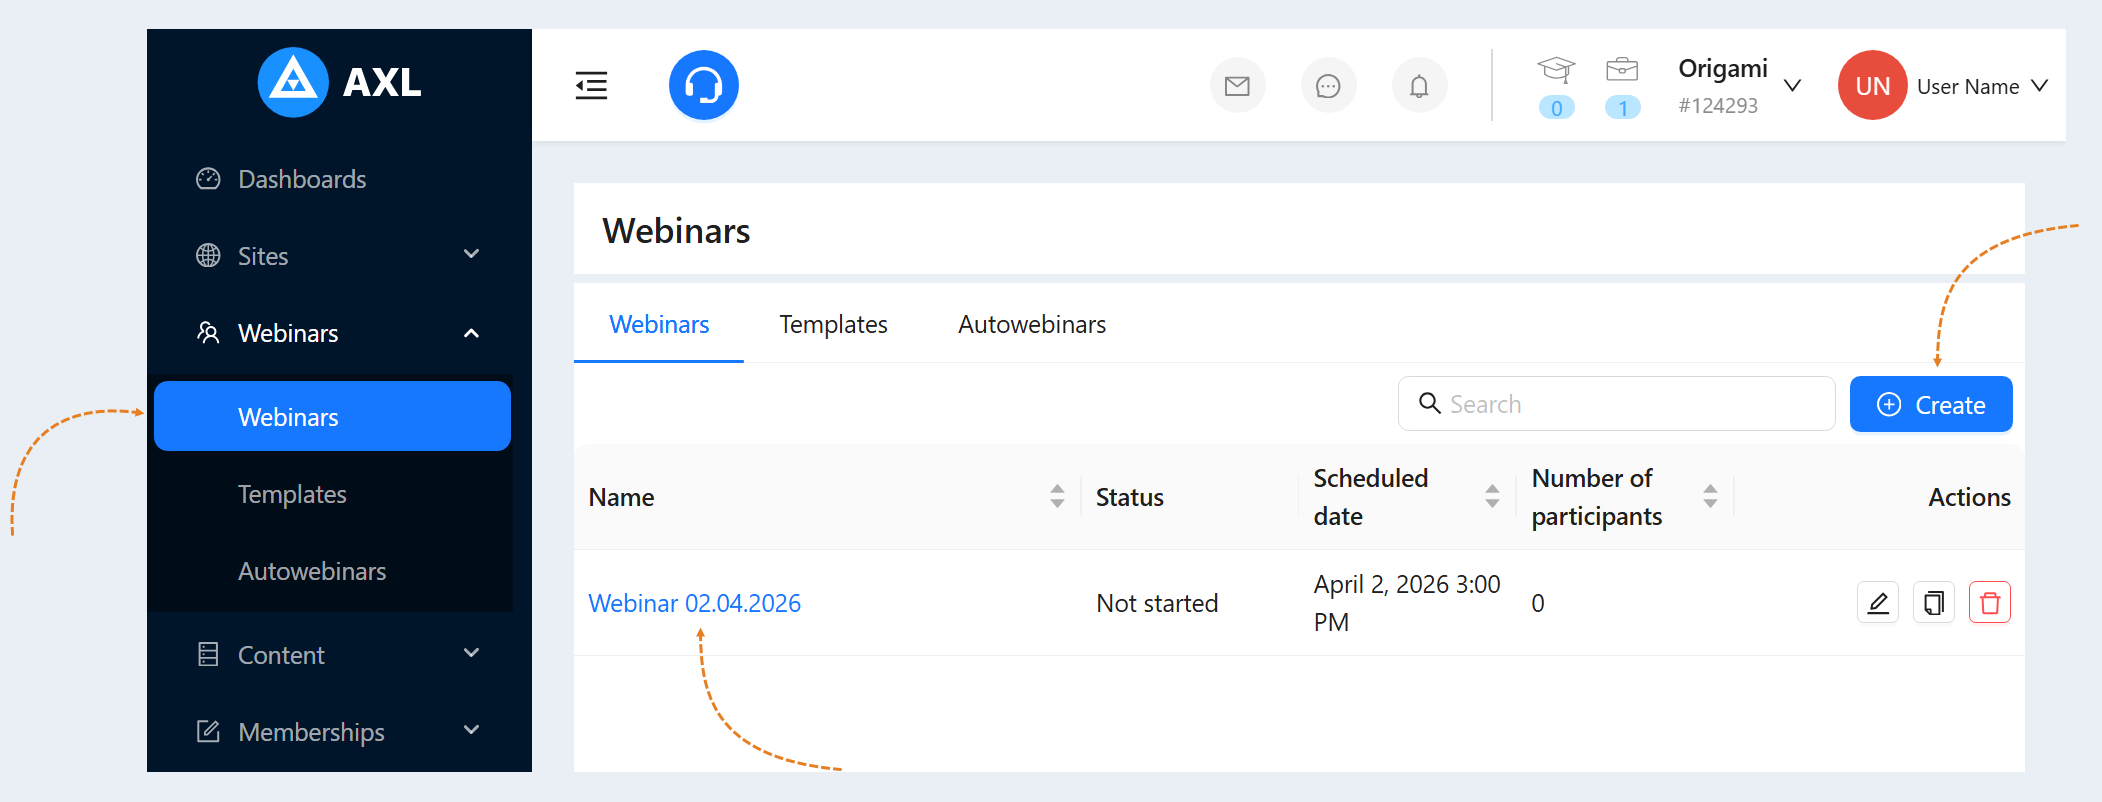
Go to the "Webinars" section. Select a webinar from the list and click on the name of the webinar or the "Edit" button.
For more information on how to create a webinar, see the article "Webinars".
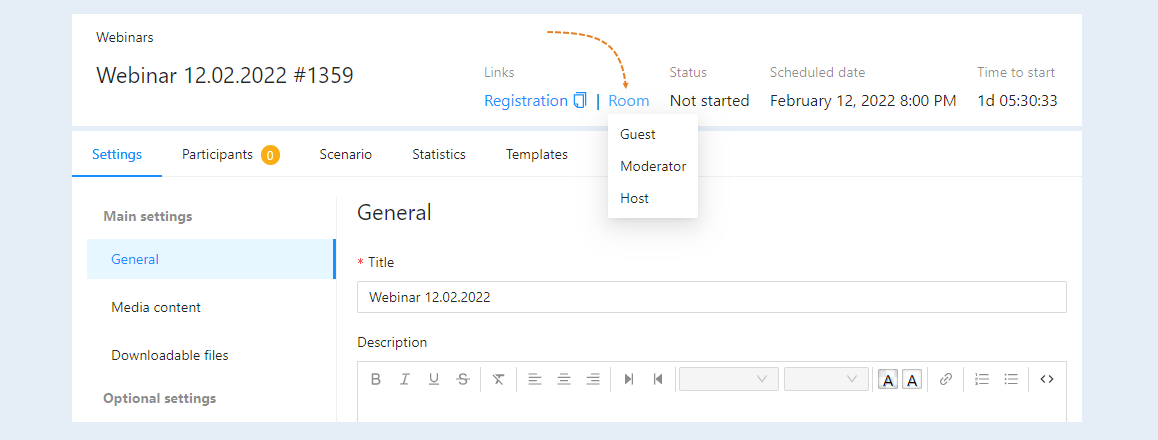
Click the "Room" button in the upper-right corner of the window. Select the "Host" role from the list.
The presenter has the highest level of access, full control over the presentation, microphone and video.
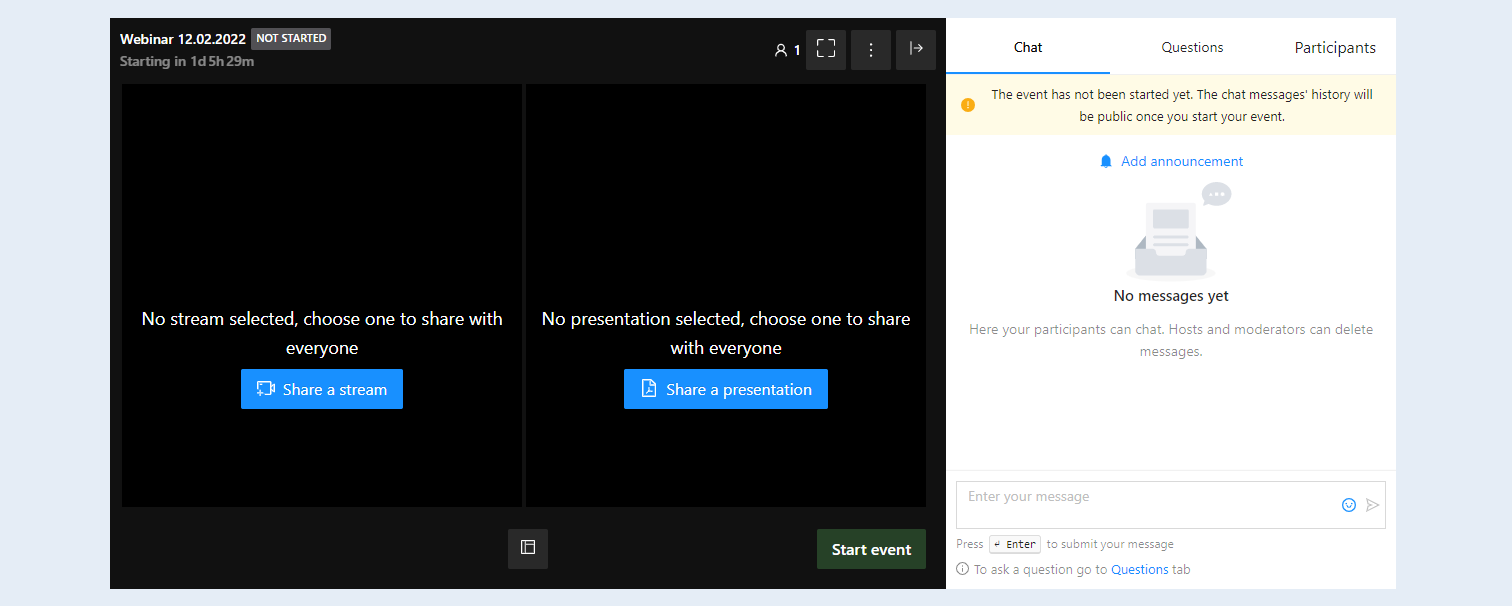
The webinar room for broadcasting will open in a separate window. This is where you set up your training and host your webinar.
Webinar room interface
The webinar room is divided into two parts:
- The broadcast window (on the left). This is the main area where the video and audio stream of the webinar is displayed. Here you can see the speaker, presentation, screen demonstration, or any other visual content shared by the presenter. The broadcast window provides the visual and audio information necessary to understand the topic of the webinar.
Participants' chat (on the right). This is a text field where webinar participants can communicate with each other and with the moderator. Here you can ask questions, share comments, express your opinion and participate in discussions. Participant chat provides interactivity and audience engagement. It allows you to ask questions to the moderator, receive feedback and create a sense of community.
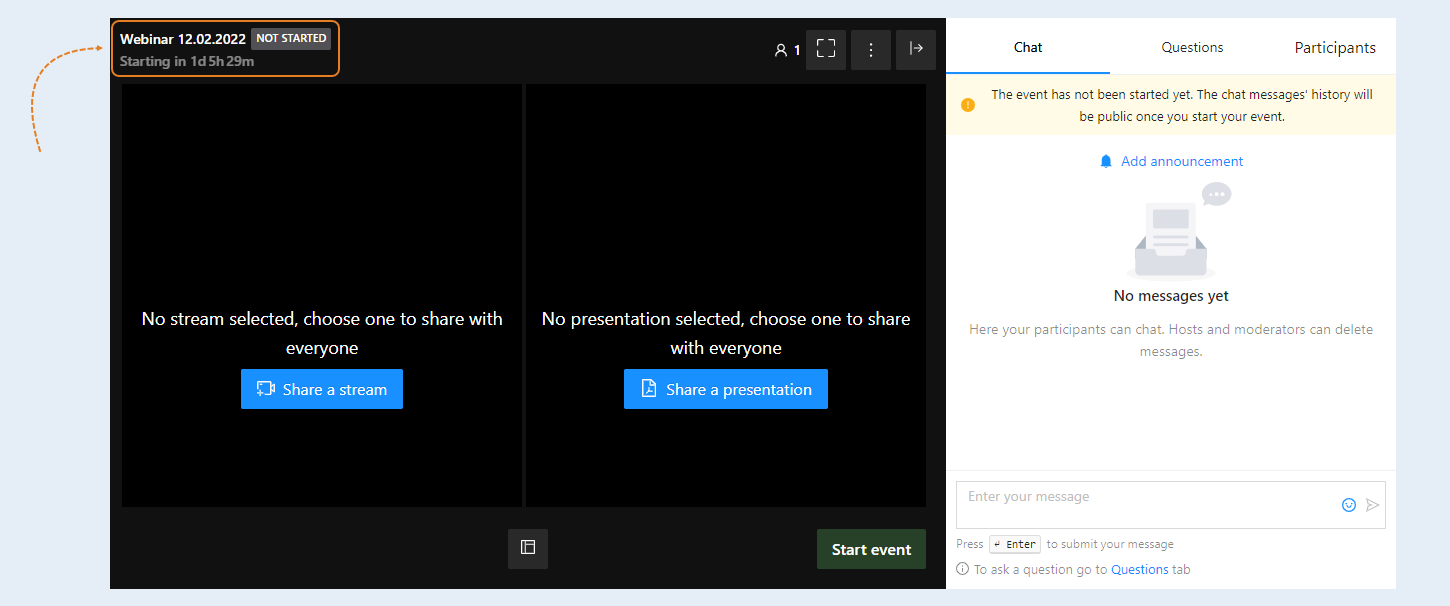
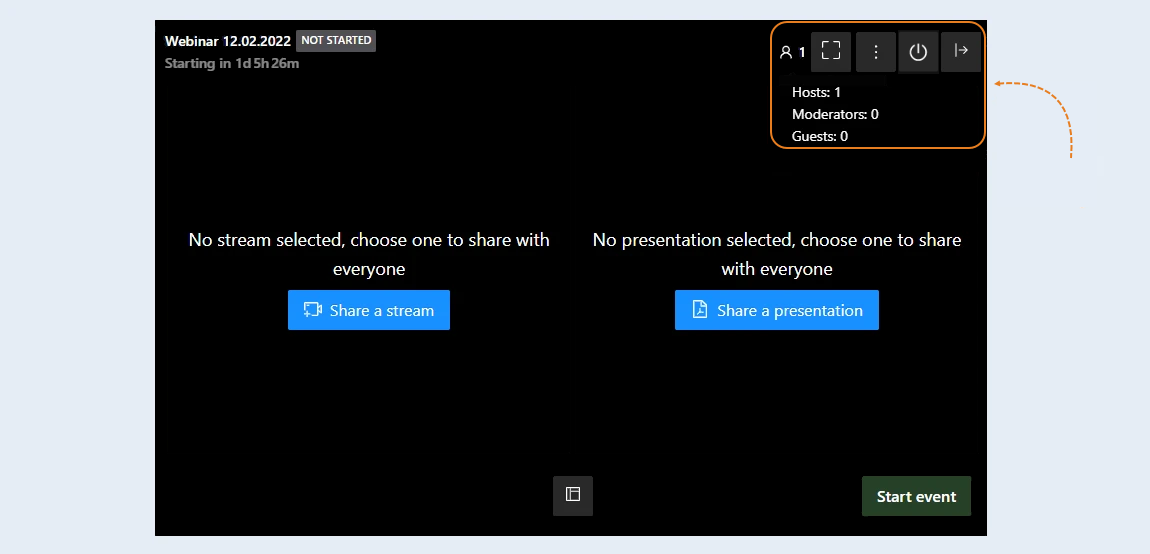
In the upper left corner of the room you can see:
- The name of the webinar. A short and clear description of the webinar topic. It helps participants quickly understand which webinar they have attended and whether it matches their interests.
The status of the webinar (Not started, Live, Completed). This is an indicator of the current status of the webinar. It provides participants with information about whether the webinar is currently underway, has already begun or has ended.
Countdown to the start of the webinar. A timer that shows how much time is left before the start of the webinar. It helps you navigate through time and understand when you need to be ready to participate.
In the upper right corner of the broadcast window you can see the buttons:
- The list of participants. Here you can see the number of participants in the webinar. You can also see the number of participants in each role: guest, moderator, presenter. To see the number of participants by role, hover over the "List of Participants" icon.
Full-screen mode. Click the button to expand the webinar room to the full screen for easier viewing.
Settings. Allows you to configure various webinar room settings, such as:
- Change the profile. Here you can change the profile you have logged in from.
Clear the chat. Deletes all messages from the webinar room chat. For example, it can be used to clear a chat before starting a new section of a webinar in order to focus the audience's attention on the current topic. In some cases, when the chat contains confidential information, it can be cleared after the webinar is completed.
Block the chat for guests. Prohibits sending messages to the chat for users who are registered as guests. Blocking guests can help maintain a more constructive discussion. After blocking the chat, use the same "Unblock Guest Chat" button to unlock it.
Exit. Click the button to leave the webinar room.
Hide the sidebar. Click the button to hide the chat of the participants. You can return the chat to the monitor at any time by clicking this button again.
Broadcast connection
Click the Share Stream button and add a link to your stream. For details on how to connect a broadcast, see the article "Hosting a webinar".
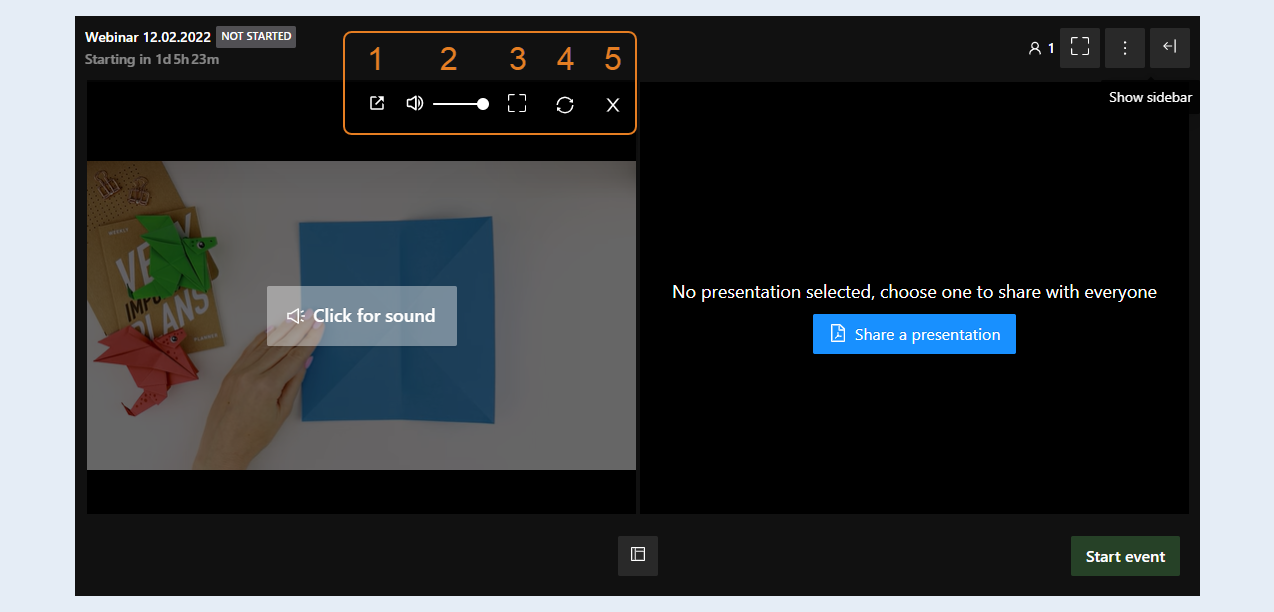
After the broadcast is added, additional buttons will appear at the top of the broadcast window:
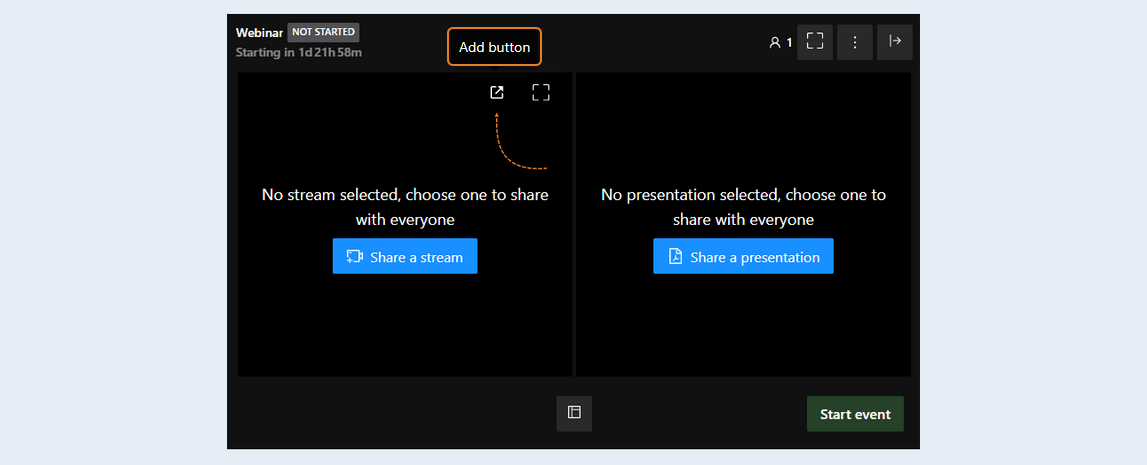
- Add a button. Allows you to add interactive elements to the broadcast screen. Click to add a button to perform actions during the webinar. Webinar participants will be able to click a button and perform a target action.
Volume level. Allows you to adjust the volume of the broadcast sound or turn off the sound completely.
Enter full-screen mode. Click the button to expand the broadcast window to the full screen.
Replace. Click the button to replace the video broadcast with another one. The "Share Broadcast" window opens, where you can add and select another broadcast.
Clear the content. Click the button to remove all visual elements from the broadcast screen. Your broadcast field will be cleared.
Adding buttons to the webinar
Click on the "Add button" button and an additional window will open.
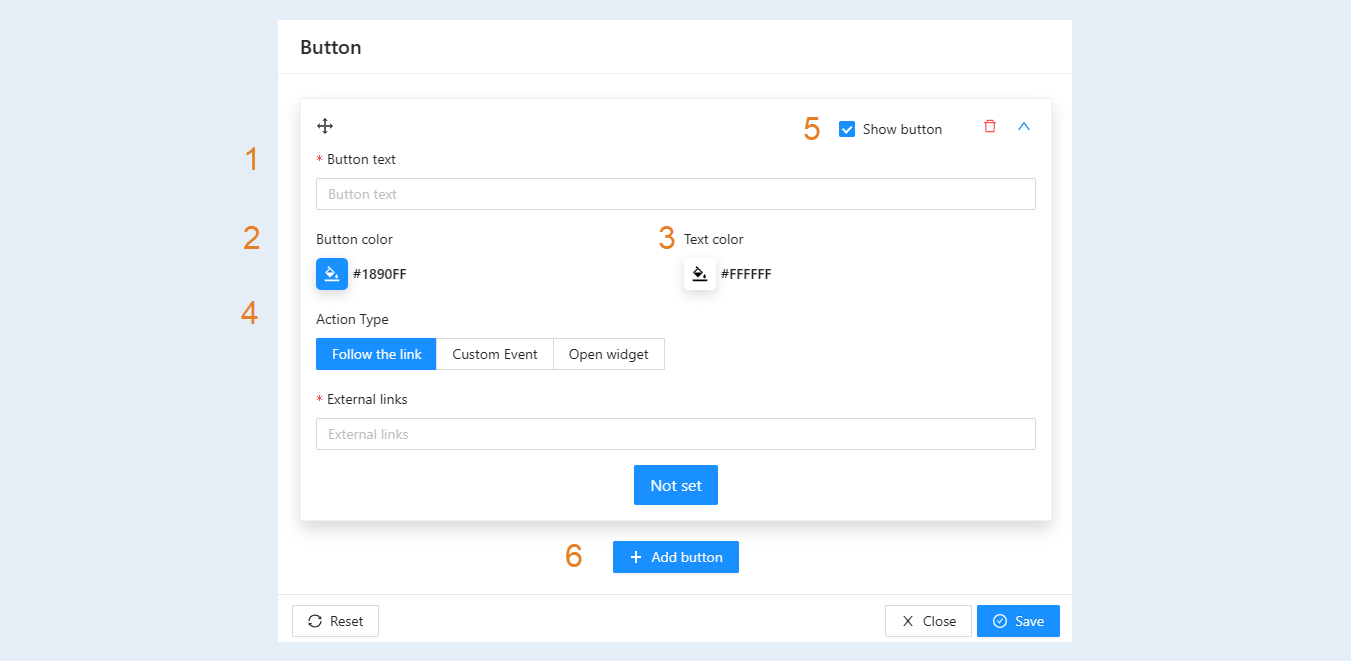
In the window that opens, fill in the fields:
Button text. Specify the text that will be displayed on the button itself. This is what the webinar participants will see and click on. The text defines what the button should do, or what message to send to the user. The text should be clear, concise and prompt to action (for example, "Learn more", "Register", "Ask a question").
Button color. You can change the color of the button itself. The color draws attention to the button and helps it stand out from the rest of the content in the webinar room. Provides better visibility and readability of the text on the button.
Text color. The color of the text displayed on the button. Provides legibility of the button text and contrast with respect to the background color. The color combination of the button and the text can match the corporate identity.
Action Type. Determines what happens when the user clicks the button. Allows you to set up different scenarios of interaction with webinar participants.
Select the type of action of clicking on the button:Follow the link. Opens the specified web page in a new browser tab. It is used to send participants to the registration, payment, download of materials, etc. pages. For more information on how to create a website on the AXL platform, see the article "How to Create a Website".
Custom event. When the button is clicked, the set user event is triggered. The event will be triggered only if the contact is registered in CRM (there is an email address). It can also be used for integration with other services. For more information on how to set up a custom event, see the article "Buttons, Widgets and Custom events in the Webinar".
Open widget. Clicking on the button opens the widget in a modal window in the center of the screen. For example, a question form, a chat, a survey. It is used for interactive interaction with the audience and collecting feedback. For more information on how to create and configure a widget, see the article "Widgets".
Show button. Enables or disables the button visibility in the webinar room. It allows you to control when the button will be visible to participants (for example, to show it only at a certain moment of the webinar).
Add button. You can add and customize several buttons in the webinar. Click to add another button.
After completing the settings, click the "Save" button.
Presentation
Click the "Share presentation" button. Upload your presentation. It will be displayed on the room screen. The following options are available to you here:
- Replace. Click the button to upload another presentation instead of the current one. For example, you can replace an outdated presentation with a new, more up-to-date version. Or use multiple presentations within the same webinar for different topics or sections.
Clear the content. Click the button to clear the presentation field. It allows you to free up space for displaying other content, such as videos, screen demonstrations, or simply focuses the audience's attention on the speaker.
Slides. At the bottom, you can open the thumbnails of all the slides in the presentation to see which slide will be next. It is used to navigate through the presentation to quickly navigate to the desired slide. The presenter can easily switch between slides, answer questions, and return to previous slides. Reviewing all the slides helps the moderator maintain the structure of the webinar and control the time.
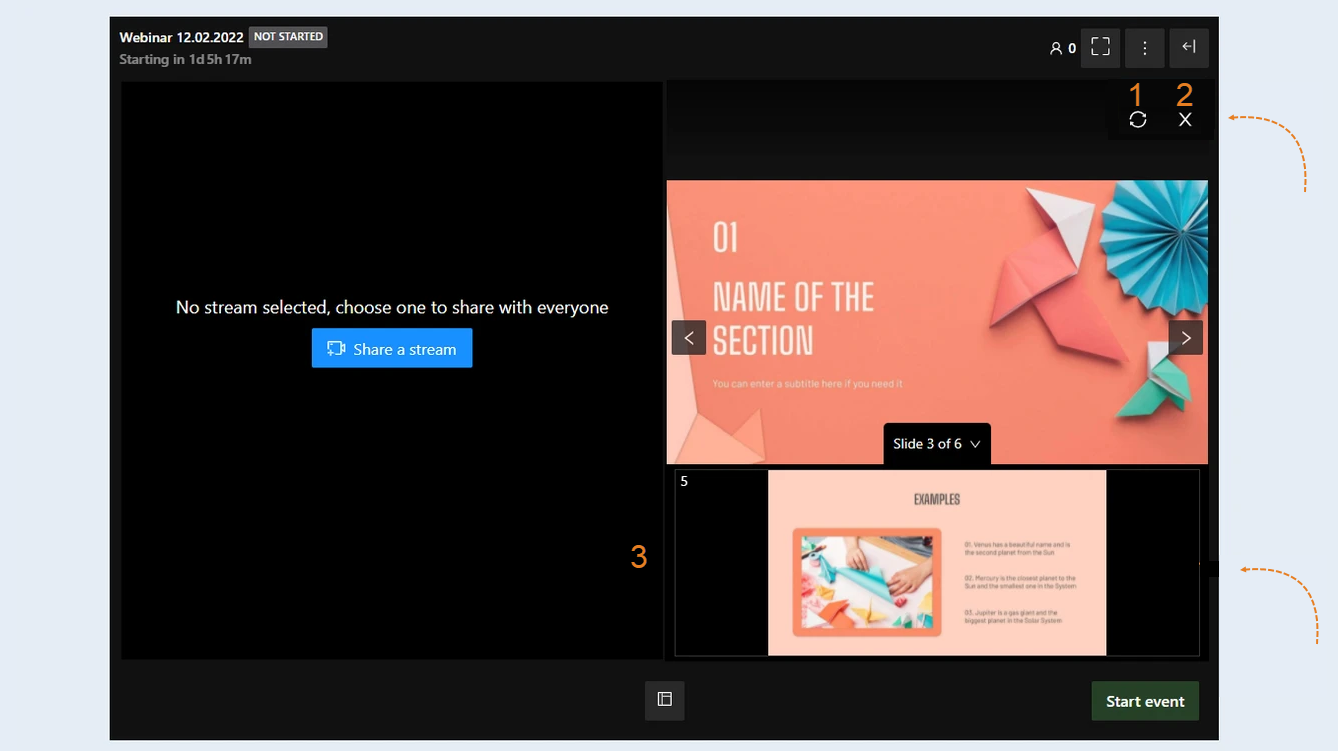
Layout template
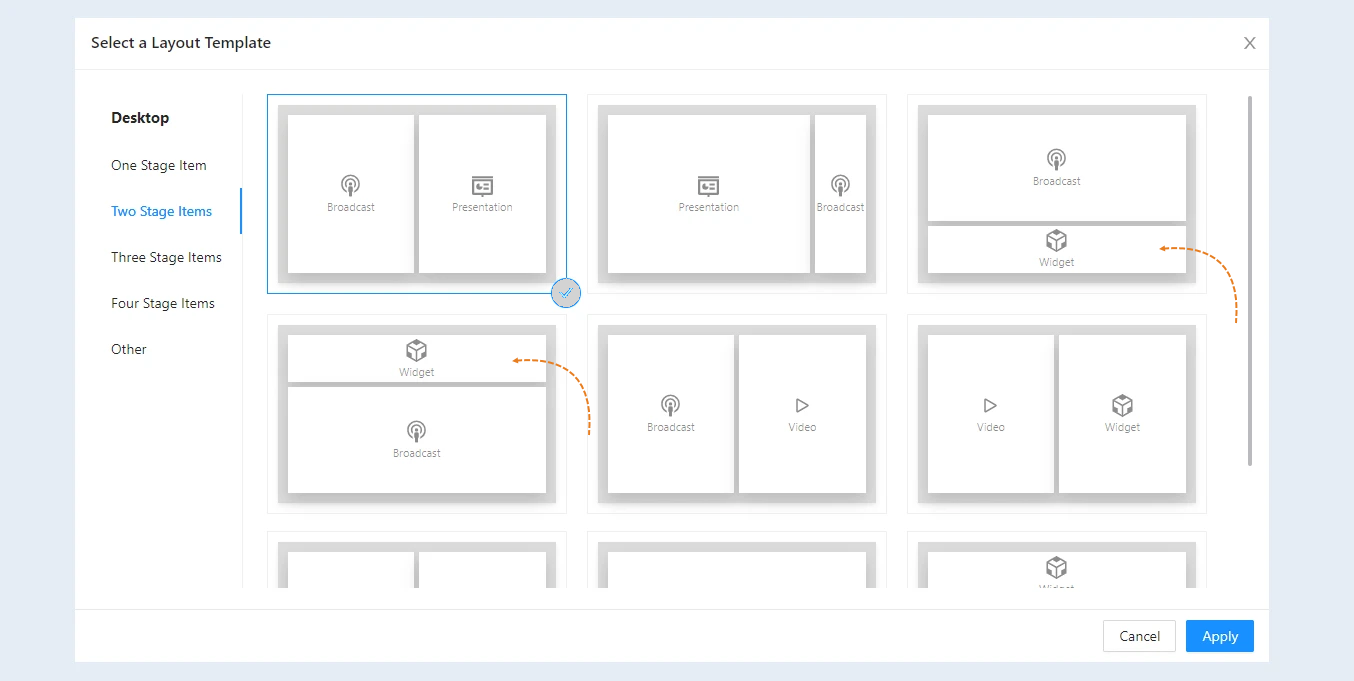
At the bottom of the screen, the Select Layout Pattern button is located in the center. You can choose the number of items on the webinar room screen, as well as choose the order of the items. Click the button to select a template.
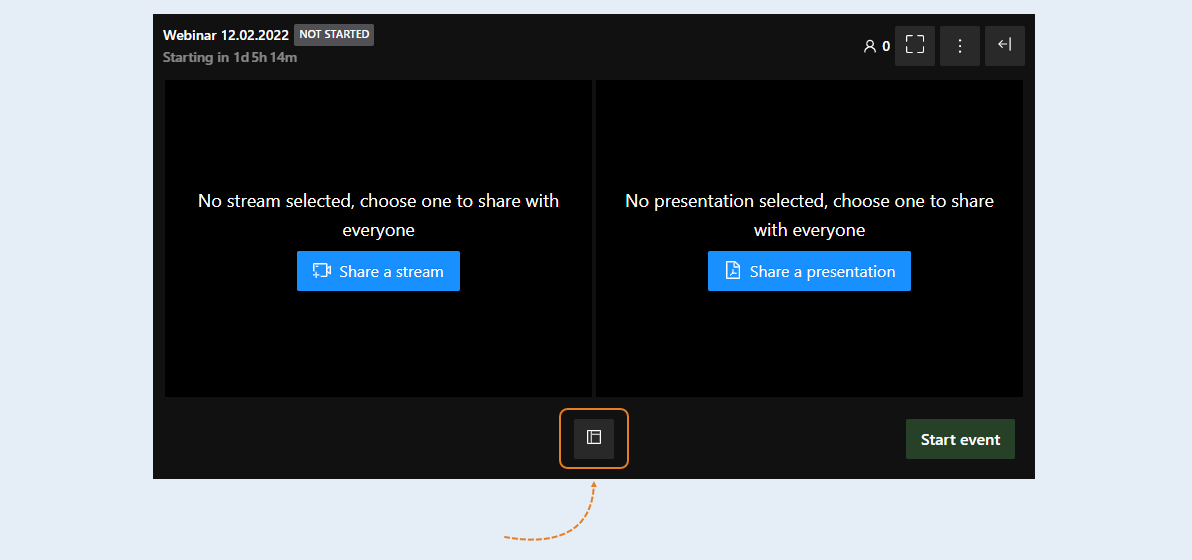
An additional window with templates will open. In the menu on the left, select the number of items on the broadcast screen: one, two, three, four, or others. Variations of the template will be shown on the left. Choose the template that suits your broadcast. And click the "Apply" button.
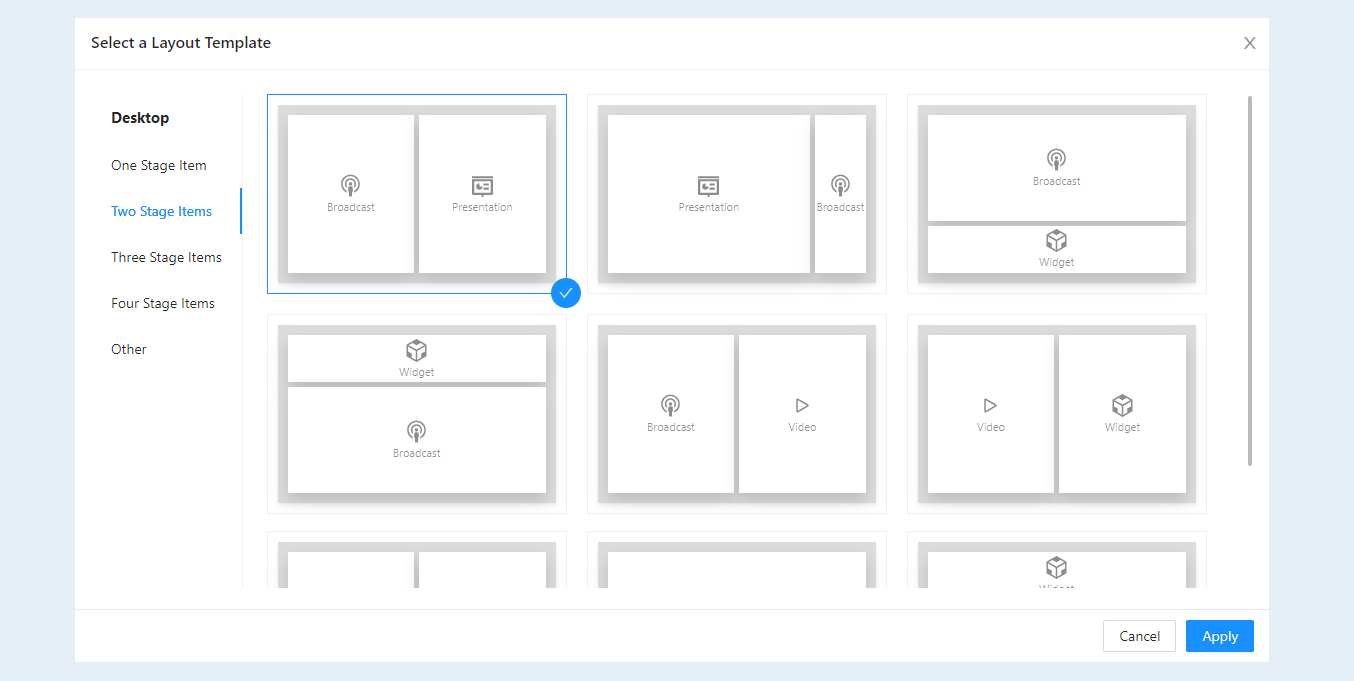
There are four elements in the templates:
- Presentations are a document or a set of documents in PDF format.
Broadcasts are materials that you can broadcast live during the webinar.
Videos are any video materials.
Widgets are embedded elements of a website. An example of a widget can be a registration form, a button, or a payment form for products.
Video
To add a video to the webinar, select the "Video" item in the layout template. It can be alone on the broadcast screen or located among other elements.
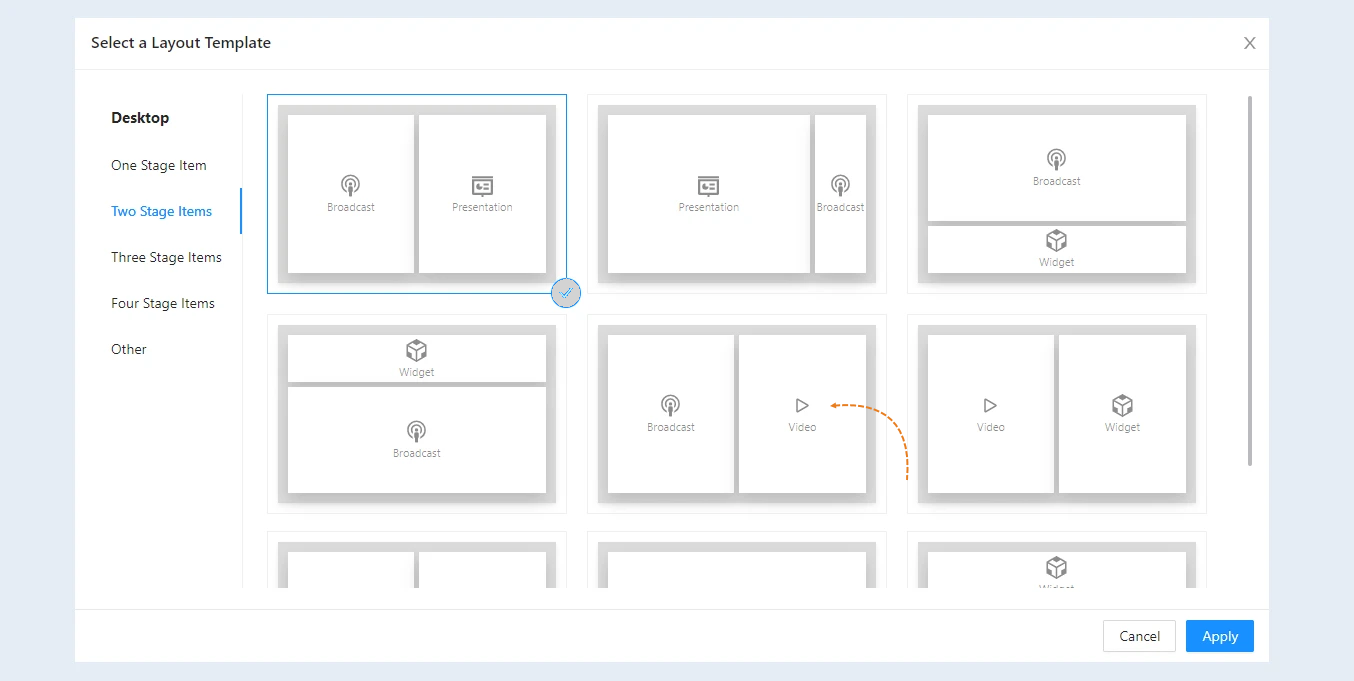
Click the "Share Video" button. Paste the link to the video in the field and click the "Share video" button next to it. The video clip will appear in the list. Next, click "Select this video" to add it to the webinar room.
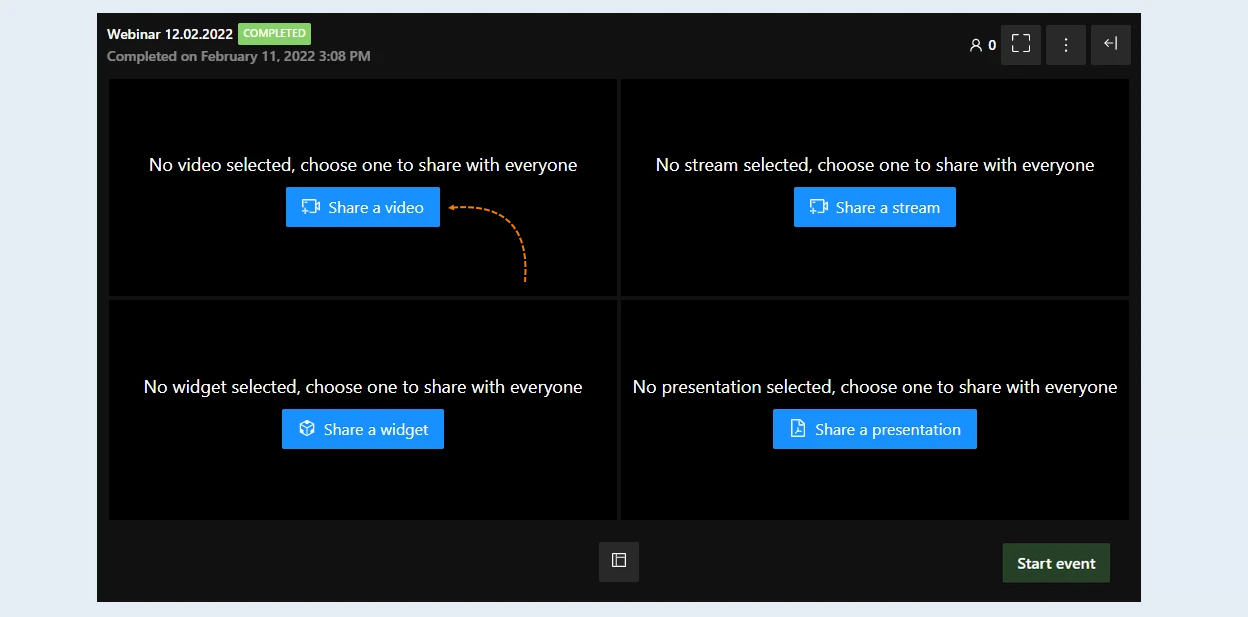
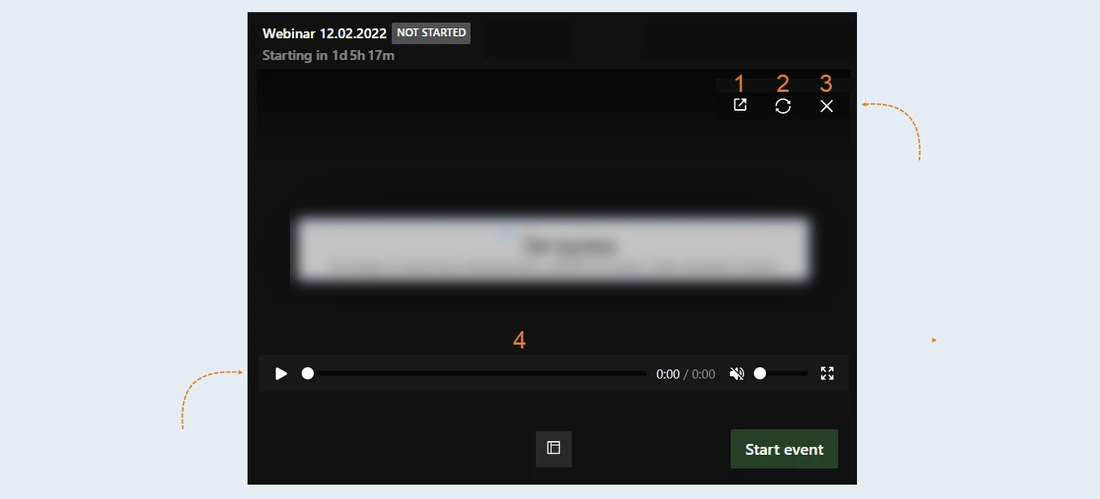
After the video is added to the webinar room, additional buttons will appear at the top of the window:
- Add button. Allows you to add interactive elements to a video. Webinar participants will be able to click a button and perform a target action.
Replace. Click the button to replace the video with another one.
Clear the content. Click the button to delete the video from the broadcast screen.
Video controls are located at the bottom of the screen, they make viewing convenient and allow you to control the playback process. The "Play/Pause" button starts or stops video playback. Rewinding a video clip allows you to quickly navigate through the video, skipping or revisiting certain moments. The playback time shows how long the video has already been played and the total duration of the video. Volume control allows you to change the volume of the video sound or turn it off completely. As well as the "Fullscreen mode" button, you can expand the video to full screen for easier viewing.
Widget
To add a widget to the webinar, select the Widget item in the layout template. It can be alone on the broadcast screen or located among other elements.
Widgets are embedded elements of a website. An example of a widget could be a registration form, a button, or a payment form for your products. Surveys, tests, and quizzes allow listeners to actively participate in the webinar. Buttons for making purchases or registering for paid courses allow you to monetize the webinar. Widgets make the webinar more lively and interesting.
For more information on how to create and configure a widget, see the article "Widgets".
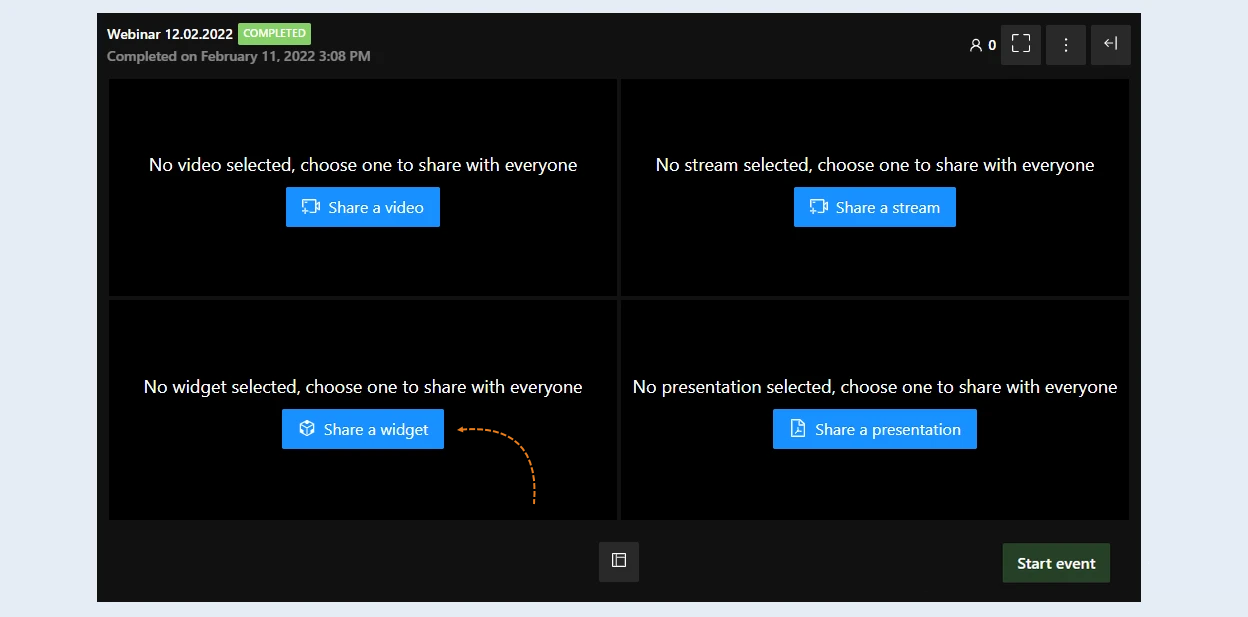
Click the "Share Widget" button. In the settings window that opens, select a previously created widget or create a new one by clicking the "Create" button.
In order for widgets to appear in the selection list, you need to add widgets in the webinar settings in the Content and Presentations section. For more information about the Content and Presentations section, see the article "Webinar Settings".
After the widget is added to the webinar room, additional buttons will appear at the top of the window:
- Replace. Click the button to replace the widget with another one.
Clear the content. Click the button to remove the widget from the broadcast screen.
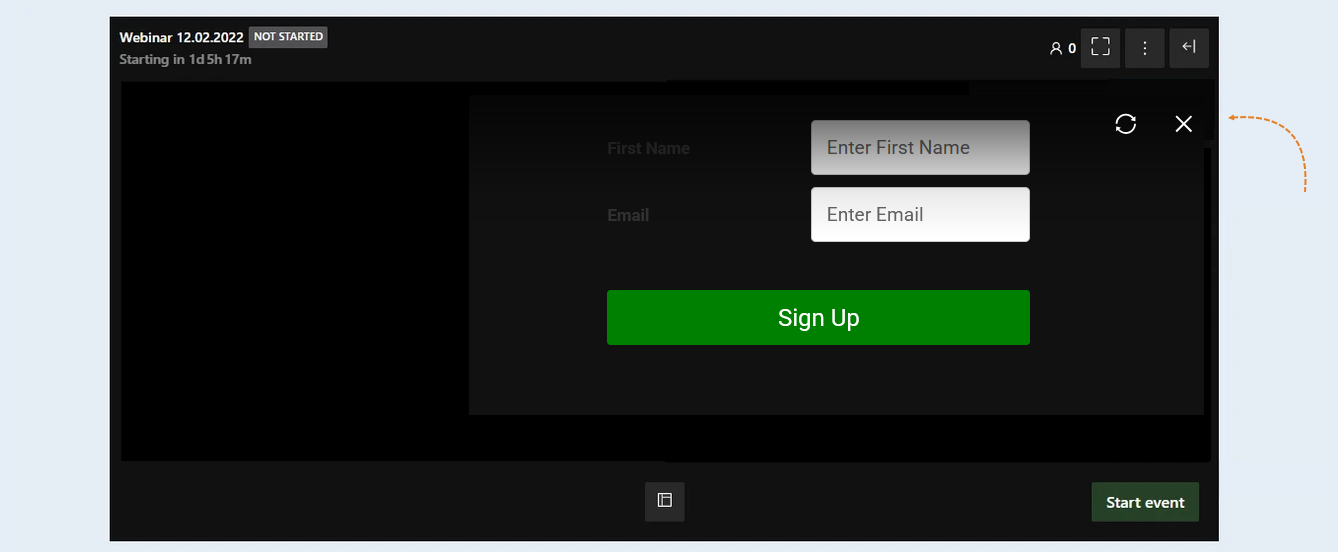
Start and end broadcast
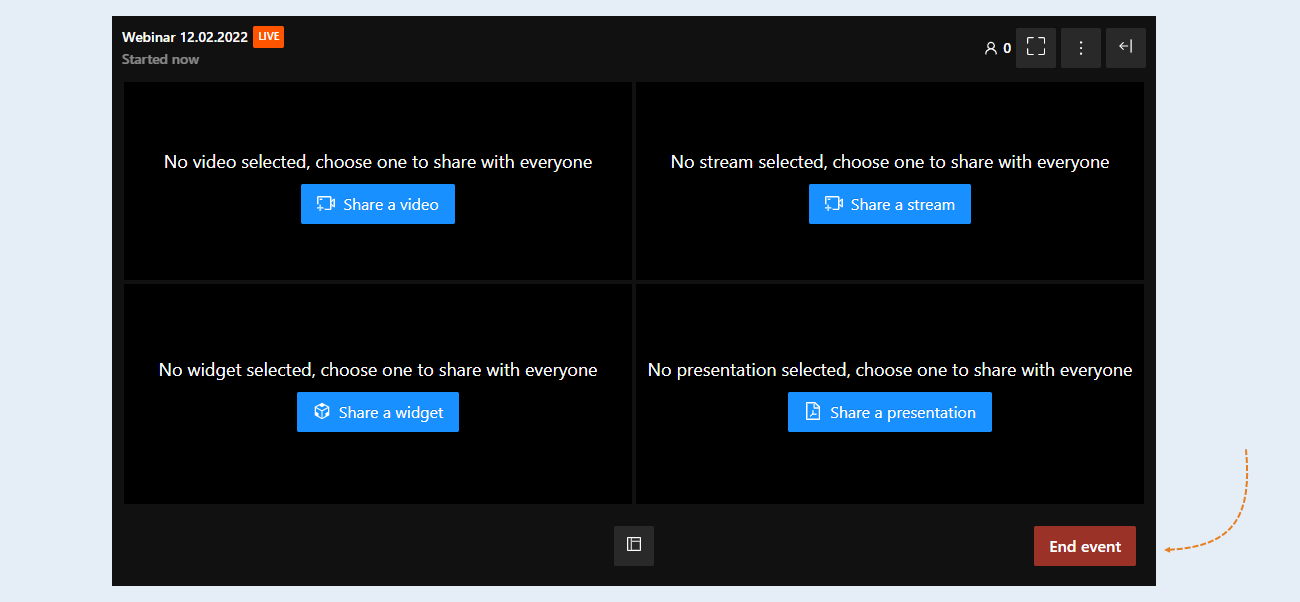
The button "Start" is located in the lower right part of the window. Click on the button to start the broadcast. After the webinar, click the "Finish" button in the lower right part of the window.
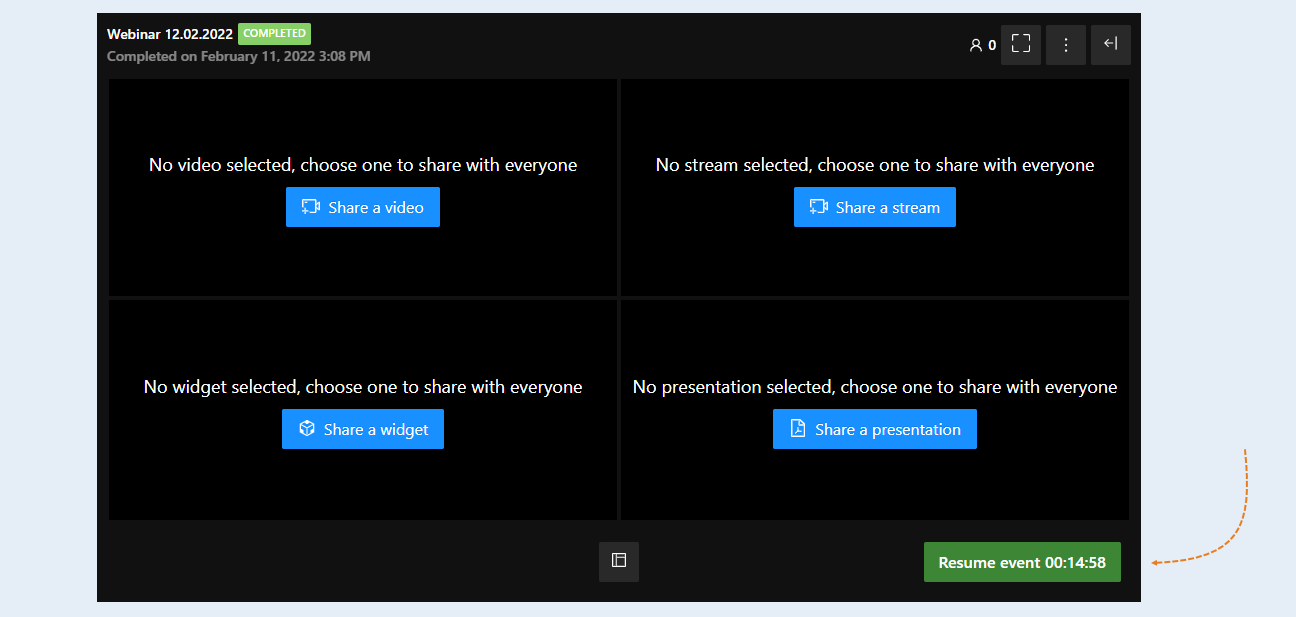
If the broadcast is interrupted or you accidentally press the "End" button, you can resume the broadcast within 15 minutes after completion. Click the "Resume" button. People who have not yet left the waiting room will be returned to the webinar.
On the right side of the webinar room interface is the "Chat". Read more about chat in the article "Webinar participants chat".