Scenario is a sequence of events and actions within your account on the axl platform. The goal of a scenario is to automate the processes of interaction with customers of your account.
The scenario responds to user manipulations (website visitors, users) and performs corresponding actions. Essentially, it is a sequence of interactions between the seller (you) and the users of your account through automated processes (such as sending emails).
When creating a scenario, the first step is to identify the event that triggers the chain of corresponding actions. The event will activate the scenario.
In this article, we will examine the following sections in detail. Click on the desired section to jump to its description:
Creating a scenario
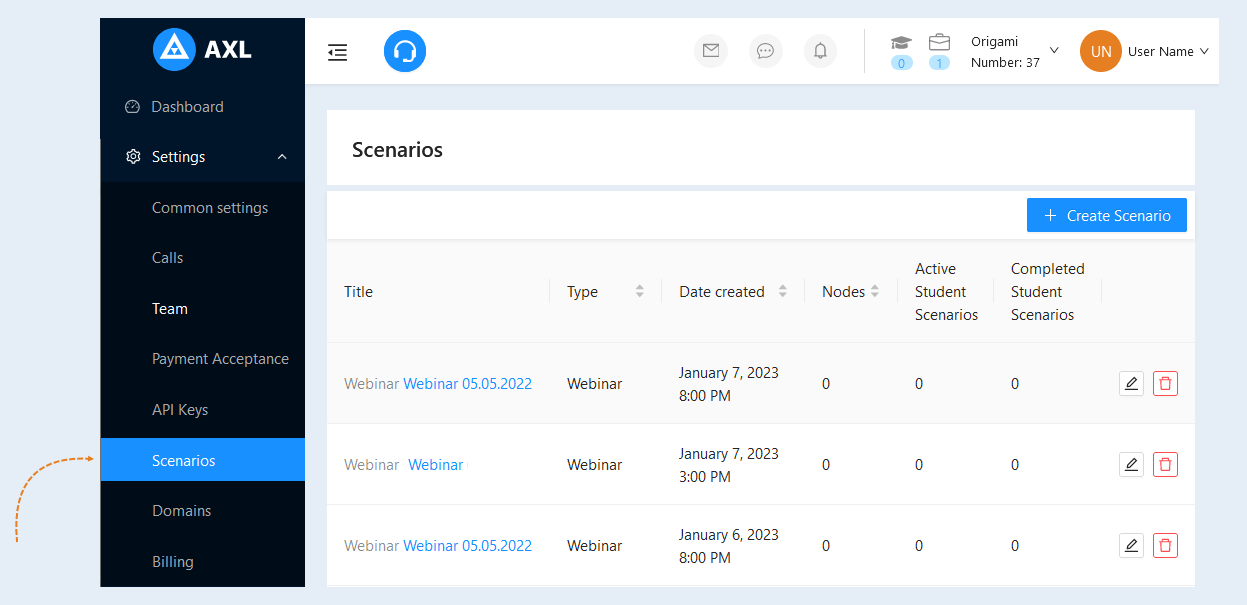
To create a new script for your account, go to the Settings section and select the Scenarios tab. Click on the "Create Scenario" button.
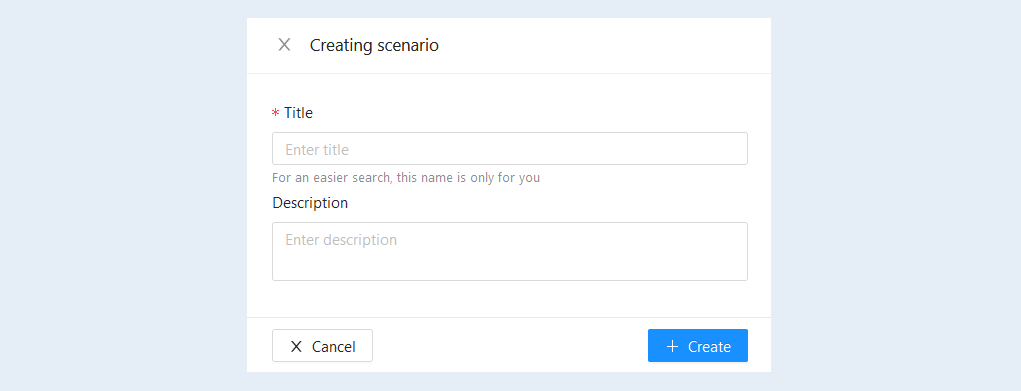
In the window that opens, fill in the fields:
- Title. Enter the name of the script.
- Description. Add a description to this scenario. This field is optional.
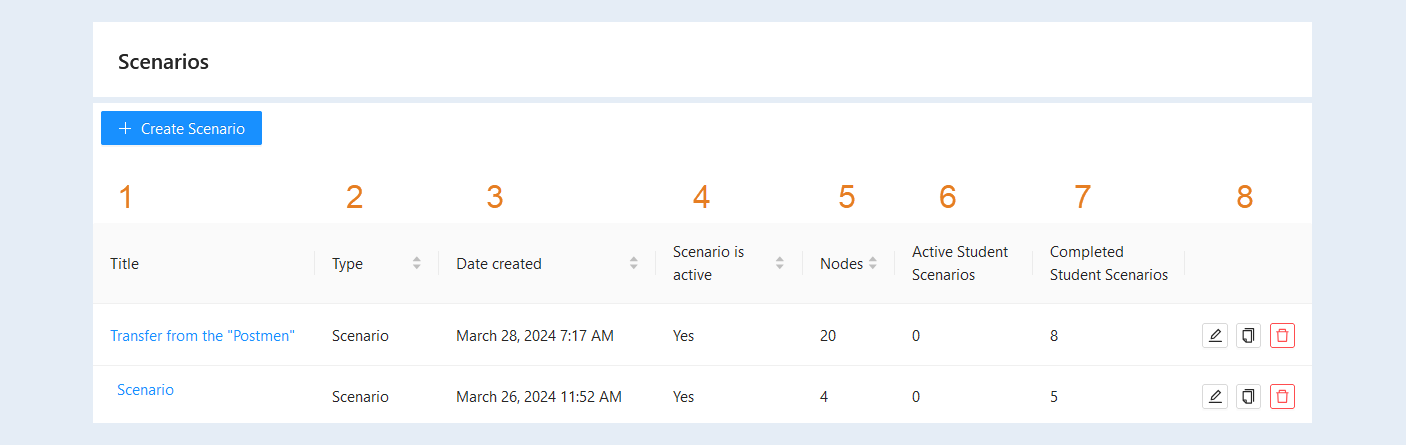
The scenario you created has appeared in the list of scenarios. Here you can see information about the scenario:
- Title. The name of the specific scenario. It allows users to quickly identify and distinguish between different scenarios, making it easier to navigate and select the desired scenario.
Type. This is a type of scenario, types of scenarios on the AXL platform are described below. It helps to filter and structure the content depending on the goals and format of the training.
Date created. The exact date and time when the scenario was created. It allows you to track the age of the scenario , which can be useful for understanding the relevance of the content and planning updates.
Scenario is active. Informs you if the scenario is active. You can make the scenario active inside the scenario by moving the slider "scenario is active" to the enabled position.
Nodes. The number of related elements in the scenario . Reflects the complexity of the scenario and helps in planning its structure and navigation.
Active User Scenarios. The number of scenarios used by users.
Completed User Scenarios. The number of scenarios that were completed by the users.
The "Edit" button. Click to edit the scenario.
The "Copy" button. Click to create a copy of the selected scenario.
The "Delete" button. Click to delete the scenario.
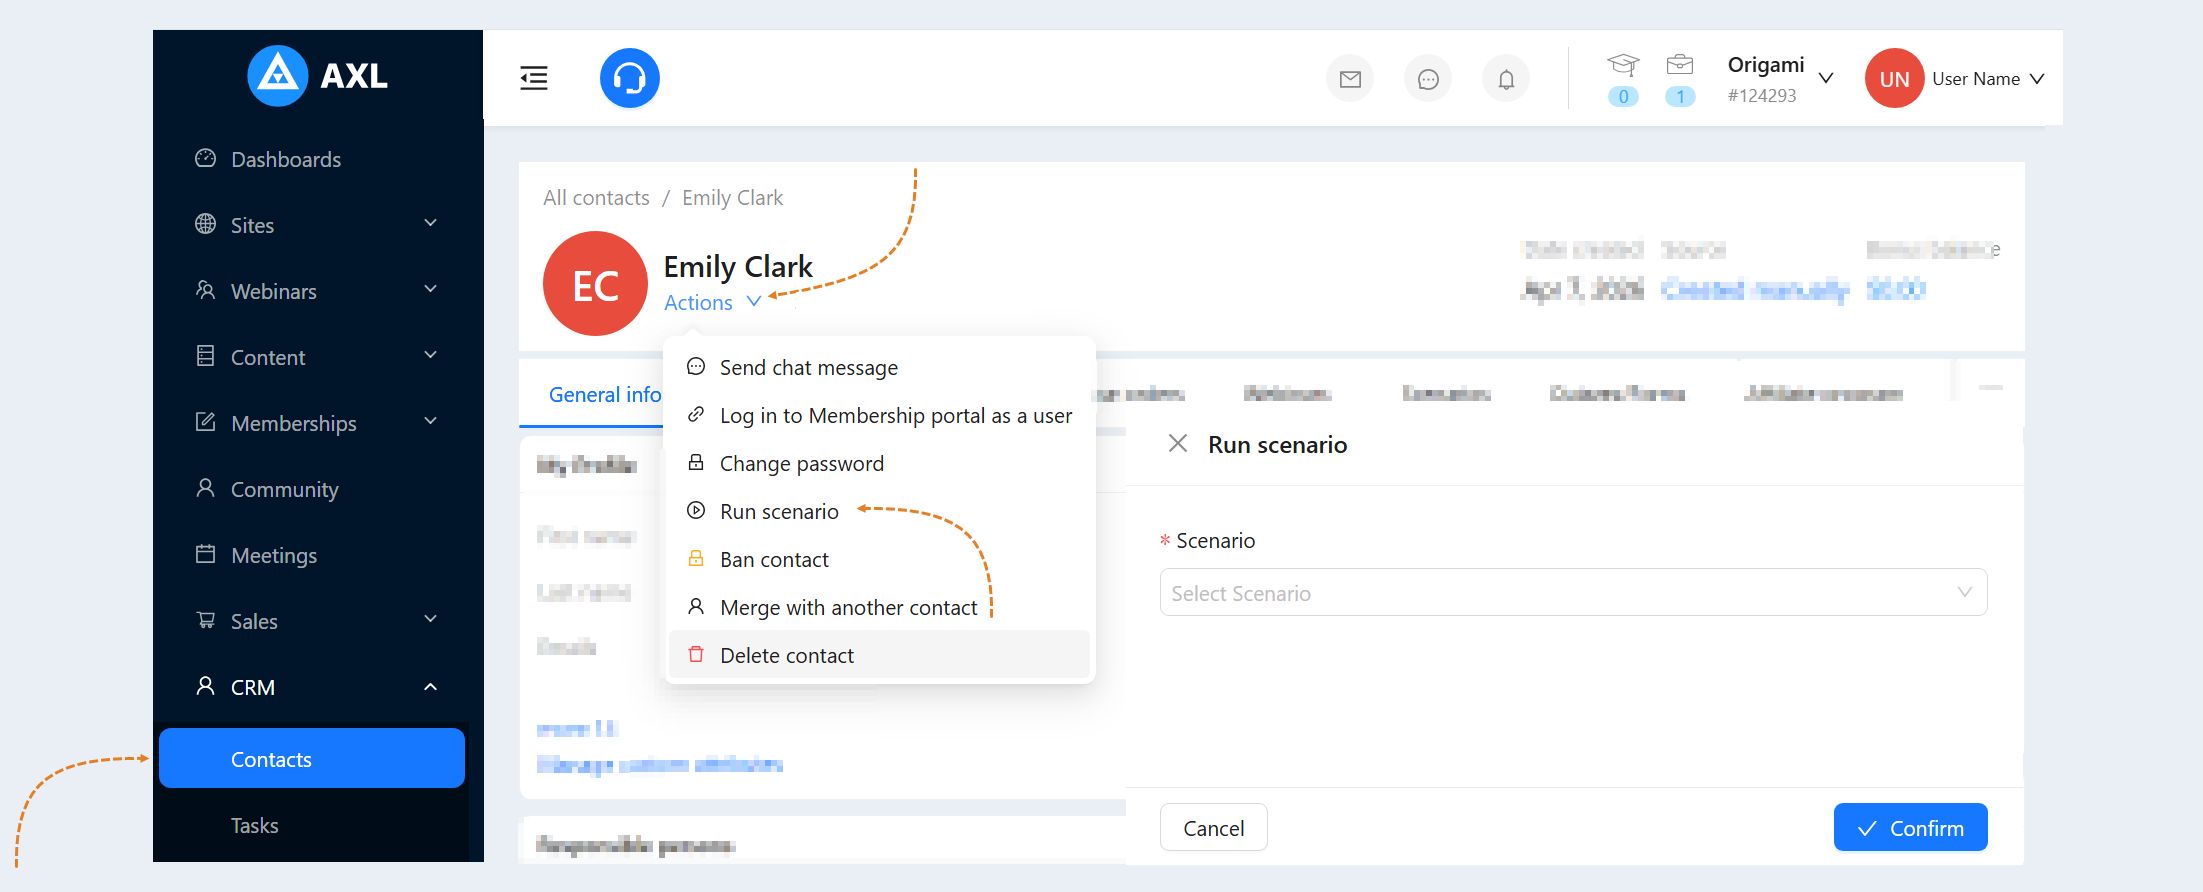
After the scenario is created and configured, you can run the scenario for a specific contact from their contact card.
To do this, go to the "CRM" section, then the "Contacts" tab. Click on the client's name to open their profile (contact card). In the upper left corner, click the "Actions" button and select "Run Scenario". This action will run the selected scenario for the contact.
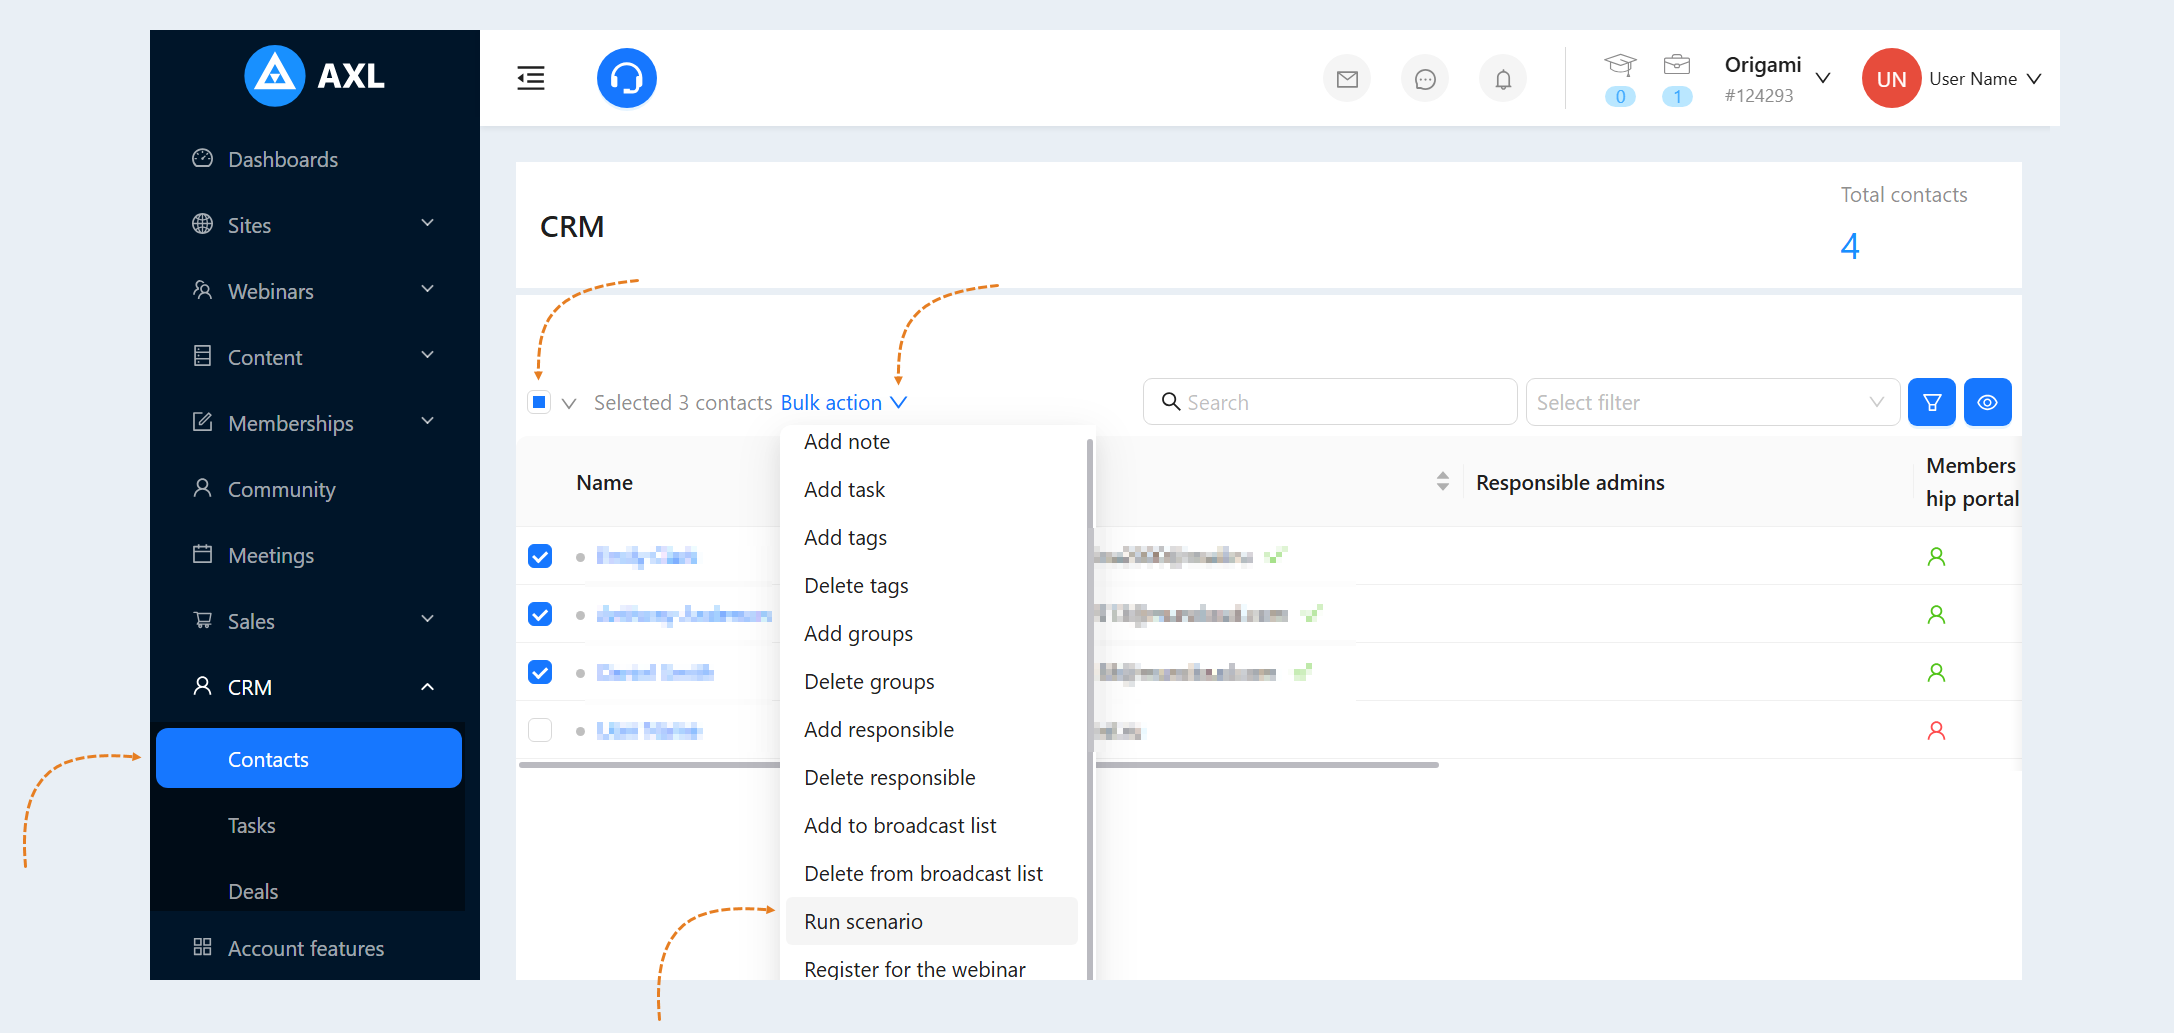
Using filtering and search conditions, you can highlight the needed contacts and perform bulk actions with them. For more information on how to use filtering, refer to the article "Filtering and search terms".
Select the contacts and click the "Bulk Action" button, then choose "Run Scenario". This action will run the selected scenario for all chosen contacts.
Scenario types
You can also create and configure a scenario in the appropriate section of the AXL platform. There are several types of scenarios available.
1
Site scenario
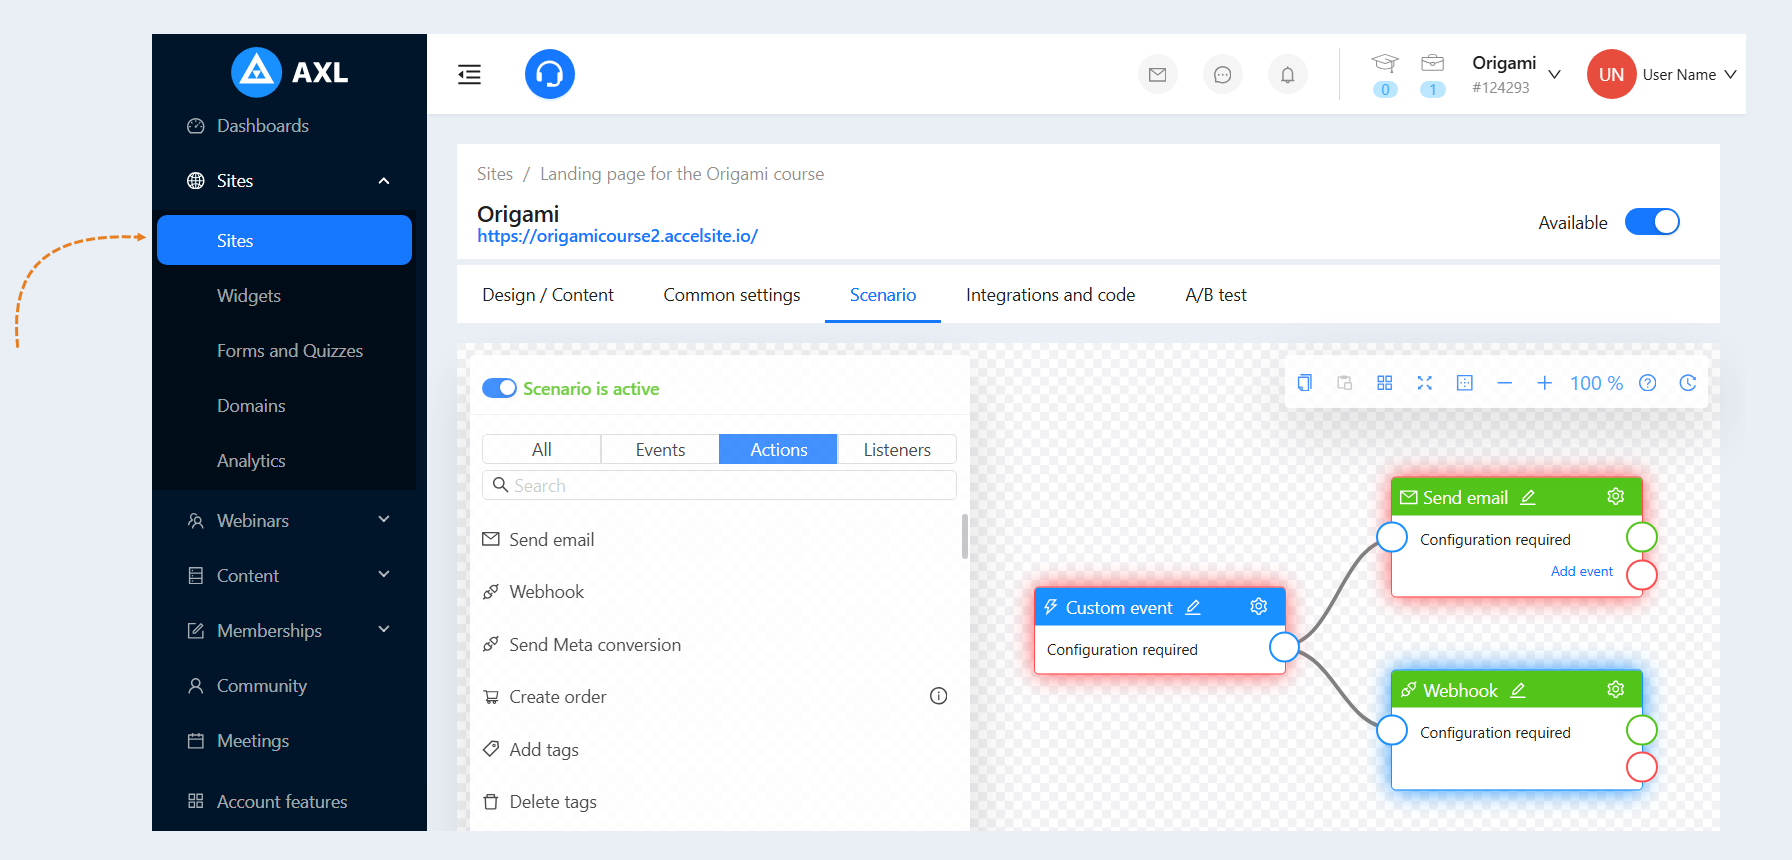
The site scenario is located in the "Sites" section.
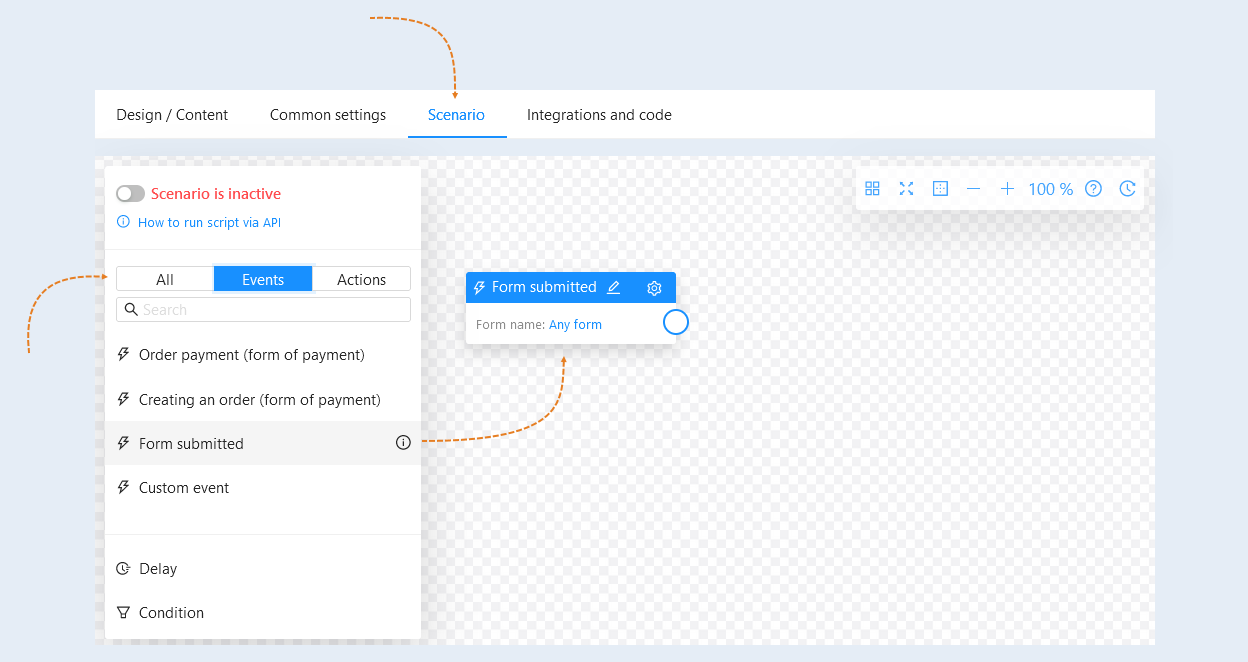
A site script defines the sequence of events and actions between you and your potential customer - a site visitor. To run this scenario, switch the "Scenario inactive" slider to "Scenario is active". For more information on how to create a site scenario, see the "Site Scenario" article.
2
Widget Scenario
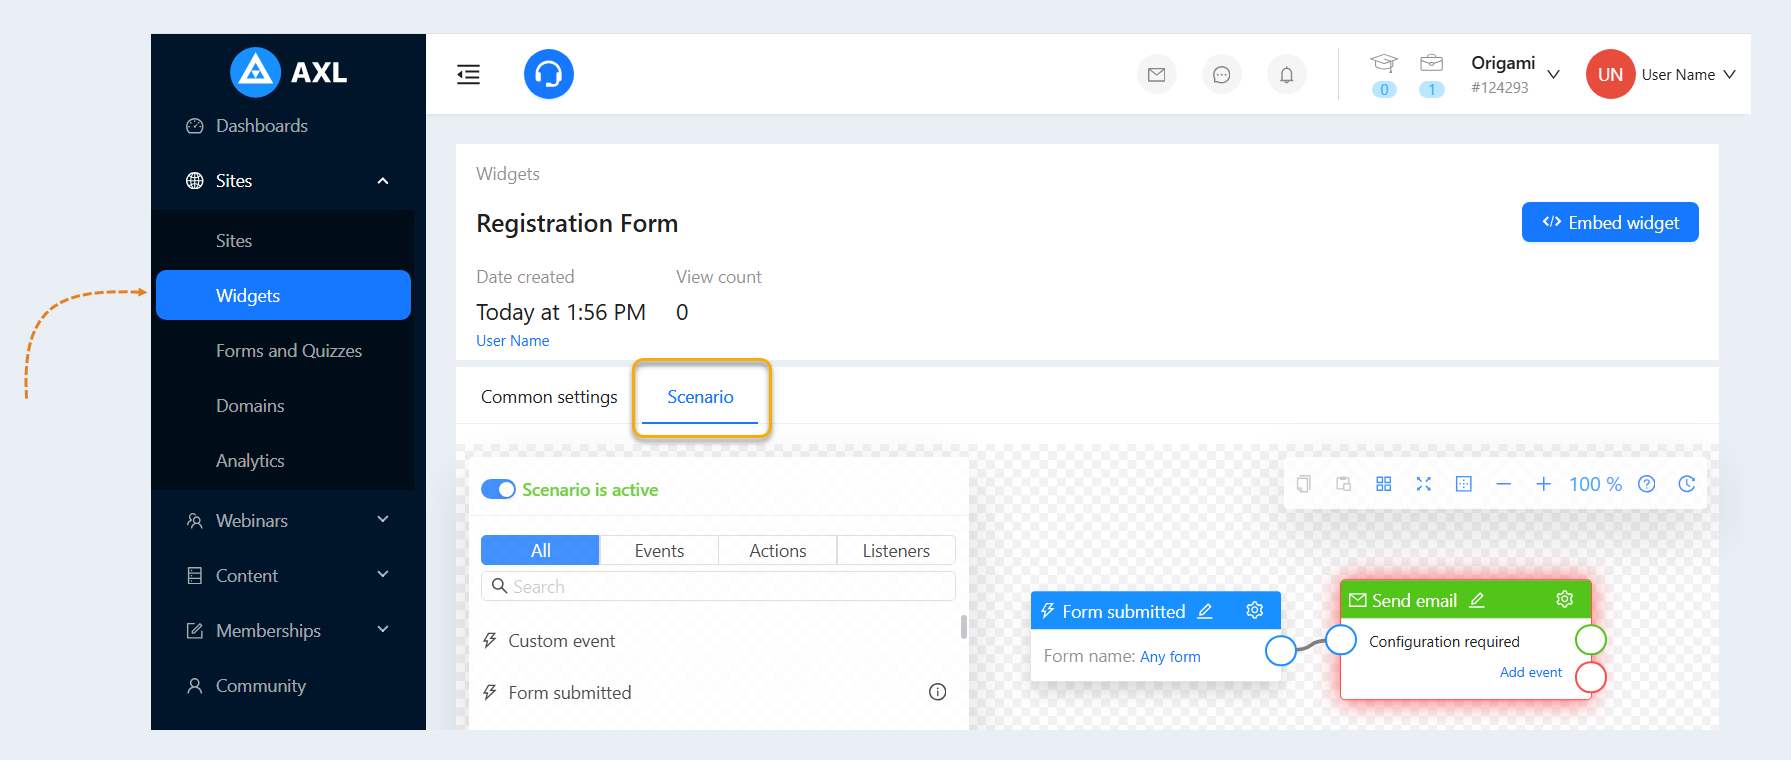
The widget scenario is located in the "websites" section, under the "widgets" tab.
The widget scenario determines the sequence of events and actions between you and your potential customer - the website visitor. For more information on how to create a widget scenario, read the "Site scenario" article.
3
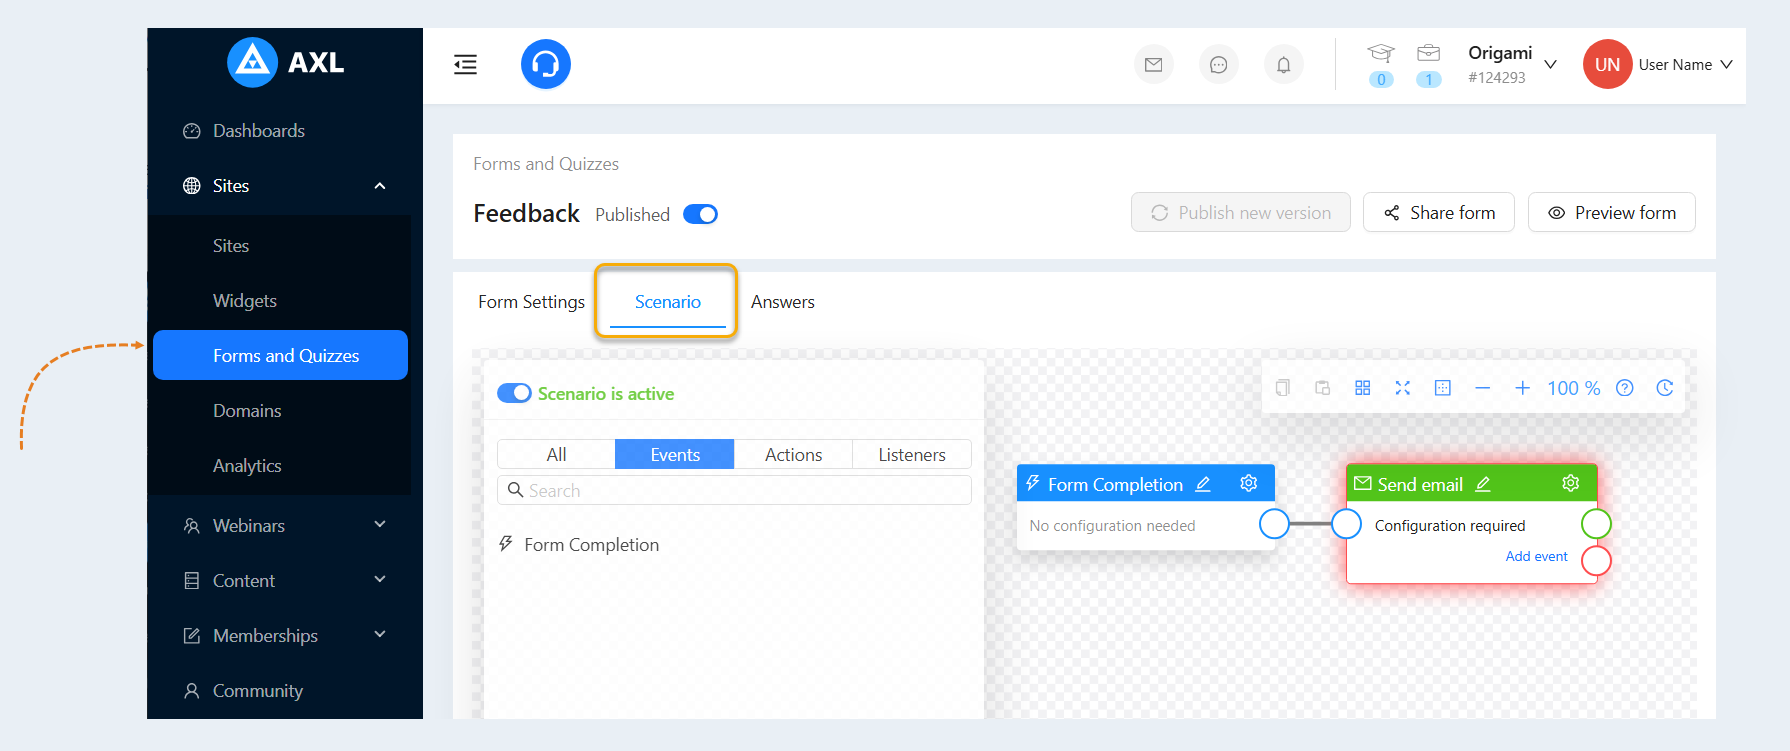
Form and Quiz Scenario
The form scenario is located in the "websites" section, under the "forms and quizzes" tab.
The form scenario determines the sequence of events and actions between you and your potential customer - the website visitor. For more information on how to create a form scenario, read the "Site scenario" article.
4
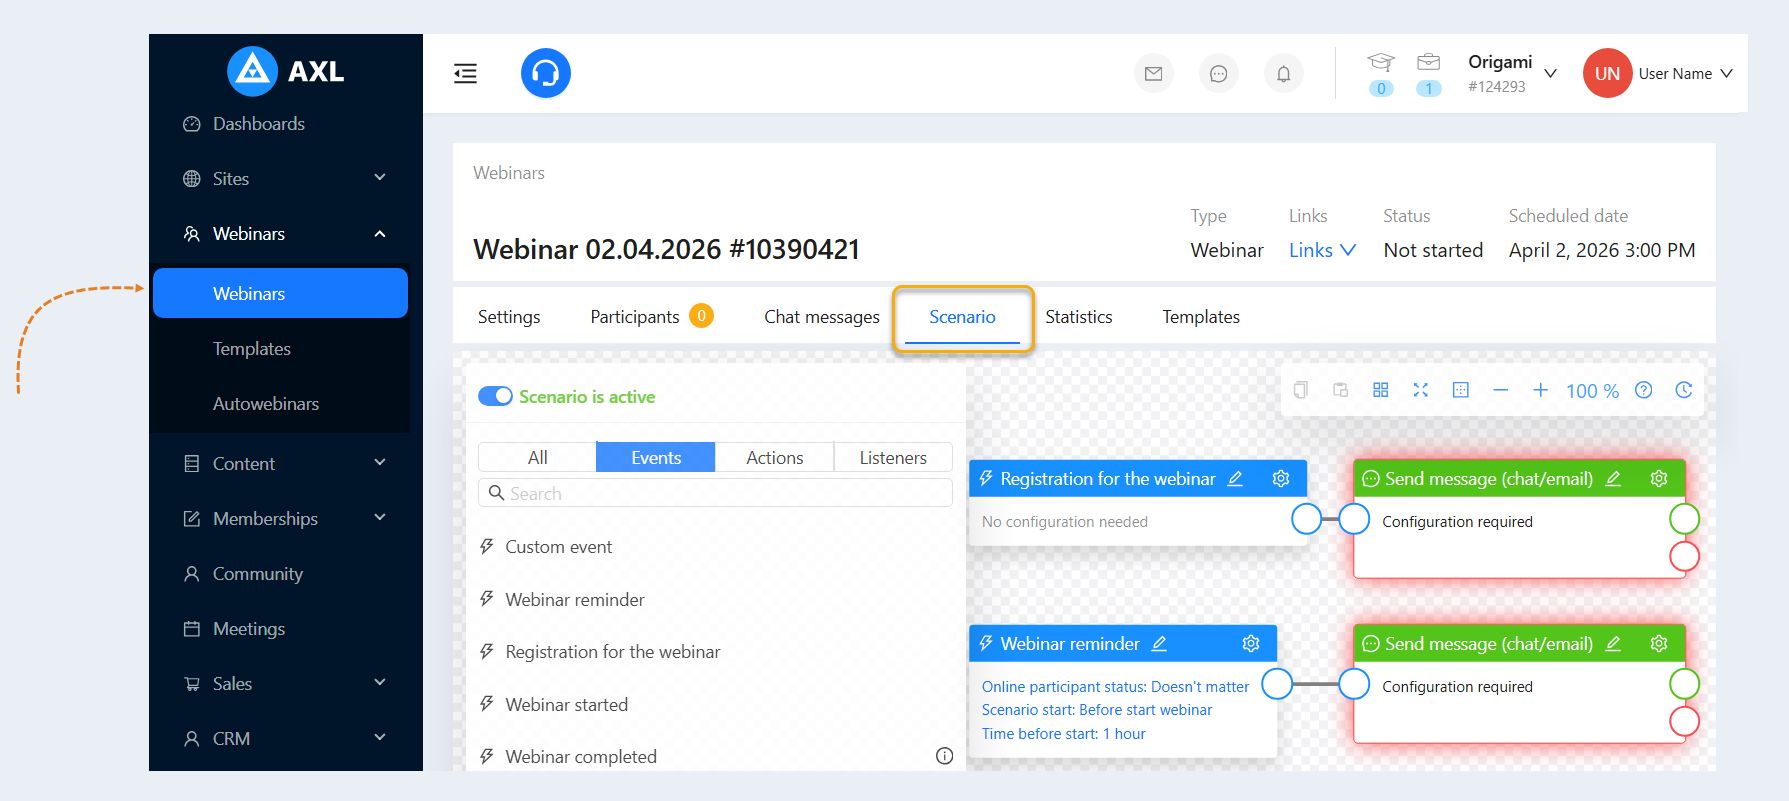
Webinar scenario
The webinar script is located in the "Webinars" tab.
A webinar scenario is a sequence of events and actions that is triggered after a user has registered for a webinar at your account on the AXL platform. The script reacts to the user's manipulations on the site, namely, the user's registration for the webinar and then performs response actions - sends emails with reminders about the webinar and a link to the webinar room. Read more about how to create a website script in the article "Webinar Scenario".
5
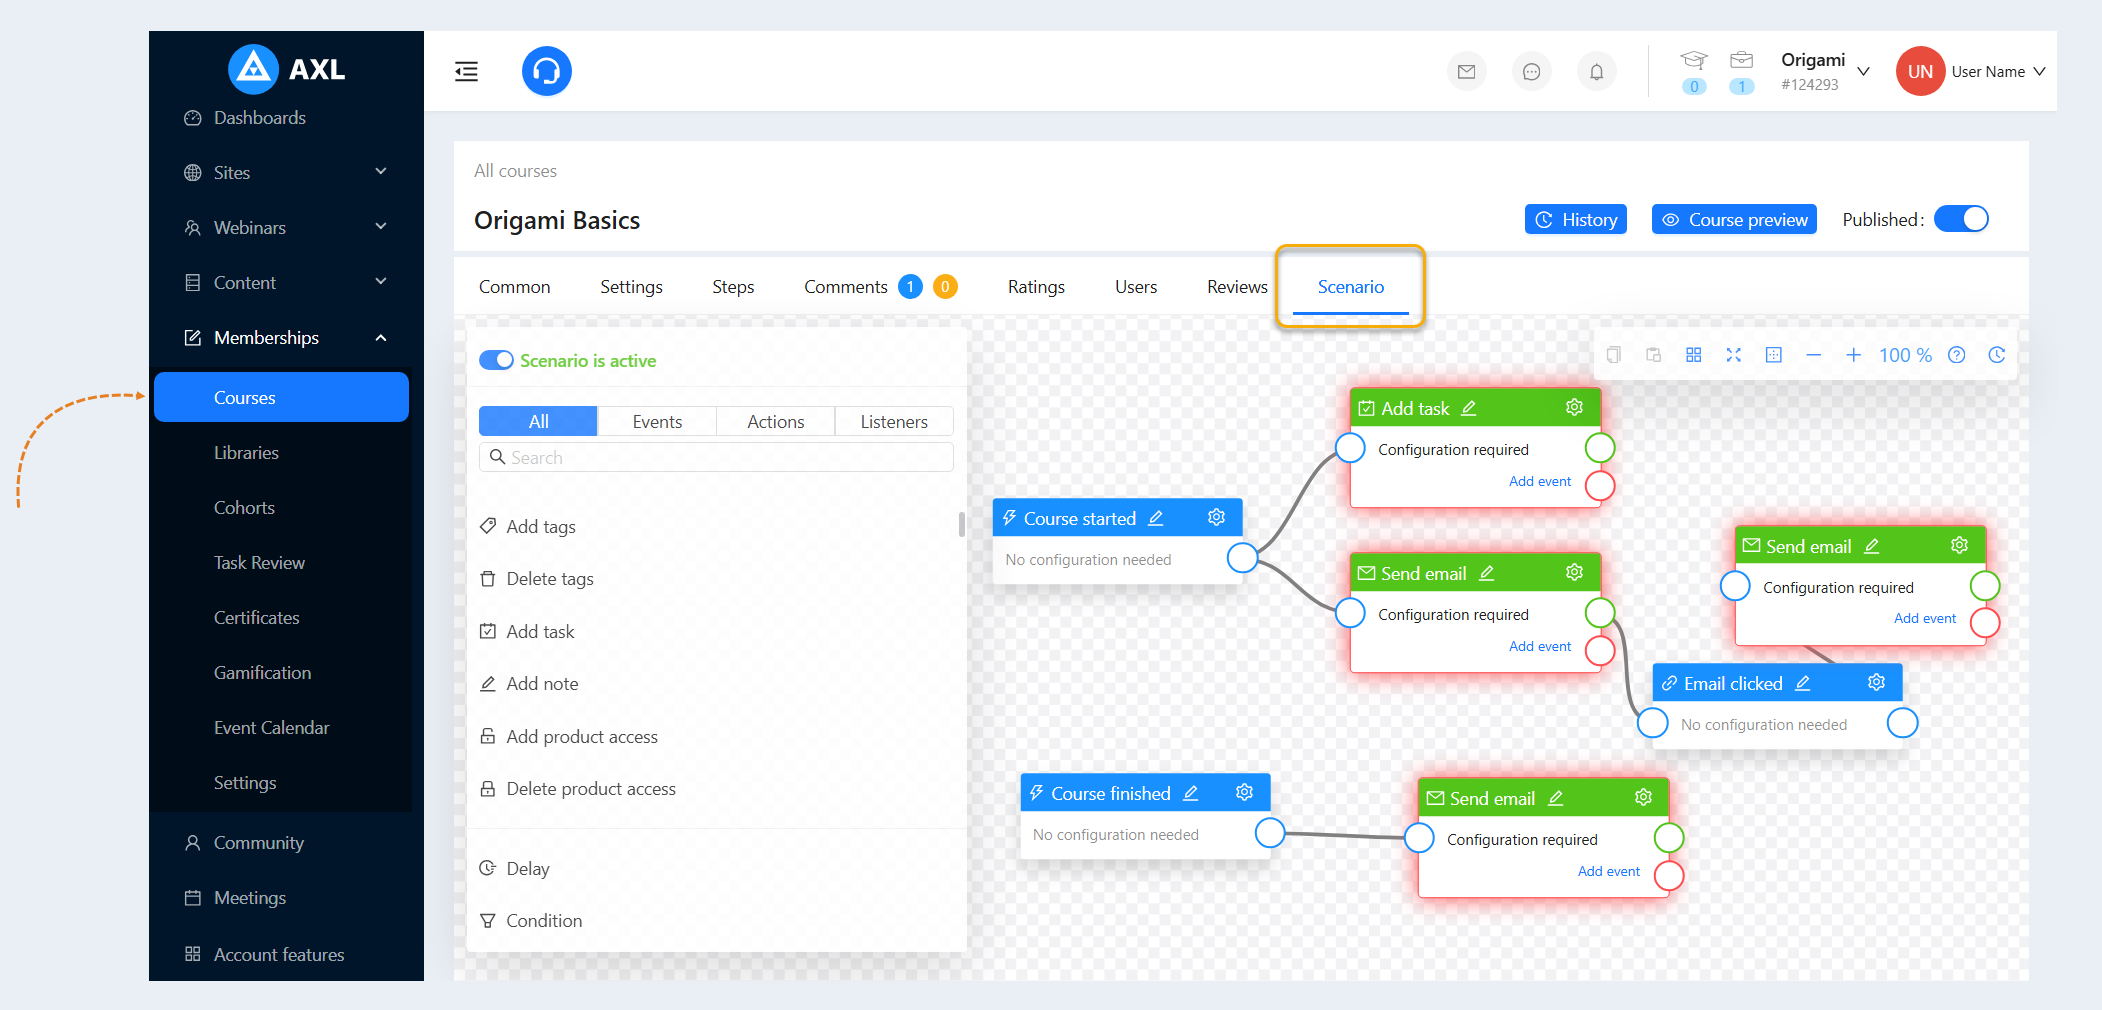
Course scenario
The course script is located in the "Courses" tab, "Courses and training" section.
The course script defines the sequence of events and actions at the moment when a user of your membership portal starts studying in any course, during the course of study and after the completion of the course. To run this script, switch the "Scenario inactive" slider to "Scenario is active". For more information on how to create a course script, see the "Course Scenario" article.
6
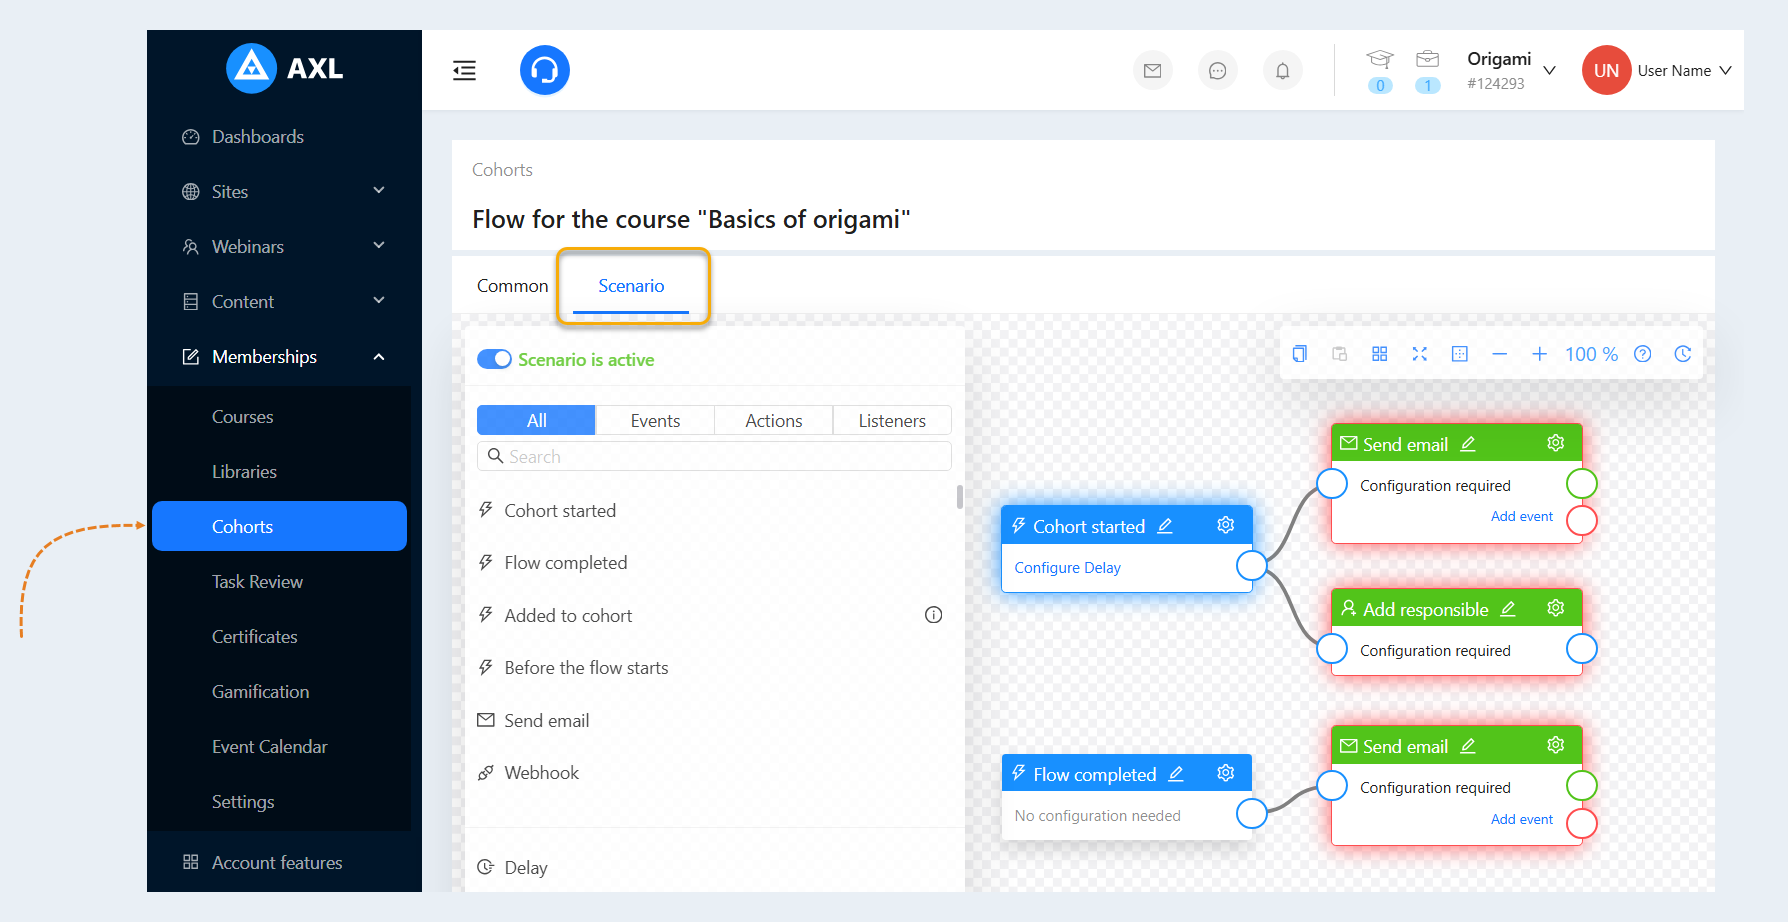
Flow scenario
The flow scenario is located in the "Flows" tab, "Courses and training" section.
A thread script defines the sequence of events and actions within a thread. To run this scenario, switch the "Scenario inactive" slider to "Scenario is active". For more information on how to create a stream scenario, see the article "Flow".
7
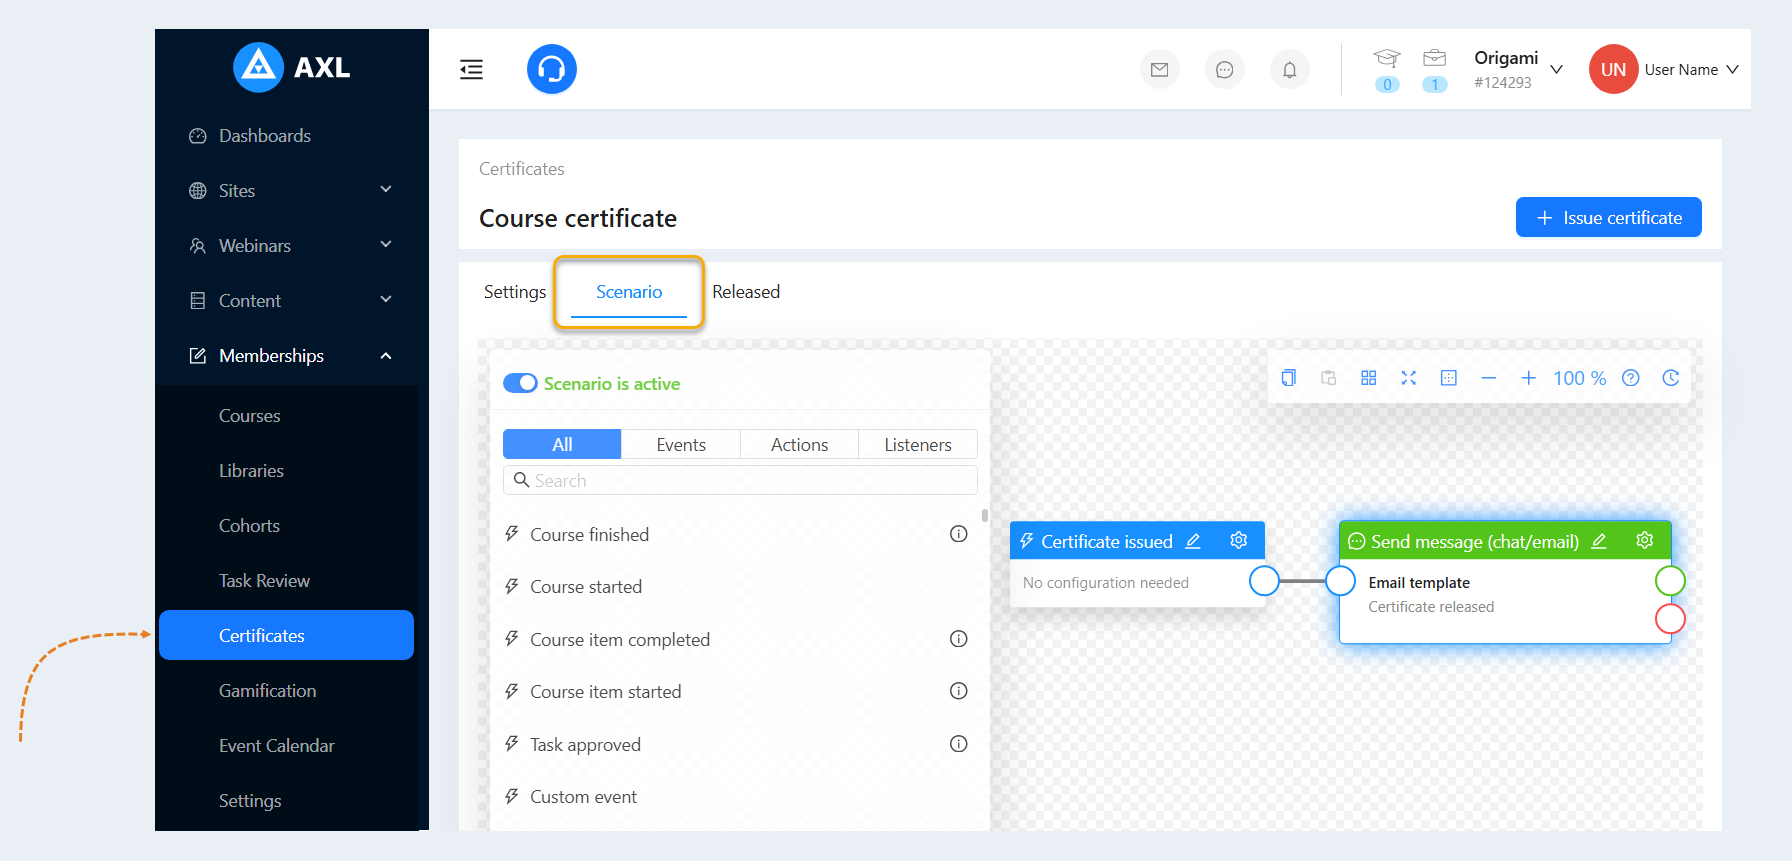
Certificate scenario
A certificate is an official document issued to participants who have successfully completed a specific training event. It confirms that the participant has gained certain knowledge, skills, or competencies in a given field. For more information on how to configure a certificate template, read the article "Certificate".
A certificate scenario is a specific sequence of steps and actions that automates the process of issuing certificates to participants of online courses or training programs. The scenario allows for automatic issuance of certificates after participants successfully complete specific courses or programs. This frees the organizers from manual creation, signing, and sending of certificates, saving their time and resources. Automatic certificate generation eliminates the possibility of human errors that could occur during manual data processing. For more information on how to create a partner program scenario, read the article "Certificate Scenario".
8
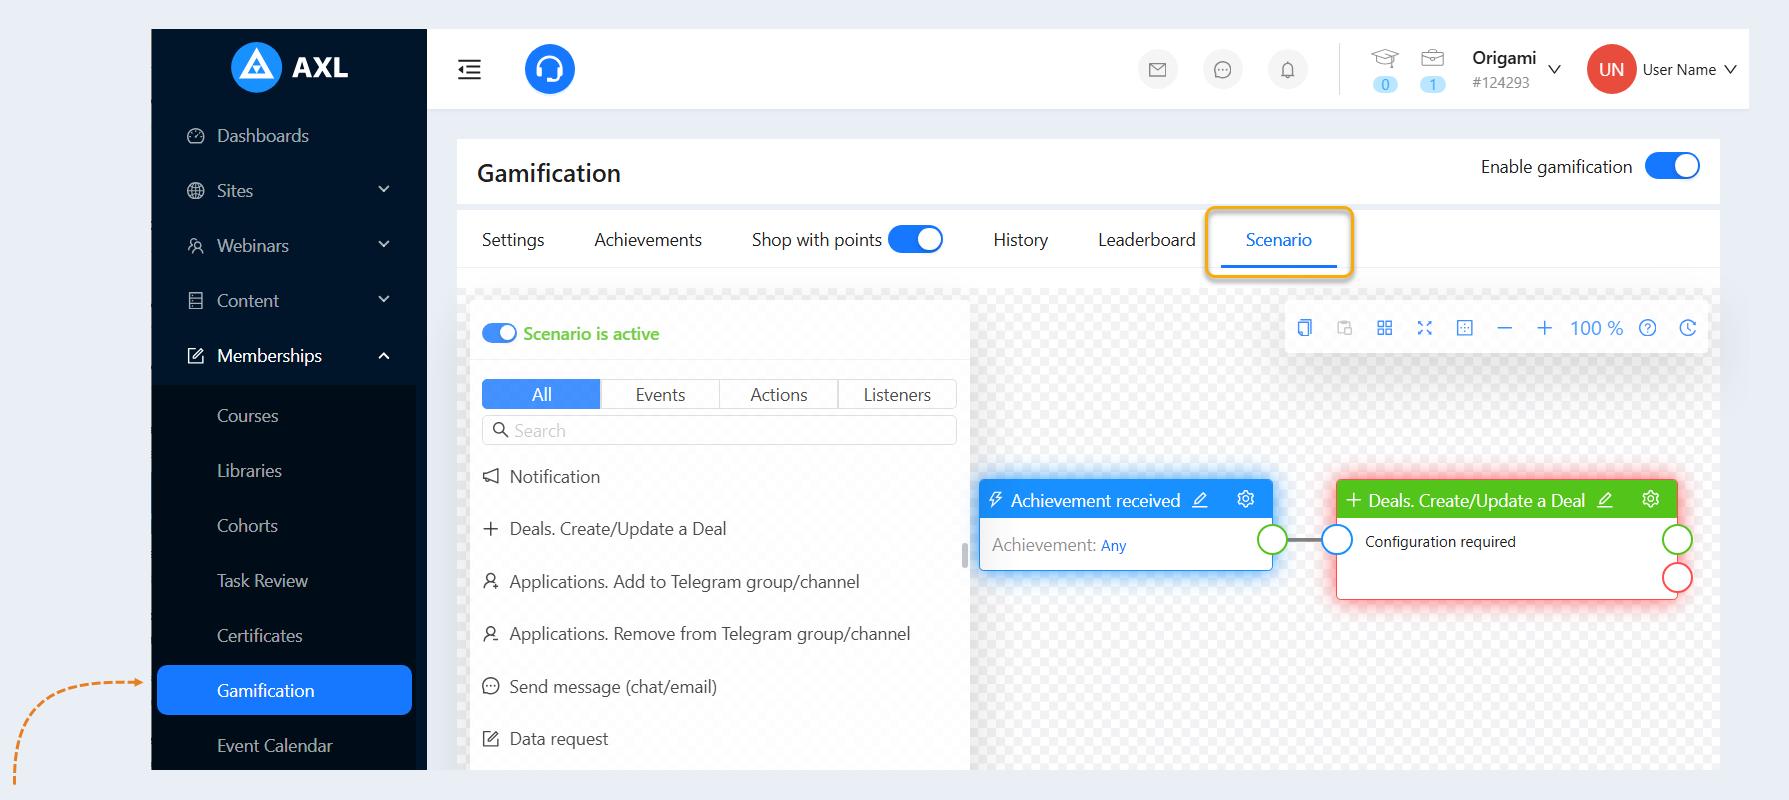
Scenario for the "Gamification" section
The scenario is located in the "Courses and Training" section, under the "Gamification" tab, in the "Scenario" tab.
The "Gamification" section is a tool that utilizes game elements to enhance users' educational experience. It includes various gaming mechanics, rewards, and achievements designed to motivate users and make learning more interesting and engaging. For more information on how to set up this section, please refer to the article "Gamification."
The scenario for the "Gamification" section is a specific sequence of steps and actions that automate the process of earning achievements for successful task completion and points allocation to users' achievement accounts. The scenario allows for automatic addition of achievements after successfully completing tasks or completing specific courses or programs. This frees organizers from manual processes and saves them time and resources.
9
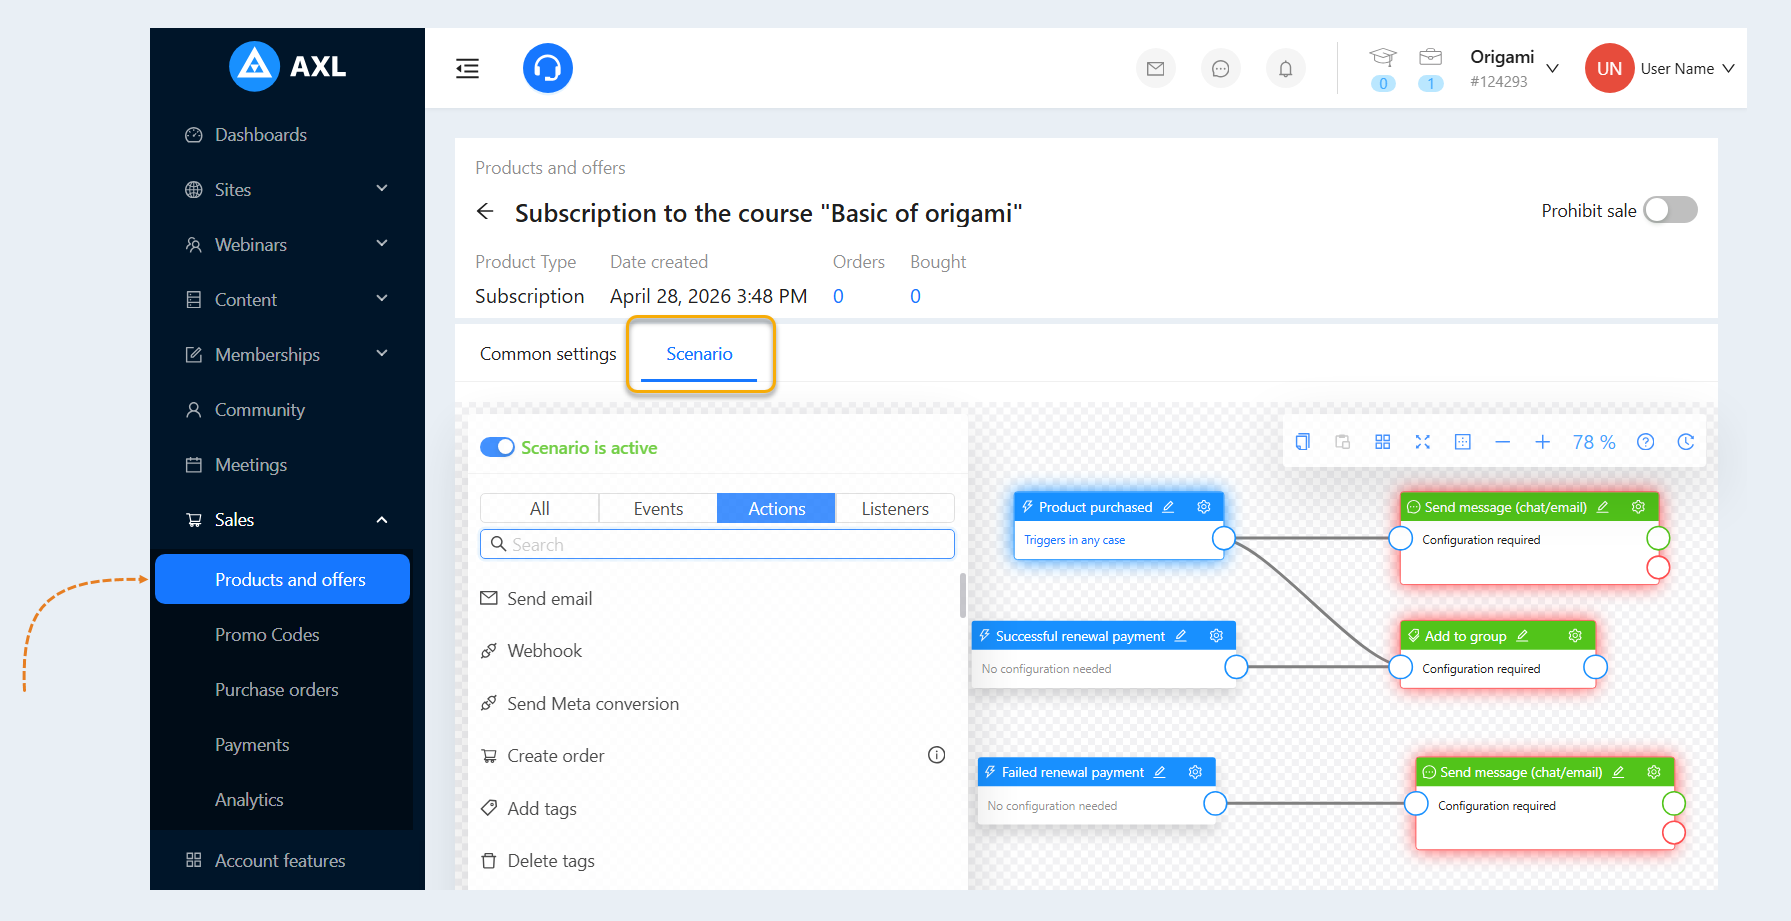
Product or Subscription scenario
The product or subscription scenario is located in the "Products and offers" tab, the "Sales" section.
The subscription scenario determines the sequence of events and actions at the moment when a user of your account bought a subscription, successfully or unsuccessfully paid for subscription renewal. You can also manage some third-party service by sending data during renewal - for example, exclude it from the group in a telegram or add it. Read more about how to create a subscription script in the article "Subscription".
10
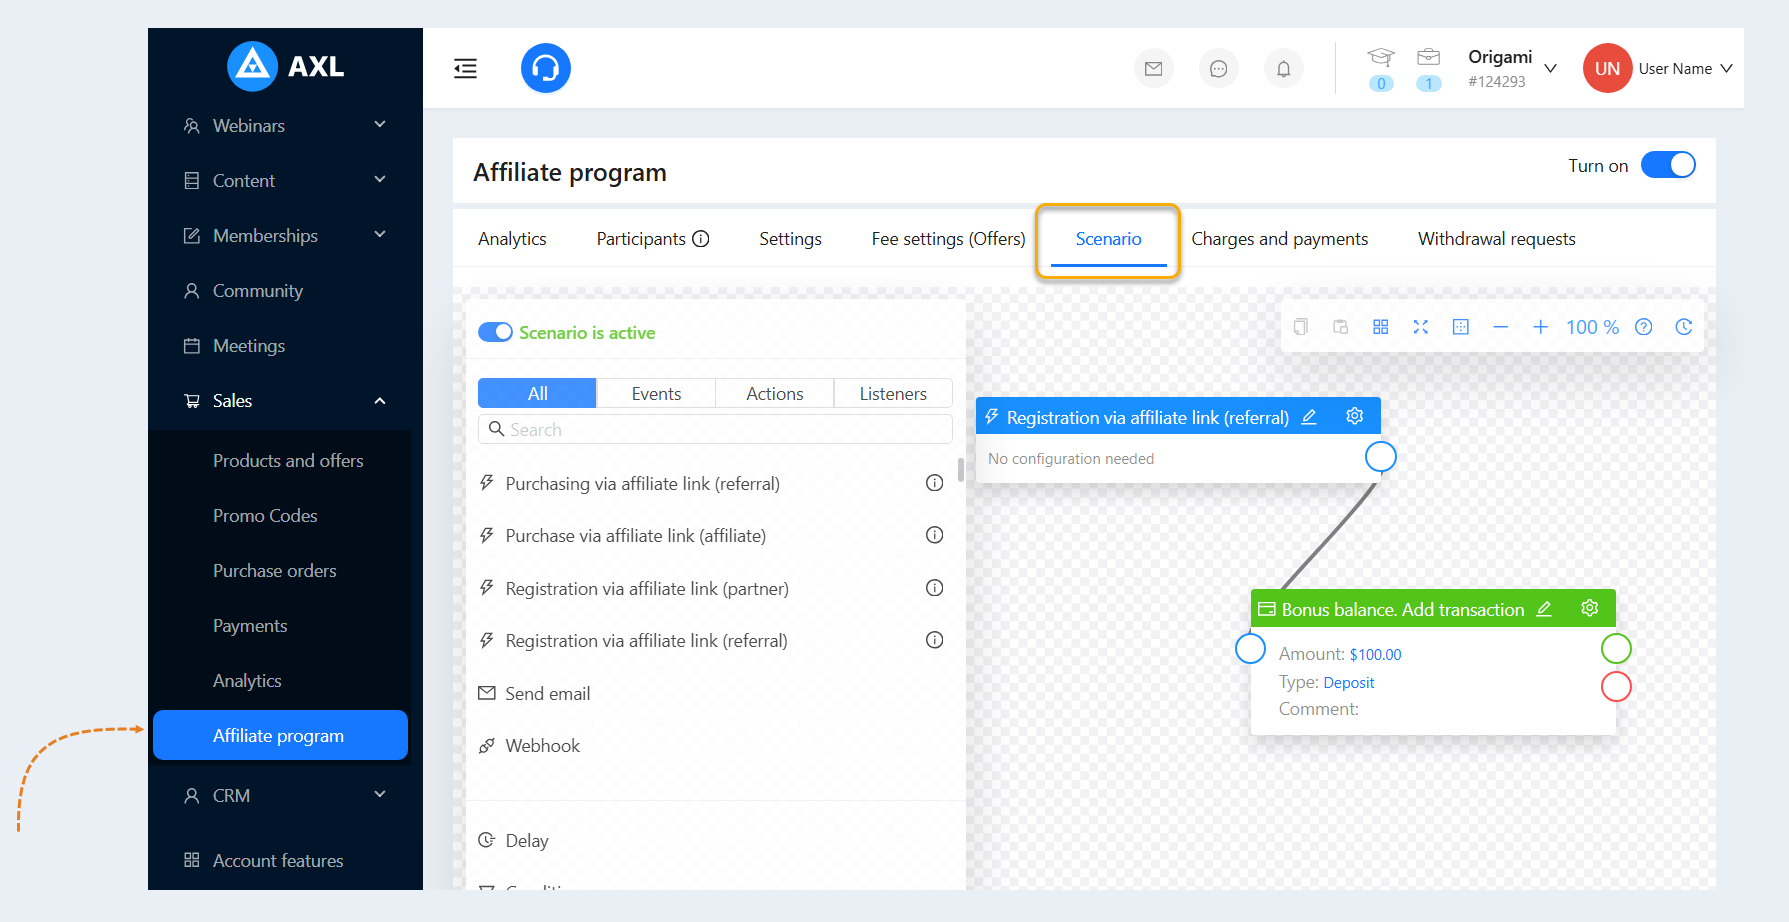
Affiliate program scenario
The script of the affiliate program is located in the "Sales" section, the "Affiliate Program" tab, the "Scenario" tab.
An affiliate program is a form of cooperation between a seller and partners when selling a product or providing services on the AXL platform. The purpose of the affiliate program is to attract new customers and increase sales. Read more about how to set up an affiliate program in the article "Affiliate Program".
The affiliate program scenario is a sequence of events and actions. The scenario reacts to manipulations within the partner program and performs retaliatory actions. In the "Scenario" section, you can automate processes and set up a sequence of events and actions for the affiliate program. For more information on how to create an affiliate program scenario read the article "Affiliate Program Scenario".
11
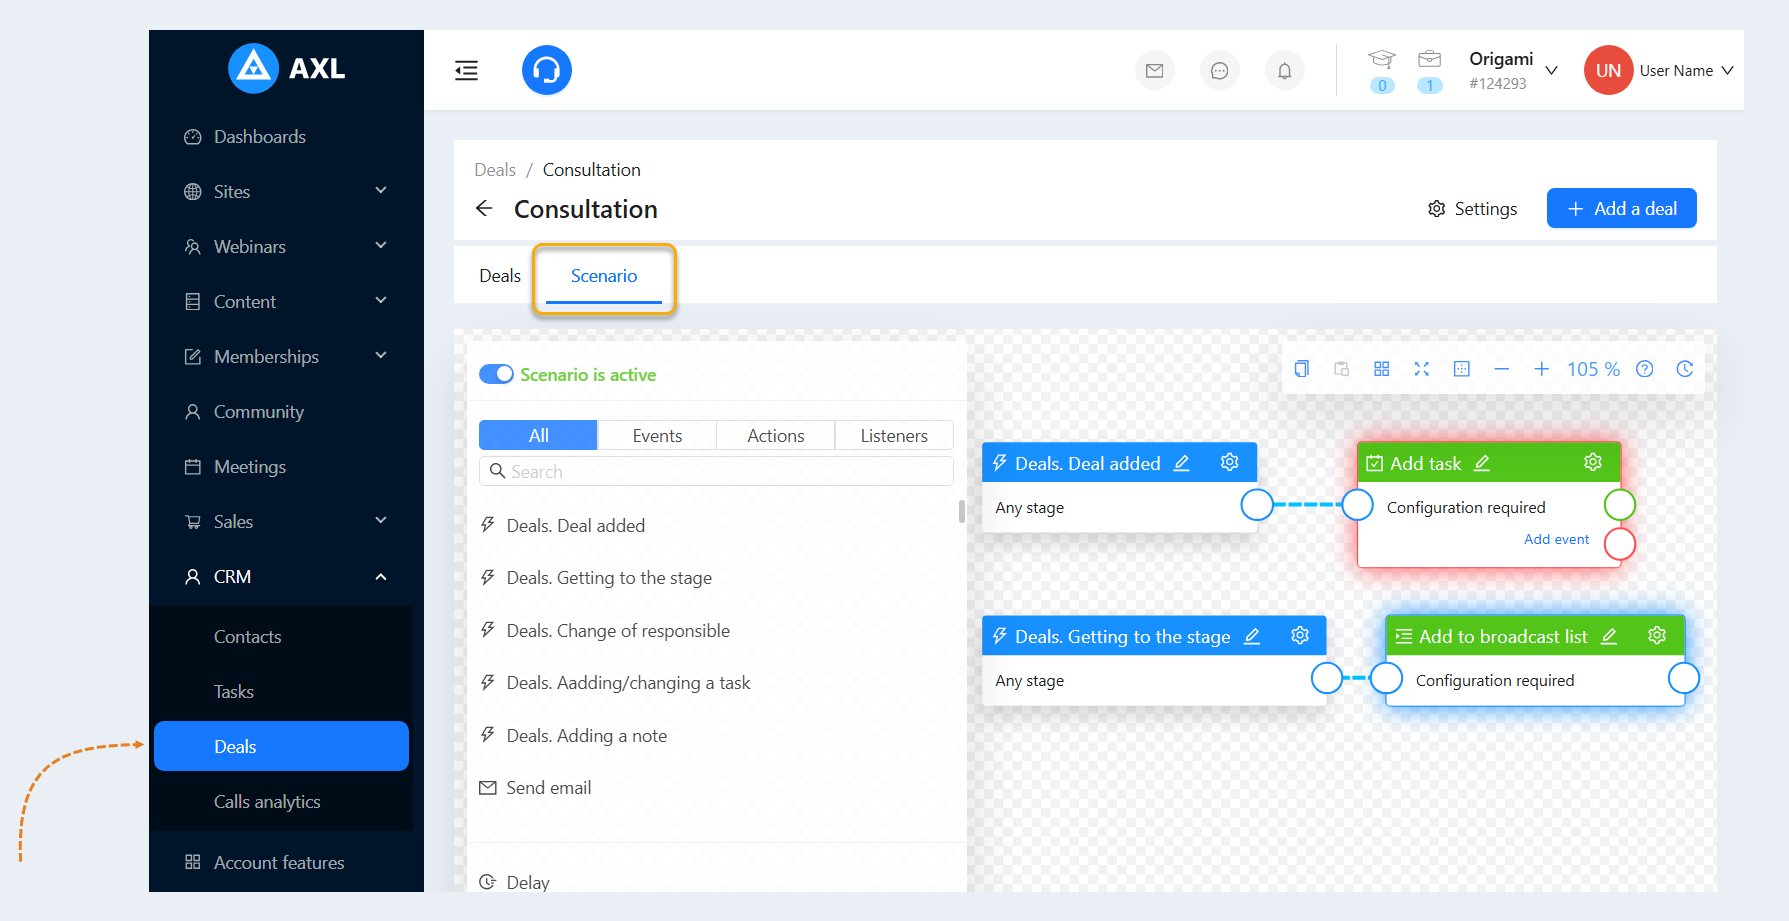
Deal scenario
The deal scenario is located in the "CRM" tab, the "Deals" section.
A funnel scenario is a sequence of events and actions. The scenario reacts to manipulations with deals inside the funnel and performs retaliatory actions. The scenario allows you to automate funnel processes. Read more about how to create a deal scenario in the article "Deal Scenario".
12
Chatbot scenario
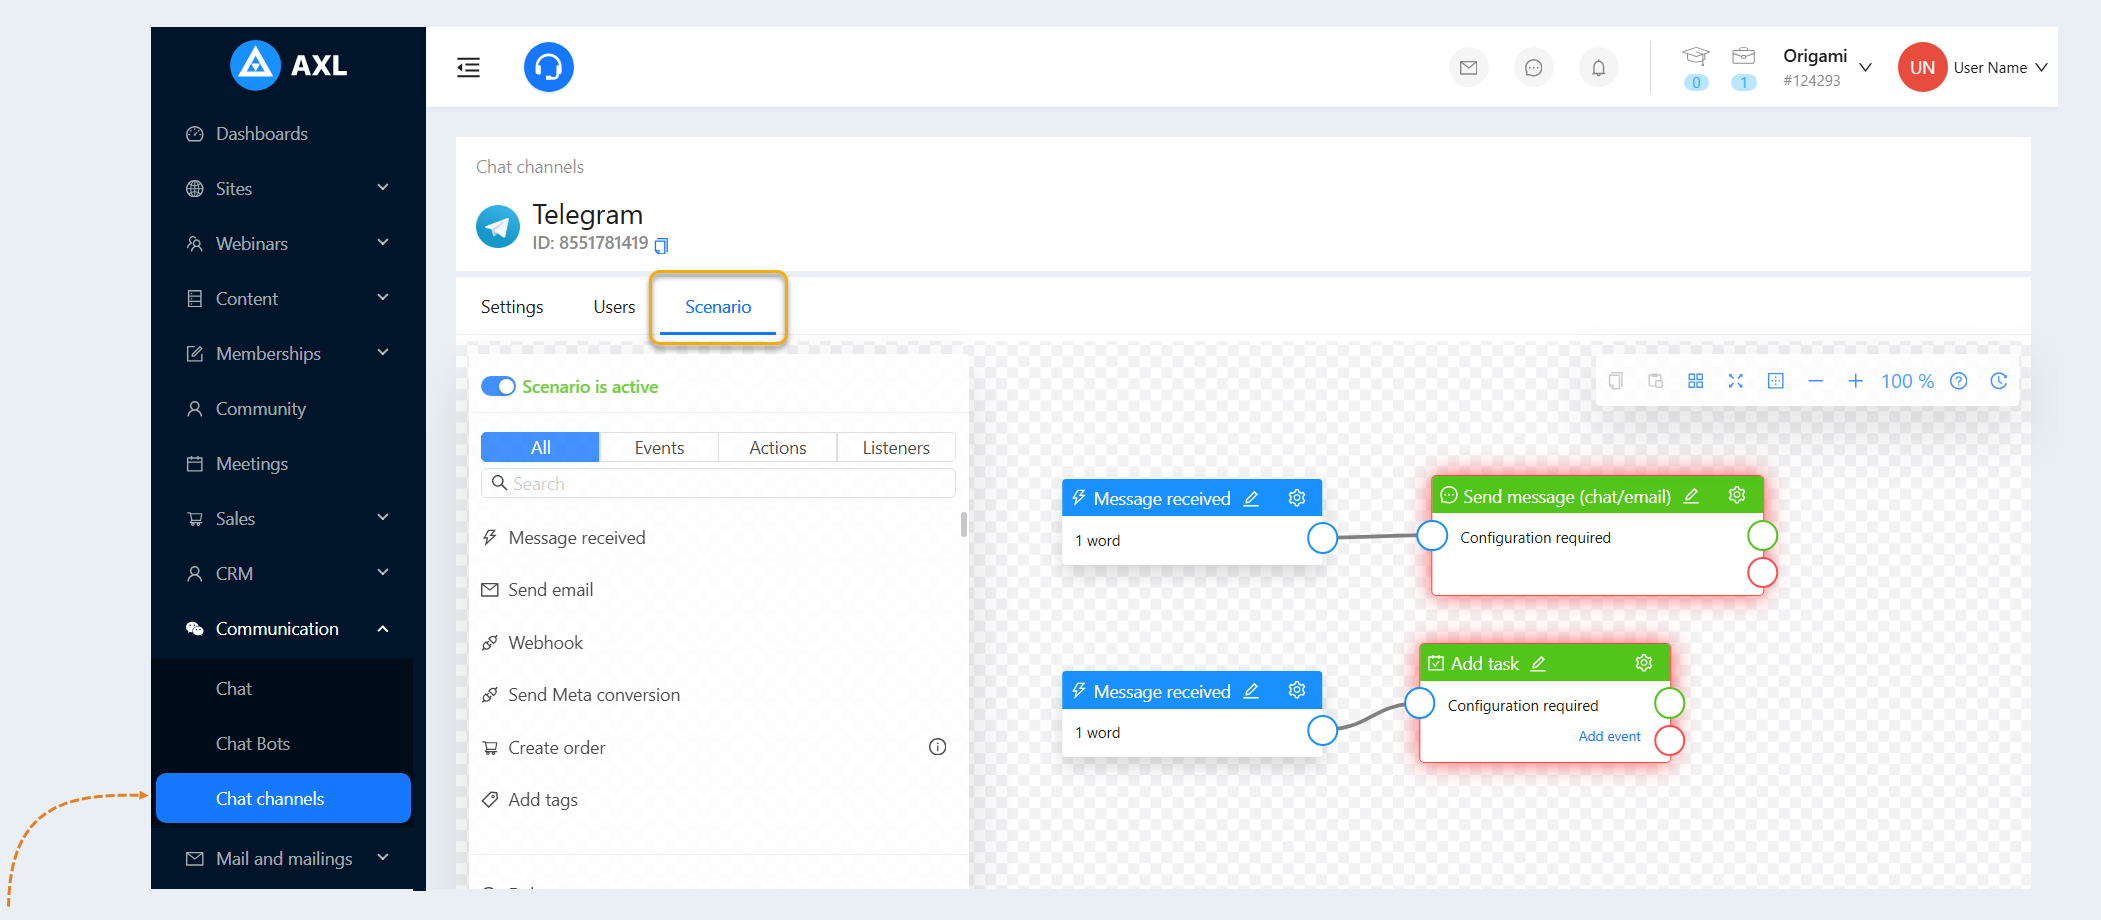
The scenario is located in the "Chat Channels" tab, the "Communication" section.
The scenario of the chat channel is a sequence of events and actions inside the chat channel of your account on the AXL platform. The scenario reacts to the user's manipulations inside the chat channel and performs retaliatory actions. For more information on how to create a chat channel scenario, see the article "Chat Channel scenario".
13
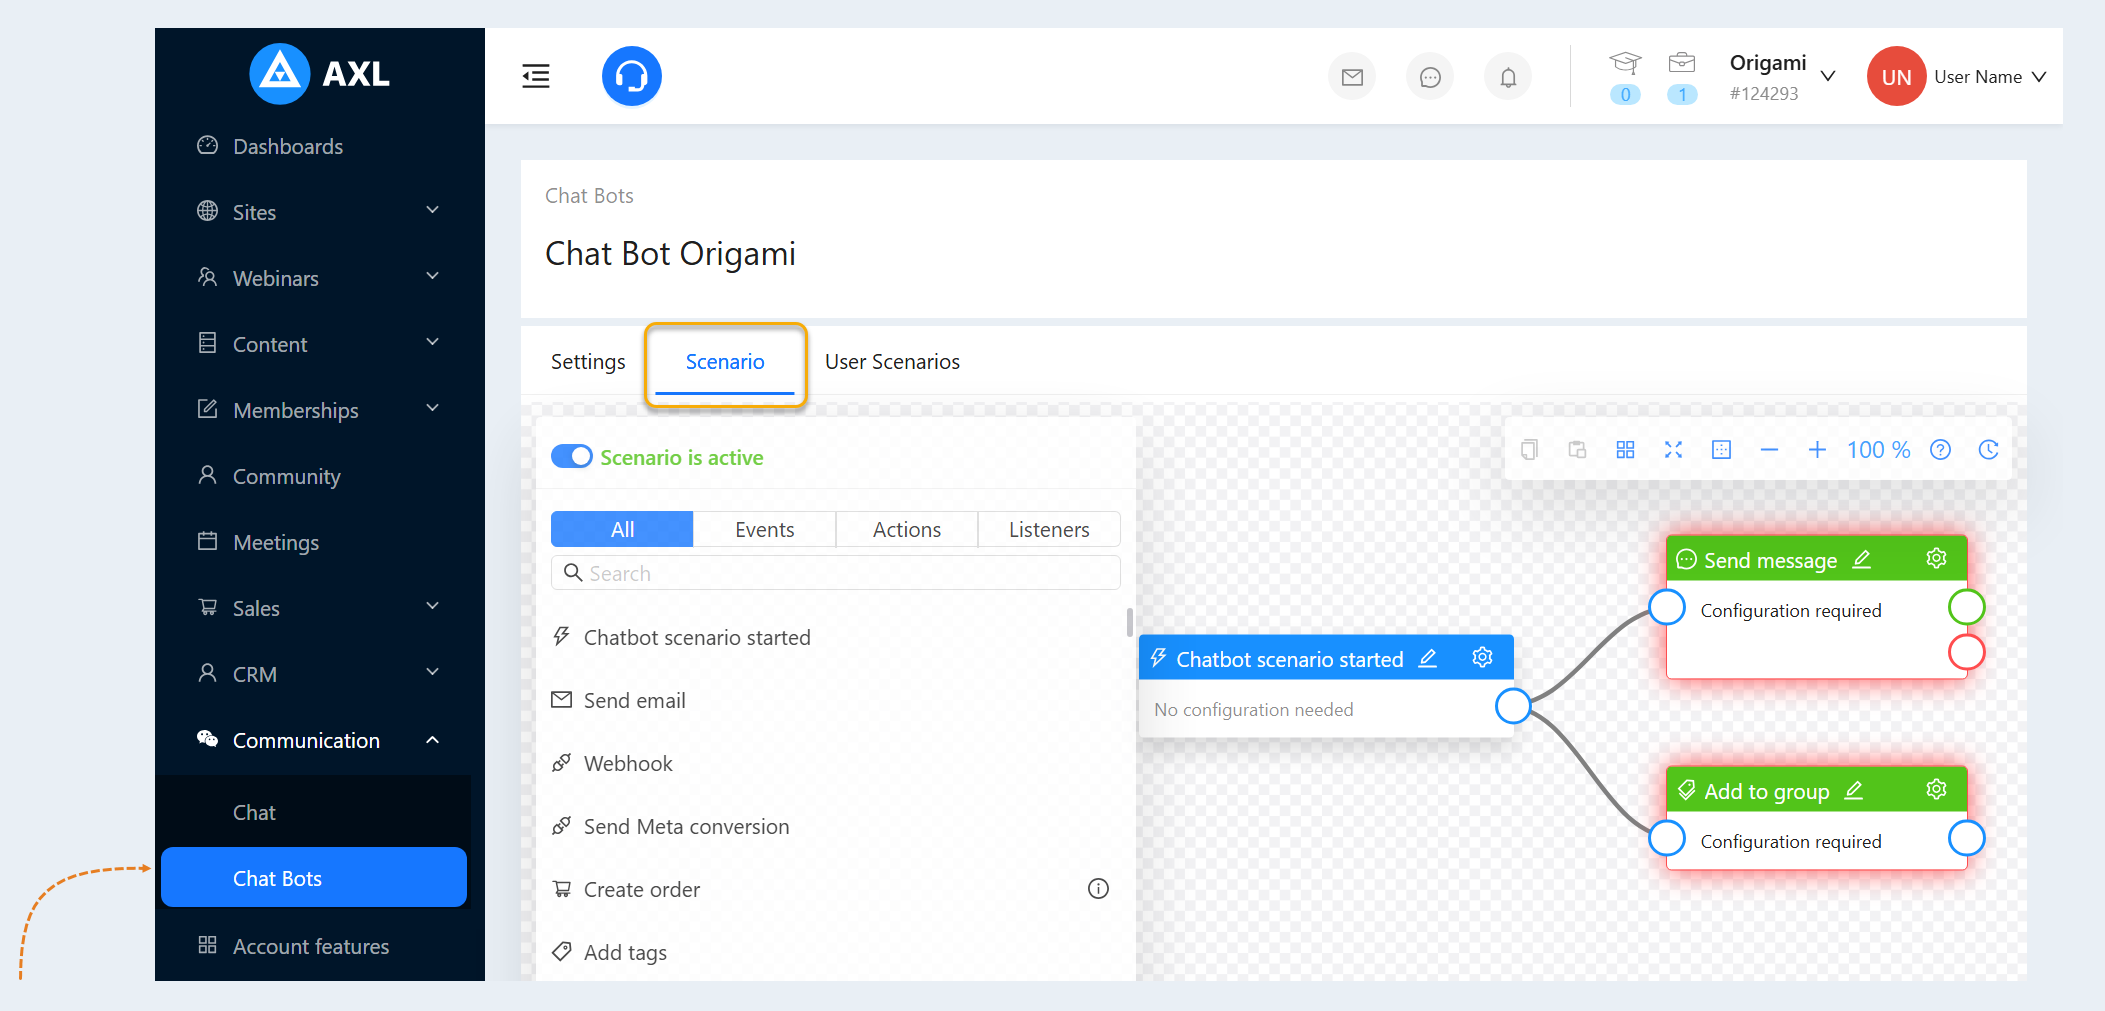
The chatbot script is located in the "Chatbots" tab, section "Communication".
A chatbot script is a sequence of events and actions inside your account's chatbot on the AXL platform. The script reacts to the user's manipulations inside the chatbot and performs retaliatory actions. Read more about how to create a website script in the article "Chatbot Scenario".
14
Scenario of the "Telegram groups/channels" Application
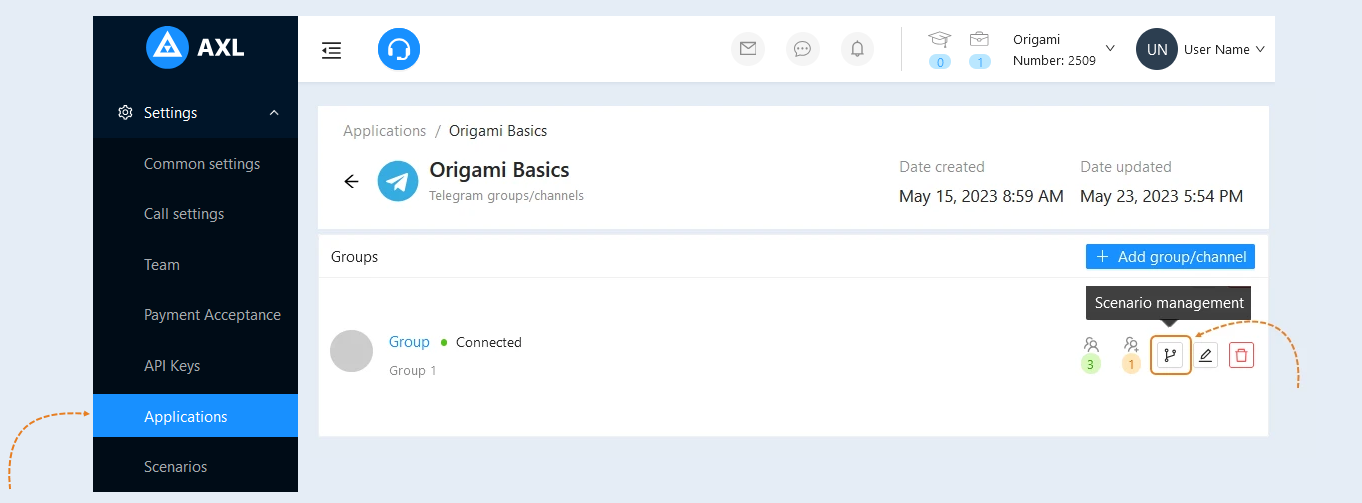
The scenario of the "Telegram groups/channels" Application is located under the "Applications" tab, in the "Settings" section. To open the scenario, click the "Manage" button in the "Telegram Groups/Channels" window. In the list of Telegram groups/channels, you will see a list of all connected groups and channels. Click the "Scenario Management" button next to the group/channel to open and configure the scenario.
The scenario is a predefined sequence of actions that are executed automatically in response to specific events, such as sending messages to a group or channel. These actions may include interacting with users, providing information, conducting surveys, sending notifications, delivering educational materials, and performing other tasks.
15
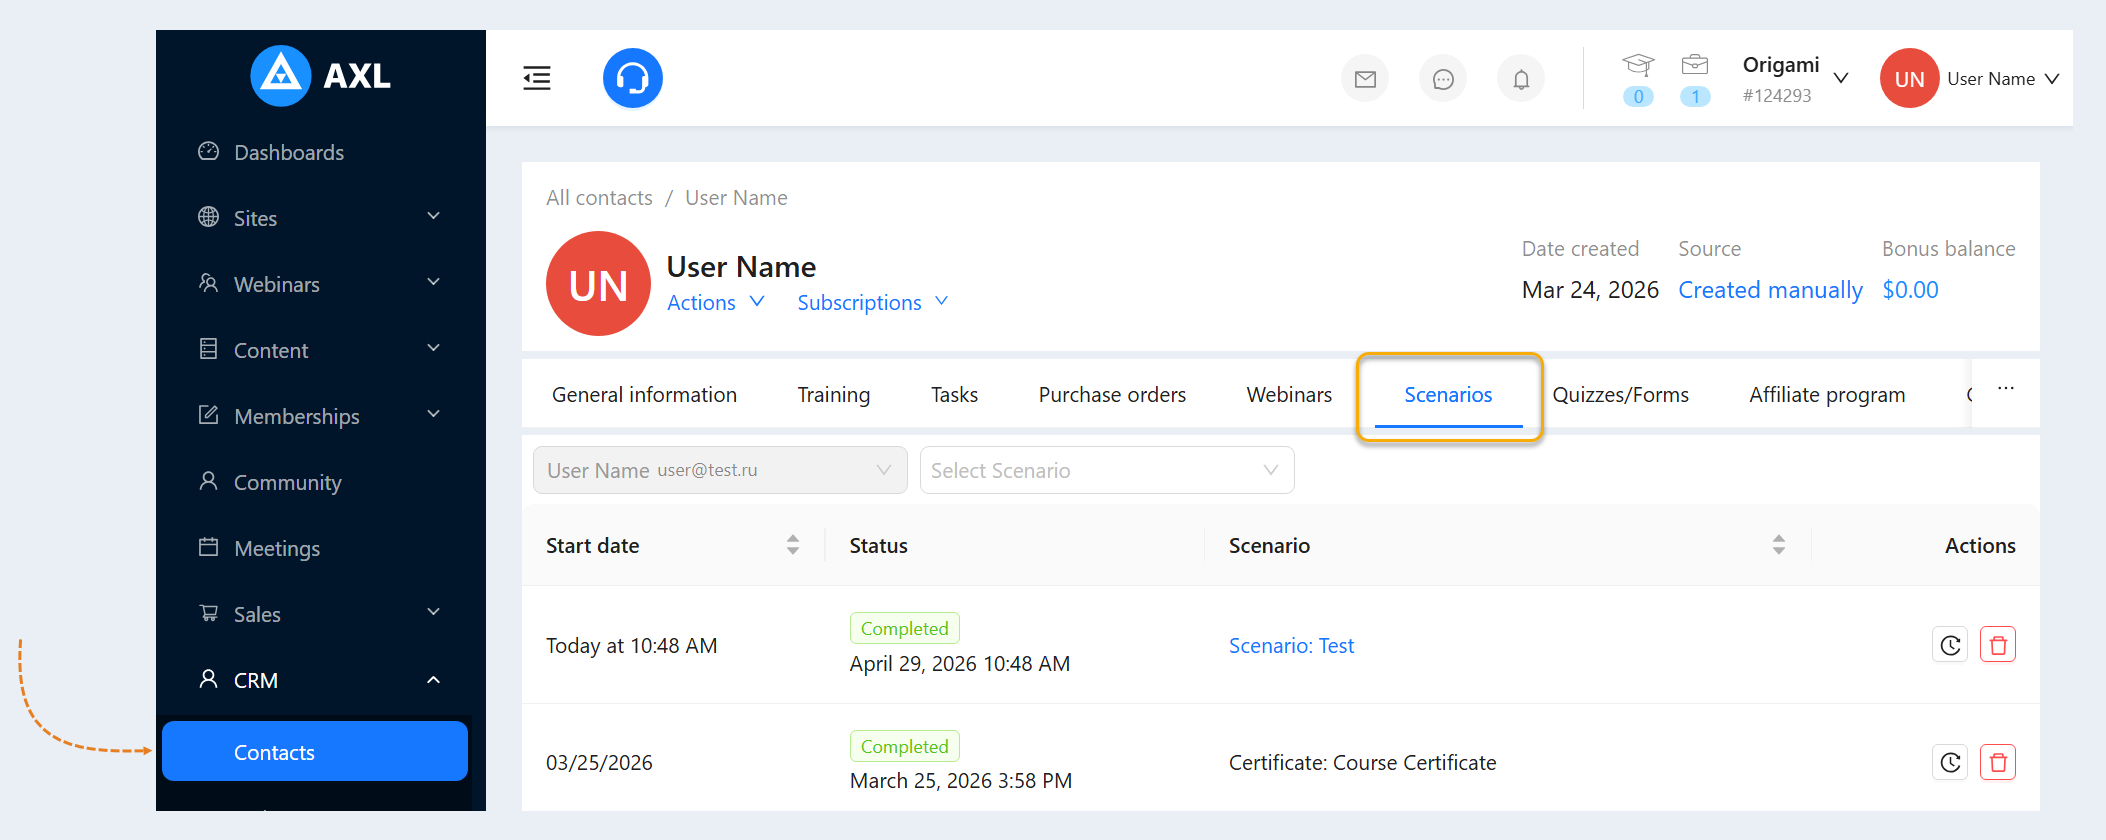
Contact Scenario
The contact scenario is located in the "CRM" tab, under the "Сontacts" section.
In the "Scenarios" tab, you will see a list of scenarios that have been initiated by the user. For more details, read the "Scenarios in the contact card" article.
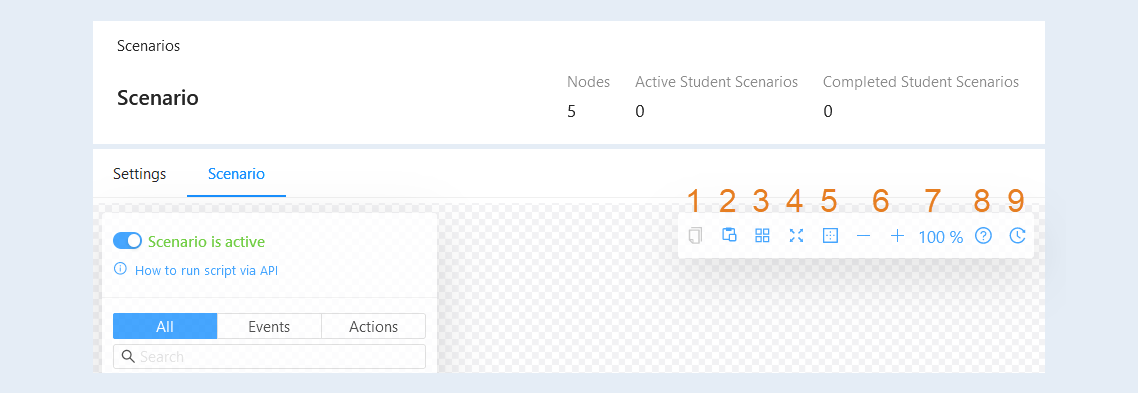
Toolbar
The toolbar is located in the upper right corner:
"Copy" button. This function allows you to copy one or more script steps. You can copy steps and bundles between scenarios within the same account. The button will become active after you select the necessary script steps.
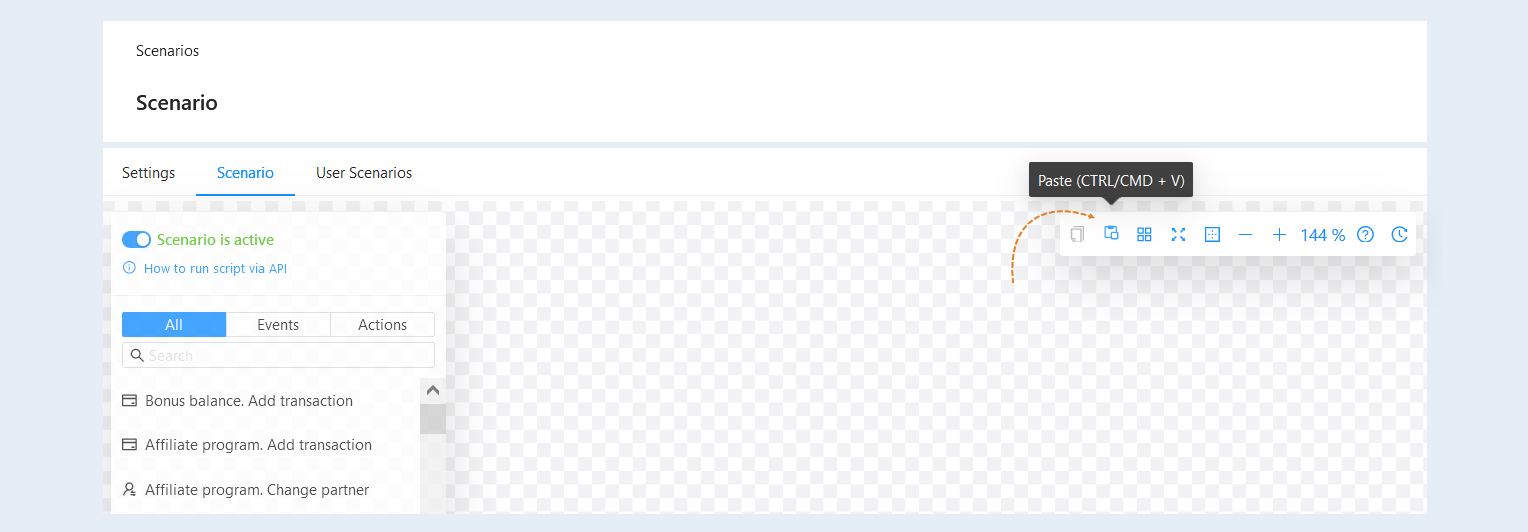
"Paste" button. Click the button to paste the previously copied steps into the script.
"Auto distribute" button. This function aligns the position of script elements in the field vertically and horizontally.
"Enable full screen" button. Click to expand the script field to full screen. Pressing it again collapses the field.
- "Zoom to fit" button. This function scales items to fit the window.
- "-" and "+" buttons. Click to change the scale of the script field - zoom in or out. This function is also performed by the mouse wheel.
- Scale indicator. This value shows the scale as a percentage.
- "Help" button. Help for users.
"History" button. Click to open the script history.
Scenario Events and Actions
An event is a specific user choice when interacting with your account. Each type of scenario has its own set of events. Read more about events in the article "Types of events in the scenario and their configurations".
An action is a sequence of steps in a scenario in response to an event. The set of actions in a scenario is the same for all types of scenarios. Read more about actions in the article "Types of actions in the scenario and their configurations".
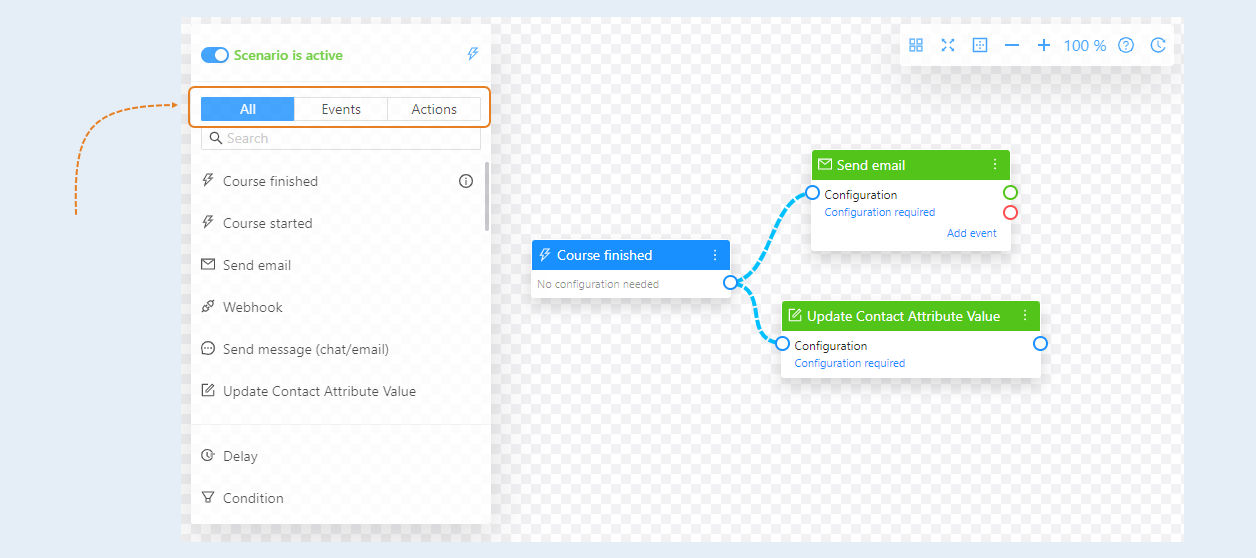
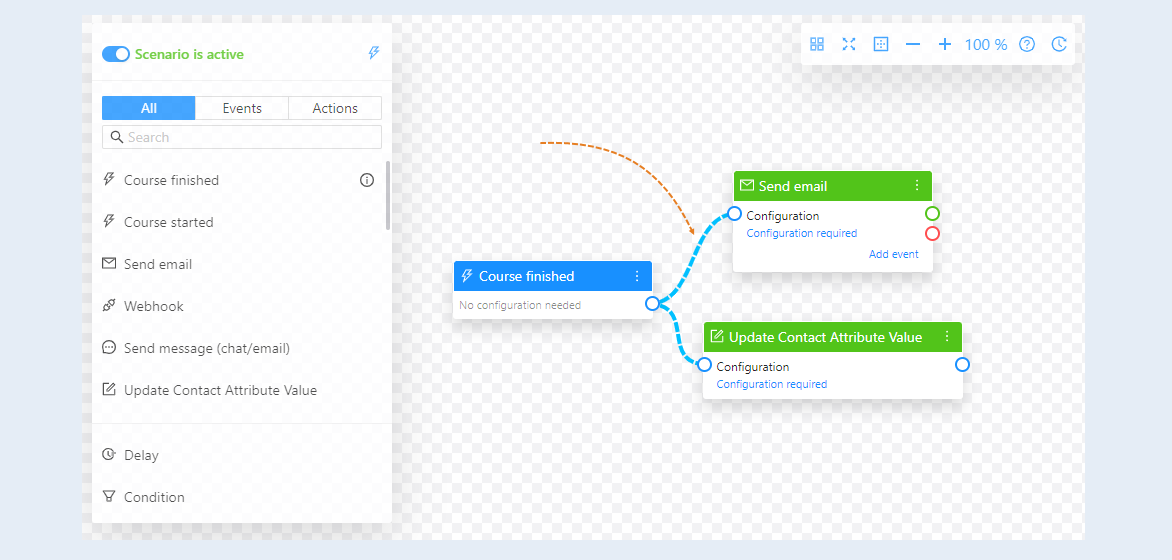
On the left is a toolbar with events and actions for the scenario. Select the event that will trigger the scenario and the action that will follow the event, drag them into the scenario field. An event (blue) or action (green) card will appear in the central part.
To create a sequence of events and actions, connect the cards to each other - draw a line between one event or action to another. To remove the link between the elements of the script, double-click on the link.
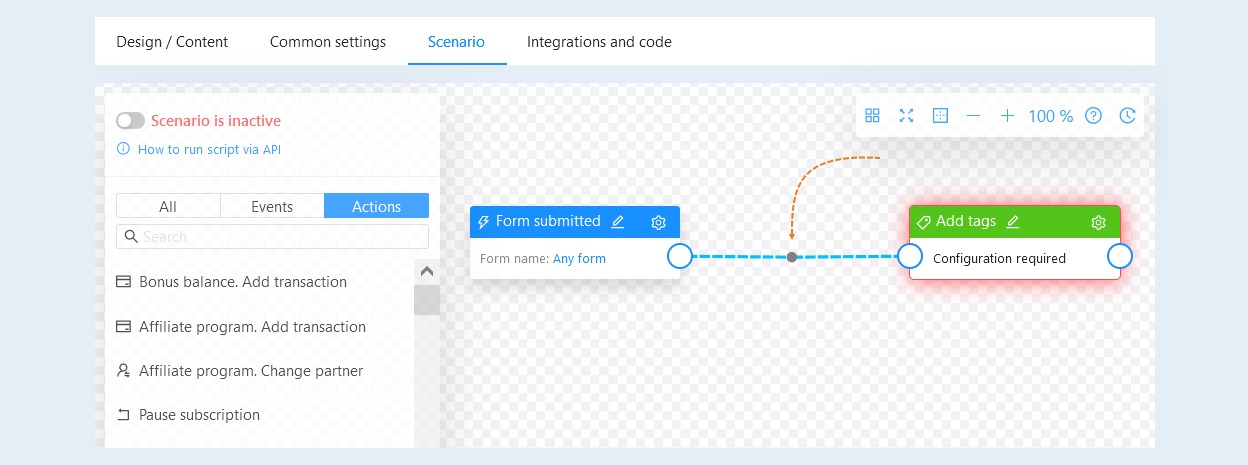
You can use the function of adding points to connections to create chains. To add a reference point, select the location on the communication line where you want to add the point. Left-click on the place selected on the line and simultaneously press the Ctrl key on the keyboard. Next, you can move the location of the reference point in the script field.
To delete a reference point, double-click on the point. Double-clicking on the line will delete the line and all reference points on it.
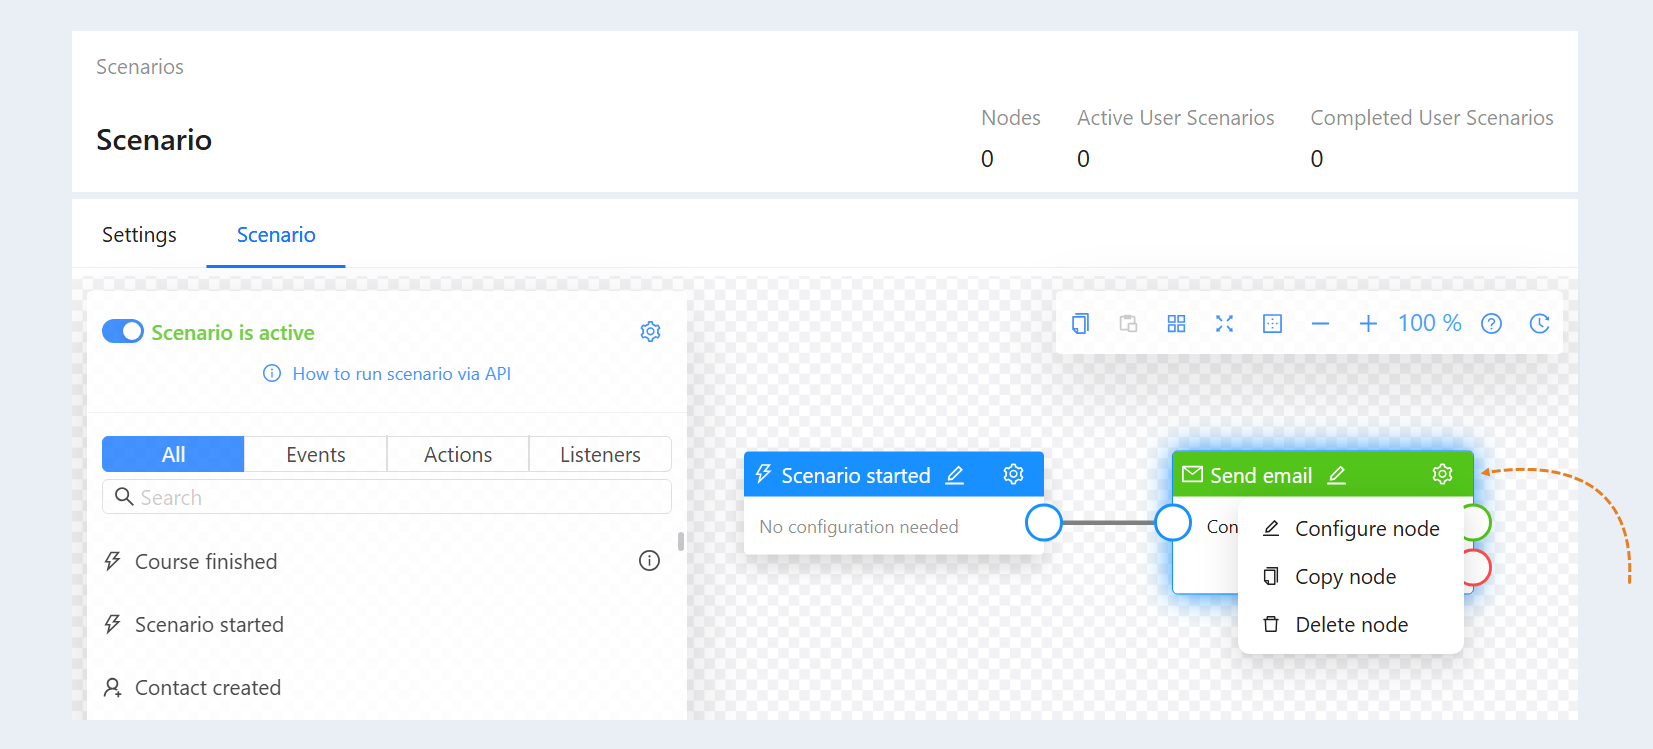
Some events and actions require customization. Click the “Configure node” button. An additional field will open. Fill in the fields and click “Save”.
In the configuration settings, you can add template variables.
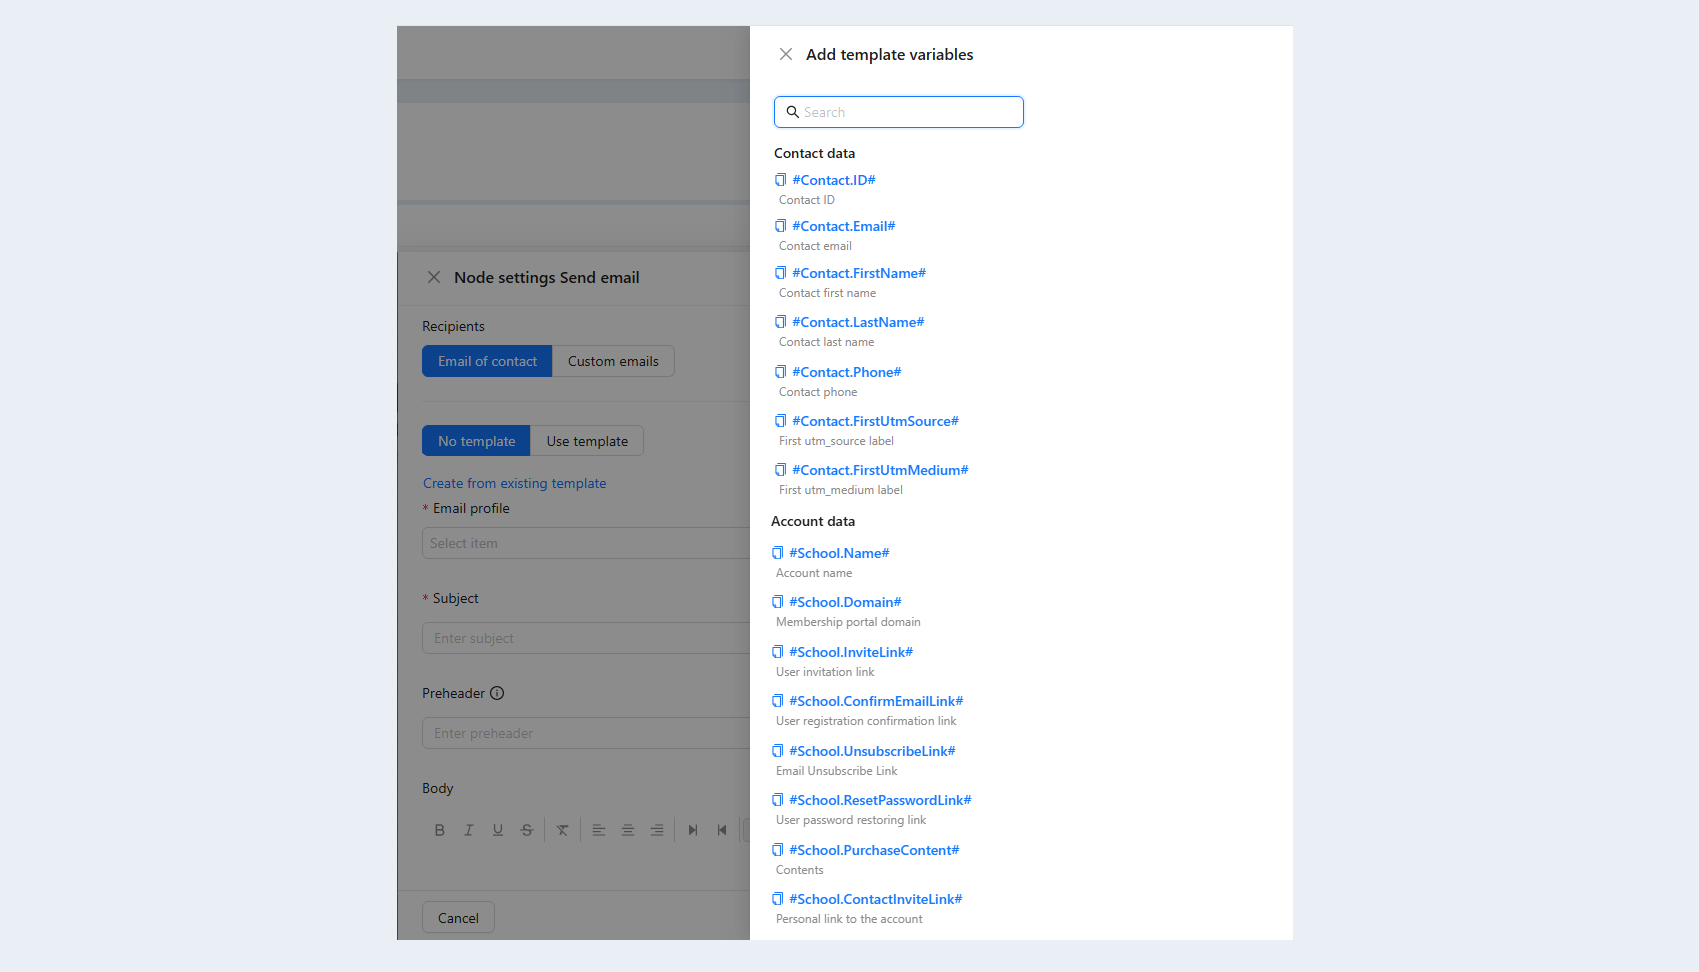
A template variable is a value to be automatically replaced with the data you selected. This can be the contact's name, email, account name, order number, etc. Variables will automatically replace the data in the email. Specify the variable “Contact first name" and when sending an email, this variable is replaced with the recipient's name.
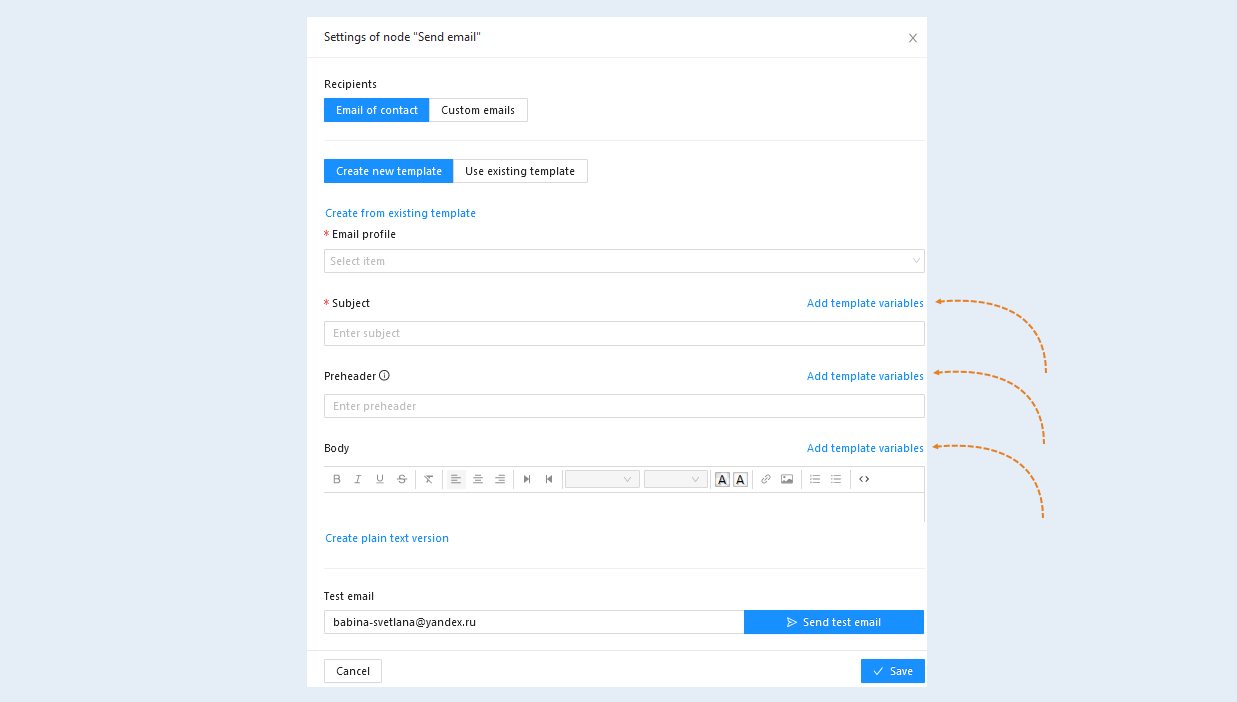
Click the "Add template variables" button next to the corresponding section. A list of variables will open on the right. Select the necessary variables from the list.
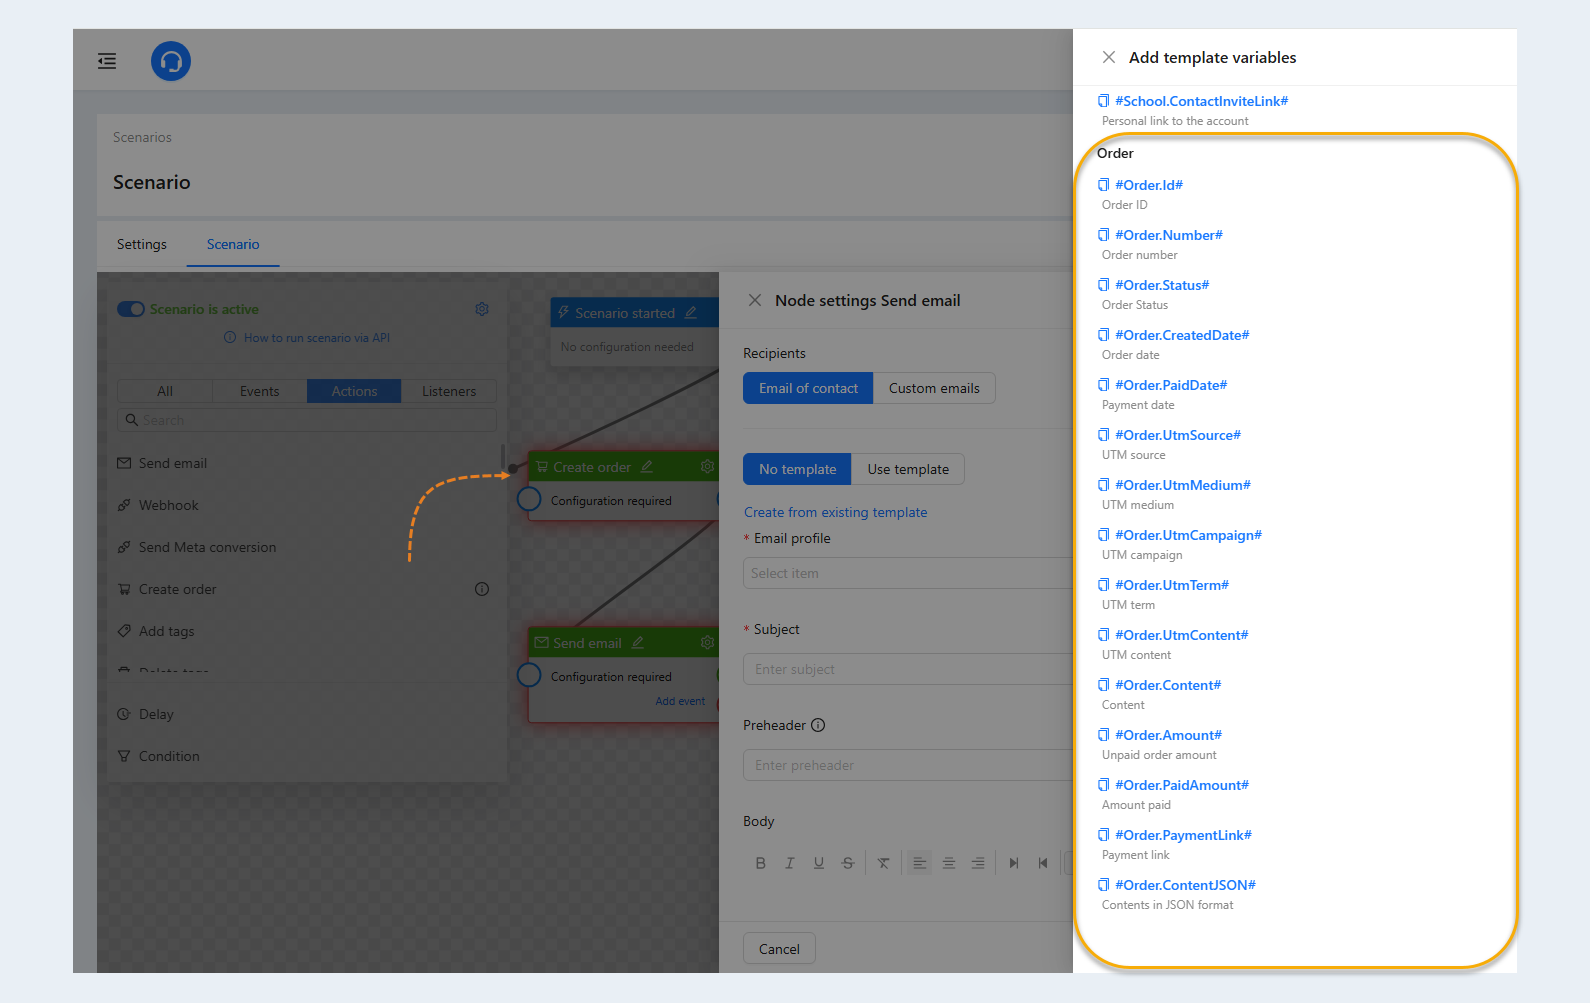
If the "Create order" action was added in the scenario at the previous step, then data about the user's order will appear in the list of template variables.
For more information about variable settings in script configurations, see the article “Variables in the scenario".
Deleting and copying script steps
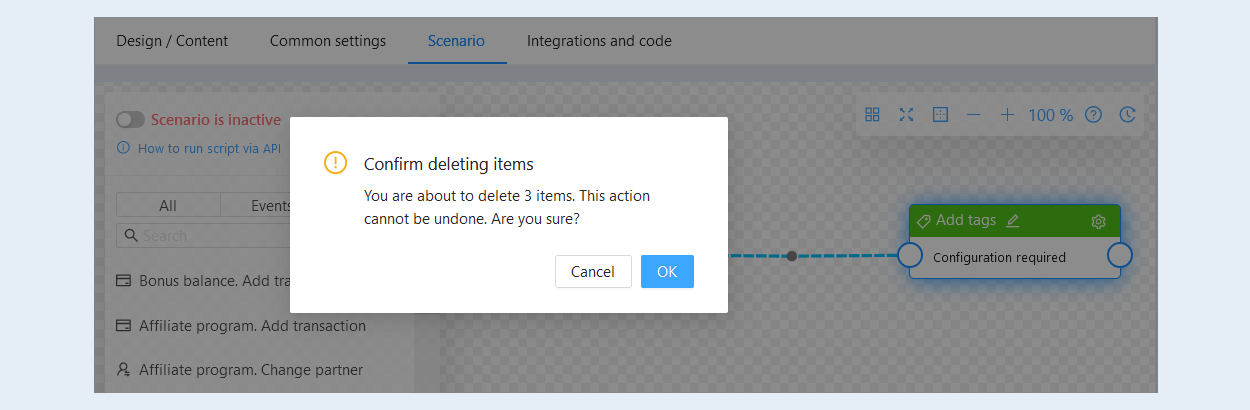
In order to massively delete scenario steps, hold down the Shift key and select the desired events and actions by clicking on them with the mouse. Next, press the Delete or Backspace key and confirm the deletion of the selected scenario steps.
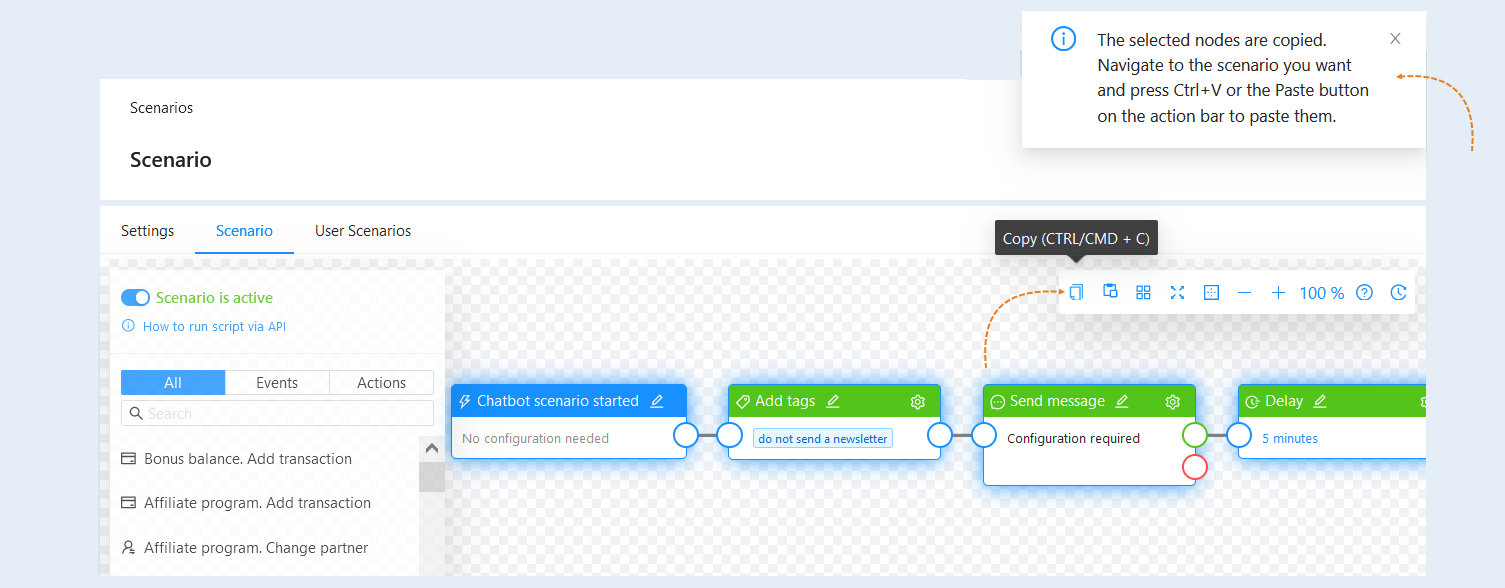
You can copy steps and connections between scenarios within one account. Press Shift and select the desired steps by clicking on them with the mouse. The selected scenario steps will be highlighted with a blue border.
Then copy the selected steps by pressing the "Copy" button or Ctrl + C on the keyboard. A message will appear in the upper right corner stating that the scenario steps have been copied.
Open another scenario of your account. Please note that transferring scenario nodes only works within the same account. Press the "Paste" button or Ctrl + V on the keyboard. The scenario steps will be copied to the new scenario.
The history of the scenario step
In the upper right corner of each event and action there is information about the number of its launches. The numbers indicate the number of messages sent. To view the history of a script step, click on the "Execution times.
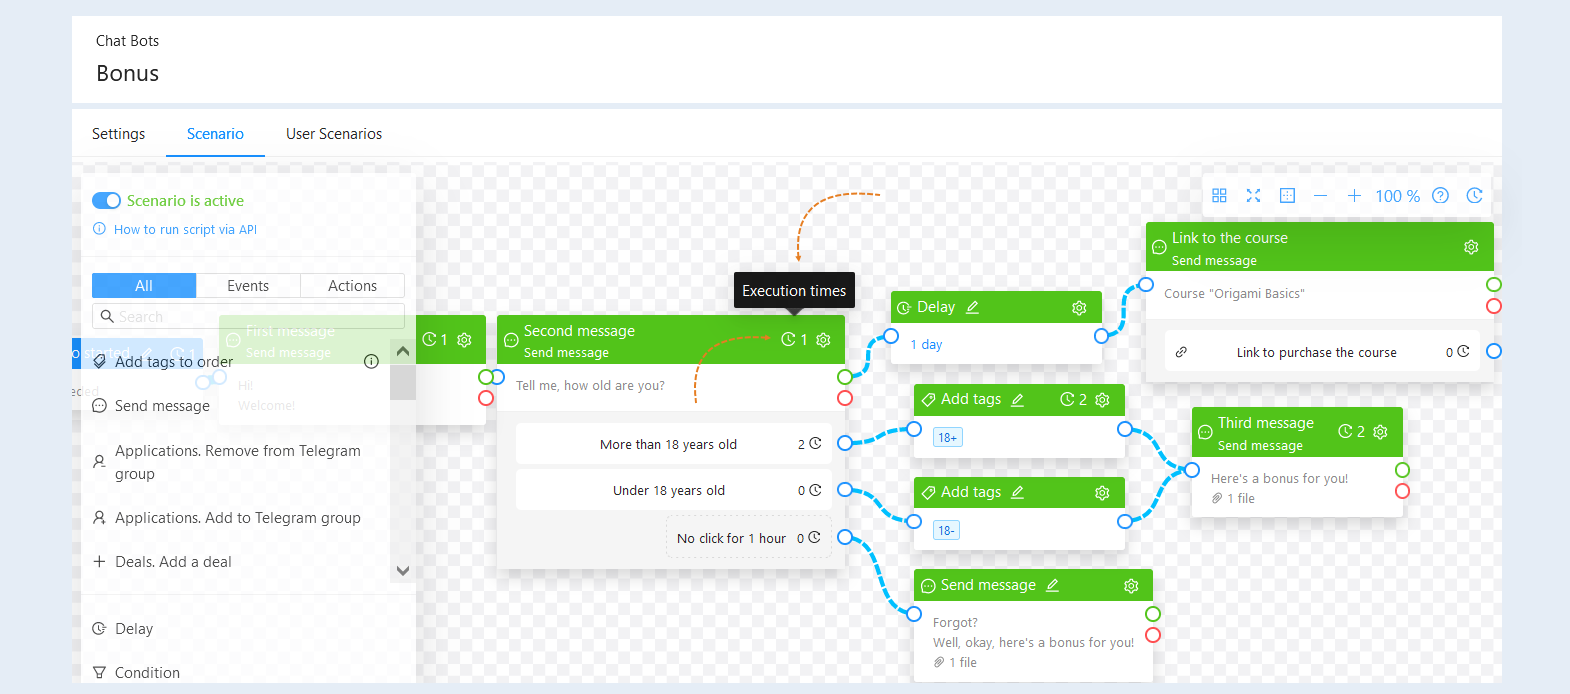
Click the "Execution times" icon and the "Node History" window will open. Here you can see detailed information about the date and time the message was sent and the recipients of the message. Click on the username to open the CRM contact card.

In the upper right corner of each button there is also information about the number of clicks on it.
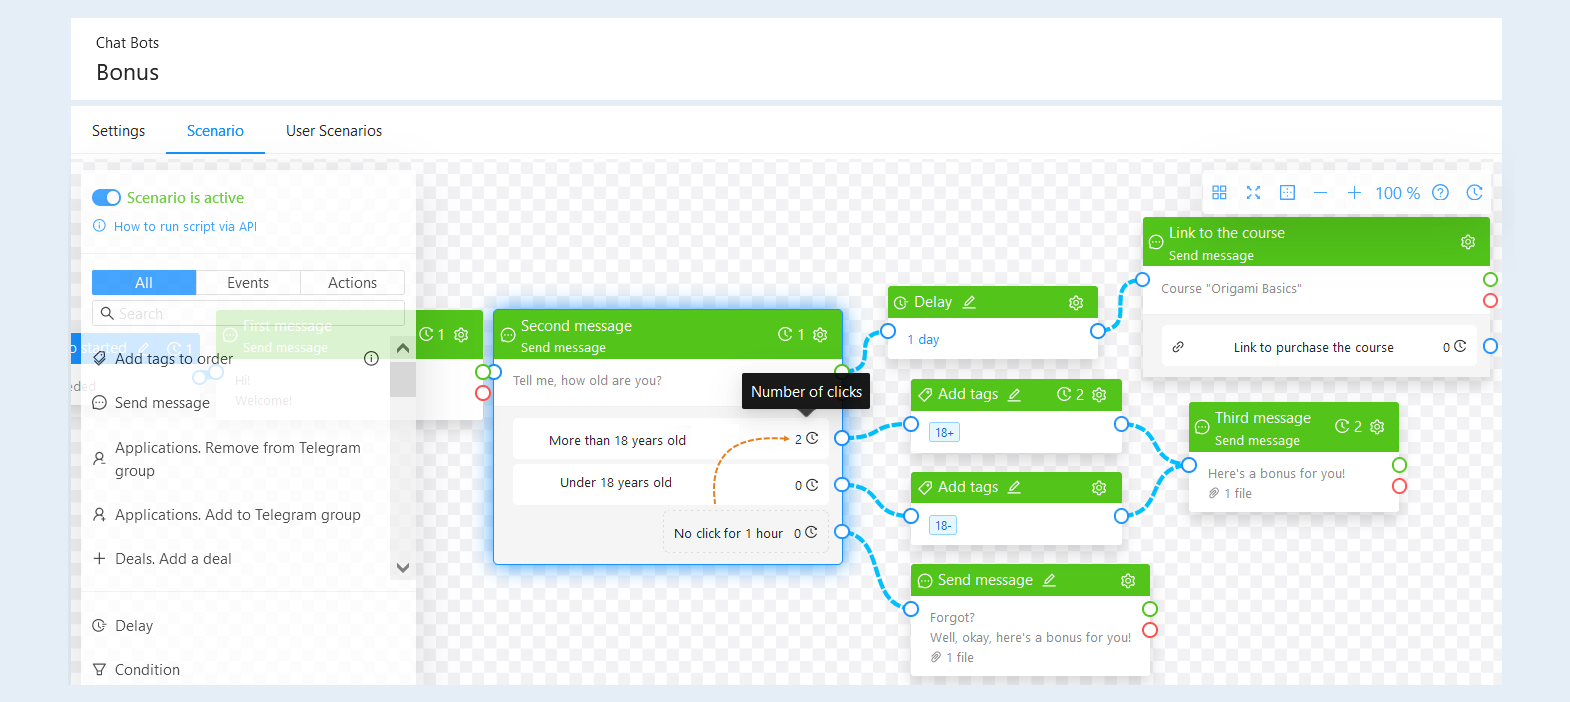
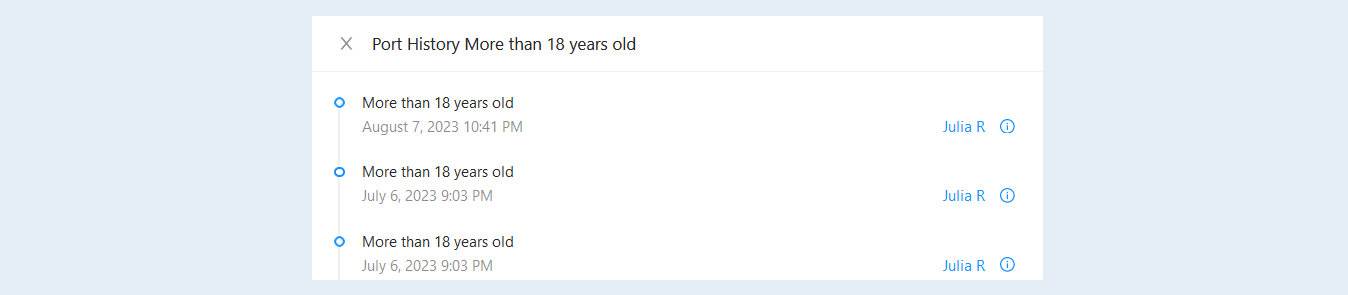
Click the "Number of clicks" icon and the "Port History" window will open. Here you can see detailed information about the date and time of the click and the users who clicked the button. The history shows which button the user clicked. Click on the username to open the CRM contact card.