Libraries are learning materials that are not included in courses. The library is a knowledge base, reference material, a set of articles that the user studies separately from the courses.
Access to libraries can be paid or free and is configured by the administrator separately from the courses.
In this section, you can manage the list of libraries.
Click on the desired section of the article to go to its description:
Creating a library
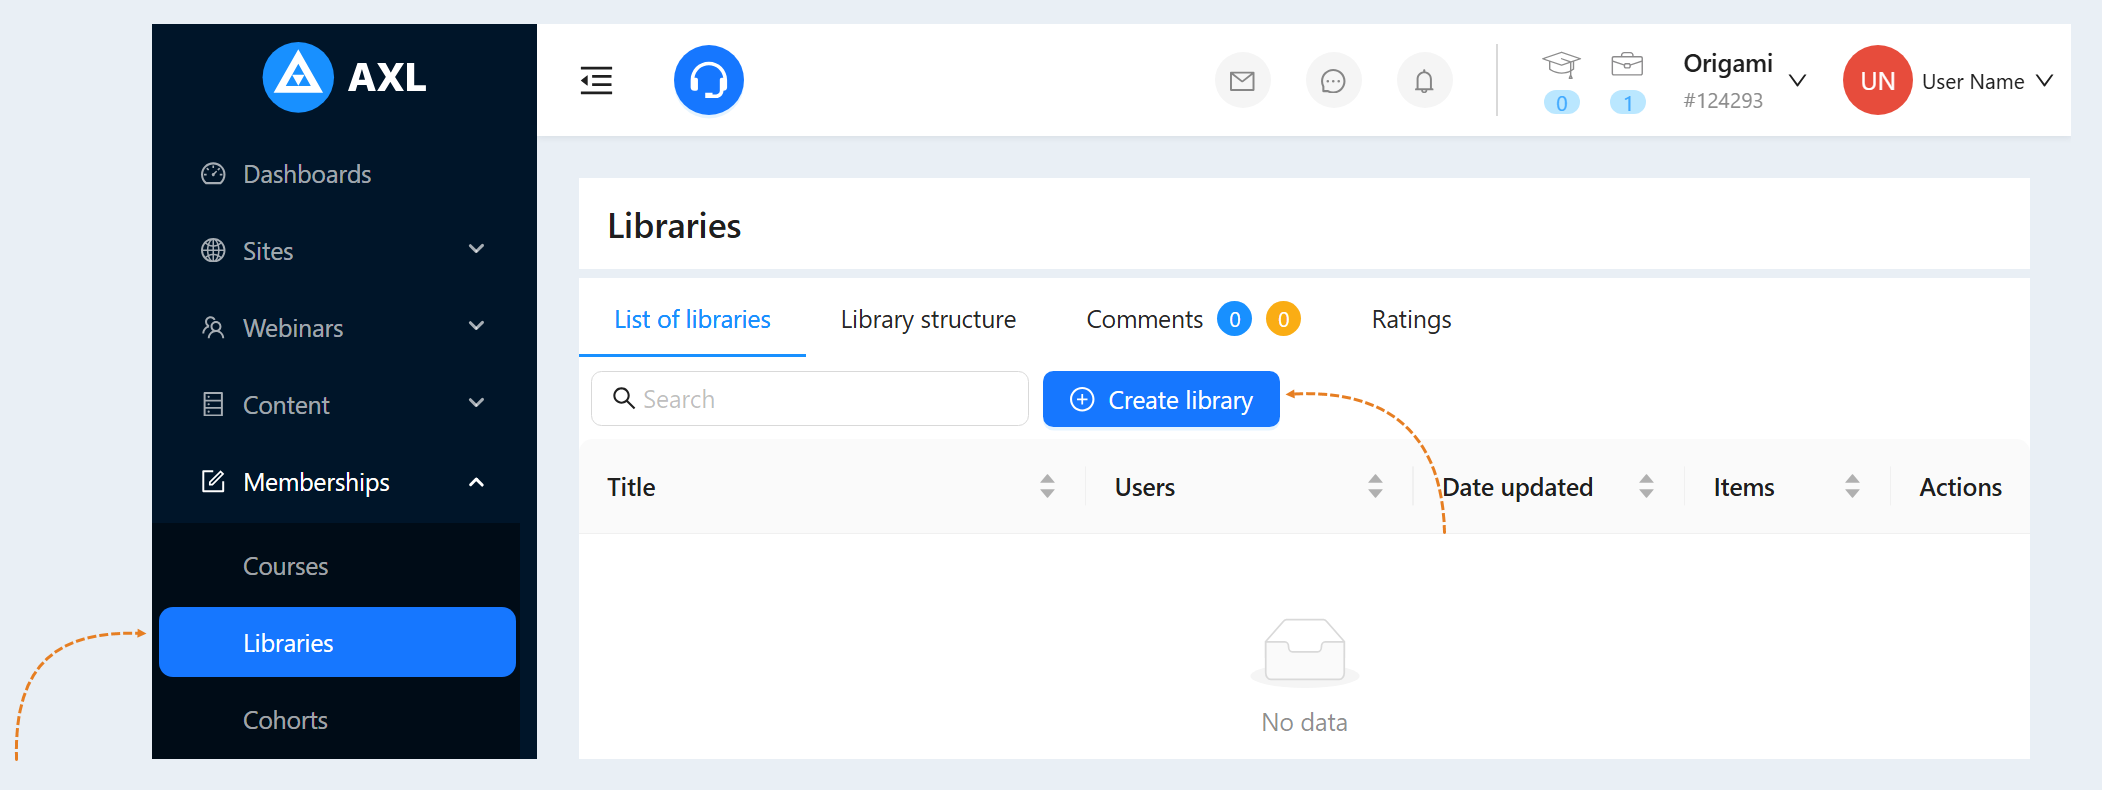
Go to the Materials and Courses section and select the Libraries tab.
You will see a list of created libraries. To create a library, click the “Create Library” button in the upper right corner.
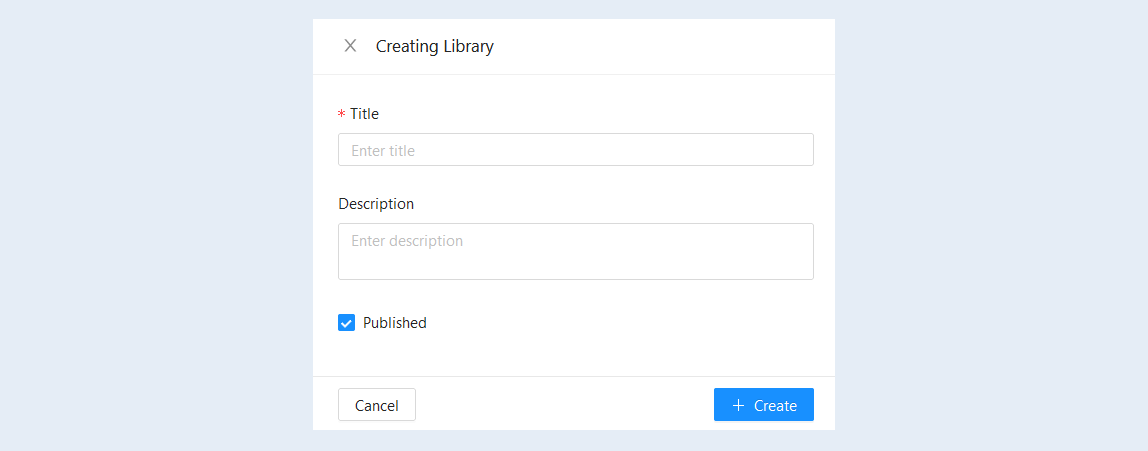
An additional window “Library creation” will open. Enter a “Title” and “Description” for the library. Check the box "Published" to make the library available to users. Click the "Create" button.
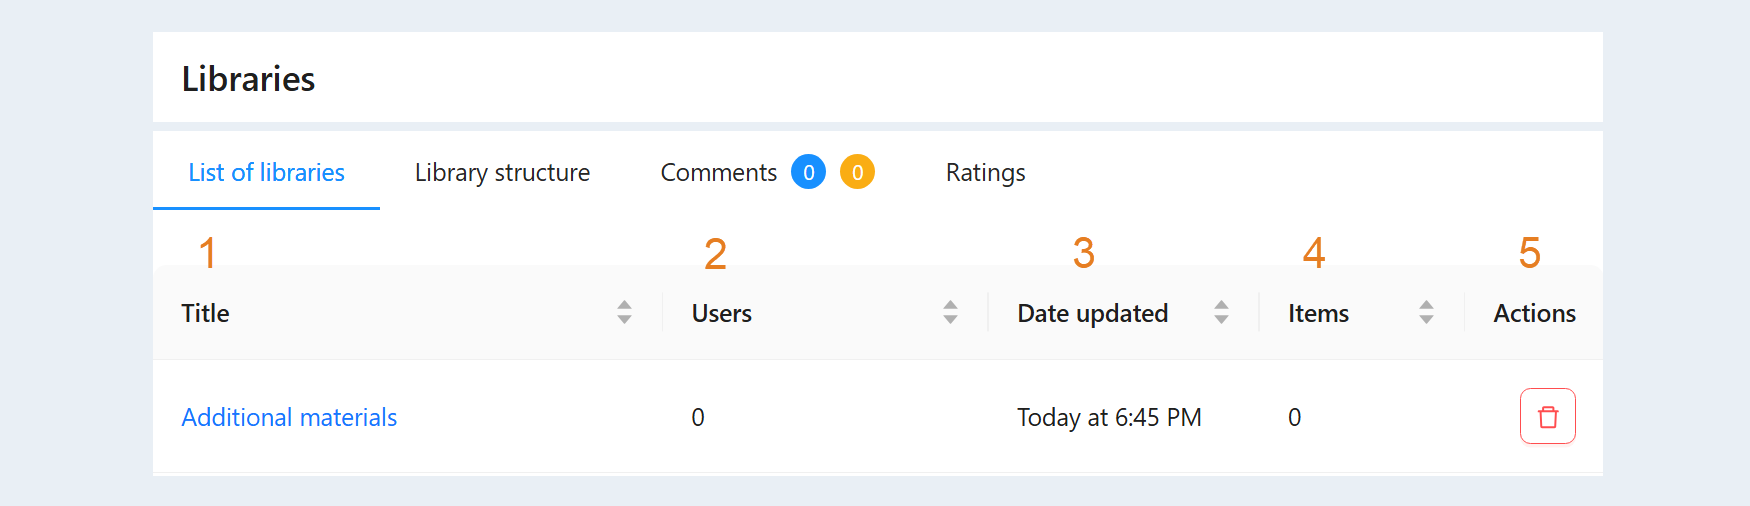
The library you created is now displayed in the list.
Title. Library name. Click on the title to go to editing the library.
Users. The number of users with access to the library is shown.
Date updated. The date when the last changes were made to the library.
Items. This is the number of articles (lessons) within one library.
- Actions. The buttons are available here:
The "Delete" button. Click to delete the library.
A search bar is available at the top of the section. Use it to quickly find the library you need.
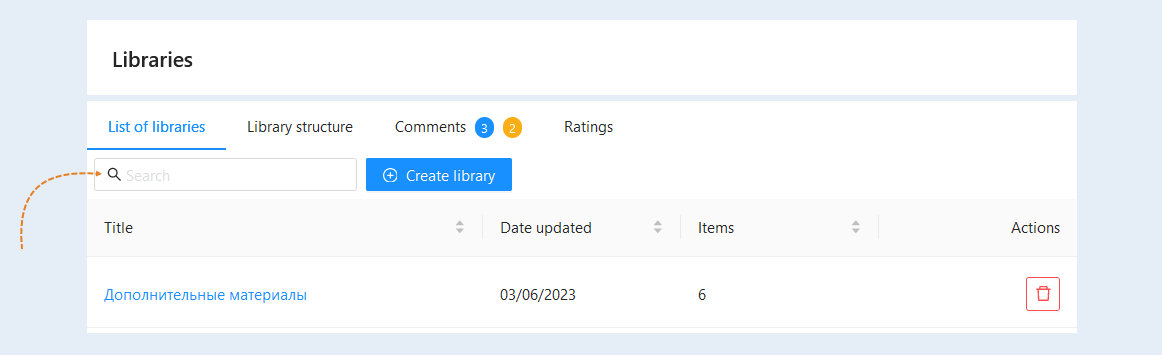
Library management
To configure the created library and fill it with content, click on the library name in the list of Libraries. The library settings window will open.
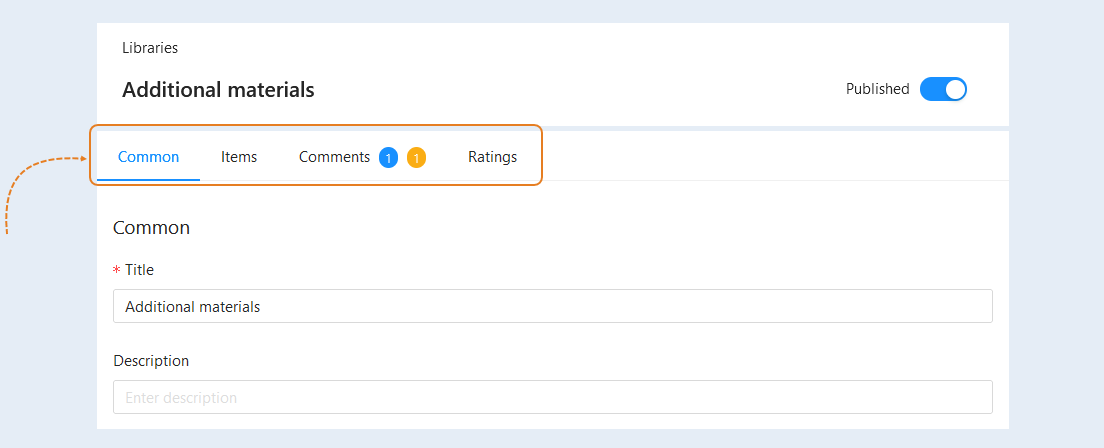
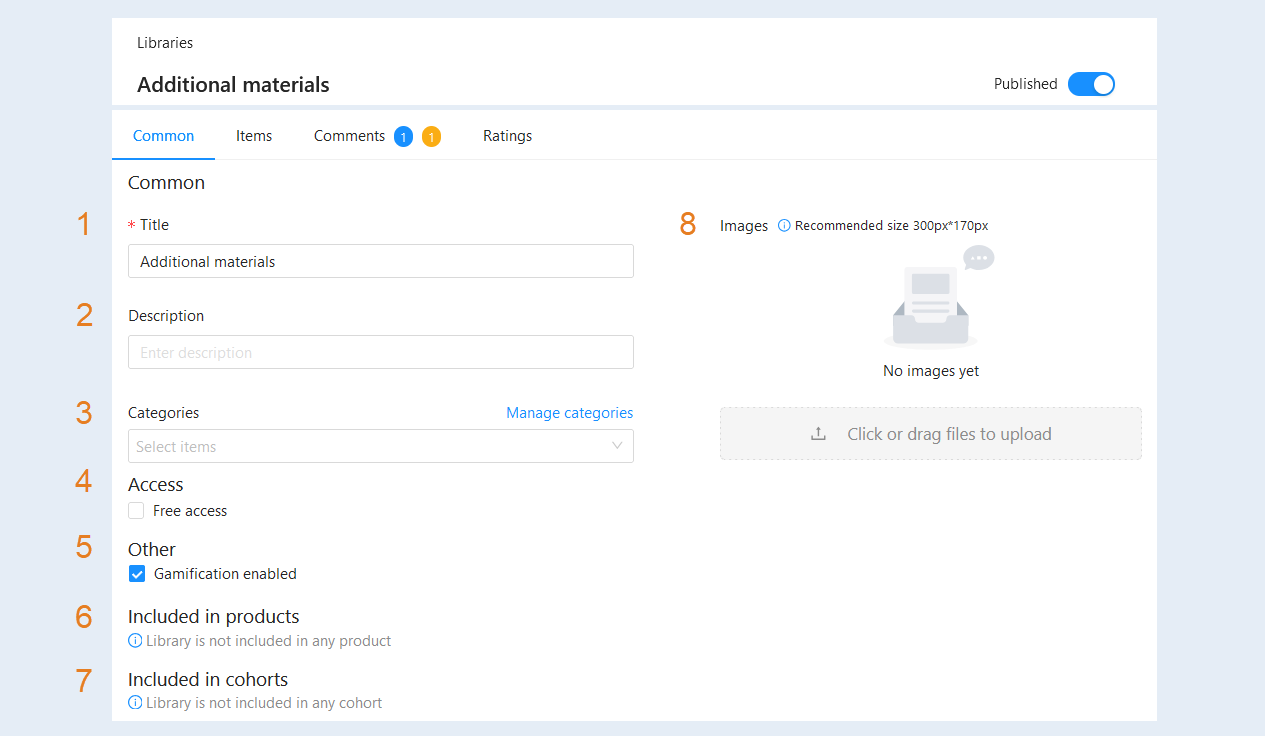
This section provides the necessary information about the available materials. Make the necessary changes in the "Common" tab:
- Name. You can change the name of the library.
- Description. You can add a description of the library. This field is optional.
- Categories. Select a category for your library from the list. Or add a new category. Click the "Manage Categories" button. In the window that opens, click the "Add Category" button. Enter a name for the category and click the “Save” button. After that you can select a category in the “General Information” tab. Click the “Save” button.
Access. You can provide free access to the library for free for users or make access only after purchasing courses.
Other. The Gamification section is a tool that uses game elements to enhance the educational experience of users. It helps to stimulate users' interest in learning and keep their motivation at a high level. Game elements such as rewards and achievements create a sense of progress that can inspire users to keep learning and achieve new goals. For more information about gamification settings, read the article "Gamification".
Check the box "Gamification enabled" so that users can earn achievements for mastering library materials. Uncheck the box if you do not want this library to participate in gamification.
Included in the products. In this section you can see which product includes the library.
Enters the streams. In this section, you can see which thread the library is part of.
- Images. Load images for this library.
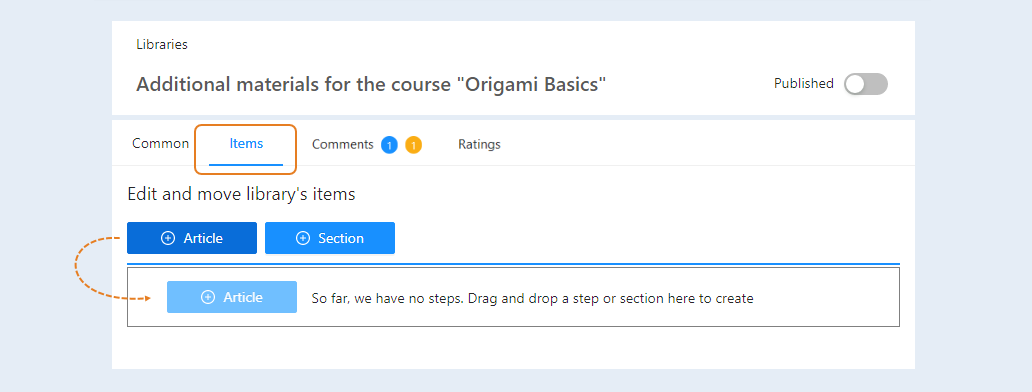
Items
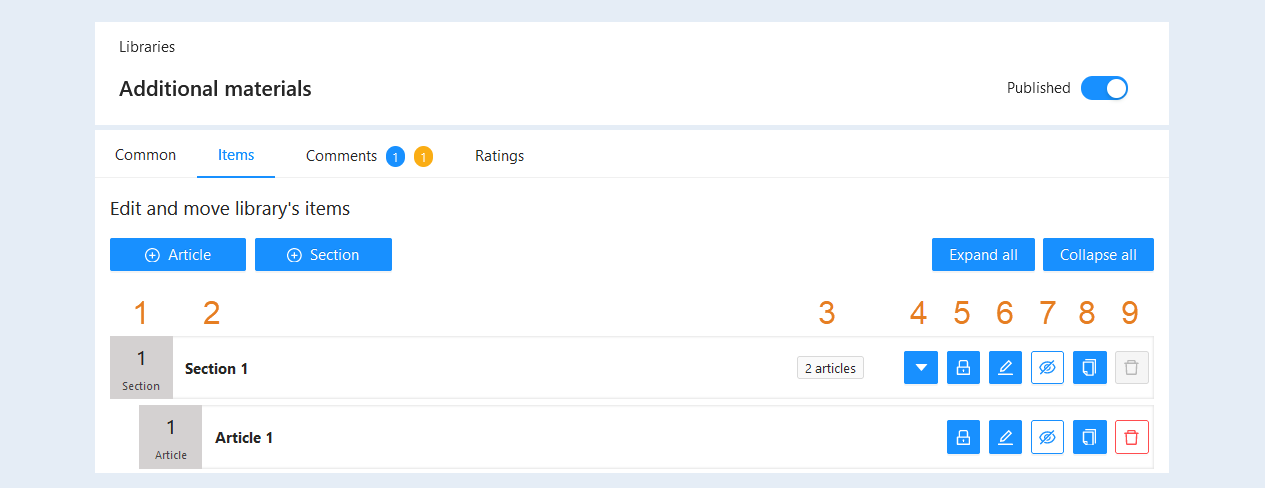
In this section, you can add items to the library. Press the "Article" button and hold down the left mouse button and drag this element into the working field. The article will appear as a list of steps.
Drag and drop as many items as needed and arrange them in the desired order. It can be several sections or one, several articles or several articles within one section.
On the right are buttons for controlling items.
The number of the element in order.
The name of the section or article.
The number of elements inside the section.
Hide button. Click to hide items inside a Section.
- Accessibility button. Click to edit the access parameters for this item in the libraries.
- Edit button. Click to edit the item.
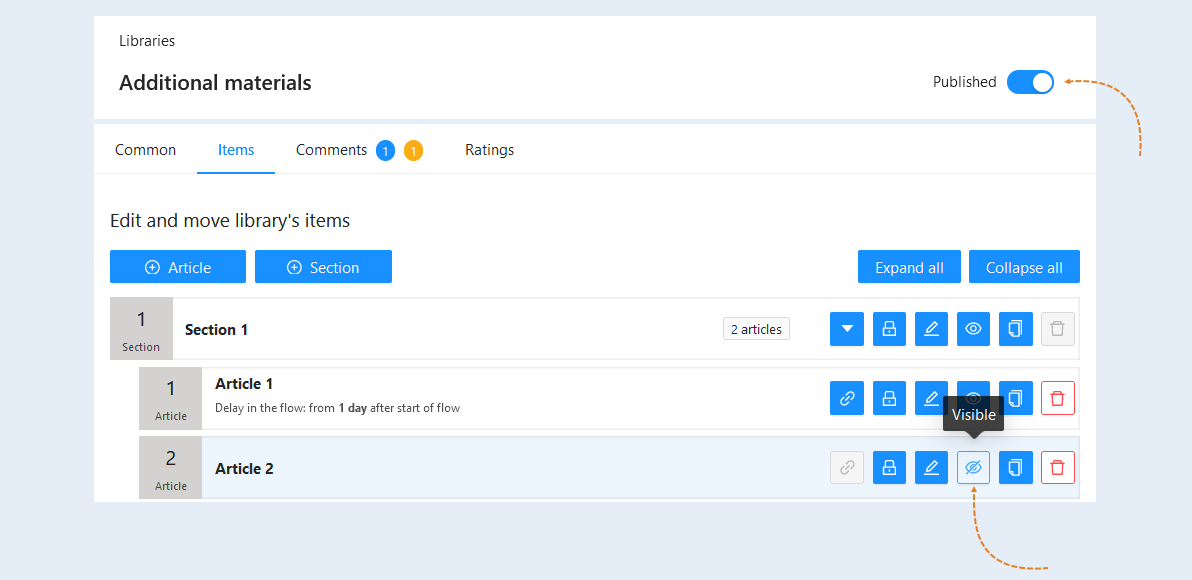
- Show button. You can hide the item in the library. Click the button to show or hide it from users.
- Copy button. This button creates a copy of the item.
- Delete button. This button removes an item from the list. To delete a section, you must delete all articles within the section.
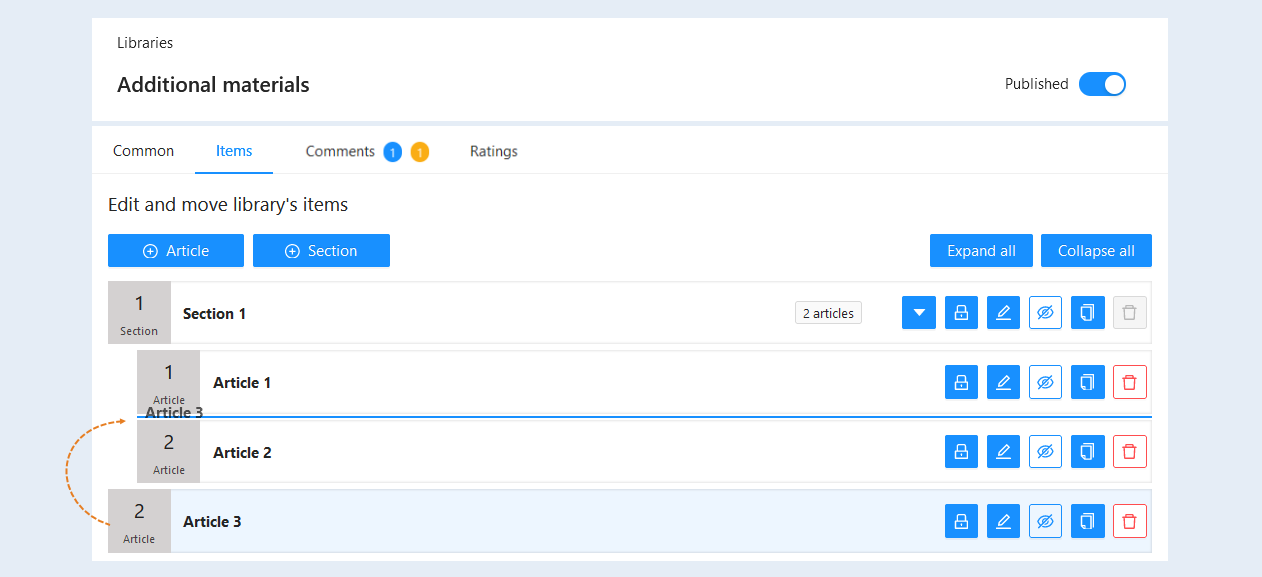
You can change the sequence of articles within a section by dragging articles between each other. Hover the cursor over the title of the article, hold down the left mouse button and move the article relative to others, above or below.
In the upper right corner there is a button "Collapse all". Click to hide all articles in the list and leave only the main sections.
Element creation
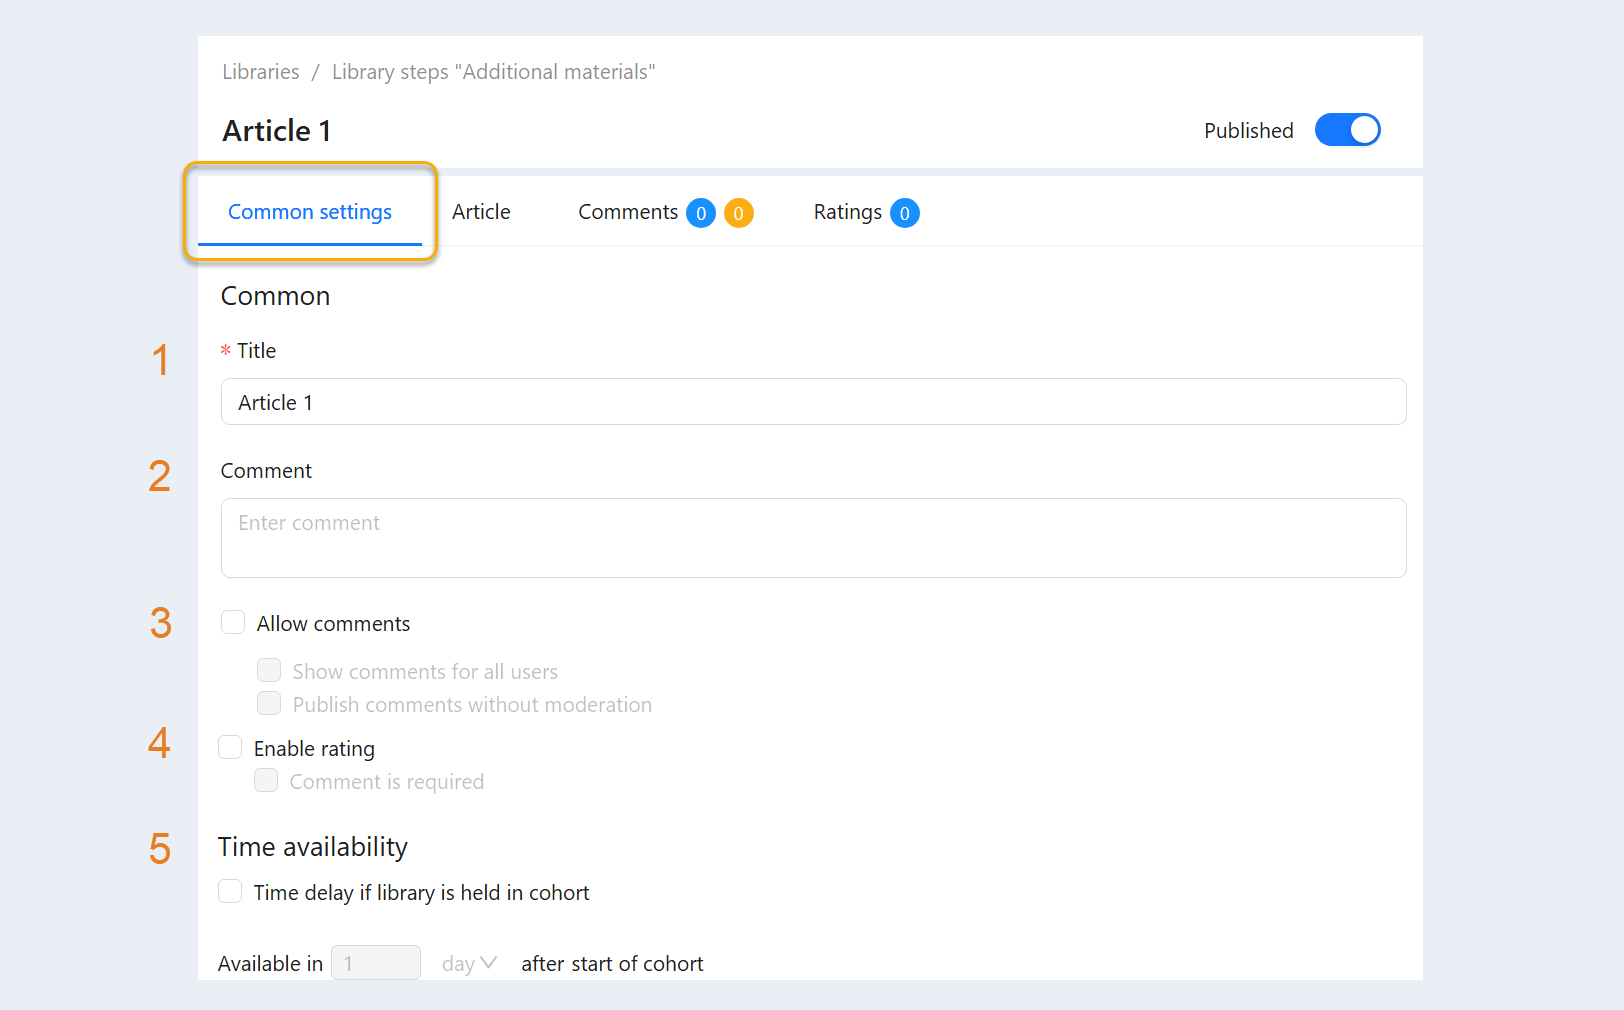
Click on the name of the item in the list or on the "Edit" button. A field for creating or editing an Element will open. On the left, enter:
Title. Write the title of the item (article or section).
Comment. You can write a comment for this item.
Allow comments. Check the box if you want users to be able to comment on this element (article or section).
Show comment for all users. Check the box if you want the comments to be visible to other users of the course.
Publish comments without moderation. Check the box if you want comments to be published without checking and approval of the administrator.Enable rating. Check the box if you want users to be able to evaluate this step of the course on a 10-point scale and explain their assessment.
Comment is required. Check the box so that the user's assessment is not accepted without an explanation to it.Time availability. Set a time delay for accessing a library item.
Check the “Delay when the library is passed in stream” checkbox if you want the access to the item to be opened with a delay and select the delay time below in the special field “Access in N days after the start of the stream”.
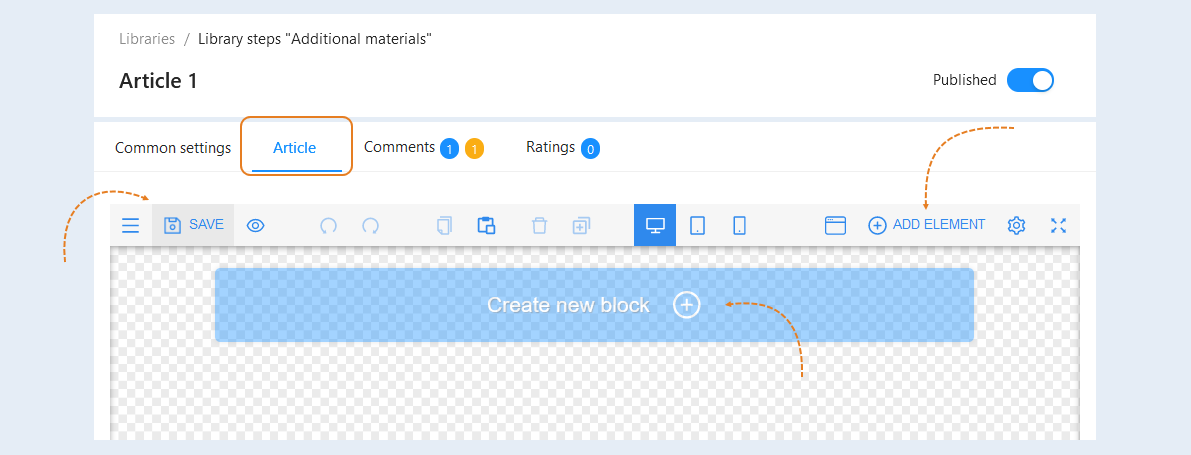
In the "Article" tab there is a field for creating an element. Click the Create New Block button. Select the block to create: “Cover and Headers” or “Text”. Read more about how to work with elements in this editor in the article “Page editor overview”. After the item is created click the “Save” button.
After the Library has been created, click the “Publish” button in the upper right-hand row.
To return to the page with the list of items, click on “Library items“ library name ”in the top line.
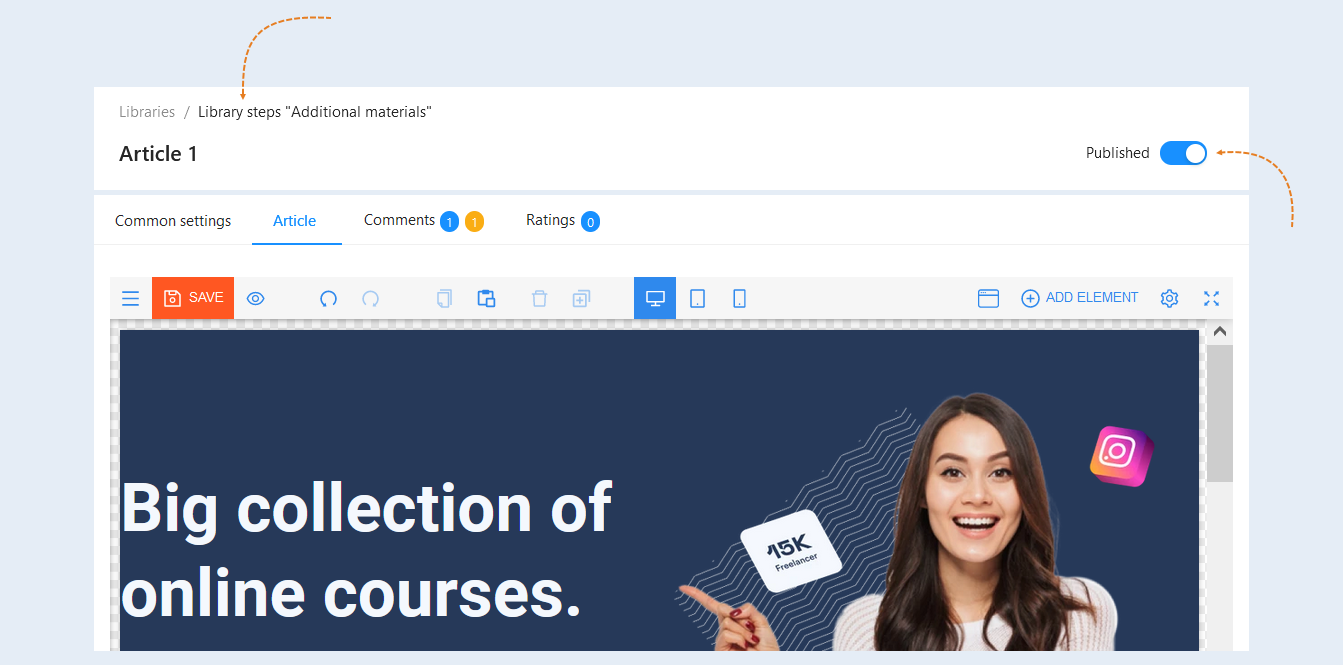
The library was created and published in your membership portal. Make sure the "Posted" button in the upper right corner of the page is turned on. And also next to each item (article and section) the button "Visible" is included.
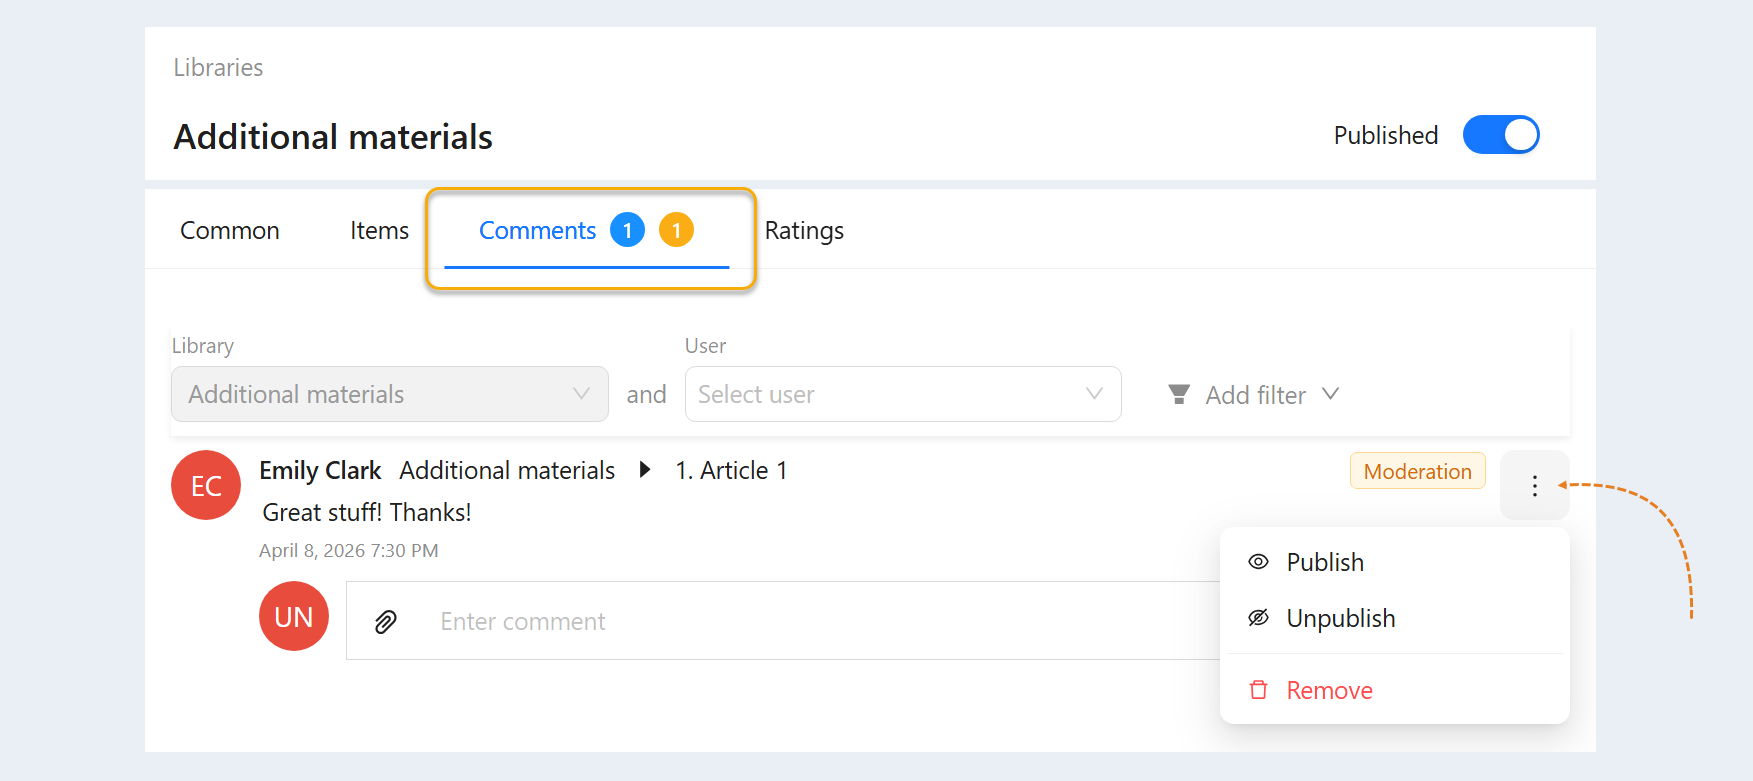
Comments
The "Comments" tab contains feedback from users. In this section you can see users' comments about the library elements. You can also manage comments and respond to them.
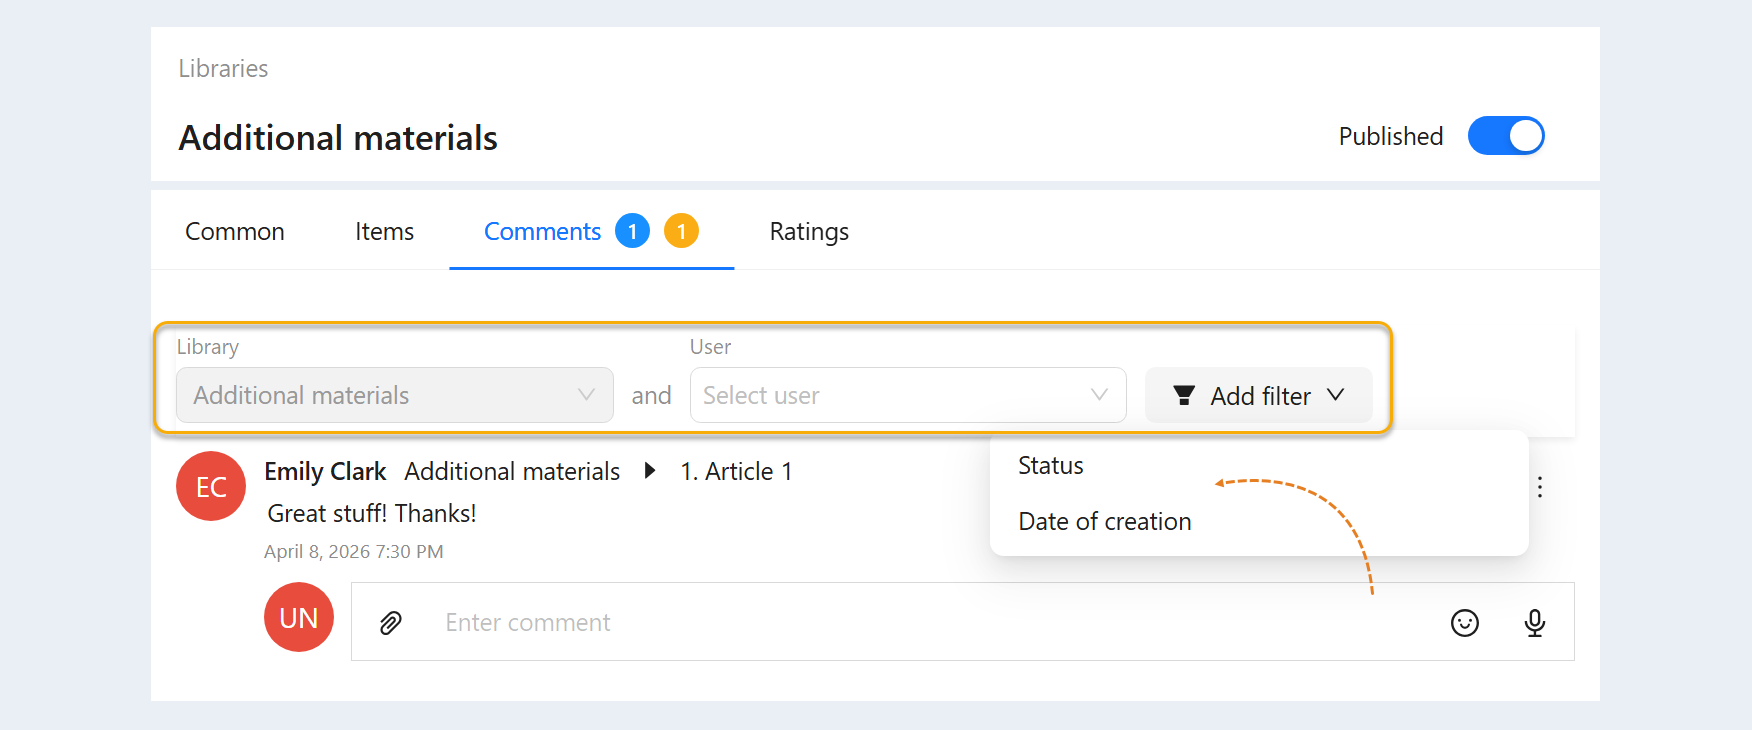
At the top there are search lines for managing comments. You can select comments by the following parameters:
- Library. Select the name of the library to read the comments on it.
User. Select the user's name to read only his comments.
Status. Select the comment status: published, under review, not published.
Date of creation. Select the date when the comment was created.
Ratings
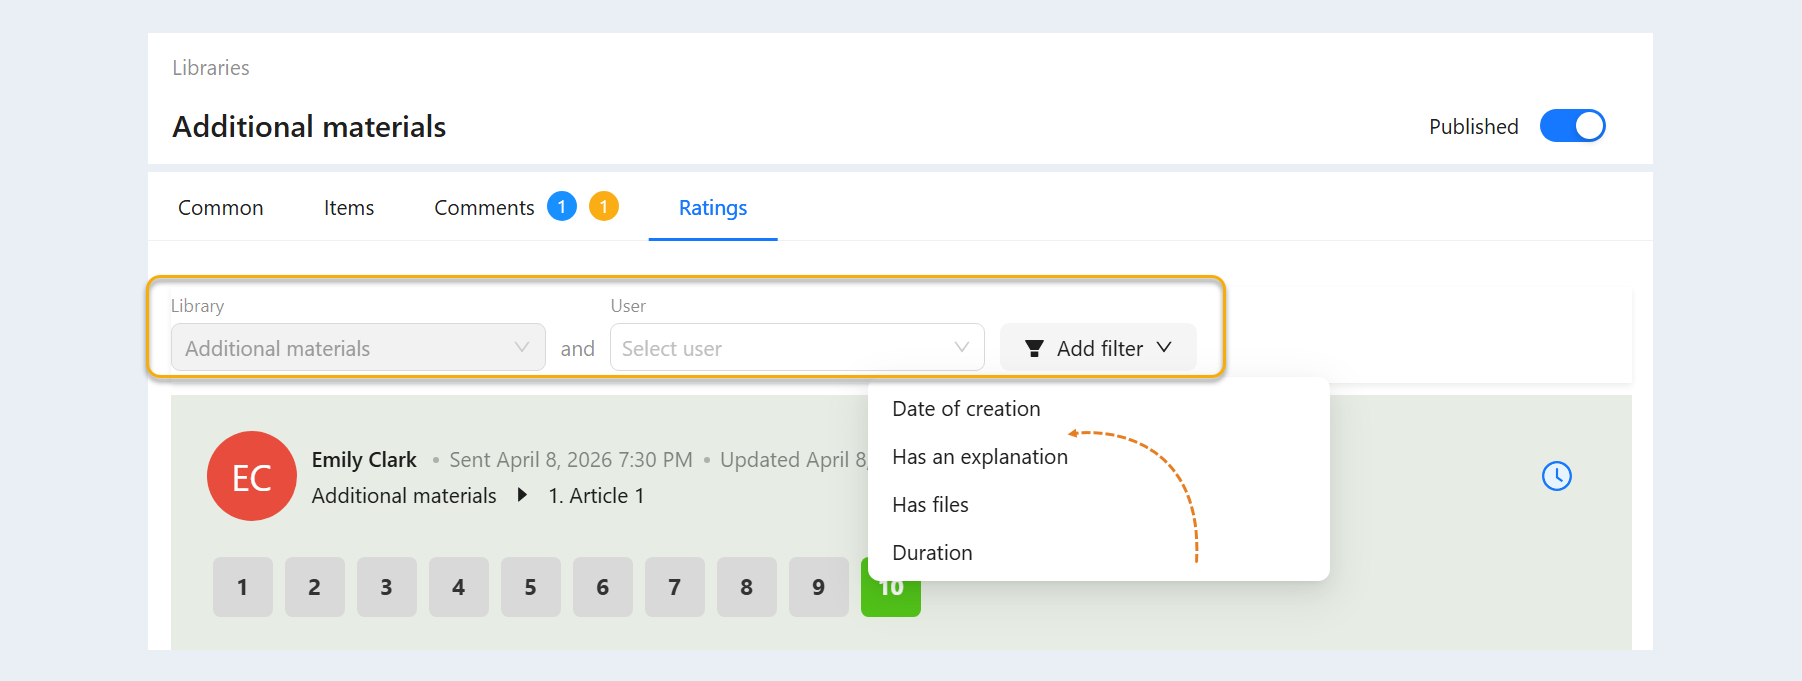
In the "Ratings" tab, you can see the grades of your library's users. The score is set on a scale from 1 to 10. Users can rate library items if you have checked "Allow rating" in the general settings of the items.
In this section you can comment on users' grades.
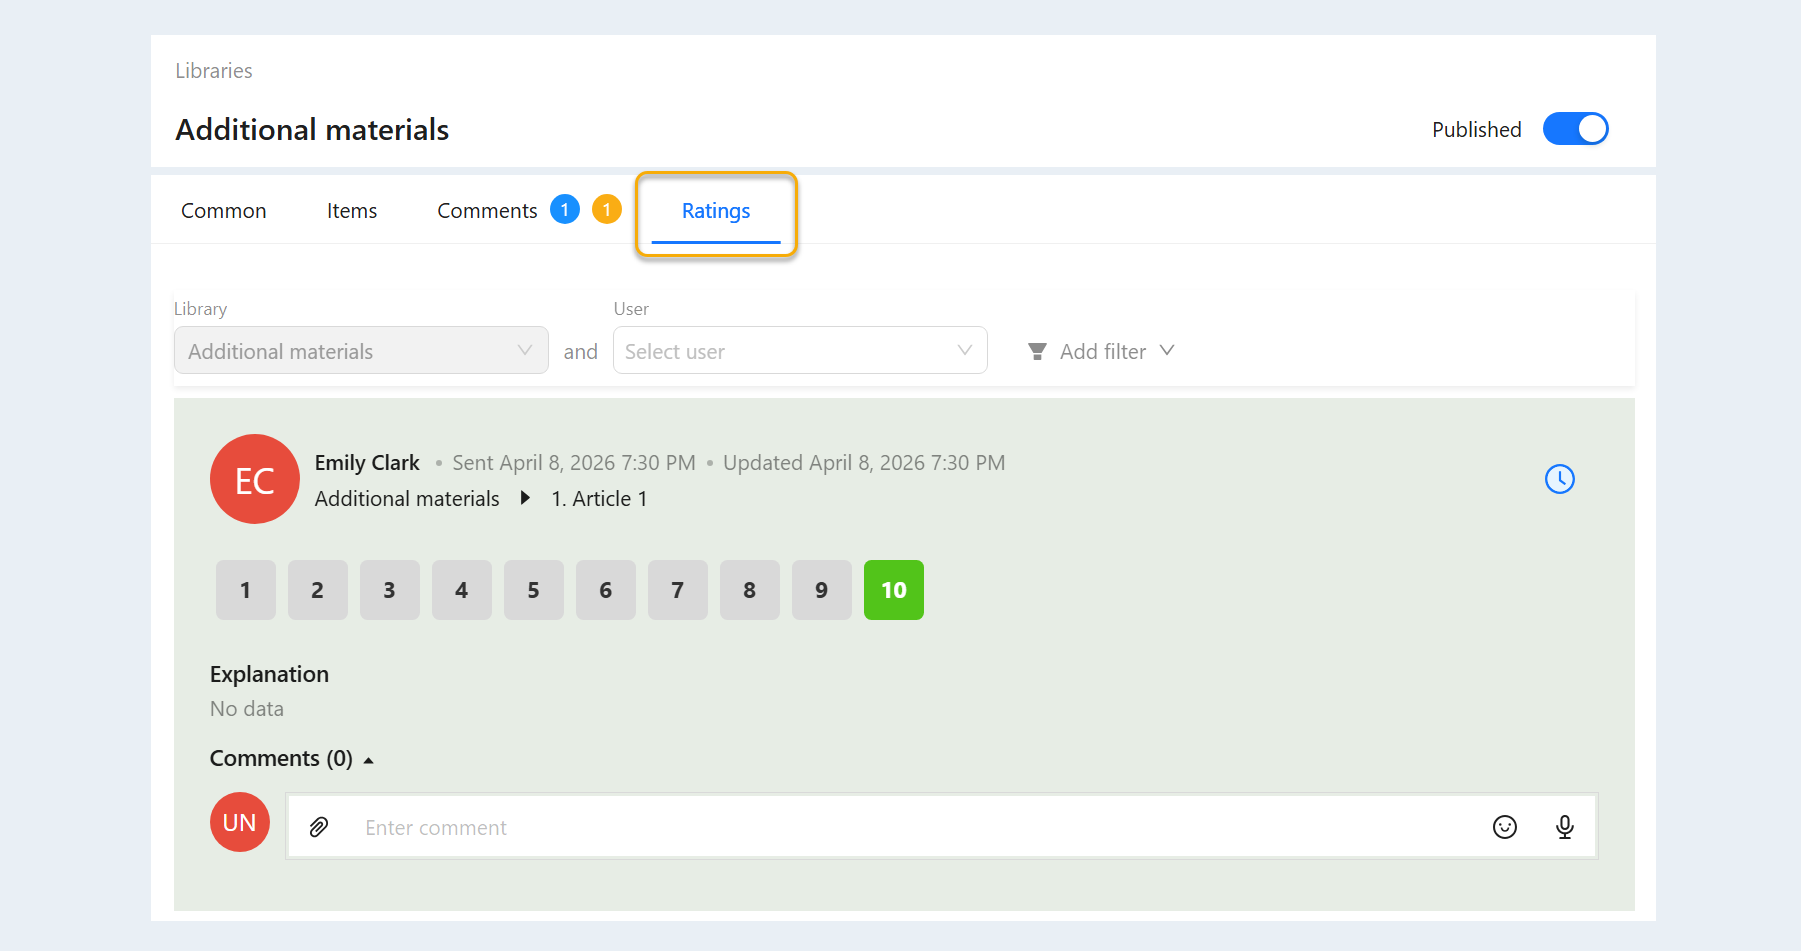
At the top there are search lines for managing ratings. You can choose the ratings according to the following parameters:
Library. By default, the library you are currently in is already selected.
User. Select the user's name to see only their grades.
Date of creation. This condition highlights the estimates that were created on certain dates.
Has an explanation. This condition highlights the estimates that have or do not have explanations.
Has files. This condition highlights the grades, with or without attached files.
Duration. This condition highlights scores that range from 1 to 10 inclusive. This means that only those scores that are equal to the values selected on the scale will be displayed. All other grades will be excluded from the list.