In this article, we will take a detailed look at the general site settings. Click on the desired section to go to its description:
Site card
After creating the website, it will appear in the list as a card. To learn more about how to create a website, read the article "How to create a site".
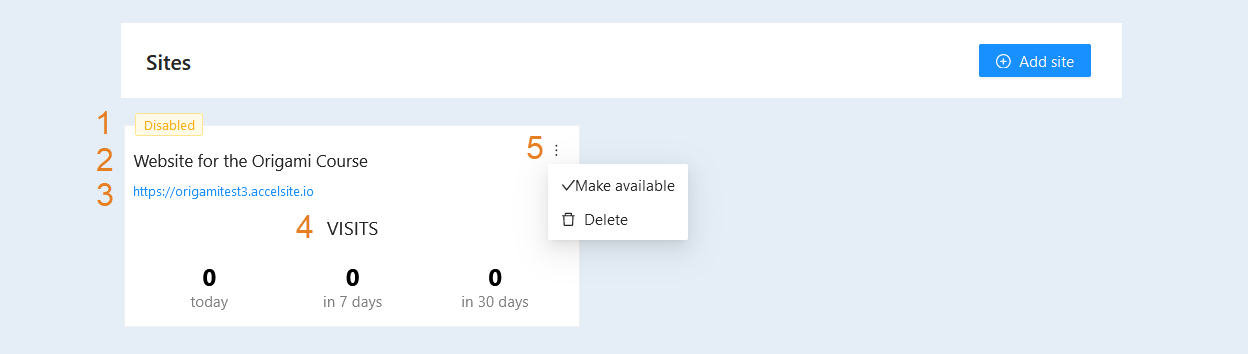
On the site card, you can see:
- Status. Shows the status of the website, whether it is enabled or disabled.
Name. Specifies the name of the website.
Address. Displays the website's page address.
Site statistics. Shows the number of visits for today, 7 days, and 30 days.
Actions. In the top right corner of the card, there is a three-dot icon. Click on the icon and select:
Make available. Click to publish the website and make it accessible to visitors.
Delete. Click to delete the website.
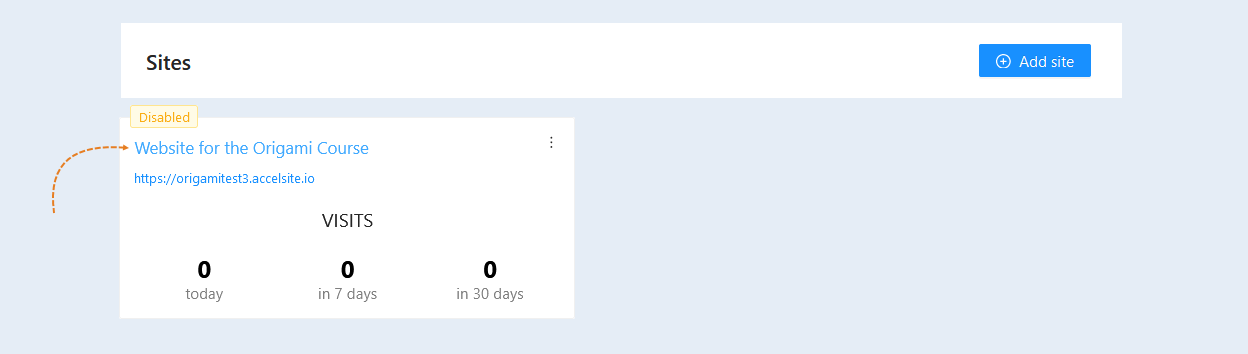
After the website is created, you need to configure it and populate its pages. Click on the website name to open it.
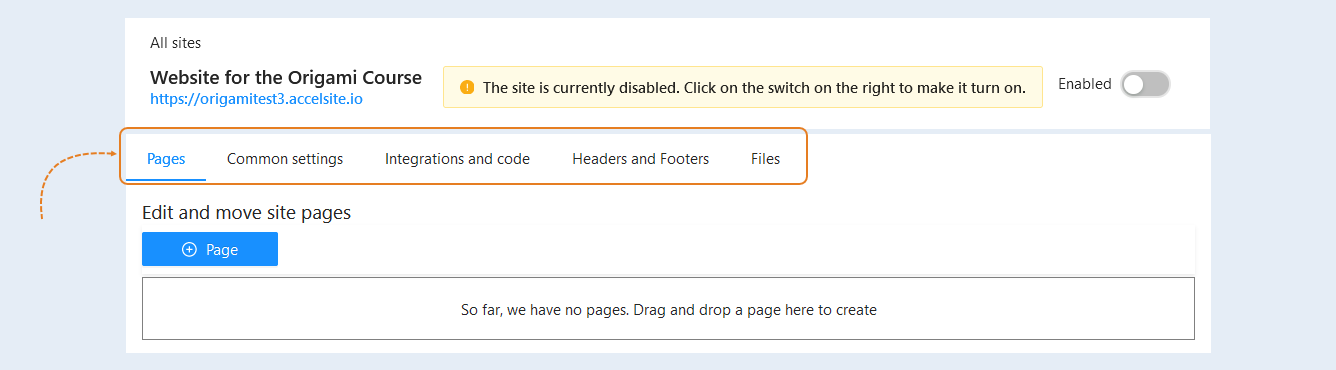
A page for editing will open. At the top of the page, you will see the following tabs:
Pages. This block is used for creating and editing pages on your website. Here you can add text, images, videos, and other elements, as well as customize page layouts. This is the main tool for shaping the content of your website.
Common settings. This section contains parameters that define the general characteristics of your site, such as the name, description, technical domain, and other important settings that affect the functionality and presentation of the site.
Integration and code. This element allows you to implement third-party codes and integrations. This is useful for adding non-standard features that are not provided by the standard functionality of the platform.
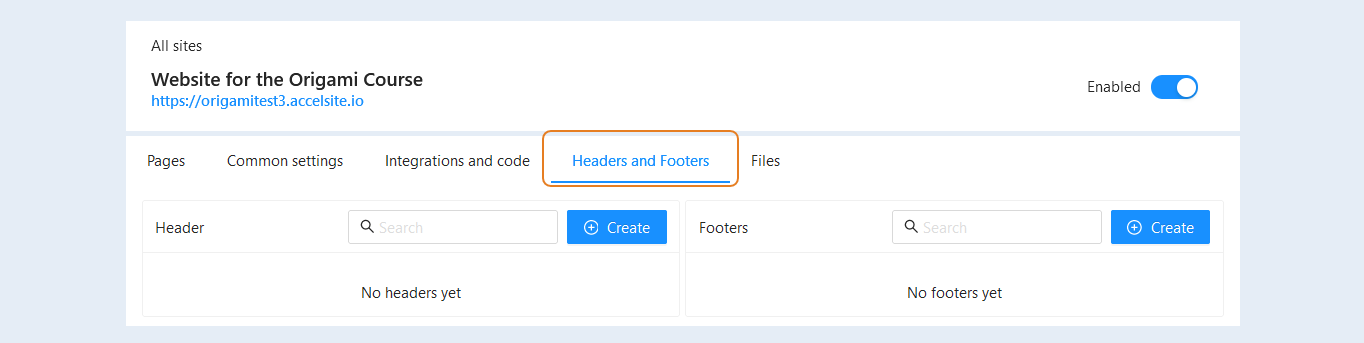
Headers and Footers. This block allows you to edit the top (header) and bottom (footers) parts of your site. Here you can add logos, navigation menus, contact information, and other elements that should be available on all pages of the site.
Files. A section for managing files uploaded to the site, such as images, documents, videos, and other resources. Here you can upload new files, manage existing ones, and organize them into folders.
Below is a detailed description of each tab.
Pages
In the "Pages" section, you can add pages to the website. Website pages represent individual sections or blocks of information that contain different content. Each page can be dedicated to a specific course, subject, or topic and contain relevant information. To add a new page, left-click and drag the "Page" button into the field. To learn more about how to create and configure a website page, read the article "Website Pages". For more information on how to populate a page with content, read the article "Site Pages".
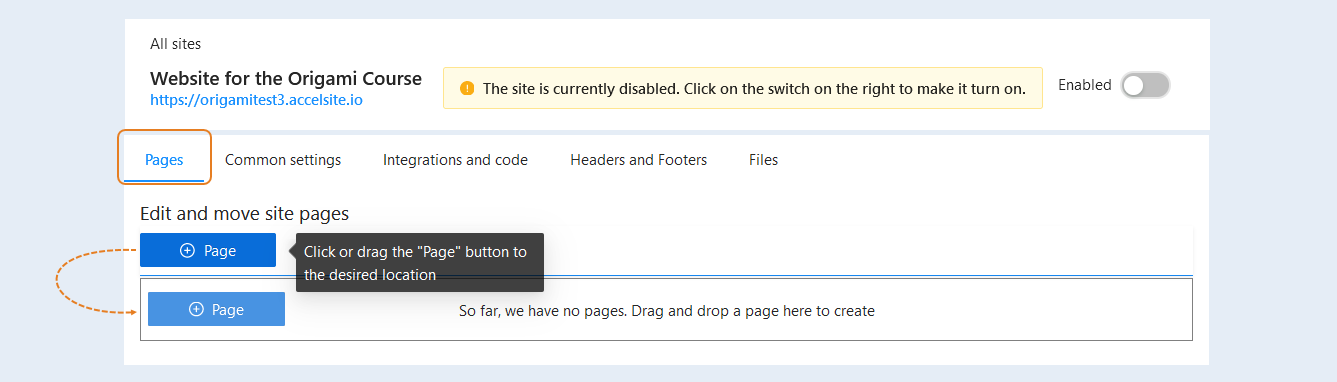
Read more about how to fill a page with content in the article "Page editor overview".
Common settings
In the "Common settings" tab, you can make changes to the site settings:
- Name. You can change the site name.
Short description. You can add a description. This field is optional. Users will be able to see the description on the site page.
Site technical domain. The technical domain will be used if you have not connected your own domain.
Domain. You can connect your own domain. Choose a domain from the list or click the "Manage Domains" button to create a new domain. For more information on creating a domain, read the "Domains" article.
404 Page. A 404 page is a page that is displayed when a visitor tries to access a nonexistent page on a website. Its name comes from the HTTP status code 404, which indicates that the requested resource was not found. It is used to inform visitors that they are attempting to access a page that does not exist, and may contain an error message or recommendations for further action. The 404 page helps reduce confusion and provide a more user-friendly navigation experience on the website. Choose from the provided list the page that will be shown to the user when they try to access a nonexistent page on the website.
Form settings. The checkbox for accepting conditions on forms is used for users to explicitly express their agreement with certain conditions or rules before submitting the form. This may be related to consent to the processing of personal data, subscribing to a newsletter, accepting a user agreement, privacy policy, or other rules you set for your users. The checkbox for accepting conditions helps ensure the consent and awareness of users, as well as protect the website from potential disputes or violations of terms of use. Check the box "Show the checkbox for accepting conditions on any forms" and specify the conditions.
You can also set the checkbox for accepting conditions as default, but we do not recommend using this setting. According to the laws of some countries, the user must click the checkbox themselves for the consent to be considered official.Checkout form settings. The checkbox for accepting conditions in order forms is used for the user to actively agree to the terms or rules that may be associated with placing an order. This may include, for example, consent to the processing of personal data, acceptance of a user agreement, acceptance of payment and delivery terms, and so on. Using such a checkbox allows you to have written confirmation of the user's agreement with the terms, which is important for maintaining legal obligations and protecting the interests of both the company and the customer. It also helps prevent disputes and misunderstandings between parties if there are any questions or issues with the order later on. Check the box "Show the checkbox for accepting conditions in order forms" and specify the conditions.
You can also set the checkbox for accepting conditions as default, but we do not recommend using this setting. According to the laws of some countries, the user must click the checkbox themselves for the consent to be considered official.Domain verification settings. Domain confirmation for third-party services is required to verify domain ownership. This is done to ensure the security and protection of users' personal data. Domain confirmation allows you to establish that the domain owner has the right to provide the service with access to use this domain. For more information on how to confirm the domain, read the "Domain Confirmation for Third-Party Services" article.
File "robots.txt". The robots.txt file is a text file that is placed in the root directory of a website and is used to manage the behavior of search engines and web crawlers (robots) when indexing the pages of your site. The file specifies which pages or sections of the site can be accessed by bots and which cannot.
Explanation of commands:
User-agent: Specifies which bots the following rules apply to. The symbol * means "all robots." You can also specify the names of particular bots, for example, User-agent: Googlebot for Google's robot.
Allow: The policy for allowing indexing of specified pages or directories. The Allow: / directive allows indexing of all pages.
Disallow: If you want to prevent the indexing of certain pages or sections, specify Disallow: /path/to/section.
Sitemap: Points to the sitemap file, which helps search engines find pages on the site.Sitemap. The link where the site map is available is indicated. A sitemap is a file that contains information about the structure of your website. It helps search engines like Google to index your site's pages faster. The site map lists all the important URLs, as well as provides information about how often the pages are updated, their importance, and other data.
Site logo. You can add a website logo in PNG format, with a minimum size of 256x256 pixels. The logo helps users to quickly recognize and remember your brand. It becomes a symbol of the company, distinguishing it from its competitors.
Website image on the tab (Favicon). Add a favicon - it's the website icon. The favicon is displayed in the browser tab before the page (website) title. The favicon enhances the appearance of the website, increases brand recognition, and helps users navigate the tabs. Upload the image in PNG format, with a minimum size of 128x128 pixels.
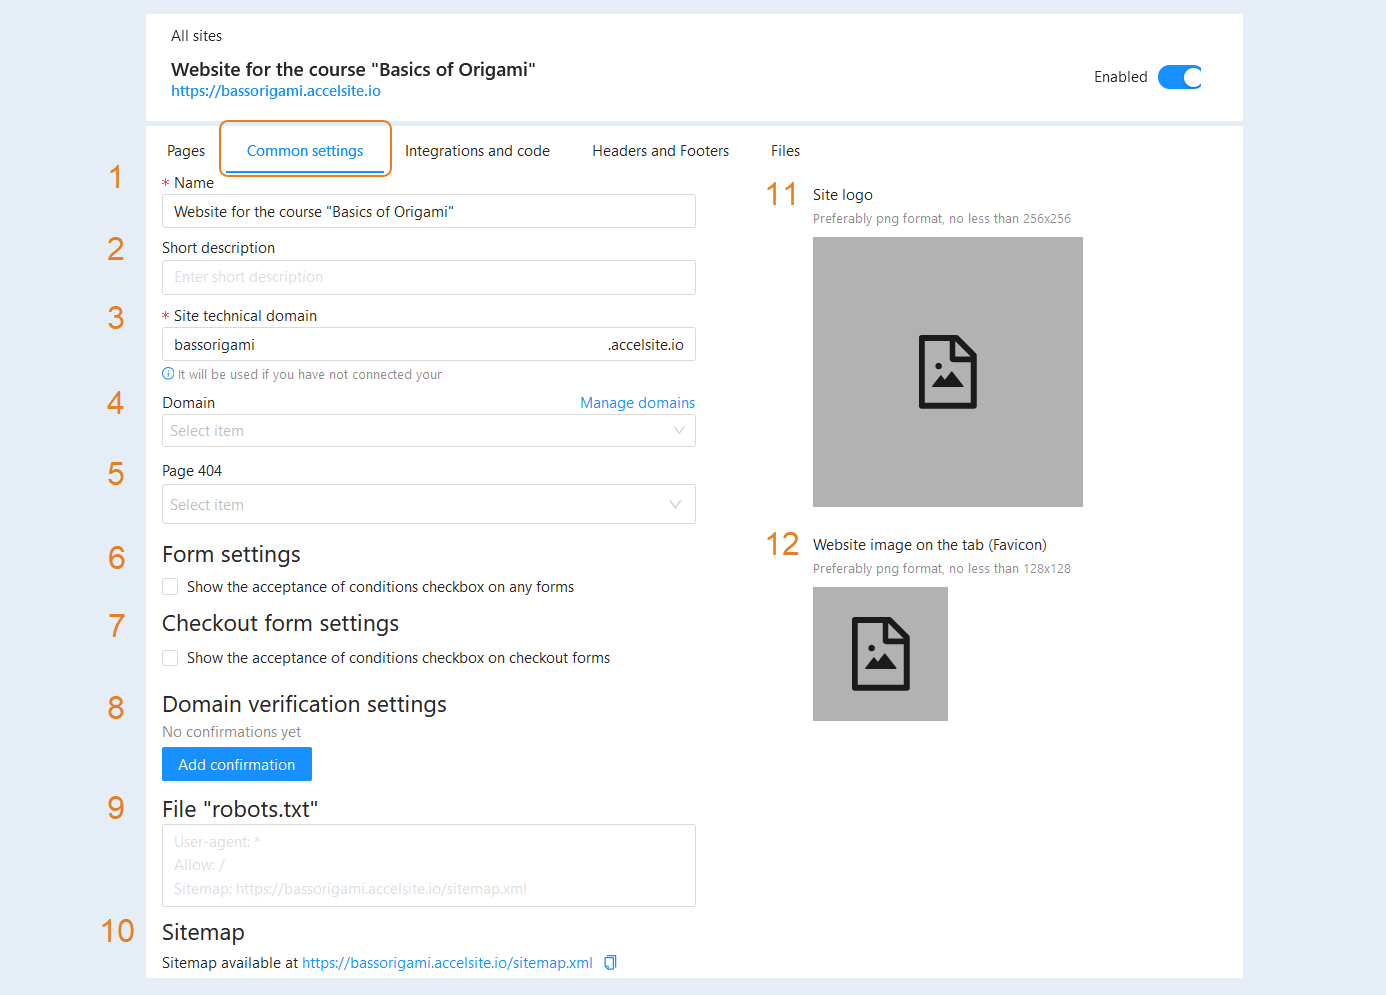
After making changes, press the "Save" button at the bottom of the page.
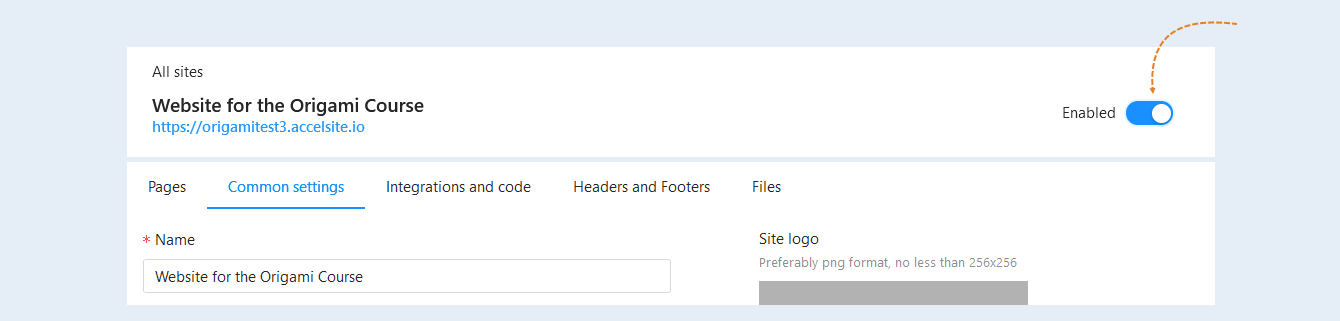
On this page, you can also enable website accessibility for visitors. To do this, move the "Enabled" slider in the top right corner of the page to the active position.
Integration and code
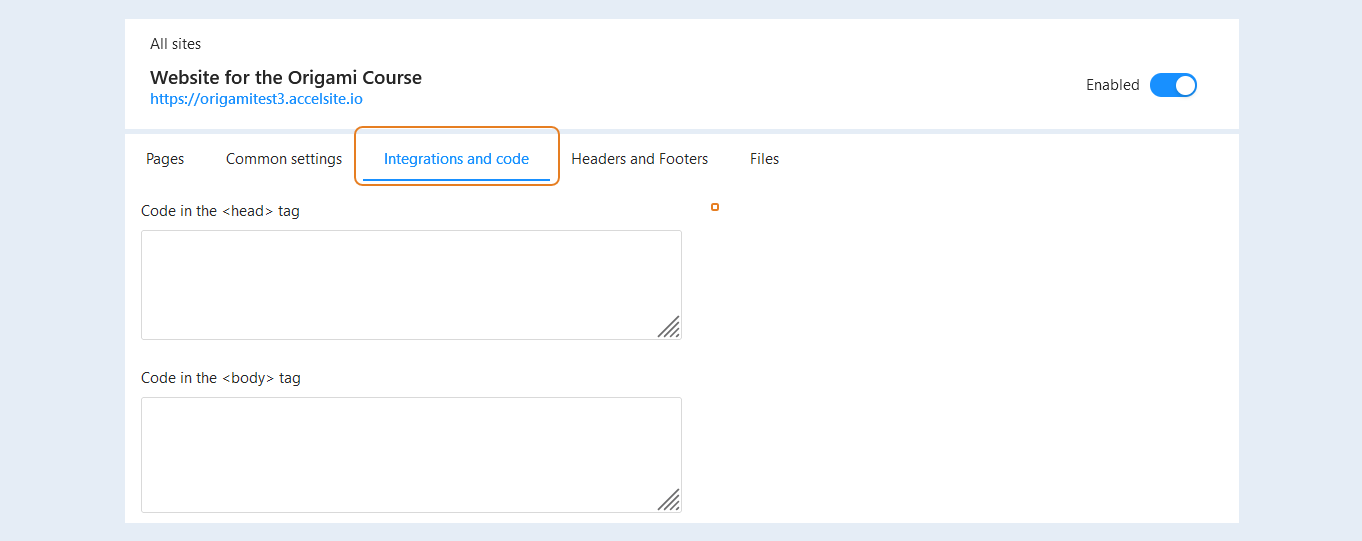
Code is a special element that allows you to embed non-standard elements on a page. This option is for programmers or website creation specialists. You can embed special code in the or tag.
Header and Footer
A header is a block at the top of a website page that is visible on all pages of the site. In this block, you can place a logo, the website menu, contacts, language switcher, and a shopping cart.
A footer is a block at the bottom of a page that is visible on all pages of the site. In this block, you can place contacts, details, links to other pages, and duplicate the website menu.
To learn more about creating headers and footers, read the article "Header and Footer".
Files
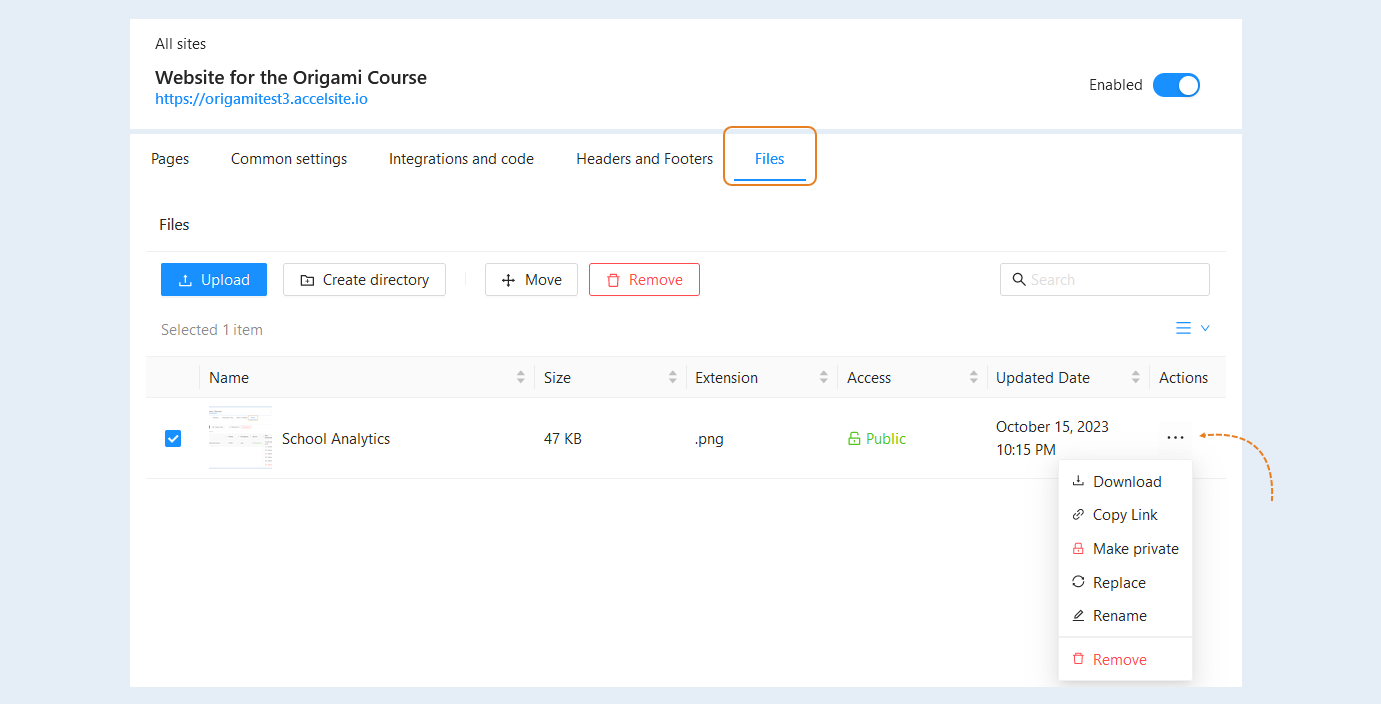
Files are a separate section in the page editor where you upload files and materials for storage and use on your websites.
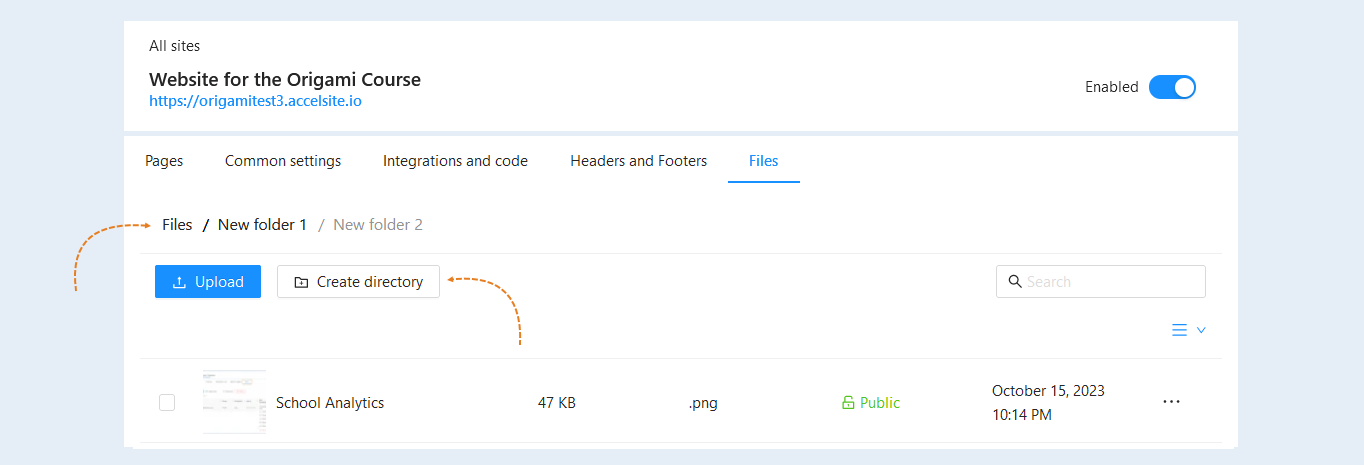
Upload files from your computer. Here you can manage your files: move, group into folders, download, copy file links, rename, replace, make them public or private.
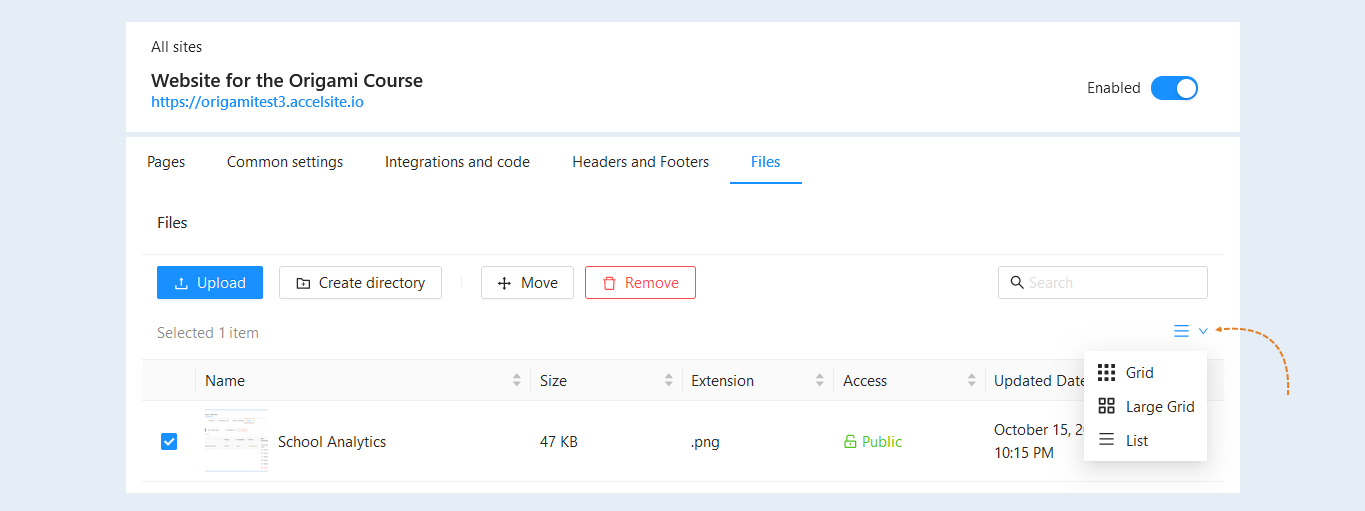
You can change the view of the "Files" section to grid, large grid, or list.
For convenience in sorting and searching uploaded files, create folders. Click the "Create folder" button. Inside the created folder, you can create another folder, thus creating a chain of folders, or you can upload files into it.
The selected folder path will be shown in the upper left corner. Click the "Files" button to return to the top of the list. Or, if you have created a folder hierarchy, click on the name of the desired folder to go to it.