Payments is a list of paid orders.
This list will display all orders that were paid or an attempt was made to pay, but for some reason the payment was not completed. If the payment failed, the status "unsuccessful" will be indicated.
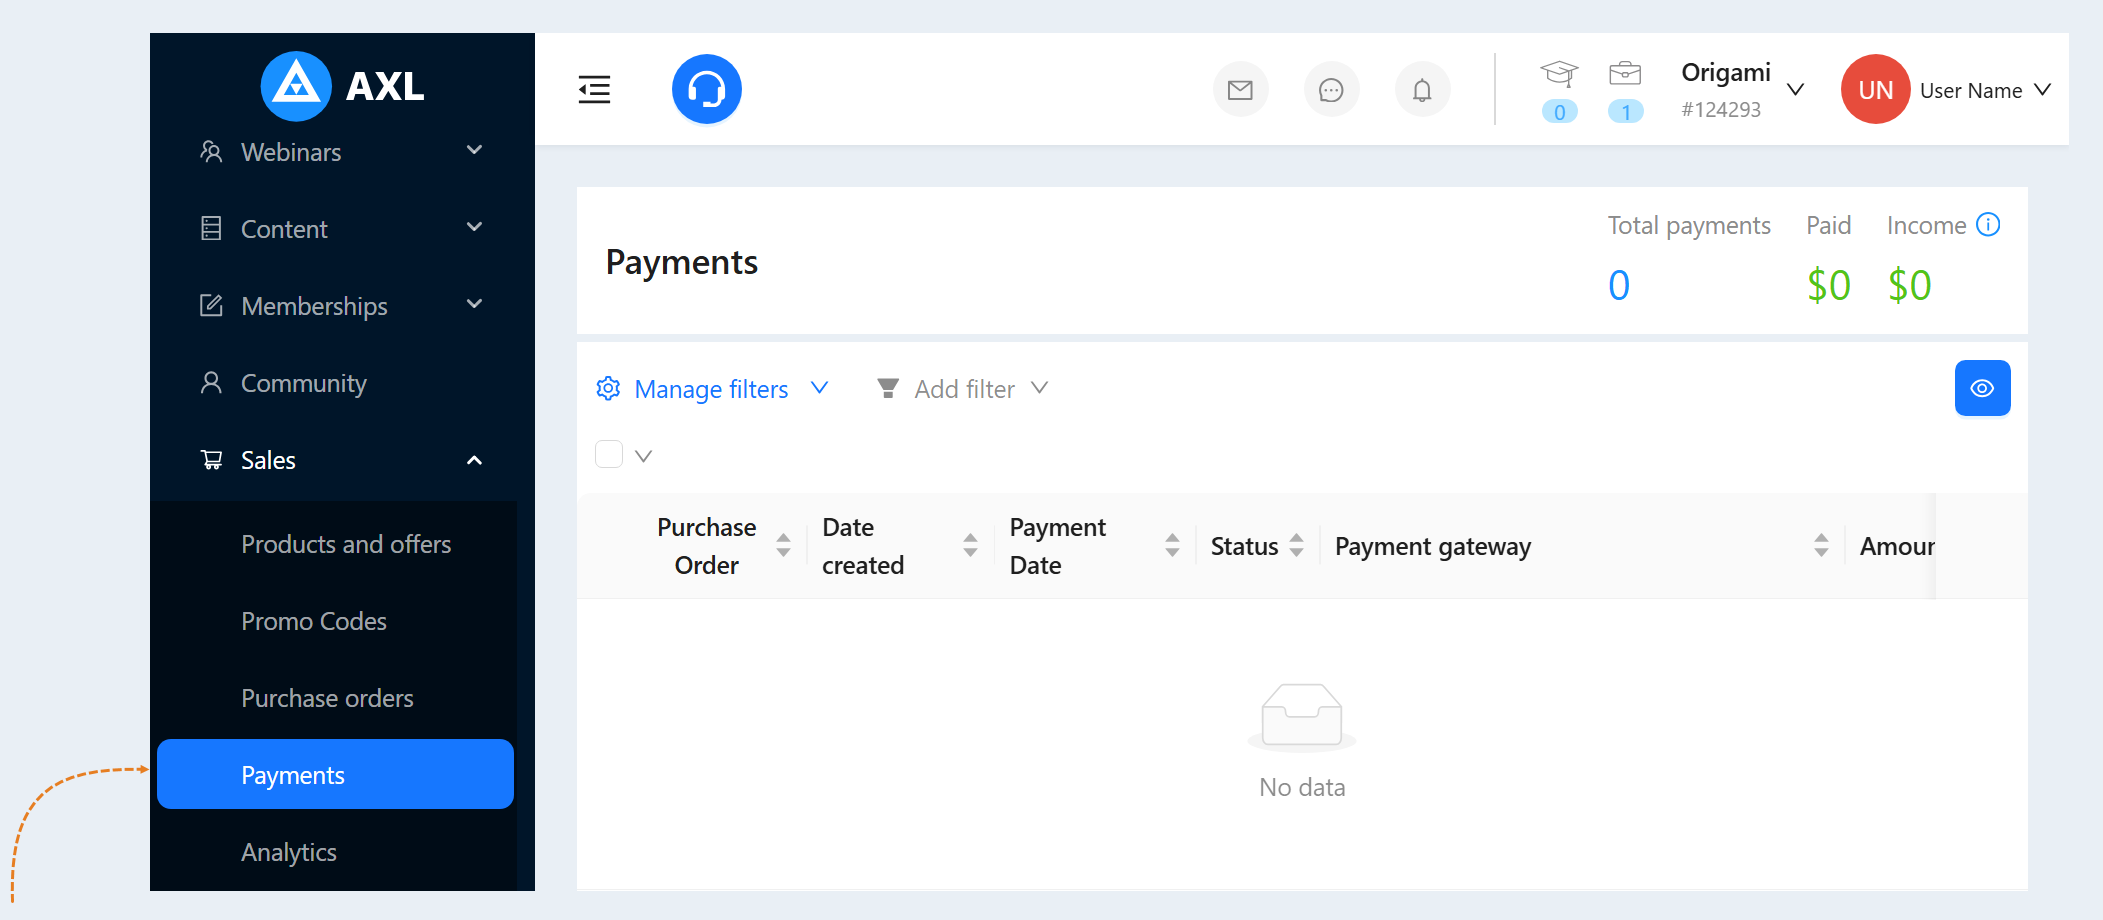
To view the list of payments, go to the "Sales" section, the "Payments" tab.
Click on the desired section of the article to go to its description:
Payment list
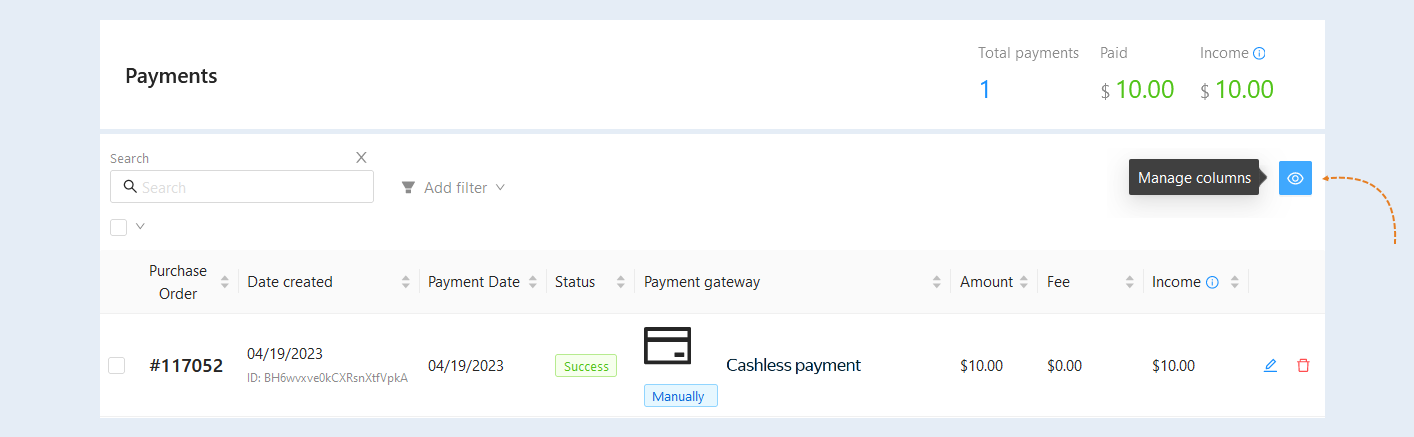
In the "Payments" tab you see the information:
Purchase Order. By clicking on it, an additional window will open. Here is the same information as in Orders. You can manage this order and make changes. Read more in the "Orders" article.
Date created. The date of creation of the order and the unique registration number assigned to the order (ID) are specified.
Payment date. You can see the exact date and time of the payment.
- Status. Here you can see the status of the payment: "Successful" or "Refund".
Payment gateway. You can see the payment instrument with which the payment was made.
- Amount. This is the amount paid by the client.
Fee. The commission is pulled up automatically upon payment.
Income. Income is the amount paid minus the commission amount.
Actions. The buttons are available to you here:
The "Edit" button. Click on the button to make changes to the payment.
The "Delete" button. Click on the button to delete the payment.

You can customize the number, content and sequence of columns. To do this, click the "Manage columns" button.
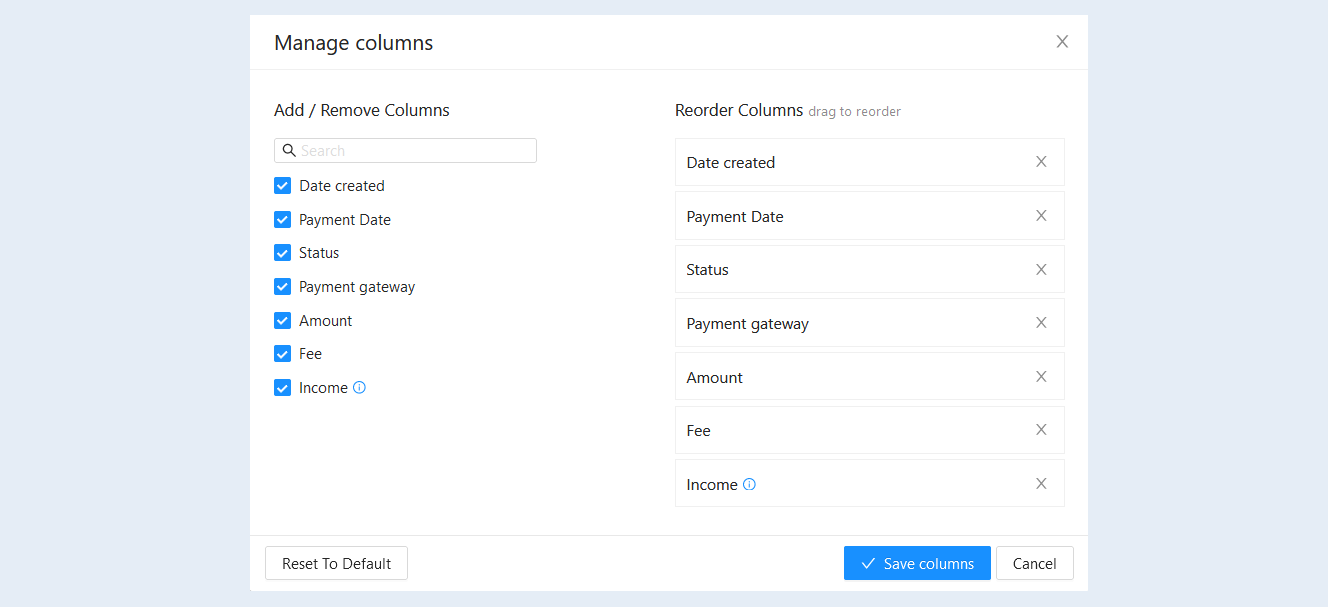
You will have an additional window "Column Management".
The full list of possible columns is shown in the left part of the window. Check the boxes next to the columns that you want to display in the list of payments. Or click the "Default" button to return to the original view.
In the right part there is a list of the columns you have selected. You can change the order of the columns. To do this, grab the column and drag it up or down. After completing the settings, click the "Save columns" button.
Search and filter
A search bar and a filter are available to you at the top of the page. Use them to quickly find the right payment.
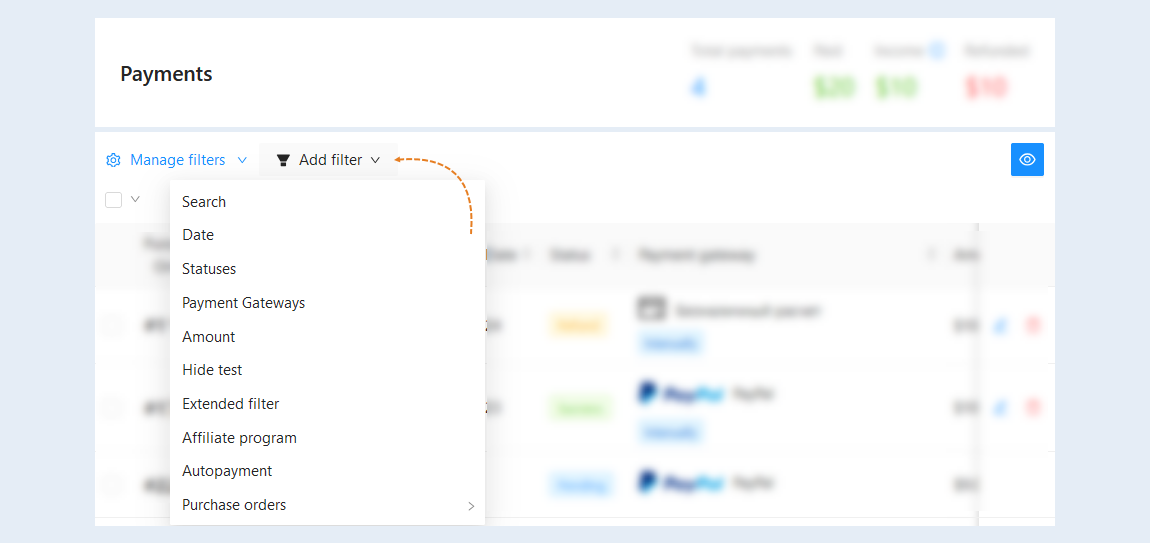
Click the "Add Filter" button and select a filter condition from the list:
Search. Free keyword search.
Date. This condition distinguishes calls by the date and time of the start and end of the call.
Statuses. This condition highlights payments that are currently in a certain status. Select the payment status from the suggested list.
Payment Gateways. This condition highlights payments made in a certain way: Prodamus, Stripe, Fondy, SquareUp, BePaid, Smart Glocal, cash or non-cash payment, etc. Select the type of integration from the suggested list.
Amount. This condition highlights payments that are paid for a certain amount. Set the desired amount interval.
Hide test. This condition allows you to hide all test payments.
Extended filter. Select the advanced filter to create different combinations of conditions for selecting payments. An additional window "Filtering and search conditions" will open for you. Here you define the conditions for creating a payment list. Read more about the filtering conditions in the article “Filtering and search conditions".
Affiliate program. This condition highlights the payments created within the framework of the partner program.
Autopayment. This condition highlights the payments for which the autopayment is enabled.
Purchase orders. This condition distinguishes payments according to the terms of the order. For more information about the conditions of the order filter, read the article "Purchase orders".
The "Manage filters" feature allows users to customize and optimize the list of payments. This can be especially useful for teams that work with a large number of orders and need a convenient way to track the status of payments.
By choosing different filter conditions, you can create a “set” filter that can be saved for future use. This is especially useful if you often search for the same data. You can save your preferences and not adjust the filters every time.
Select the necessary conditions for the filter, click "Manage filters" and "Save".
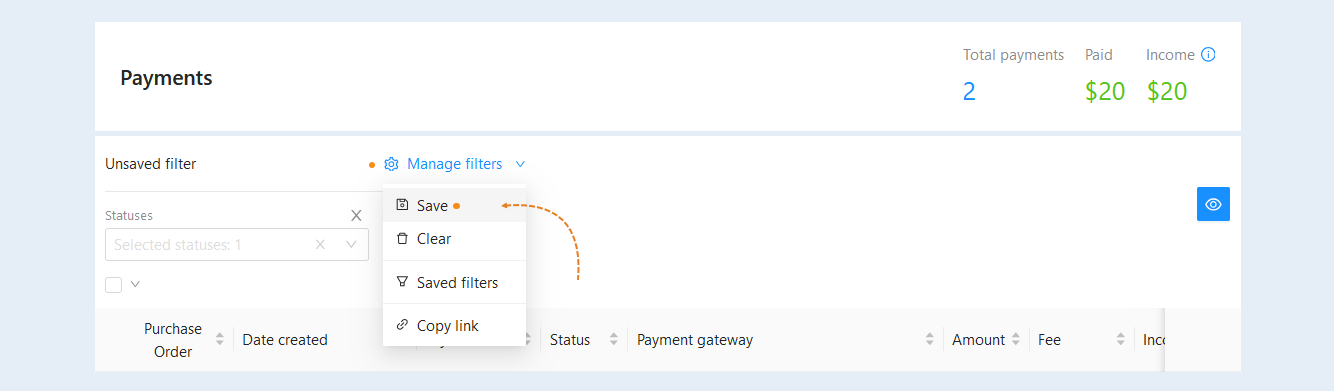
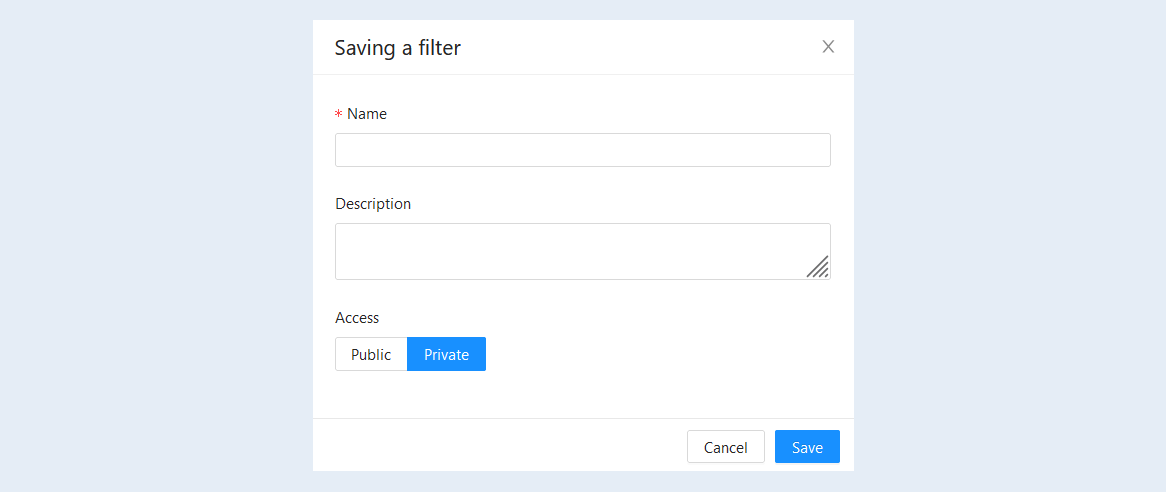
In the window that opens, fill in the fields:
- Name. Enter the name of the filter.
Description. Add a short description of the filter for easy search.
Access. The filter can be public or private.
Public. The public filter will be available to all users.
Private. A private filter with limited access, it can only be viewed by those users who have been granted access to it.
Then click "Save".
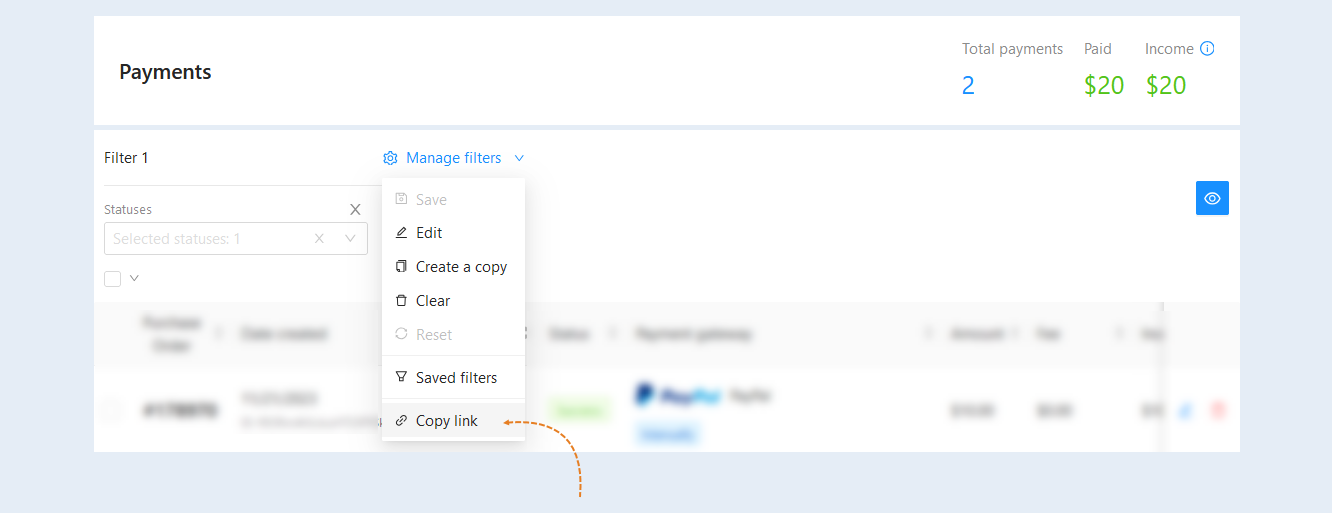
After the filter is configured and saved, you can copy the unique link to this filter. You can send this link to other team members so that they can quickly access the same filtering settings and see a similar selection of payments. This greatly simplifies collaboration and discussion.
Using filters, the team can find the data they need faster, which makes it easier to manage time and resources and improves overall productivity.
You can also copy the link and forward it to your employees. If an employee follows this link, the employee's "Payments" section will open with the "set" filter you created.
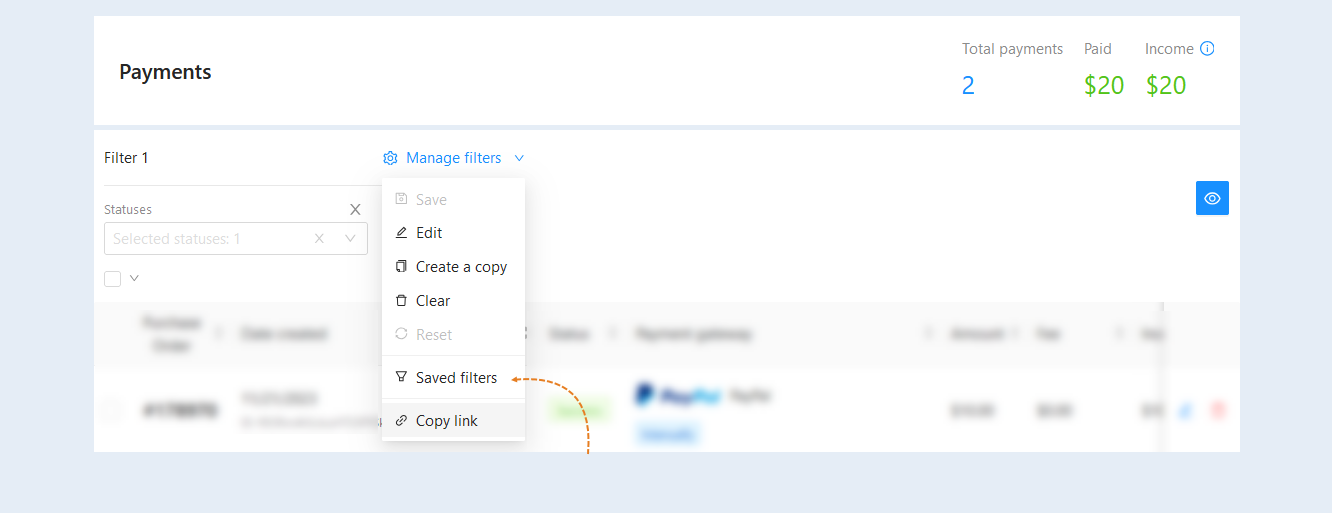
All previously created filters will appear in the list of saved filters. Click "Manage Filters" and then "Saved Filters".
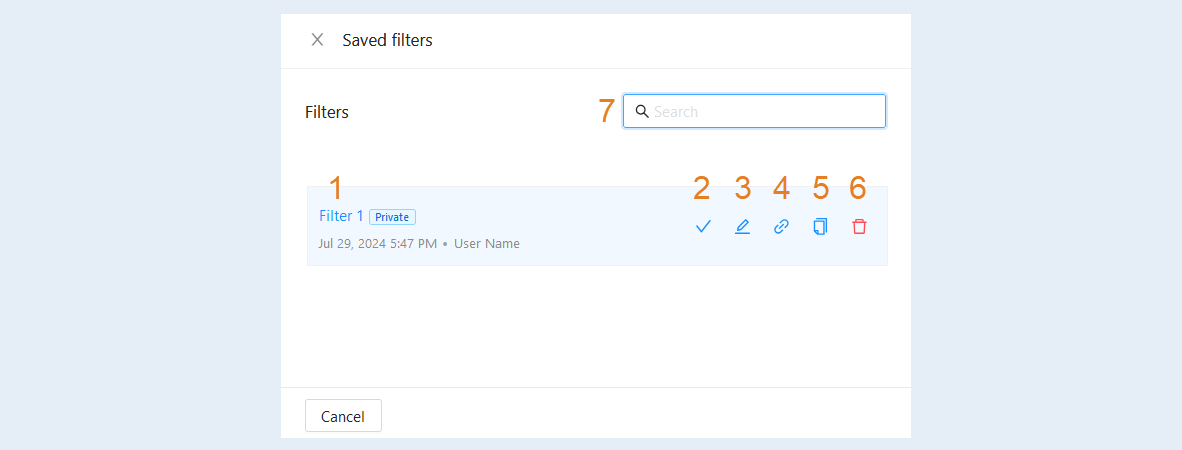
In the window that opens, you see the following information:
- The name of the filter, the type of access, the date and time of its creation and by whom the filter was created.
Apply. Click the button to open the list of payments with the conditions of this filter.
Edit. Click the button to make changes to the saved filter.
Copy the link. Click the button to copy the link to this filter and then forward it.
Copy. Click the button to create a copy of the filter.
Remove. Click the button to remove the filter.
Search. Use the keyword search bar to conveniently search for a filter in the list.
Creating a payment manually
Payments are created when the user clicks the "Pay" button in the order payment form.
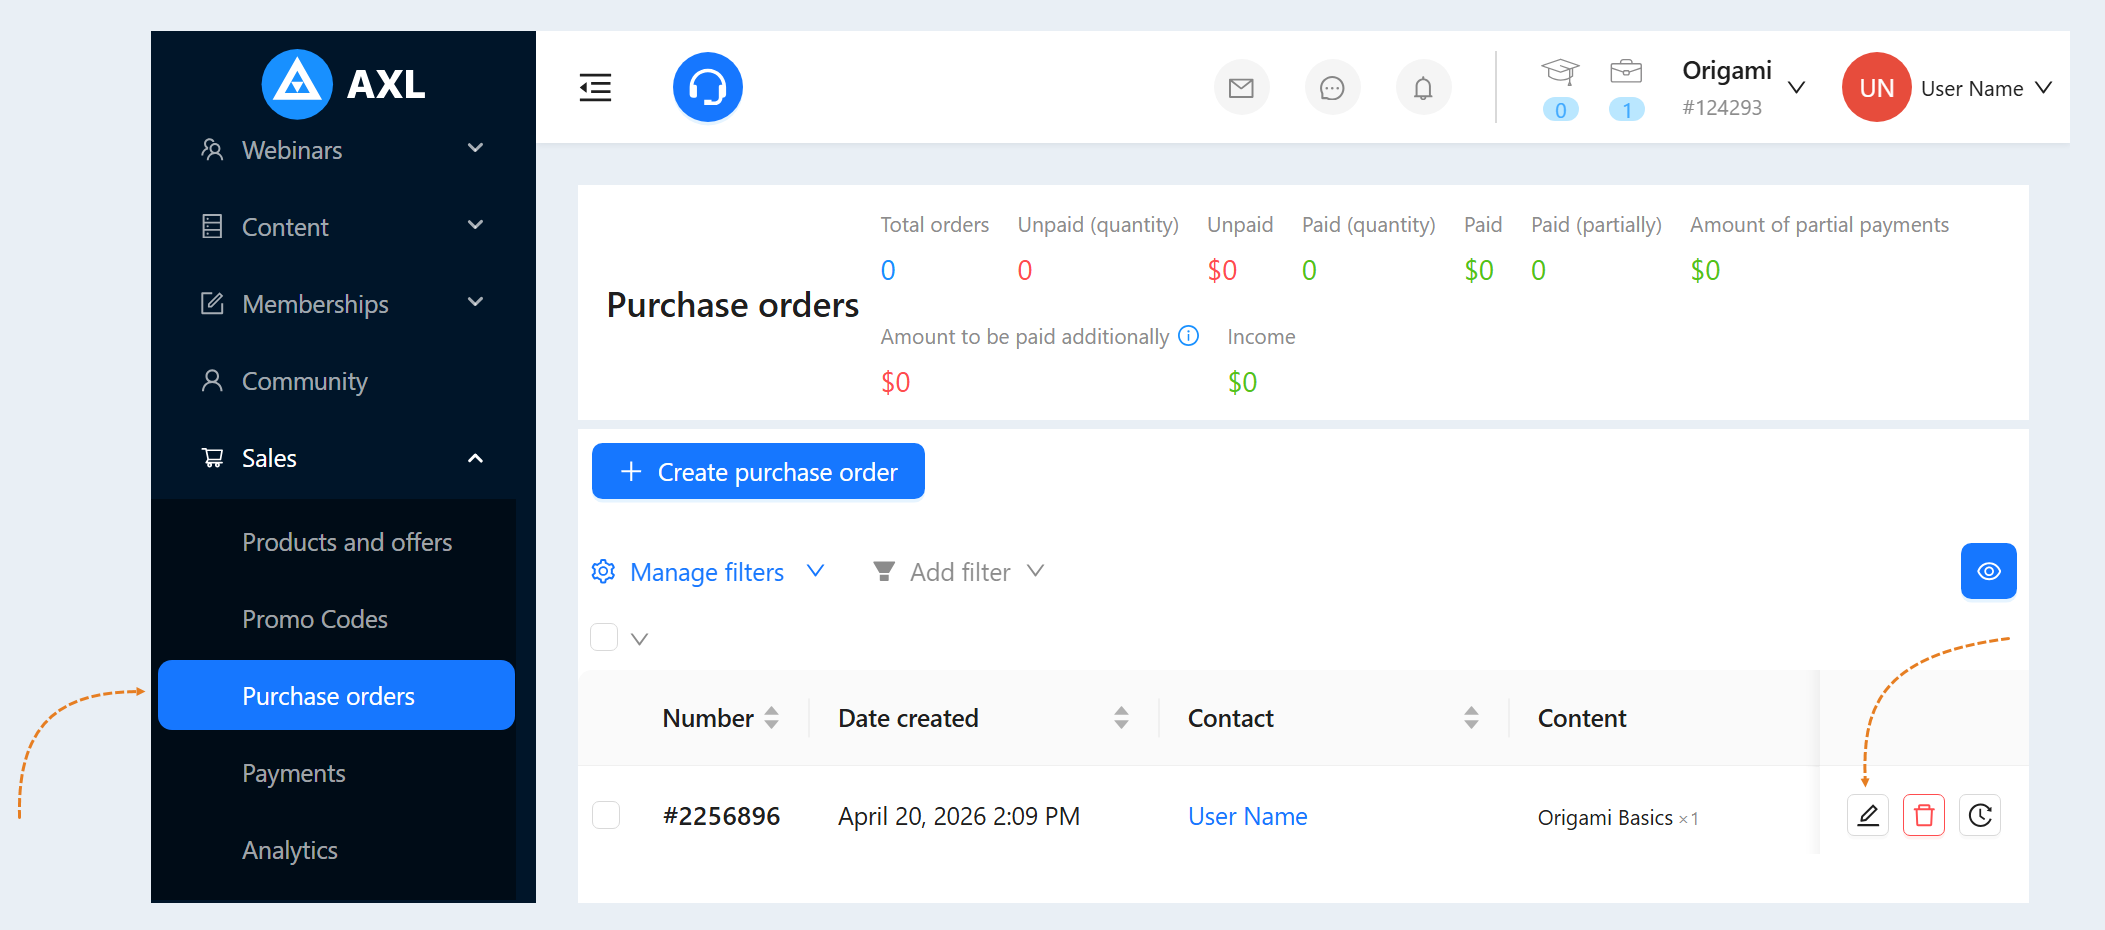
You can also create a payment manually. To do this, go to the "Sales" section, the "Purchase orders" tab. Open the order details by clicking the "Edit" button.
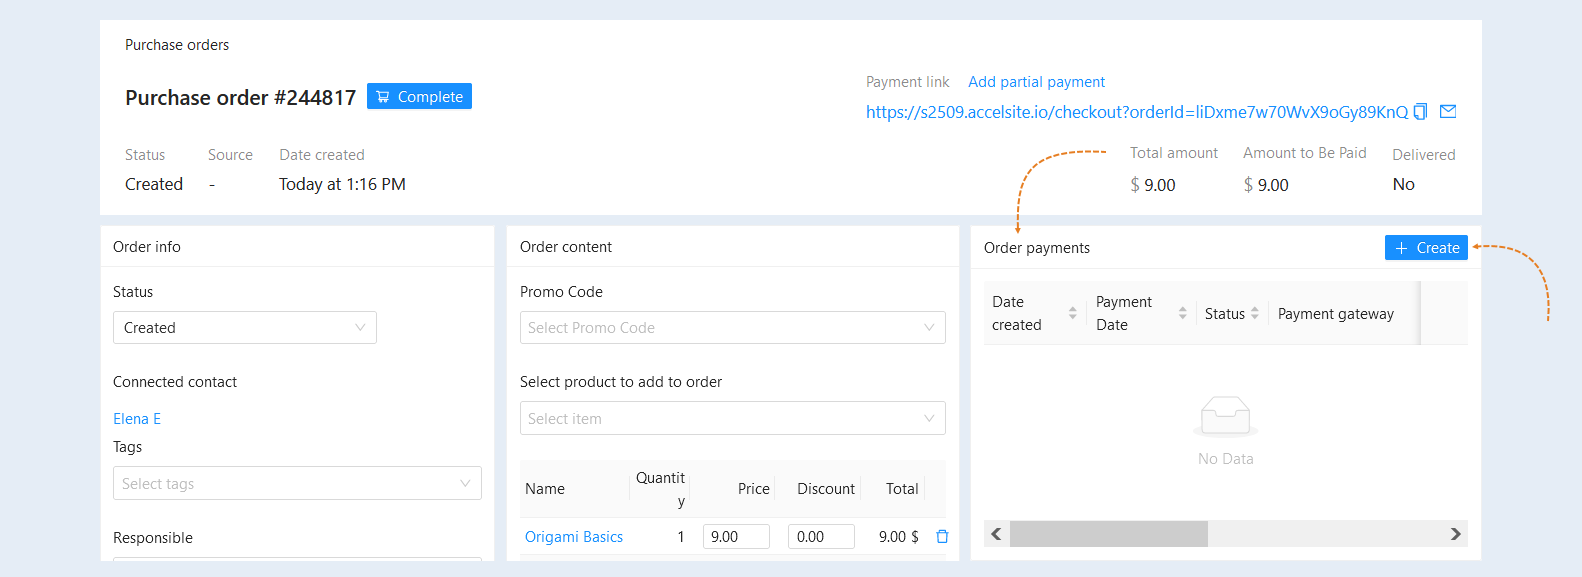
You will have detailed information about the order. In the "Order Payment" section, click the "Create" button.
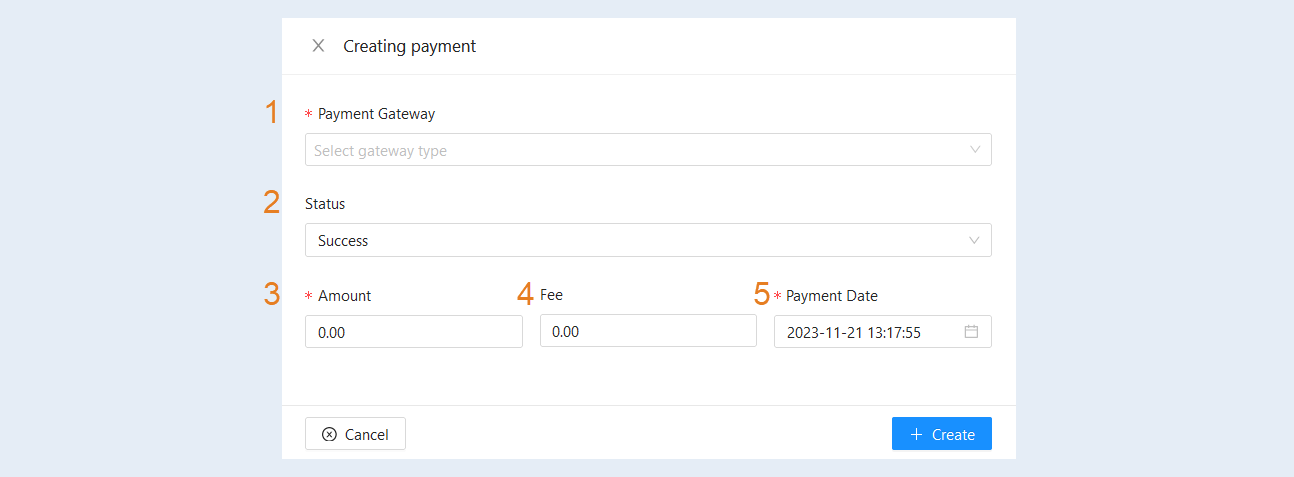
In the window that opens, fill in the fields:
Payment Gateway. Select the type of integration from the suggested list. For more information about payment integration settings, read the article "Payment Settings".
Status. Select the payment status: successful or refund.
Amount. Specify the payment amount.
Fee. You can set a commission when manually creating a payment.
Payment date. Select the exact date and time of payment.
Click the "Save" button. After that, the created payment will appear in the order information window, in the "Order Payments" section and in the list of payments.
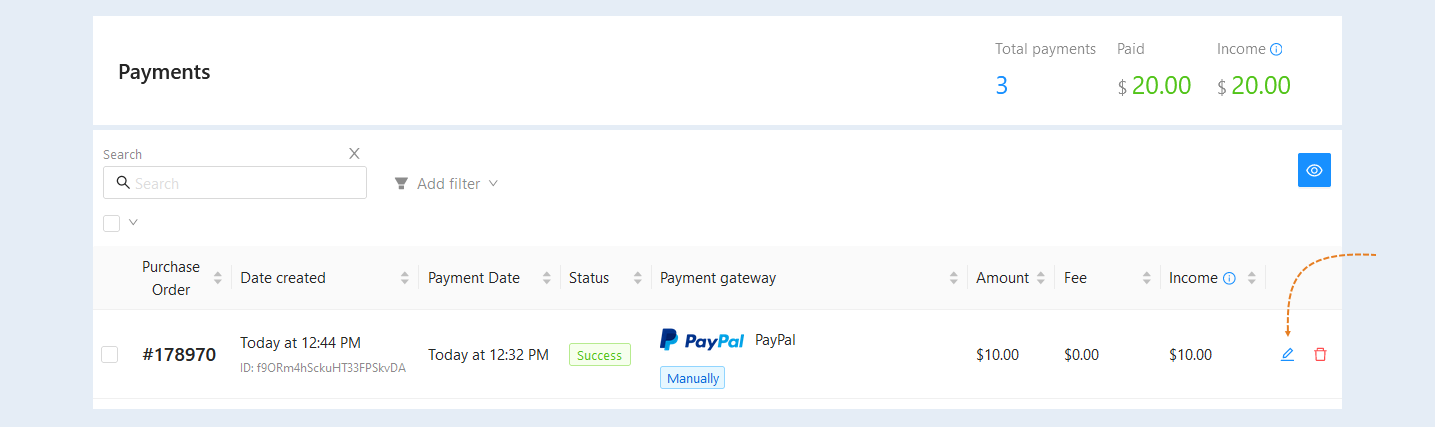
If the payment was added manually by the administrator, then it will be marked in the list of payments with the corresponding comment "Manually".

Editing a payment
To make changes to the payment details, click the "Edit" button.
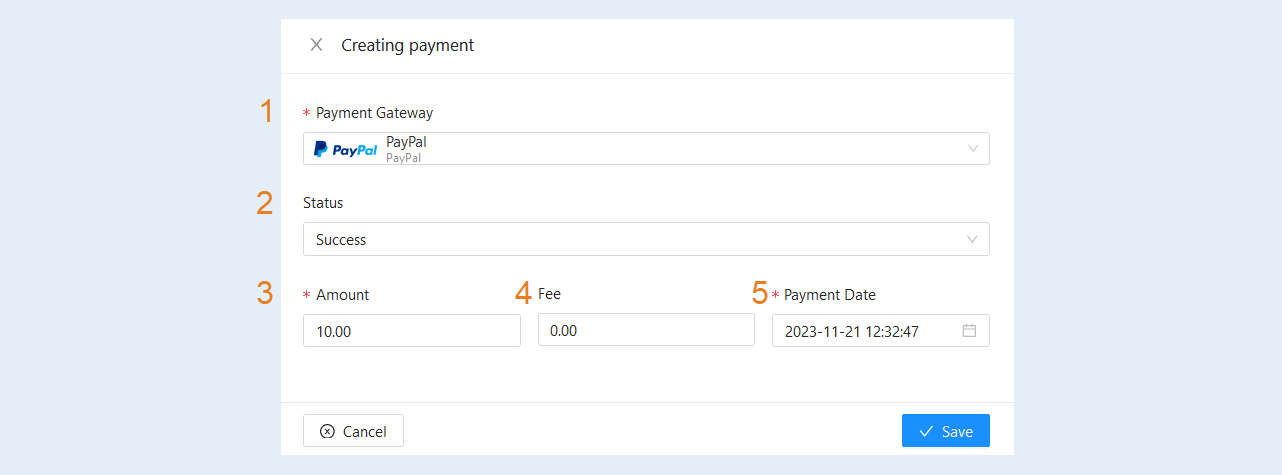
Payment integration. Here you can see the payment service that the customer used to pay.
- Status. Payment status: successful or refund.
- Amount. This is the amount paid by the client
Fee. The commission for this payment is indicated.
- Payment date. Here you can see the exact date and time of the payment.
After you have made changes to the payment, click the "Save" button.
Exporting payments
Using filtering and search terms, you can highlight payments and perform mass actions with them. Select the necessary payments by ticking the boxes and click the "Bulk Action" button.
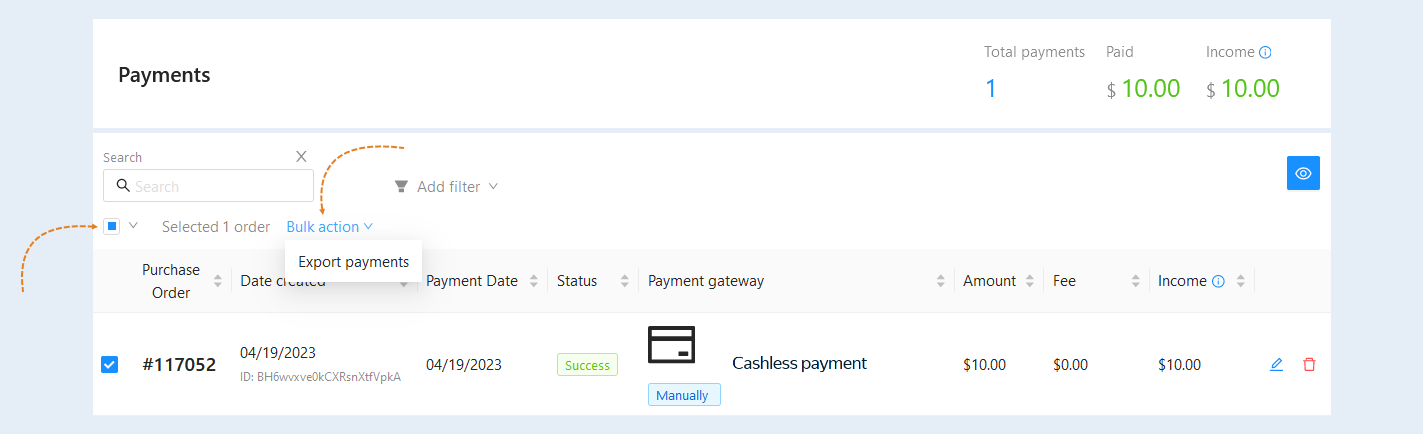
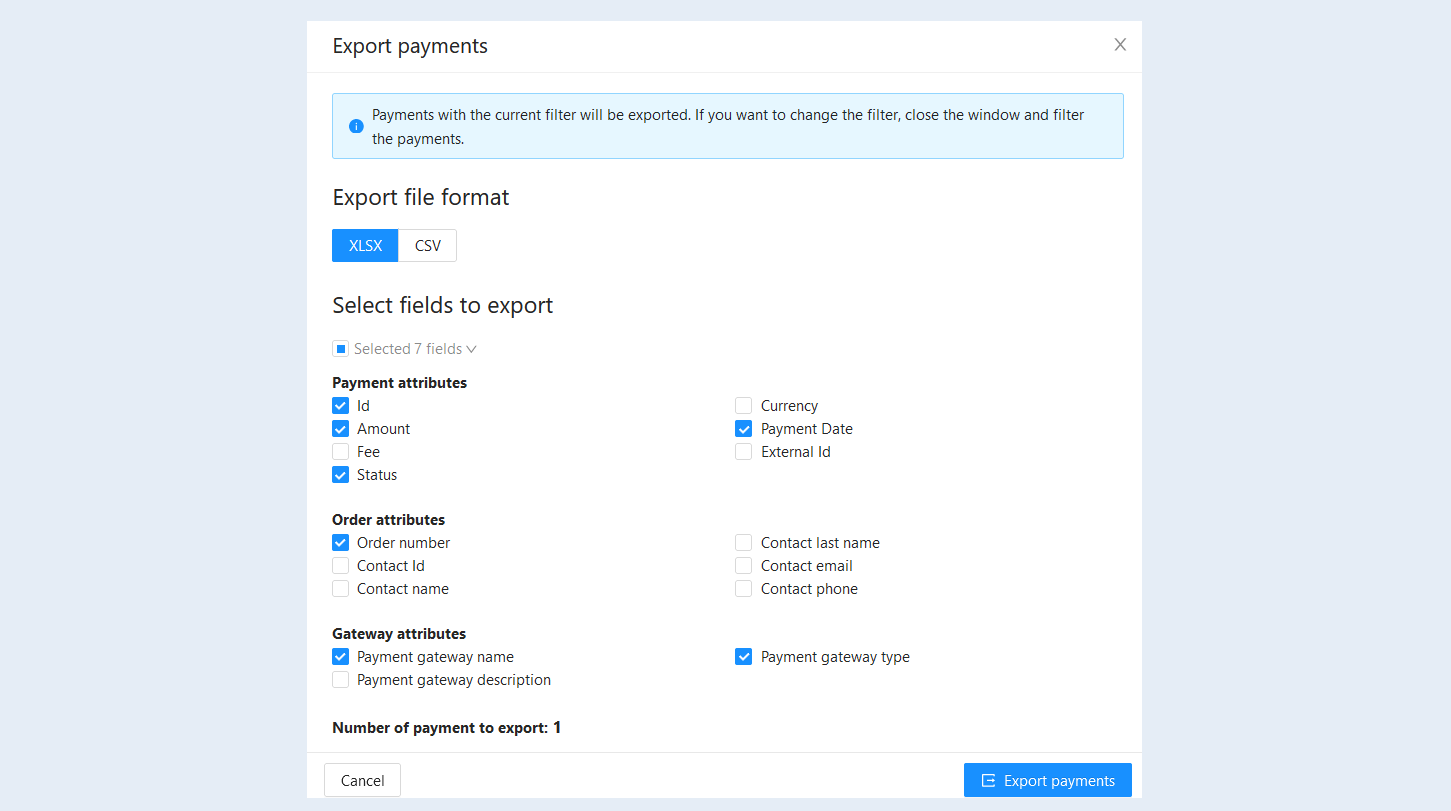
The "Export Payments" function allows you to export all selected payments in XLSX or CSV format. Exporting payments is uploading a list of payments from your account to another account. In the window that opens, select the file format and the fields to export. Click the "Export payments" button and download the file to your device (computer, laptop, tablet) in one file.
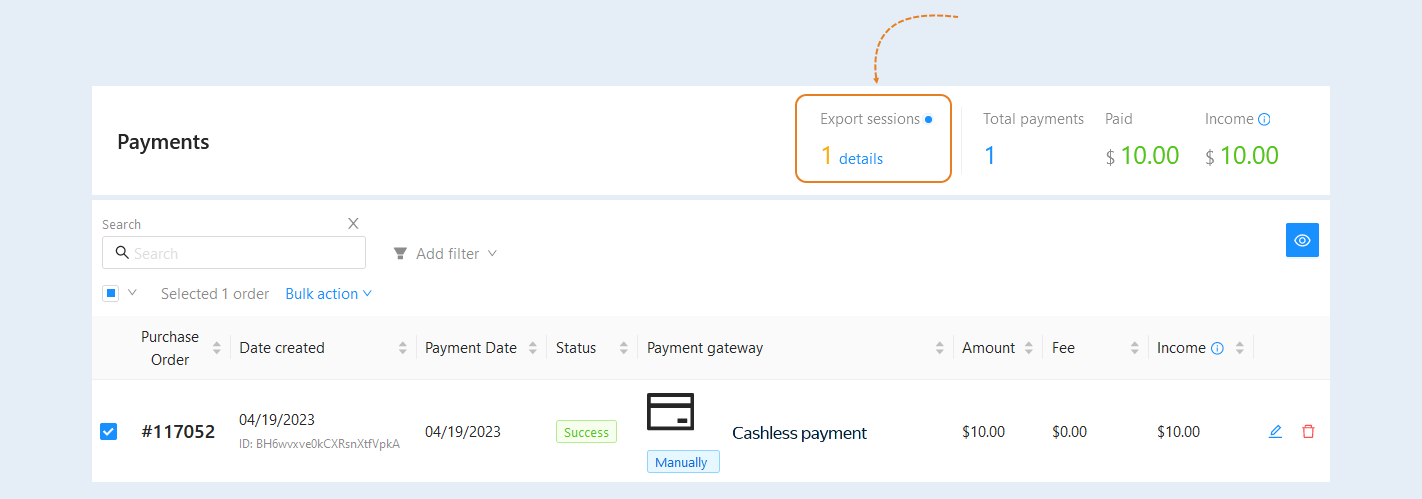
The export sessions will be saved and displayed on the panel of the "Payments" section. The number of sessions held is indicated here. Click the "Learn More" button to perform actions with saved sessions.
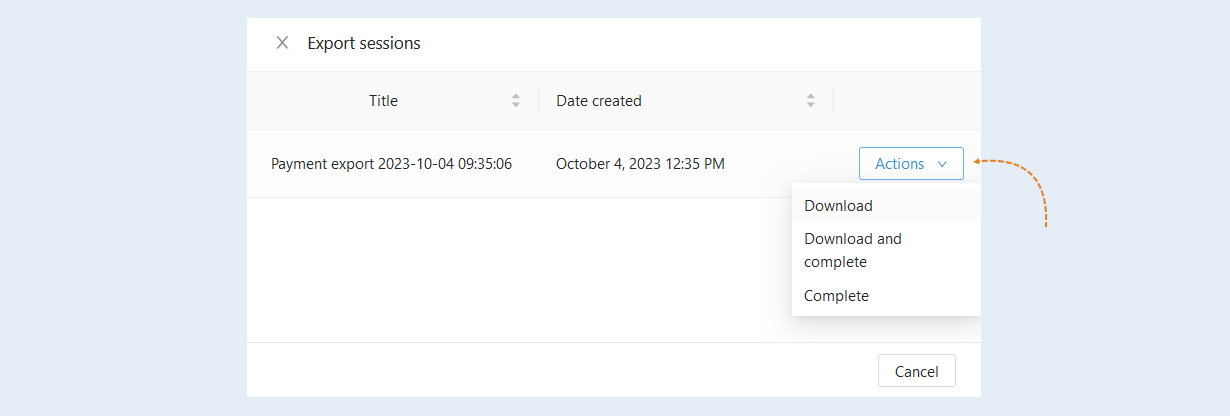
In the window that opens, all previously created payment export sessions will be available. You can re-download the created files by clicking the "Actions" button and selecting the "Download" action.