The "Settings" section allows you to maximally adapt the platform to the needs of a specific educational organization, ensuring a more convenient, efficient, and personalized learning experience for users.
Click on the desired section of the article to jump to its description:
Settings
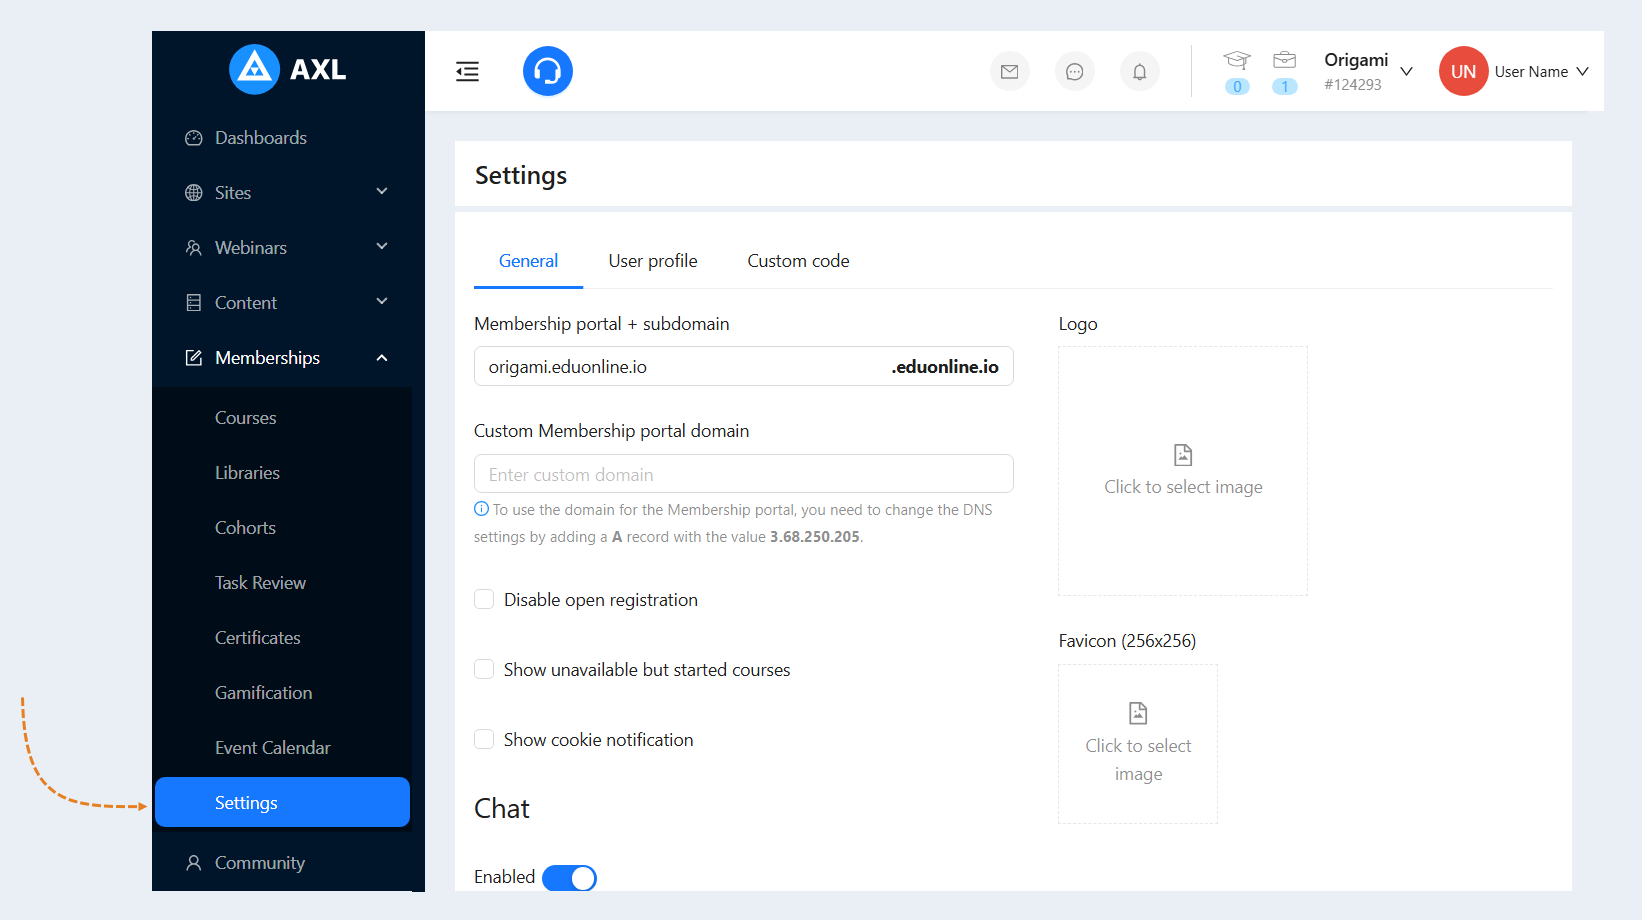
The "Settings" tab is located in the "Member Portal" — "Settings" section.
In settings, you can change general information about the member portal. In the "Settings" section, three tabs are available: General, User Profile, and Custom Code. Let's look at each tab in detail.
General
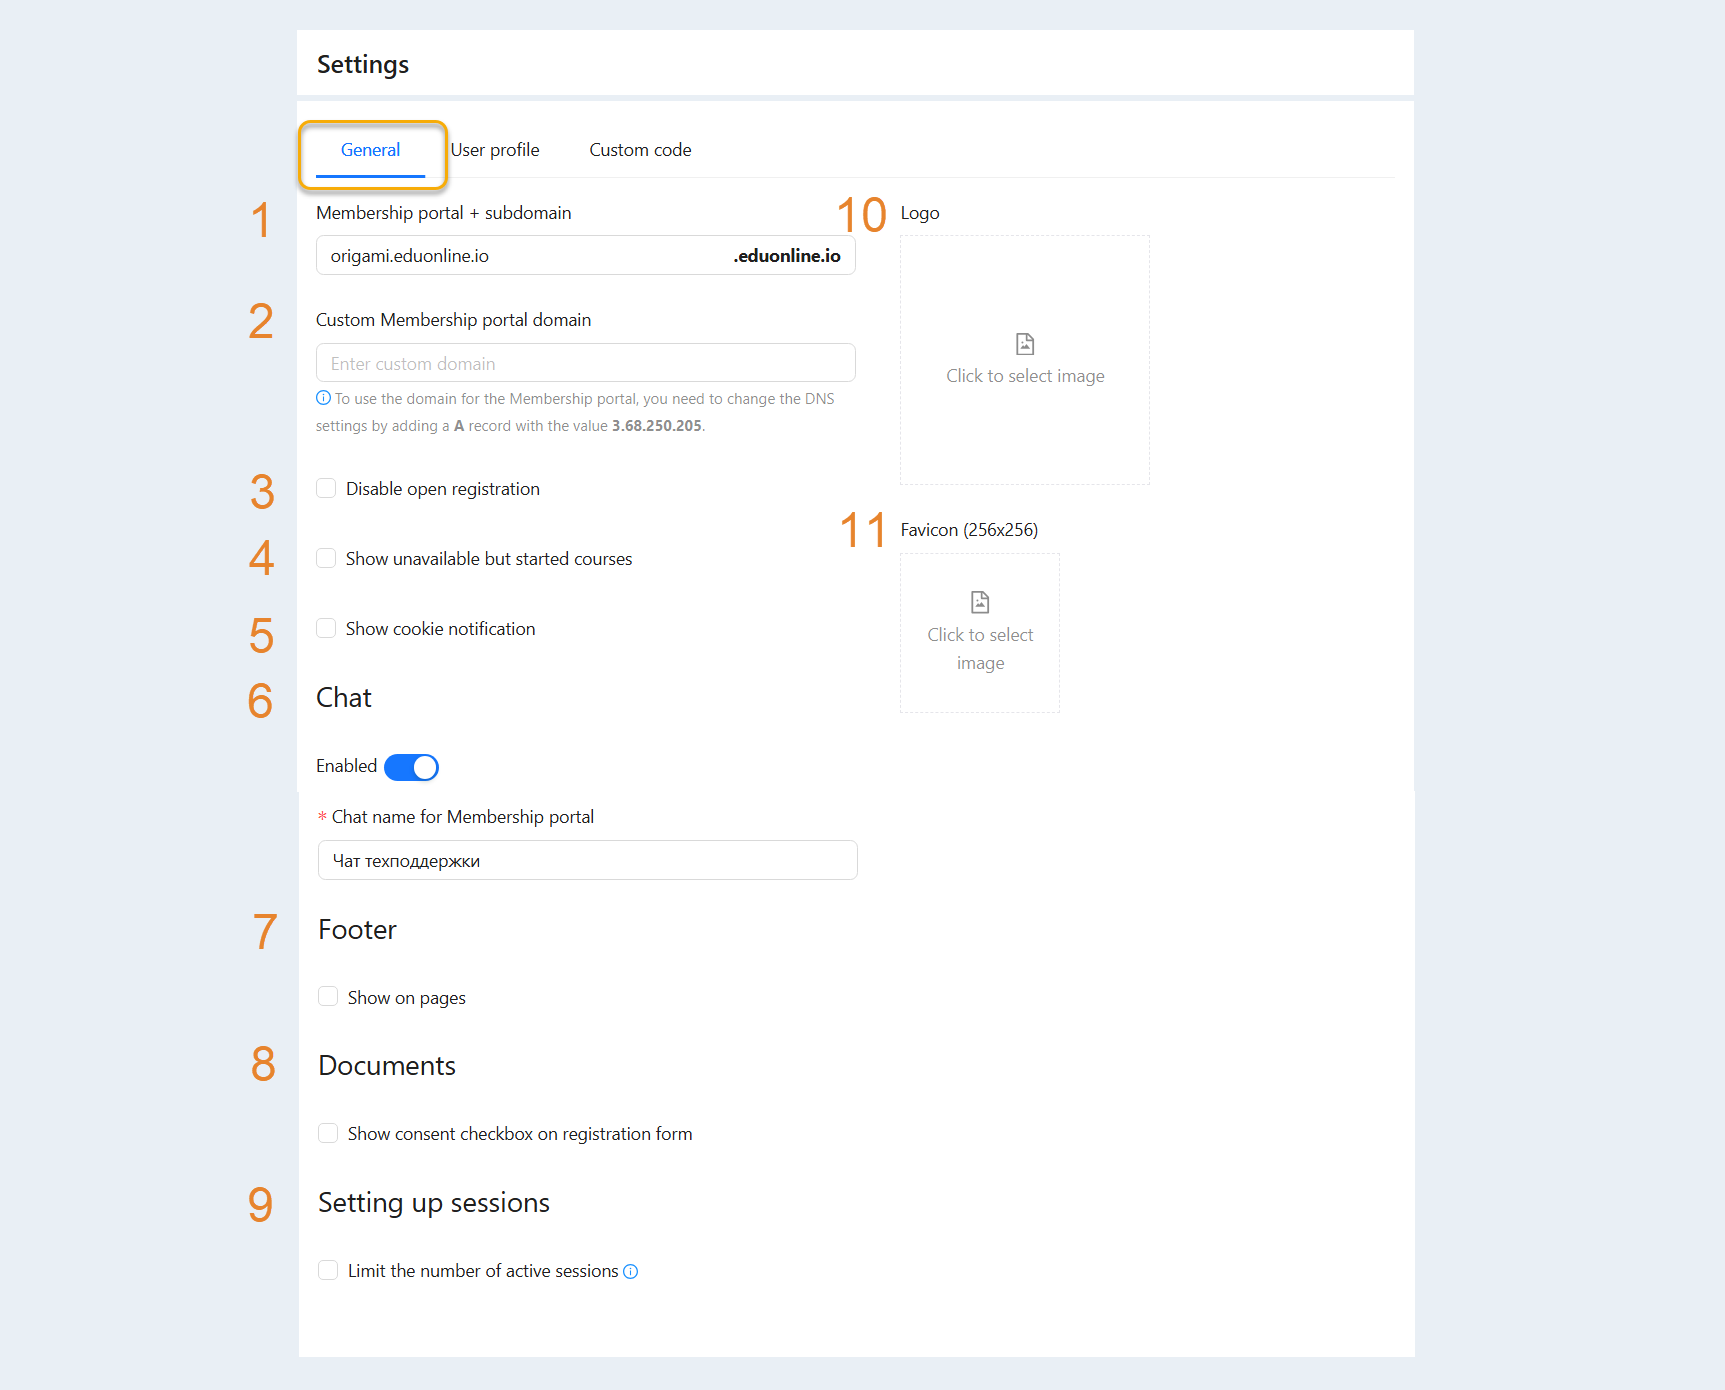
This section includes settings related to the member portal. It helps to establish a single standard and rules for all users in the system.
General account settings contain the following information:
- Member Portal + Subdomain. Enter the domain name for the member portal using English letters.
Custom Member Portal Domain. To use your own domain for the member portal, you must change the DNS settings by adding an A-type record with the value specified in the note.
Disable Open Registration. Check this box if you want to prevent users from registering for the member portal without payment.
Show Unavailable but Started Courses. Check this box so that the user's personal cabinet shows courses they have already started but are temporarily unavailable for any reason (e.g., subscription expired). This feature allows users to see progress on started courses and track updates/availability notifications.
Show Cookie Notification. This option displays a notification to users that the site uses cookies. Cookies are small text files that websites store on a computer or mobile device. This demonstrates transparency and care for user privacy. To insert a link, use square brackets: [link text | link].
Chat. Enable chat for your account employees and specify the name of the chat for members. To disable the internal chat, move the toggle to the inactive position.
Footer. Check "Show on pages" and enter the footer text.
Documents. Check "Show consent checkbox in the registration form" so that the registration agreement becomes available to users. Then add the registration agreement text that the user will see.
Session Settings. The "Limit the number of active sessions" option allows you to set a limit on the number of simultaneous active sessions (logins) for each user. This prevents unauthorized access. If a password is stolen, the intruder won't be able to use the account simultaneously with the owner. It also limits account sharing. Usually, 1-2 sessions are enough for most users. A 1-session limit guarantees only one person can use the account at a time.
Logo. Upload your account logo.
Favicon. Add a favicon image for your account. Image size should be at least 256x256 px.
After making changes to the general settings, click the "Save" button at the bottom of the page.
User Profile
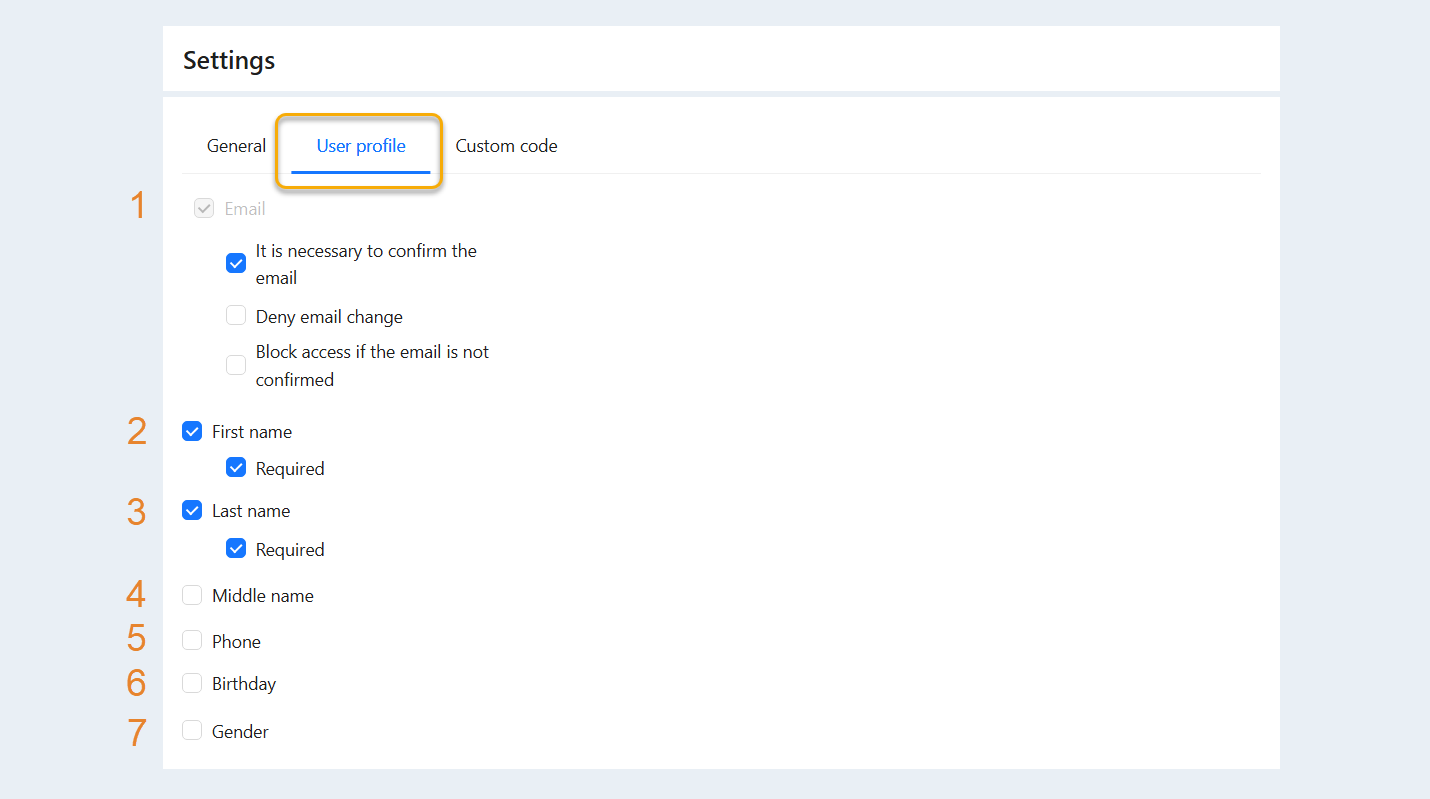
In the "User Profile" section, you set the mandatory conditions for users during registration on the member portal (e.g., email confirmation).
Choose the conditions from the proposed list:
Email Address. Set parameters:
- Email confirmation required. A letter will be sent to the specified mailbox for confirmation.
- Prohibit email change. You can prevent members from changing their email address.
- Block access if email is not confirmed. Block portal access if the user hasn't confirmed their email.- First Name. Check this box to have members provide their first name during registration. Set it to "Required".
Last Name. Check this box if you want members to provide their last name. You can mark it as required.
Middle Name. You can check this box to have members provide their middle name.
Phone. If you want members to provide their phone number, check this box. You can also mark it as required.
Date of Birth. Check this box if you want members to provide their date of birth.
Gender. Check this box if you want members to provide their date of birth.
Click the "Save" button.
Custom Code
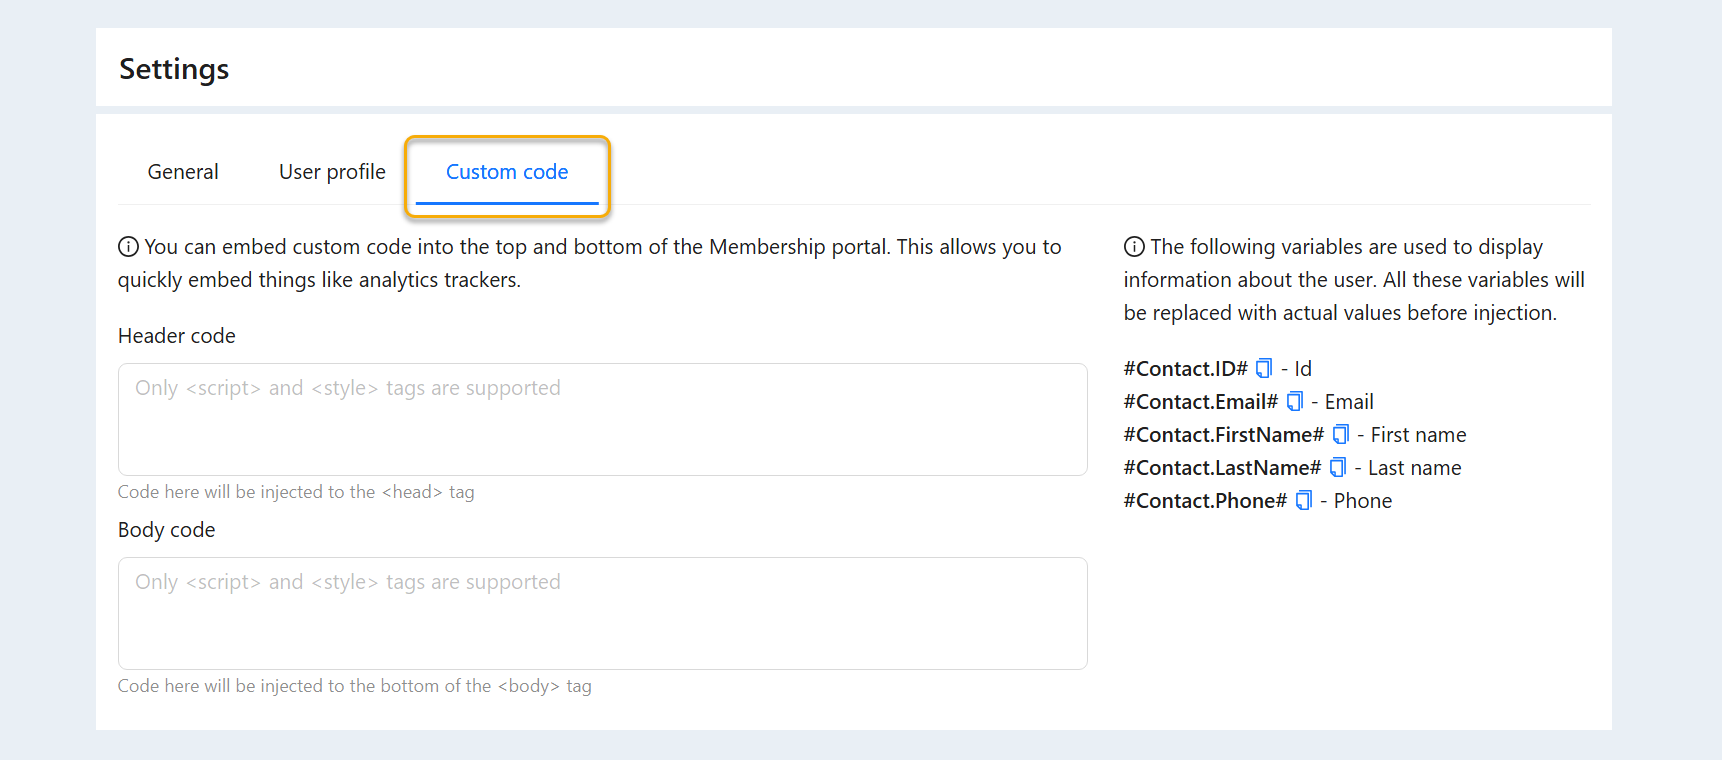
You can enter custom code in the header and footer of the account site. This allows for quick integration of, for example, analytics trackers. An analytics tracker is a system for measuring, collecting, and analyzing data about website visitors to improve and optimize site performance.
In the "Custom Code" section, you can make the following changes:
Header Code. Code will be inserted into the top part of the page (<head>).
- Body Code. Code will be inserted into the main body of the page (<body>).
- Variables. These variables are used to display member information before the code insertion:
- #Contact.ID# — Identifier
- #Contact.Email# — Email
- #Contact.FirstName# — First Name
- #Contact.LastName# — Last Name
- #Contact.Phone# — Phone
Click the "Save" button.
Advanced Settings and JS Code
You can subscribe to the rendering of a lesson, test, or task in the learning section using built-in tools. This may be necessary, for example, if you need to run a JS function every time a user moves from step to step.
Code Example:
JavaScript
window.AXLSchool.addEventListener('CourseItemChanged', function (data) {
// your function
});
Data is an object with the following data:
JavaScript
{
courseId: string; // course ID
courseItemId: string; // step ID
tab: 'theory' | 'tests' | 'tasks' | 'rating'; // current tab
studentId?: string; // member ID
}