Certificate - is an official document issued to participants who have successfully completed a specific training event. It confirms that the participant has gained certain knowledge, skills, or competencies in a specific field. For more information on how to set up a certificate template, read the article "Certificate".
Certificate scenario - is a specific sequence of steps and actions that automate the process of issuing certificates to participants of online courses or training programs.
The scenario allows for the automatic issuance of certificates after participants successfully complete specific courses or programs. This frees organizers from the manual process of creating, signing, and sending certificates, saving them time and resources. Automatic certificate generation eliminates the possibility of human error that may occur during manual data processing.
Creating a certificate scenario
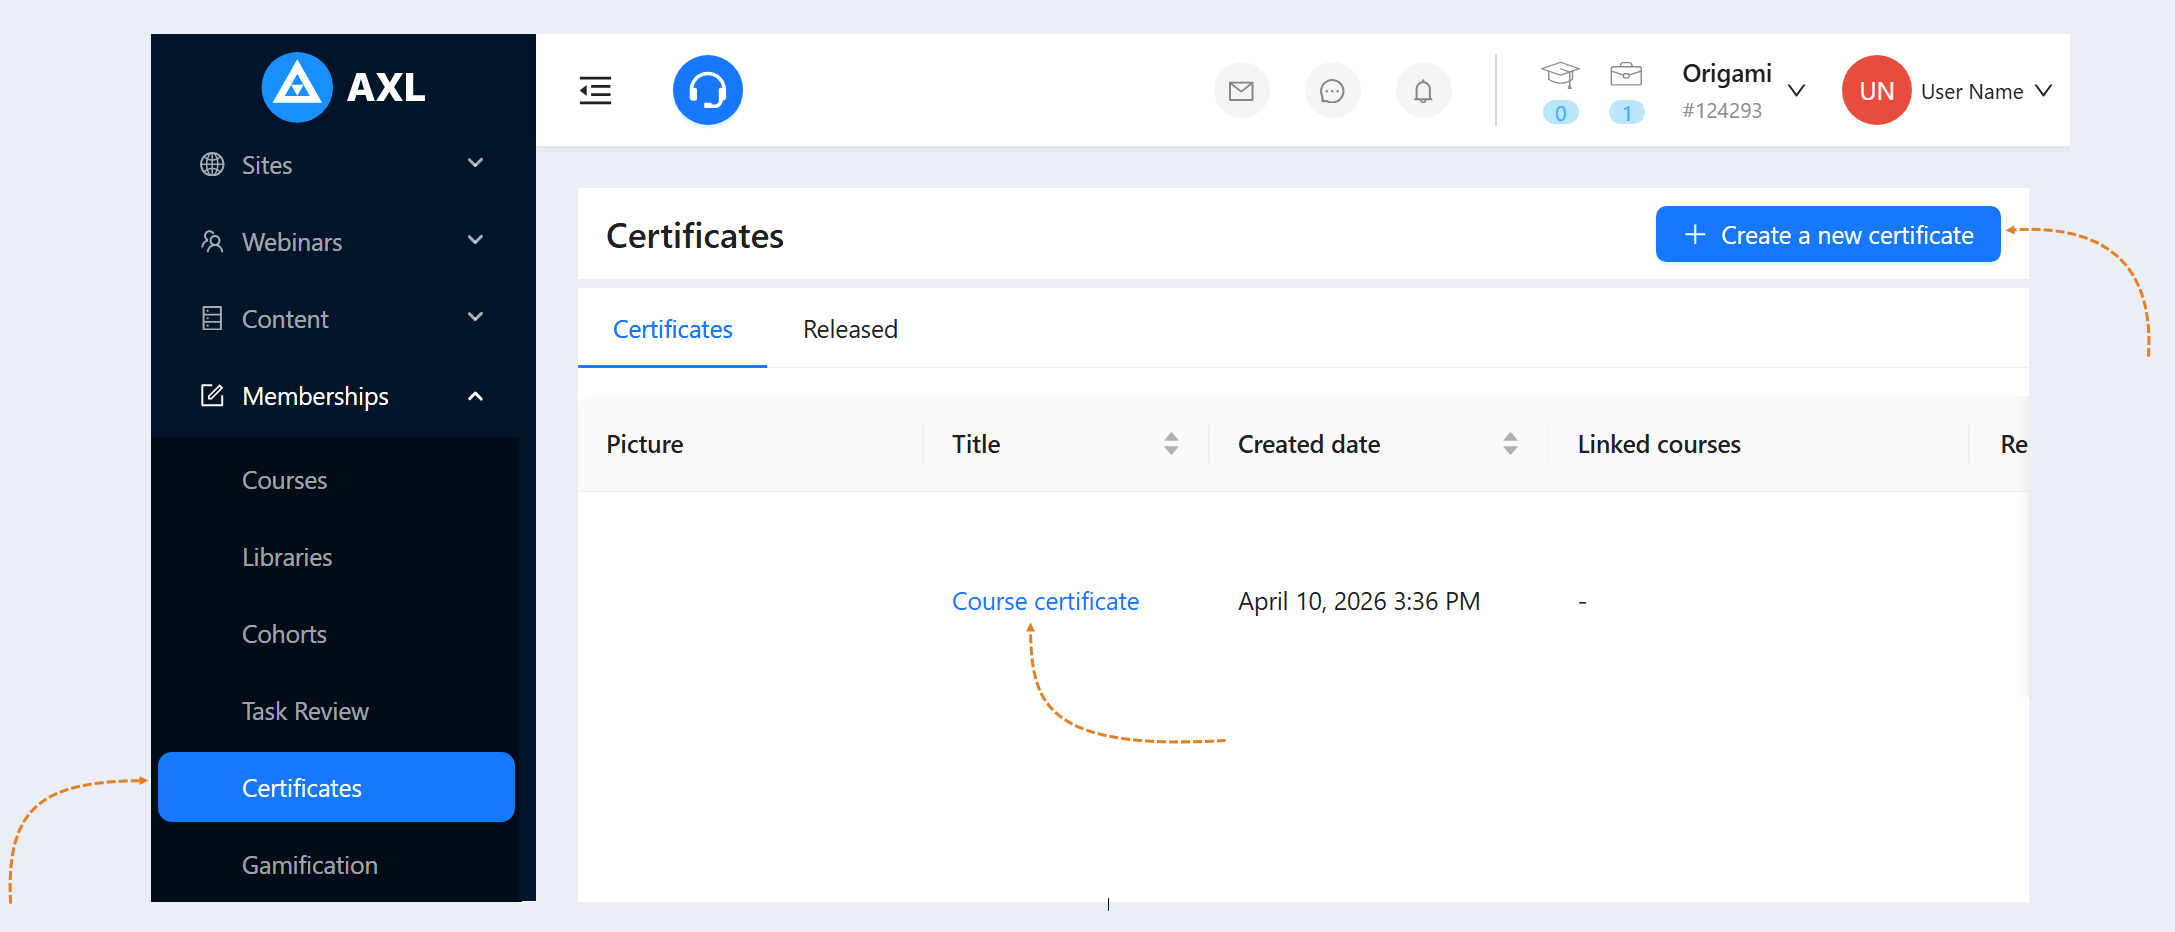
Go to the "Courses and Training" section and select the "Certificates" tab.
Open a previously created certificate or create a new one. For more information on how to create a certificate, read the article "Certificates".
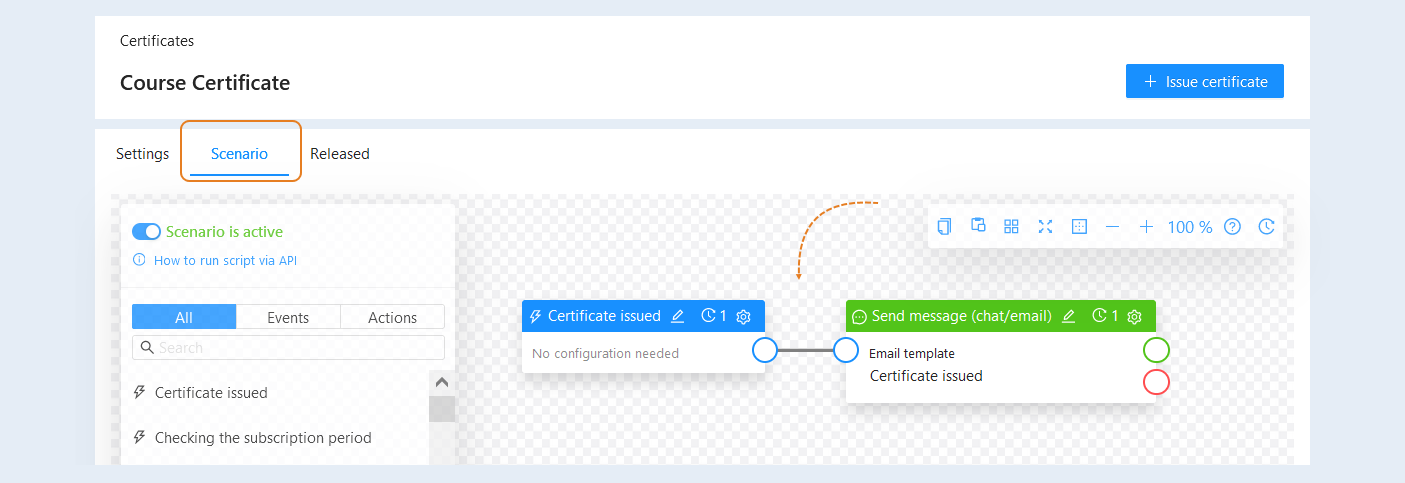
Next, go to the "Scenario" tab.
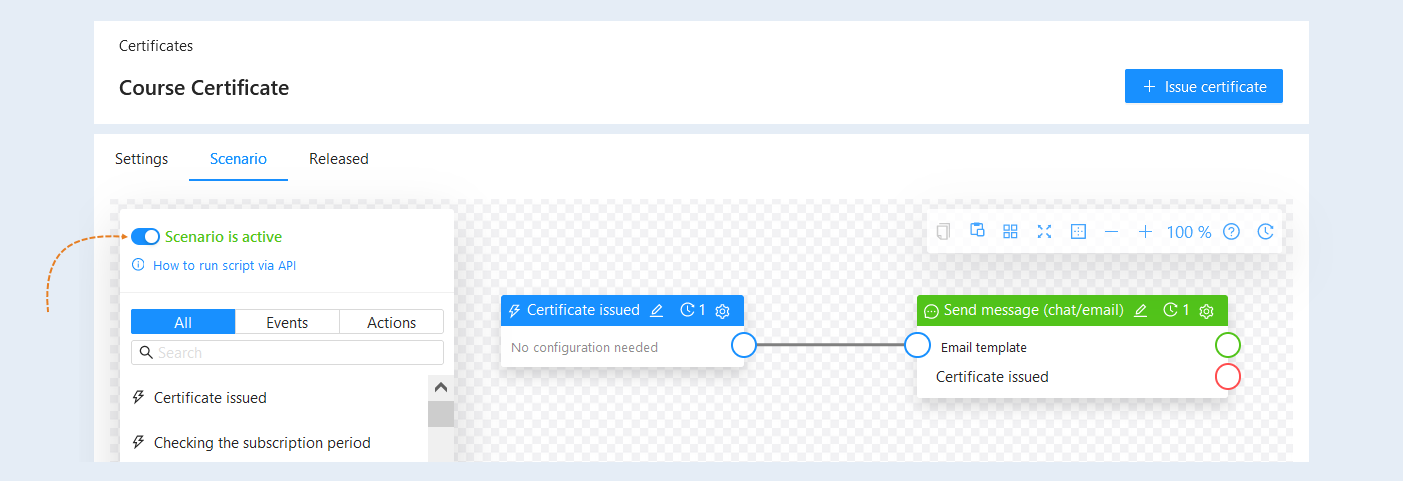
In the "Scenarios" section, you can set up automatic certificate issuance. There is already a default scenario here that sends a message to the user after issuing the certificate. It is automatically created when you create a new certificate template. You can use an existing template or create your own scenario.
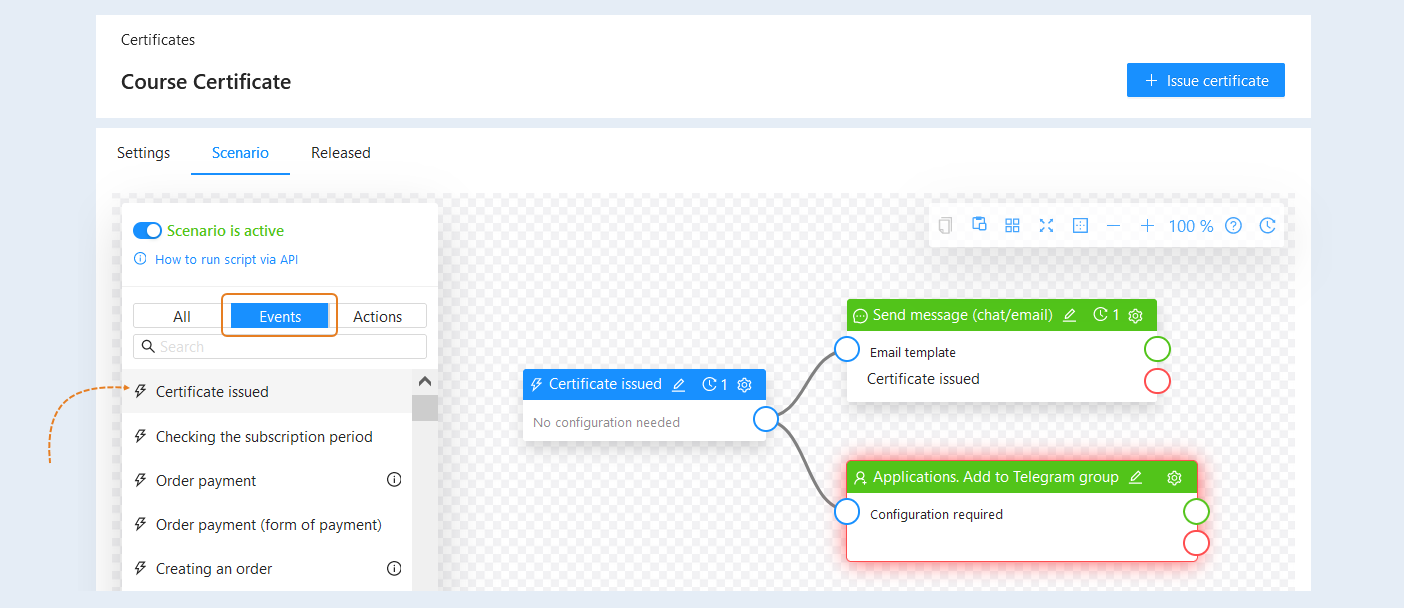
To create your own scenario, select an event from the list and drag it into the scenario field.
- The event "Certificate issued" launches further actions in the scenario when the certificate is issued. Additional configuration settings for the event are not required. For example, after successfully completing a course, the user will receive an email with a link to the certificate, and the user will be added to the Telegram group of course graduates.
For more details on other events, read the article "Types of events in the scenario and their configurations".
After that, you need to add actions to the scenario. Open the "Actions" tab, select an action from the list, and drag it into the scenario field.
- The action "Issue certificate" means creating and providing the user with a certificate that confirms their successful completion of a specific course or training program. For example, participants who attended a webinar can receive a participation certificate that confirms their attendance and active participation. You can configure this action in the webinar certificate scenario. Thus, after completing the webinar, a certificate will be issued, and then the certificate scenario will be triggered, sending the user an email with a link to the certificate.
For detailed information about other actions, read the article "Types of actions in the scenario and their configurations".
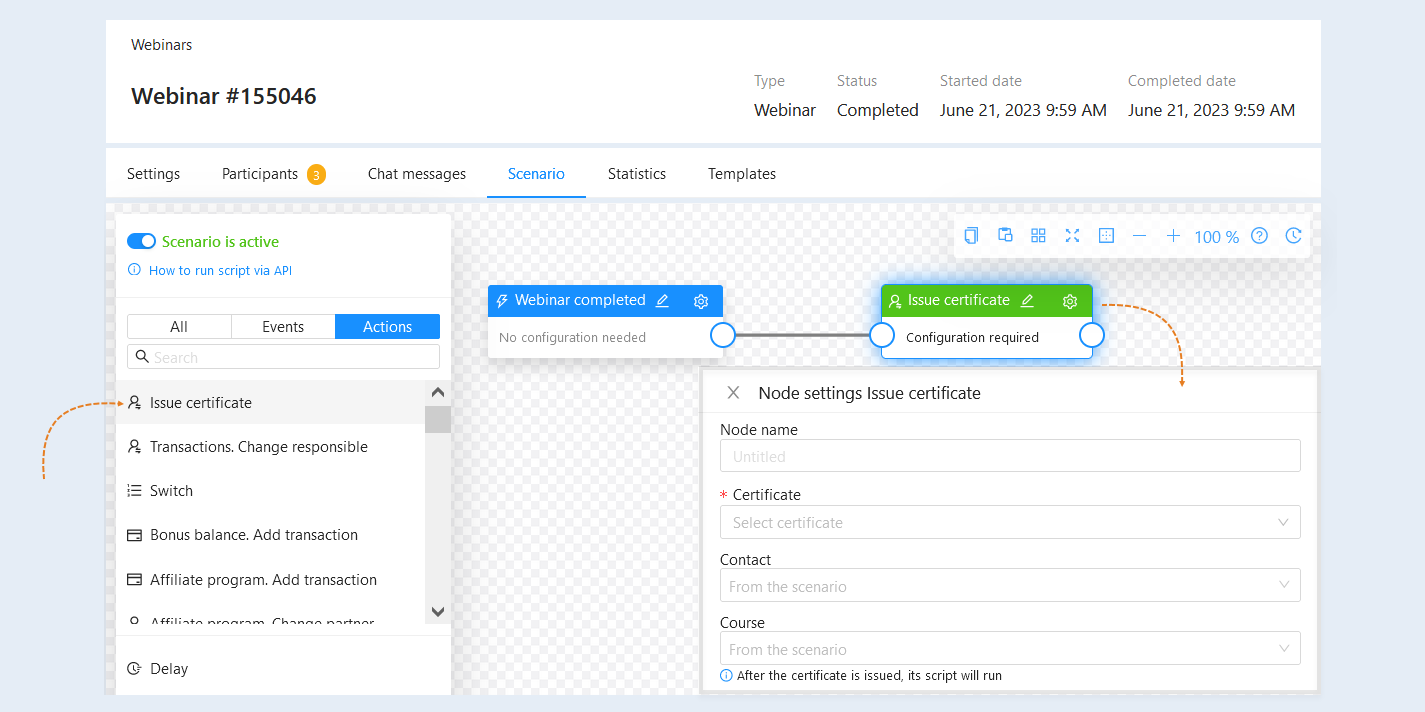
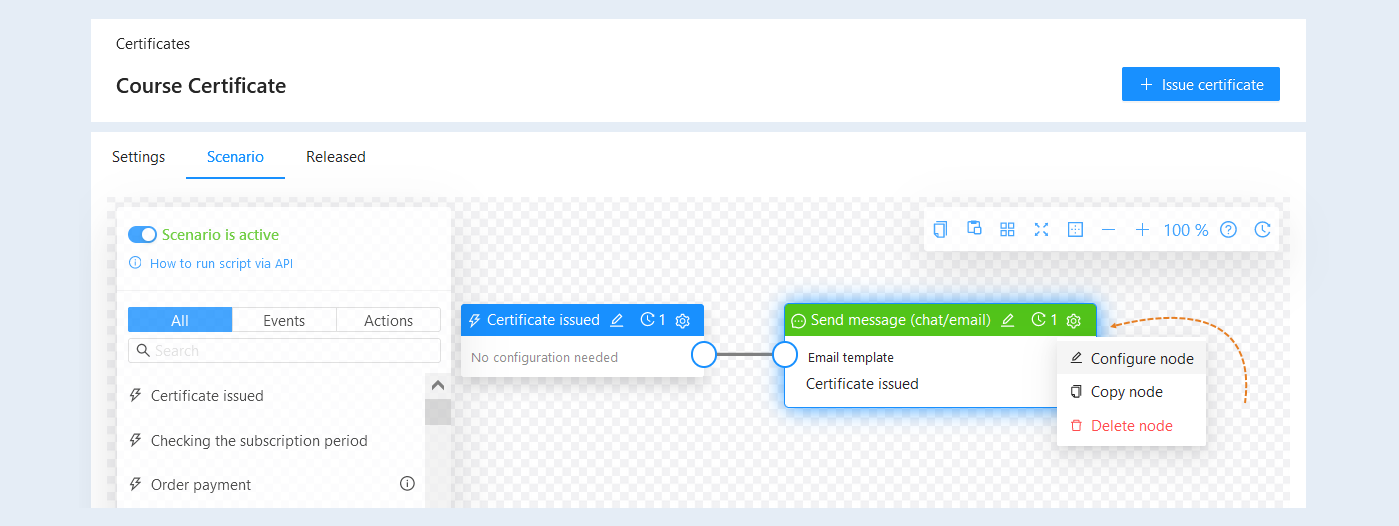
For each action, you need to configure the settings. Click the "Settings" button in the top right corner of the action, then open the node settings.
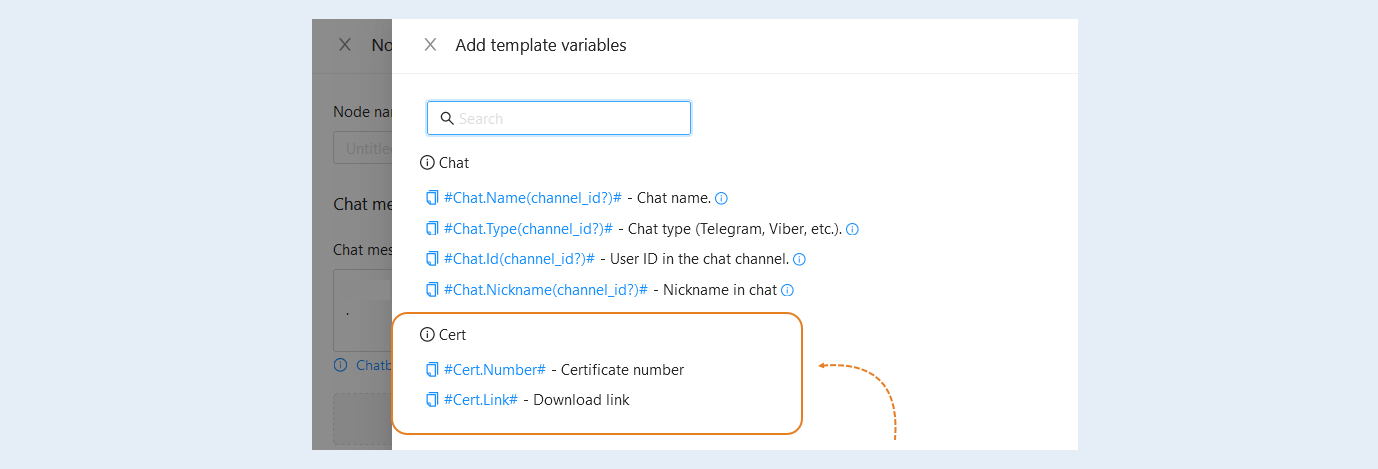
In the configuration settings of actions such as "Send Email" or others, you can add variables. A variable is a value that is automatically replaced with the data you choose. It can be the contact's name, email, account name, order number, etc. Variables will automatically replace the data in the email. Click the "Add Variables" button next to the corresponding section. A list of variables will appear on the right. Select the desired variables from the list.
- The variable "Certificate Number" allows you to add a sequential certificate number to the email text.
The variable "Download Link" adds a personalized link to the user's certificate in the text.
For detailed information about other variables, read the article "Variables in a Scenario".
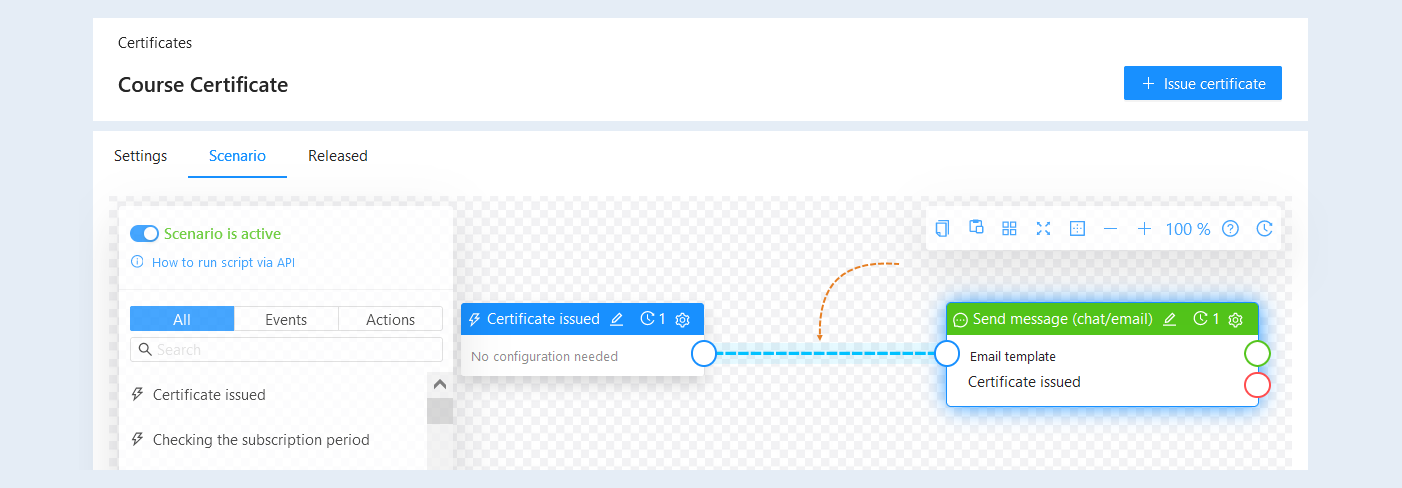
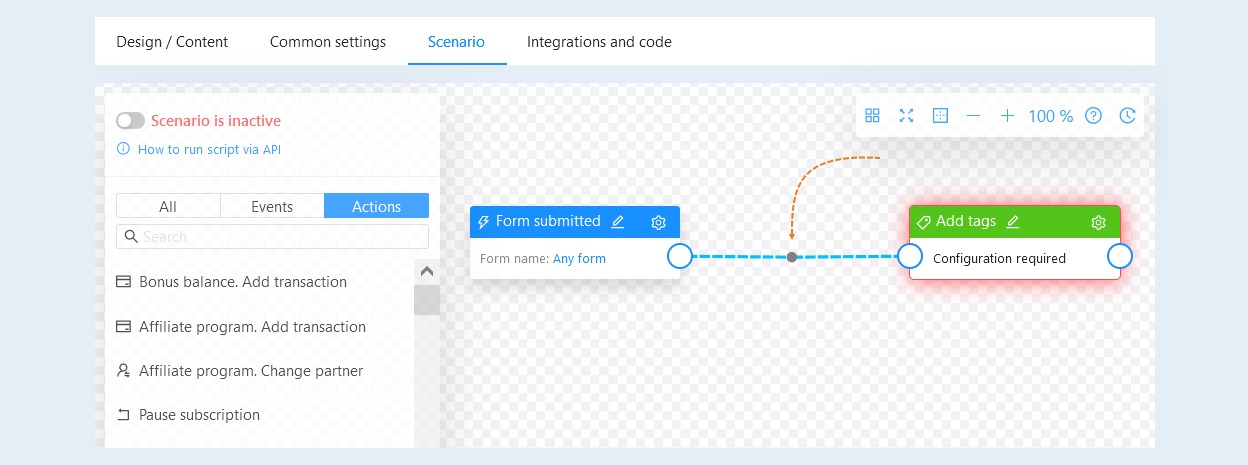
Next, you need to connect the event and the action. You can create one or multiple links between events and actions. To remove a link between scenario elements, double-click on the link.
You can use the function of adding connection points to create chains. To add a connection point, select the location on the link where you want to add the point. Left-click on the selected location while simultaneously pressing the Ctrl key on the keyboard. Then you can grab the connection point and move it within the scenario field.
To remove a connection point, double-click on the point. Double-clicking on the line will remove the line and all connection points on it.
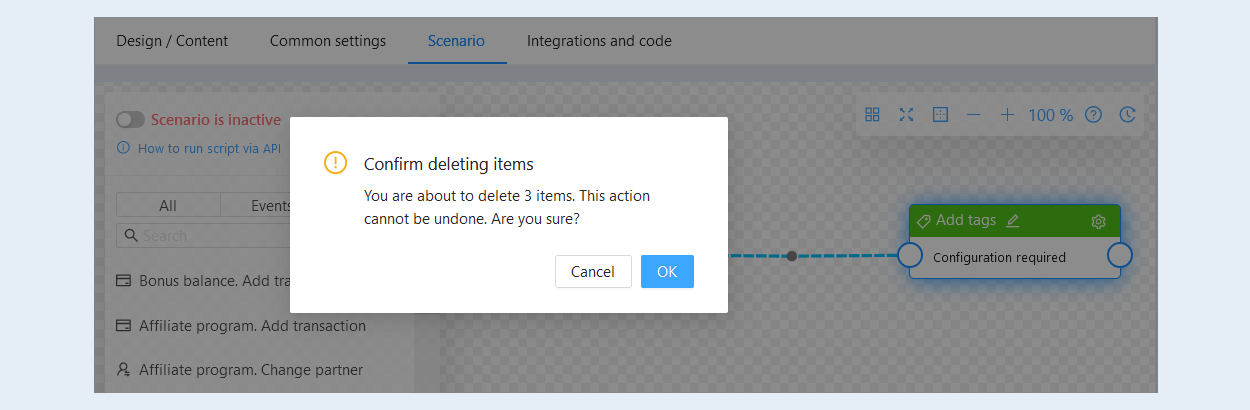
To massively delete scenario steps, hold down the Shift key and select the desired events and actions by clicking on them with the mouse. Next, press the Delete or Backspace key and confirm the deletion of the selected scenario steps.
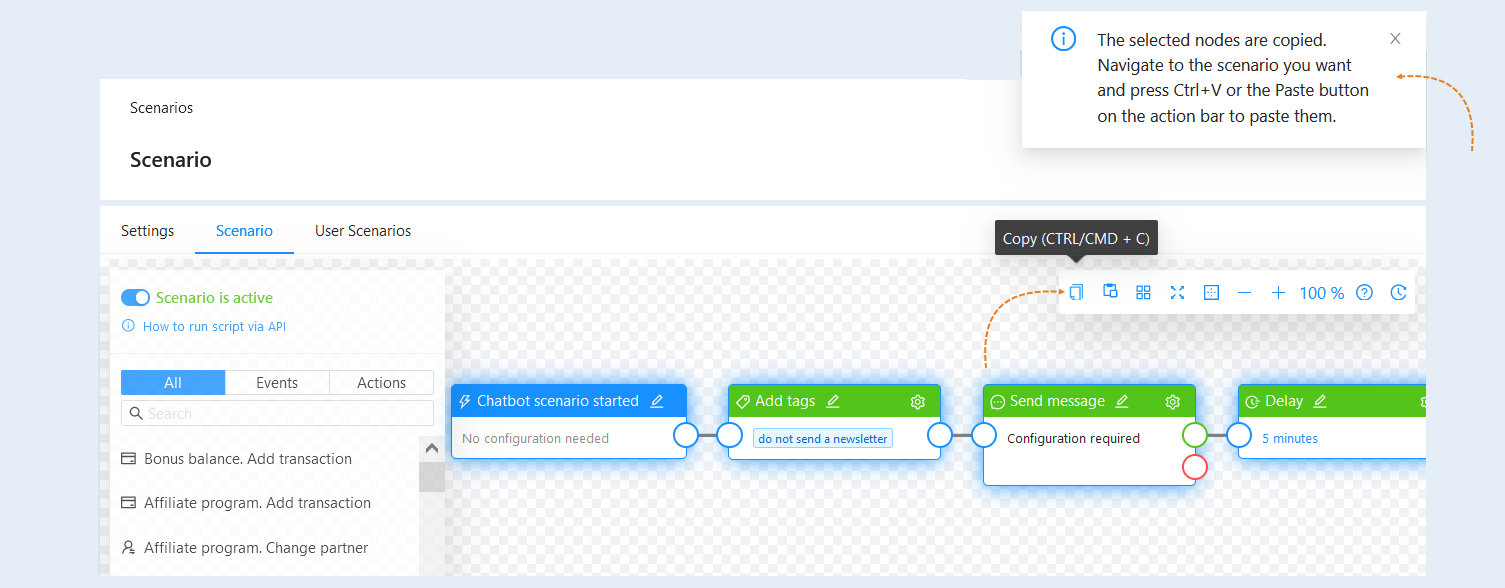
You can copy steps and connections between scenarios within one account. Press Shift and select the desired steps by clicking on them with the mouse. The selected scenario steps will be highlighted with a blue frame. Then copy the selected steps by clicking the "Copy" button or "Ctrl + C" on the keyboard. A message will appear in the top right corner stating that the scenario steps have been copied.
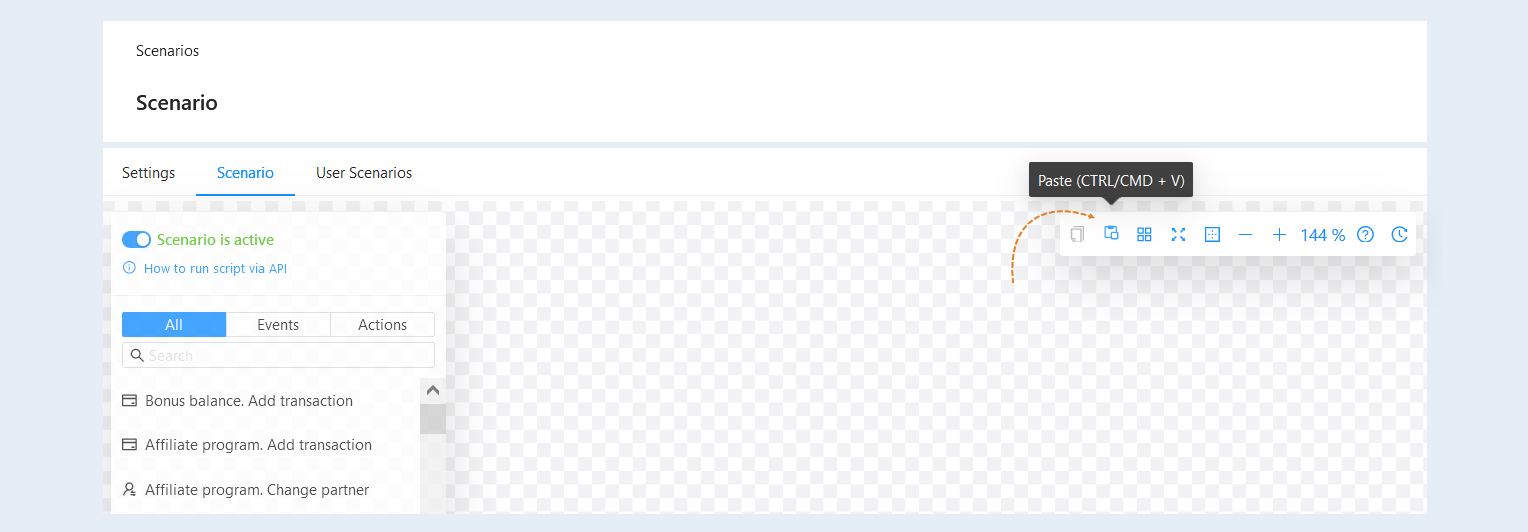
Open another scenario in your account. Note that transferring scenario nodes only works within the same account. Click the "Paste" button or "Ctrl + V" on the keyboard. The scenario steps will be copied to the new scenario.
Add the necessary number of events and actions to your scenario. Now your scenario is ready. To activate the scenario, move the slider to the active position.