Certificates are official documents that confirm the completion of a specific course, program, or training. They can be presented in electronic or paper format and may contain information about the course name, completion date, and sometimes the grade or acquired skills.
Certificates have several main purposes:
- Confirmation of achievements. A certificate serves as documentary evidence of a user's success in completing a course or program. It confirms that the users have gained certain knowledge and skills.
Resume enhancement. Certificates document the participant's qualification in a specific field, which can be useful when seeking employment, advancing in a career, or continuing education.
Motivation for learning. Obtaining a certificate can serve as motivation for participating in educational programs, as they provide a specific goal to achieve.
Self-improvement and development. Learning and acquiring certificates help participants continue self-education and develop their professional and other skills.
Click on the desired section of the article to go to its description:
Certificates
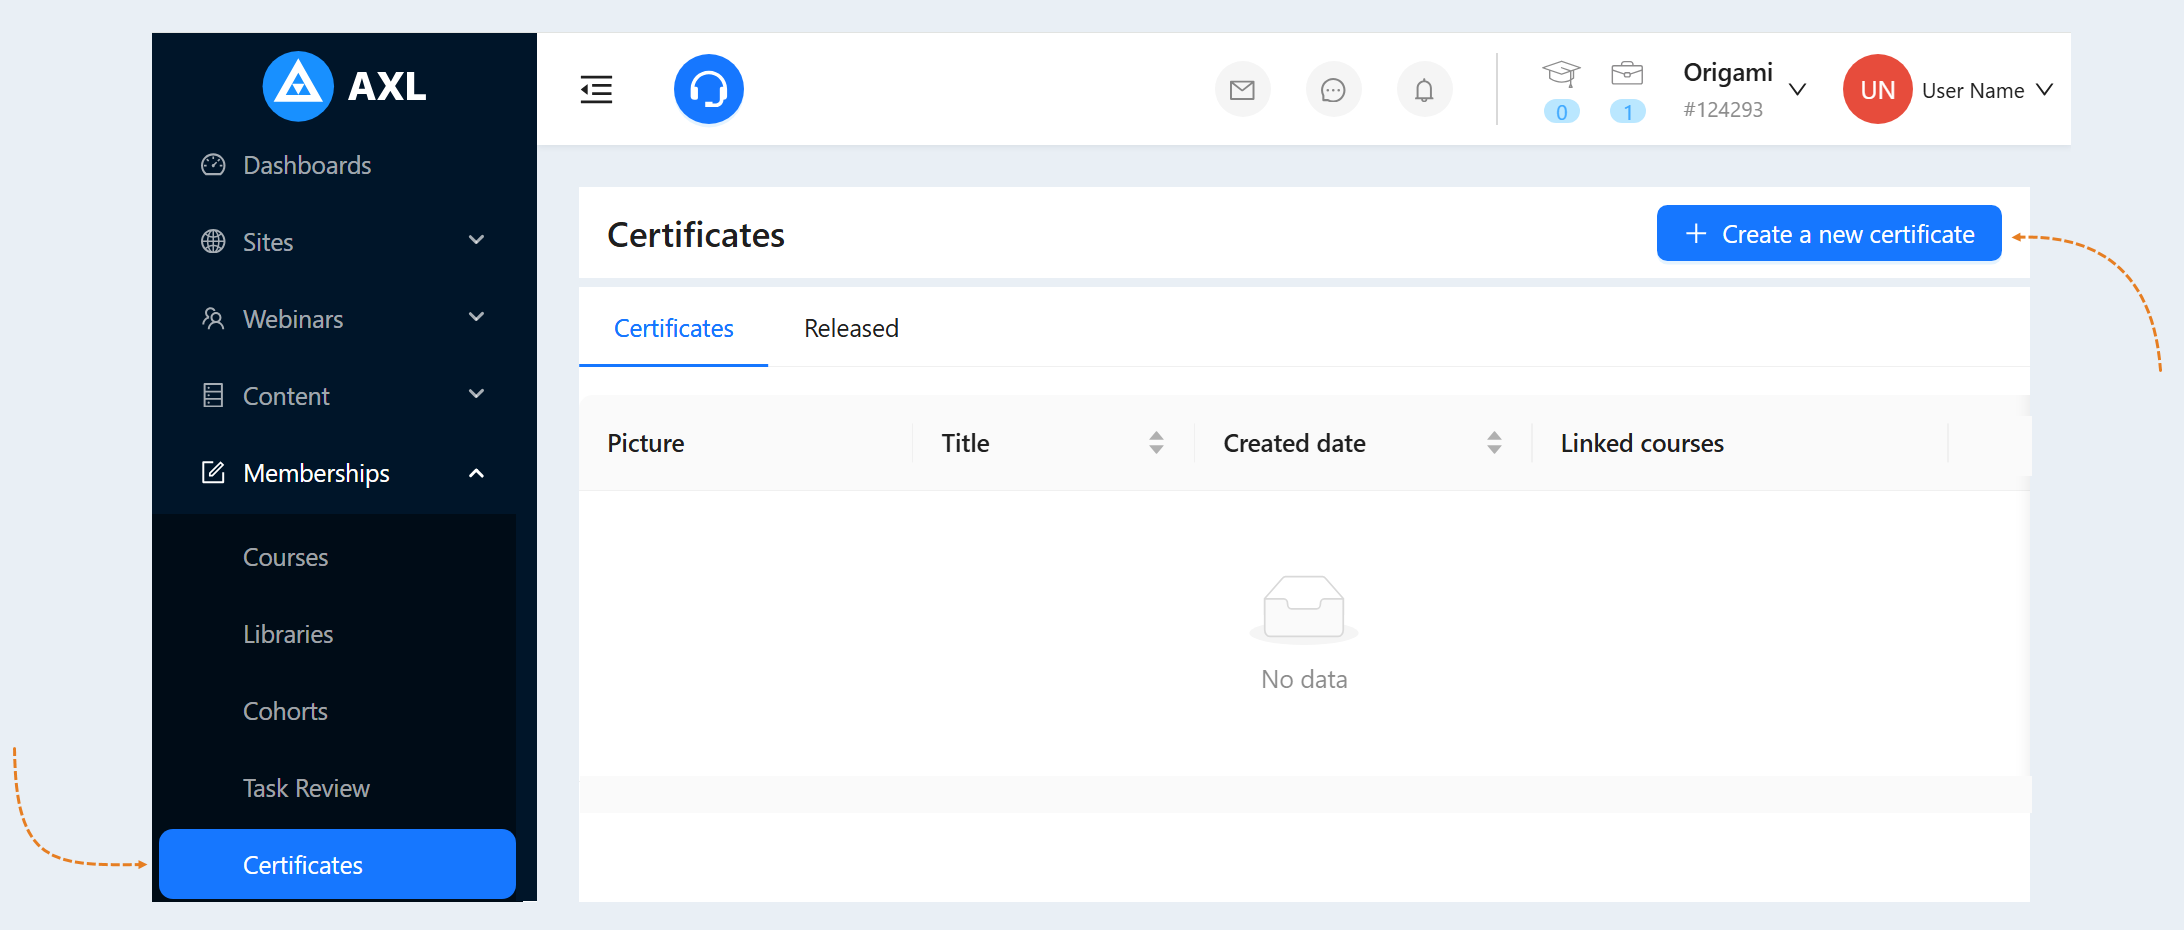
To create a new certificate template, go to the "Courses and Training" section and select the "Certificates" tab. Click the "Create new certificate" button in the top right corner of the page.
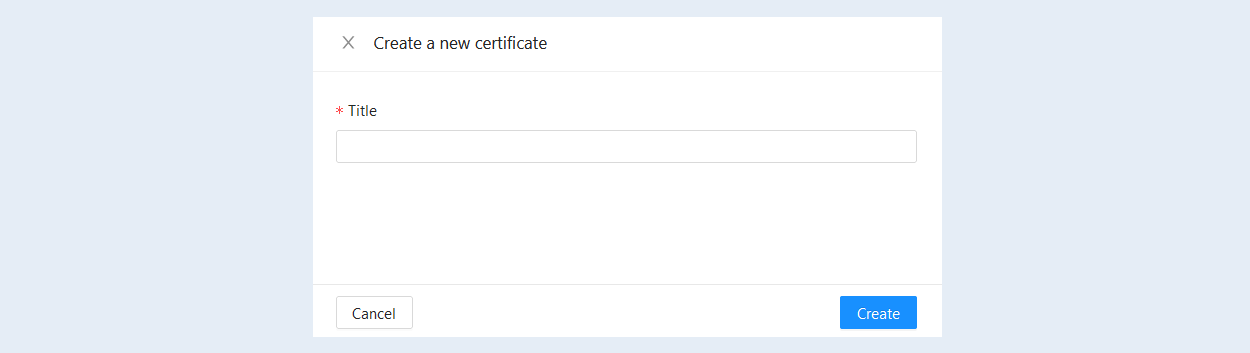
An additional window "Create new certificate" will open. Enter a "name" for the certificate template. Click the "Create" button.
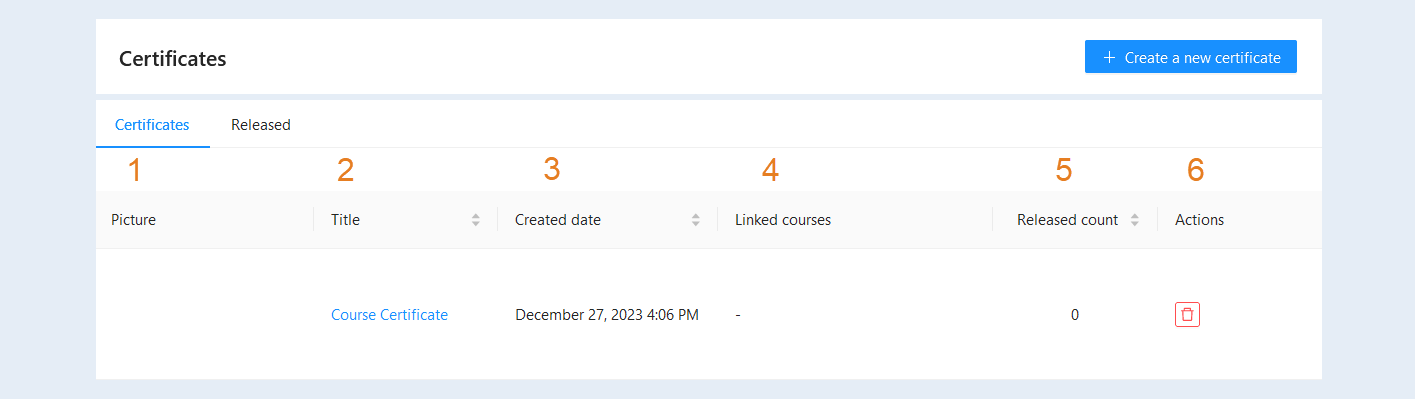
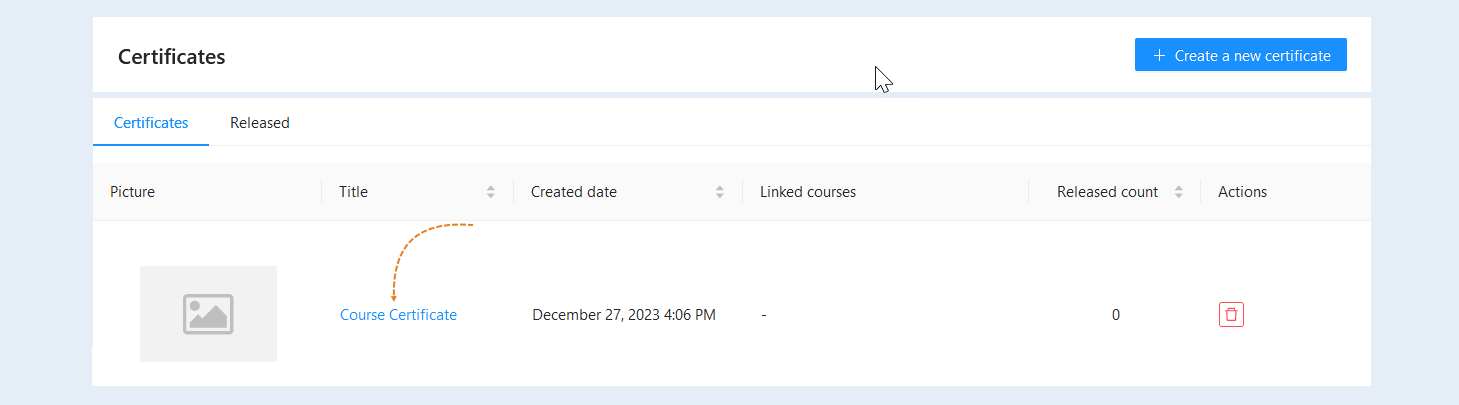
The certificate will appear in the list. Here you can see the following information:
- Picture. The background image of the certificate is shown.
Title. The name of the certificate template is specified.
Created date. The exact date and time of the certificate creation is shown.
Linked courses. All courses are shown, in the settings of which the issue of this certificate template is linked. For more information on how to set up a course certificate, see the article "Course Management".
Released count. The number of certificates issued is indicated.
Actions. The buttons are available here:
The "Copy" button. Click the button to create a copy of the certificate.
The "Delete" button. Click on the button to delete this issued certificate number.
To customize the created certificate and fill it with content, click on the certificate name in the list.
Settings
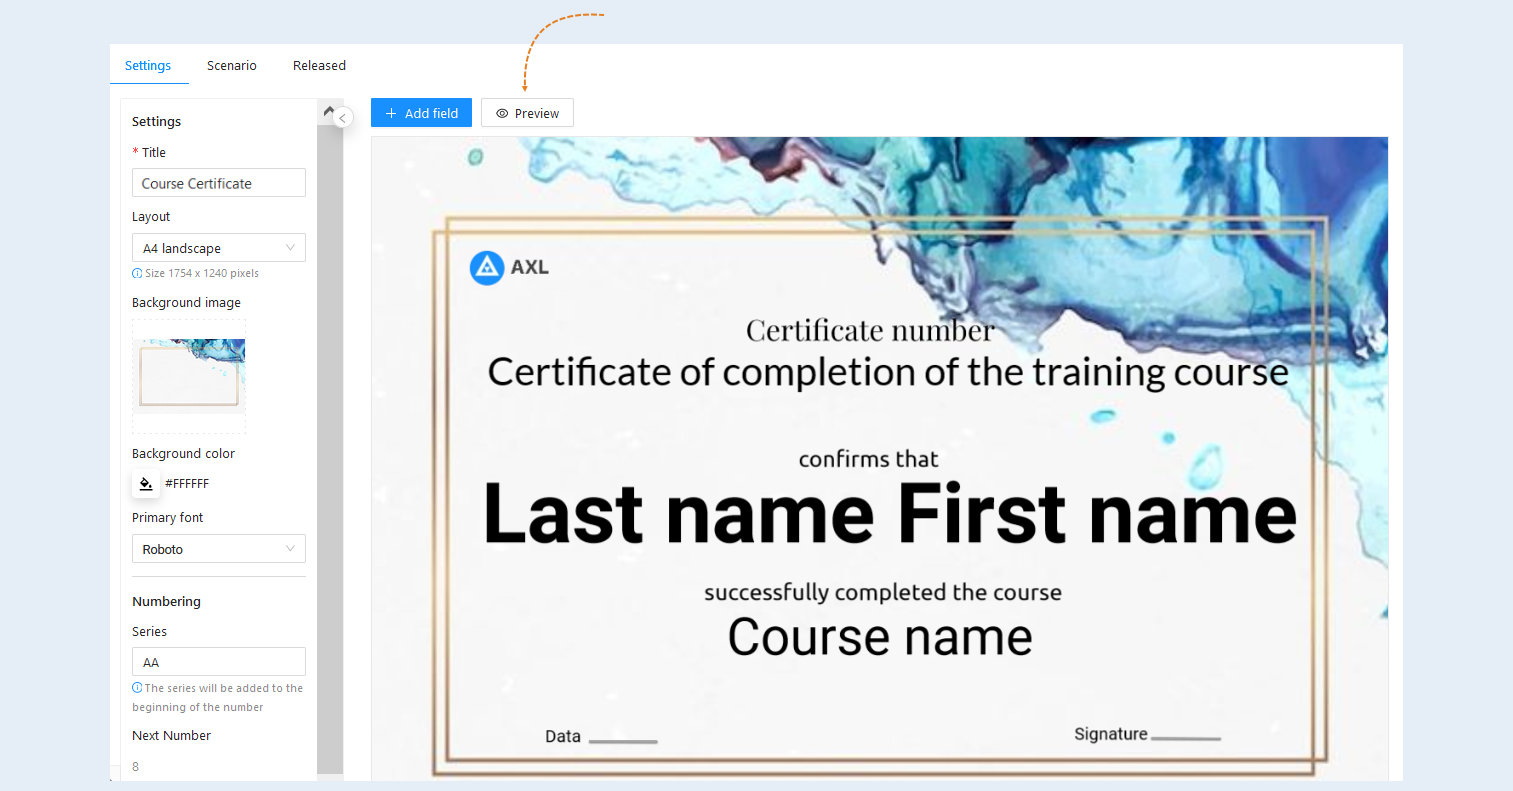
In the Certificate editor window that opens, configure the template for the new certificate.
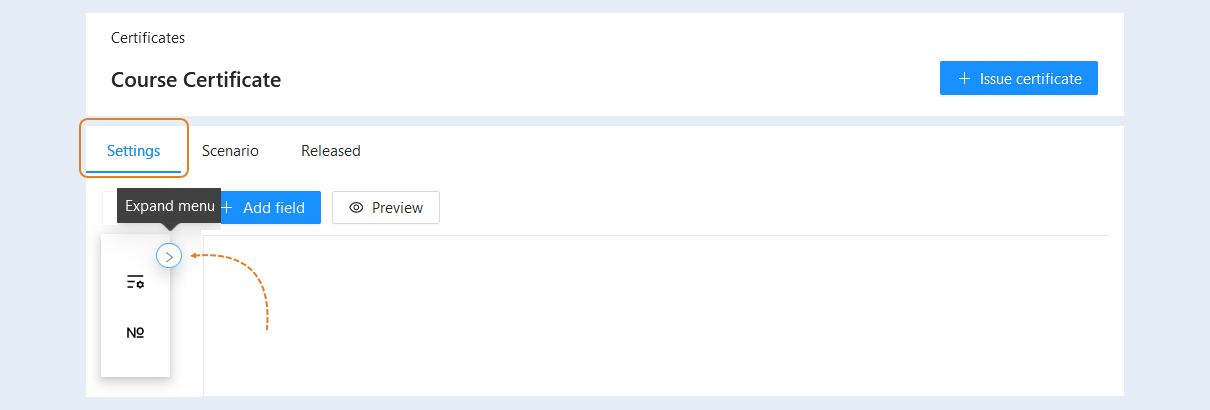
The Settings panel is located on the left side of the page. To open the settings, expand the menu.
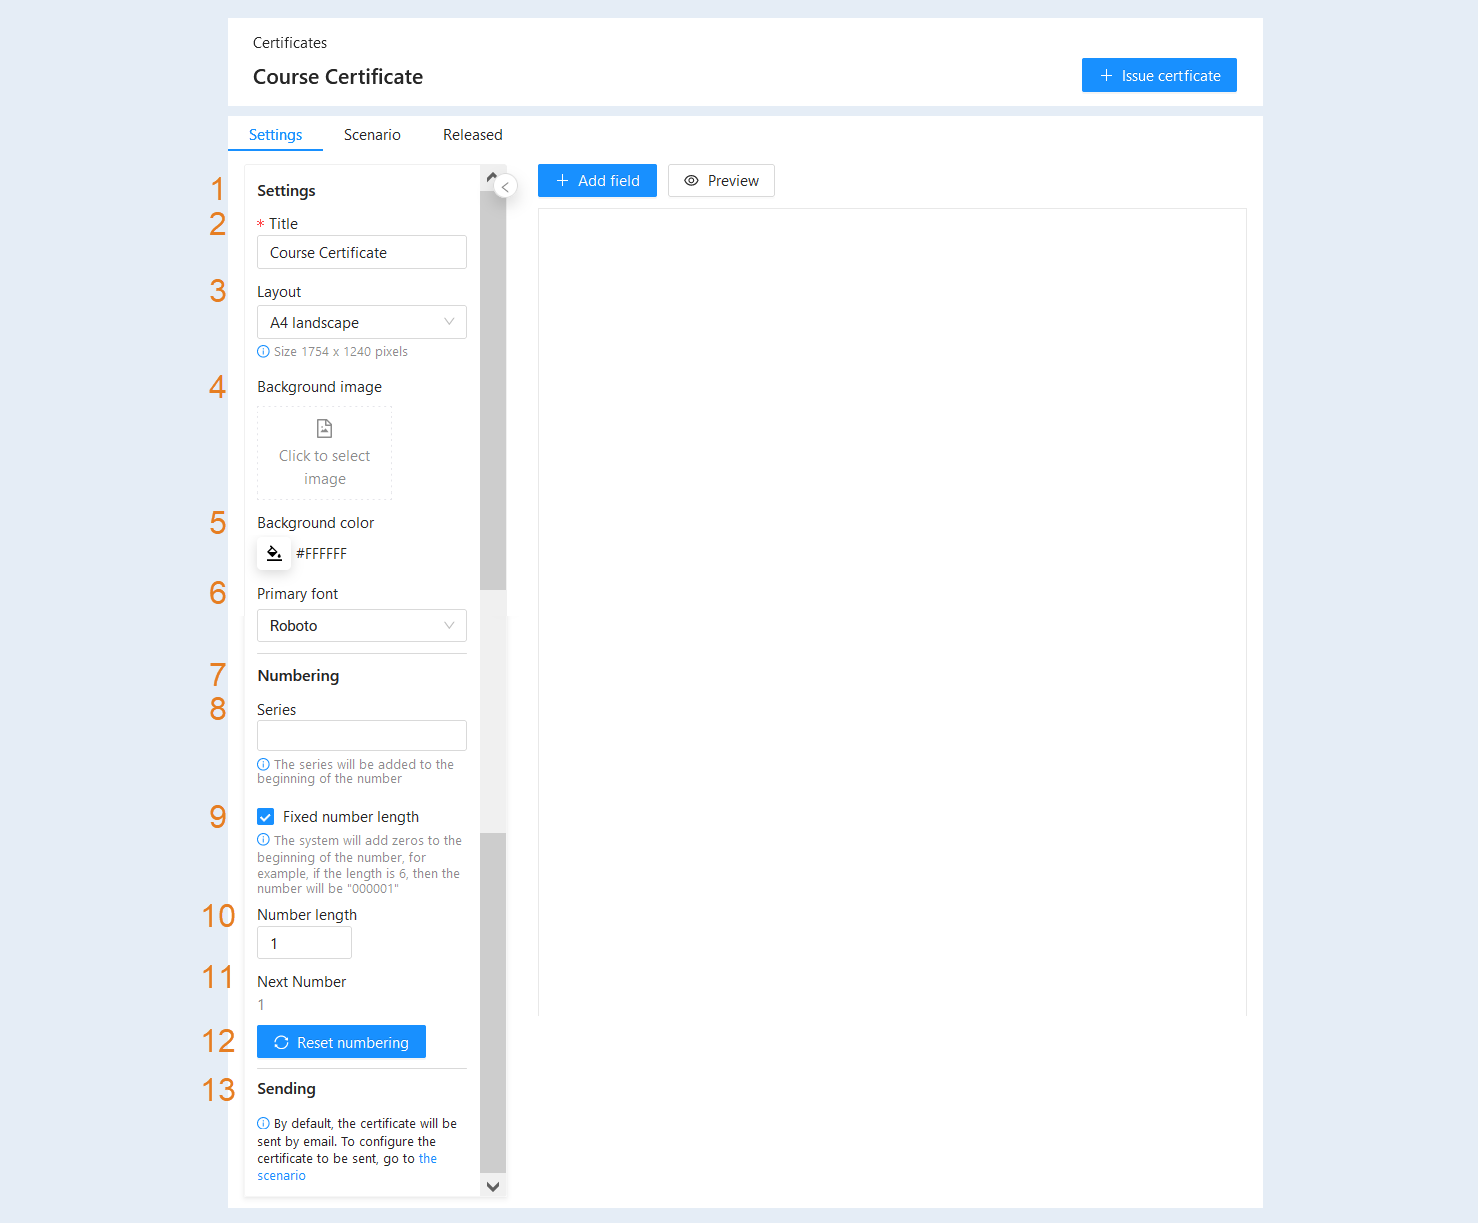
Еhe "Settings" panel includes:
- Settings. Settings are necessary to create a unique certificate that meets requirements and preferences. They allow you to customize the appearance of the certificate for visual appeal and alignment with specific needs and tasks.
Title. In this field, you can change the name of the certificate template.
Layout. This determines the size and orientation of the document to be used for issuing or printing the certificate.
- A4 Portrait - means using the standard A4 format (210 mm x 297 mm) with a vertical orientation (portrait orientation).
A4 Landscape - means using the standard A4 format (210 mm x 297 mm) with a horizontal orientation (landscape orientation).
Custom - means that you can set your own page size and orientation parameters depending on requirements.
Background image. This is a graphical element that will be used as the background on the certificate. Click on the icon to select and upload an image from your device (computer, tablet, laptop).
Background color. This is the color that will be used to fill the certificate background. It can be pre-defined (e.g., white, black, or gray) or customized using a color palette number, allowing you to choose any preferred color.
Primary Font. The font defines the style and appearance of the text on the certificate. Select the primary font from the available options to give a more personalized look to the certificate.
Numbering. Certificate numbering is the process of assigning a unique identification number to each issued certificate. It usually includes a series and a number. The series and number of the certificate are needed for identification and tracking of certificates in the database. They allow for easy identification of each specific certificate and linking it to the corresponding user.
Series. The certificate series is a specific code or letter designation that identifies a group of certificates. The series typically indicates a specific time period or a specific type of certificate. The series will be added at the beginning of the certificate number.
Fixed number length. Check the box so that the numbers of all issued certificates have the same length and cannot be changed. The system will add zeros to the beginning of the number, for example, if the length is 6, then the number will be "000001". The fixed number length helps to maintain a uniform format and standardization for all certificates.
Number length. Set the length of the certificate number. This field will be available when you select a fixed number length.
Next number. The certificate number is a sequential number assigned to each certificate. It is automatically assigned and incremented with each new issued certificate in a series. Certificate numbers are generated sequentially and do not repeat within a series. The next sequential certificate number will be shown in the line below.
"Reset numbering" button. Click this button to reset the numbering so that the next sequential certificate number is one.
Sending. By default, the certificate will be sent via email. To customize the certificate delivery, proceed to the scenario. For more information about the scenario, see the article "Certificate Scenario".
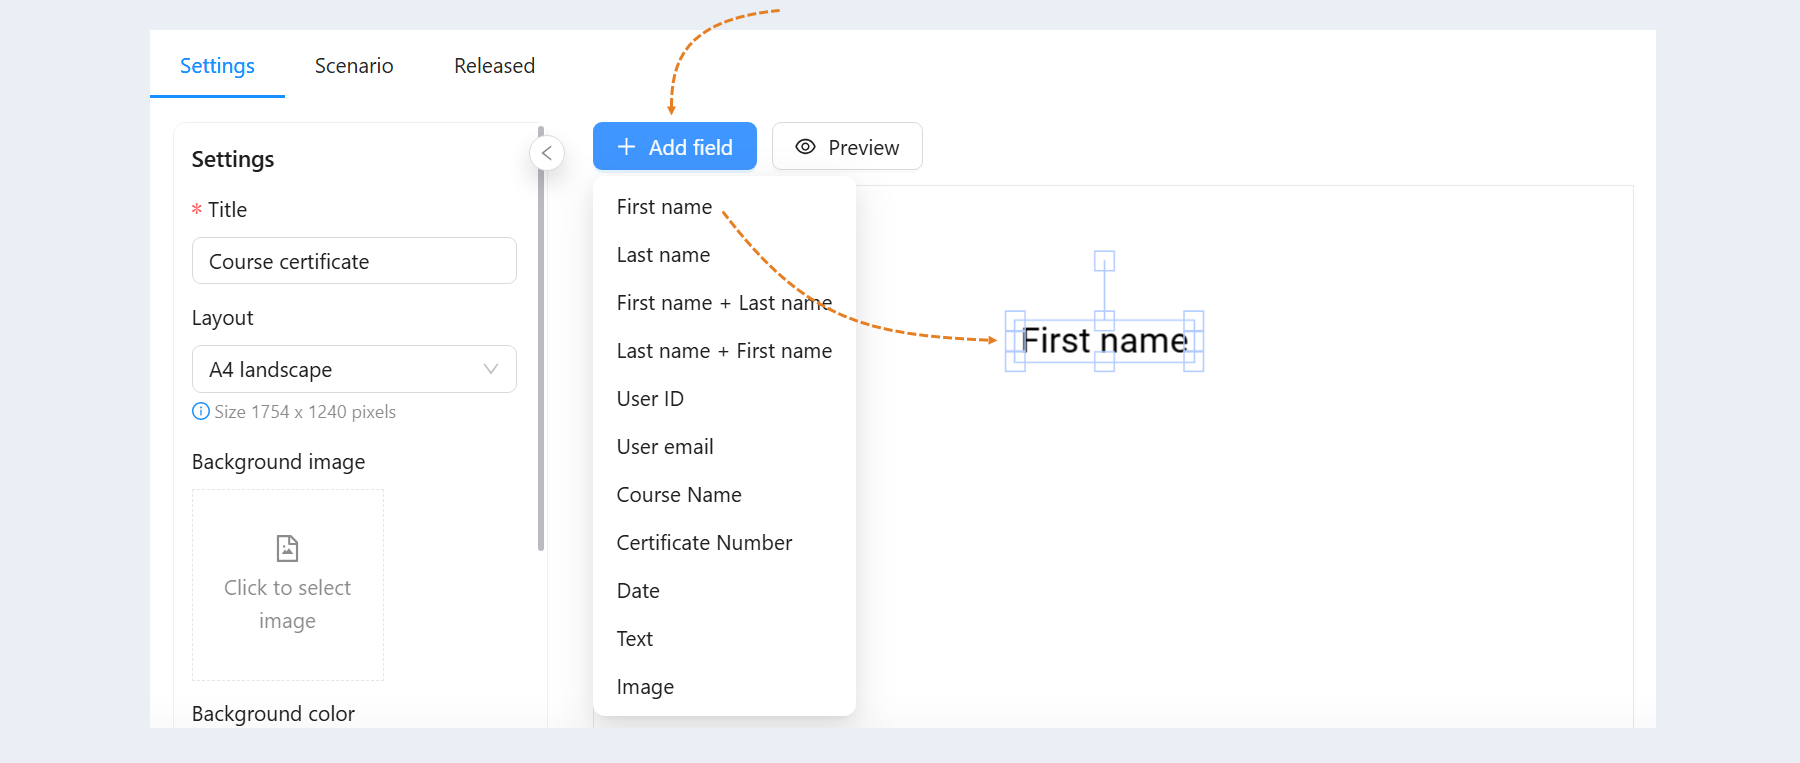
To fill the certificate with content, click the "Add field" button.
These values will be automatically replaced with the data you choose. It can be the contact's name, surname, user ID, email, certificate number, and course name. The fields will automatically replace the data in the text.
Select the necessary fields from the list:
First name. The field "First name" will automatically be replaced with the recipient's name as indicated in the contact card when issuing the certificate.
Last name. The field "Last name" will automatically be replaced with the recipient's surname as indicated in the contact card. The name and surname fields can be displayed separately on the certificate, on the same or different lines, or in different parts of the certificate.
First name + Last name. Select this field to set the sequence as name followed by the user's surname. The name will be positioned above the surname.
Last name + First name. In this field, the surname will be positioned before the name.
User ID. The ID is a unique account number for the user in the system, which can consist of numbers and letters. This field will be replaced with the user's ID.
User Email. This field will be replaced with the email that the user provided during registration on the platform.
Course Name. This field will be replaced with the name of the course when issuing the certificate.
Certificate Number. This field will be replaced with the sequential number of the certificate. In the certificate settings, you can set the numbering, including series and number, or only the sequential number of the certificate.
Date. This field will be replaced by the date of issue of the certificate.
Text. This field will not be automatically replaced with any value. Add any text to this field.
Image. Add any image to the certificate. For example, you can add the logo of your membership portal or a digital signature for each certificate to ensure its authenticity and protect it from counterfeiting.
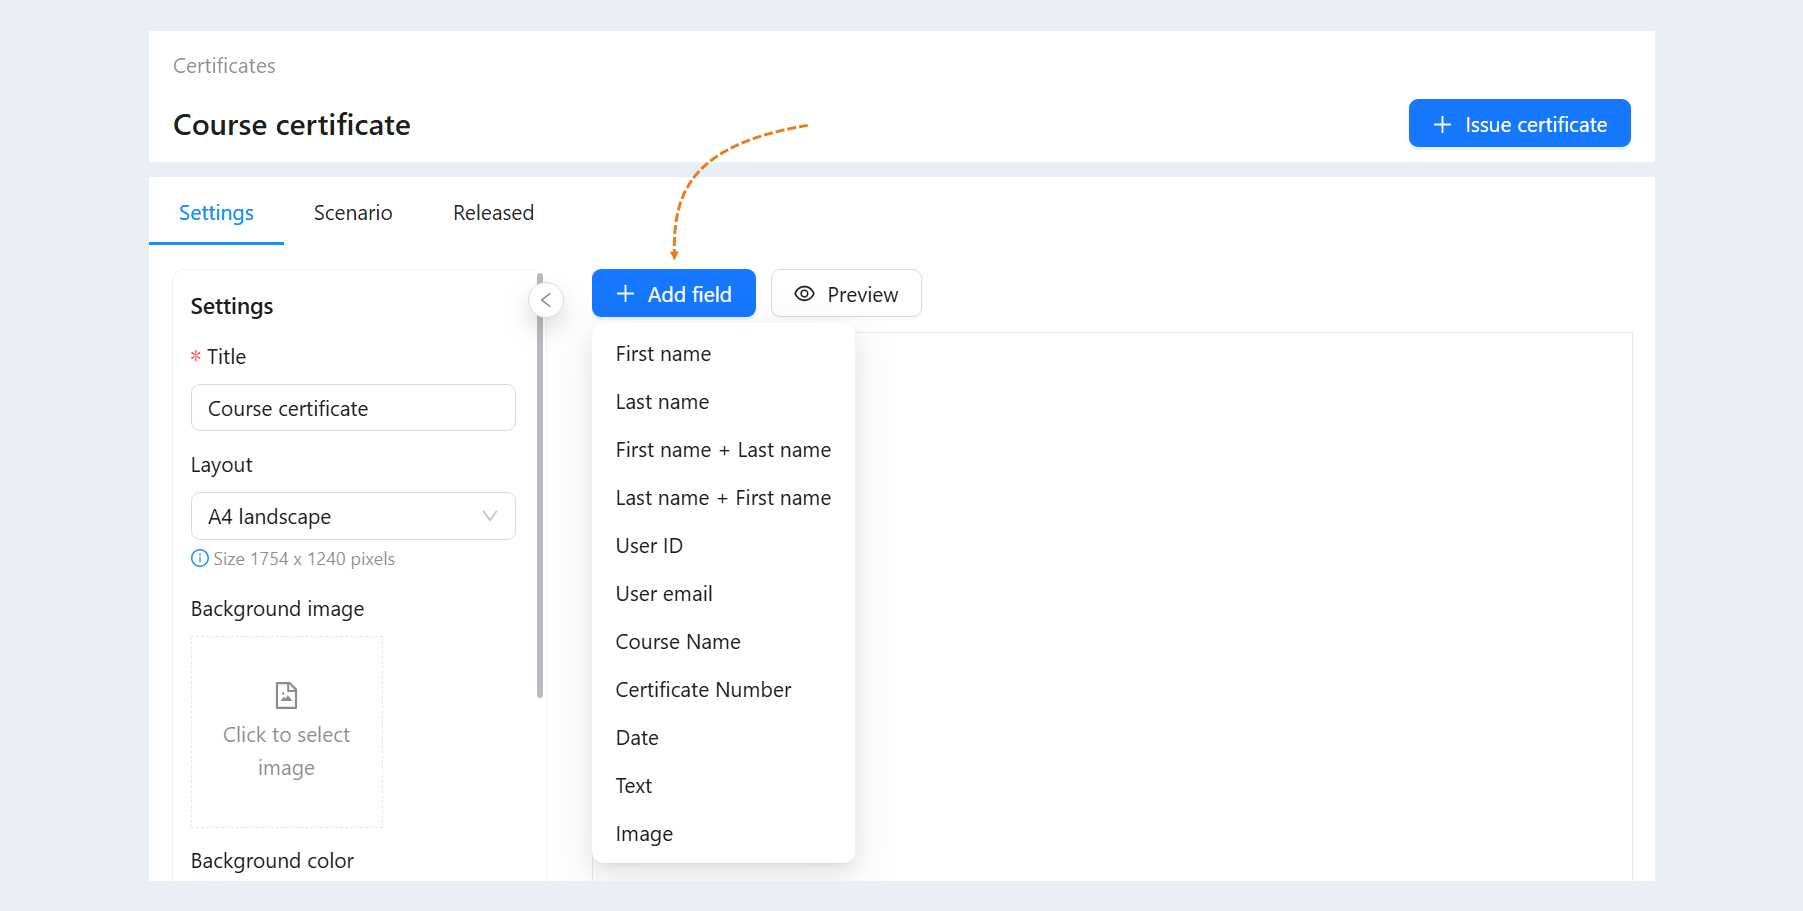
In the "Add Field" list, click on the desired value. The selected field will appear in the body of the certificate. Then, click and drag the field to the desired location on the certificate to rearrange the fields and customize the certificate layout.
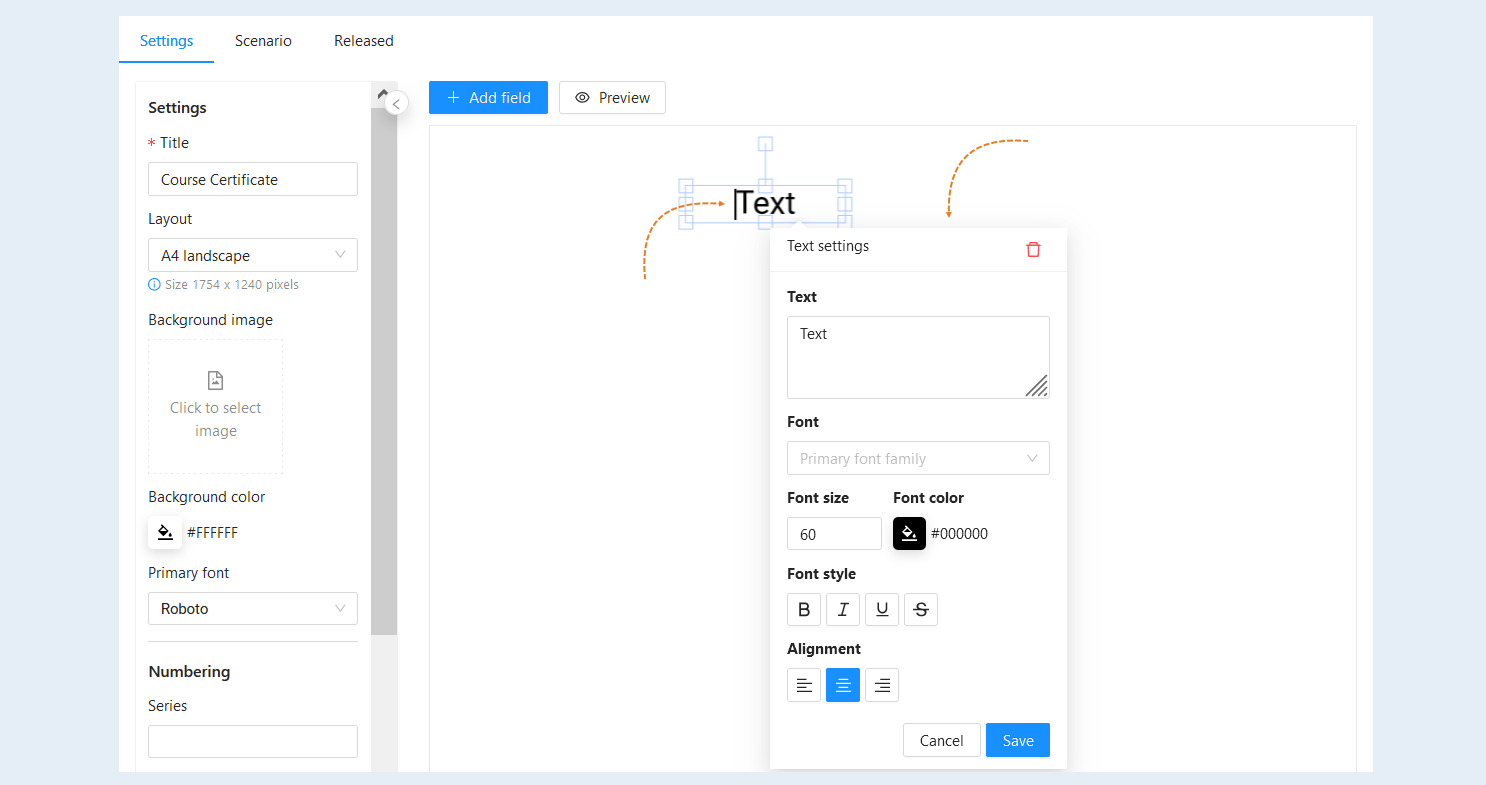
Hover your cursor over the desired field and right-click to open its settings. In the field settings, you can change the font, font size, text color, and style. You can also align the text relative to the field: right, center, or left.
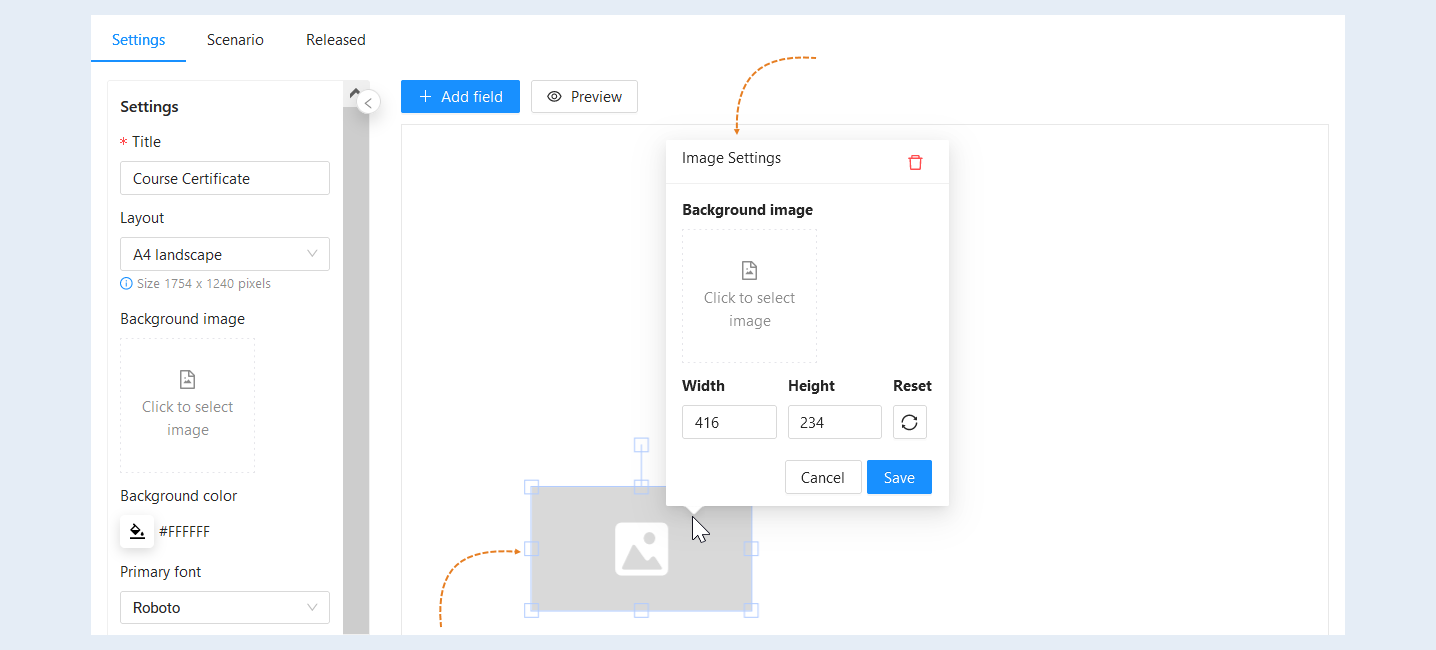
In the "Image" field settings, click on the upload icon to upload an image from your device. If needed, adjust the width and height of the image.
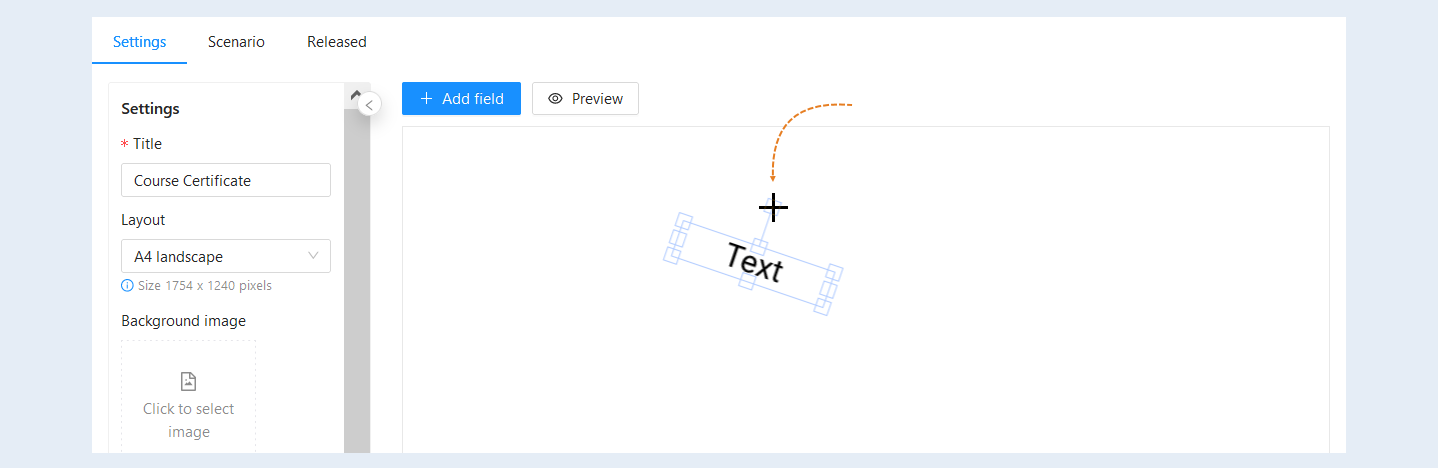
You can rotate the fields relative to the vertical or horizontal axis. To do this, grab the "transform point" with your cursor and rotate the field to the right or left relative to the axis.
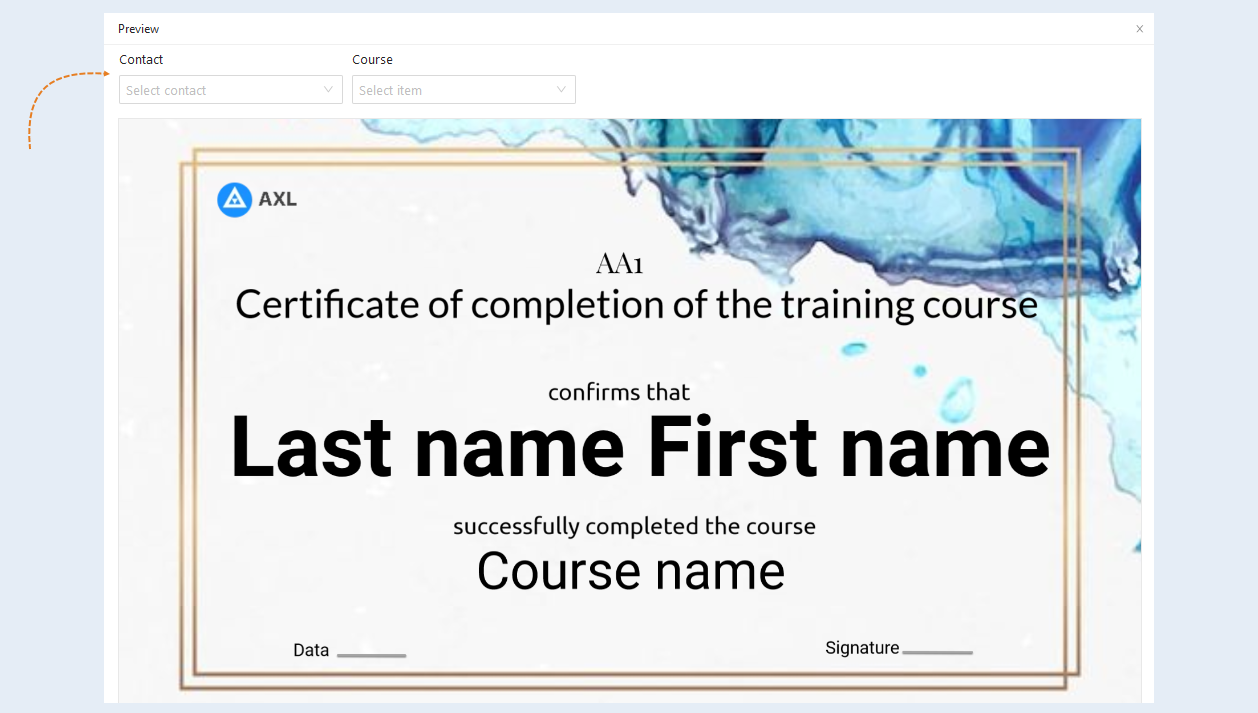
After completing the settings for the new certificate layout, click the "Preview" button to see the final appearance of the certificate.
In the preview window, you can select the contact and course name to see how the certificate will be displayed for the user.
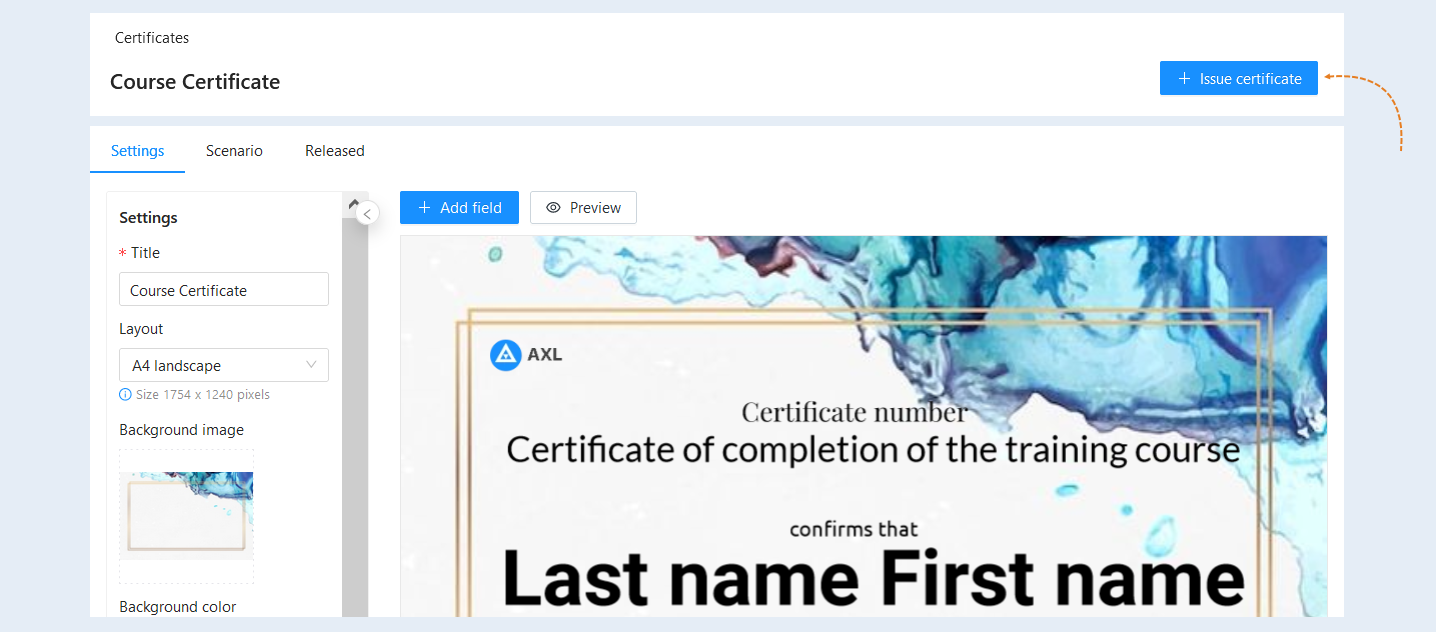
Certificate issuance
To manually issue a certificate, click the "Issue Certificate" button in the pop-up window.
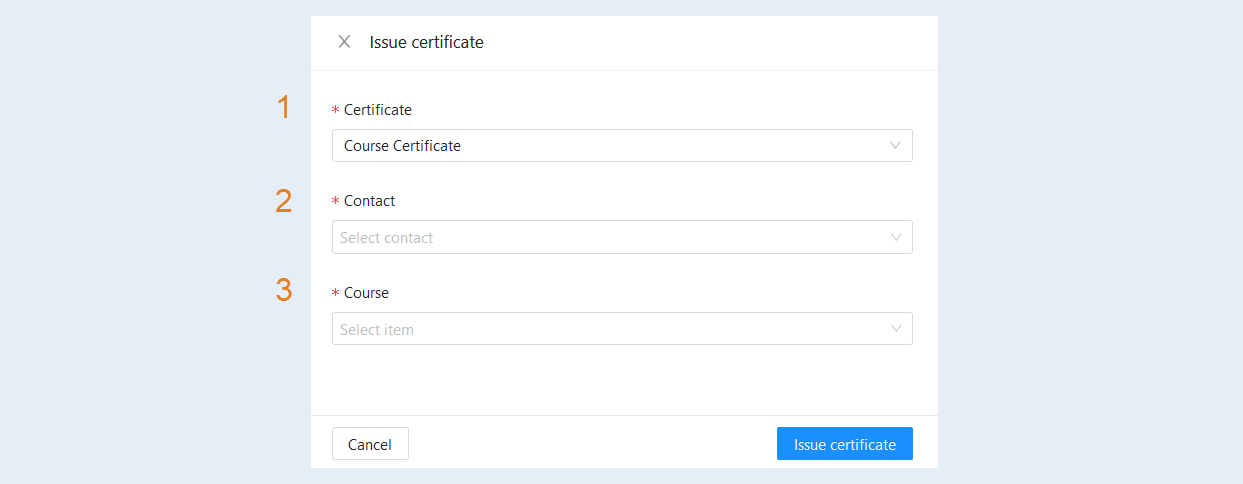
In the opened window, fill in the fields:
- Certificate. By default, the certificate template you are creating will already be selected.
Contact. Select the contact from the list for whom the certificate will be issued.
Course. Select the course name from the list, which will be indicated in the certificate.
Click the "Issue Certificate" button.
To configure automatic certificate issuance, go to the "Scenario" tab.
Scenario
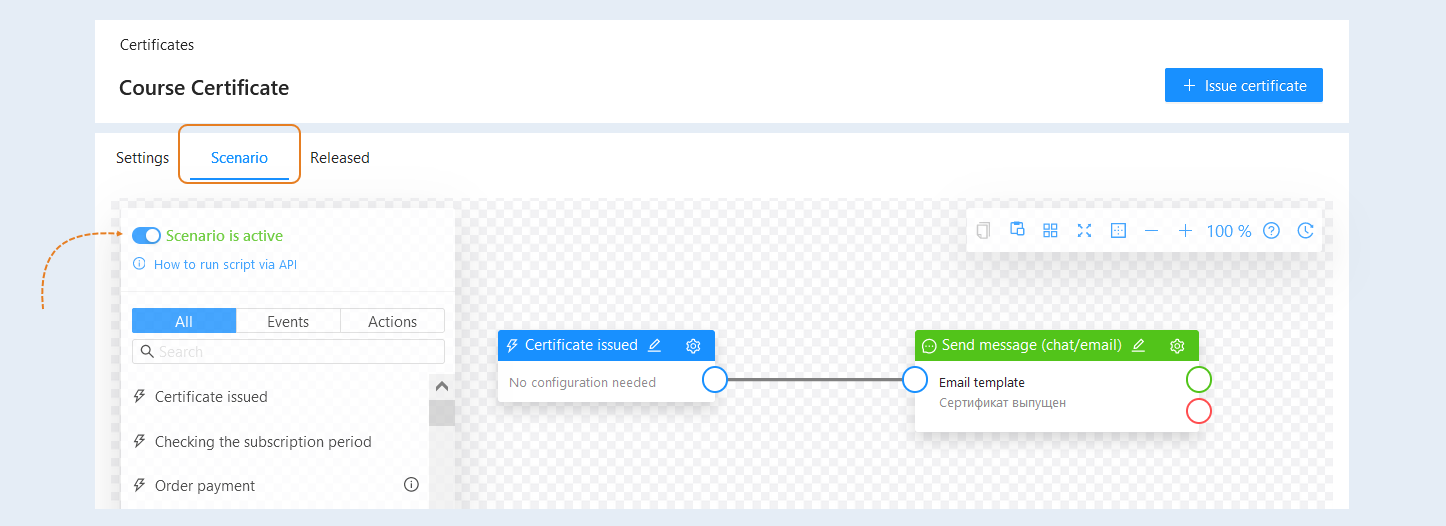
In the "Scenario" section, you can set up automatic certificate issuance. By default, there is already a scenario here that sends a message to the user after the certificate is issued. It is automatically created when you create a new certificate template. You can use an existing template or create your own scenario. For more information on scenario settings, read the "Scenario" article.
To activate the scenario, slide the "Scenario is Active" toggle to the "Enabled" position.
In the "Released" section, you can see a list of all previously issued certificates.
In the certificate list, you can see the following information:
Number. Тhe sequential number of the certificate.
Created date. Тhe exact date and time the certificate was issued.
Contact. Тhe contact for whom the certificate was issued. Click on the name to open the contact card.
Certificate. Тhe certificate template. Click on the template name to open its settings.
Actions. Here you have the following buttons available:
- "Download Certificate" button. Click on the button to download the issued certificate to your device in JPEG format.
"Copy Link" button. Click to copy the link to the issued certificate. You can send this link to the user.
"Delete" button. Click the button to delete the issued certificate number.
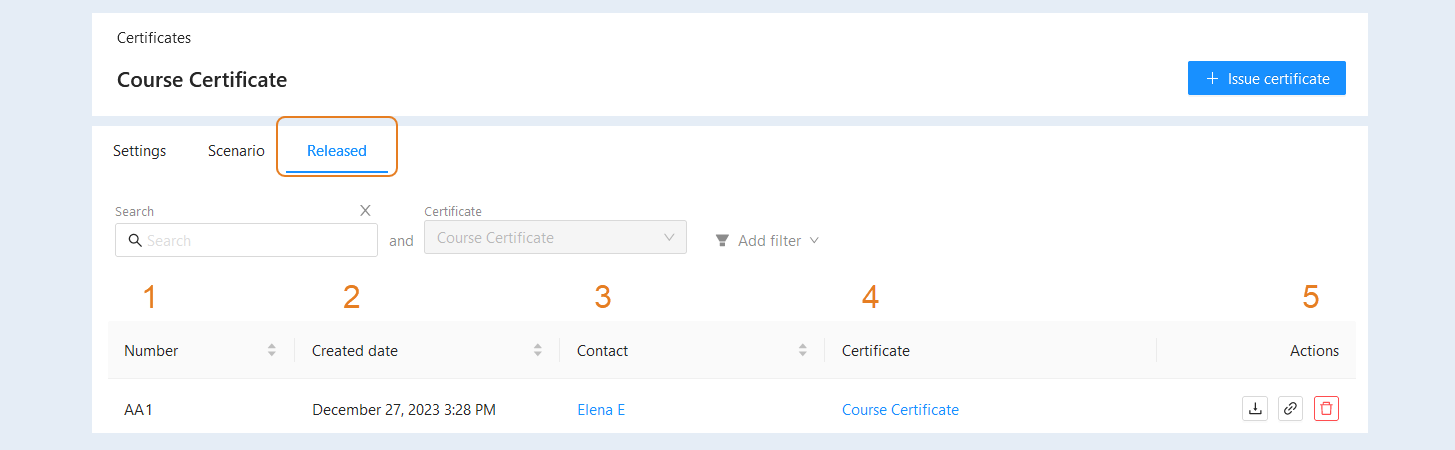
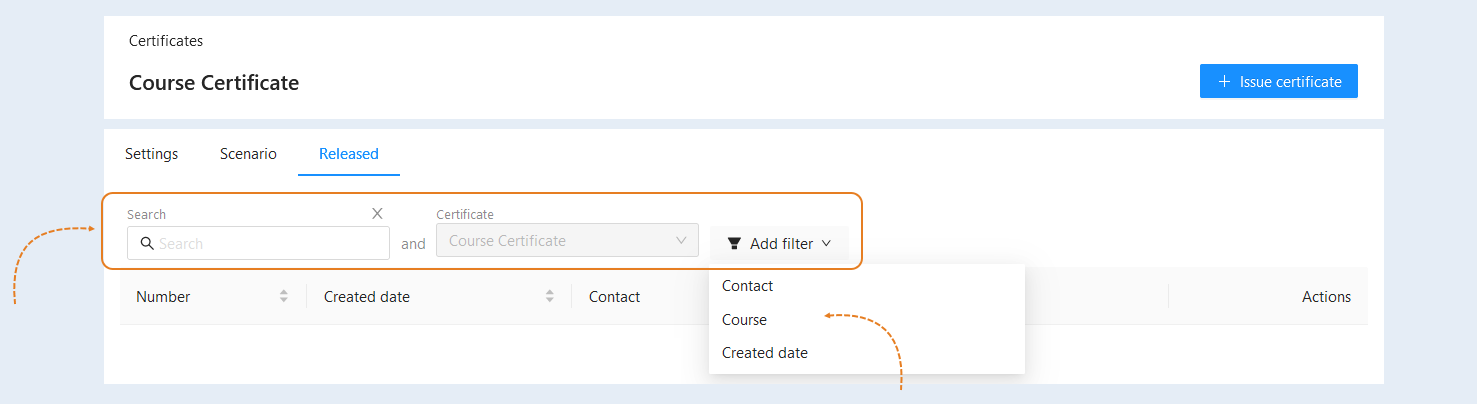
At the top of the page, you have a search bar and a filter. Use them for quick searching.
- Search. Free search using keywords.
Certificate. By default, the certificate you are creating is selected. This condition highlights certificates that are issued based on the selected template.
Click on the "Add Filter" button and select a filter condition from the list:
- Contact. This condition highlights certificates issued for selected contacts.
Course. This condition highlights certificates issued for selected courses.
Created date. This condition highlights certificates issued on specific dates or within a range of time.