In this article, we will show you how to quickly launch a webinar on the AXL platform. Click on the desired section to go to its description:
1
Webinar creation
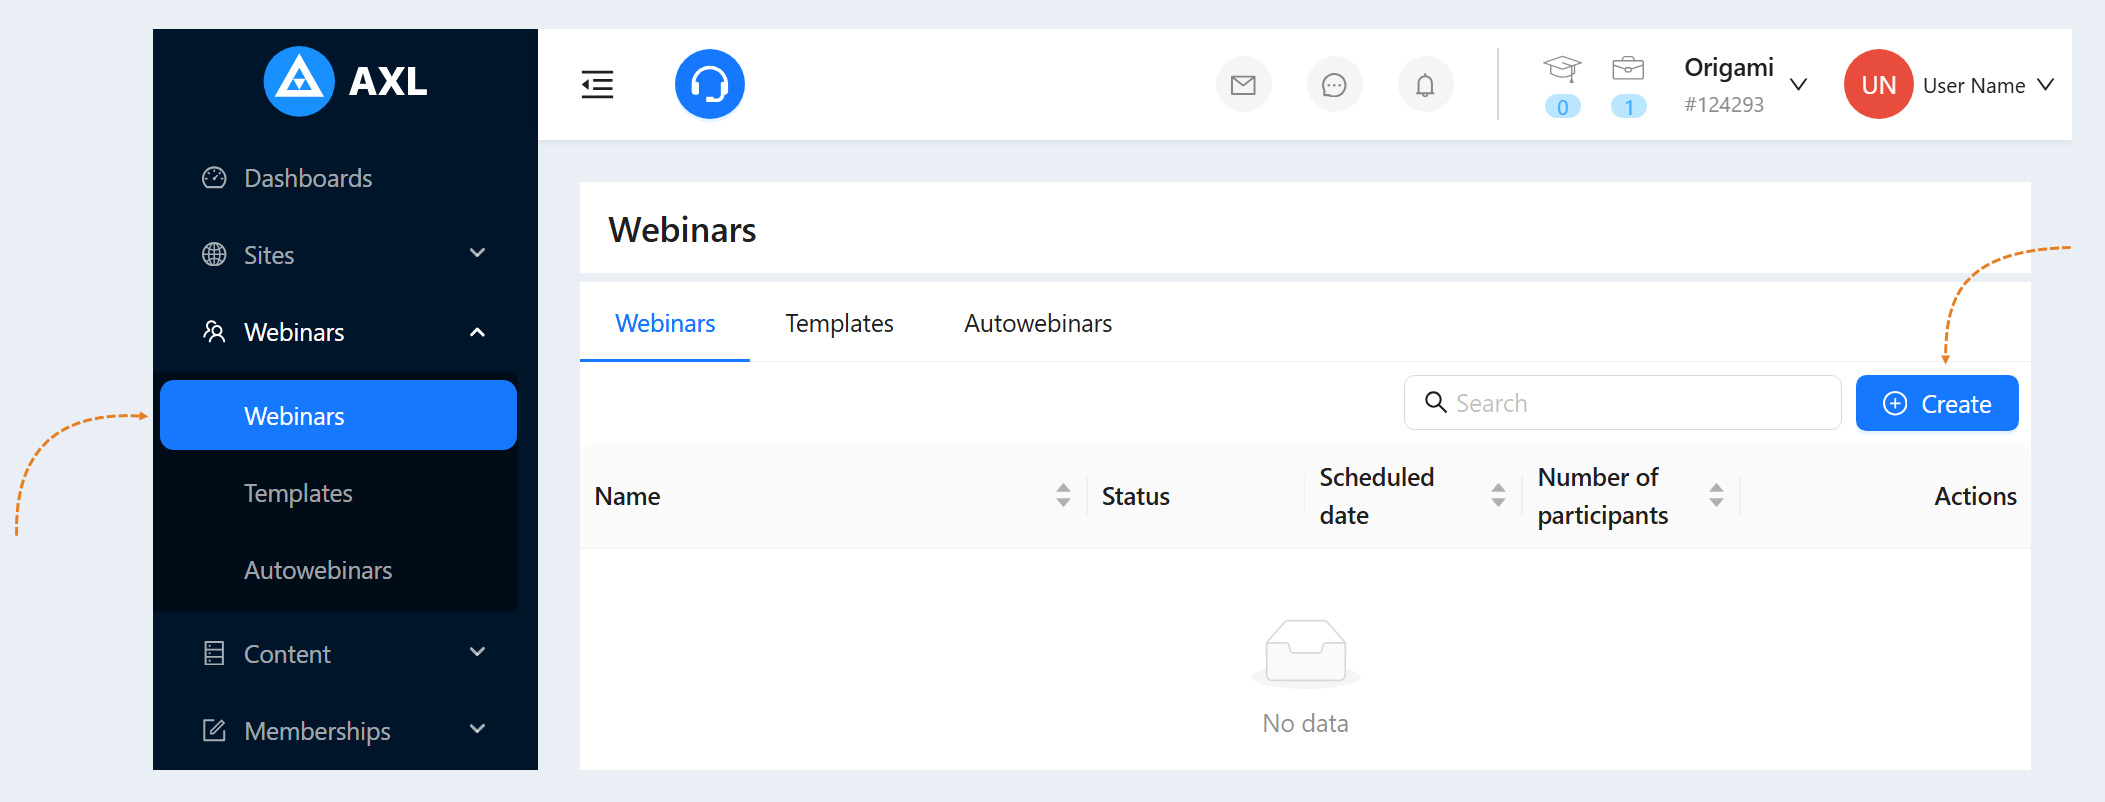
Go to the "Sites" section, to the "Webinars" tab. Click the Create Webinar button.
In the window that opens, fill in the fields:
- Name. Write your webinar title. Webinar attendees will see this title.
Internal name. The internal name will be visible only to you and will not be shown to users.
- Description. This field is optional. You can add a description of the webinar.
- Date. Set your webinar date and time zone.
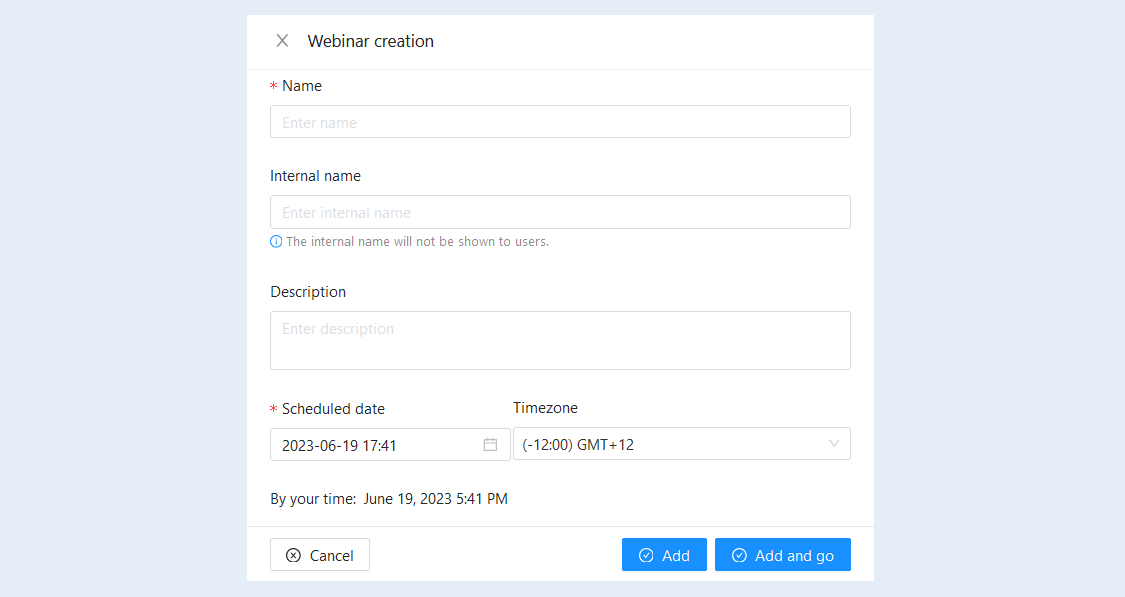
Click the Add button. The webinar you created appears in the list of webinars. Now you can go to the settings.
2
Content and presentation
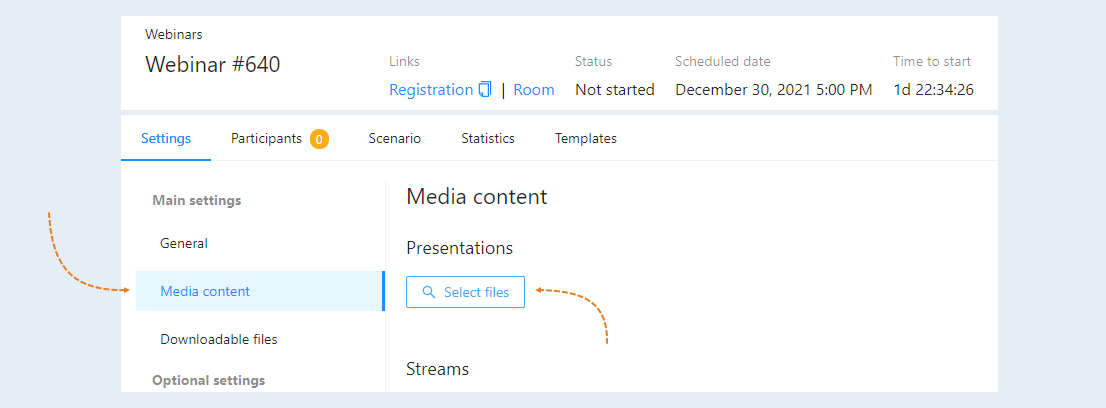
Click on the webinar title or the "Edit" button. In the "Content and Presentations" section, upload a presentation for your webinar.
3
Registration for the webinar
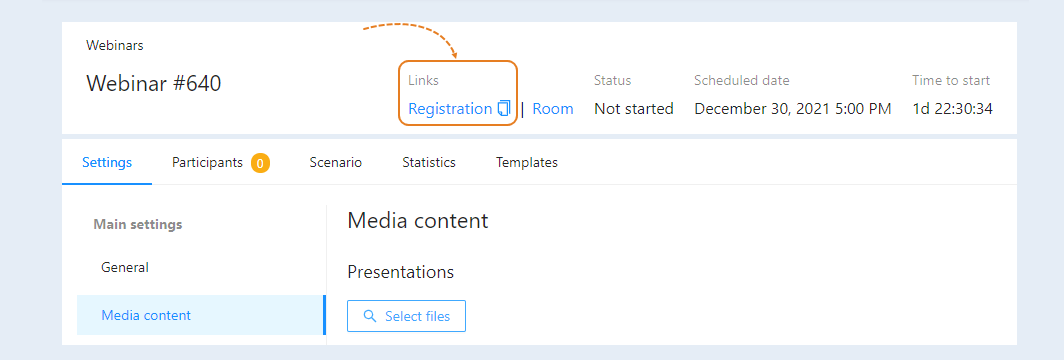
Click the "Register" button. This will open a page where you can register for your webinar. You can copy the link from the registration page or just click on the "copy" button next to the "Register" button. Send the link to your customers.
4
Webinar room
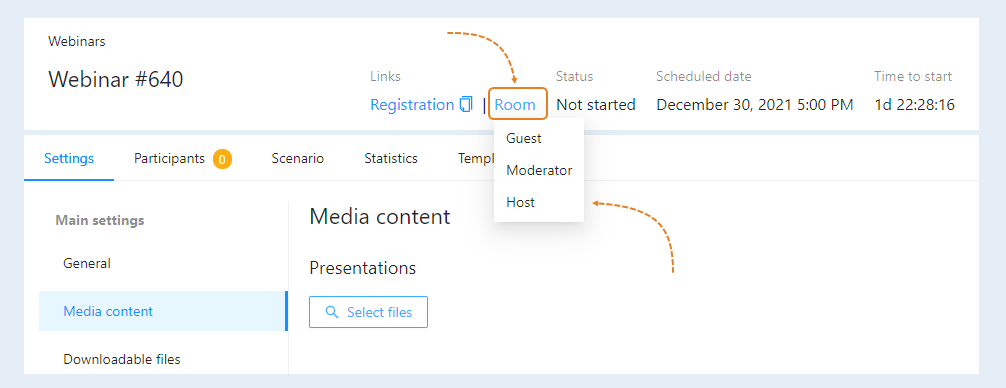
Click the "Room" button to go to the webinar room. Select "Role": presenter.
5
Presentation
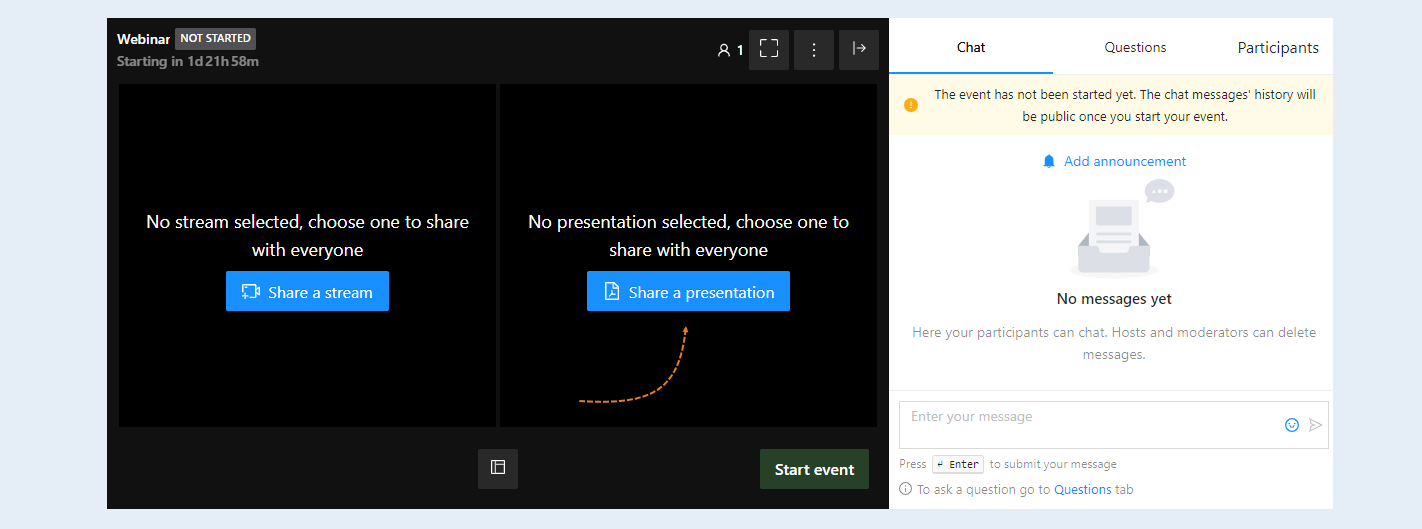
Your webinar room has opened. Click the Share Presentation button and add your presentation to the broadcast.
6
Adding a button to a webinar
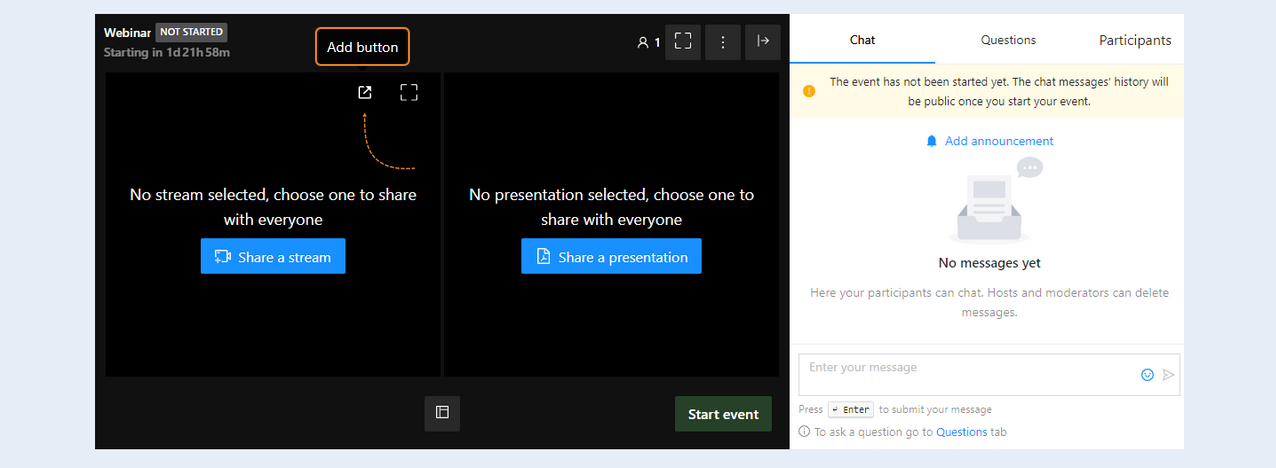
Click the "Add Button" button at the top of the broadcast toolbar.
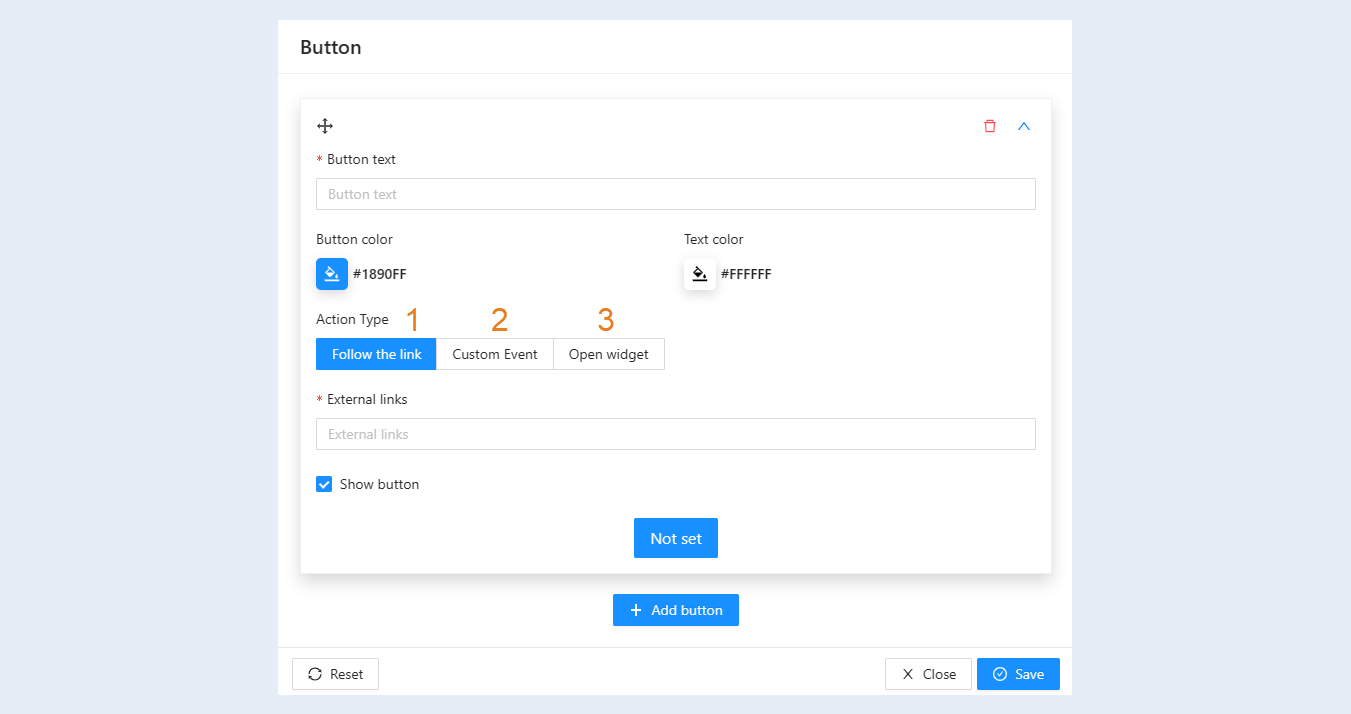
In the button settings window that opens, specify the button text that users will see. Next, select the type of click action on the button. There are three types of actions available to you when the user clicks on the button:
- Follow the link. When clicking on the button, the user will be sent by a link to the site. Add a link to the site in the field.
Custom event. When the button is clicked, the set user event will trigger. The event will trigger only if the contact is registered in CRM (there is an email address).
Open widget. When you click on the button, the widget opens in a modal window in the center of the screen. For more information on how to create and configure a widget, read the article "Widgets".
You can add and configure several buttons in the webinar. After completing the settings, click the "Save" button.
7
Broadcast creation
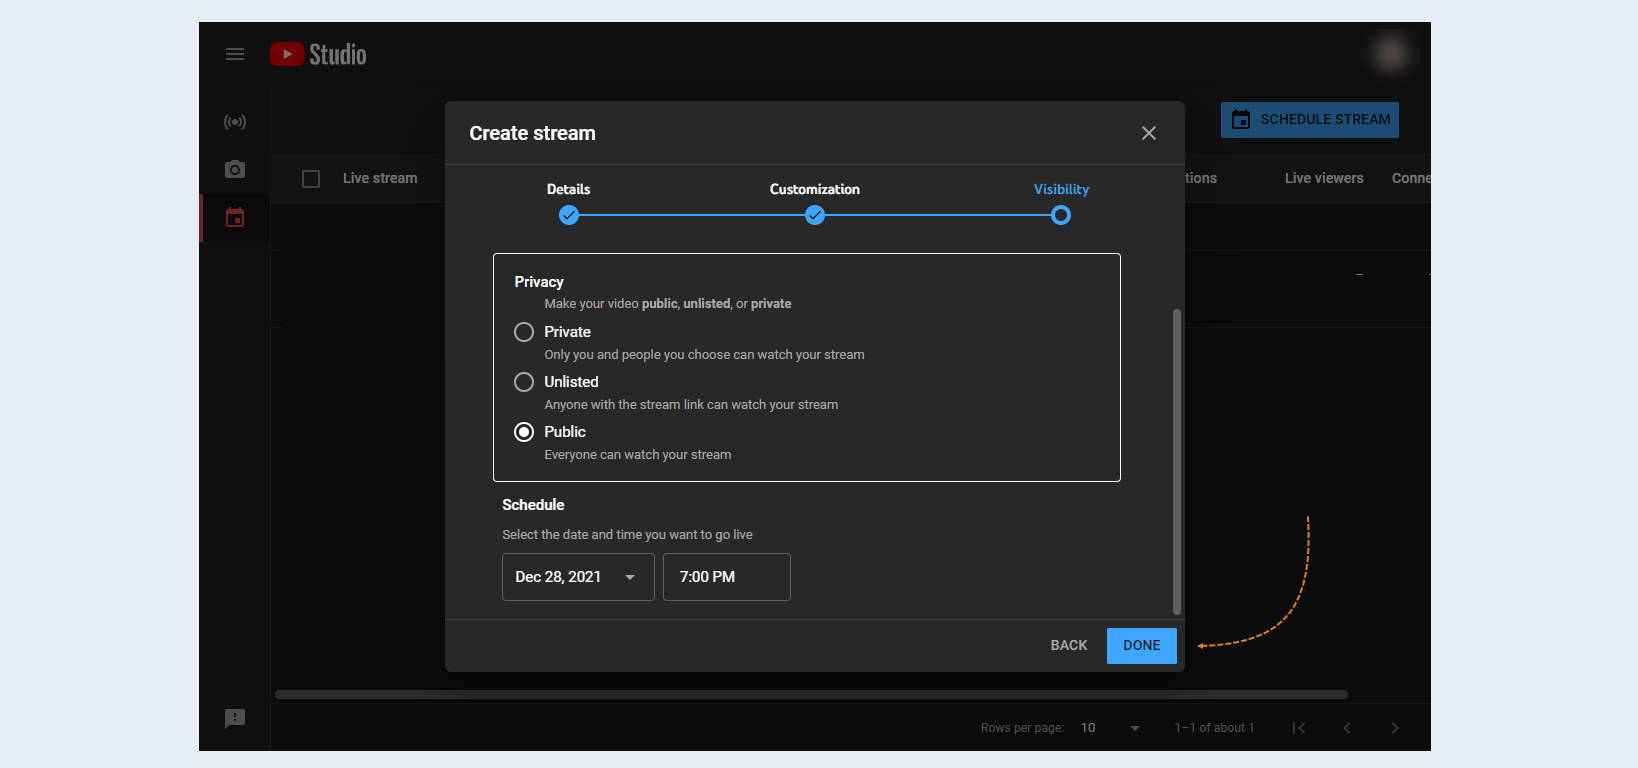
Start broadcasting on any of the services: youtube, vimeo, facebook, zoom or others.
8
Broadcast connection
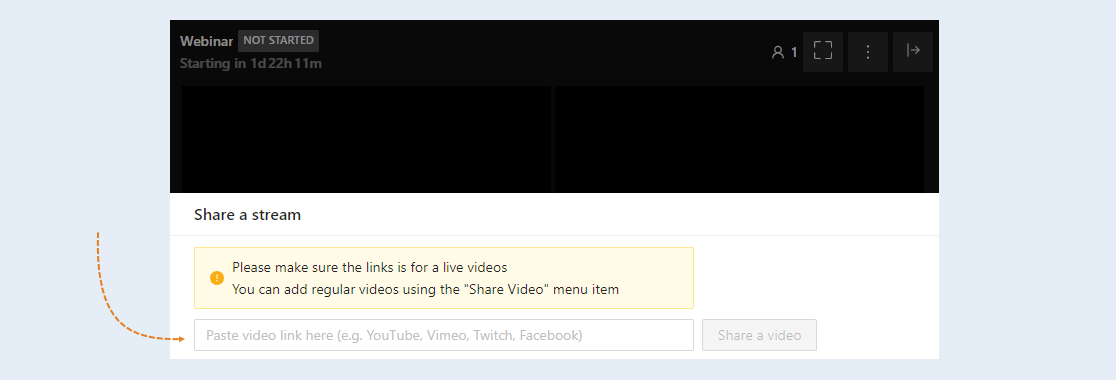
Return to the webinar room page and click the Share Stream button. Paste the broadcast link into the string.
9
Webinar launch
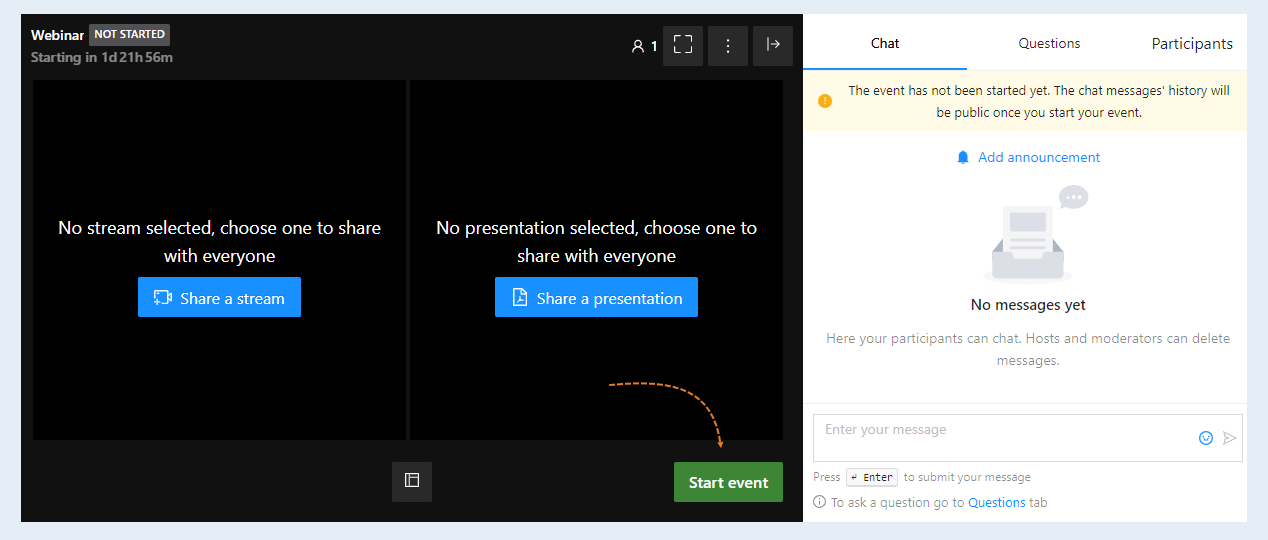
After you have connected the broadcast and loaded the presentation, you can start the webinar. Click the "start" button.
10
Completion of the webinar
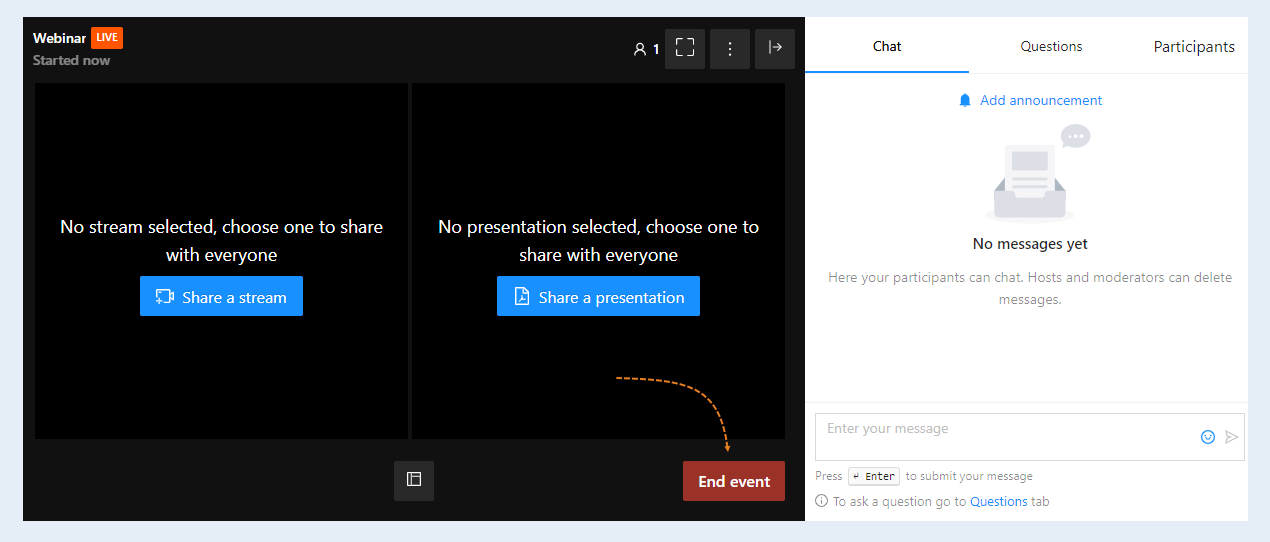
After you have hosted your webinar, click the Finish button.
For more information about setting up a webinar room, chatting participants and conducting a webinar, see the articles: "Webinars", "Webinar Settings", "Webinar Participants", "Hosting a Webinar", "Webinar participants chat" and other articles.