In AXL, we have created our own website builder. You don't need to use third-party services to create web pages.
Click on the desired section of the article to go to its description:
Page Editor
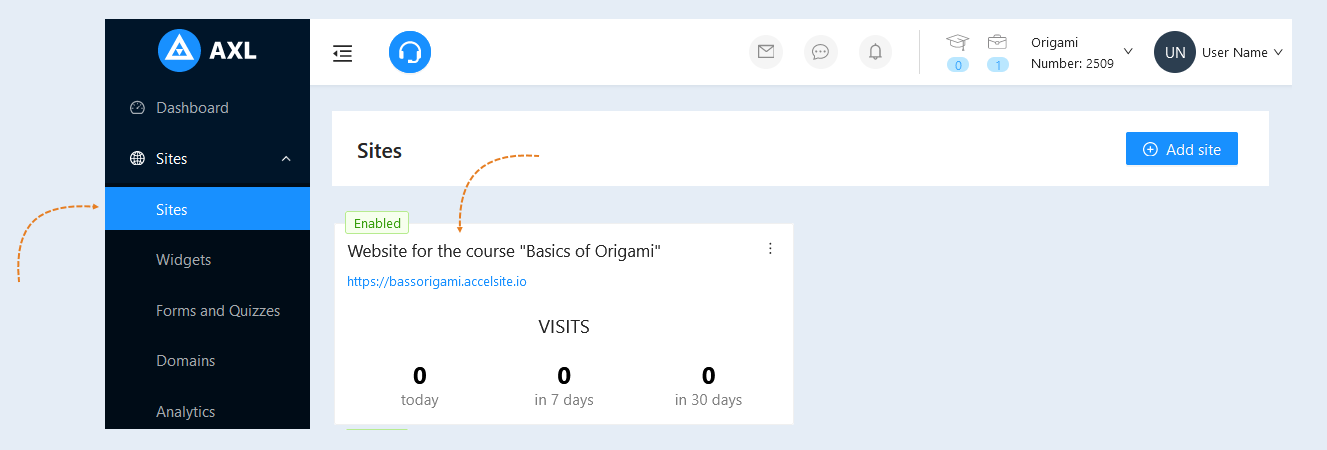
Go to the "Websites" tab. Open a previously created website or create a new one. Read the article "How to Create a Website" for more information on how to add a website.
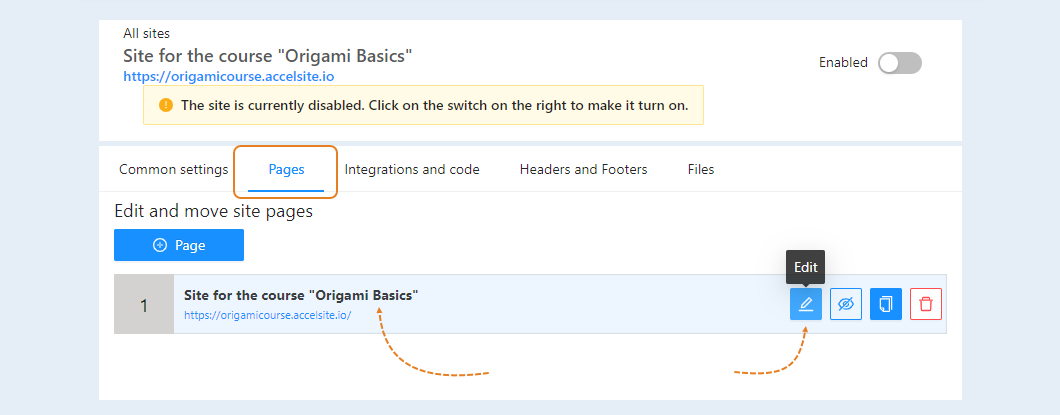
Then go to the "Pages" tab. Click on the page name or "Edit" button to open it and add content to the page.
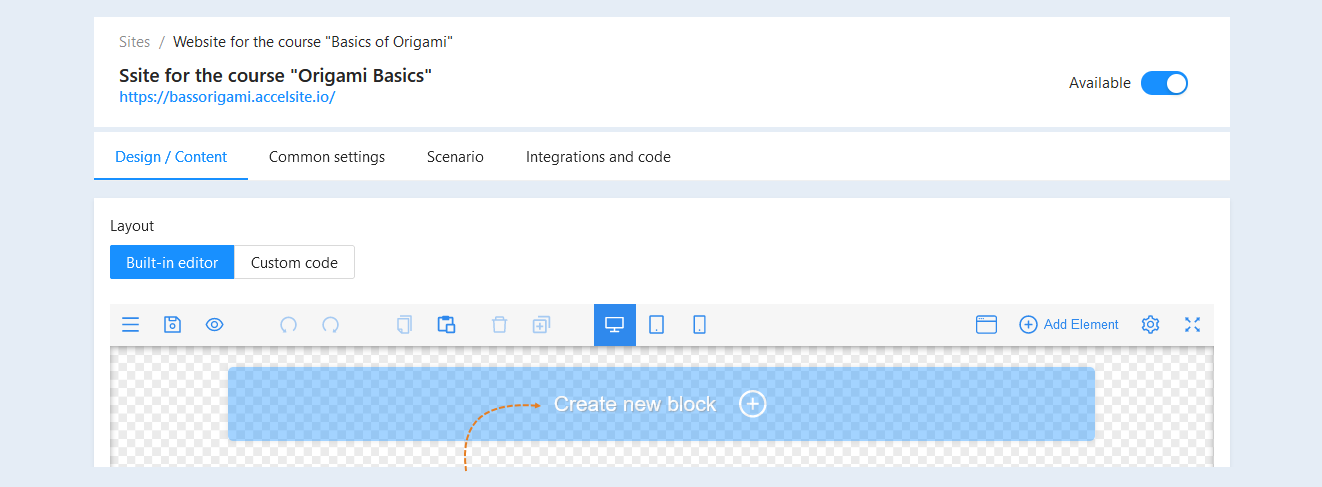
The page editor opens in the "Design/Content" tab. Click the "Create New Block" button.
Page templates and elements
Page design is very important, and creating a new page can be quite challenging. That's why we have prepared many templates for you to make it easier to create your web pages.
You can use existing templates or create a unique page by adding various elements.
Click the "Create New Block" button to start working with the page editor. In the pop-up window, select a block to create: a blank block, video, completed order, columns, menu, cover with a title, about the project, etc. On the right, you can see templates for page blocks. Select one of the templates and click on it. This will add the first block to the page. Now you can make changes to the template.
To learn more about each block template, read the articles "Block Element", "Video Block Settings", "Column Block Settings", "Cover with Title Block Settings", etc.
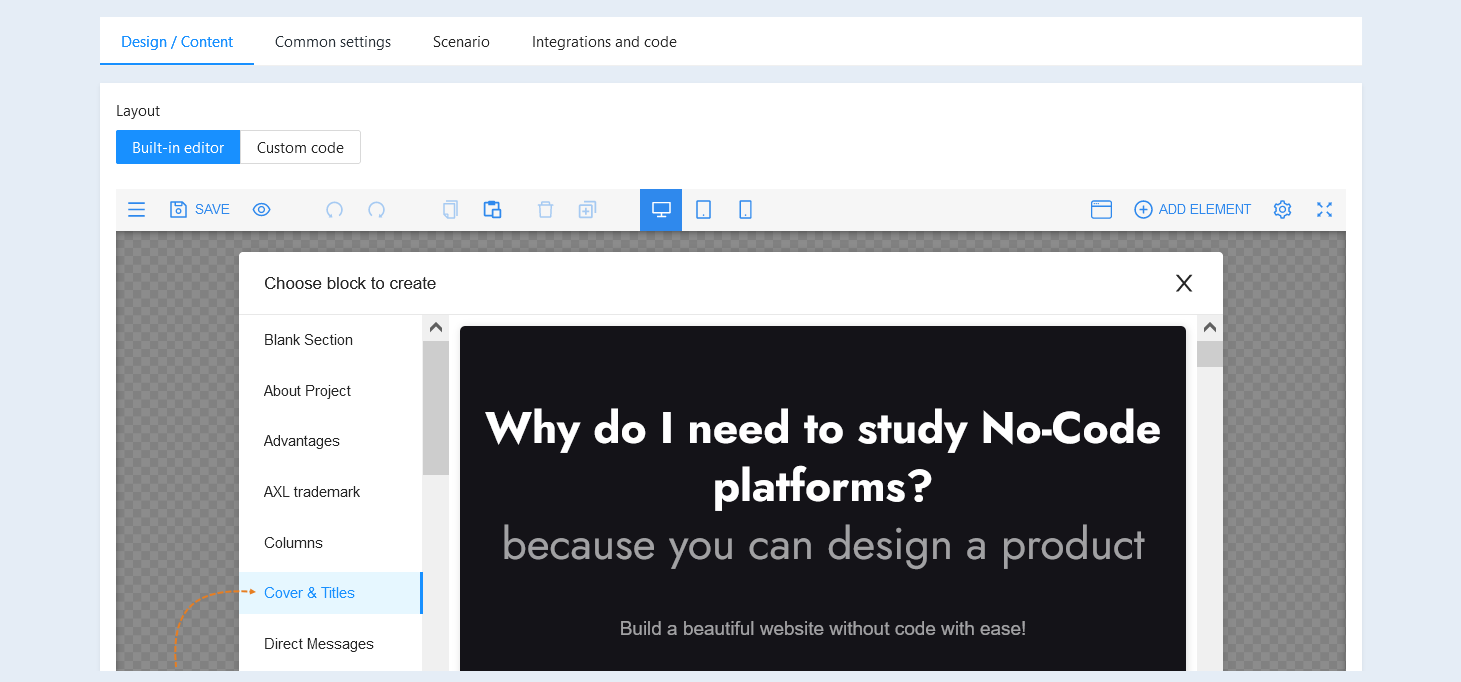
You can also add individual elements to the website. To do this, select "Blank Block" and click the "Add Element" button. Then select the desired element and click on it. You will be presented with several options for each element, created in different styles. Click on the chosen element with the left mouse button and drag it onto the page.
To learn more about each element, read the articles "Elements", "Text Element", "Picture Element", "Video Element", etc.
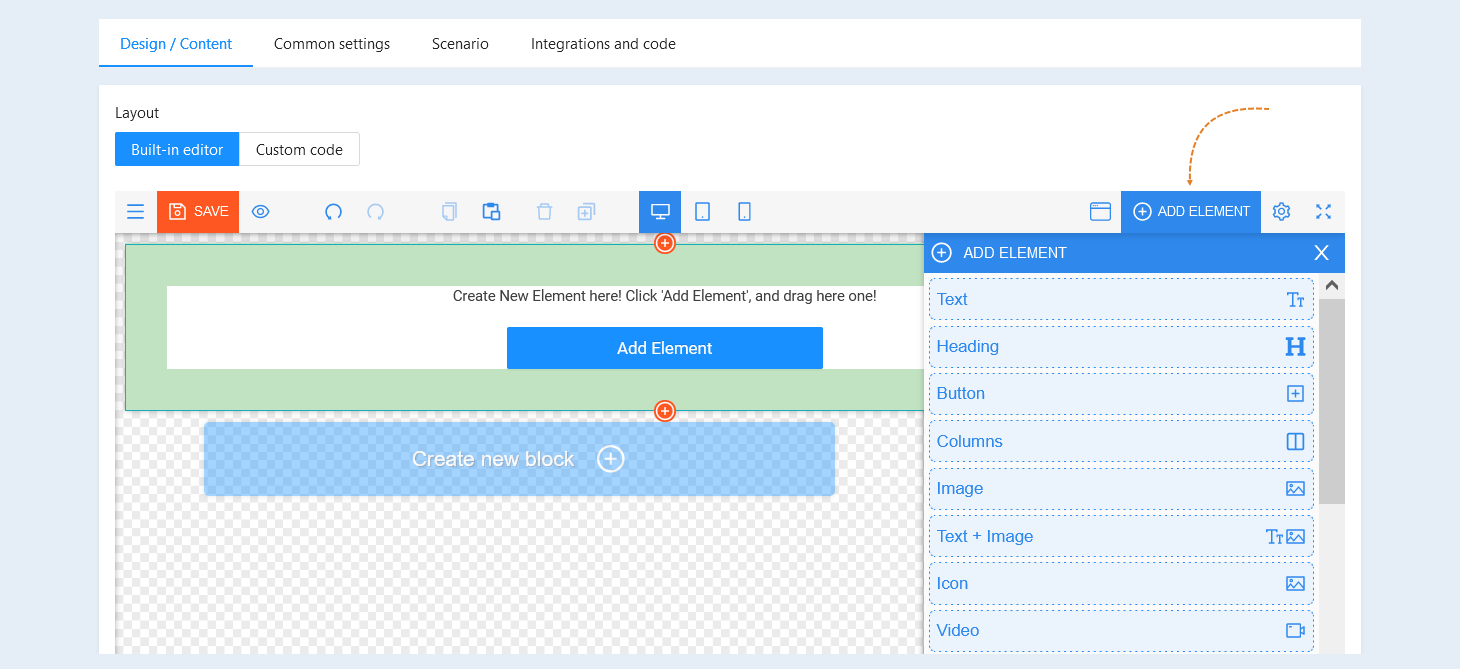
After adding elements to the page, you need to configure them.
Select the entire block to edit it. The "Block Settings" panel will open on the right. Make the necessary changes: you can modify the size, background, layout, etc. For more information about block settings, read the article "Column Block Settings".
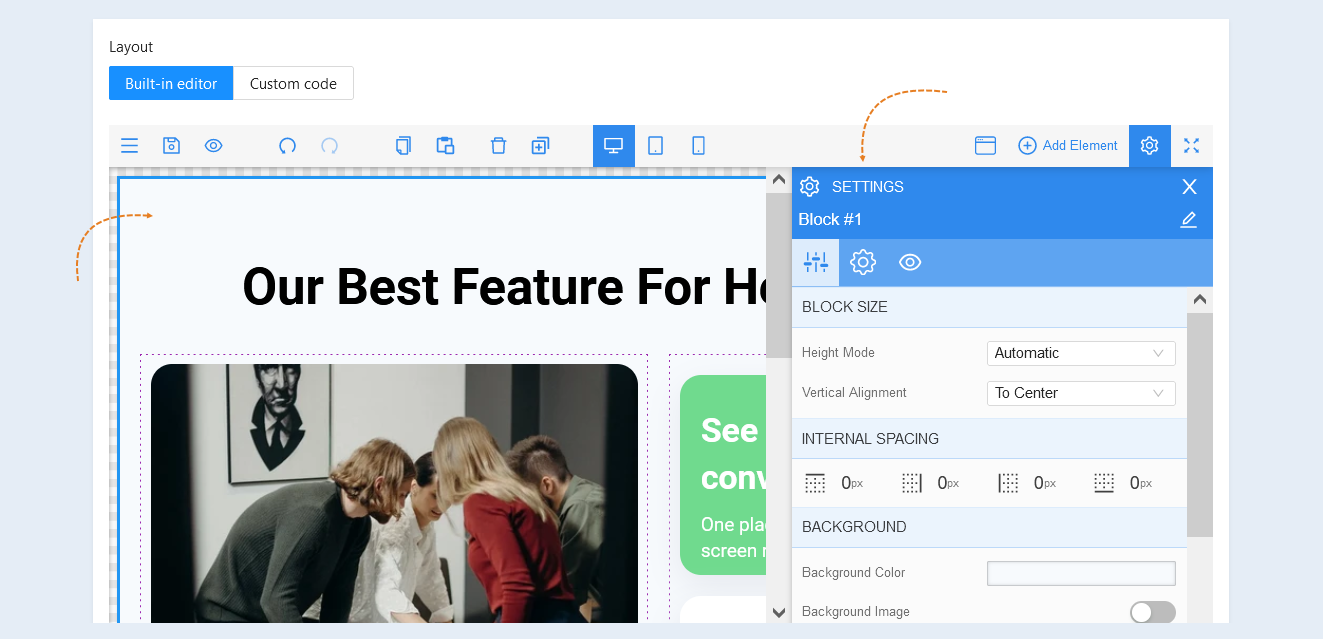
Then select an individual element inside the block to edit it by clicking on it with the mouse. The settings for that specific element will open on the right. This way, you can edit each element on the page.
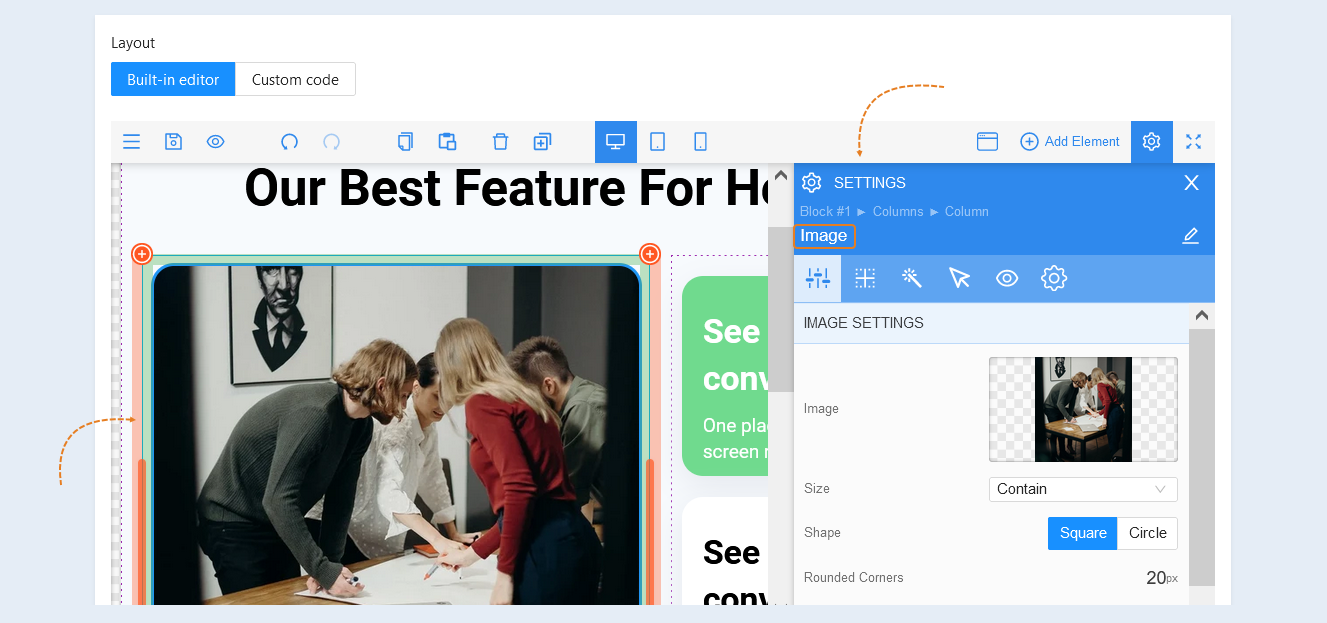
The menu on the right represents a toolbox for editing each element on the page. The toolbox contains common settings (such as text color, size, padding) and specific settings. Each element has a corresponding article. Read the articles "Element Text", "Element Video", "Element Picture" etc., for more information on each element.
Item settings
In the right sidebar, under the "Settings" section, you will see the name and path of the element, if it is nested within another element.
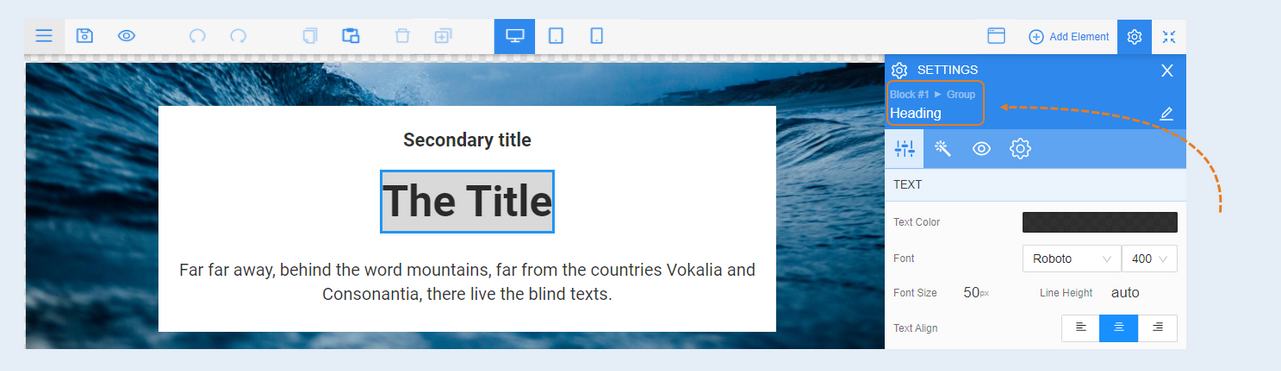
Below are the settings tabs:
General settings. This section contains general settings for the element, unique to each element.
Fields. In this section, you can customize each field of the element.
Positioning. In this section, you can adjust the size, alignment, and margins of the element. Read more about the positioning settings in the article "Positioning".
Style. In this section, you can choose the background, color, field style, etc.
Conditional show / hide. You can define conditions under which the element will be hidden from page visitors. Read more about the settings in the article "Conditional show / hide".
Advanced settings. In this section, you can insert page codes. Read more about the advanced settings in the article "Advanced Settings".
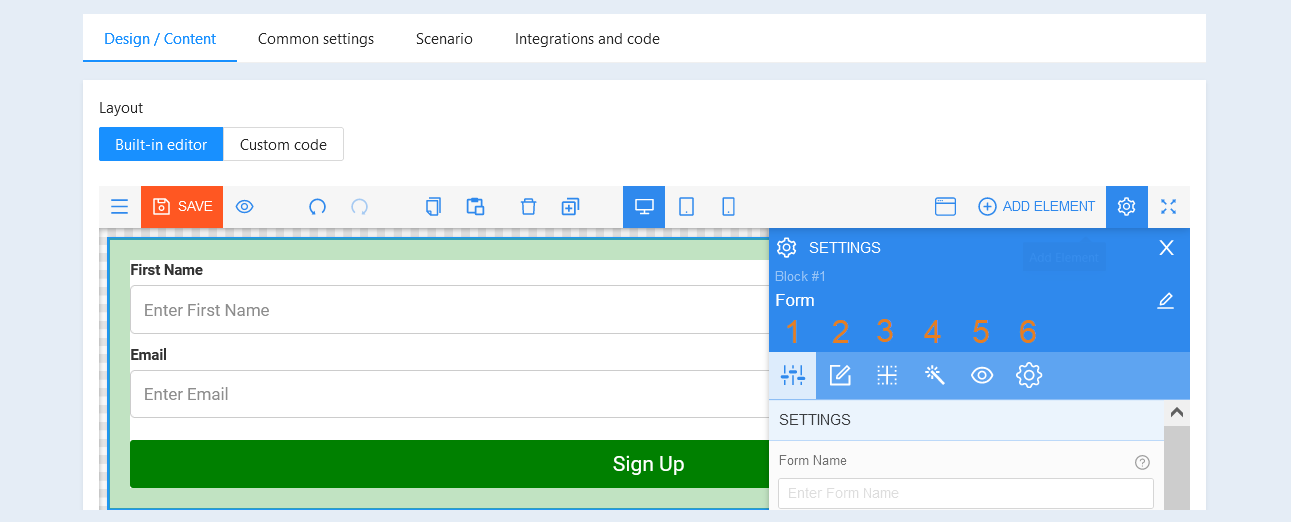
For detailed descriptions of the settings, refer to the articles for each element, such as: “Element Text”, “Element Picture”, “Video Element”, etc.
Toolbar
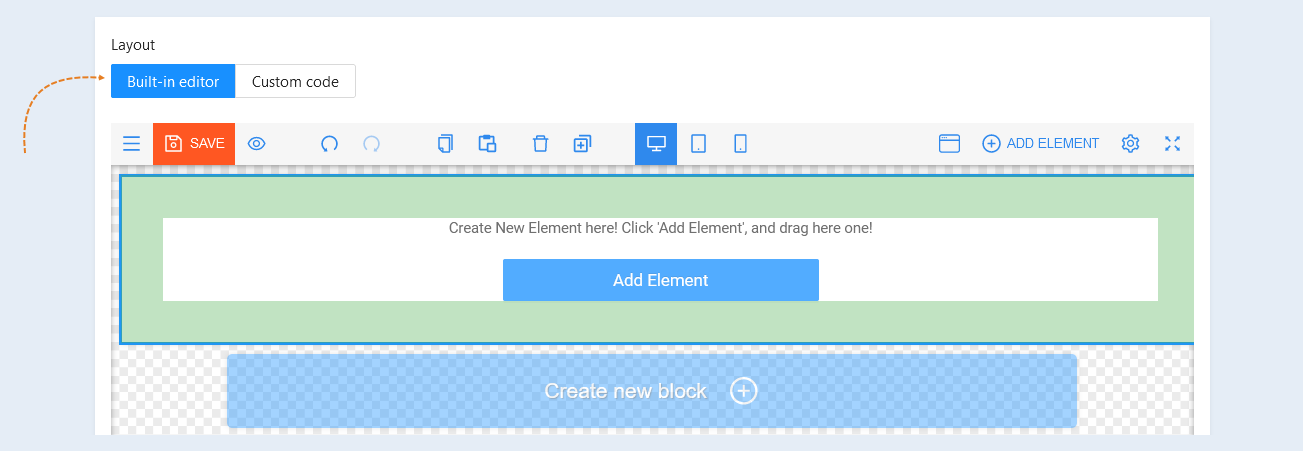
At the top of the page, you can select the layout:
- Built-in editor. Here, you use ready-made templates to create websites.
Custom code. In this section, you write code to create a unique website.
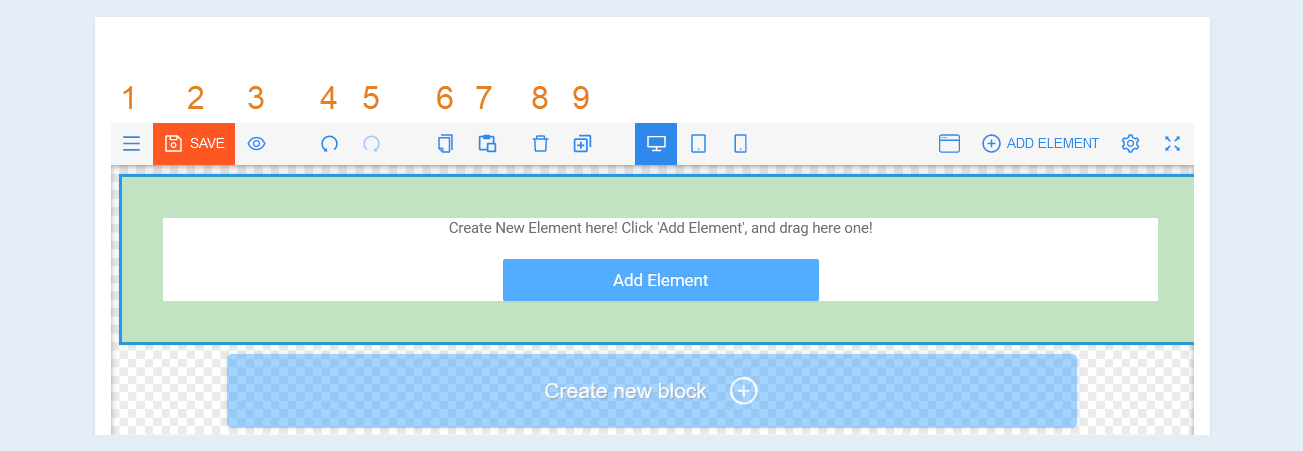
Next, at the top of the page, there is a toolbar:
- Text menu. Click the button to open the text menu. It duplicates the buttons.
Save. After making changes to your page, save them.
Preview. Preview the page before publishing.
"Undo" button. This button takes you back one step and cancels the last action.
"Redo" button. This button takes you forward one step and applies the cancelled action.
"Copy" button. Select an element to copy and click the button. Shortcut keys: Ctrl+C.
"Paste" button. Select where you want to paste the copied element and click the "Paste" button. Shortcut keys: Ctrl+V.
"Delete selected element" button. Select an element on the page and click the button to delete it.
"Duplicate selected element" button. Select an element on the page and click the "Duplicate" button to create a copy of that element.
Next, the following buttons are located on the toolbar:
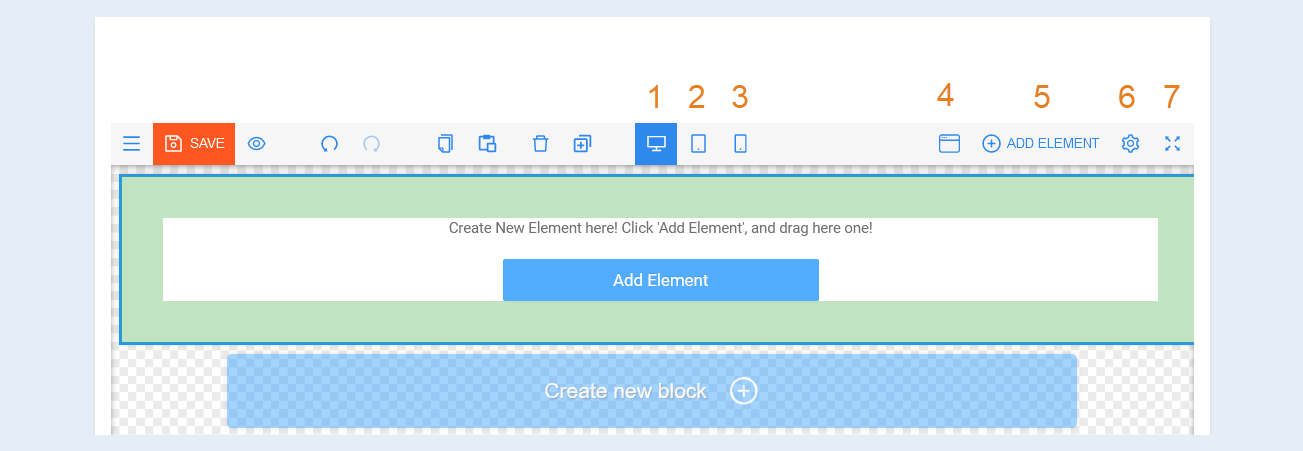
- "Desktop" button. Choose the view of your page for computers and laptops.
"Tablet" button. Click the button to change the appearance of your page for tablets.
"Mobile" button. Click this button to select the view of the page for mobile devices.
"Pop-up windows" button. You can create pop-up windows on your page.
"Add element" button. If you need to add a specific element, click this button and choose a suitable option from the list. Each element has a separate article with a description of its functions.
Settings. Select an element and click "Settings" to modify the element. Read more about it in the articles about page elements.
"Fullscreen mode" button. Click to expand the page editor to full screen and minimize it back.