Getting started with AXL
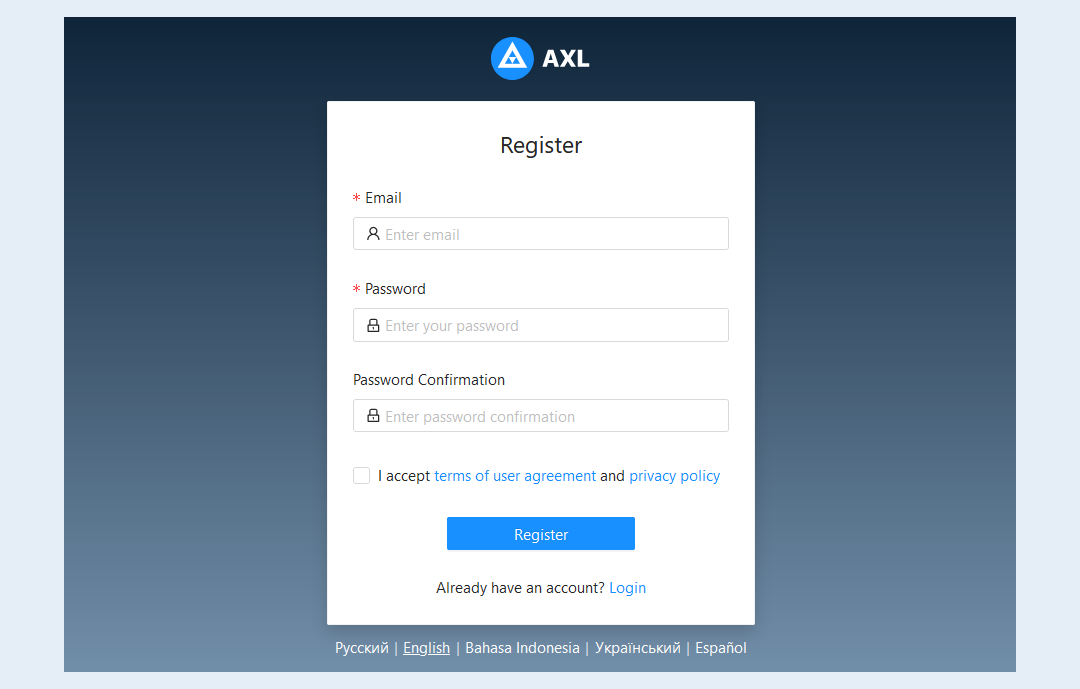
Click on the desired section to go to its description. In this article, we will consider the following sections in detail:
2
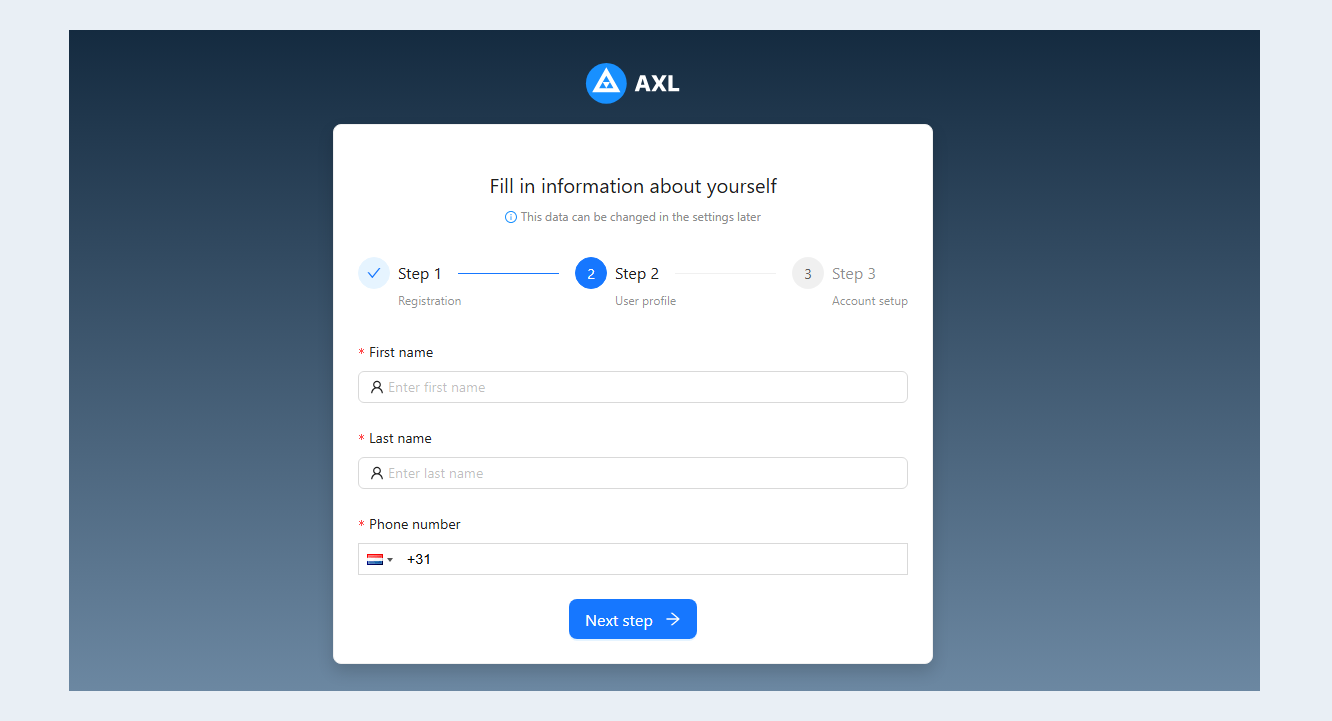
Personal data
Fill in the information about yourself: name, surname and phone number.
3
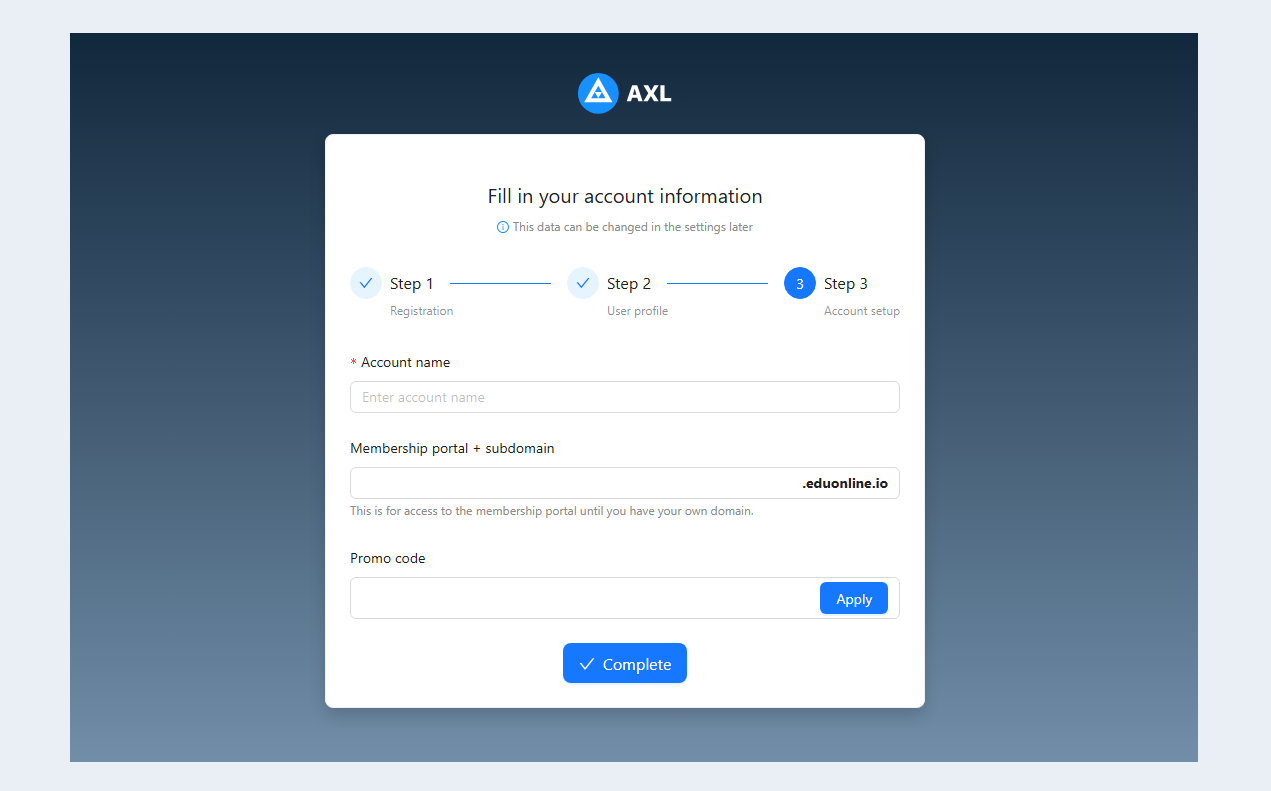
Creating an account
Write the name of your account. Enter your account domain using English letters. Click the “Complete” button.
4
Creating and configuring a course
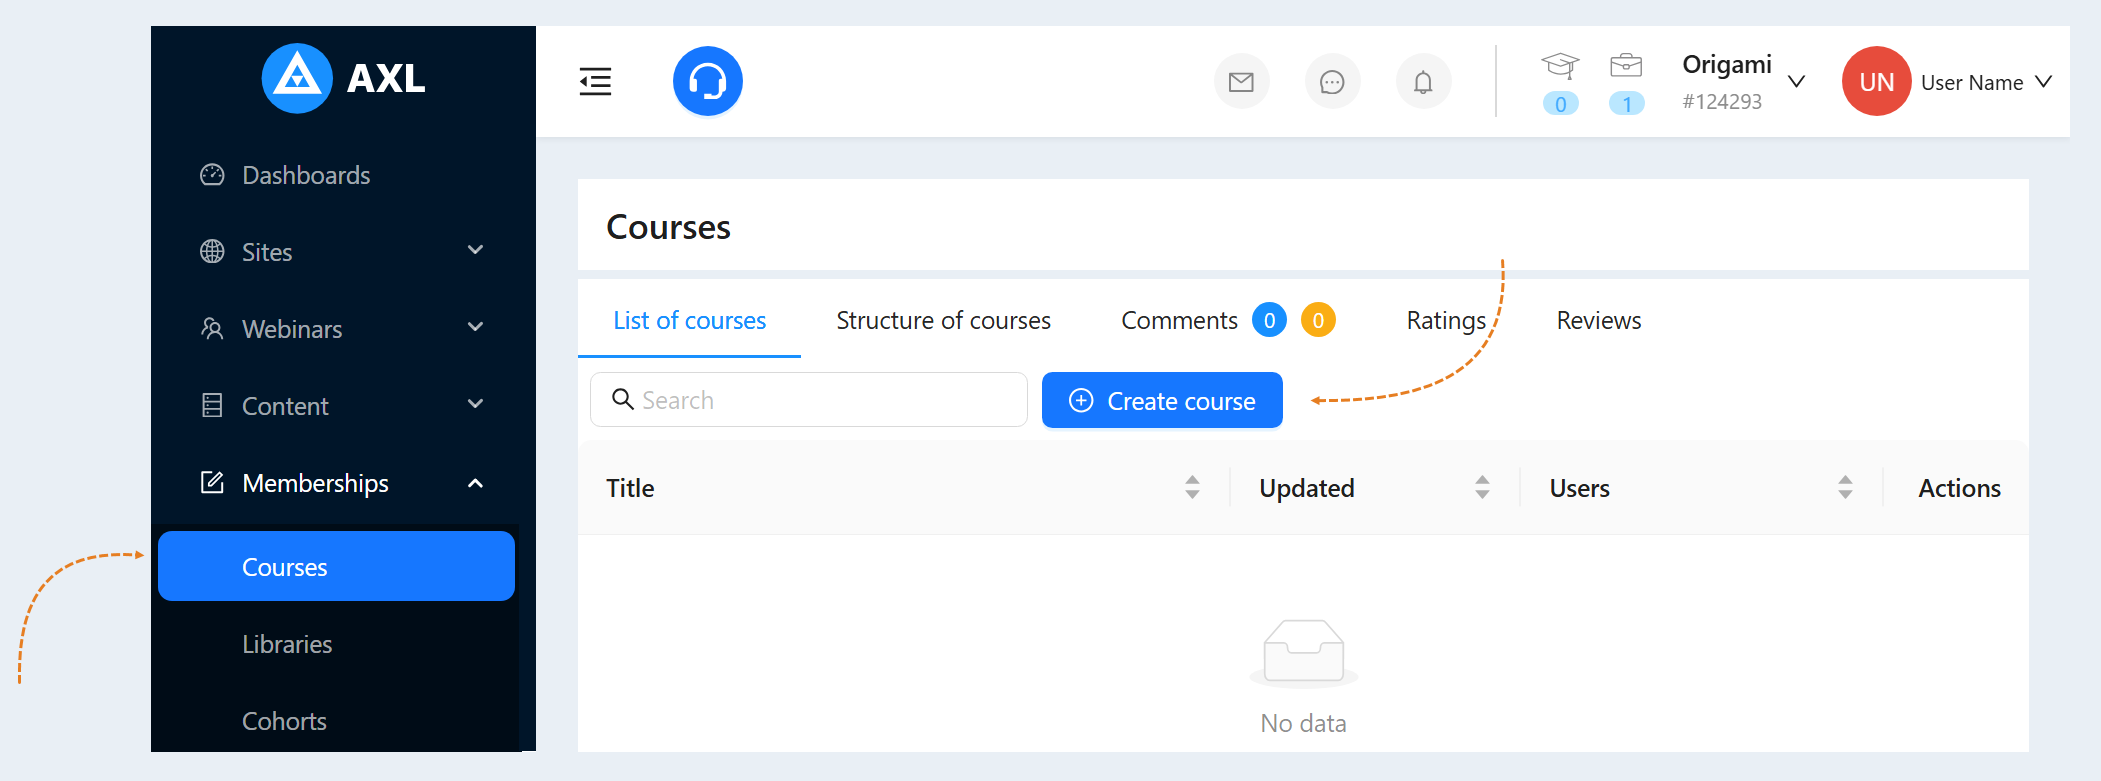
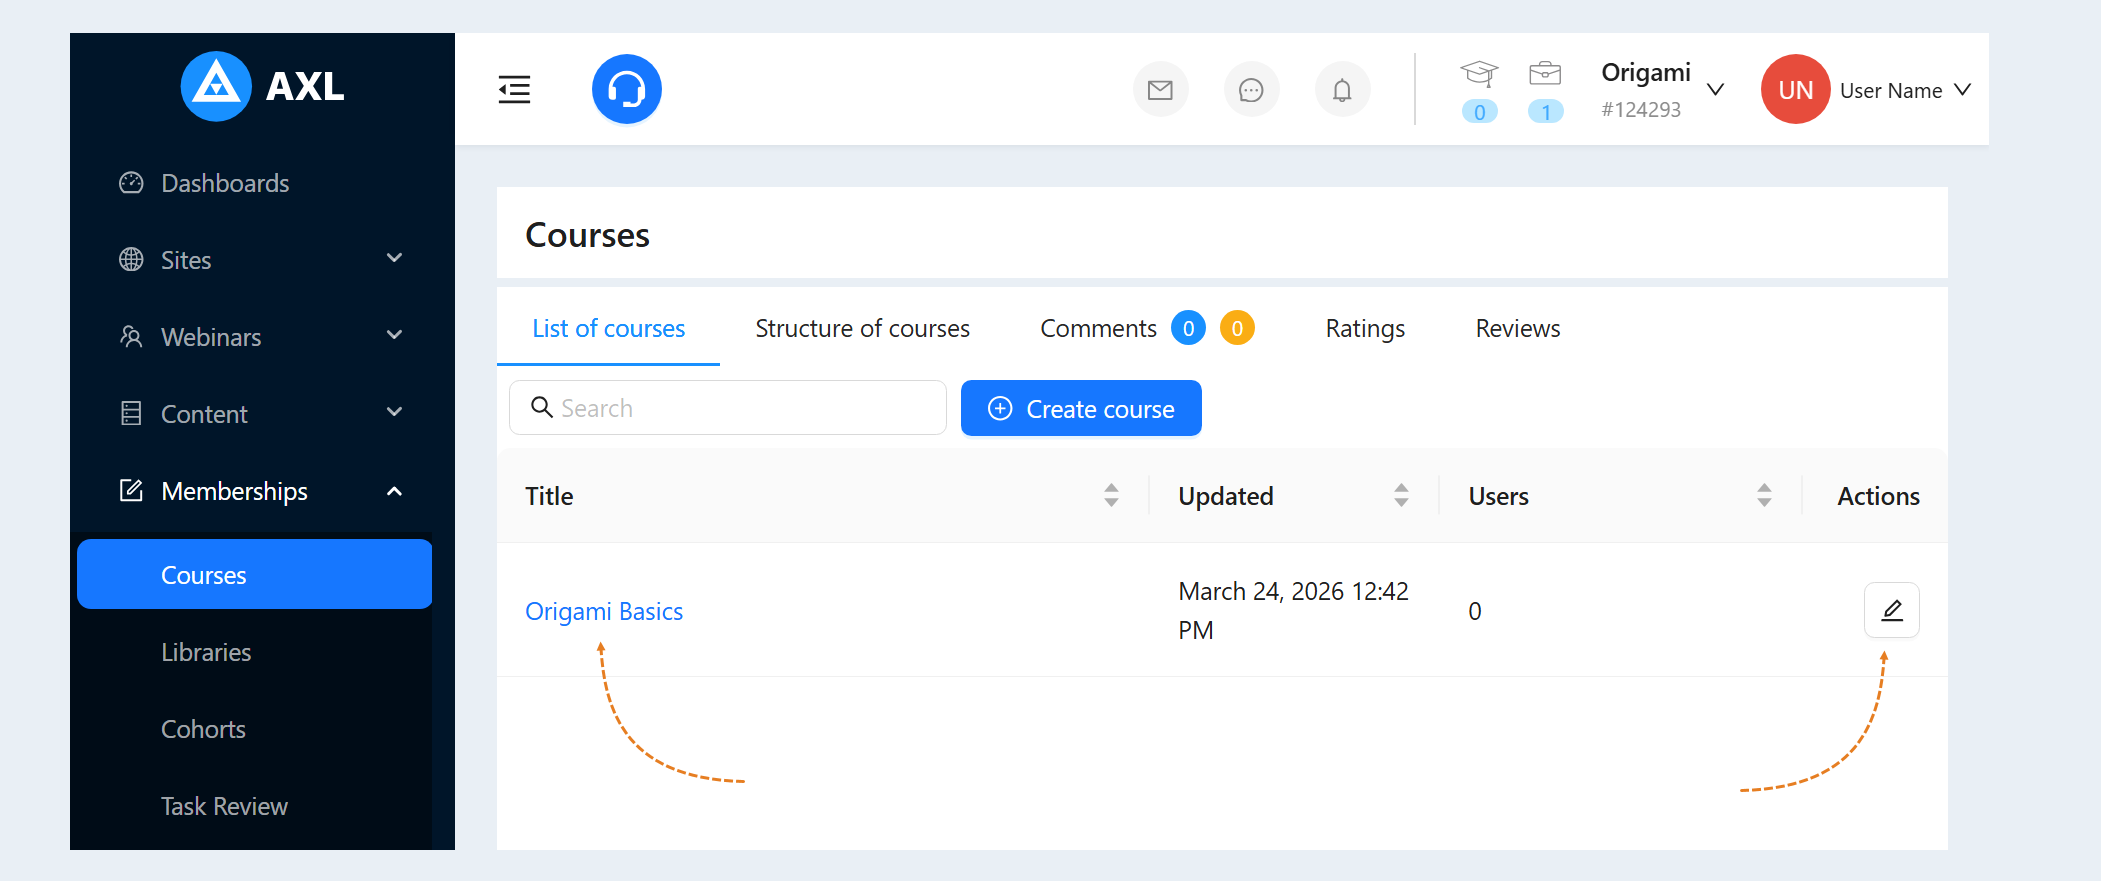
Go to the "Materials and Courses" tab and select "Courses". Click on the Create Course button.
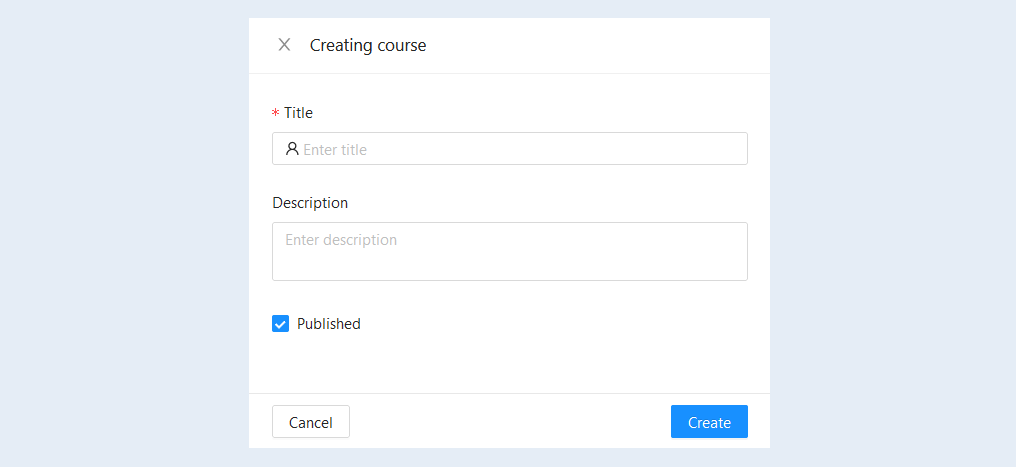
Enter the course title and course description (this field is optional). Click the Create button.
When you created a course, it appears in the course list. You can now manage this course. Click on the course name or on the “Actions” button. You will be presented with a page for editing.
5
Steps
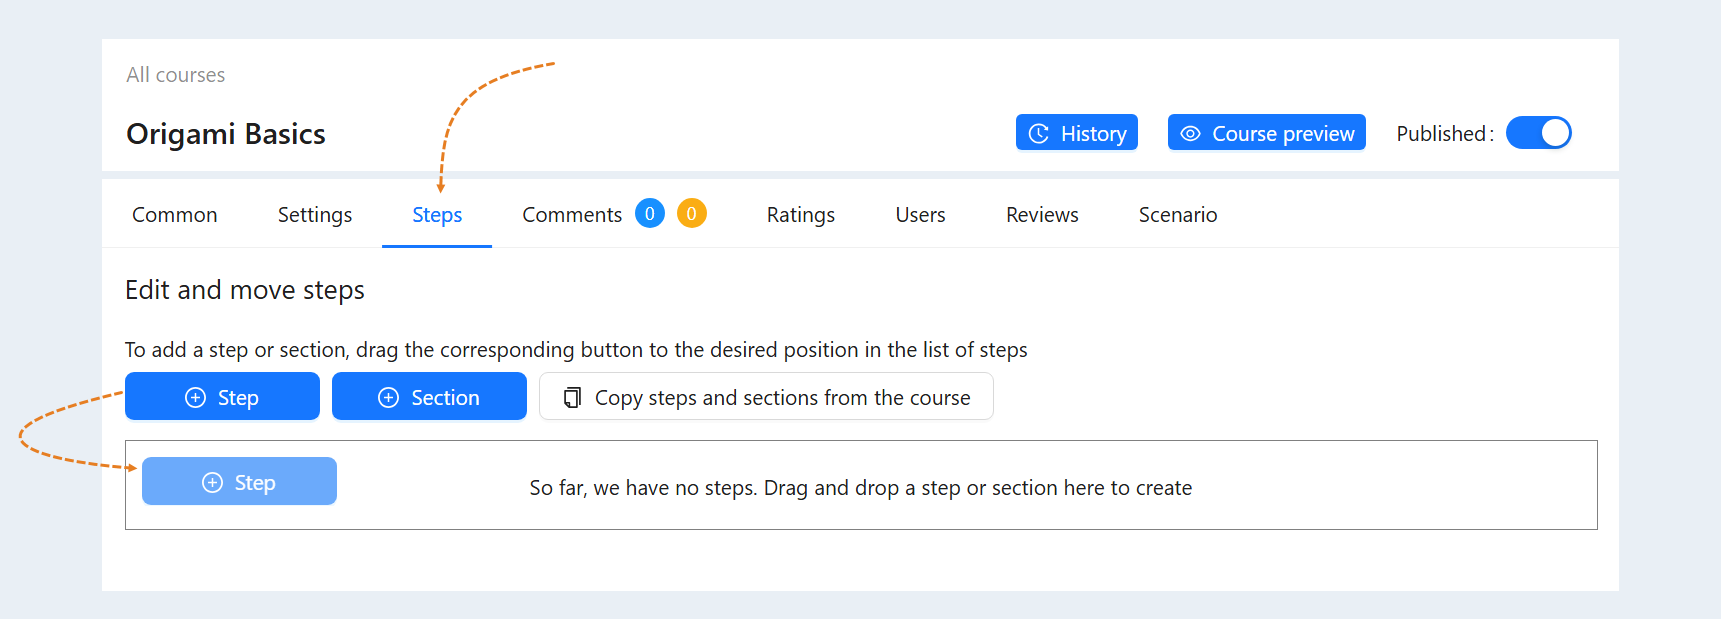
Go to the "Steps" tab - here you create a sequence of steps within the course for the user to study. You can create, delete, change the sequence of steps, add new steps.
Step button. A step is a component of a course, a unit of learning content. A step can be text, video, picture, table, list, task, test. To add a step to the course, click on the “Step” button and drag it into the field.
Section button. Needed in order to group the steps of the course if you want to divide it into parts. To add a section to the course, click on the "Section" button and drag it into the field.
After you have added steps and sections, you can fill the course with content (text, videos, assignments, and so on).
6
Adding a lesson
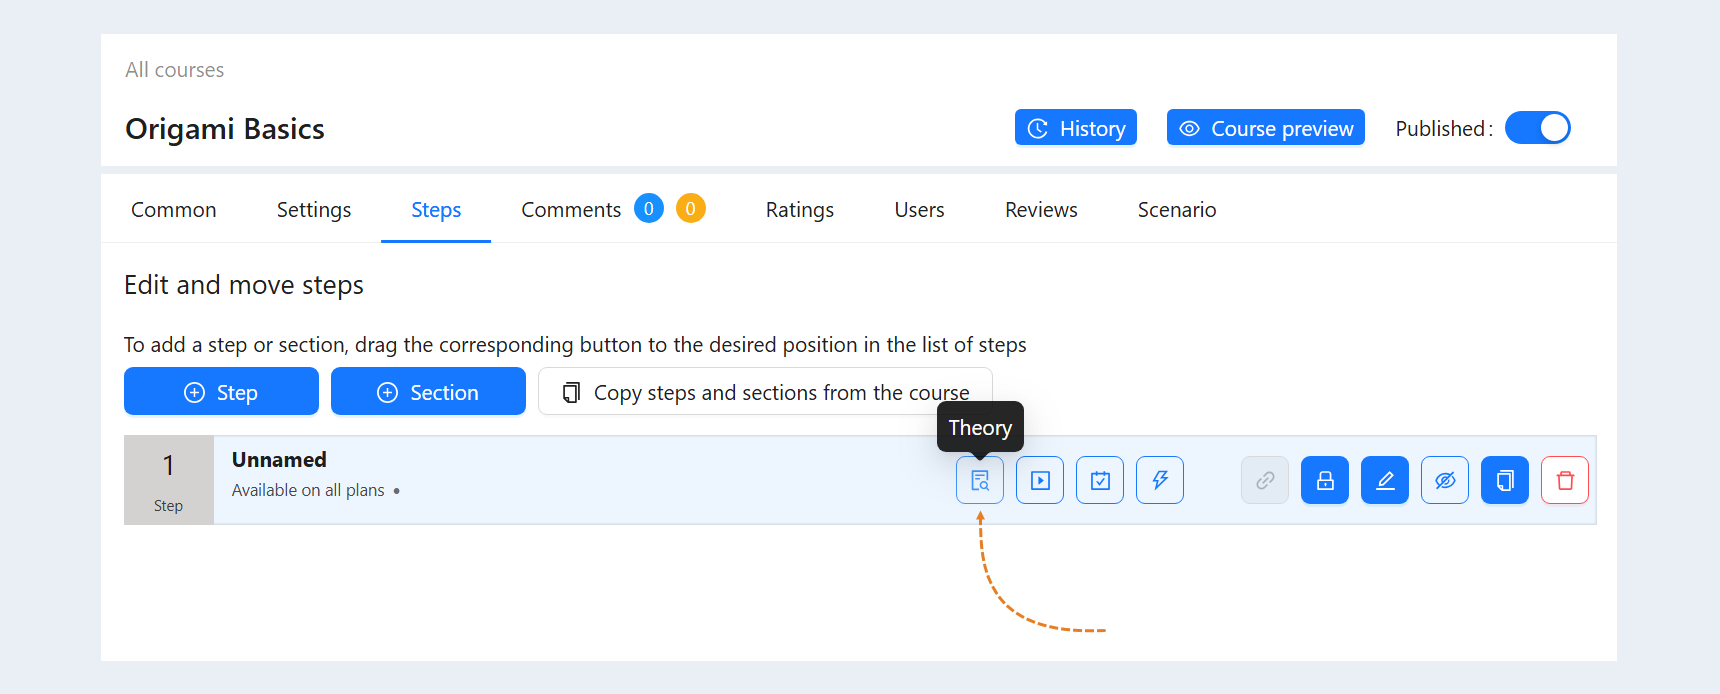
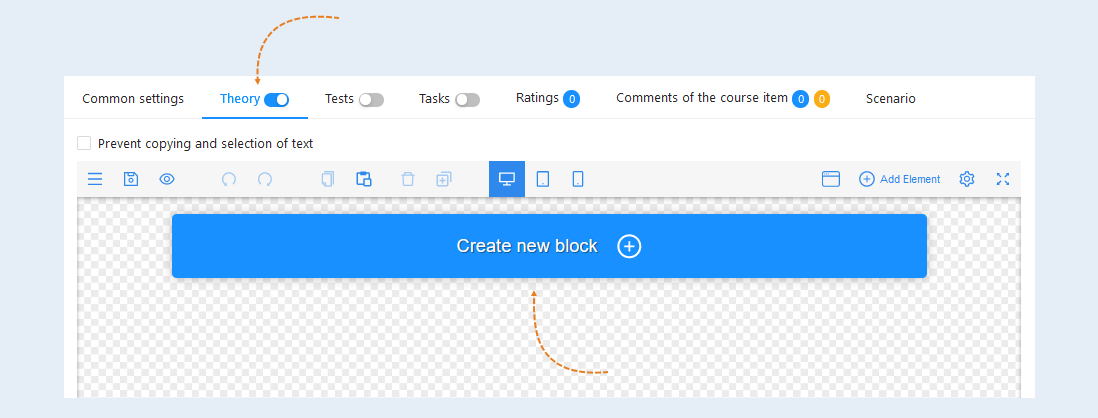
Click on the name of the step. Go to the "Theory" tab. Here you can add text blocks, videos, images.
7
Course Editor
Click the Create New Block button.
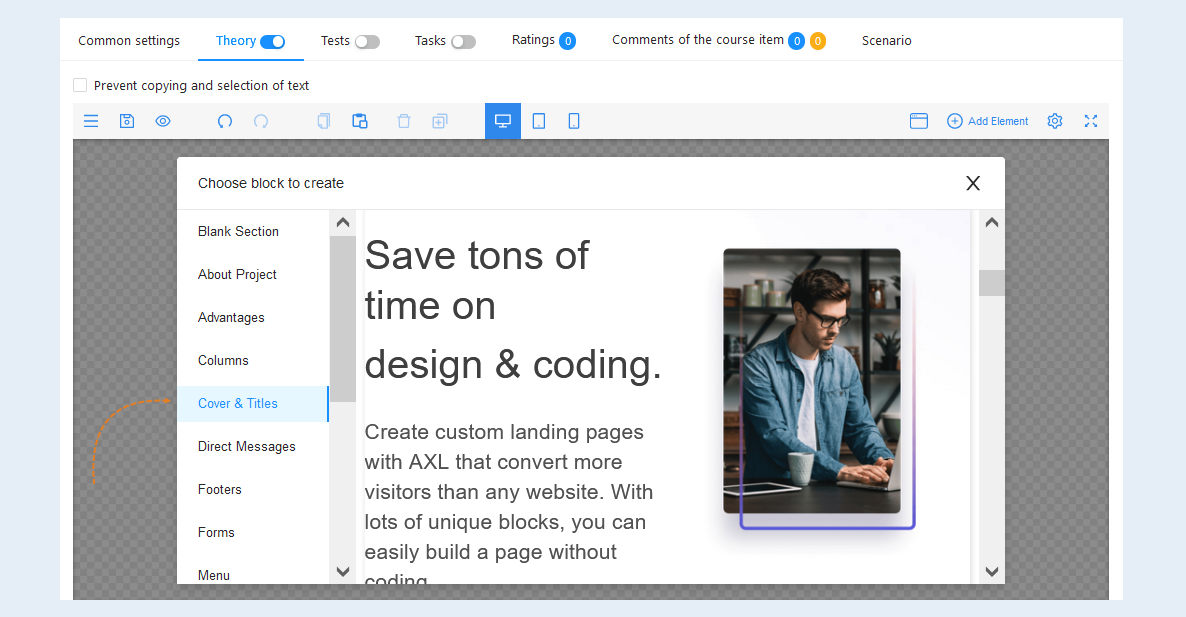
Select a block to create a course from the presented templates. For example, select the “Cover with title" block. Now you can add the title and text of your lesson. Selecting each element of the block, you go to its settings.
8
Adding a video
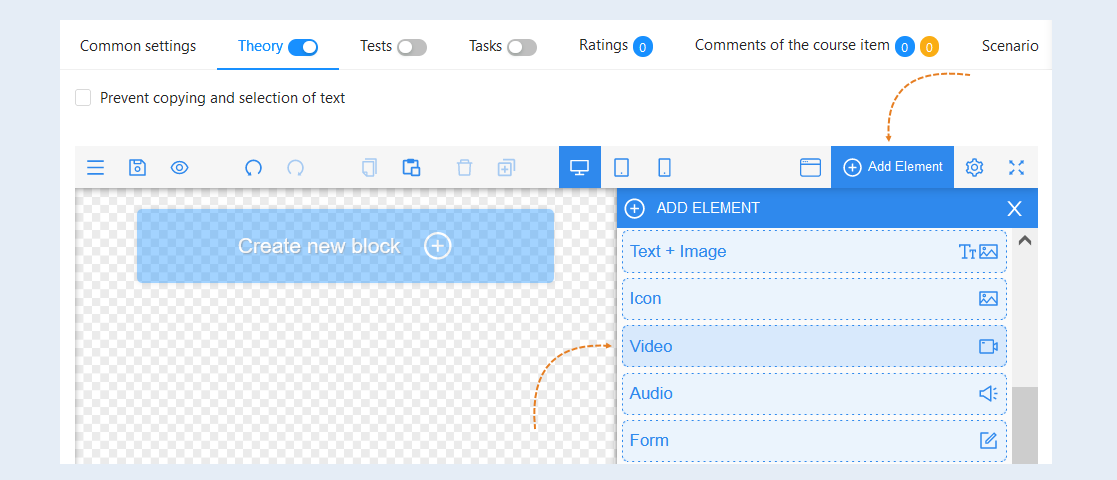
To add a video, click the "Add Item" button in the upper right corner of the page editor. Select the "Video" element and drag it to the page field.
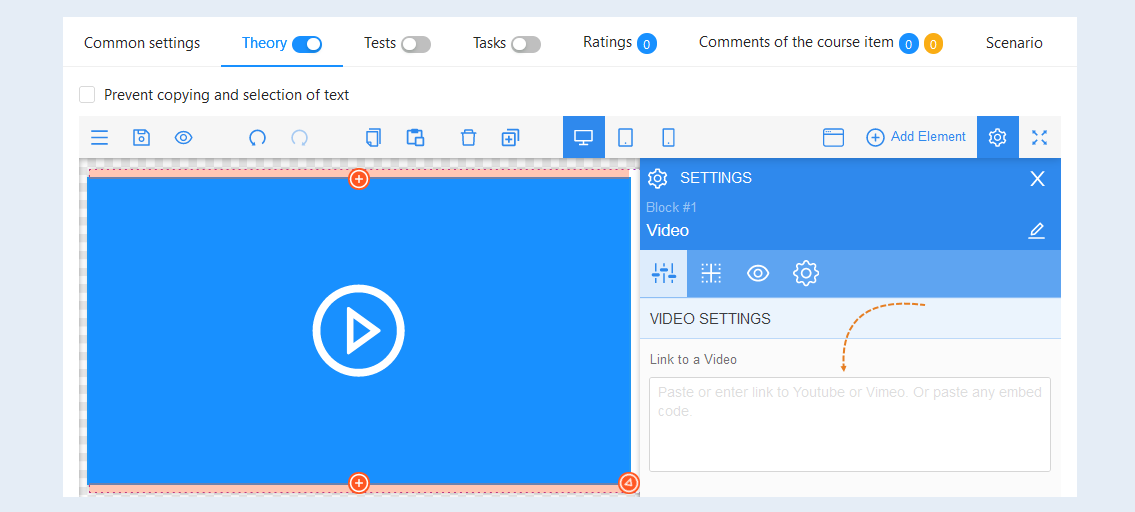
In the settings on the right, enter a link to the video in the field. You can use narrowed videos on Youtube or Vimeo channels. Or you can upload the video to the AXL platform.
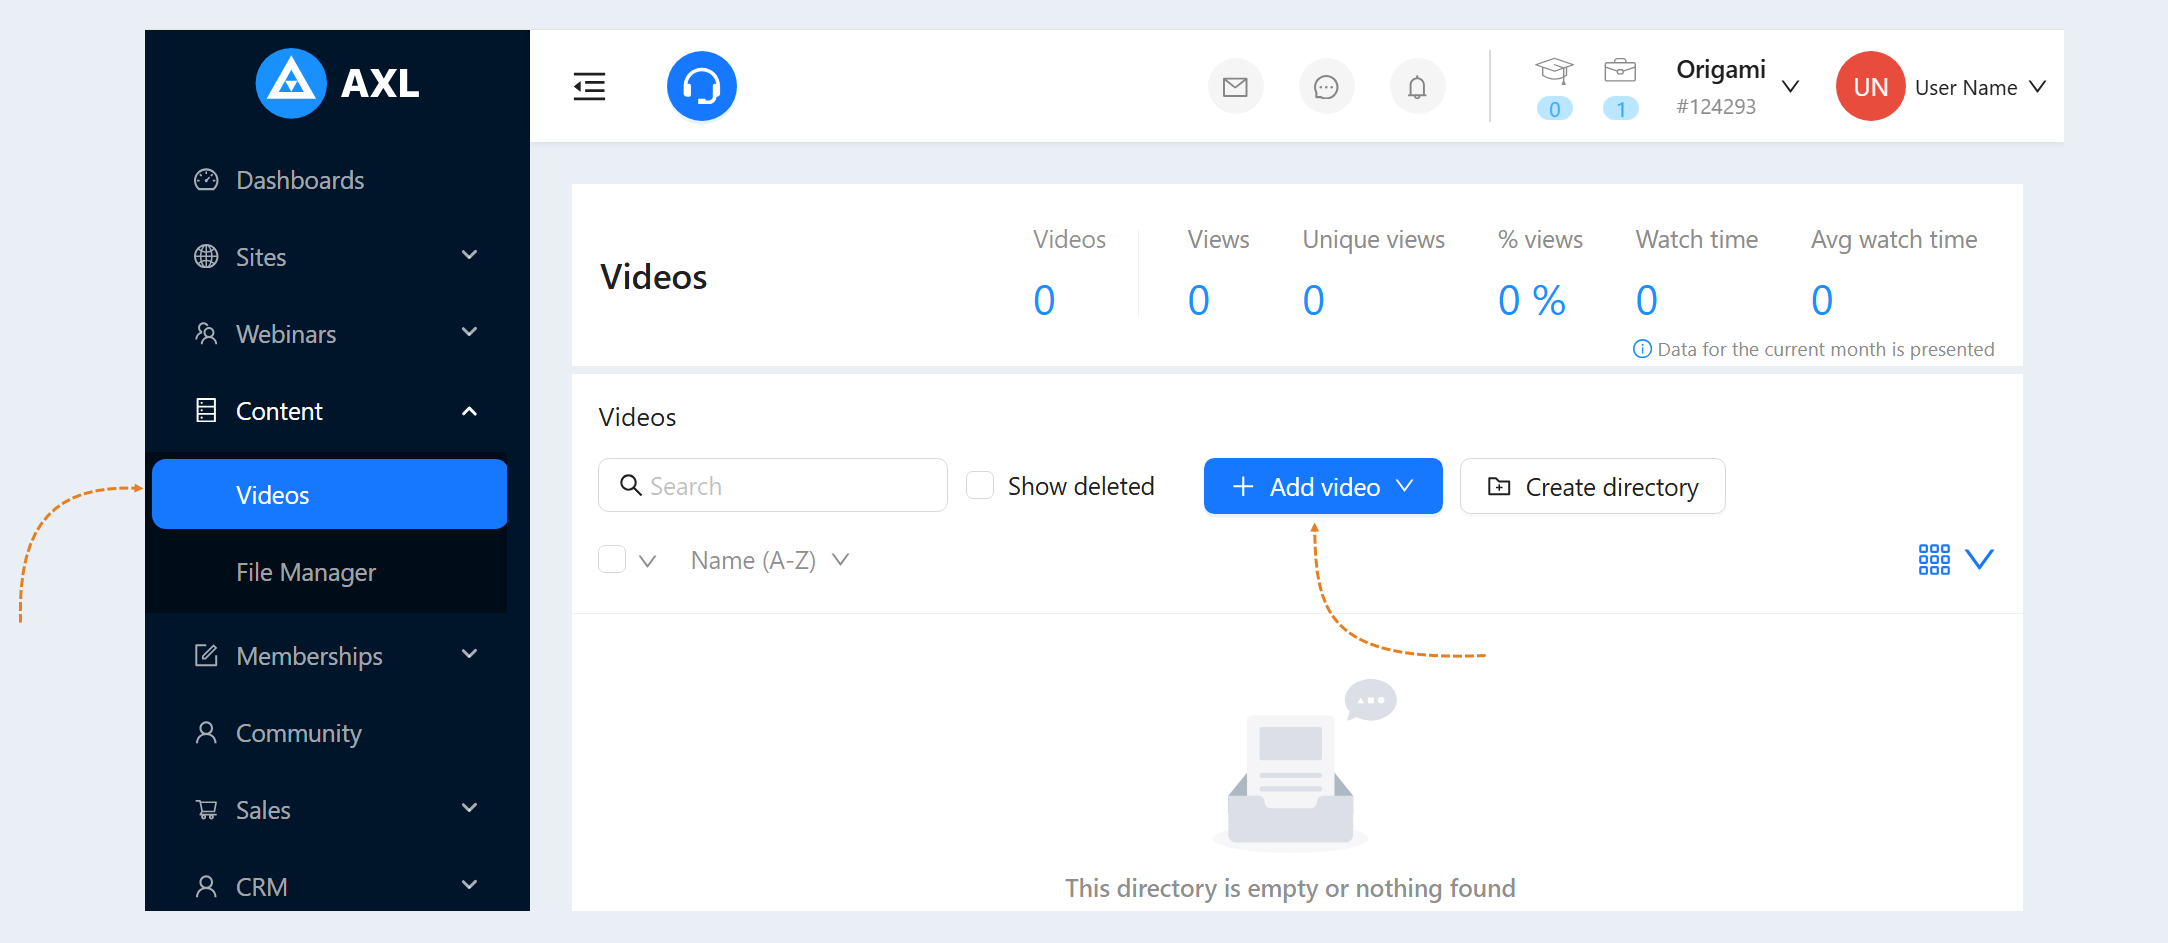
To upload a video to the AXL platform, go to the "Content" section, the "Video" tab. Click the "Add Video" button.
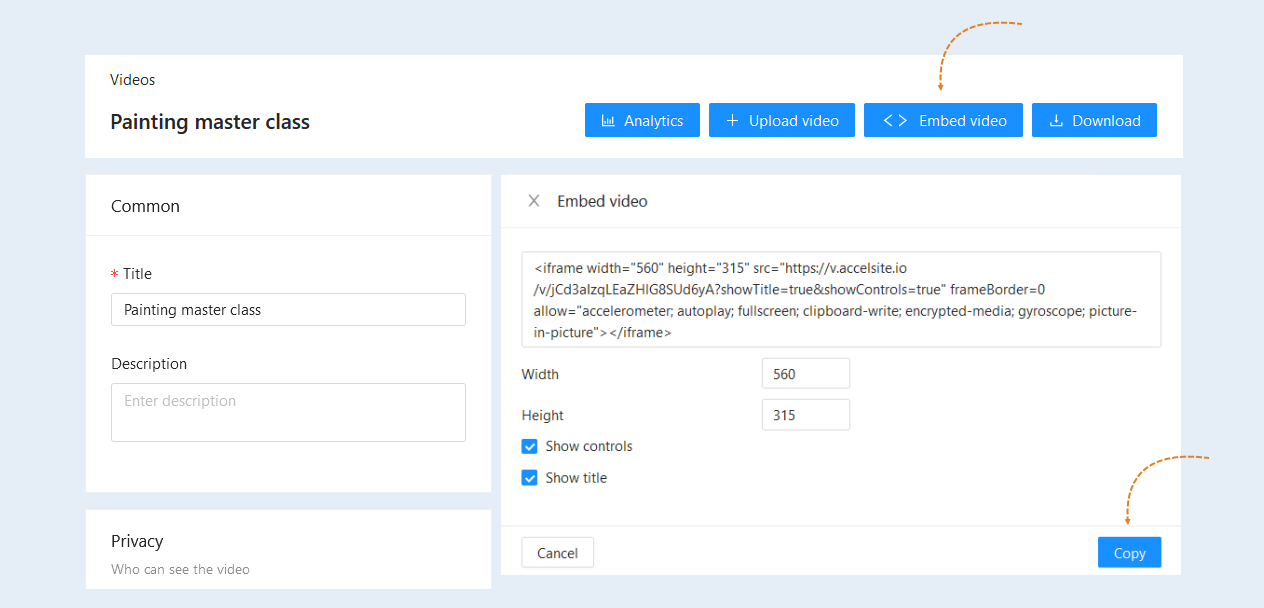
After downloading the video, click the "Embed video" button, then click the "Copy" button. The code for embedding the video has been successfully copied. To add this video to a course step, paste the copied link to the video into the video settings field in the course step.
9
Lesson visibility
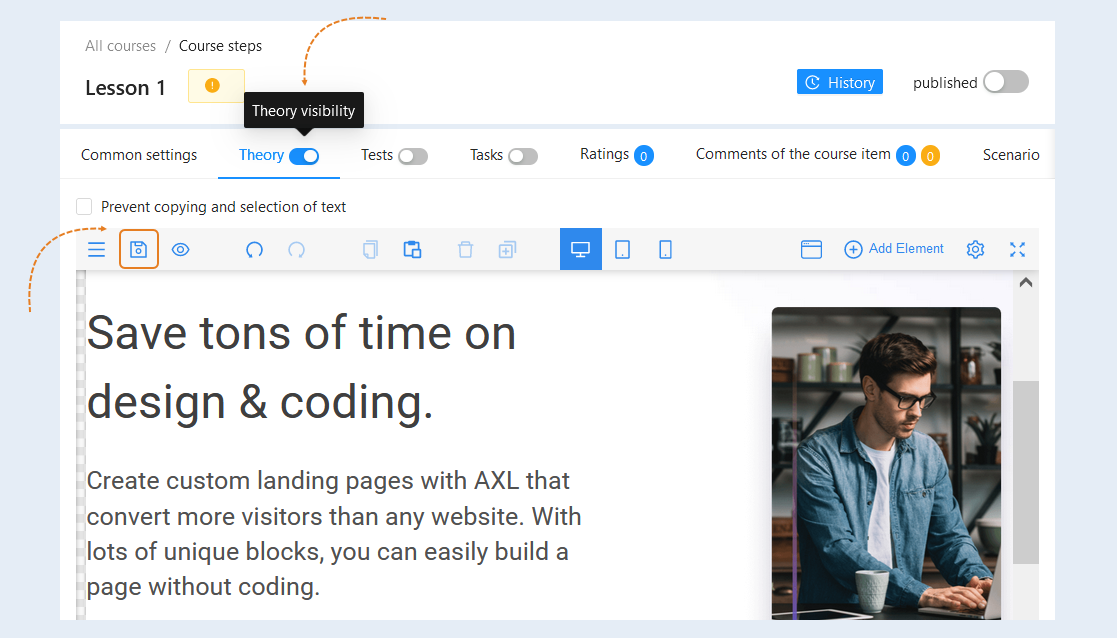
After creating a course step, click the "Save" button. At the top, move the "Theory Visibility" slider to the active position so that the course step becomes available to users.
10
Lesson Settings
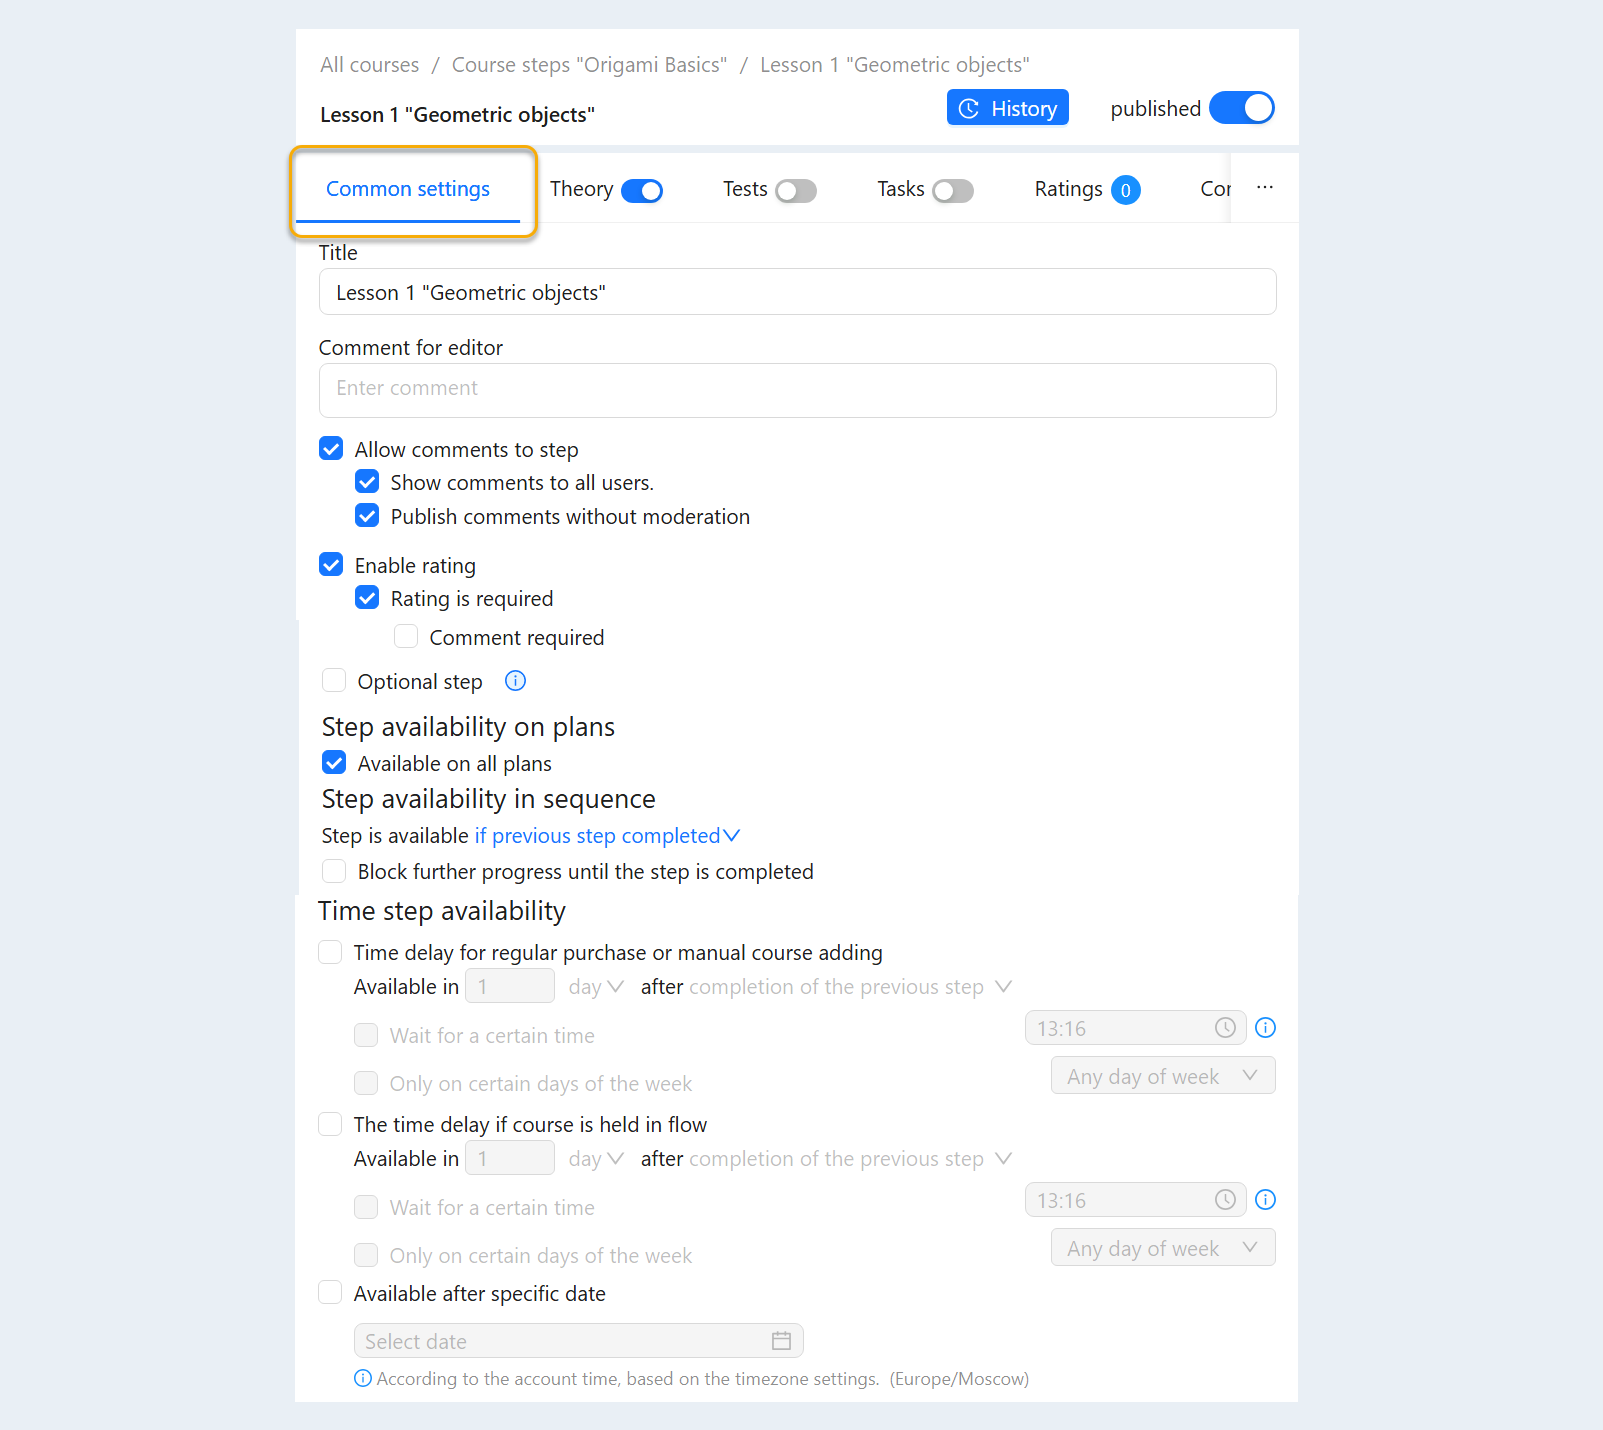
Go to the "General Settings" tab. Write the name of the lesson here. And, if desired, include comments and ratings for this
11
Adding tests and tasks
Tests are pre-prepared questions and answers to test users' knowledge in automatic mode.
Tests can be added to each step in the course or after completion of training, at the end of the course. You can add testing to a theoretical step (lesson) or create a test as a separate step of the course.
In our case, we add the test in a separate step, after passing all the lessons. Drag the step into the field. And click the "Tests" button.
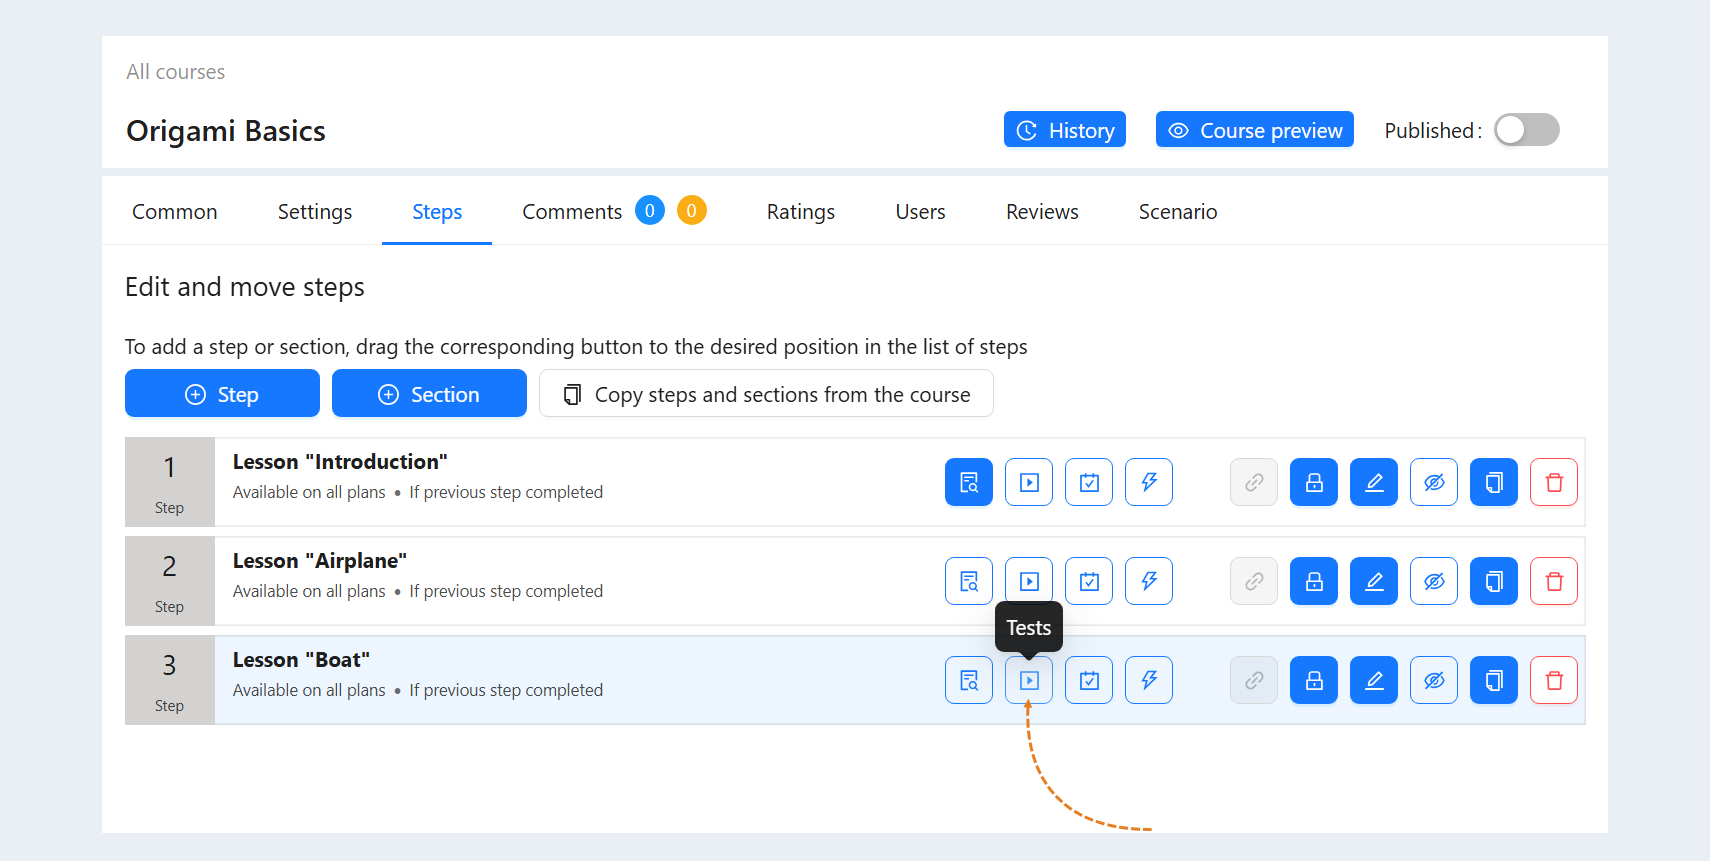
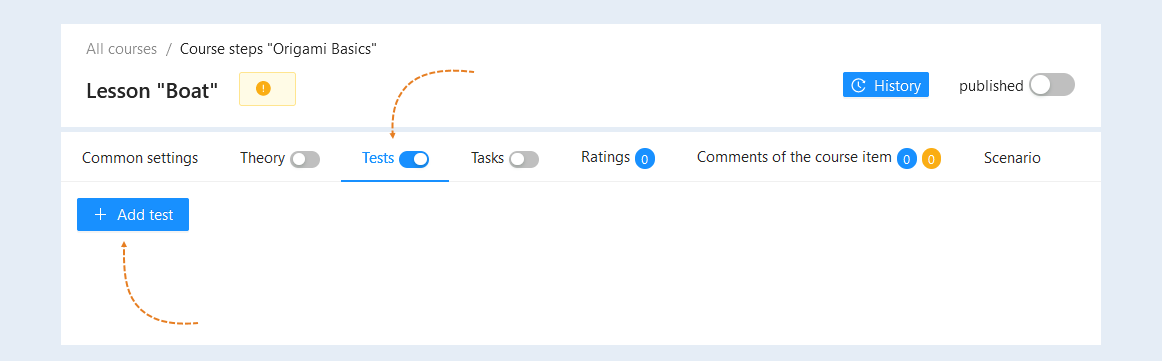
The "Tests" tab opens. Click the "Add Test" button.
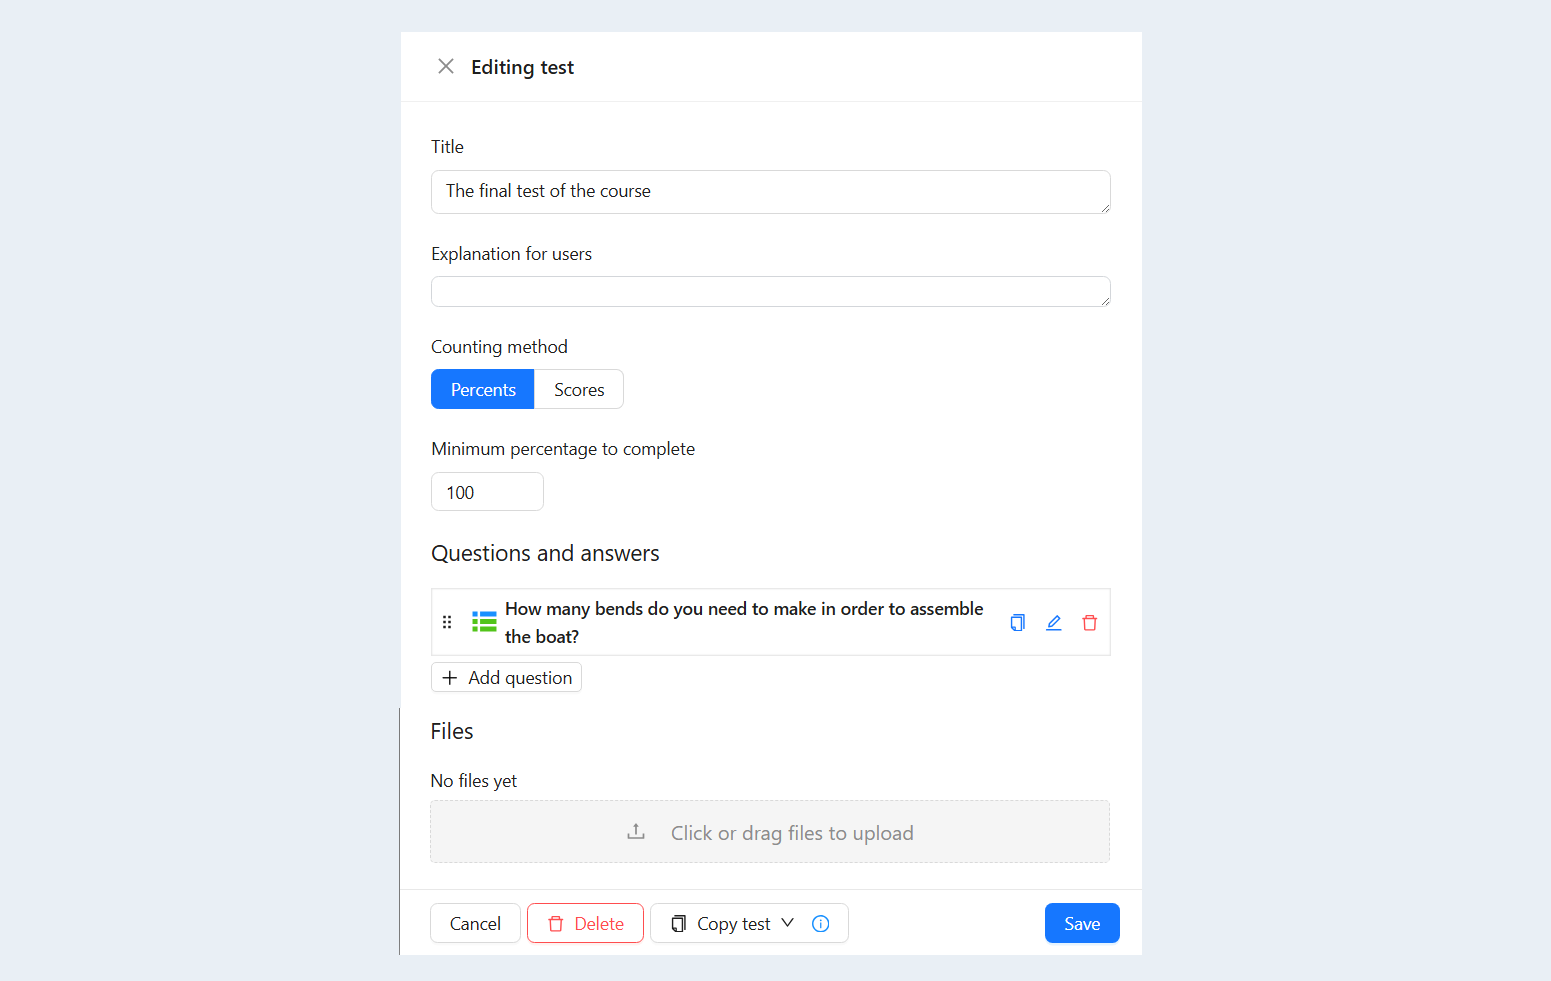
In the window that opens, we add questions to the test. Questions and answers to them are saved automatically. After adding questions and answers, close the window.
Click the "test visibility" button to make it available to users of your account. And then go back to the "Course Steps" page.
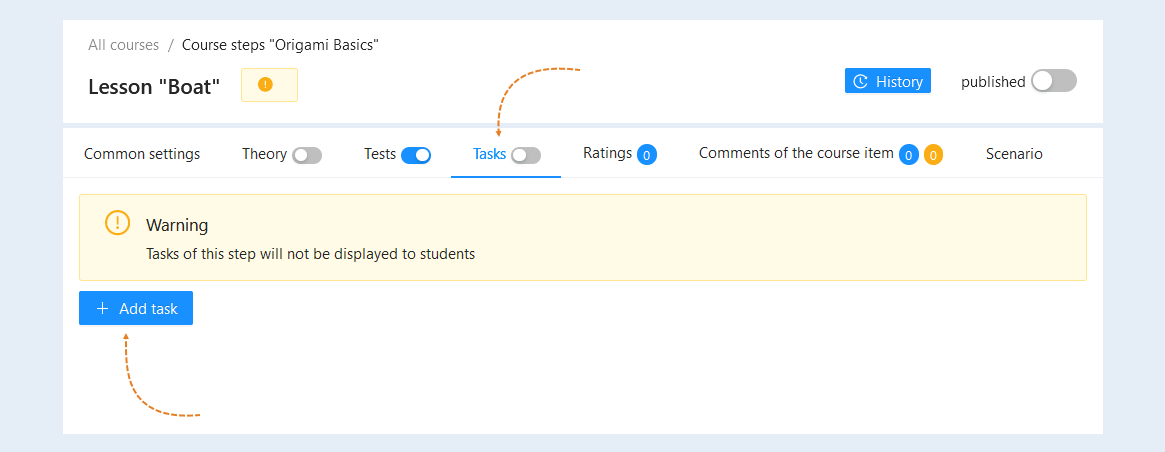
In the same way, you add tasks to the course. Read more about how to add tasks in the article "Tasks".
12
Course publication
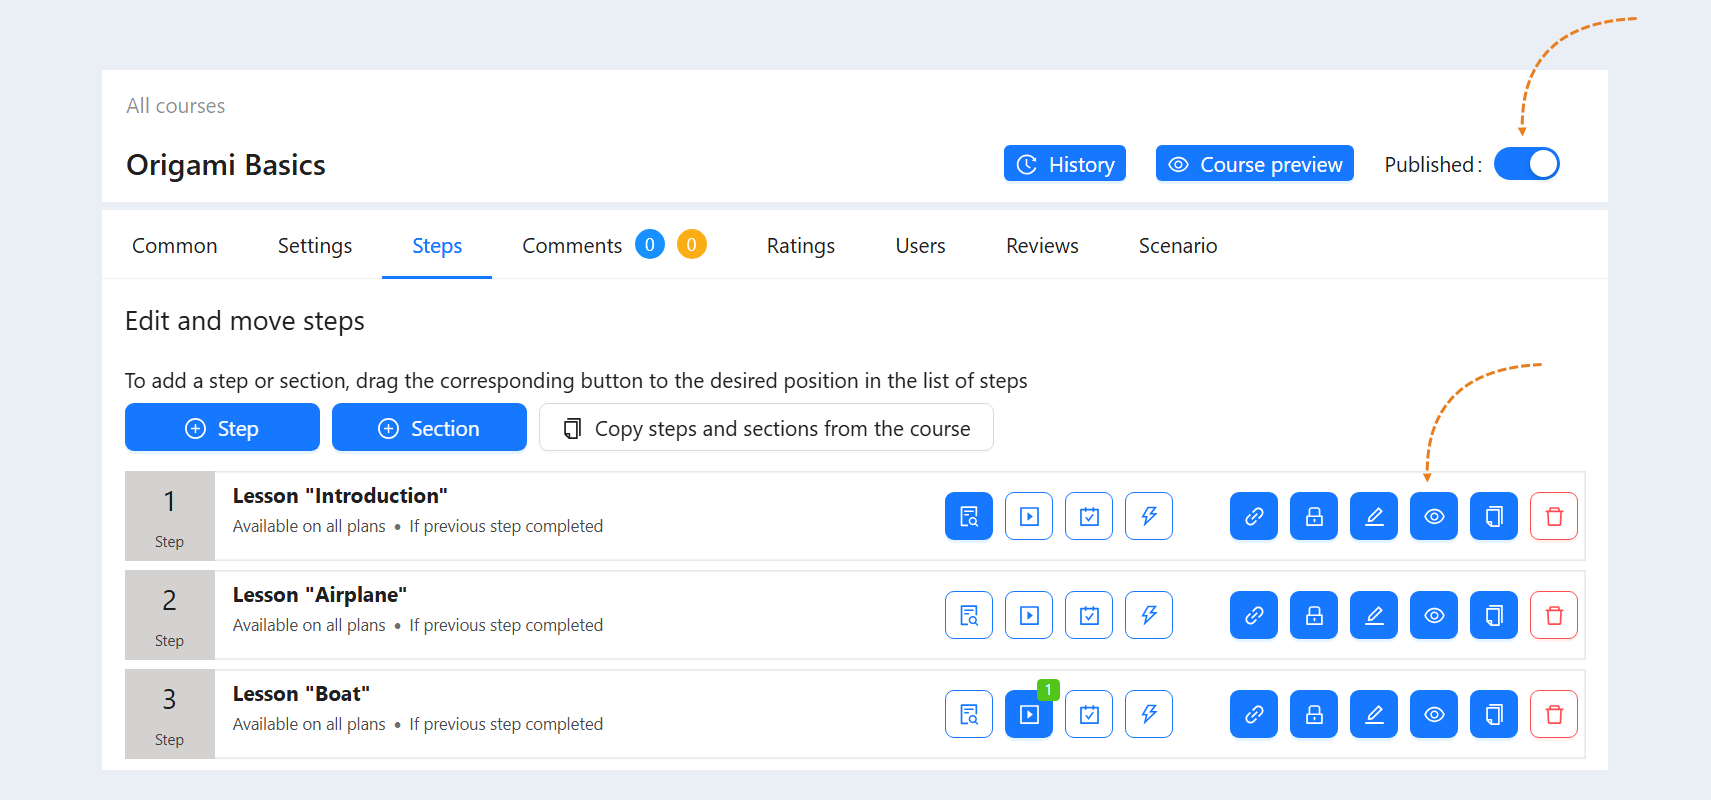
Go back to the Steps page and add the remaining steps to your course. Click on the "Show" button next to each lesson. After all the lessons are added to the course, click the "Published" button.
13
Adding Users
Go to the "CRM" section, the "Contacts" tab. You can add users in two ways: enter the contacts of one user manually, or upload a file with multiple users.
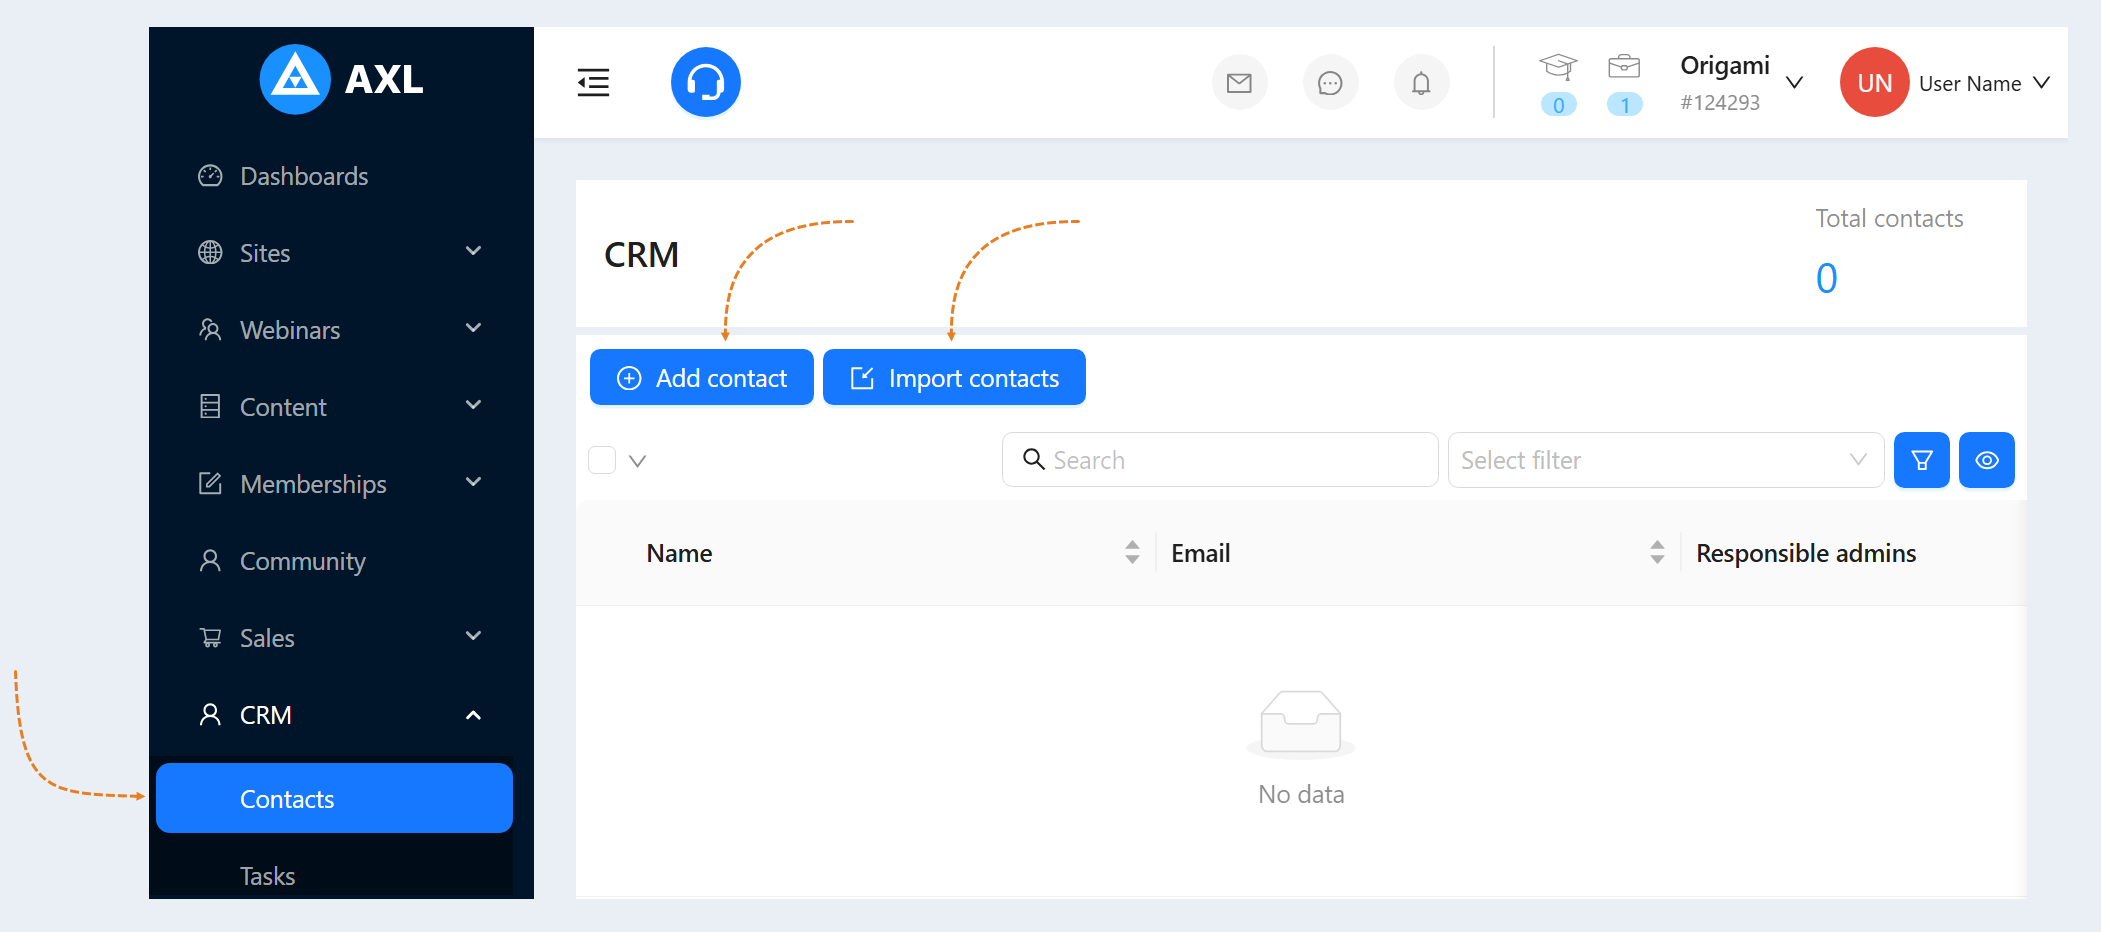
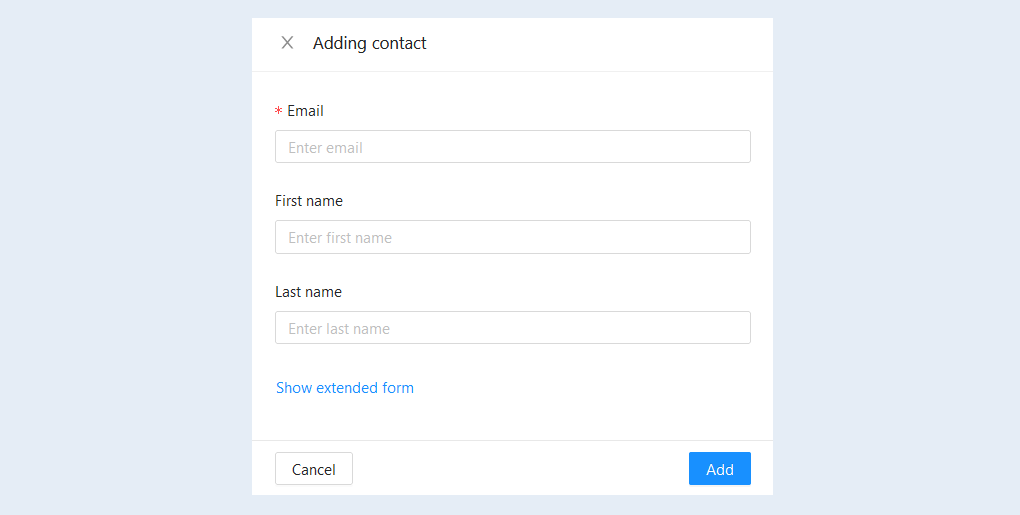
Click the "Add contact" button and enter the data in the window that opens: the user's email address, first and last name.
Click the "Add" button. The user will be displayed in the contact list.
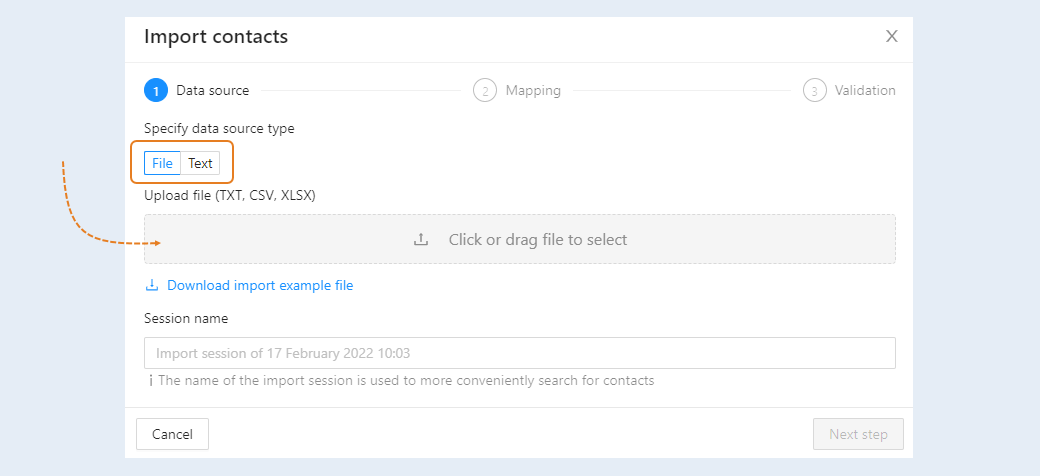
Importing Contacts
In order to download the customer base, click the "Import contacts" button. An additional window will open. In the "Specify Data Source" field, select "File" and click the button to download the file. Or you can select "Text" and paste your contact details in text format. Click the Next Step button.
Linking fields. Verify that the contact attributes are correct: name, phone, email, and more. Click the Next Step button.
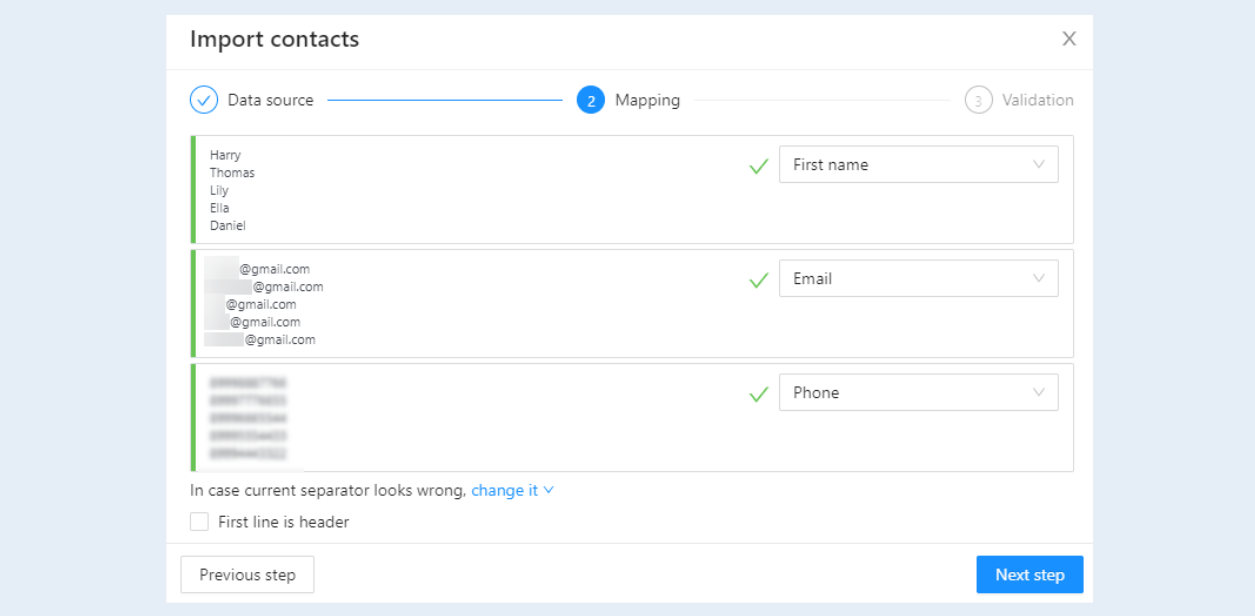
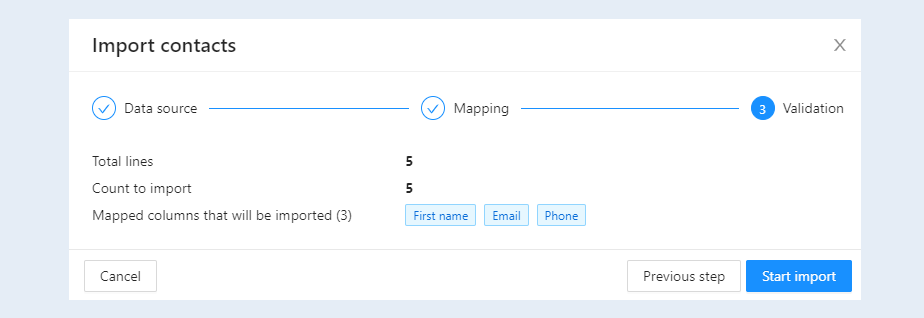
Check the correctness of the data at this stage. And click the "Start Import" button.
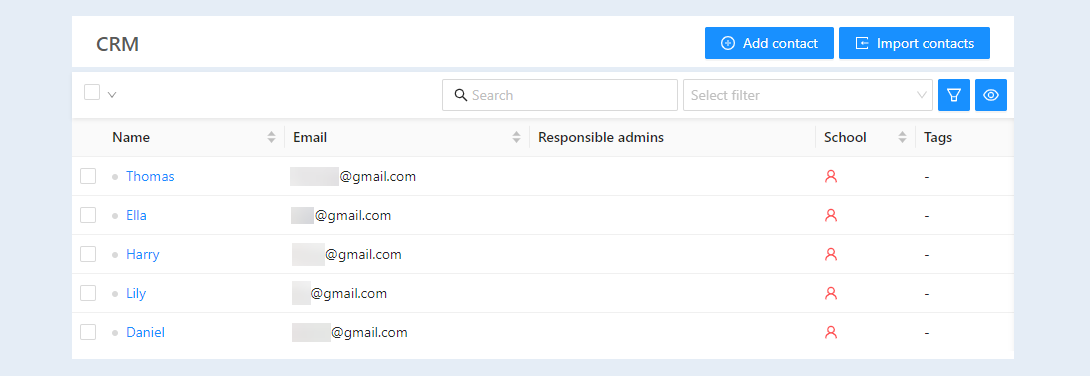
Contacts are uploaded to CRM. Now you need to provide access to the course to users.
15
Access to the course
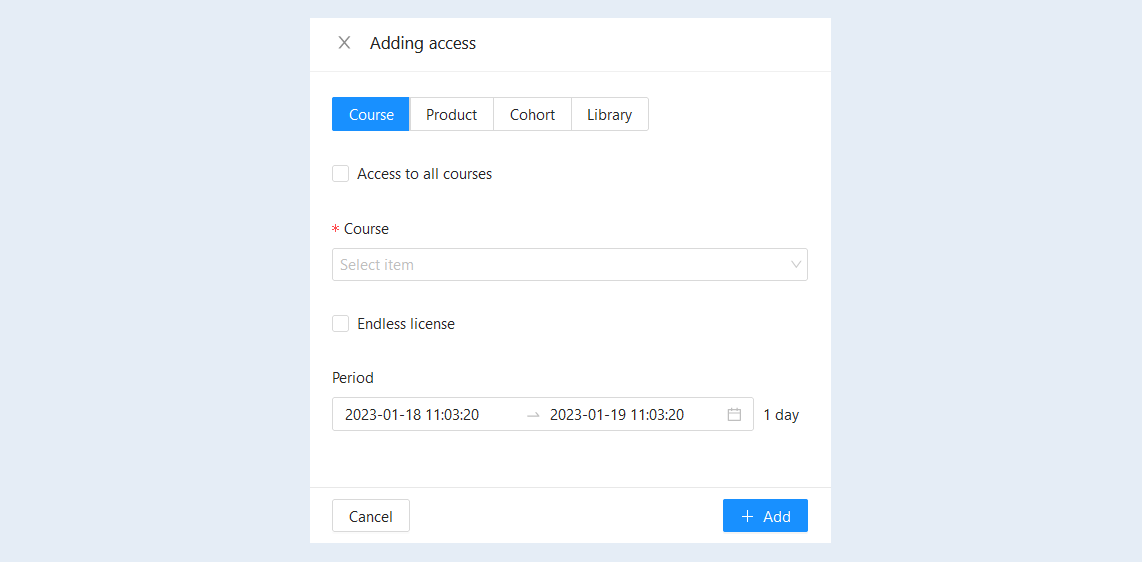
Click on the username or on the "Edit" button. The contact card will open. Click the Add button in the Access & Products section.
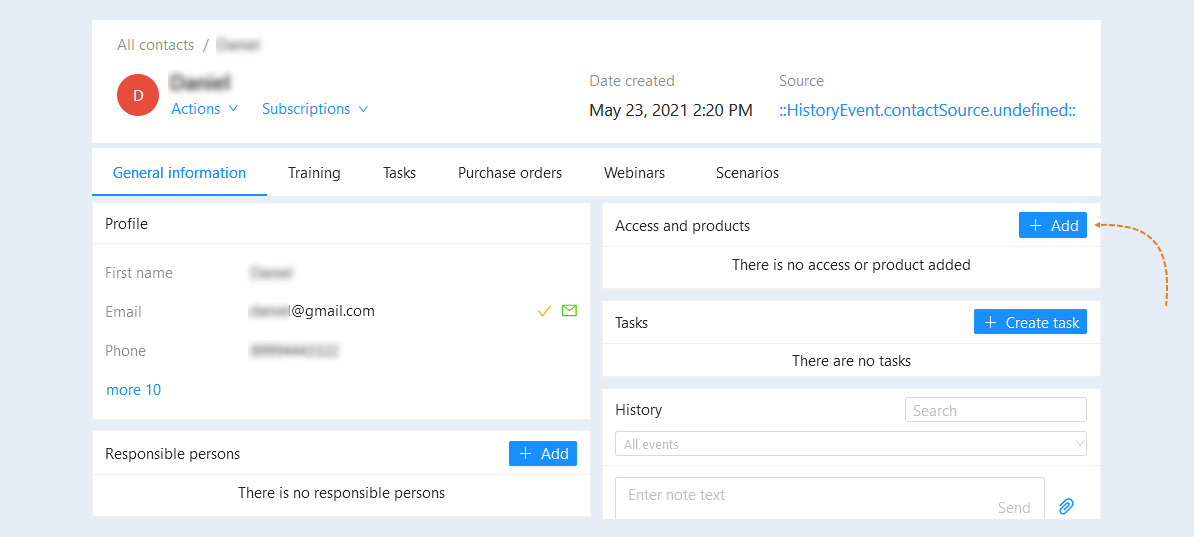
In the field that opens, fill in the fields: select a course from the list and specify the duration of access.
16
User Invitation
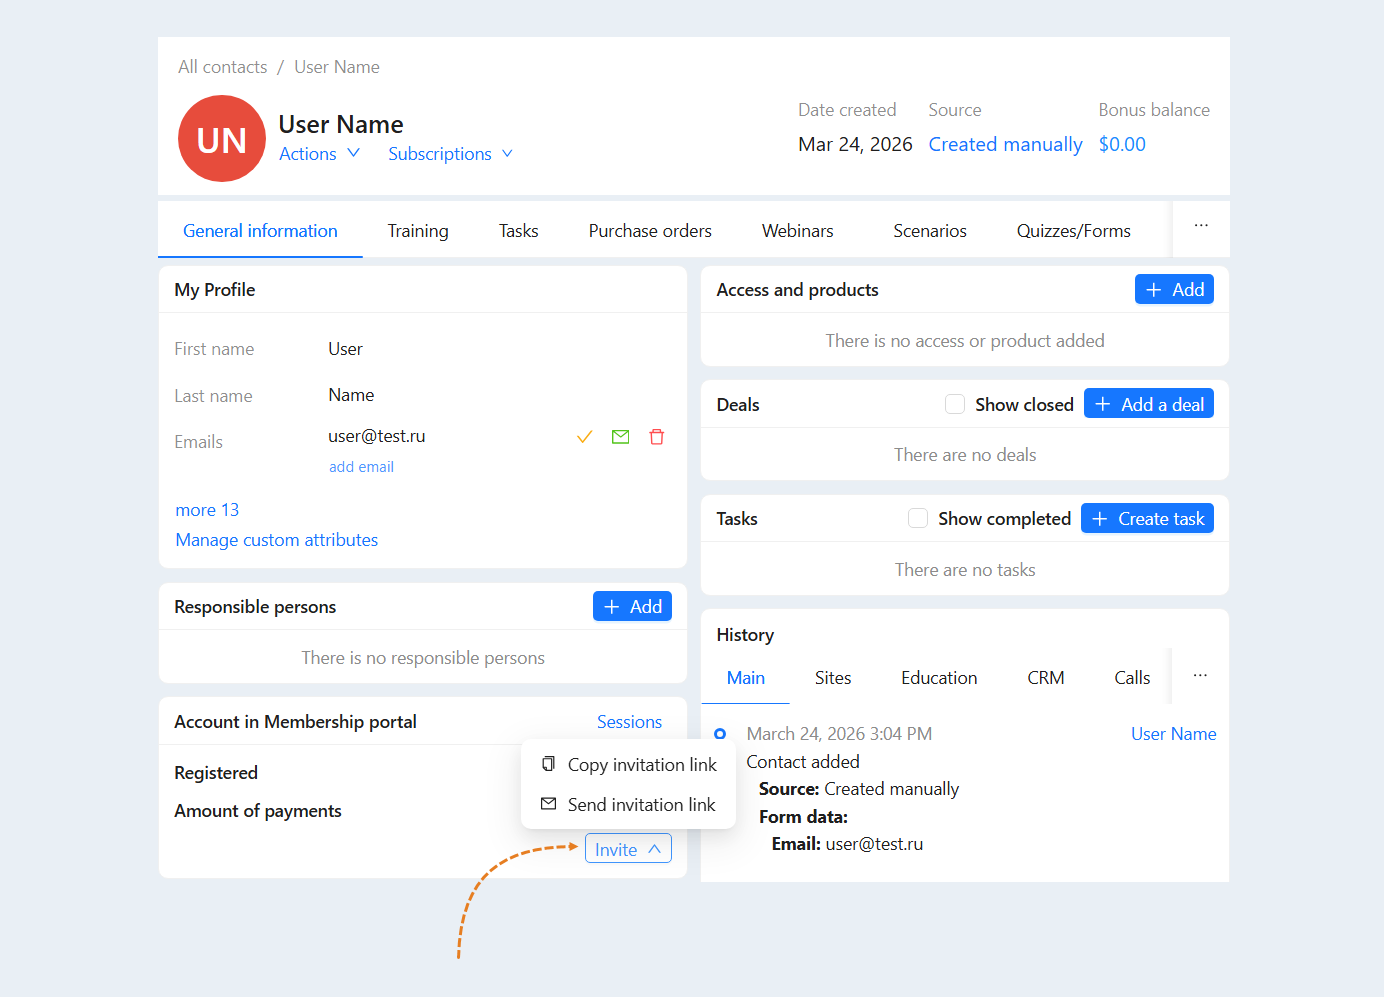
Send the user a link to your account. Click the Invite button in the Membership portal account section.
The user will receive a link to your account by email. The user needs to follow the link and create a password.
After that, he can start training.
17
Training on the course
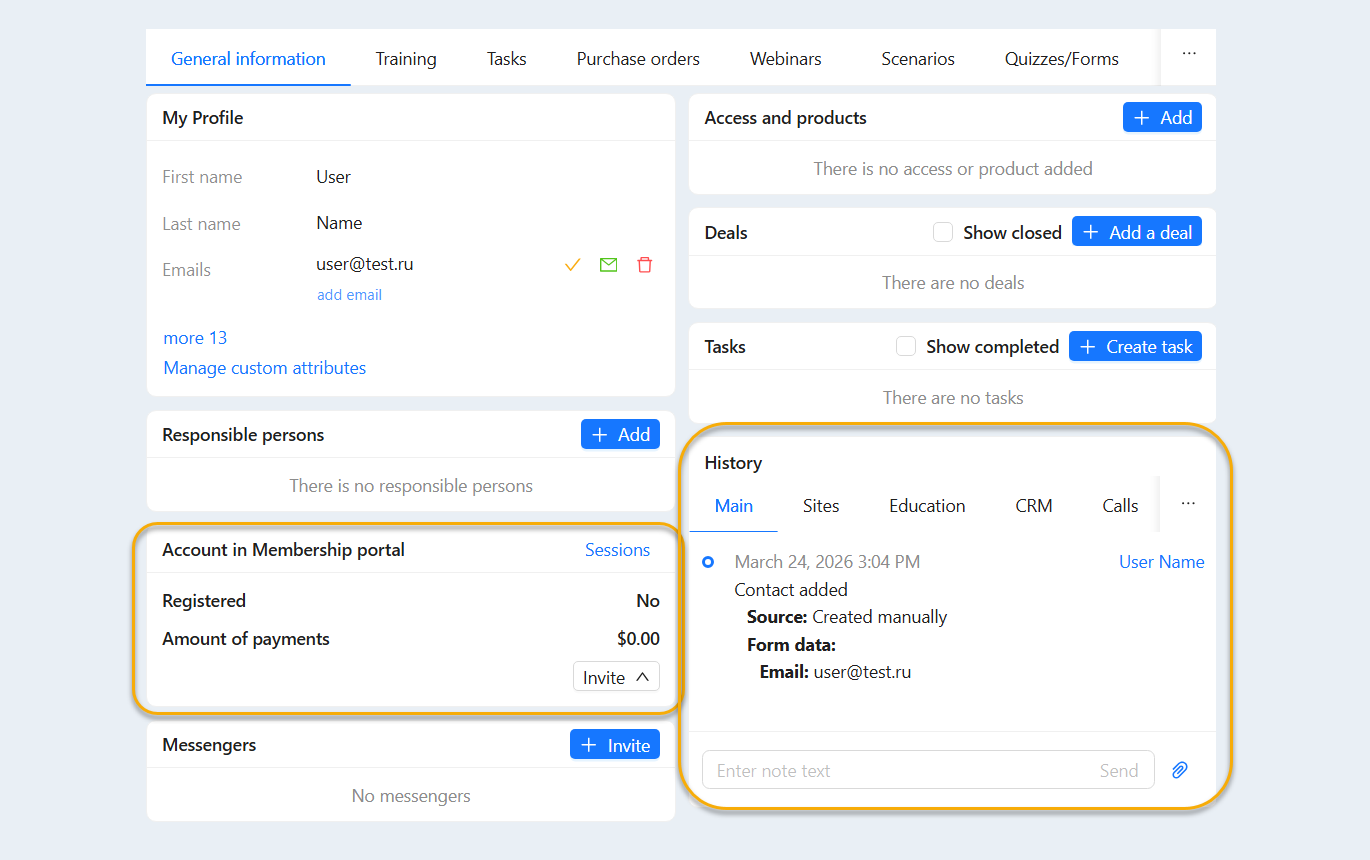
When a user is registered with an account, you can see their activity in the course. The "Membership portal account" section displays the date of registration and the last activity of the user at the account. On the right, in the "History" section, you can see detailed information about the learning process: date, time, which lesson was started and which lesson was completed.
You have created an account, added a course and added users to the course.