In the "Settings Sharing" section, you can share materials from your account with other AXL platform accounts. In this section, you can prepare materials for export and import them to another account. Website pages are imported completely, including copying images and settings (with the exception of the scenario).
Click on the desired section of the article to go to its description:
Sharing settings
Go to the "Settings" section - "Sharing settings". There are two types of actions available to you: export and import of materials.
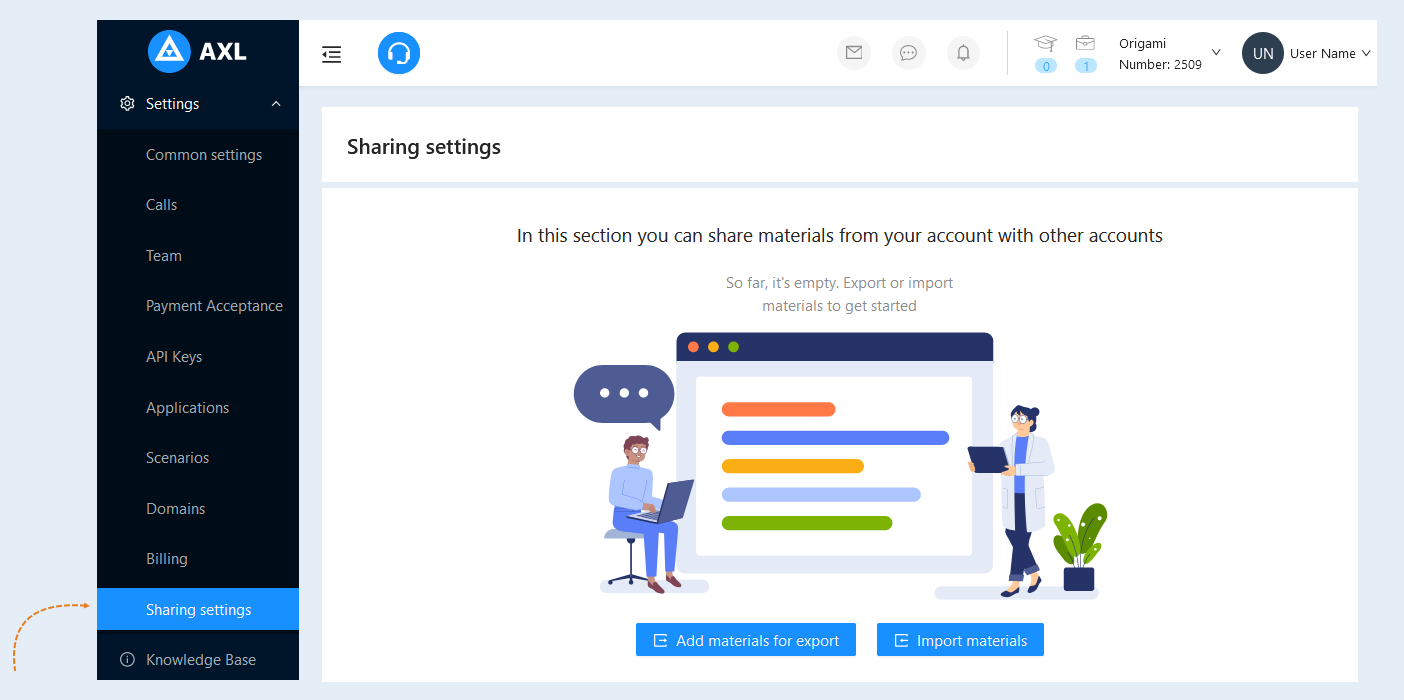
Exporting materials
Exporting materials is uploading site pages from your account to another account.
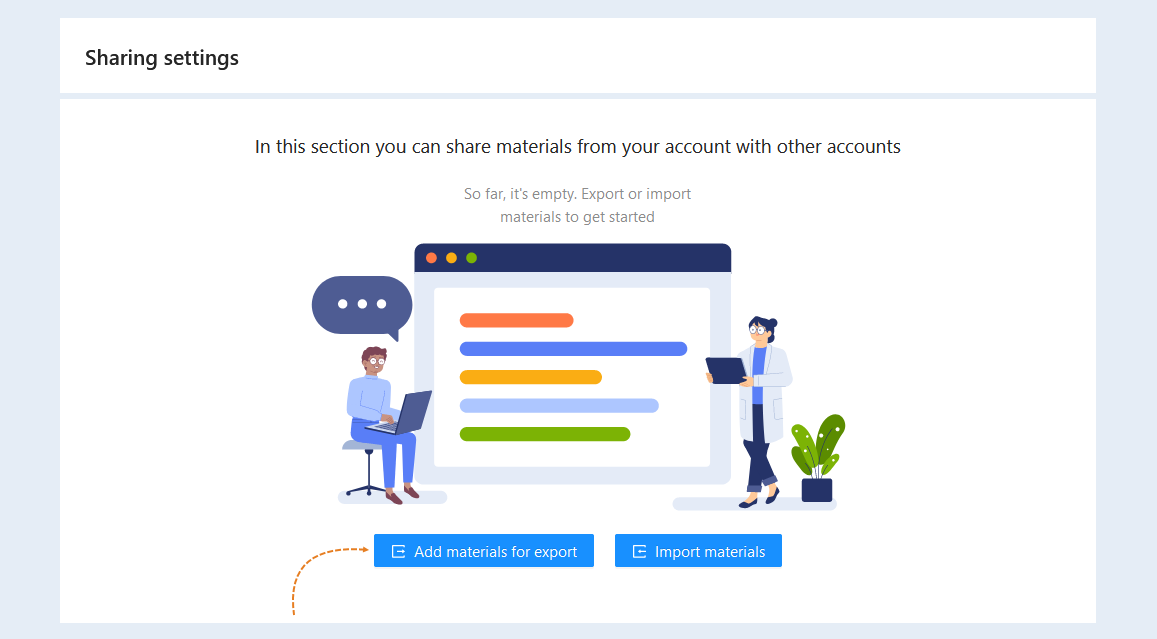
Click the "Add materials for export" button.
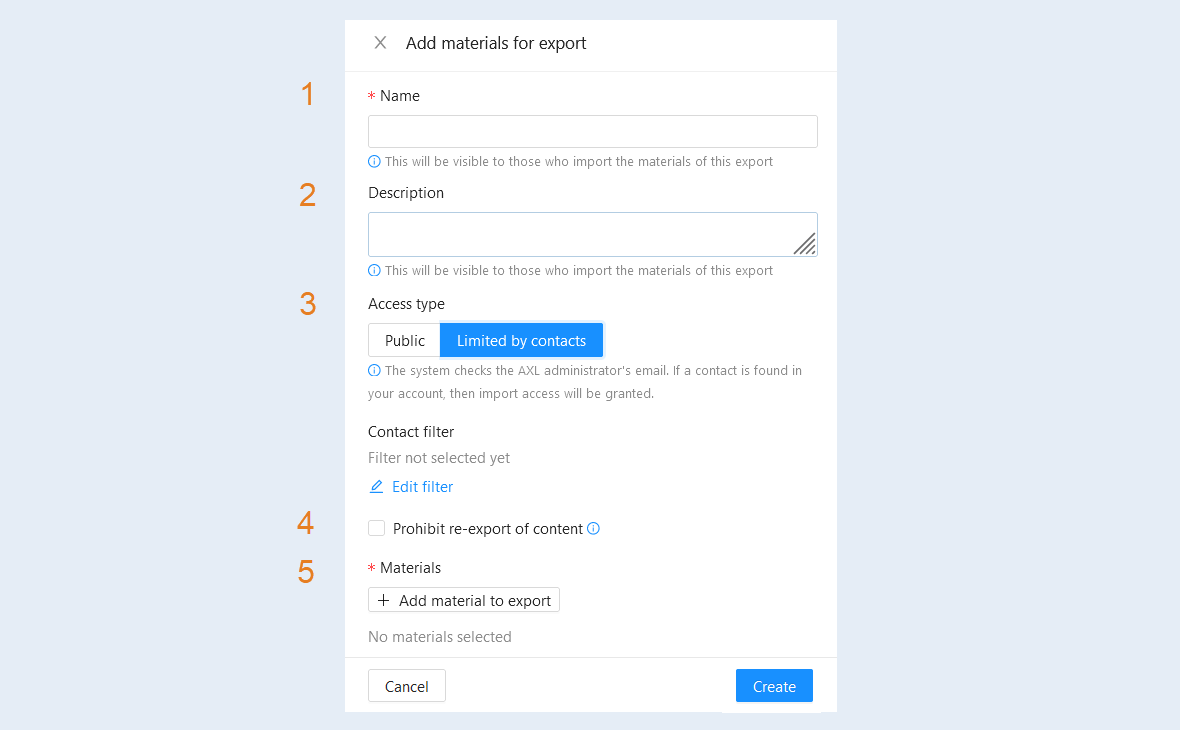
In the window that opens, fill in the fields:
- Name. Specify the name of the materials to export. The name will be visible to those who import the materials.
Description. Add a description to this export. The description will be visible to those who import the materials.
Access type. Select the type of access to the materials. Two types of access are possible:
- Public. With a free access type, anyone who has an export link can import materials.
Limited by contacts. With a limited type of access, only selected contacts will be able to import materials. The system checks the email of the importing AXL administrator. If a contact is found in your account, then access to the import will be granted.
Use the "Contact Filter" to select the contacts that I will be able to import materials. Click the "Edit Filter" button and set the filter parameters. Read more about creating a contact filter in the article "Filtering and search terms".
Prohibit re-export of content. If the checkbox is selected, the system will not allow the user to re-export your materials.
Materials. Add materials for export. Click the "Add materials for export" button and select the site pages from the list of suggested ones.
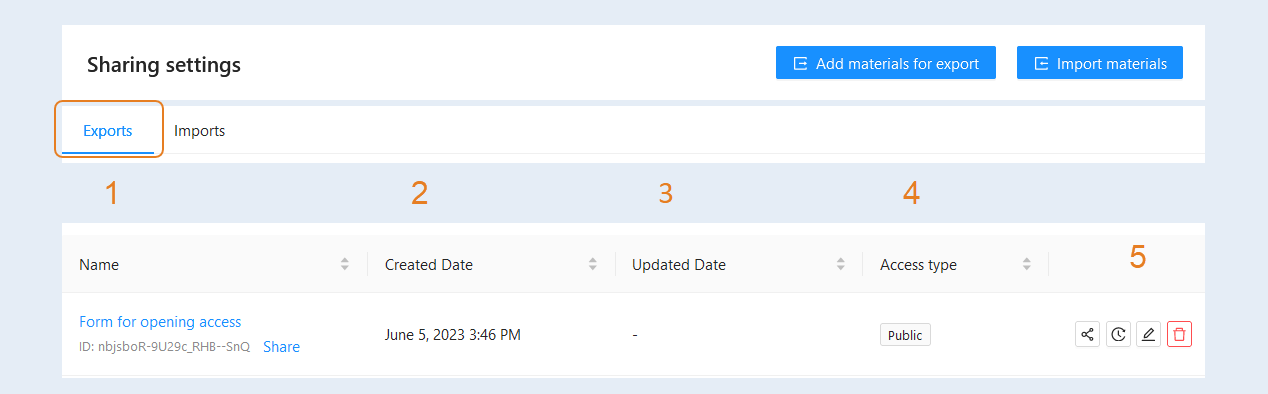
Click the "Create" button. After exporting the materials, they will appear in the list in the "Exports" tab. Here you can see the following information:
- Name. The name and ID of the export are specified. Click the "Share" button to copy the link to export the materials. Send the link to the recipient.
Created Date. The exact date and time of the creation of the export of materials are indicated.
Updated Date. The exact date and time of the last update of the materials are indicated.
Access type. The type of access to materials is specified: free or limited.
Actions:
The "Share" button. Click to copy the link to export materials.
The "View import history" button. Click to see the history of downloads of materials to other accounts.
The "Edit export" button. Click to change the export settings.
The "Delete" button. Click to delete the materials to export.
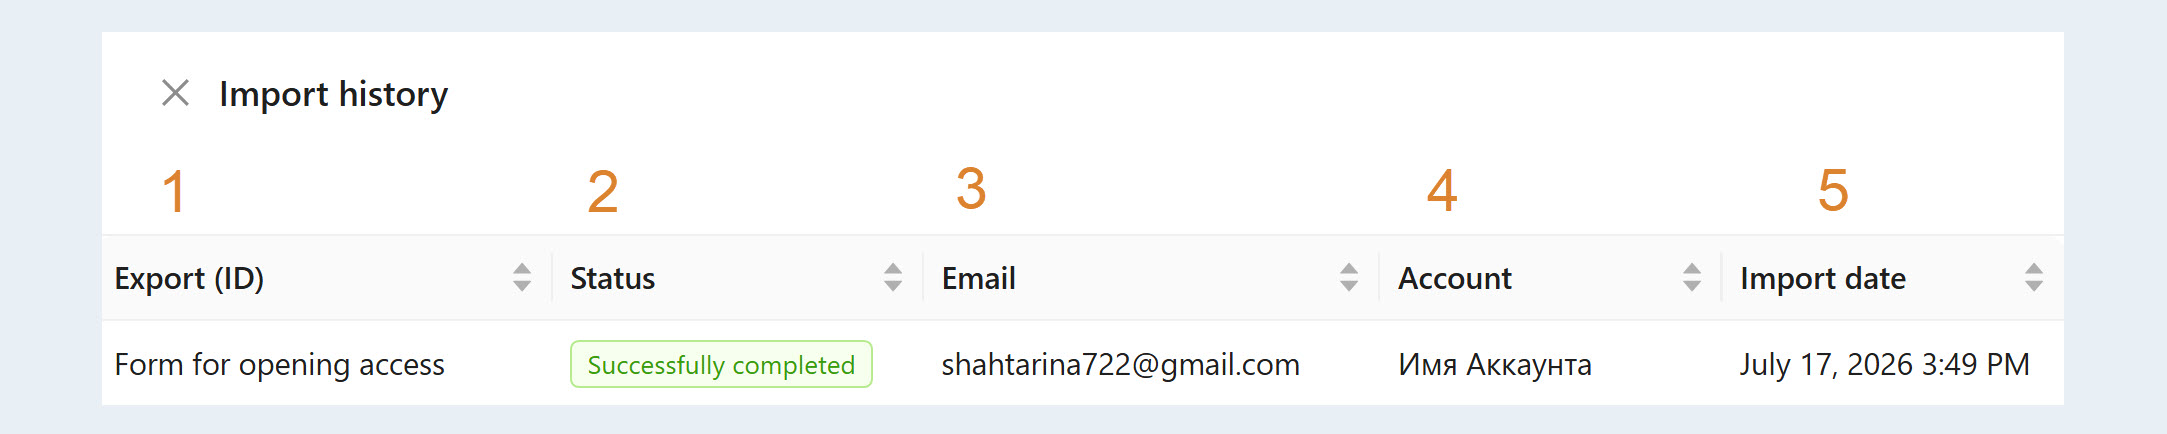
Click the "Import History" button. A window will open with a complete list of all downloads of materials to other accounts. Here you can see the following information:
- Export (ID). The name of the site page is indicated.
Status. The import status of the exported data is indicated: in processing, successfully completed, canceled.
Email. The email address of the importing AXL administrator is specified.
Account. The name of the account is indicated.
Import date. The exact date and time of import of materials are indicated.
Import of materials
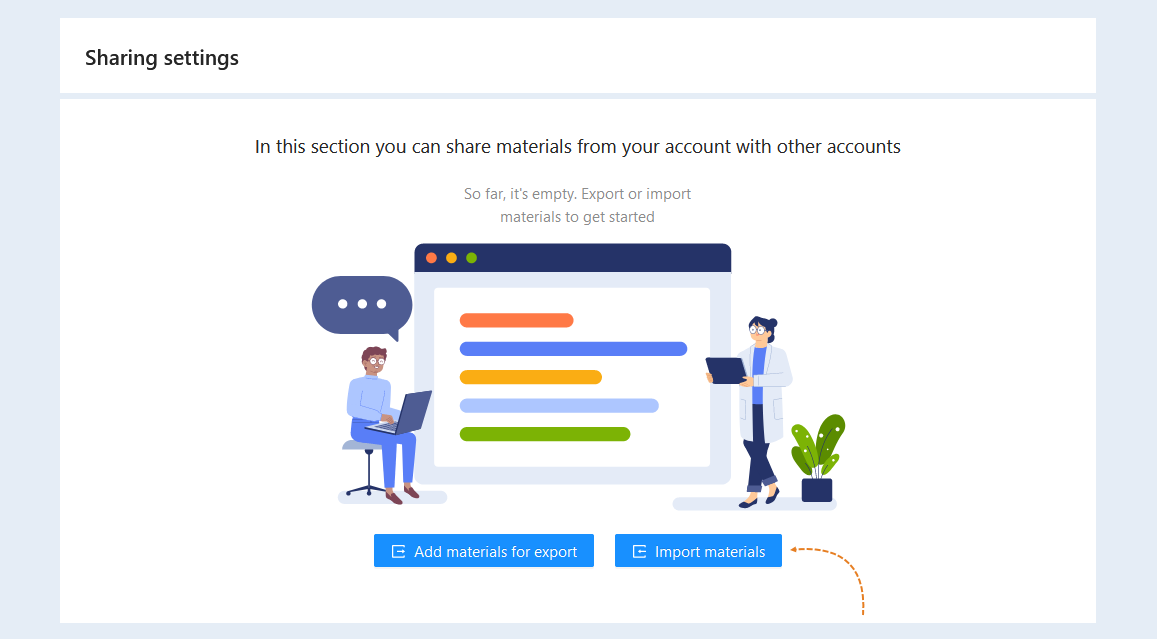
Importing materials is downloading site pages to your account from another account.
Click the "Import Materials" button.
In the window that opens, fill in the fields:
- Export (ID). Enter the export ID in the field. You can get an ID (or a direct link) from the person who provides you with the settings for copying.
Email. Enter your email address. If a restricted access type for exporting materials is set, the email will be checked for importability.
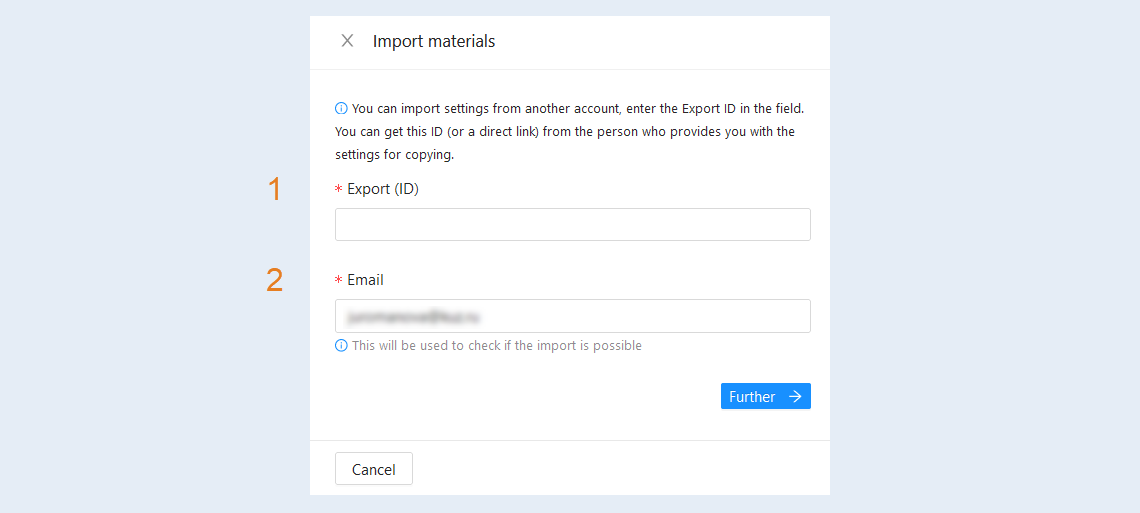
Click the "Further" button, you will open additional fields with the name, description and a list of materials to import.
Next, select from the list the site to which you want to upload the site pages from another account.
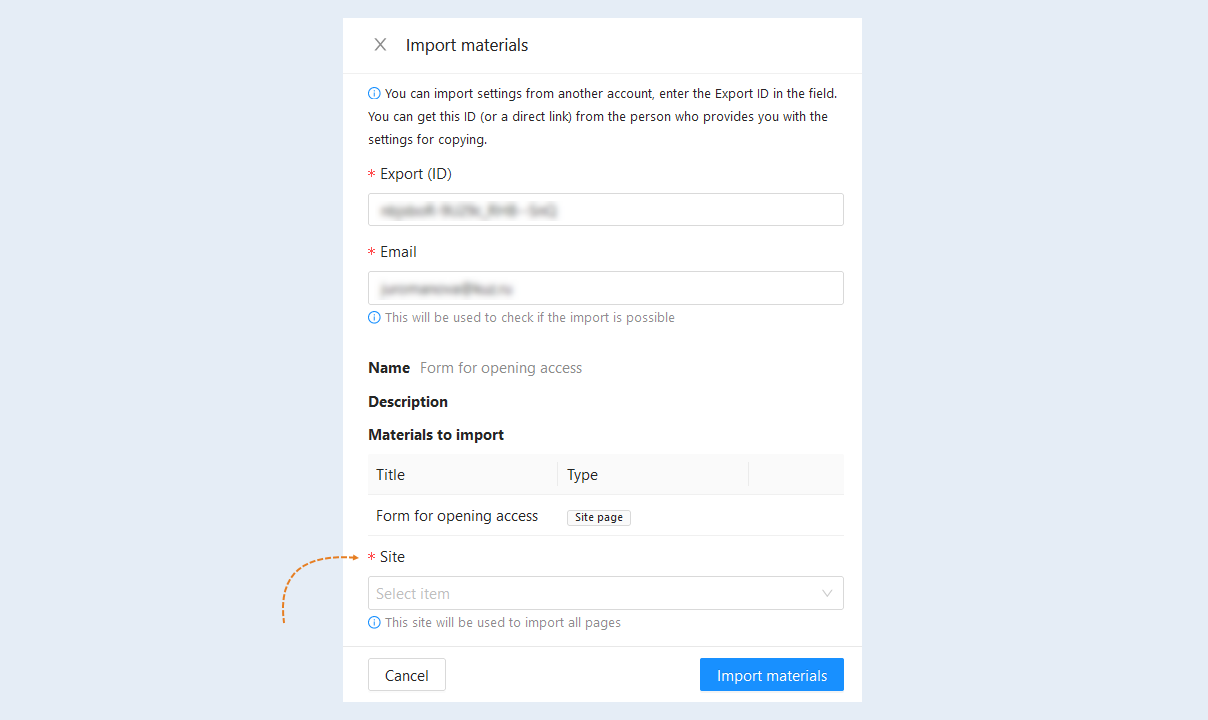
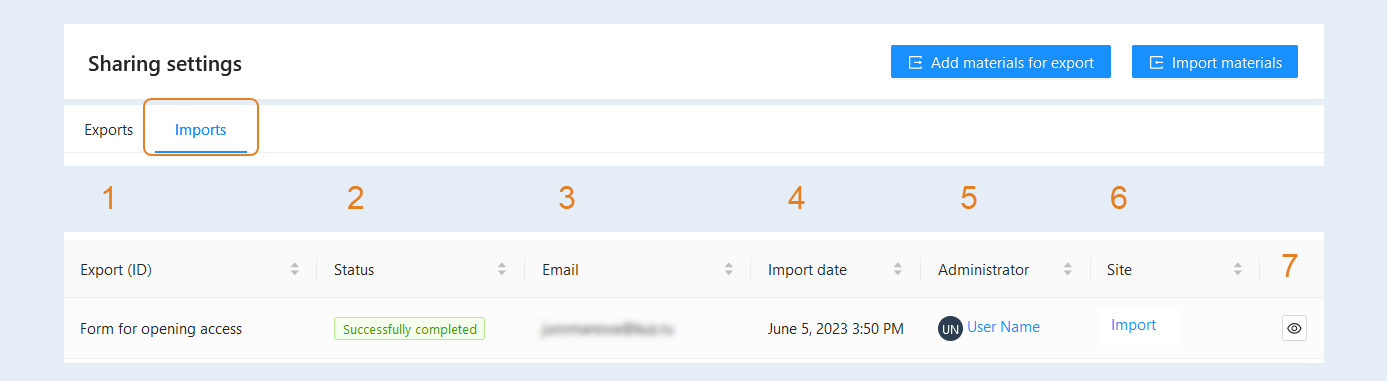
Click the "Import Materials" button. After importing the materials, they will appear in the list in the "Imports" tab. Here you can see the following information:
- Export (ID). The name of the site page is indicated.
Status. The status of the import of materials is indicated: in processing, successfully completed, canceled.
Email. The email address of the importing AXL administrator is specified.
Import date. The exact date and time of import of materials are indicated.
Administrator. The profile of the importing AXL administrator is specified. Click on the administrator's name to open his profile.
Site. The name of the site to which the materials are uploaded is indicated. Click on the site name to open it.
The "Import Details" button. Click to open an additional window with information about the import.