In this article, we will consider in detail how to create a free course on the AXL platform and open access to it to users.
Click on the desired section to go to its description:
1
Creating and configuring a course
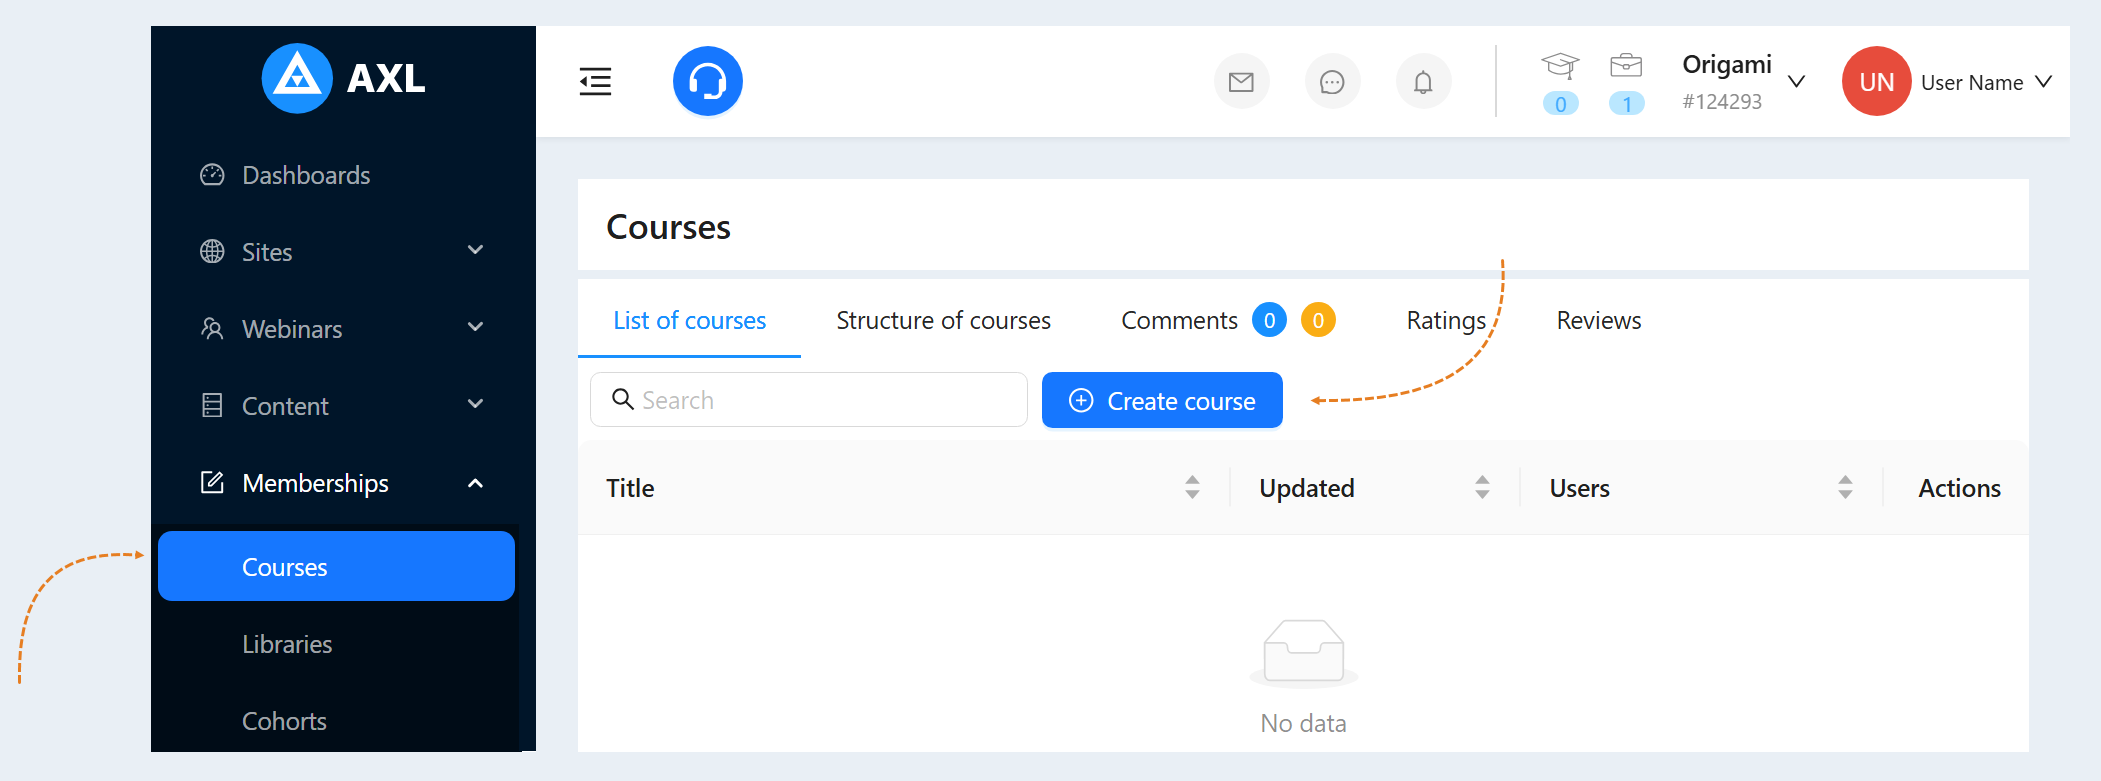
Go to the “Courses and Training“ section and select the "Courses" tab. Click on the “Create Course" button.
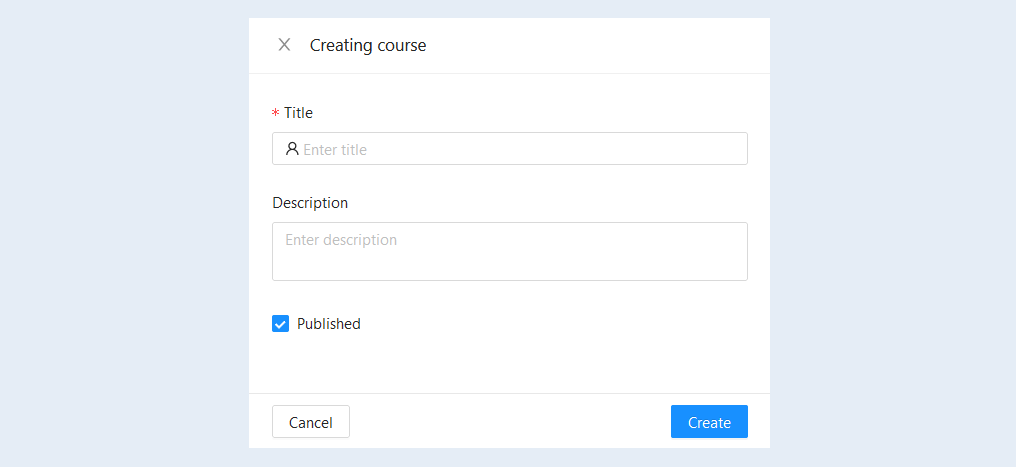
Enter the course name and course description (this field is optional). Click the “Create" button.
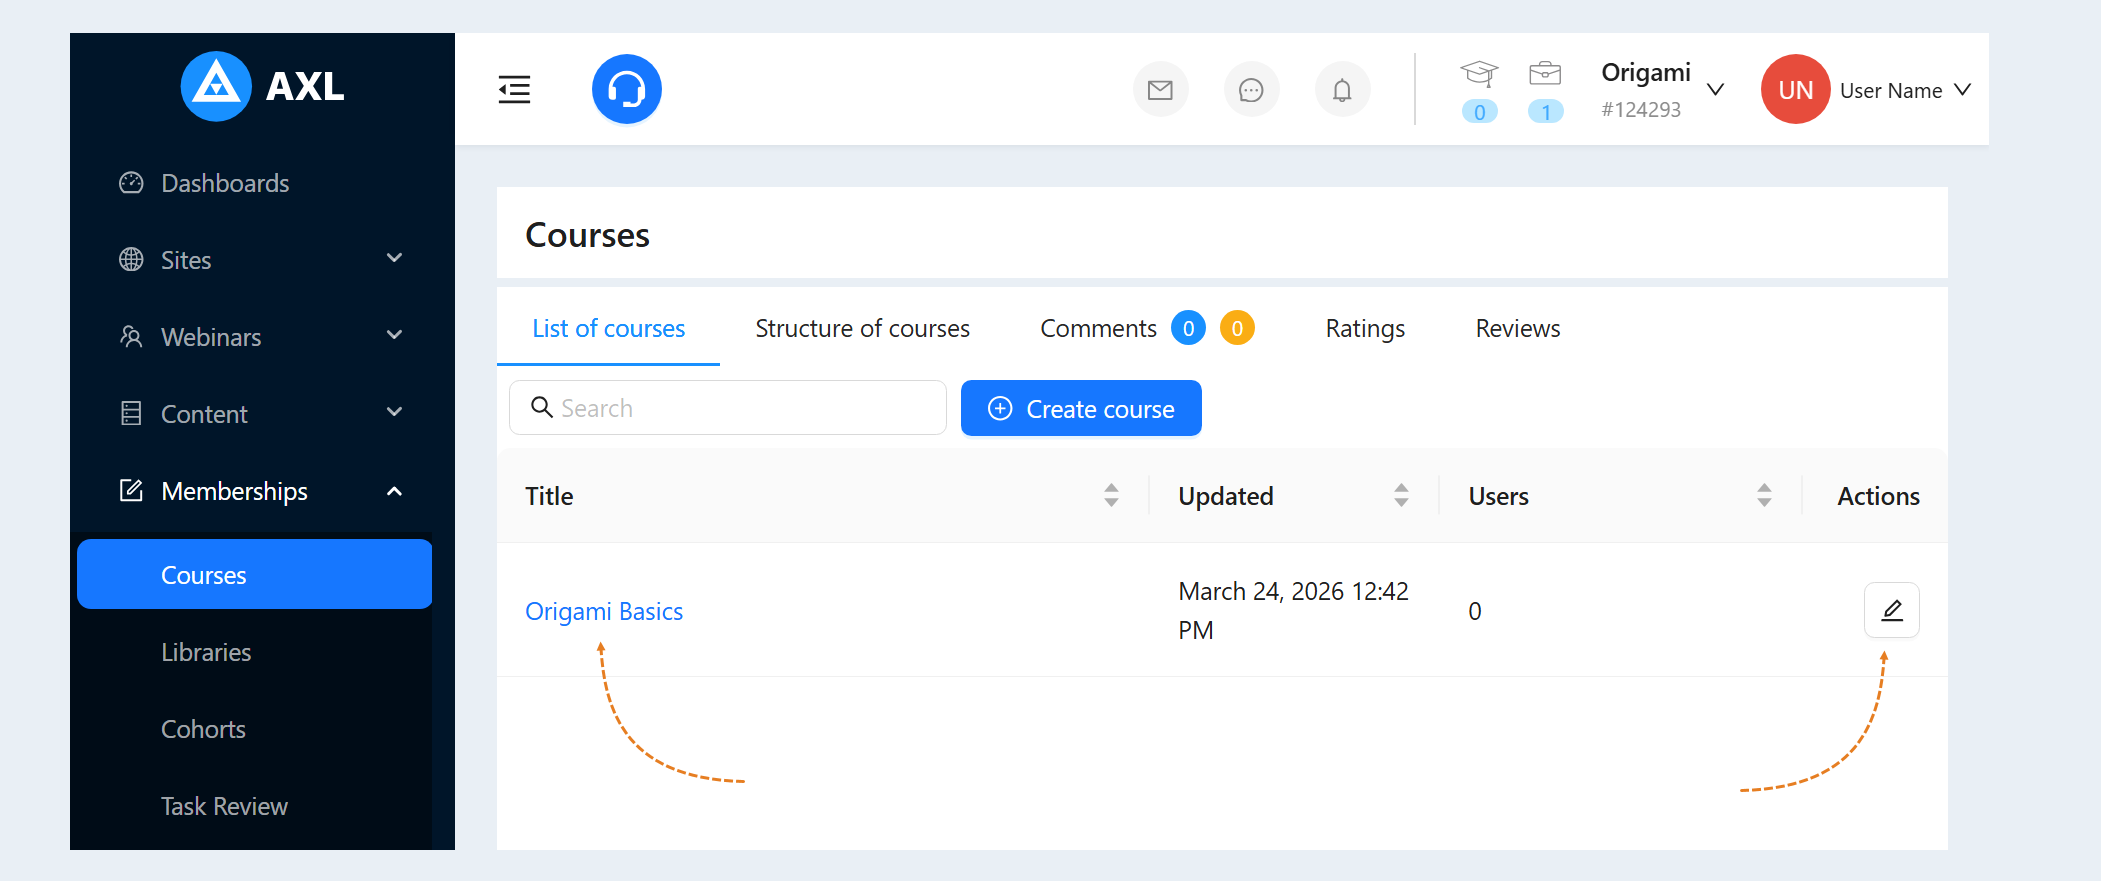
When you created a course, it was displayed in the list of courses. Now you can manage this course. Click on the course name or on the “Actions" button. A page will open for you to edit.
Adding Course steps
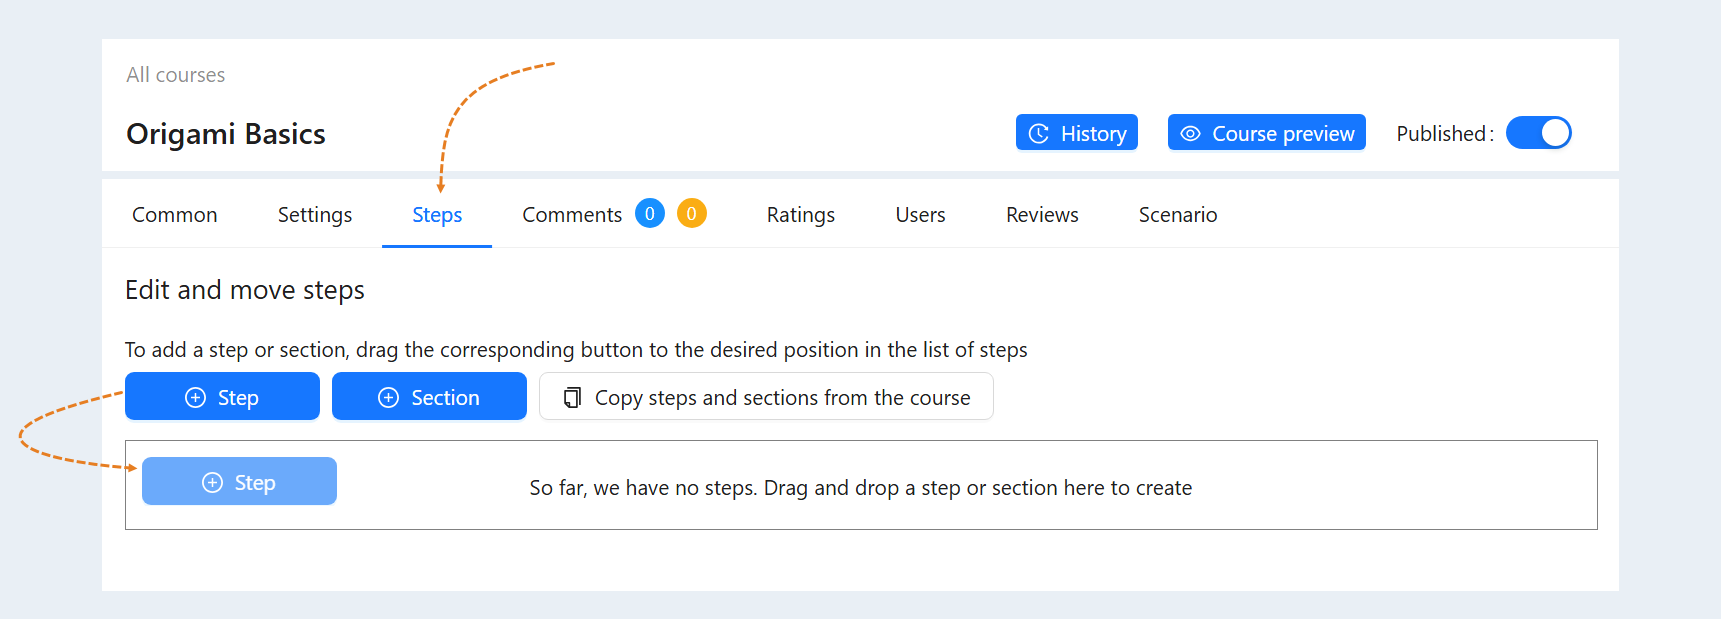
Go to the "Steps" tab - here you create a sequence of steps within the course for the user to study. You can create, delete, change the sequence of steps, add new steps.
Step button. A step is a component of a course, a unit of learning content. A step can be text, video, picture, table, list, task, test. To add a step to the course, click on the “Step” button and drag it into the field.
Section button. Needed in order to group the steps of the course if you want to divide it into parts. To add a section to the course, click on the "Section" button and drag it into the field.
After you have added steps and sections, you can fill the course with content (text, videos, assignments, and so on).
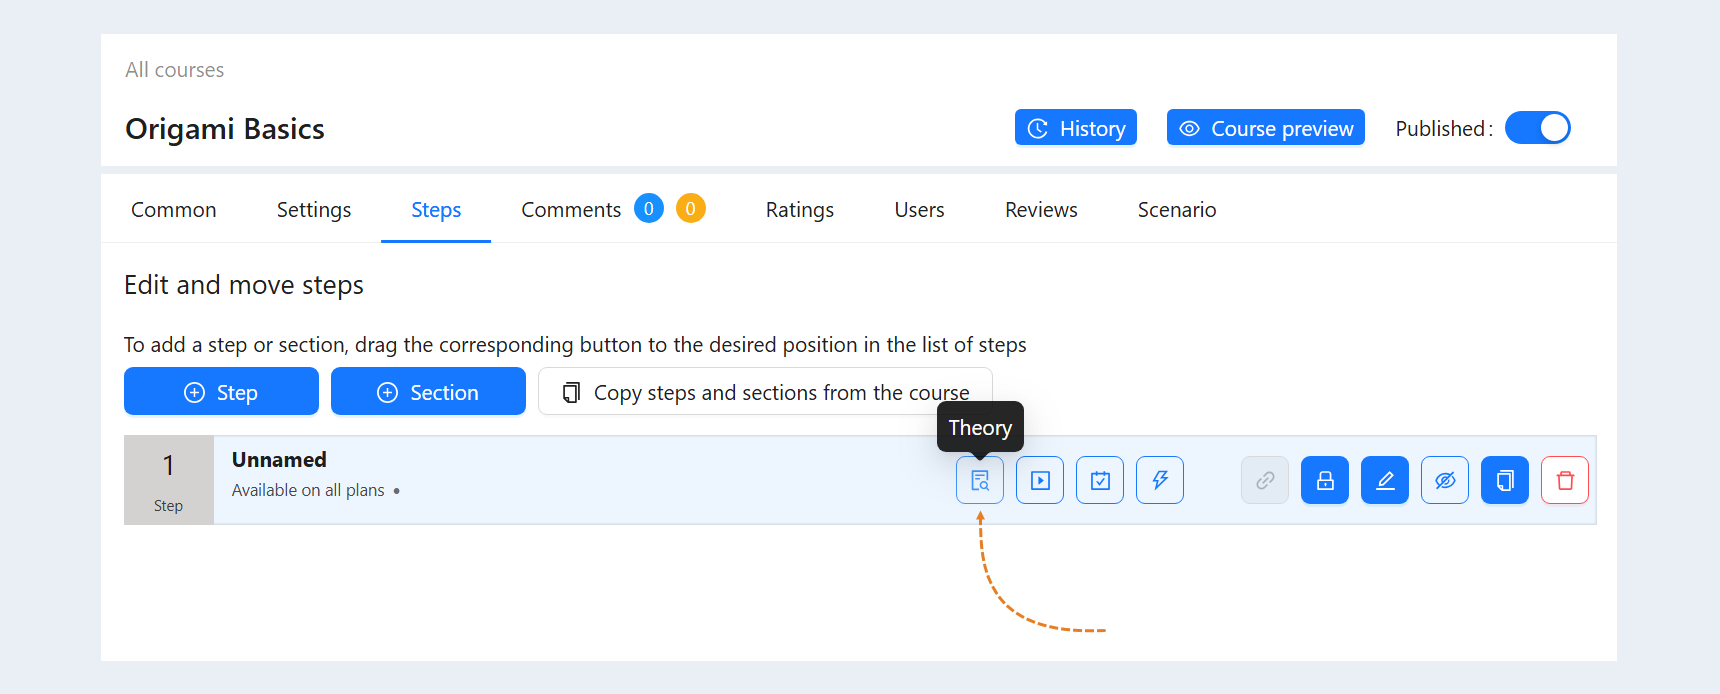
Click on the step name. Go to the "Theory" tab. Here you can add text blocks, videos, images.
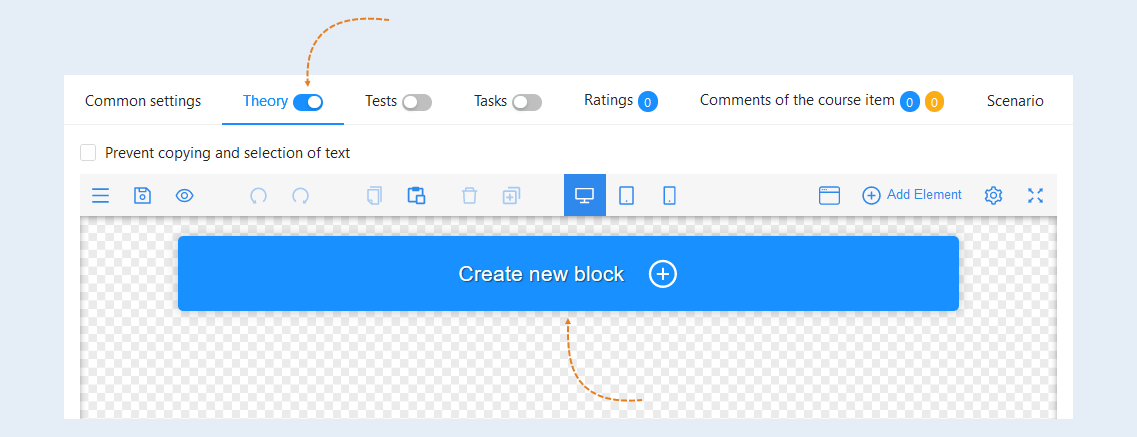
Course Editor
Click the “Create a new Block" button.
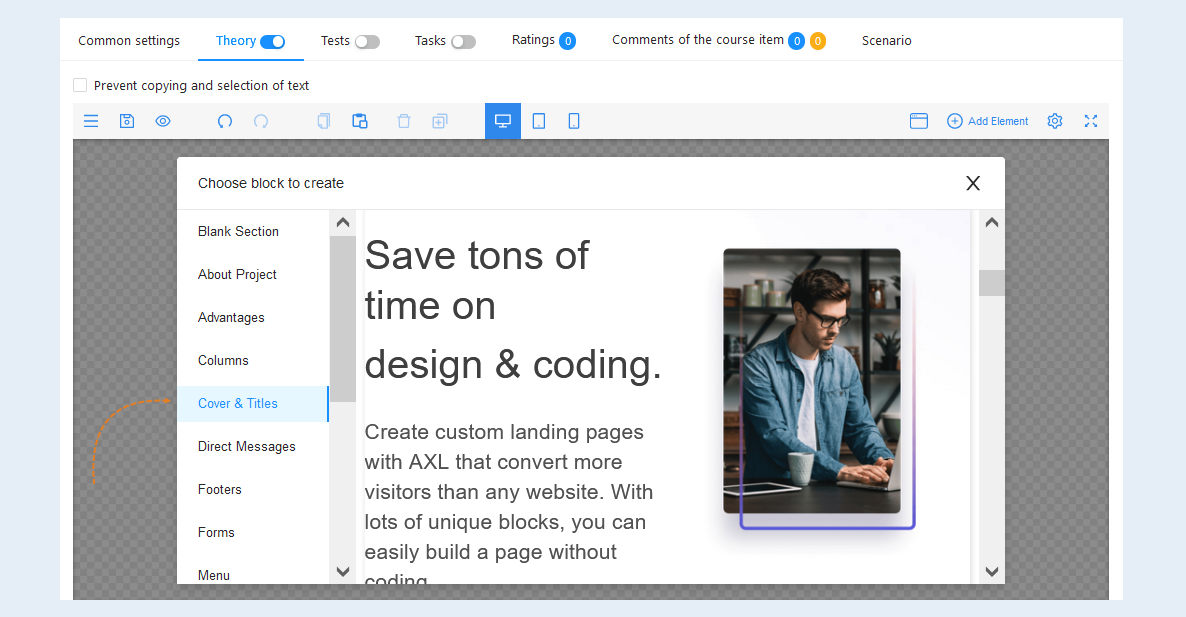
Select a block to create a course from the presented templates. For example, select the “Cover with title" block. Now you can add the title and text of your lesson. Selecting each element of the block, you go to its settings.
Adding a video
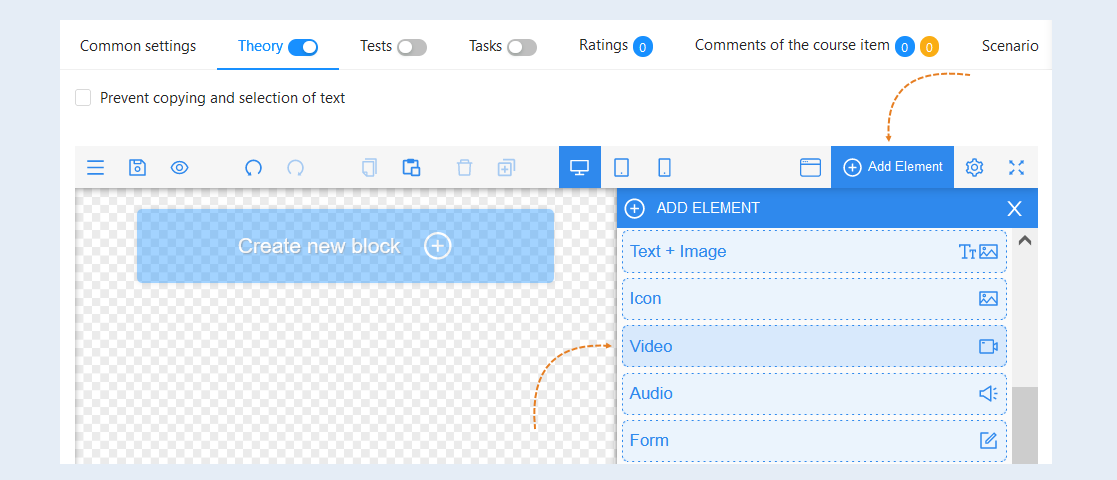
To add a video, click the "Add Element" button in the upper right corner of the page editor. Select the "Video" element and drag it to the page field.
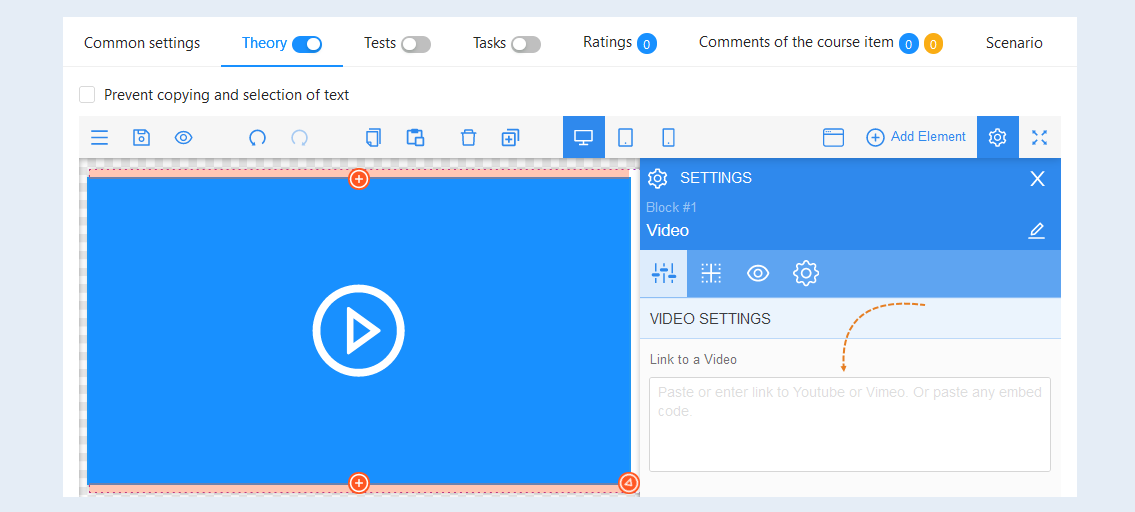
In the settings on the right, enter a link to the video in the field. You can use narrowed videos on Youtube or Vimeo channels. Or you can upload the video to the AXL platform. Read more about how to upload videos to the AXL platform in the article "Video".
Lesson visibility
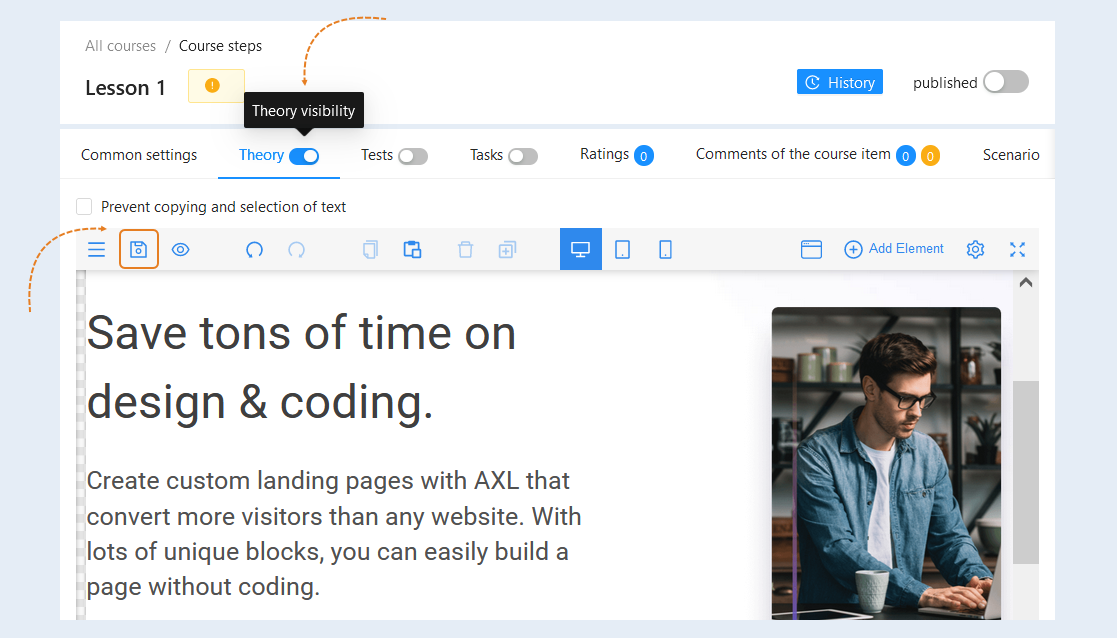
After creating a course step, click the "Save" button. At the top, move the "Theory Visibility" slider to the active position so that the course step is available to users.
Lesson Settings
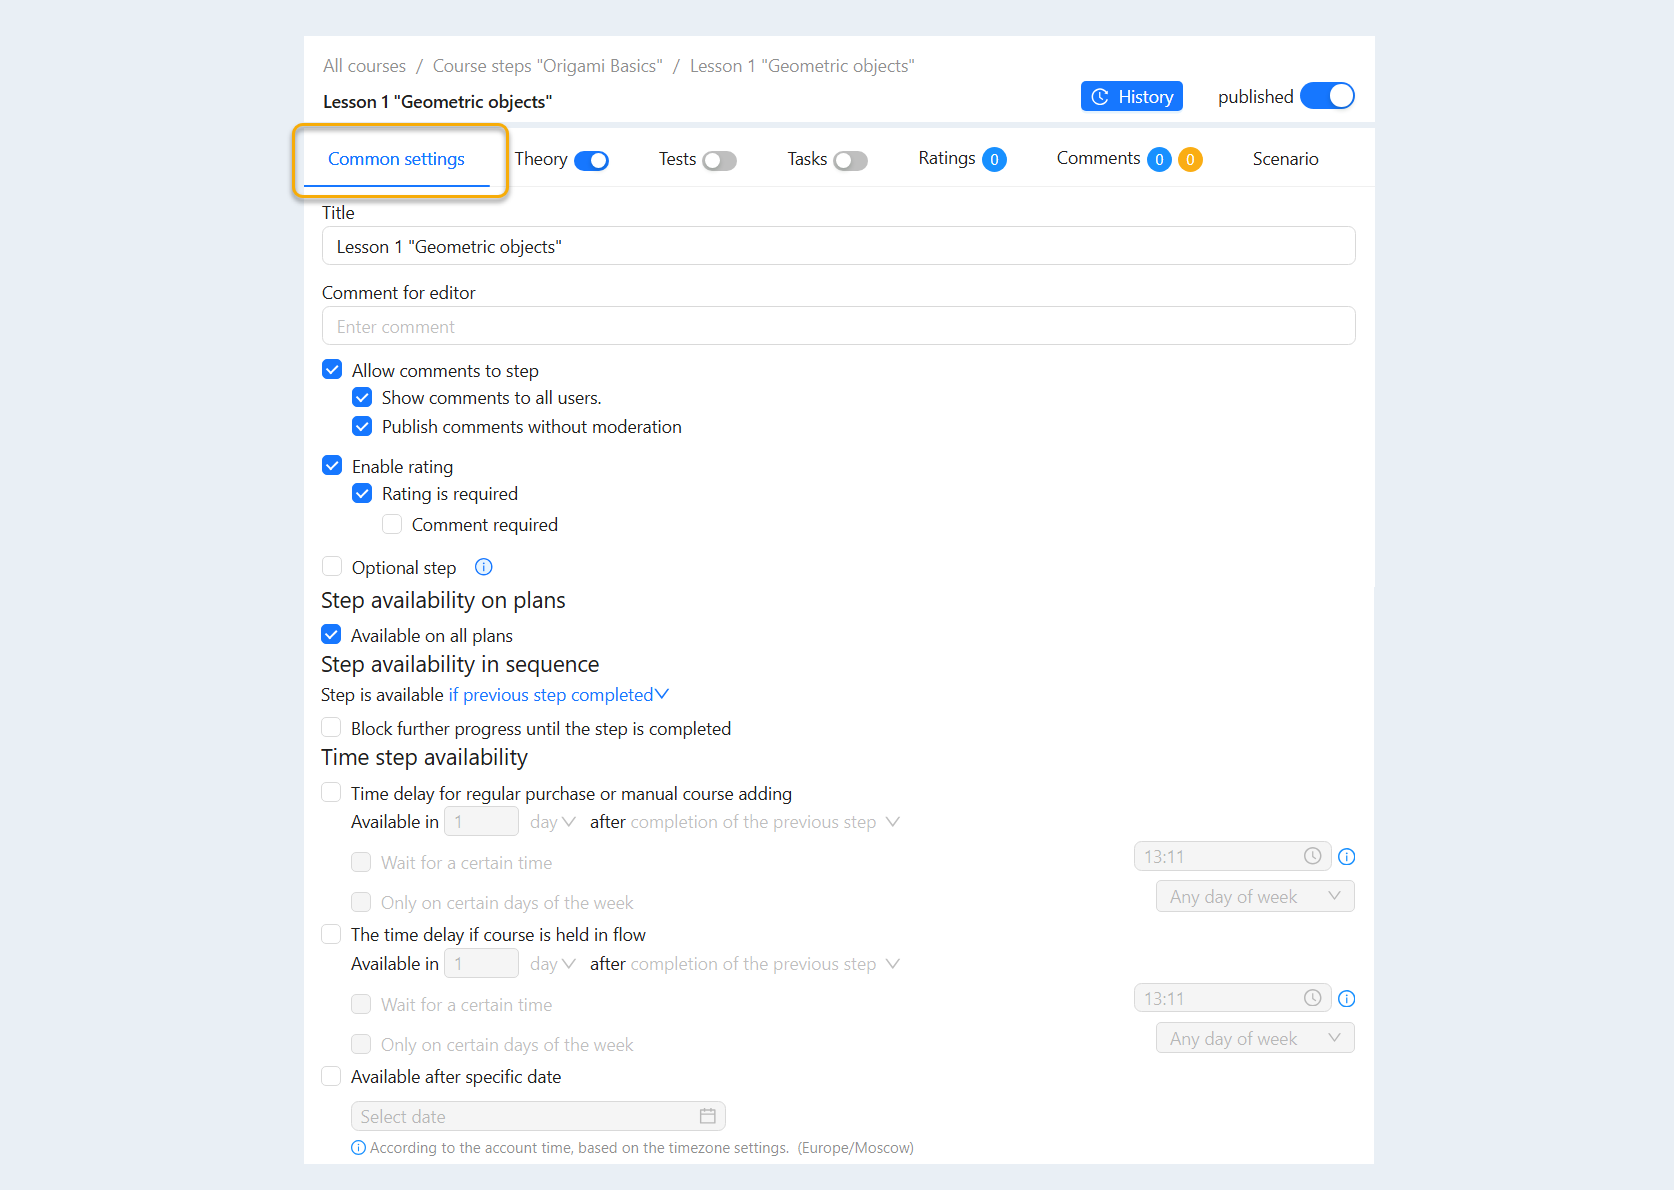
Go to the "Common Settings" tab. Write the name of the lesson here. And, if desired, include comments and ratings for this lesson.
Course publication
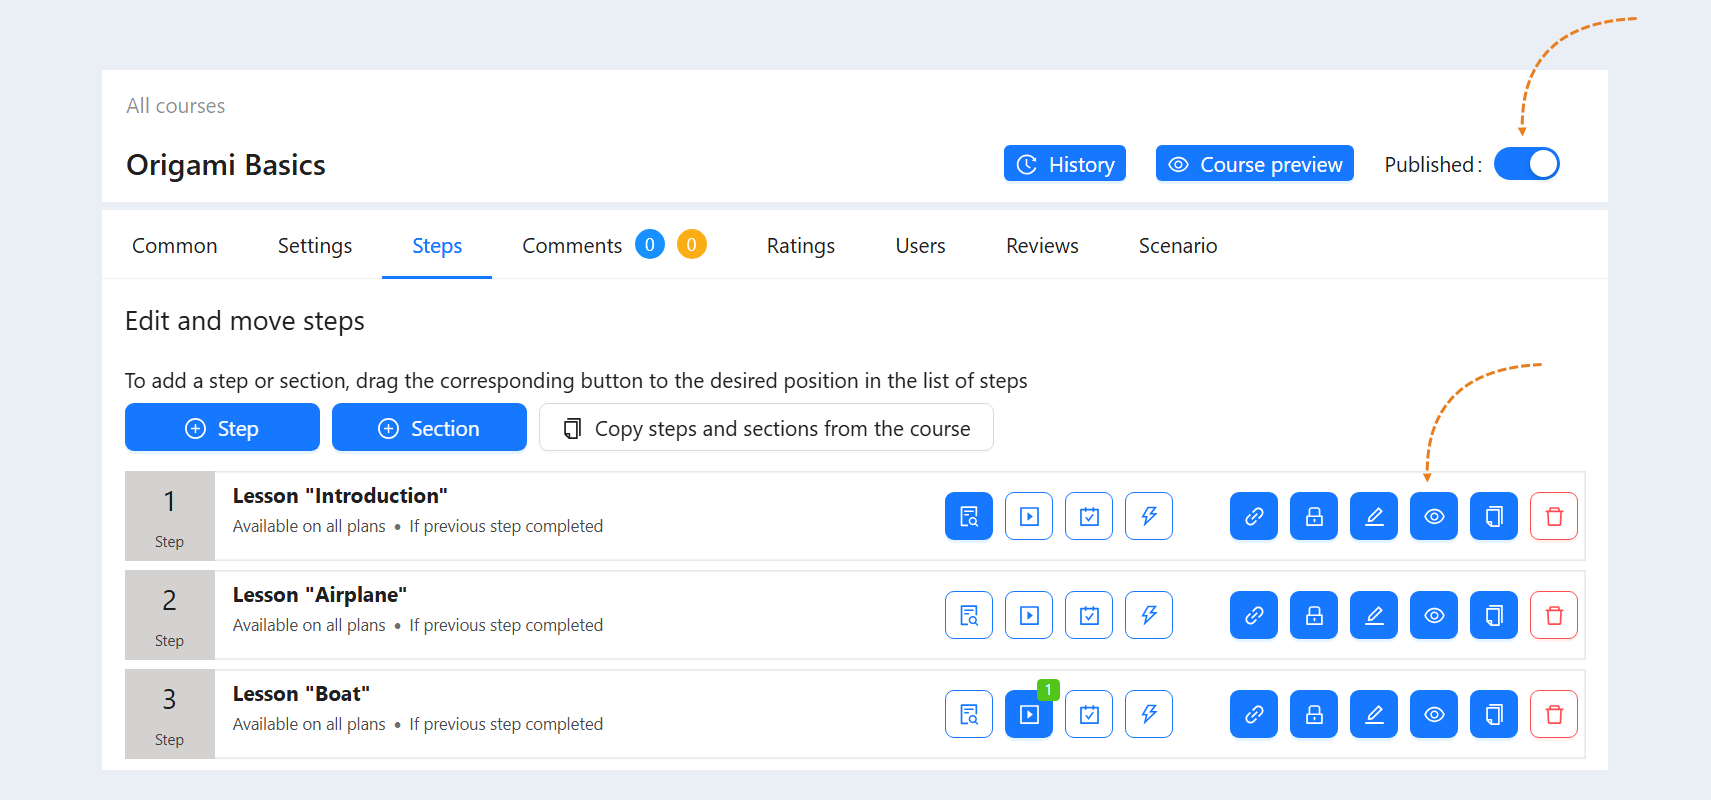
Go back to the Steps page and add the rest of the lessons to your course. Click on the "Show" button next to each lesson. After all the lessons are added to the course, move the "Published" slider to the active position.
How to grant the user access to the course manually
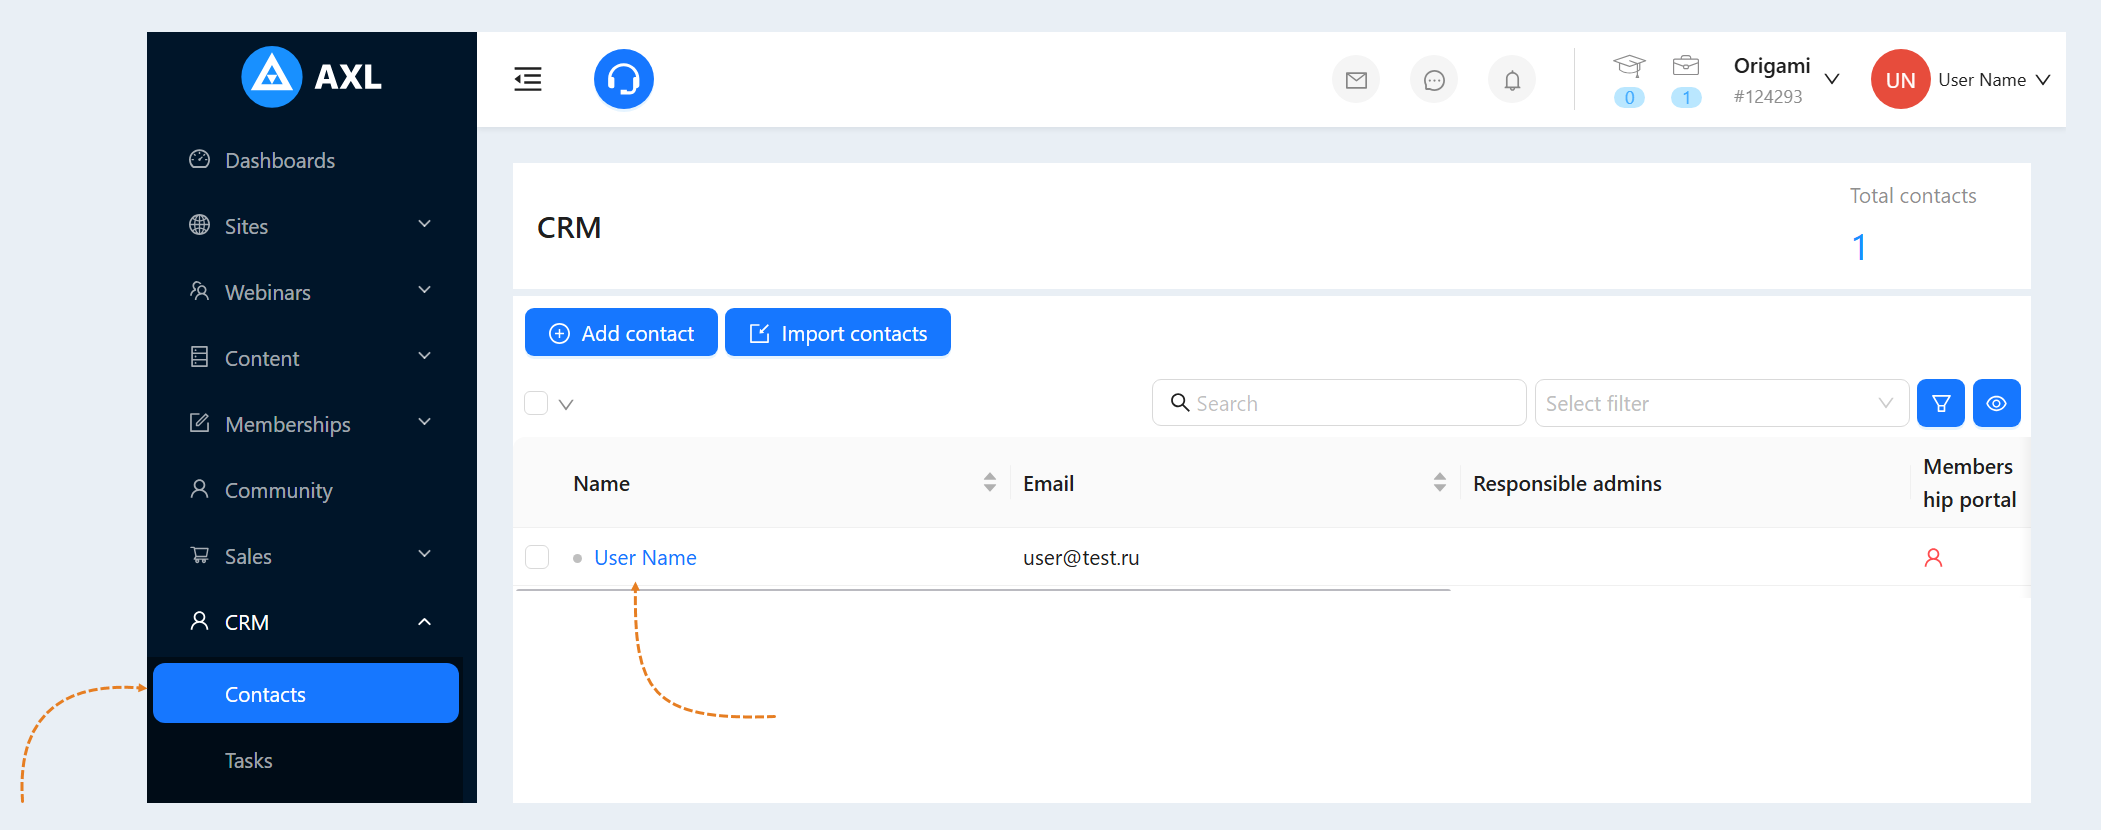
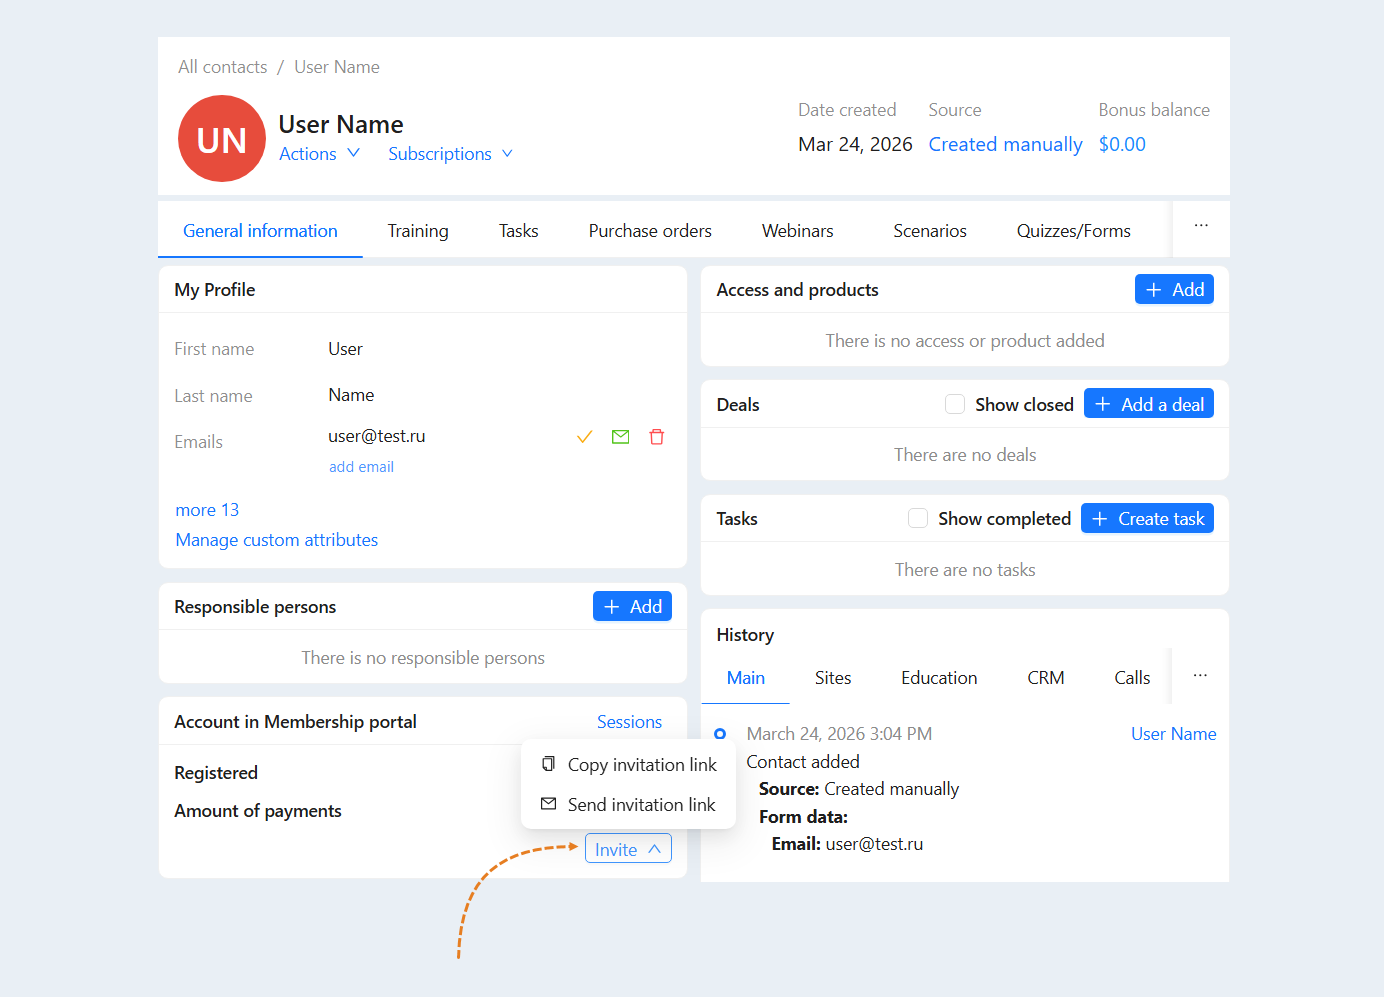
Go to the “CRM” section and select the ”Contacts" tab. Click on the user name to open the contact card.
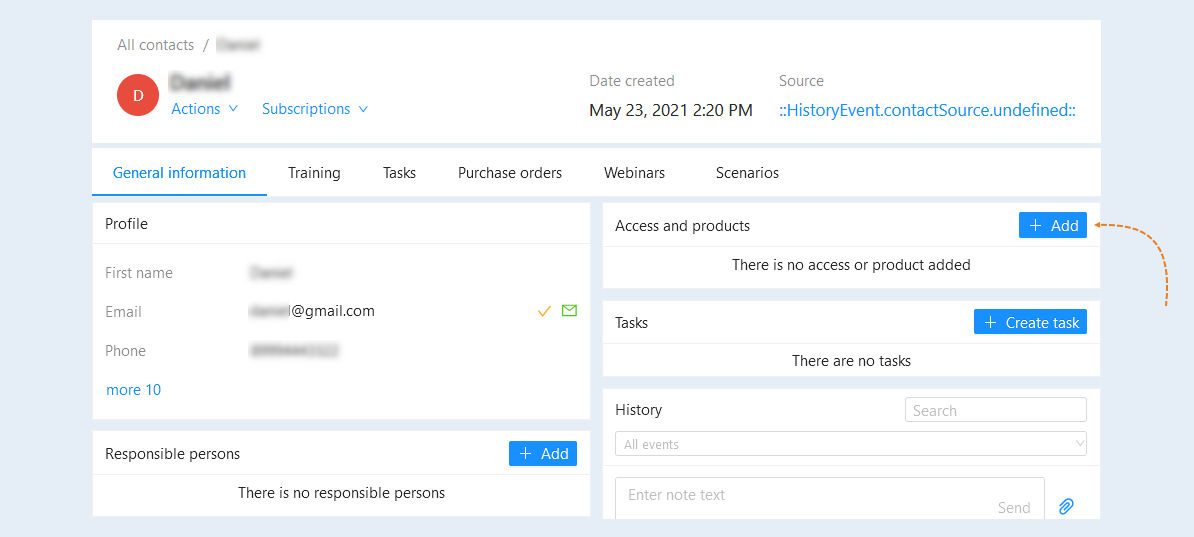
The contact card opens. Click the "Add" button in the "Access and Products" section.
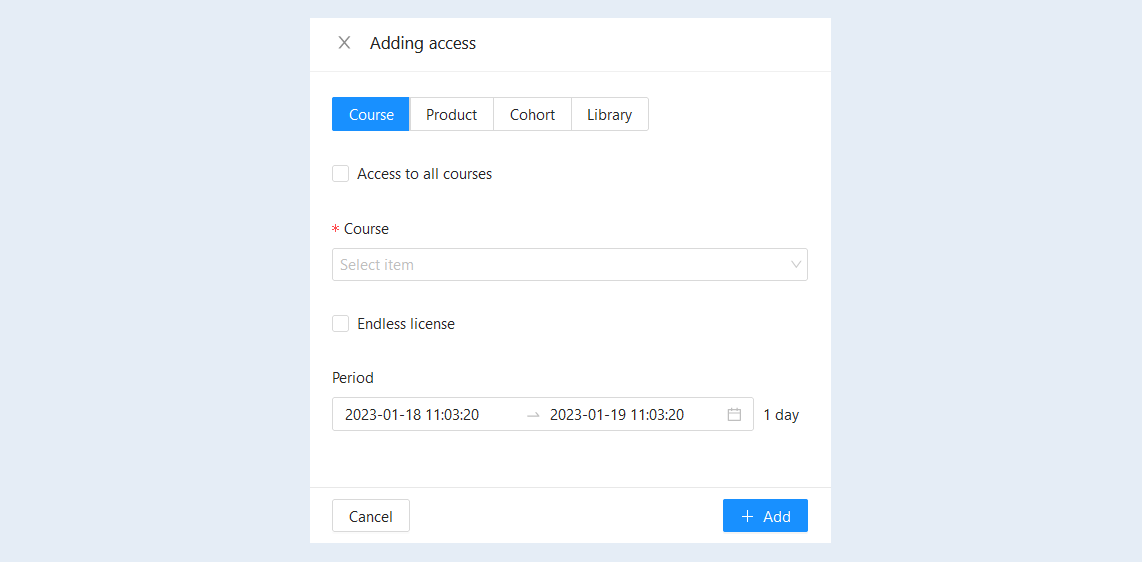
In the field that opens, fill in the fields: select a course from the list and specify the duration of access.
User Invitation
Send the user a link to your Membership portal. To do this, click the "Invite" button in the "Account in Membership portal" section. Click "Send Invitation link". The user will receive a link to your Membership portal by email. Or click "Copy invitation link" and send the copied link to the user.
The user needs to click on the link and create a password. After that, he can start training.
How to grant users access to the course using the payment form
Creating a site
To create a site on the AXL platform, go to the “Sites” tab and click the “Add site” button.
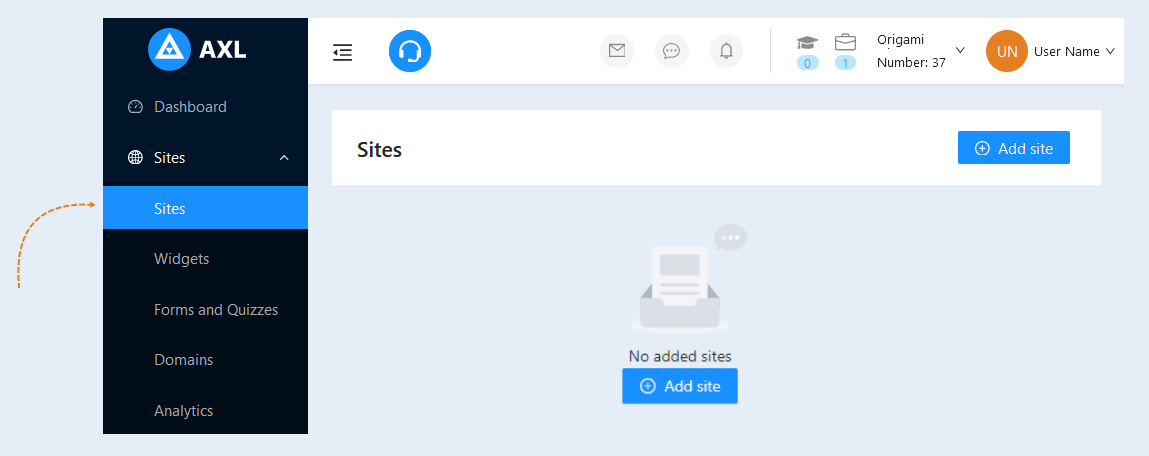
After the site is created, you need to make the settings. Read more about the site settings in the article “How to create a website".
Adding a site page
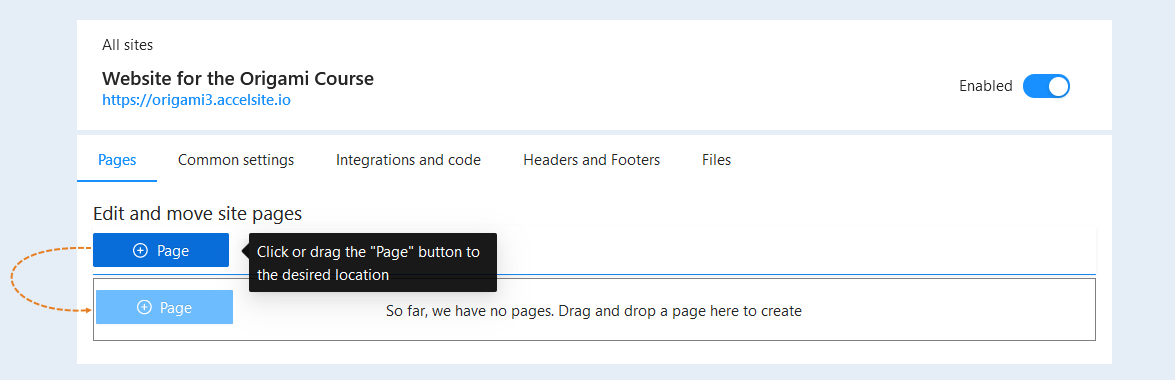
Next, you need to fill the site with pages. Open the created website. Drag the Pages button into the field.
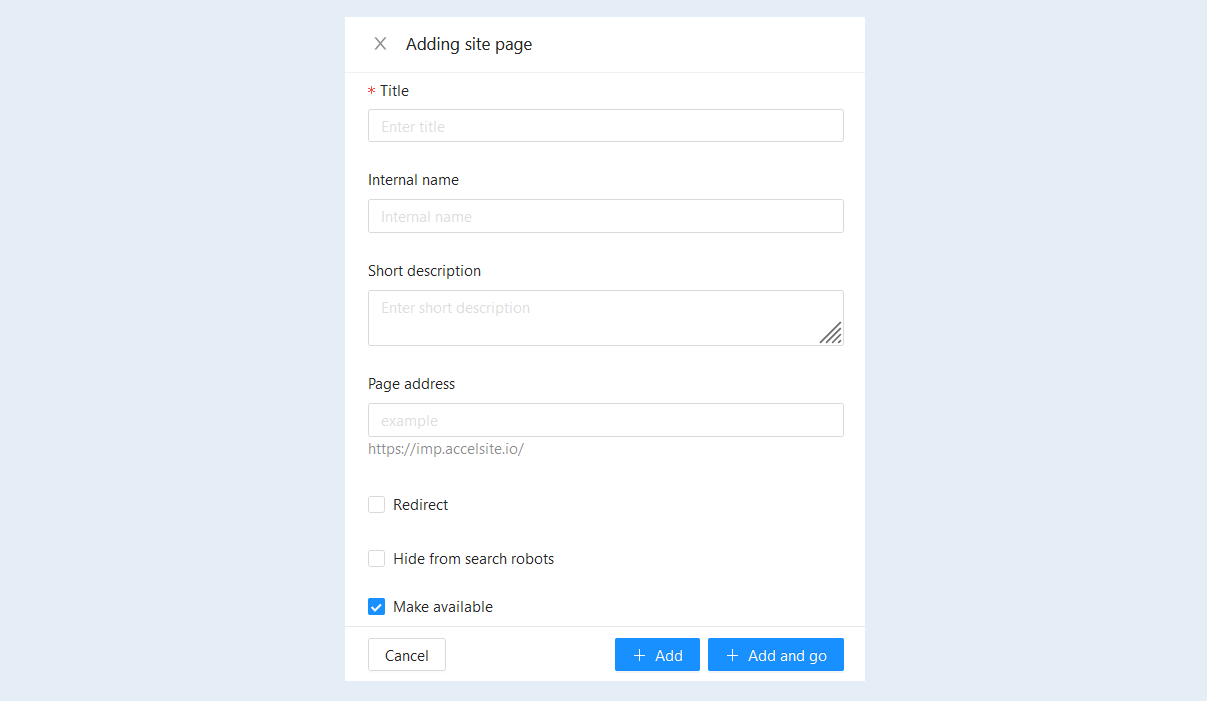
In the window that opens for adding a site page, specify the page name and page address. Then click the "Add and Go" button. You will open the site page editor.
Creating a form
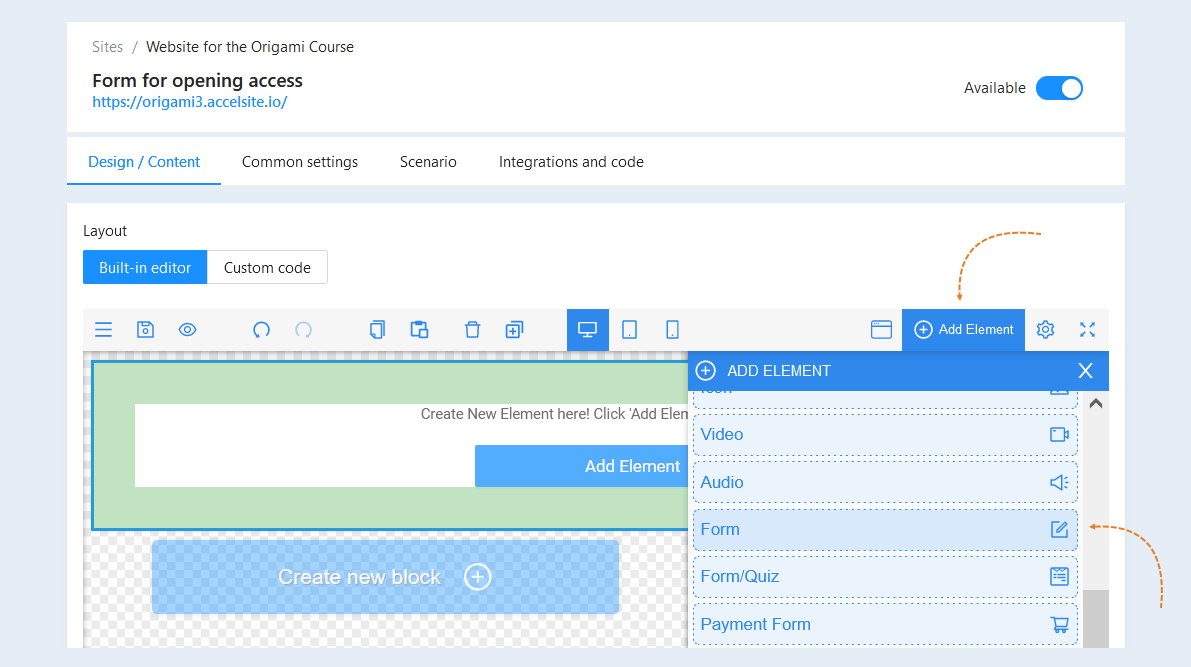
In the editor window of the site page, select "Empty block" and click "Add element". Select the "Form" element by transferring it to the element.
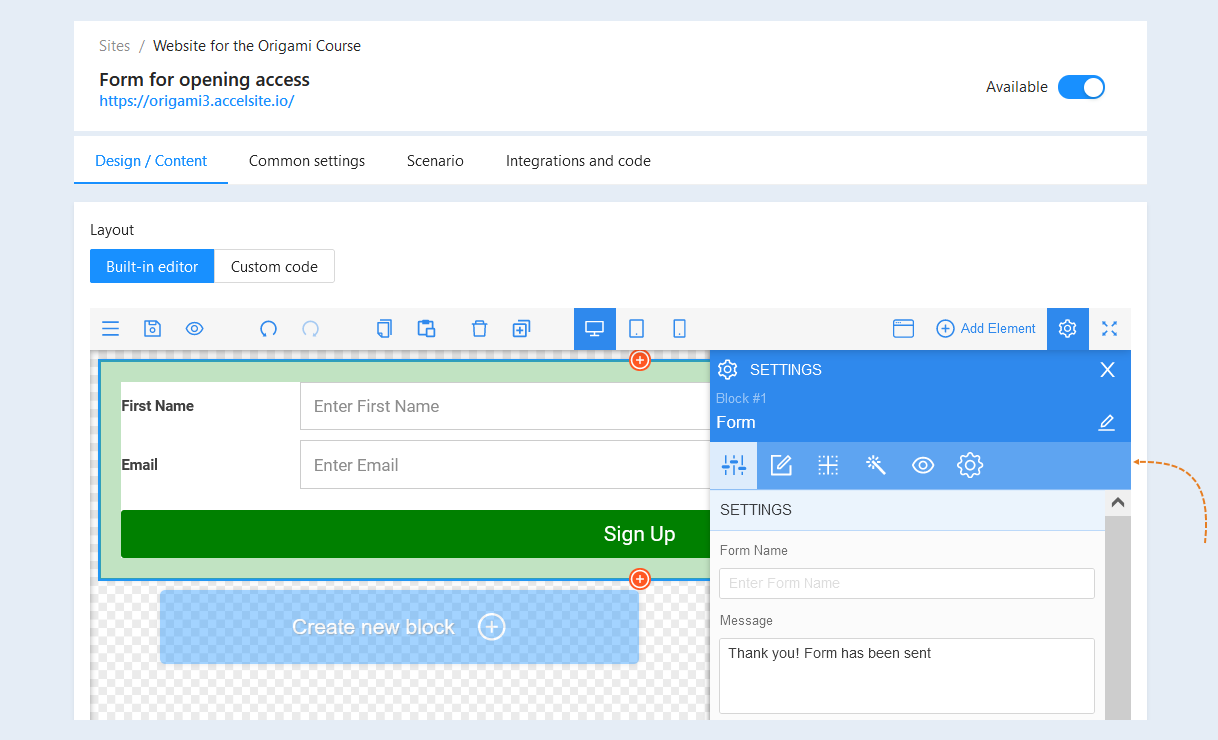
Select the entire form to open the settings for this item. The Settings toolbar opened on the right.
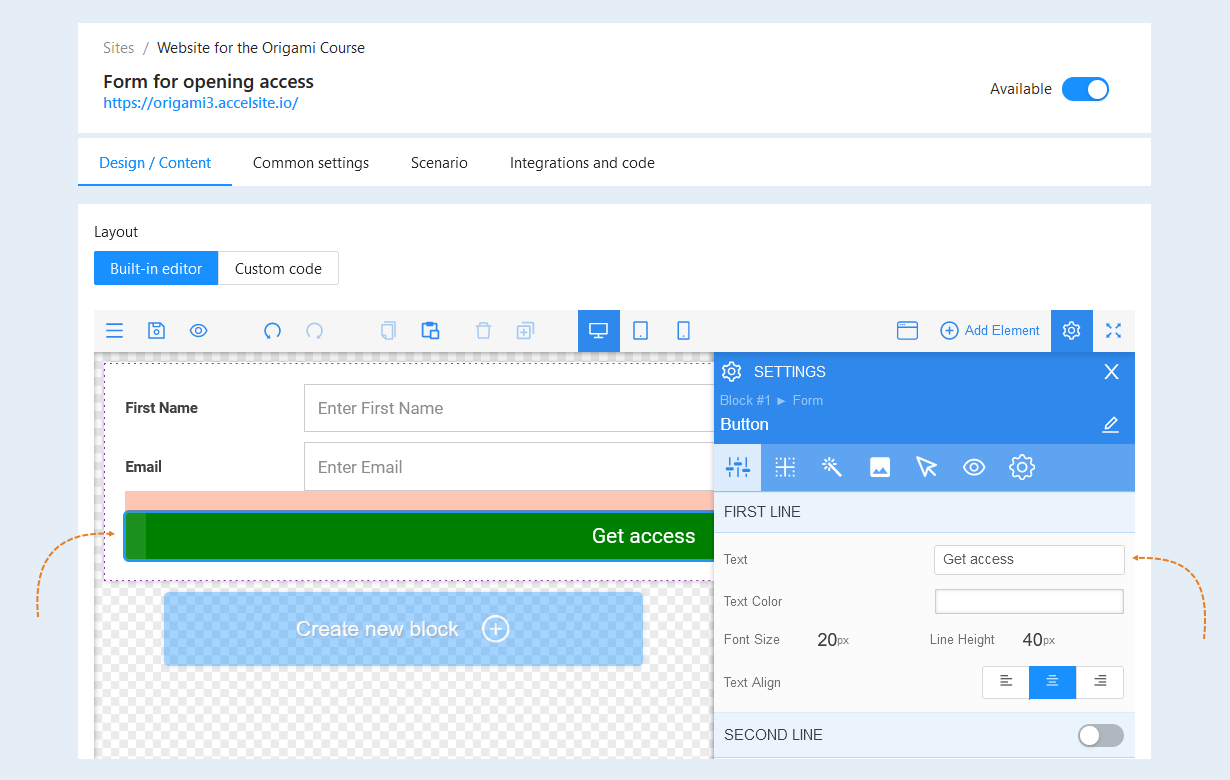
Highlight the "Sing Up" button to open a window with advanced button settings. Change the text of the button to the text "Get access" or write your own text.
Next, add the necessary elements to the form: course name, course description text, image, etc. Read more about how to add site elements in the article "Elements".
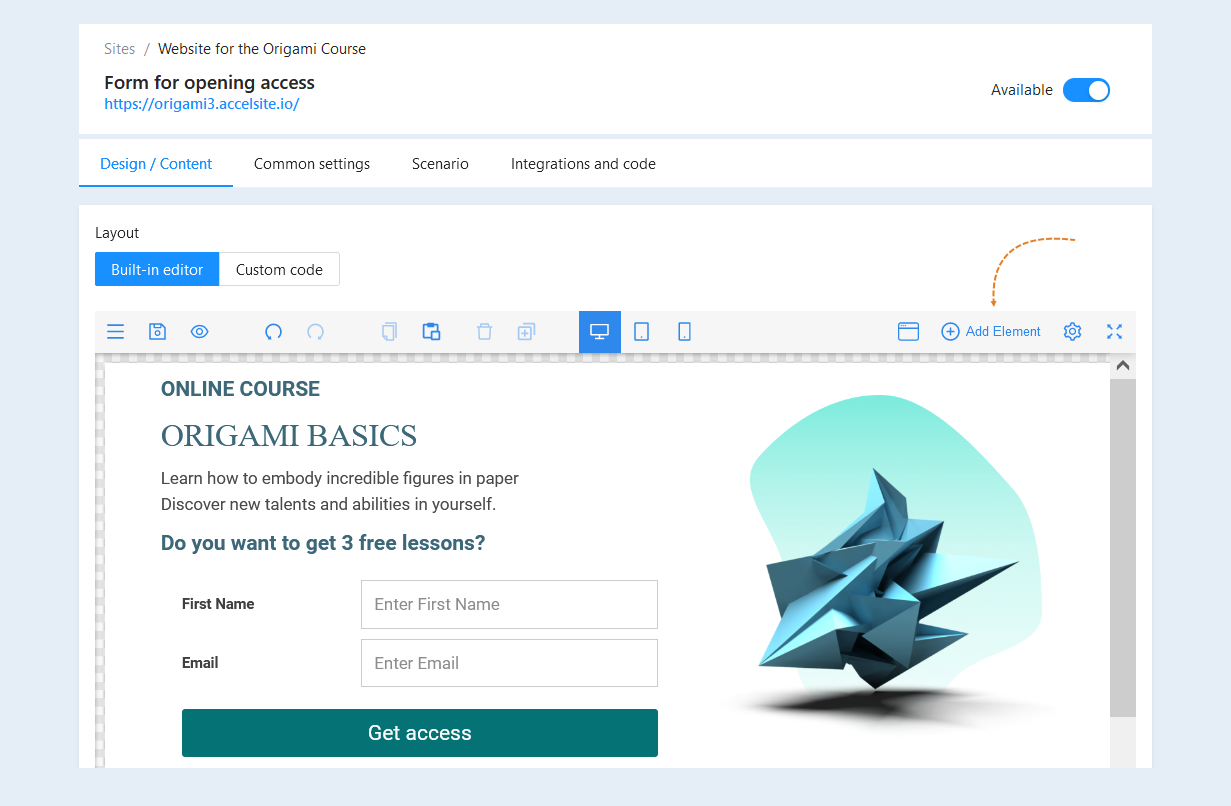
After completing the form settings, click the "Save" button.
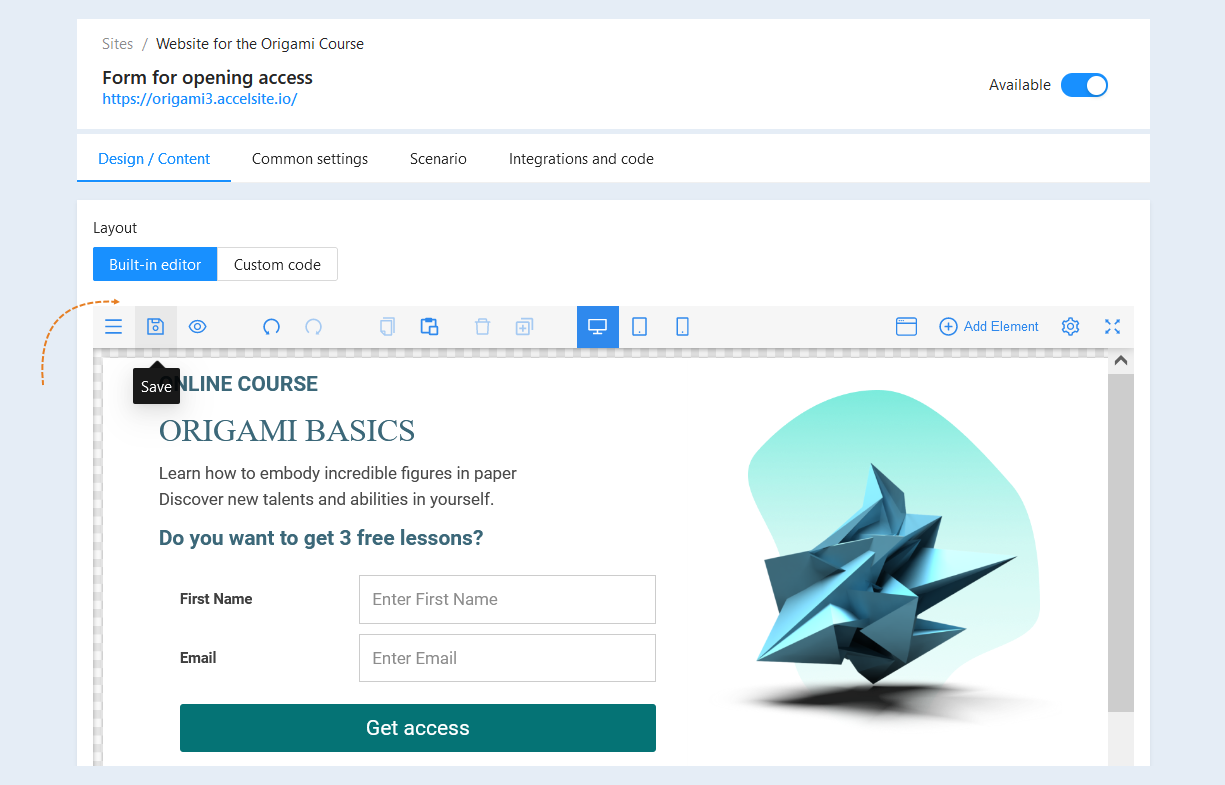
Setting up the scenario
In order for the user to have access to the free course after clicking the "Get access" button, it is necessary to configure the site scenario.
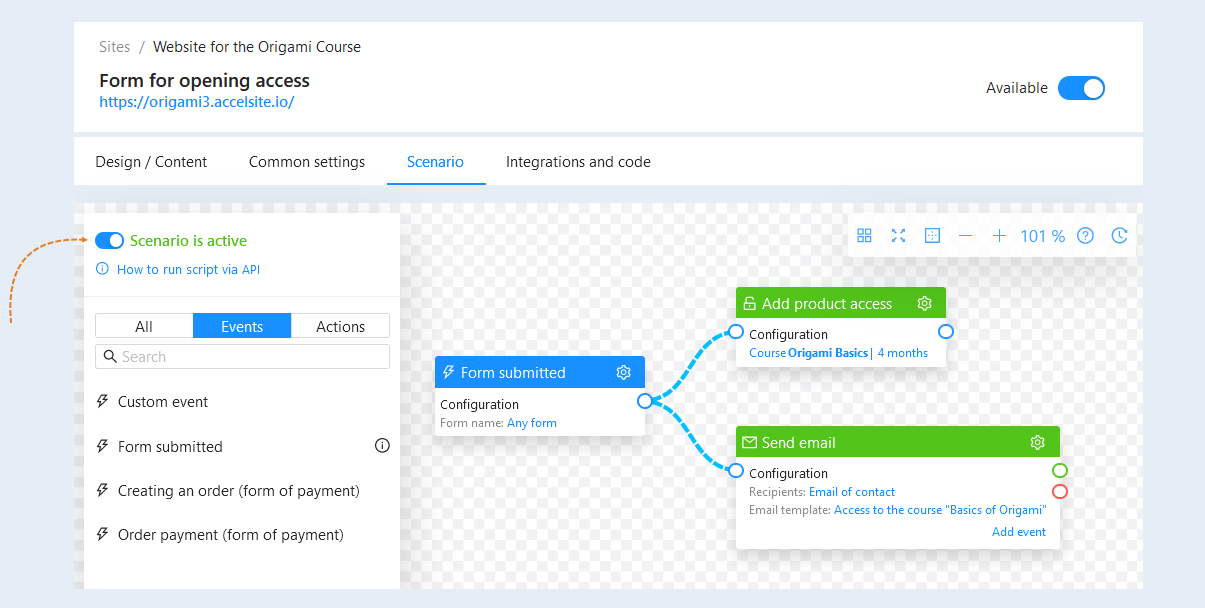
Open the Scenario tab. Open the "Events" tab, select "Form submitted" and drag the event to the script field. Next, open the "Actions" tab, drag "Add Product Access" and "Send Email" into the script field. Next, you need to connect the event and the action together.
For more information on how to create a website script, read the article "Site Scenario".
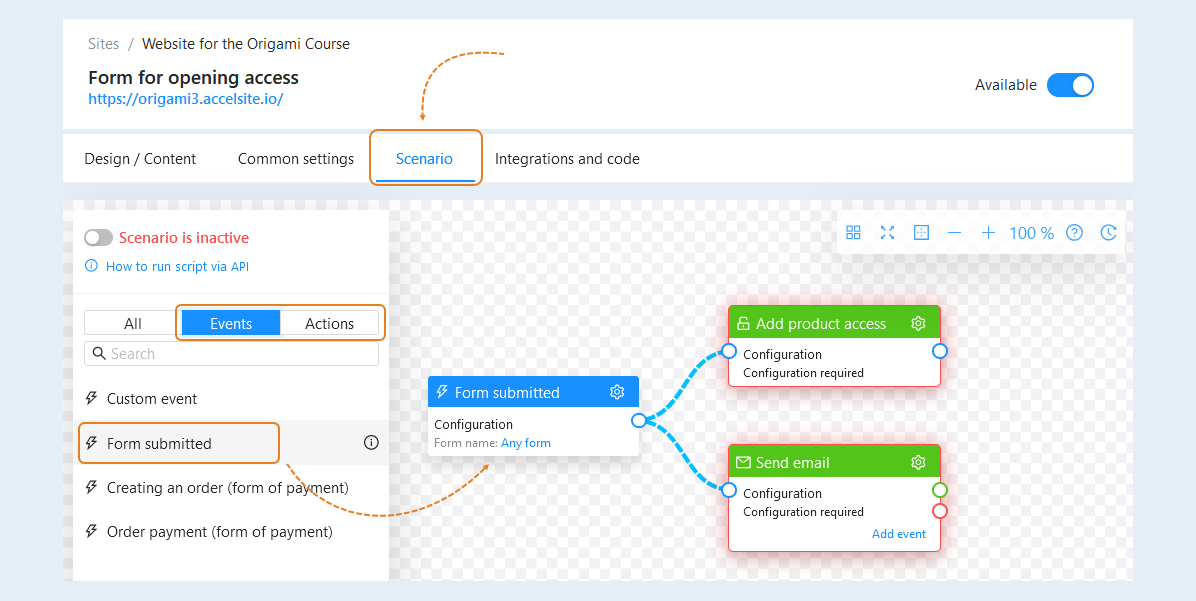
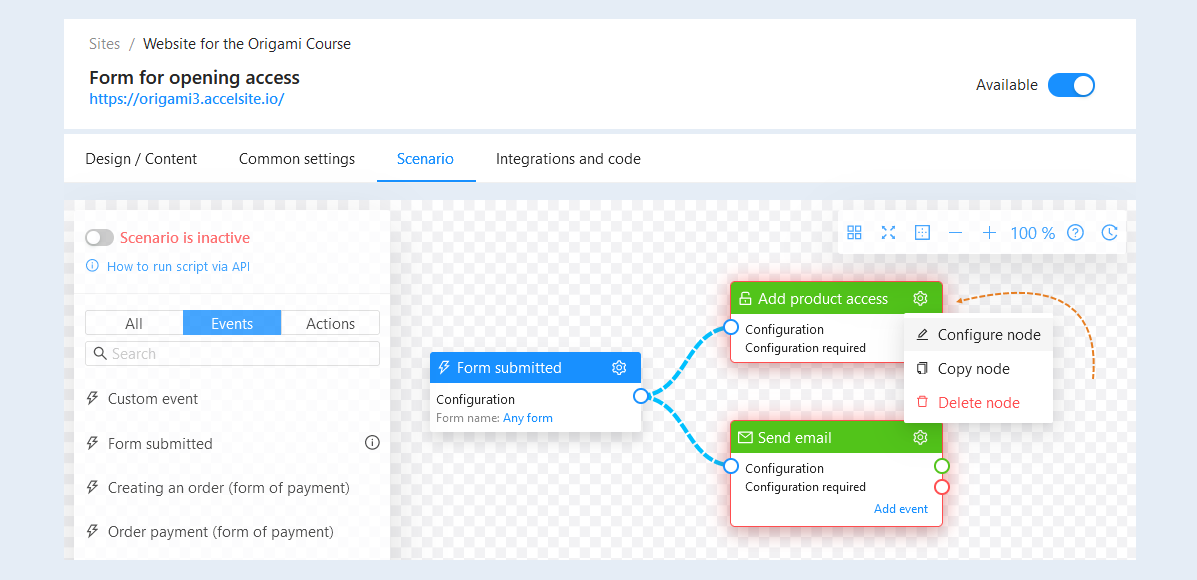
For the actions "Add access to the product" and "Send an email", you need to perform the configuration settings. Click on the "Settings" button and then the "Configure Node" button.
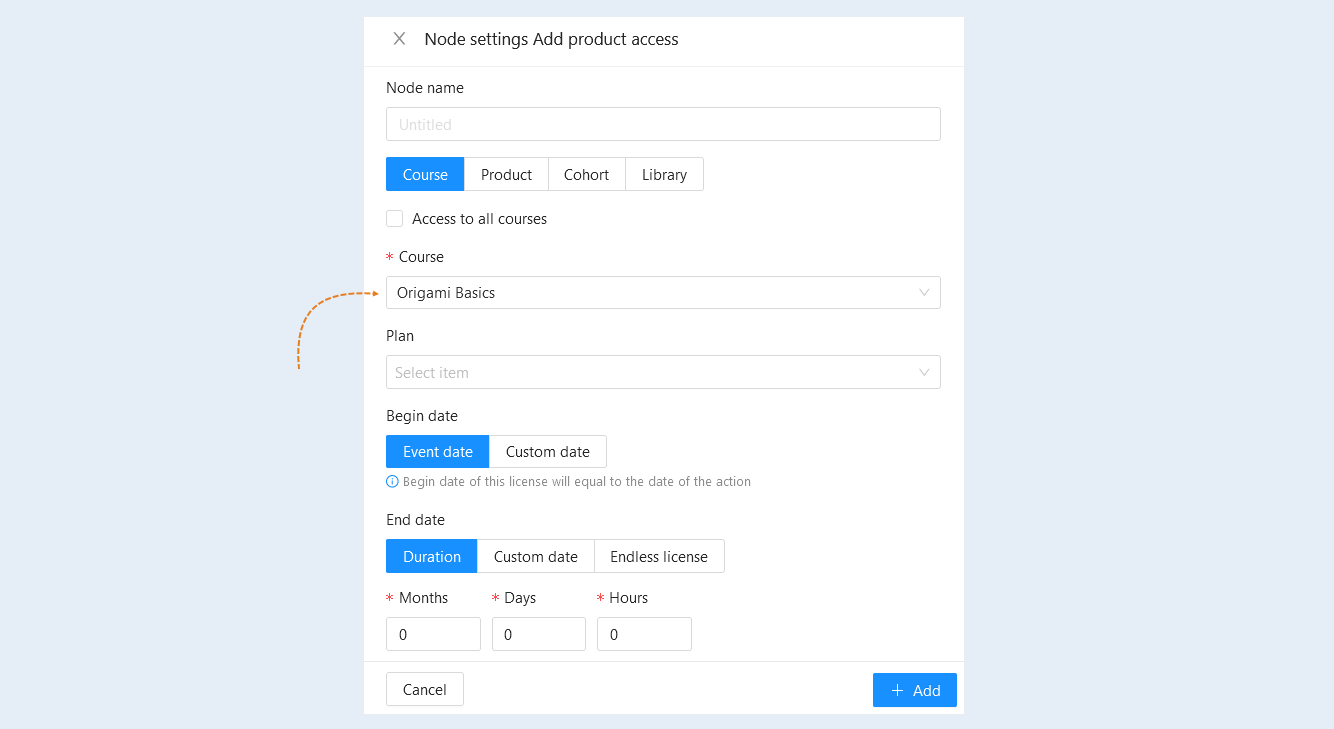
You will see the "Add access to Product" node settings window. In the "Course" field, add a free course by selecting it from the list. Next, specify the period for which access to the course will be opened. Click the "Add" button.
Click on the "Settings" button and then the "Configure Node" button in the "Send email" action. You will see the "Send Email" node settings window. Select the sending profile from the list, add the subject, the header and the text of the letter.
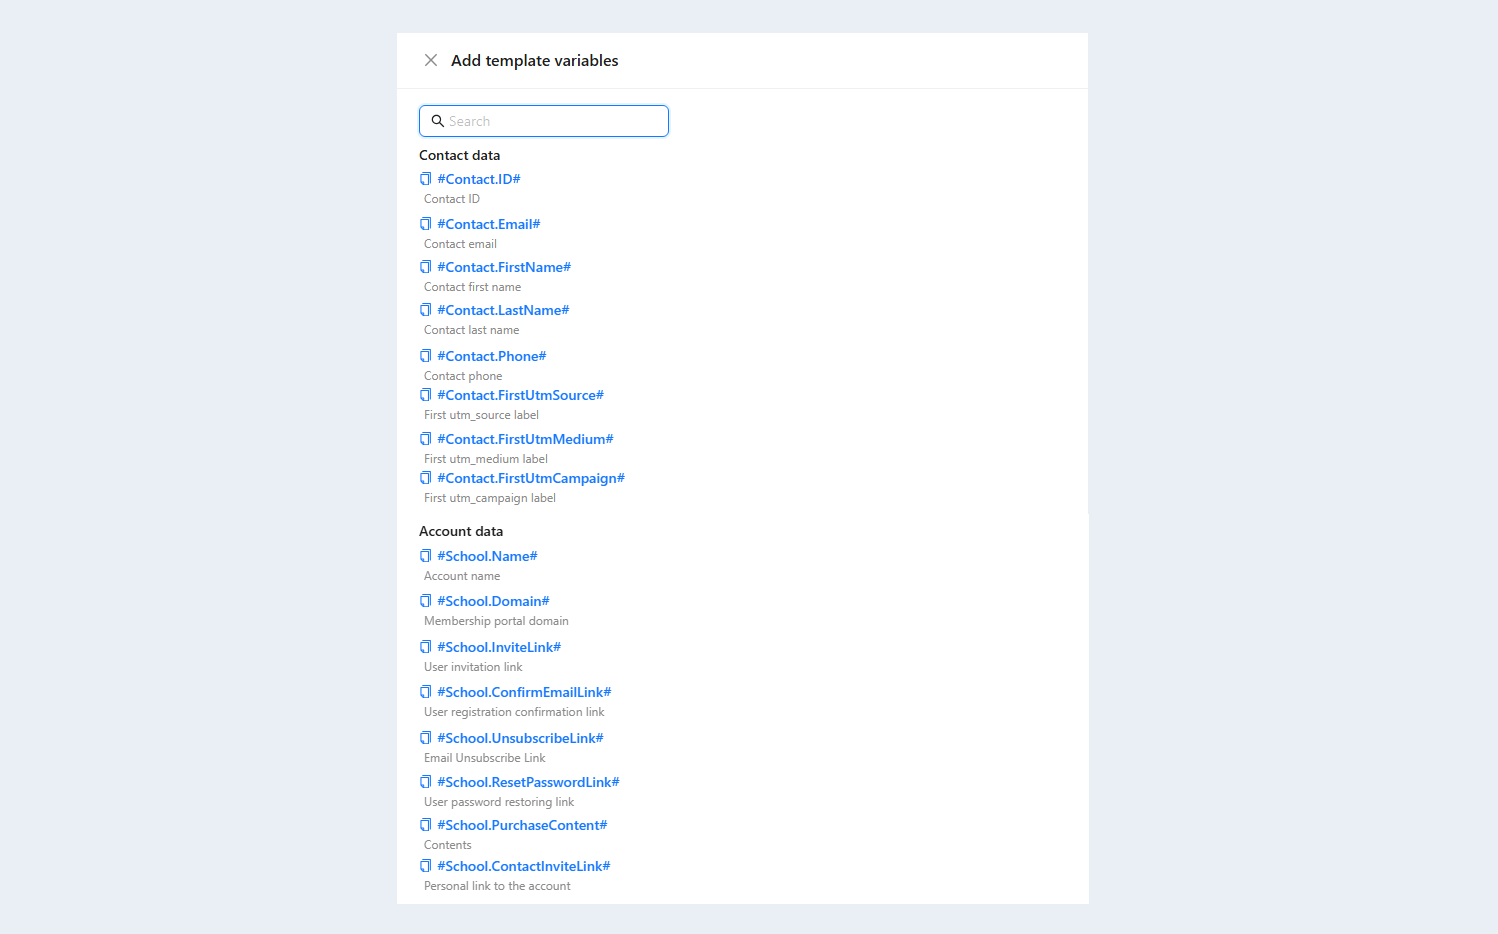
In the configuration settings, you can add variables. A variable is a value to be automatically replaced with the data you selected. This can be the contact's name, e-mail, account name, order number, etc. Variables will automatically replace the data in the email. Specify the variable “Contact Name" and when sending an email, this variable is replaced with the recipient's name. Click the "Add templare variables" button.
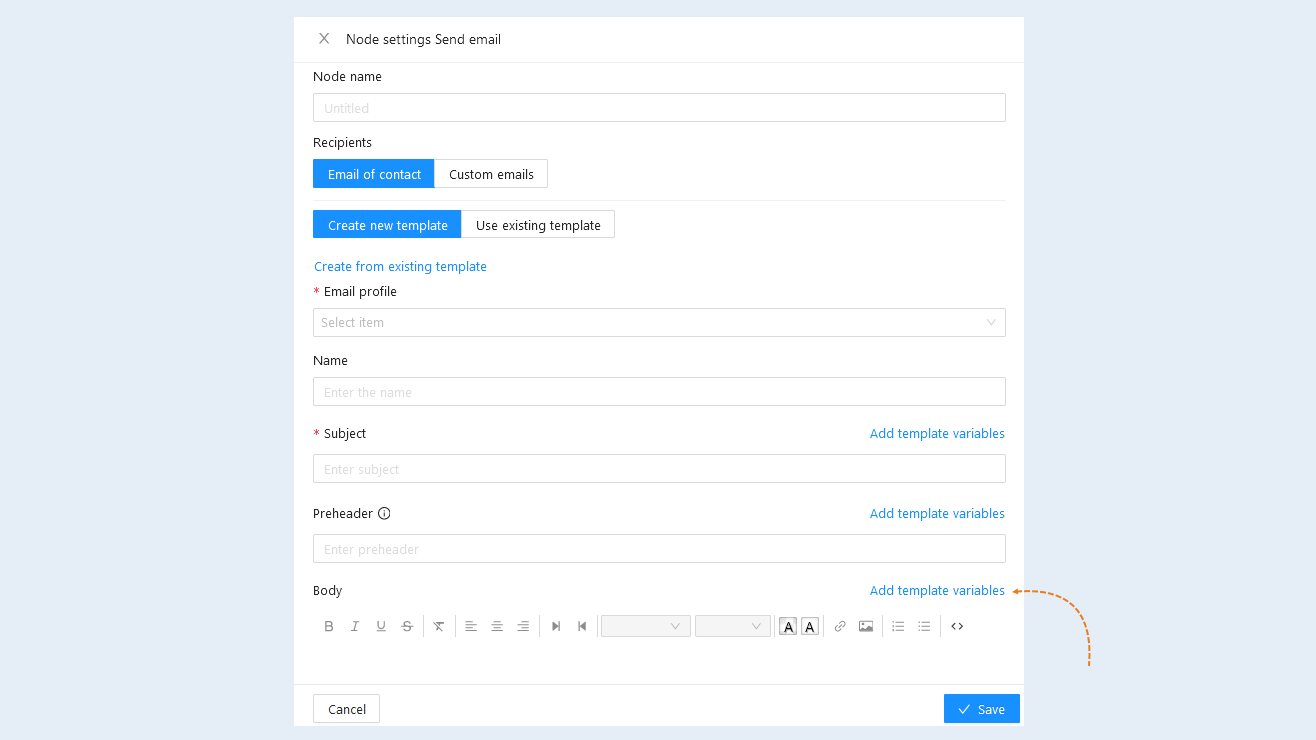
Next, select the desired variables from the list and add them to the email.
After completing the scenario settings, move the "Scenario is active" slider to the active position.
Enabling the site
Go back to the "Sites" section. Open the previously created site. In the upper right corner, move the "Enabled" slider to the active position to make the site page accessible to users.
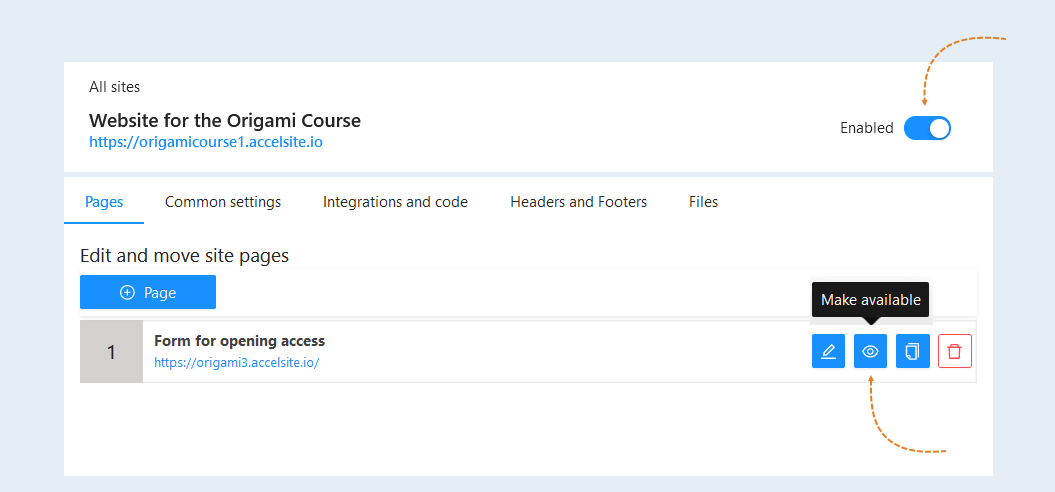
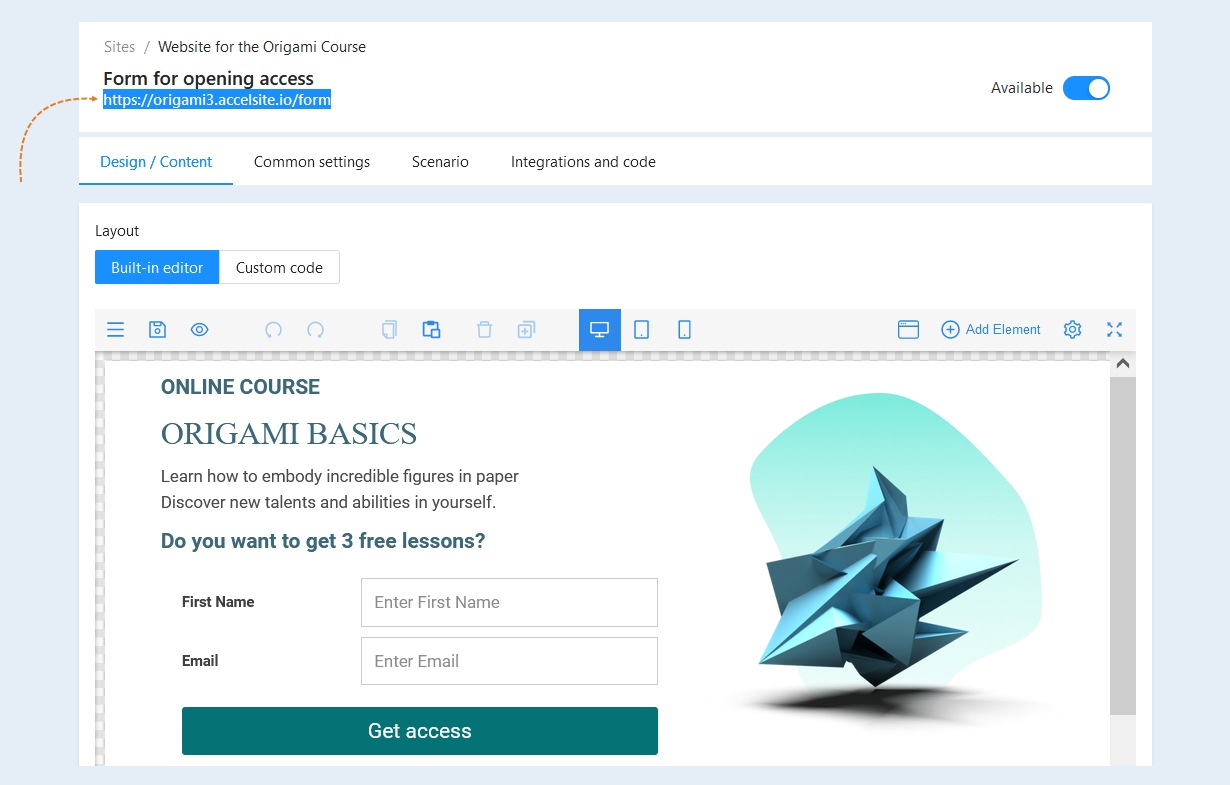
Open the site page. Copy the link to the page to open access to the course in the upper left corner. You can use this link to the form in mailing lists to users.