In this article, we will consider in detail how to create and configure a website on the AXL platform. Click on the desired section to go to its description:
1
Creating a website
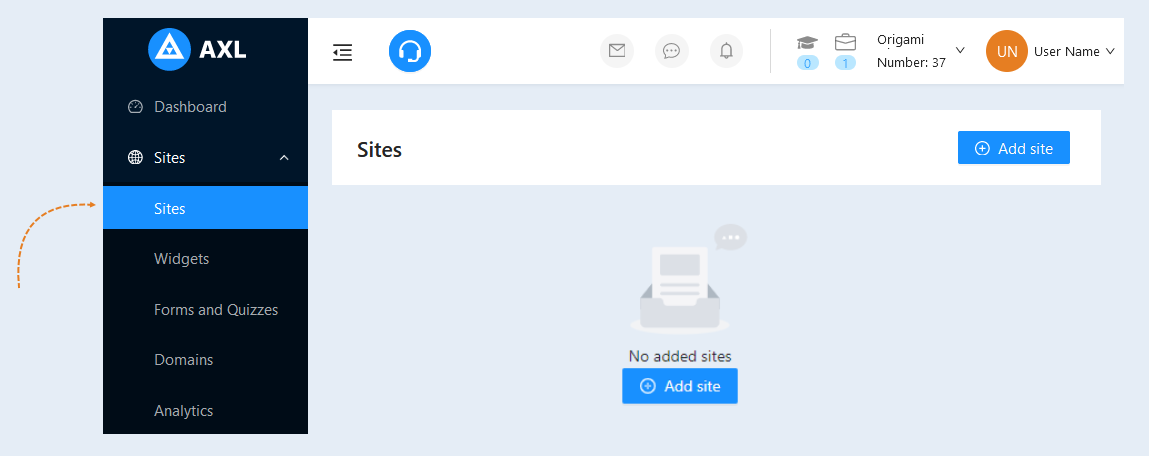
Go to the “Sites" tab and click the “Add Site" button.
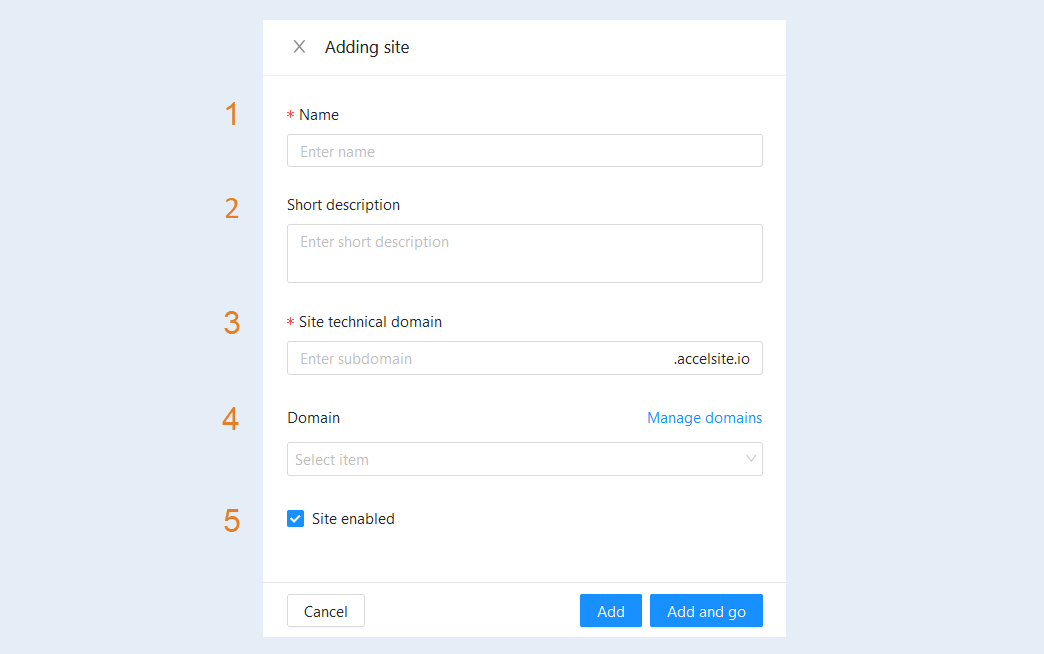
In the window that opens, fill in the fields:
- Name. Write the name of the site.
- Short description. This description will be seen by site visitors.
Site technical domain. Write the account domain using the English alphabet. Domain is the address of a website on the Internet, consisting of a set of letters and numbers. Each domain name is unique. A subdomain (or subdomain from the English subdomain) is a domain that is part of a higher-level domain. For example admin.accelsite.io is a subdomain and the higher level domain would be accelsite.io.
- Domain. You can also attach your existing domain to the AXL platform in order to sell your product through AXL. How to create a domain is described in the article "Sites".
Site enabled. Check the box to enable the site.
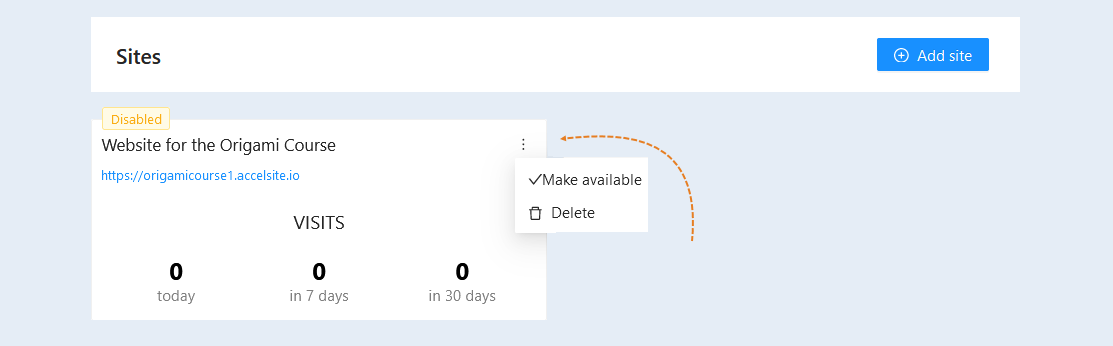
Now you have a website card in the “Sites” field.
You can see the name of the site and the address of the page. As well as site statistics: visits for today, for 7 days and for 30 days.
There is a three dots icon in the upper right corner of the card. Click on the icon and select:
- Make it available. Click to publish the site and it will become available to visitors.
Delete. Click to delete the site.
2
Adding a site page
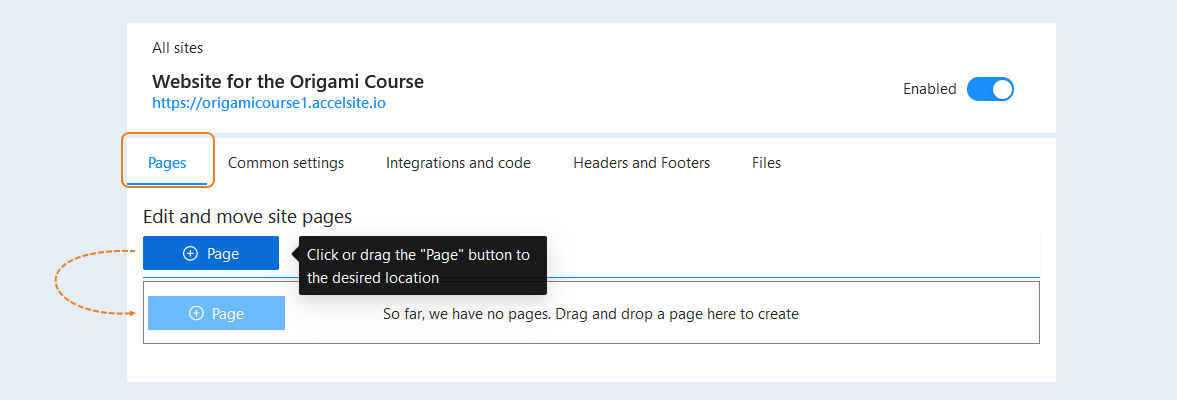
After the site is created, you need to make settings and fill it with pages. Click on the site name. In the "Pages" tab, you can add site pages. Drag the Pages button into the field.
An additional window will open. Fill in the fields:
- Title. The title of the page is displayed here. You can change the name.
Internal name. The internal name will be visible only to you and will not be shown to users.
- Short description. This description will be seen by site visitors. This field is optional. In the event that this field is left blank, then site visitors will see a description of the site.
- Page address. Enter the page address in the field.
Redirect. If you want to enable redirection to another site, then check the box and in the field that opens, enter the address of the site where the visitor will be redirected.
Hide from search robots. This function is used if you do not want search engines to find your site.
Make available.Check the box to make the site page available to users.
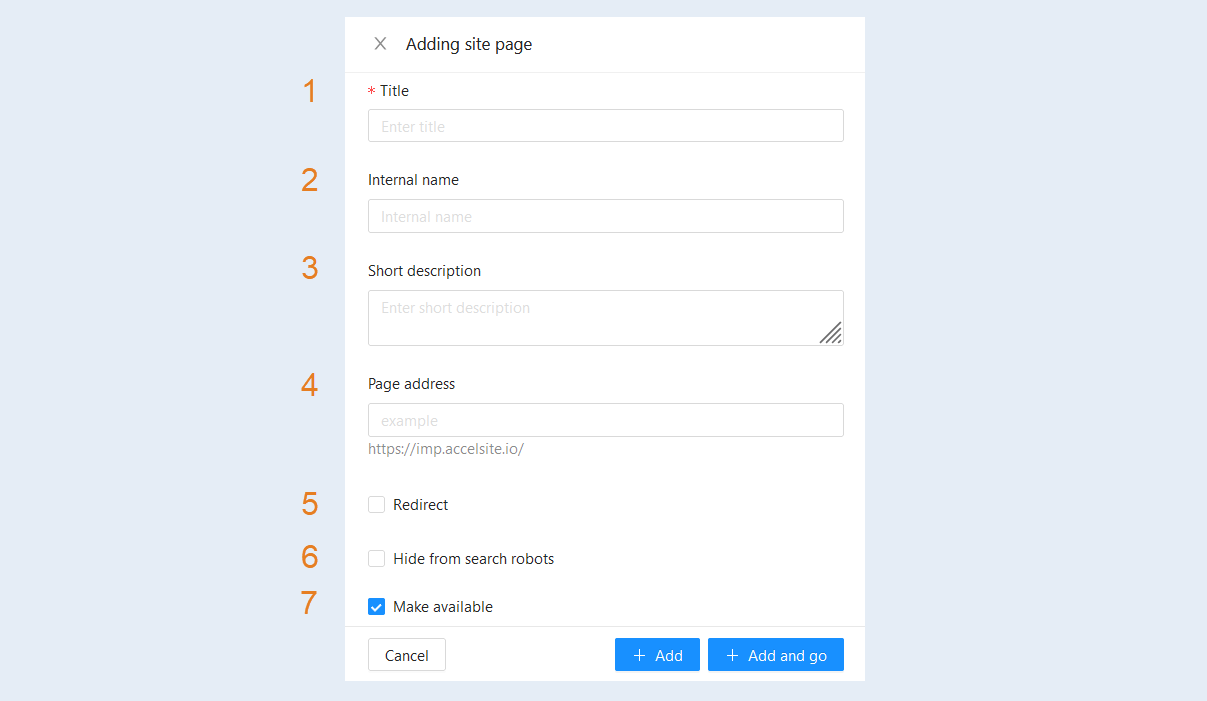
Click the "Add and Go" button.
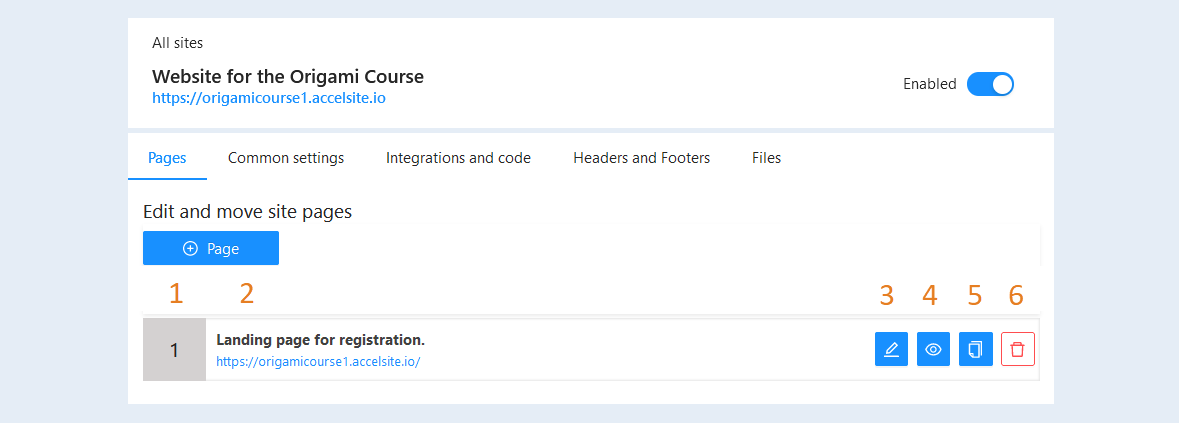
Now you have a list of pages. You see the following information:
- The page number in order.
- The name of the page and its email address.
- Edit button. Click to change page details or to fill the site with content.
- Make Available button. After clicking this button, the page will become available to visitors.
- Copy button. Click to copy page.
- Delete button. Click to delete the page.
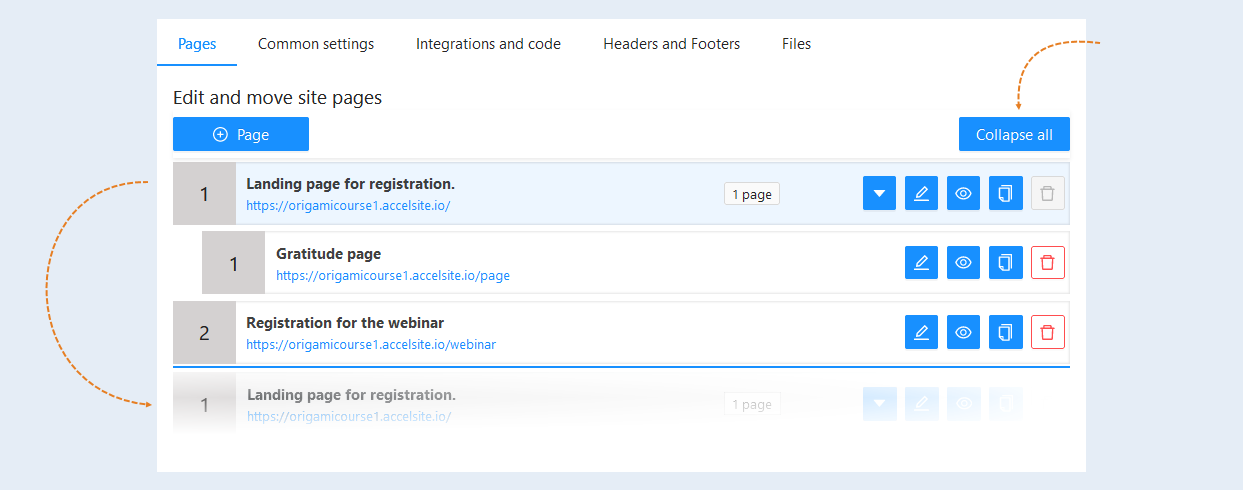
You can move pages between each other by dragging and dropping. Hover the cursor over the page line, hold down the left mouse button and move the page relative to the others, above or below. You can also make a page “under the page" to another one.
In the upper right corner there is a "Collapse all" button. Click to hide all subpages in the list and leave only the main pages.
You have created a website. Next, you need to fill it with content. For more information on how to do this, see the "Page Editor Overview" article.
3
Common Site Settings
Open the “Commonl Settings" tab. Here you can make changes to the site name, description, change the technical domain of the account, manage domains and payment form settings. You can also add a website logo in png format, with a size of at least 250-250 pixels. And add a favicon - this is the site icon. The favicon is displayed in the browser tab before the name of the page (site). Favicon improves the appearance of the site, increases brand awareness and helps users navigate through tabs. Upload an image in png format, at least 128-128 pixels in size.
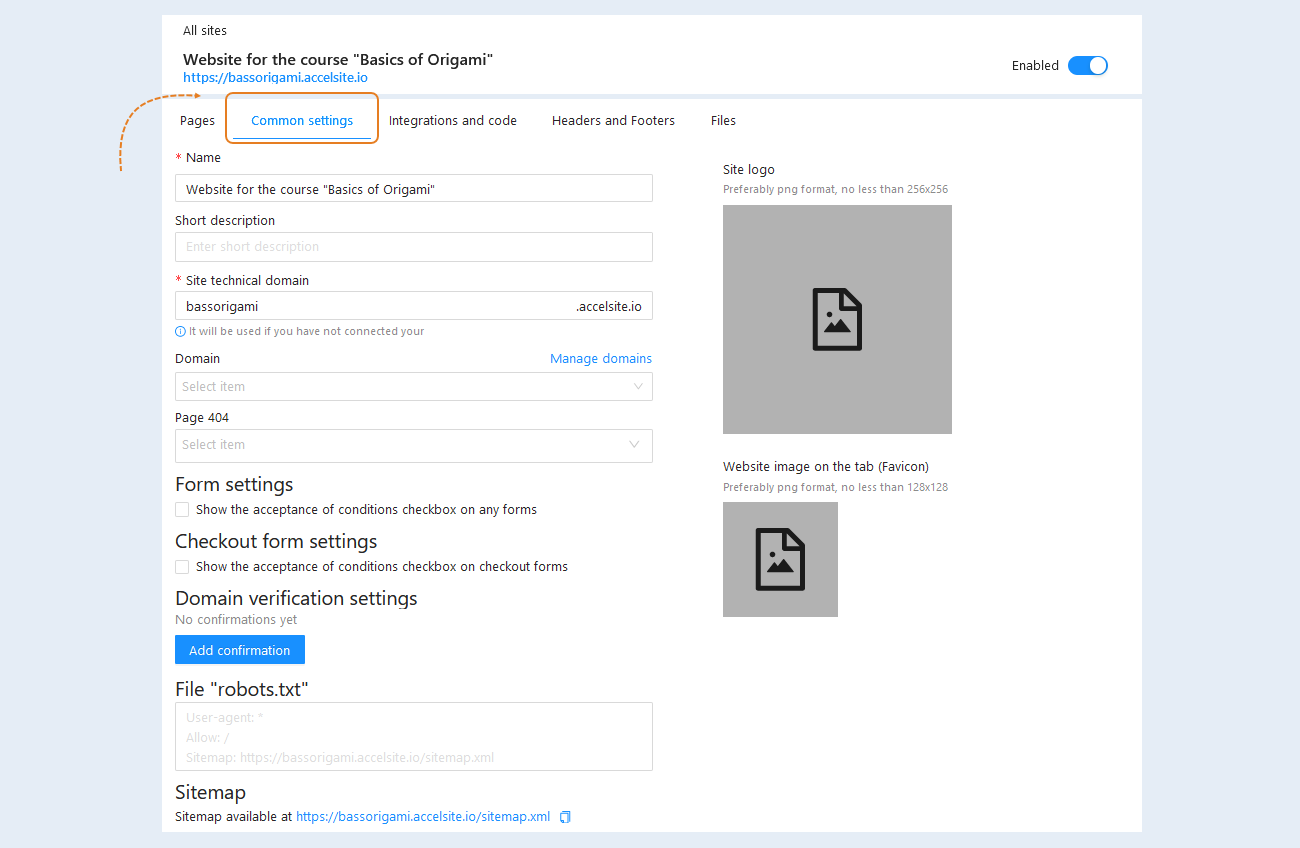
After making changes, click the “Save" button.
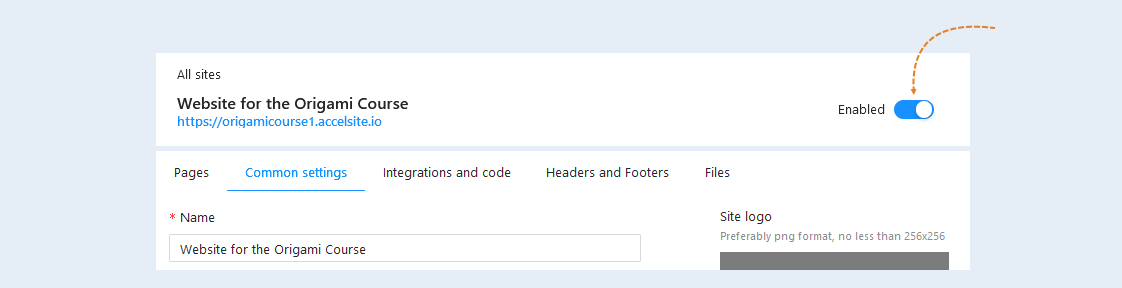
In the "Common Settings" tab, you can also enable site accessibility for visitors. Move the “Enabled” slider to the active position in the upper right corner.
You have created a website. For more information about the settings of the other sections of the site, read the article “Websites".