The "Form" element is one of the most important blocks of the page editor. It is with the help of the form that users register in your project, subscribe to mailing lists, create and pay for orders.
With the help of the form you make a sale of products and services in your account. And also collect information about users.
Click on the desired section of the article to go to its description:
How to create a sales form
To create a form, go to the "Sites" section. Open an existing site or create a new one.
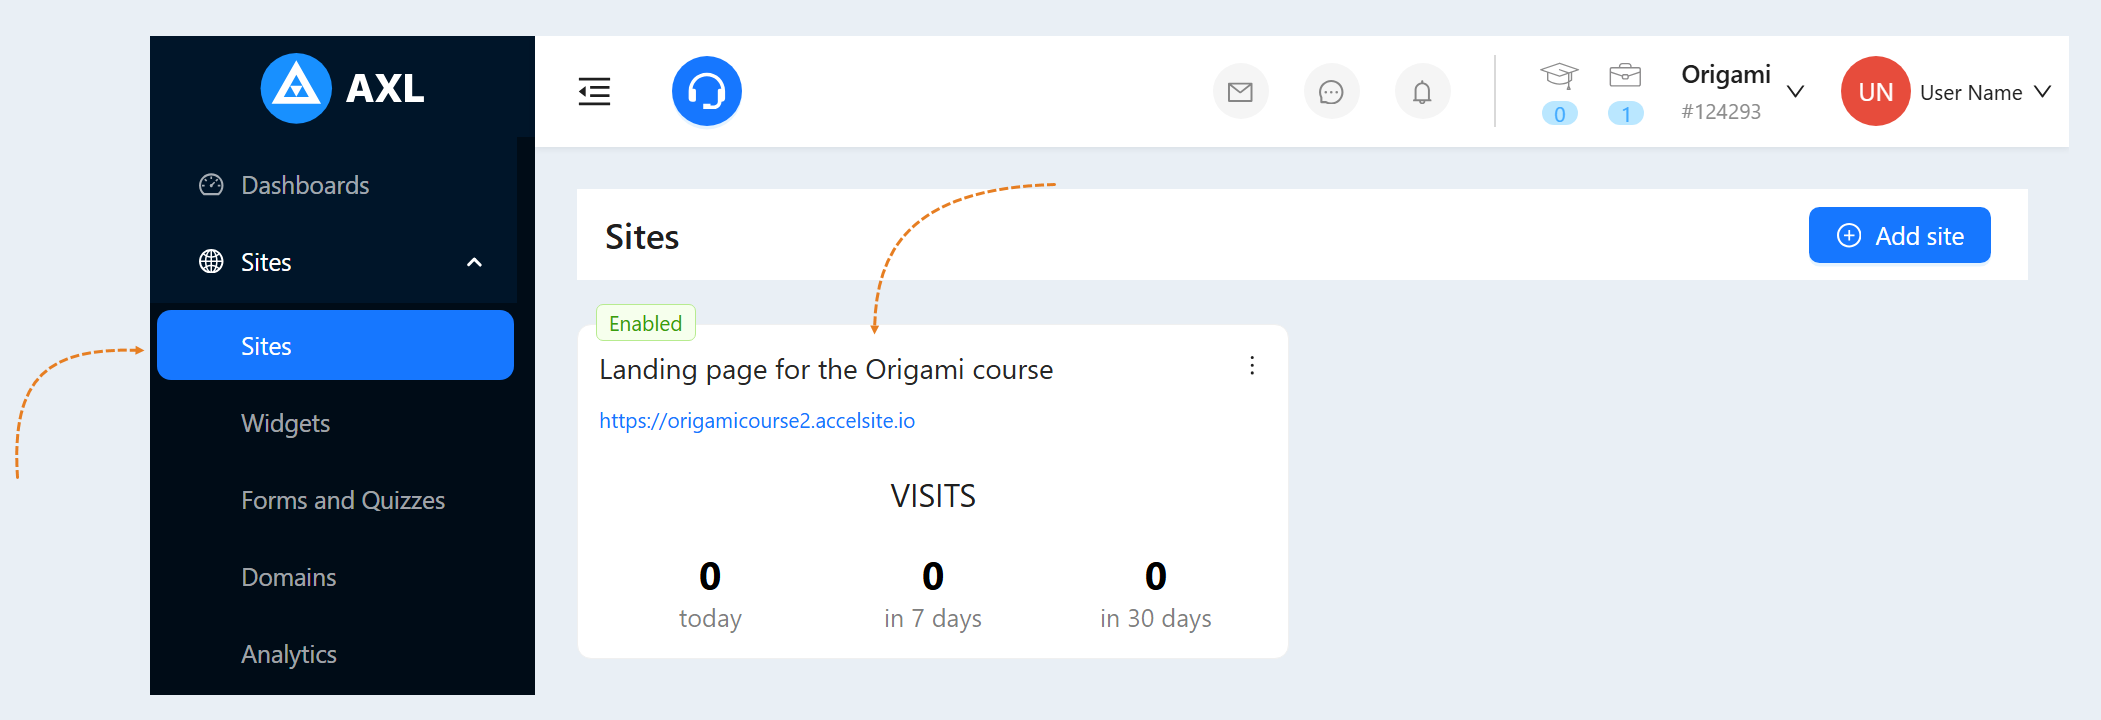
Next, go to the "Pages" section. Open an existing page or create a new one.
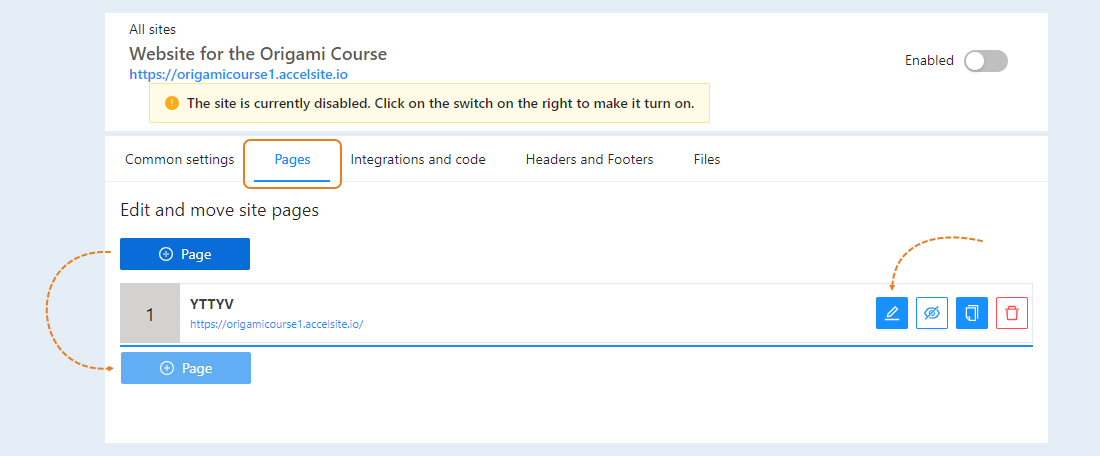
Next, open the "Design / Content" tab. The page editor has opened.
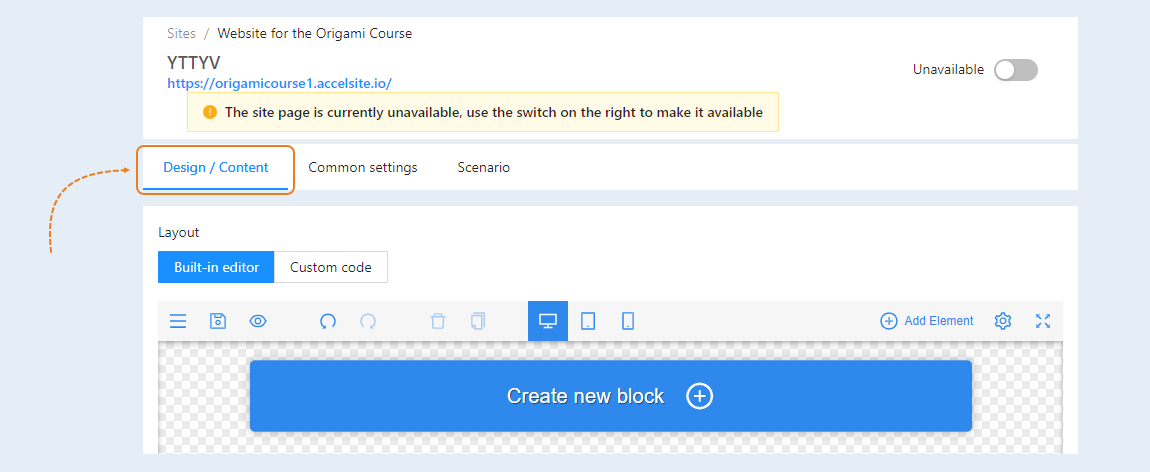
Next, click "Create a new block" and select "Empty block".
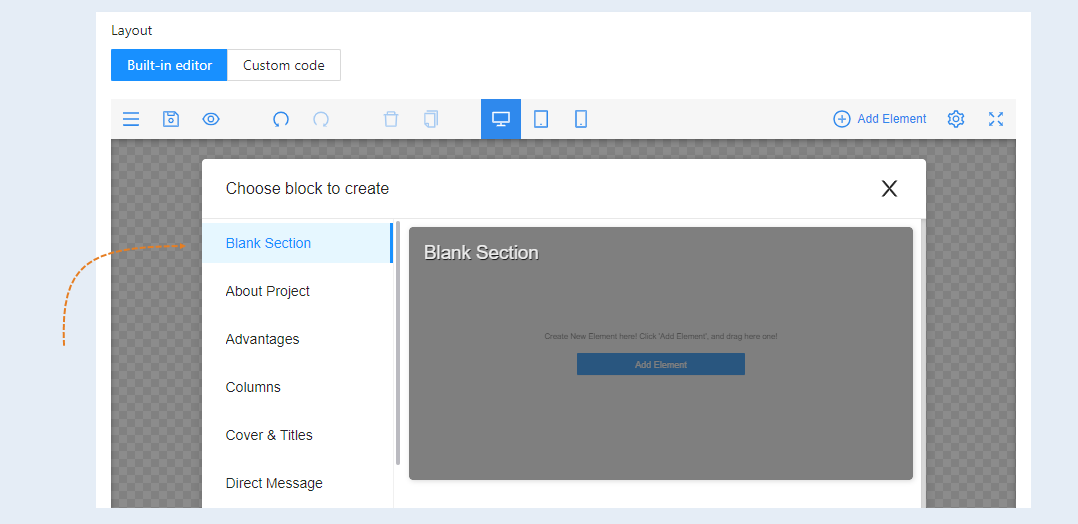
Click "Add Element".
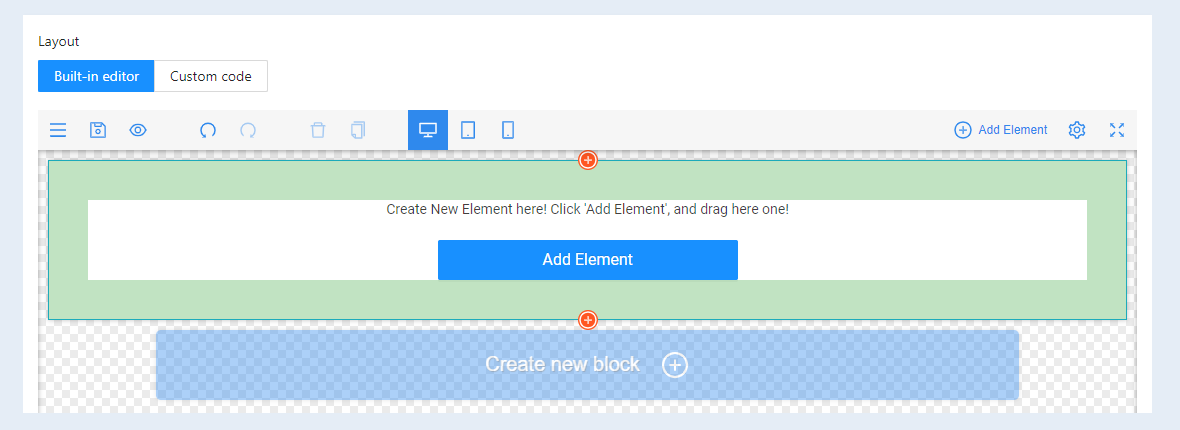
Select the Form element and drag it into the page field.
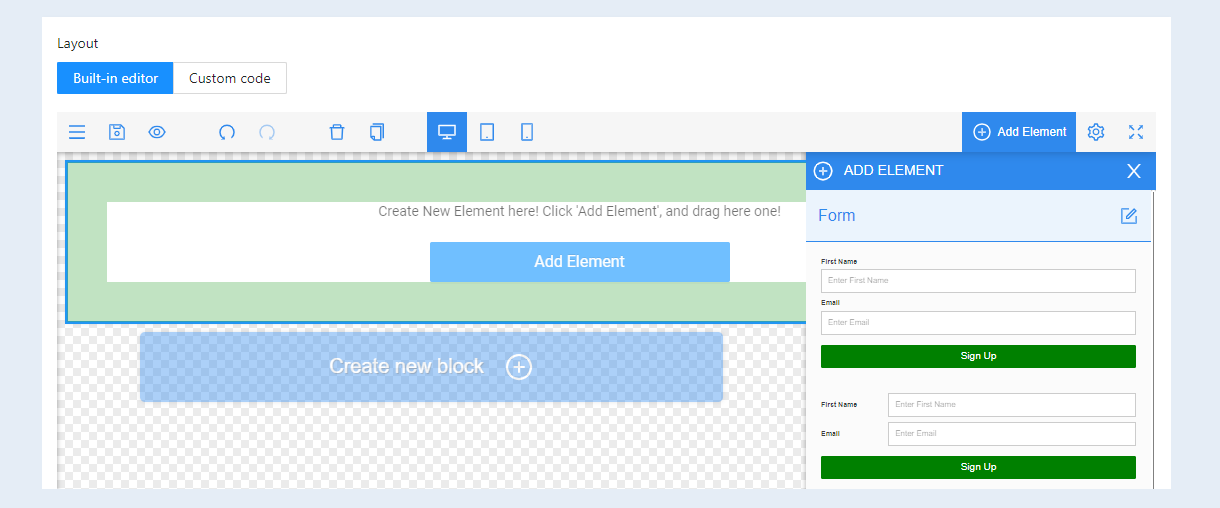
You have created a form. Select the entire form to open the settings. On the right, in the settings, you can adjust the appearance of the form, add fields, change the style.
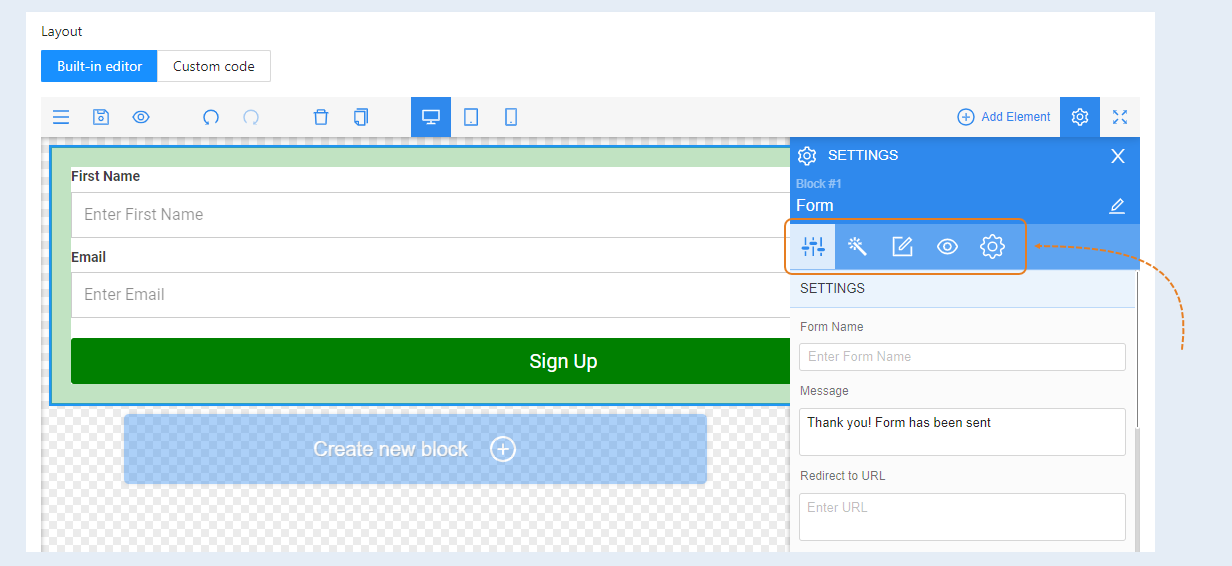
Note: By the same principle, you can create a form in the "Widgets" section.
Go to the "Widgets" section, click the "Create Widget" button. Next, click open. The page editor will open. Create a new block and add a "Form" element.
Form functionality
After you have created the form, you need to configure its functionality, that is, what happens when the visitor fills out the form and clicks on the button.
To do this, select the button. Settings will open on the right.
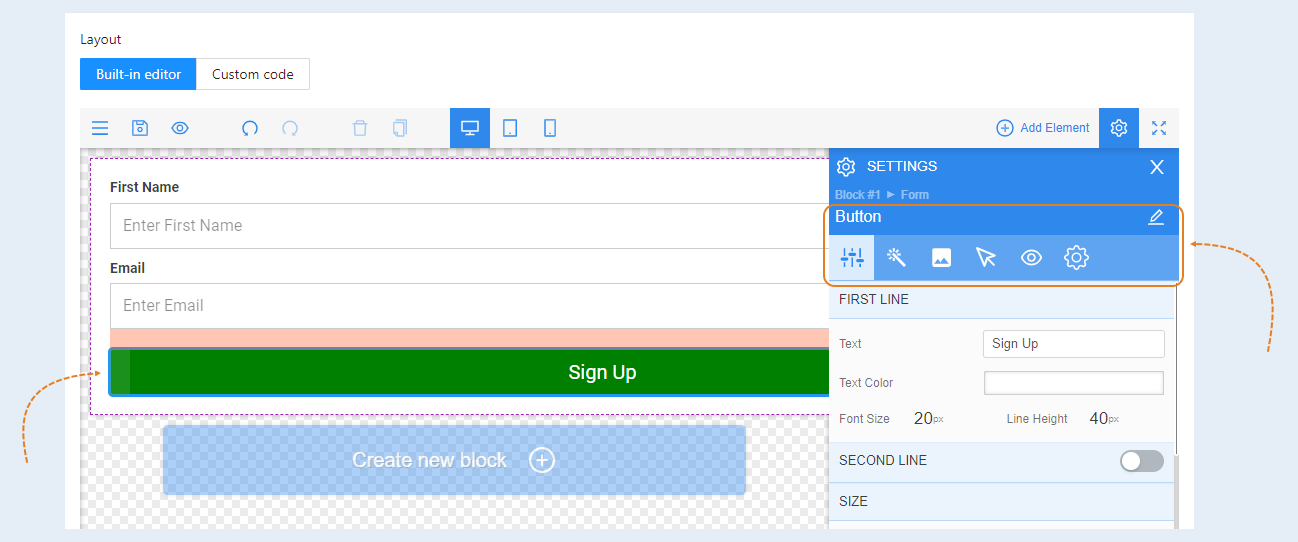
Select the "Interaction" tab.
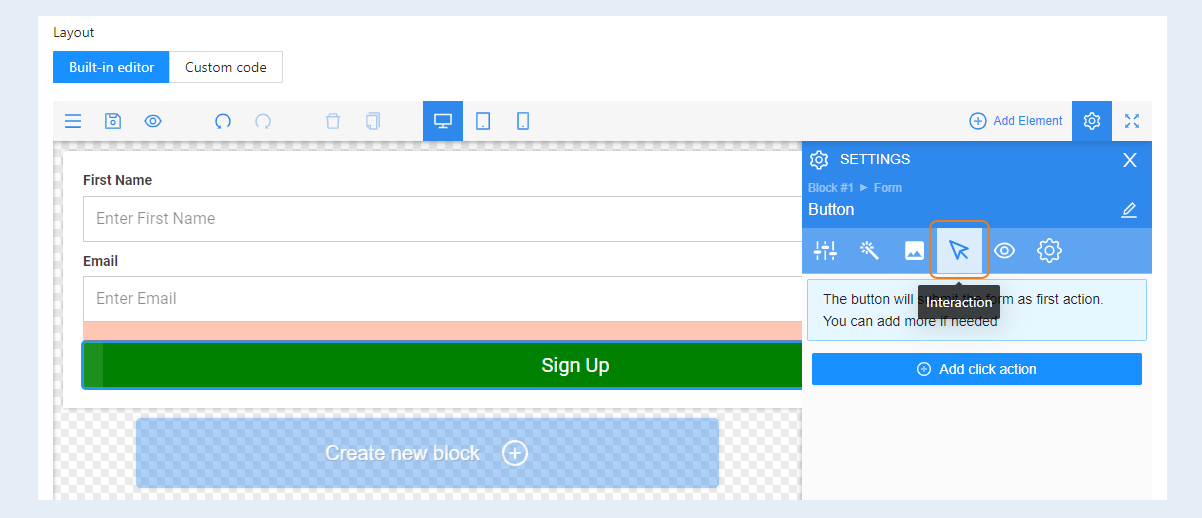
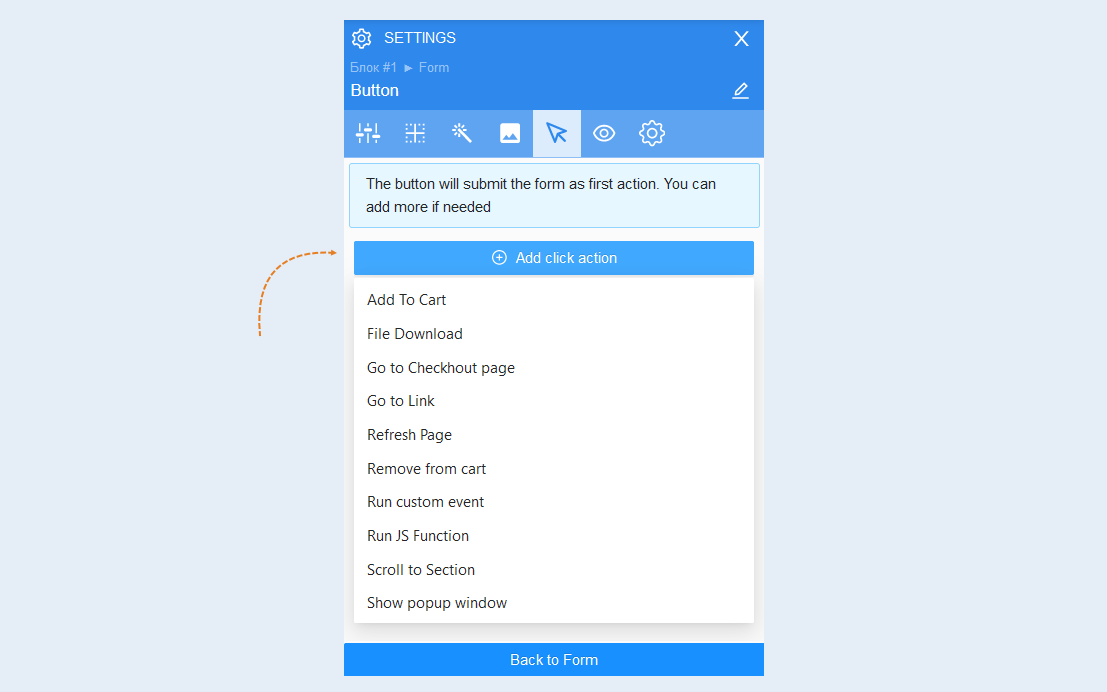
Here you see the "Action click action" button. By choosing one of the actions, you determine what will happen when the visitor clicks on the button.
If you need to create a form to sell your products, select the steps:
- Add to Card. Select a product from the list of your products and services.
- Go to checkout.
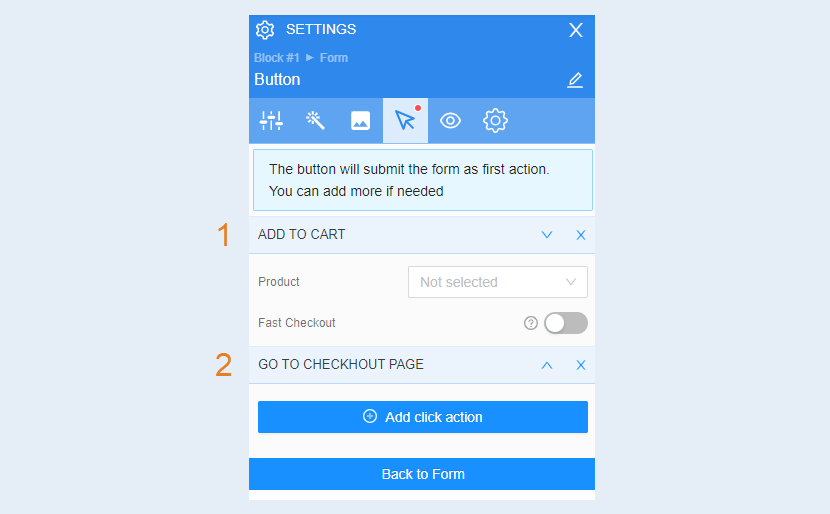
If you add only the "Add to Cart" click action, then after clicking the button, the user will see the cart on the right. He will be able to click on the cart and go to checkout and payment.
If you add the "Go to checkout" action, then the product will be added to the cart and the user will immediately be redirected to the checkout and payment page.
Click actions
For different forms, you can choose different options for click actions, depending on what purpose this form serves. Consider in more detail all the options for action.
Click the "Add click action" button and choose from the options:
Add to Cart. When you select this action, you must specify a product. Choose from a list of products. If you select the "Quick Checkout" feature, the checkout process will begin as soon as the user adds the item to the cart. The "Checkout" window will open on the right and the user will be able to immediately make a purchase on the same page.
File download. Upload the file, which can be downloaded by clicking on the button.
Go to checkout page. The user will be taken to the checkout page.
Go to link. If you choose this action, paste the link in the box and check the "Open in new window" box.
Refresh the page. When the user clicks on the button, the page will be updated automatically.
Remove from cart. Select a product from the list to be removed from the shopping cart.
Run custom event. Specify the name of the event to be triggered. Next, you will need to specify this event in the script for this page. Read more in the Scenarios section.
Run JS function. Trigger a JS function when the element is clicked. For advanced users. In this field, you can specify your Java script and it will be launched when the user clicks on the button.
Scroll to section. Select the block of the page that the user will go to by clicking on the button.
Show a popup window. When the user clicks on the button, a pop-up window opens.