We've created our own platform for hosting live streams, webinars, and masterclasses.
The "Webinars" section is your hub for conducting interactive online events. Here, you can organize both live streams with real-time audience interaction and launch automated webinars – pre-recorded presentations accessible at any time convenient for your listeners. Convenient moderation tools, a chat for communication, and options for conducting polls – all of this helps create an engaging and productive learning space.
This section is designed to make the process of interacting with your audience as effective and flexible as possible. Webinars allow you to expand the geography of your communication, share knowledge in real time, receive feedback from participants, and create a community around your courses. Automated webinars, on the other hand, allow you to scale your training, providing access to valuable content 24/7 without the need for a constant presence of the presenter.
Click on the desired section of the article to go to its description:
How to create a webinar
Go to the "Sites" section, to the "Webinars" tab. Click the Create Webinar button.
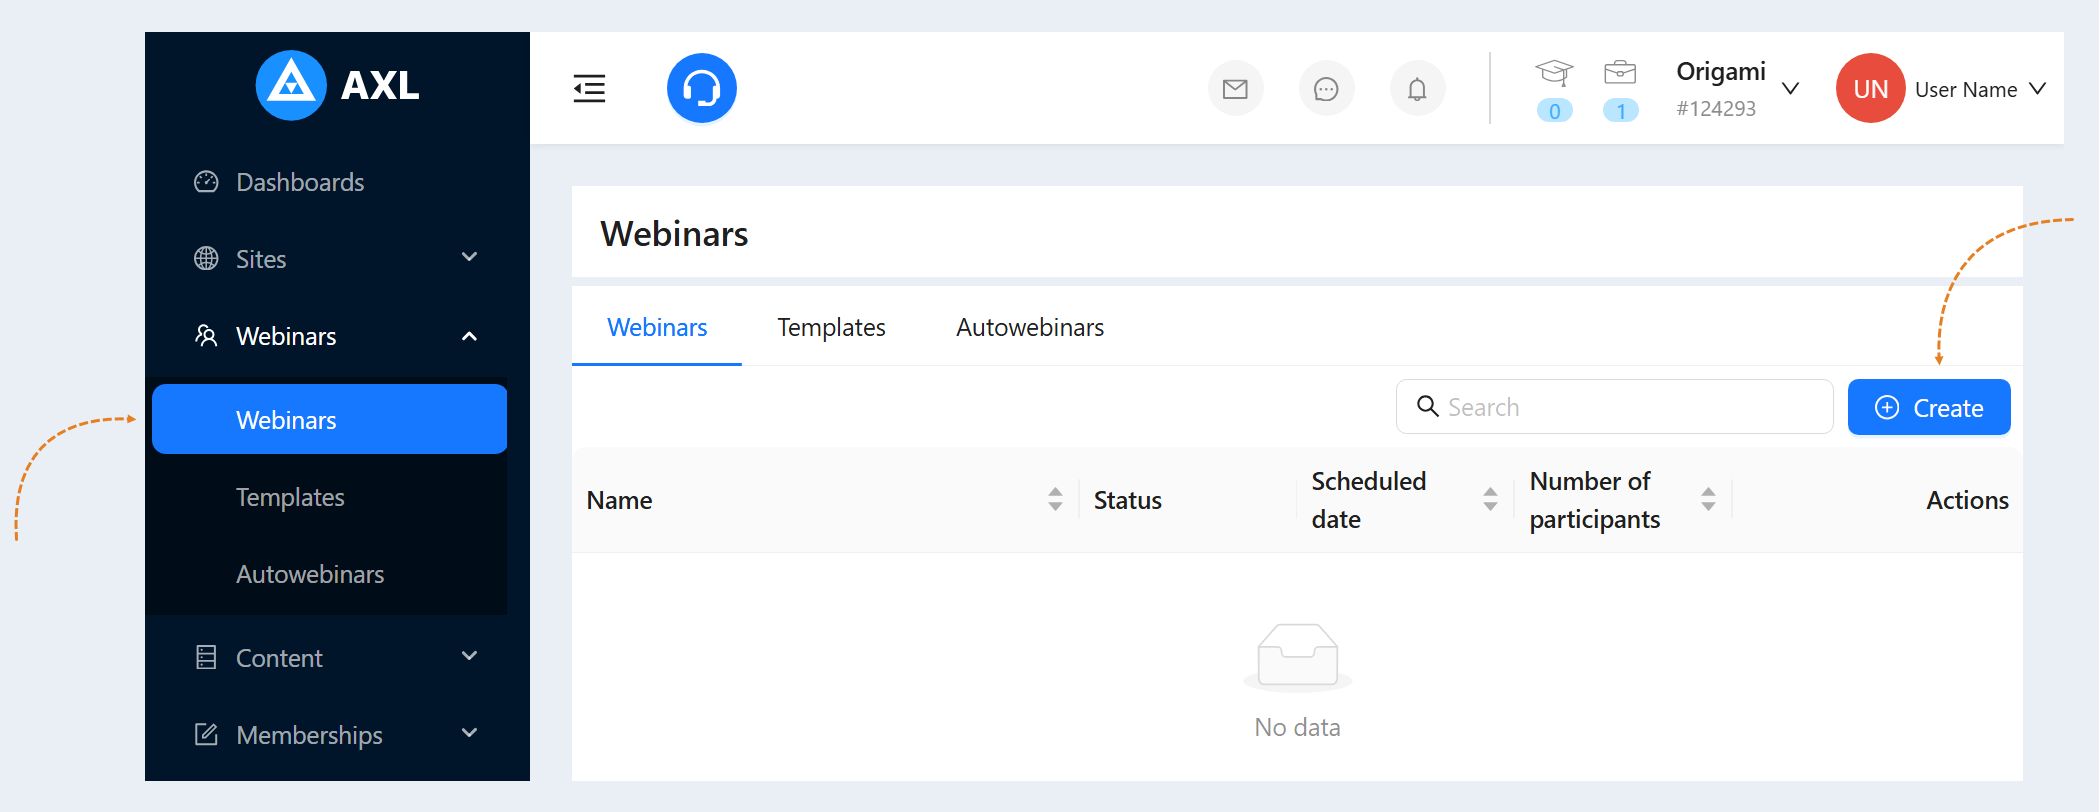
An additional window will open. Fill in the fields:
- Name. Enter a title for your webinar.
Internal name. The internal name will be visible only to you and will not be shown to users.
- Description. Add a description of the webinar.
- Planned date. Set the webinar date on the calendar. Enter the start time for the webinar. And choose your time zone.
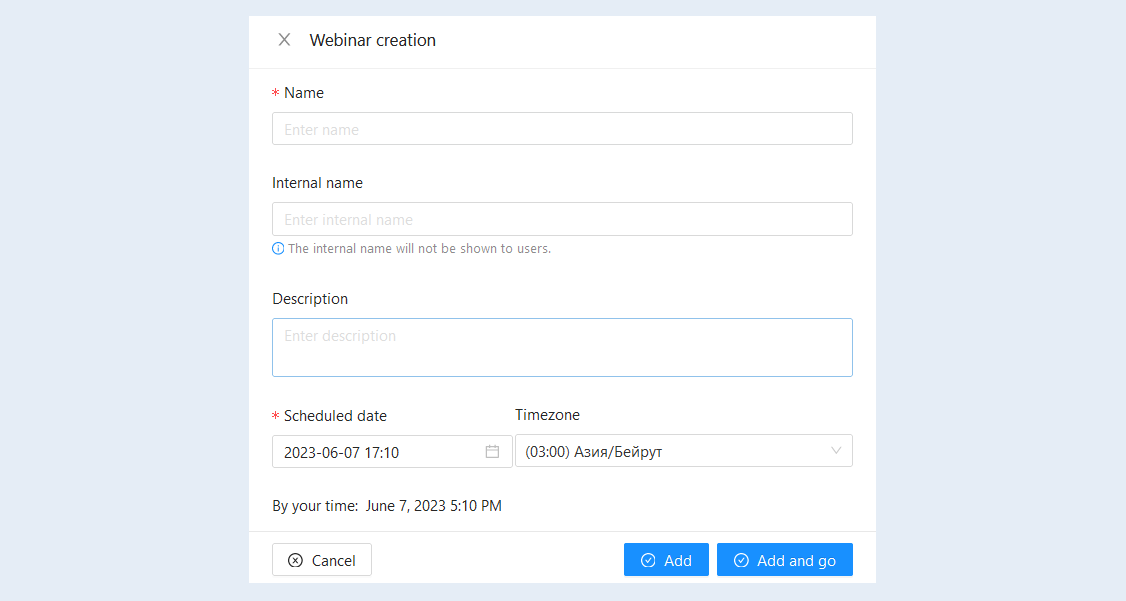
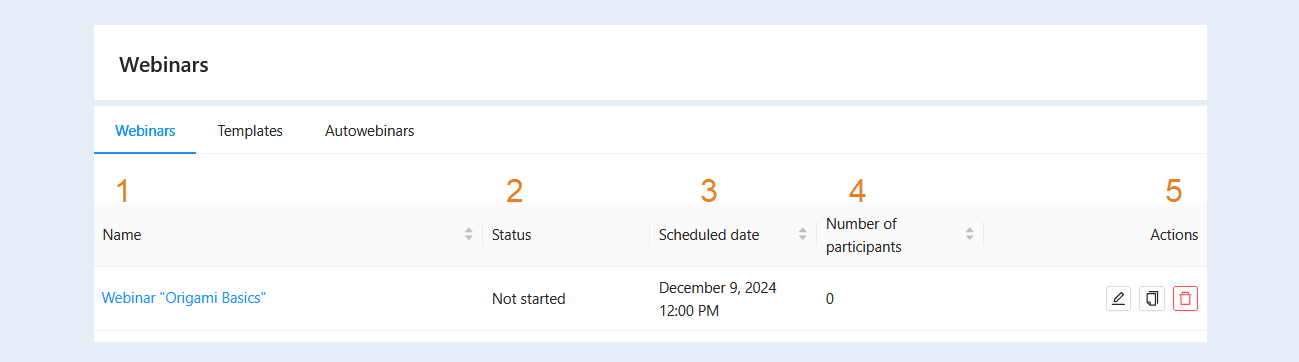
Click the "Add" button. The webinar you created appears in the list of webinars. In the list, you will see the following information:
- Name. Contains the webinar title. This is how the webinar is identified in the list and for users. Allows you to quickly identify the webinar among the others.
Status. Displays the current status of the webinar. Allows you to quickly determine which webinars are active, completed, or require attention.
Scheduled Date. Indicates the date and time the webinar is scheduled to take place. Allows you to sort webinars by the date of the event. The scheduled date is important for organizing and planning the webinars.
Number of Participants. Displays the number of participants who have registered or actually participated in the webinar. Allows you to assess the popularity and reach of the webinar.
Actions:
- "Edit" Button. Allows you to change the information about the webinar (title, description, date, time, etc.).
"Copy" Button. Allows you to create a copy of the webinar. There are two options:
- Create a copy, keeping the link. Creates an exact copy of the webinar, using the same access link as the original. This can be useful for re-running the same webinar for another group.
Create a copy without keeping the link. Creates a copy of the webinar with a new, unique link. Used when you need to conduct a webinar for another group and separate the participants from the original webinar.
"Delete" Button. Allows you to remove the webinar from the list.
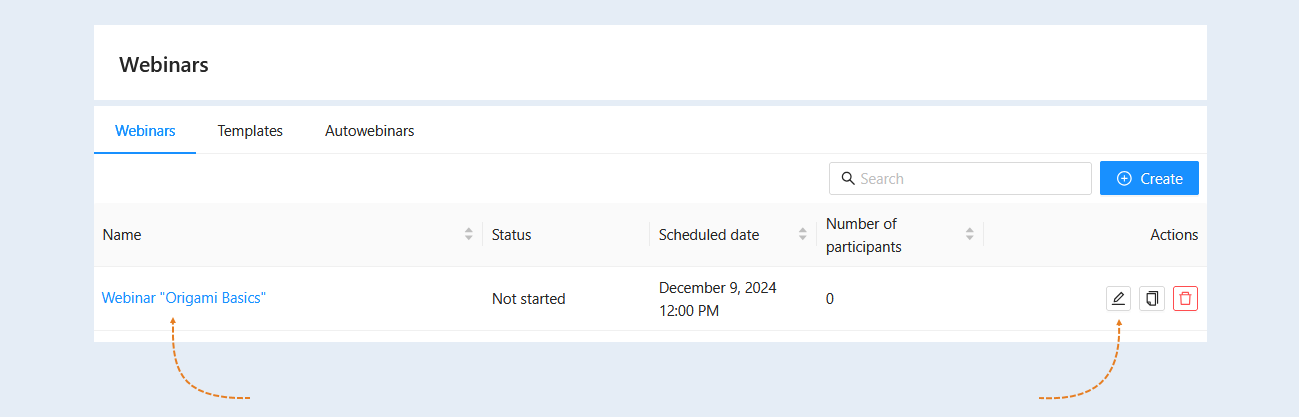
Click on the name of the webinar or the "Edit" button. Now you can go to the webinar settings.
Webinar settings overview
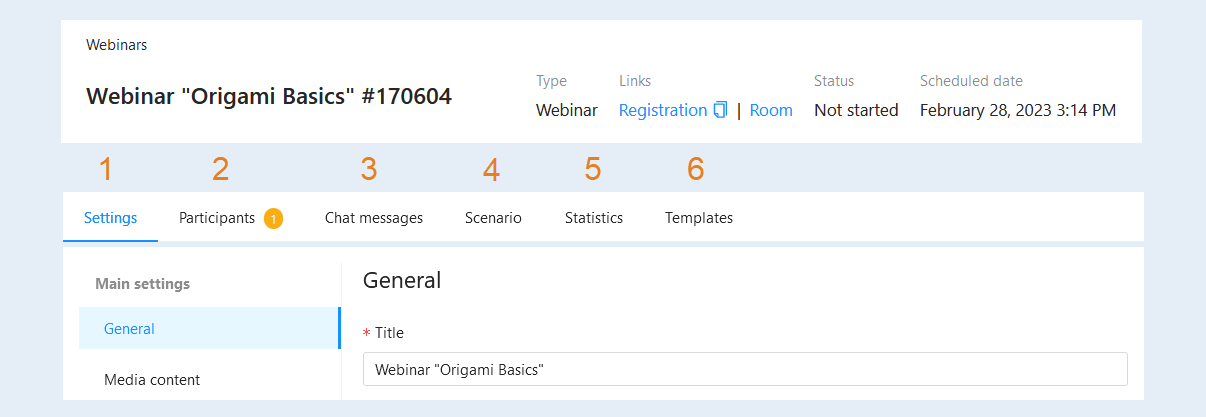
You have opened a section with webinar settings. Here you can manage your webinar room. At the top of the page, you see the tabs:
- Settings. This is where you set up your webinar room. Read more in the article "Webinar Settings".
- Participants. In this tab you can see the personal data of the webinar participants. You can invite new members or delete. Read more in the article "Webinar participants".
Chat messages. In this tab you can see the messages of the webinar participants. Read more in the article "Chat Messages".
- Scenario. This is where you set up the sequence of events and actions for the webinar. Read more in the article "Webinar scenario".
- Statistics. In this tab, you can see the statistics of the webinar: the number of registrations, the number of participants, the percentage of presence and views. Read more in the article "Webinar Statistics".
Templates. This is where you manage the Auto Webinars. Read more in the article "Webinar Template".
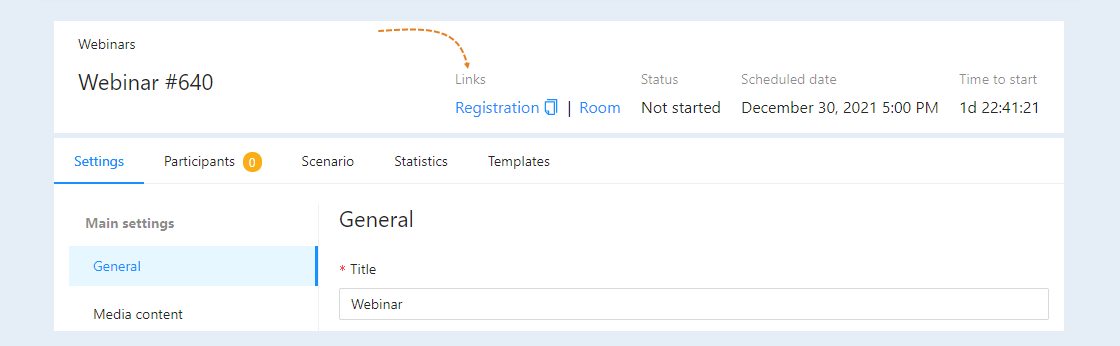
At the top right, you see links:
- Registration. You can copy the registration link and send it to the webinar participants. This action is optional - all participants receive a link to the webinar automatically after registration.
- Room. Click on the button to go to the webinar room. Read more about the webinar room in the article "Webinar room".
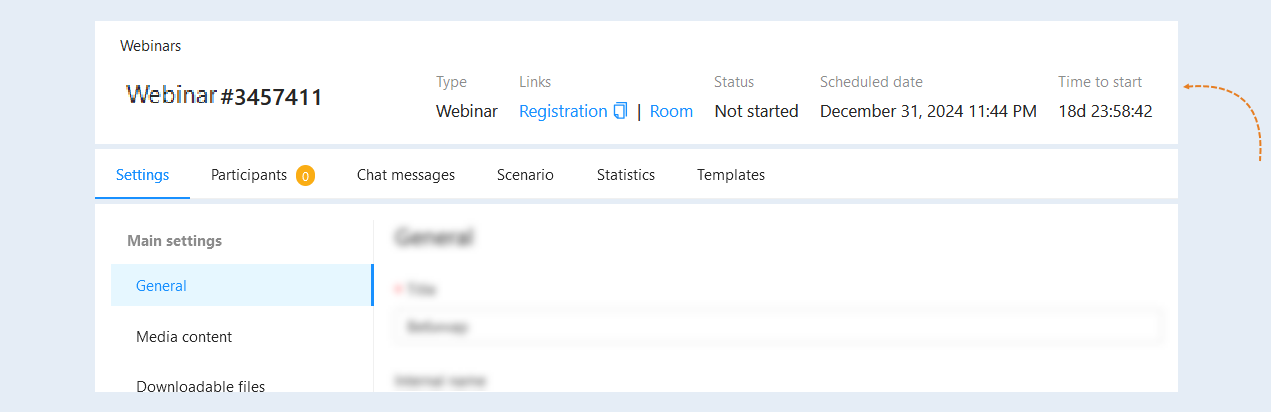
Also in the upper right part you can see information about the webinar:
Type. This line specifies the type of webinar.
Status. This line will display the status of the webinar: not started, on air, completed.
Scheduled date. Here you can see the exact time and date of the webinar.
- Time to start. Here you can see how much time is left until the start of the webinar.
Read more about the webinar settings in the articles: "Webinar Settings", "Webinar Participants", "Webinar Scenario", "Webinar Statistics", "Autowebinars".